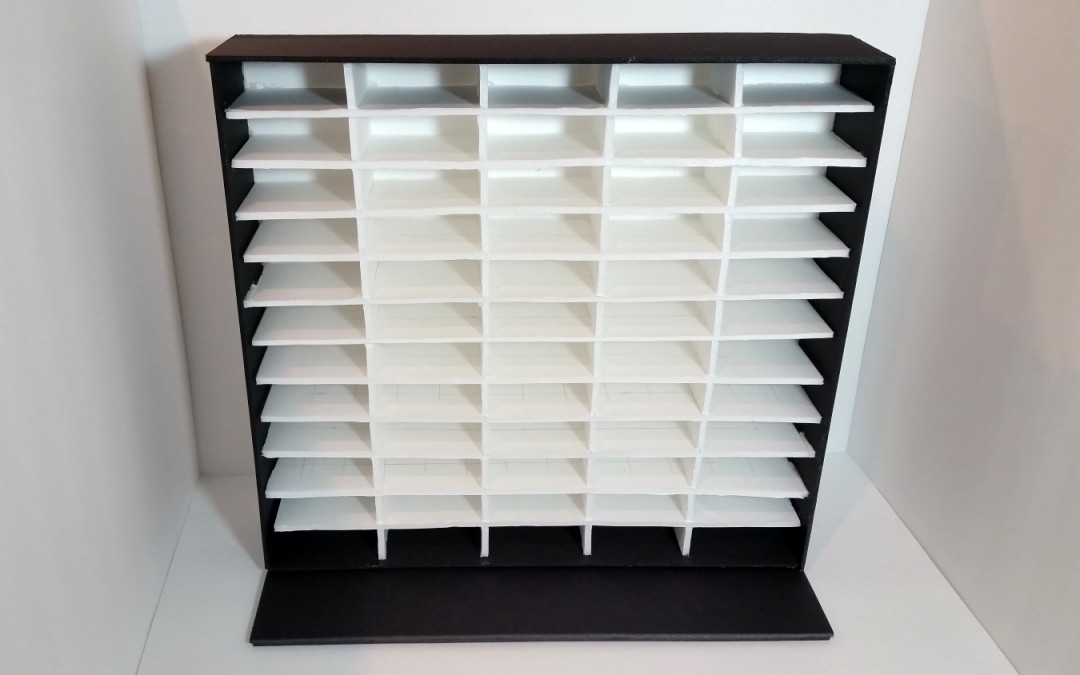
I’ve been hesitant to spend ~$60 on an ink pad storage unit (yes, I had all these ink pads lying around on my craft desk for months in piles–ugh). I mean really, with that kind of money I could buy so many more fun crafty goodies! So I finally took the time to design, measure and cut foam core to make this awesome DIY unit that I LOVE and that cost me less than $4!
Vertical Pieces With 11 Half-Way Slits Being Cut (note I had to widen the slits)
Here’s what you’ll need:
1. 3 large pieces of foam core (I picked up my white at the Dollar Tree and my black at Staples)
2. Ruler (a T-square ruler might simplify the measuring and a metal ruler is better for cutting along but neither is necessary)
3. Cutting blade (I used an X-Acto Knife and a new sharp X-Acto replacement blade
which made all these cuts a breeze)
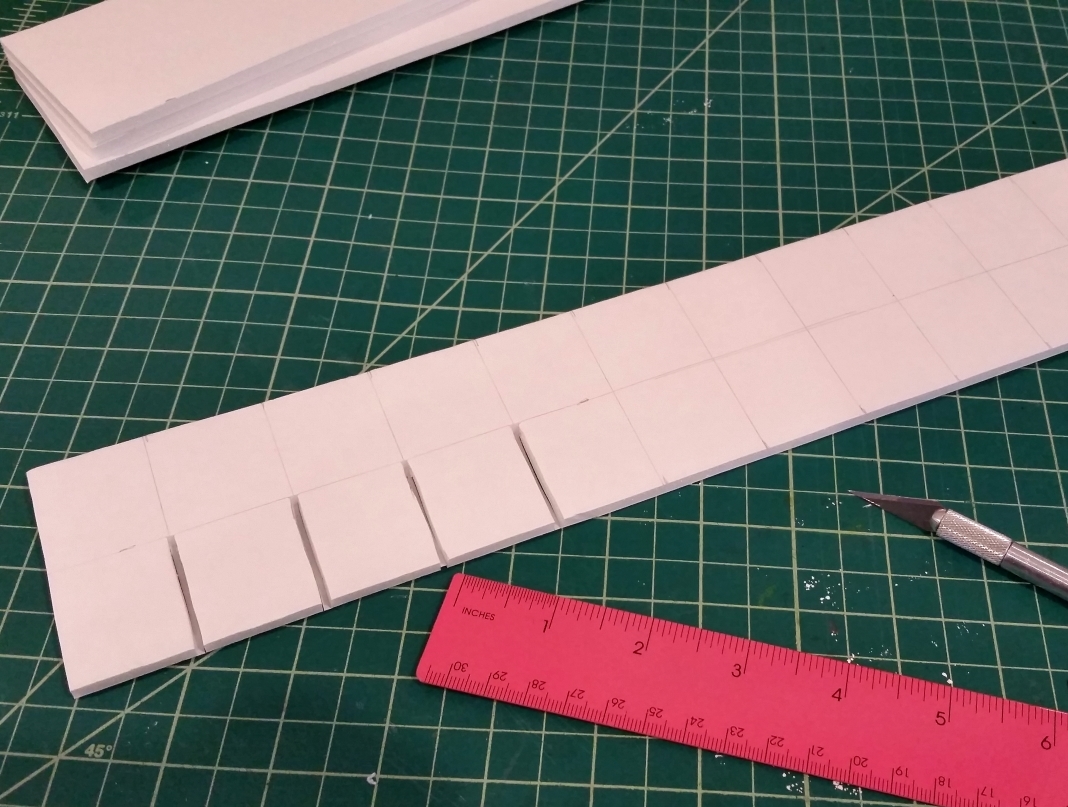
Horizontal Pieces With 4 Half-Way Slits Being Cut
For the internal shelving structure, I cut the foam core into the following 15 pieces:
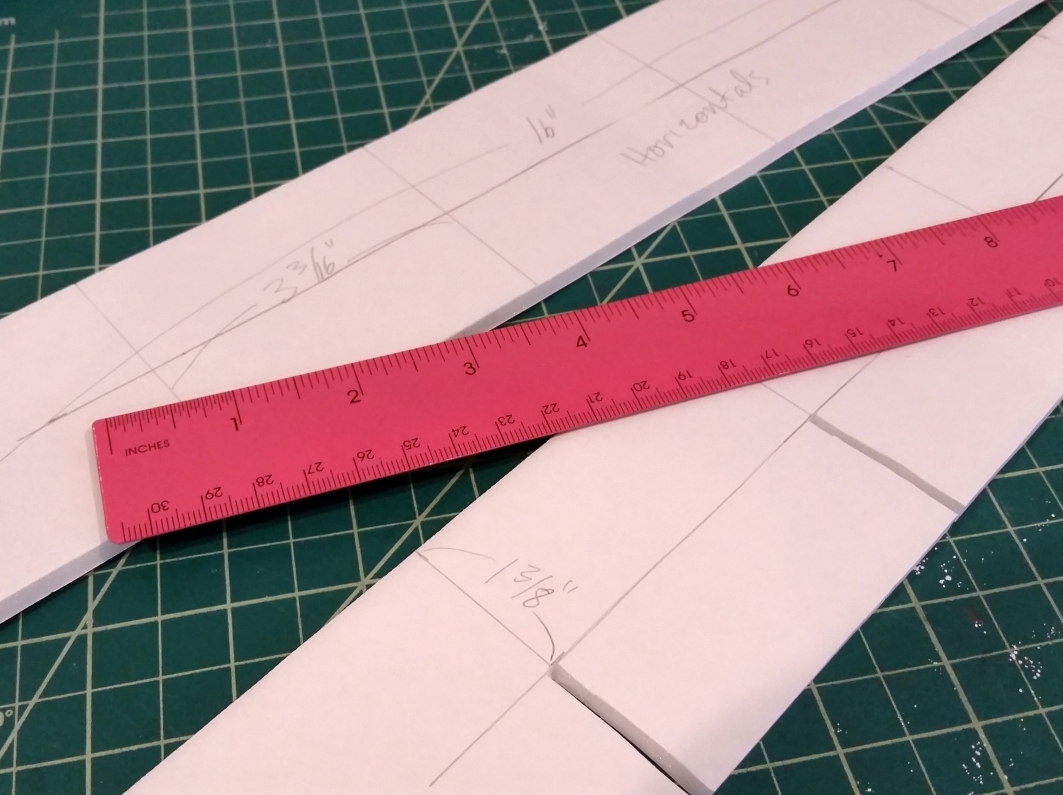
1. Four verticals: 2 3/4″ x 15″ with eleven 3/16″-wide half-way slits that are 1 1/4″ apart (the 1 1/4″ gives the clearance for the 1″ high ink pads)
2. Eleven horizontals: 2 3/4″ x 16″ with four 3/16″-wide half-way slits that are 3 3/16″ apart (the 3 3/16″ gives the clearance for the 3″ wide ink pads)
Adjustment Options: The 2 3/4″ width of the pieces made the compartments shorter than the 3″ wide Distress Ink pads for which I was building this unit. The shorter depth of the shelves makes the ink pads easy to take in and out of the storage unit. If you are making a storage unit for longer ink pads, you could adjust this width to be larger (like 3 1/2″ for Ranger Adirondack ink pads). The height and width of the half-way slits for spacing out the compartments would work fine for other standard ink pads if they are more narrow than 3″ and under 1″ in height.
The following is a video illustrating these cuts as well as how to assemble the horizontals and verticals together:
For the outside frame verticals, I cut two pieces of foam core to 3″ x 15 1/4″. For the outside frame horizontals, I cut two pieces of foam core to 3″ x 16 1/2″. For the back of the unit, I cut a large piece of foam core to 16 1/2″ x 15 1/2″. For the 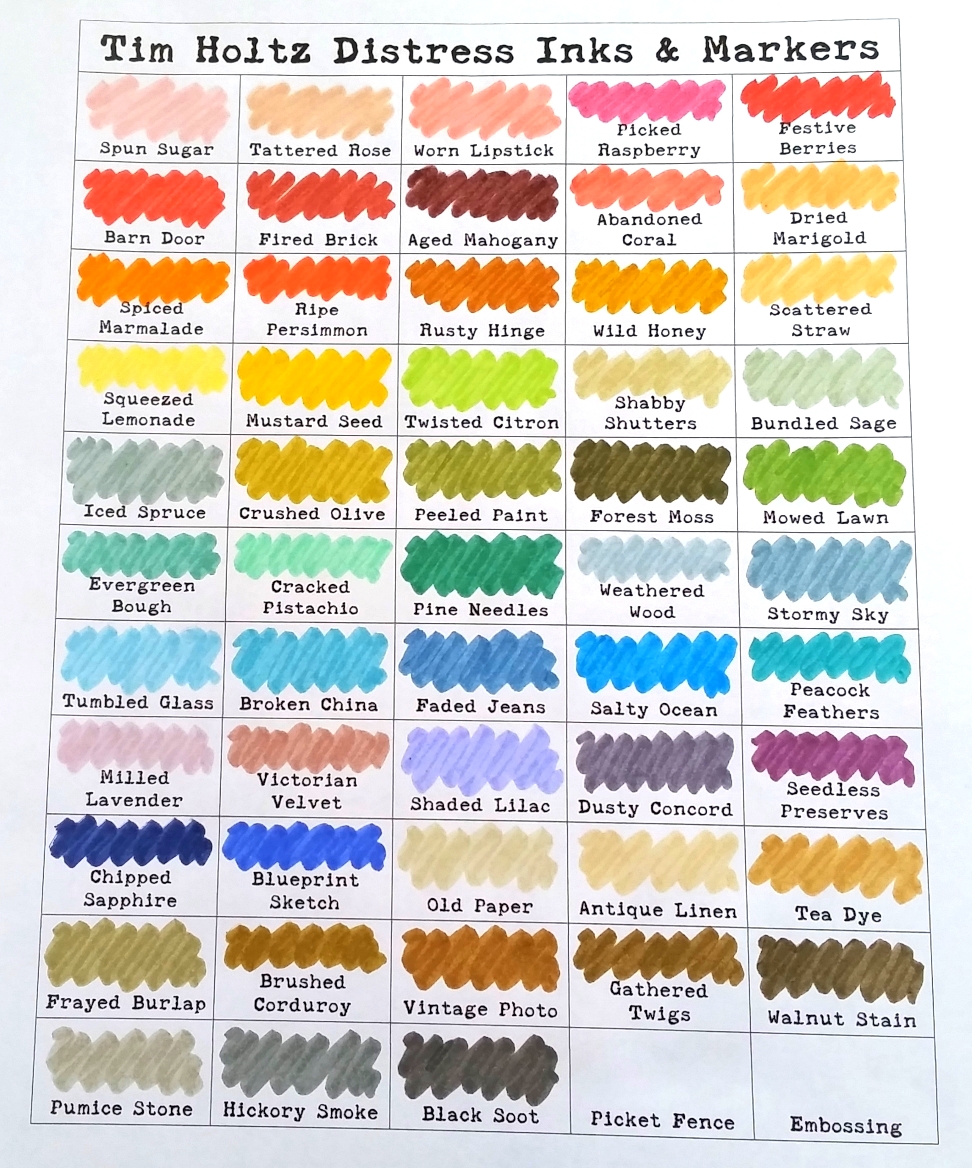 wider base to stabilize the unit, I cut a piece of foam core to 6″ x 16 1/2″. I also cut up an old rubber mouse pad in half and adhered that down underneath the back side of the wider base to weigh down and further stabilize the unit. I filled in the front side of the base with a strip of foam core to fill in the difference where the cut up mouse pad didn’t reach. Then it was just a matter of strengthening the joints and adhering all the pieces together with hot glue.
There are ready-made charts for Distress Ink Pads and other Tim Holtz products online HERE, but I wanted one that only listed the colors I have so I created a color chart in Microsoft Word with 5 columns and 11 rows just like my storage unit so that I could use it for easy reference for all the Distress Ink Pads (and matching Distress Markers) that I have in my collection. If you are interested in the labels that I made for all of my ink pads, please check out my blog post HERE for details–I just love the free distress type font I found for those!
This DIY storage unit, that was the best gift to myself this Christmas (LOL), is being entered into the Lil Patch of Crafty Friends Anything Goes Challenge
If you found this post helpful, please share and leave me a comment. Thanks!


What a fantastic idea, love the tutorial shown too. Such a great achievement when you create something yourself. Thanks for joining Lil Patch of Crafty Friends, good luck and hope to see you again. Happy New Year too.
~ Denise~
Owner of LPOCF
Thanks so much Denise! It was something that I had been wanting to create for such a long time. I felt such a feeling of accomplishment when I was finally done. I wanted to share what I had learned with others so here it is on my blog! LOL TFStopping by and your super encouraging words! Big hugs, Kristina
This is a wonderful creation and perfect for our 24th ‘ANYTHING GOES’ challenge. Thanks for sharing your talent with us. Good luck. Wishing you a blessed festive season.
Hugs
Desíre
{Lil Patch of Crafty Friends DT Member}
{Doing Life – my personal blog}
Thank you so much for stopping by and leaving such a welcoming and encouraging comment! Big hugs, Kristina
Thank you for going to the effort to show us how to make this great idea and money savers
Oh it was my pleasure! I hope it is helpful to you and that you give it a try. I was so hesitant to get started on this because it seemed overwhelming, but really it only took me a couple days (with lots of starts and stops). Sometimes it takes me as long to make a detailed card! lol TF stopping by! Big hugs, Kristina
Thanks for your efforts. I appreciate that you made it so clear.
Vicki
My pleasure Vicki! Hope you give this a try, and it works for you. TFS stopping by! Hugs, Kristina
Amazing!!! 🙂
Thanks so much for taking the time to stop by and leave a nice comment! I really appreciate it. Hugs, Kristina
Loved it. I used straight pens to put it together. I hate to use hot glue.
Sorry, not sure how I missed your comment. So cool that you were able to make one using pins! Hope yours is still as great as mine — I use mine all the time and it has held up really well. 🙂
Did you put a backing on the unit? Would it be stable enough to hang on the wall?
This looks awesome! I am making one tomorrow!
I did put a back piece on the unit so that the ink pads wouldn’t slide through. I suppose if you used heavy weight chip board, it could also be hung on the wall. I think with foam core only, the piece might not be strong enough in the long run. Good luck making yours!
Awesome! I can’t wait to make this. I an currently using a cassette tape storage unit, but the pads are a tight fit and frustrating to get in and out. Thanks for the great instructions.
Thanks so much BrendaLea! Good luck making your own storage. I’ve had mine for a while now and it’s still going strong! YAY
Wow. We’ve been nearly all morning searching for ideas on how to fix up my crafting area. This is a winner! We have finally hit the excitement state of where to start!
Now if we could just find someway to make a storage cabinet for cardstock, adjustable shelves, that are either plastic or wire…or anything else. Any Ideas?
Awww thanks so much Kay! I am so glad you found this helpful. I haven’t figured out a good storage for card stock, but I have been toying with just buying a rack from Scrapbook.com. Let me know if you think of something better. Thanks for stopping by! Hugs, Kristina
How wonderful of you to share your hard work. I have looked for a while to find an easy to read and understand template and instructions. Thank you so much!
Oh I’m so glad you found this helpful! I hope you like your storage unit as much as I still love mine! 🙂
So happy that you were kind enough to share this project :). Hubby is making me a paper organizer and when I showed him this ink pad storage he said he would have it made for me tomorrow! Thank you!!
WOW what a lucky lady you are to have a handy hubby! Hope you like yours as much as I love mine! 🙂
Thank you for sharing your hard work so freely! I am going to make this unit for the Distress Oxides, since they are slowly taking over my craft space! I have the mini cubes in the regular distress inks that I keep in the container designed for them. Like you, I wasn’t about to spend a lot of money on a storage unit when there are so many crafty goodies on my wish list. Thanks again for the measurements and tutorial. Wish me luck! I will try to report back when I’m finished.
Wow!! What a find for me . . . thank you so much for the video and instructions to make this useful storage for inks . I too keep the Tim Holtz in the small containers, but I have a drawer full of larger inks and they don’t all get used as have to sort every time I was thrown by foam core and we don’t have a dollar store unfortunately in South Australia selling it – Not to sound foolish, but ,we have foam in packets only -so I will have to look around for it -Is it thicker (hence core?) It looks lightweight and maybe one inch thick? guessing !! Thank you again for passing on your great work -Kindest Regards Rita
I’m so glad you found this helpful! I would say that foam core board is about 1/8″ thick. It is very light weight but it is firm and sturdy. Good luck putting a storage unit together! I love mine. 🙂
I think it is called Corflute in Australia & it comes in various thicknesses so you would have to pick one that is easy to cut, but sturdy enough (3 or 5 mm at a guess). Your local hardware or Bunnings etc should sell it.
Thank you for this great and inexpensive idea for storing my ink pads. I shared it on my FB page, so I wouldn’t forget it.
Thanks so much! I hope you find this helpful, Erica! I still use and love my storage unit! 🙂
Thanks, I am going to do this project.
Awesome! I hope yours turns out fabulously! I still use mine and I love it.