Family friends are moving to our city, and we’re totally excited to welcome them. However, one of the kids has a birthday the week they are moving, and I’m sure leaving all her friends behind at this time as she becomes a teen is tricky at best. I wanted to make a special summer time birthday card to let her know she’s not alone and we’re wishing her the best.
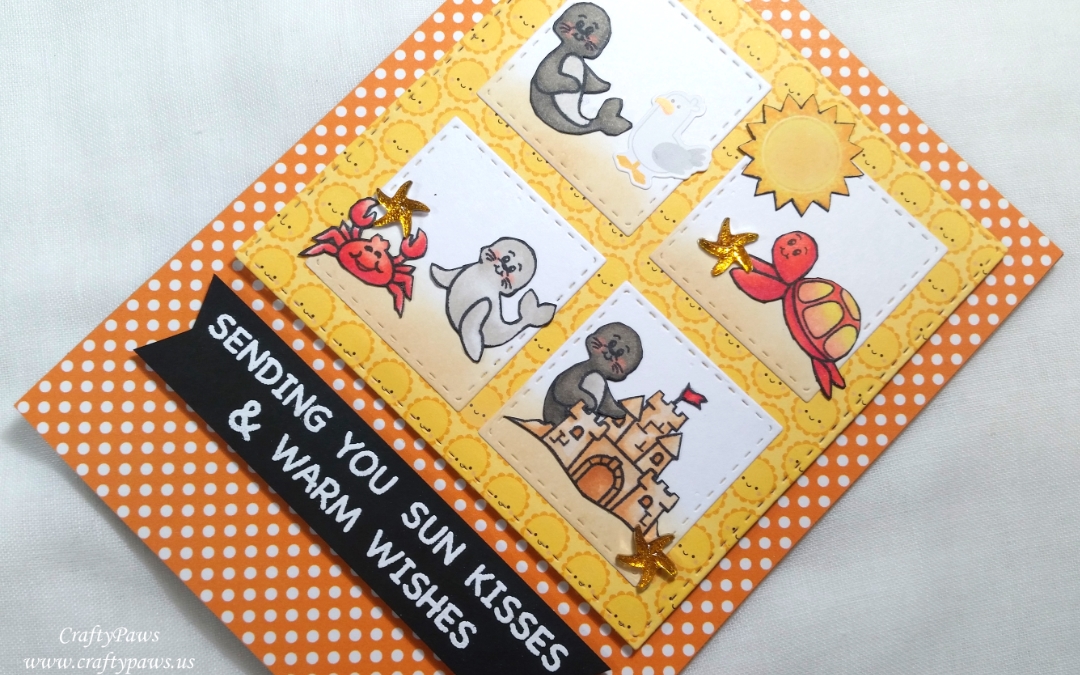
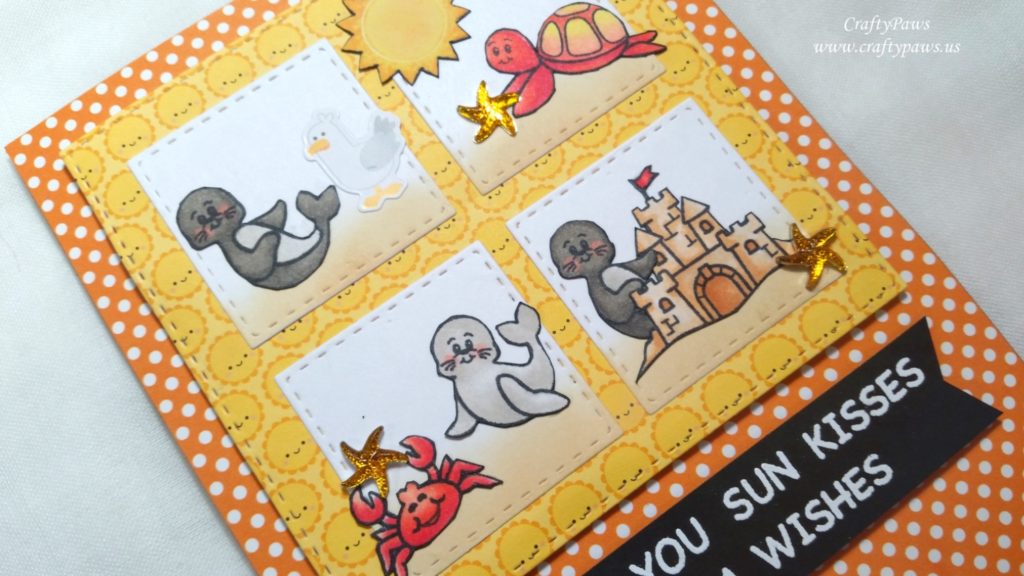
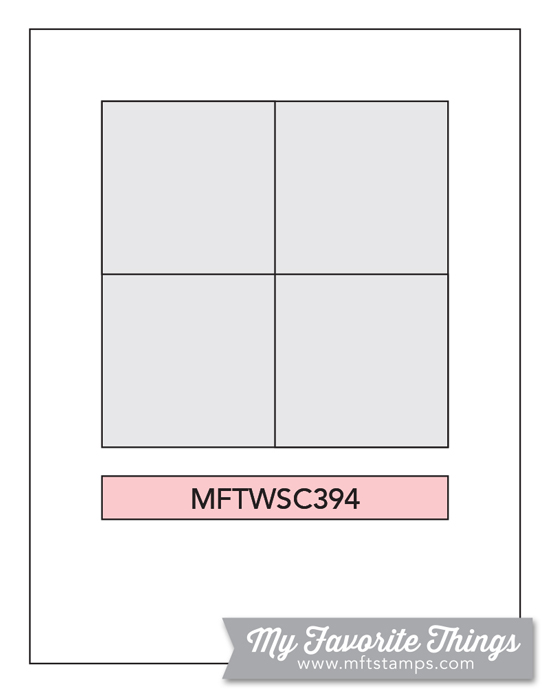
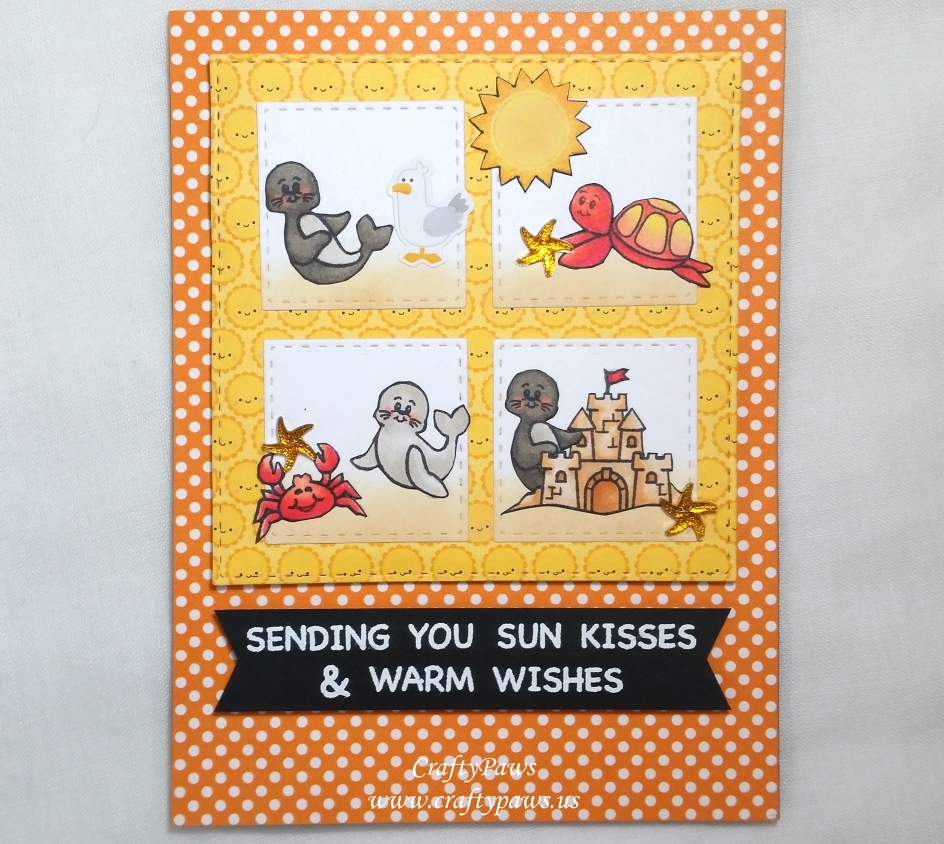 To create this sun shiny card, I used some fun papers from the Scrapping for Less June At the Beach Card Kit. The orange polka dot and the smiley face sun patterned papers are from the Doodlebug Designs “Sweet Summer” paper collection. I first, however, cut out four 1.5″ stitched squares from plain white card stock using the Simon Says Stamp Stitched Squares Die Set. These are then layered in a grid pattern over the smiley face sun paper that I die cut using the largest die from the Simon Says Stamp Stitched Squares Die Set. This whole assemblage is popped up on fun foam to add a bit of dimension to the card.
For the sentiment, I heat embossed, “sending you sun kisses & warm wishes” from the LDRS Creative “Just Beachy” stamp set also from the Kit. I used black card stock and Ranger Super Fine White Embossing Powder to ground the card with black (which is repeated in a lighter tone in the seals used in the scenes – oh, but I’m jumping ahead) and so that the words would pop. To match the depth of the framed die cut squares above it, I backed this sentiment strip with fun foam as well.
Then to create cute little scenes of sea animals all sending the birthday girl kisses and warm wishes, I stamped, Copic colored, and fussy cut out the following critters from the LDRS Creative “Just Beachy” stamp set:
 Seals: W0, W1, W3, W5, and R20 for blush
Sandcastle: E41, E51 and E53
Crab: R11, R22, and R35
Turtle, Y11, R11, R22, and R35
As the sun from the stamp set was a semi-solid stamp, I didn’t want to stamp this in black and then try to color up the inside. Instead, I stamped out the sun with Tim Holtz Distress Oxide Inks in Squeezed Lemonade and Carved Pumpkin and then filled in the inside lightly with both of those inks using a finger dauber. To match the black lines around the other stamped images, I inked the sun (and all the other images) with a Momento Tuxedo Black Marker for a finished look.
Before selecting which sea animals to put into which squares, in order to ground all the animals, I blended on some Tim Holtz Distress Oxide Ink in Antique Linen to the bottom 1/3 of each white square. Then all that was left was the fun of picking which critters would go where. As I had repeated the same seal image twice, I positioned one behind the sandcastle to make it look like he was building the sandcastle and I did not put them in squares directly above one another. Since the other seal and the turtle, were positioned looking to the left, I made sure they were on the right sides of the squares. I also located the crab and the turtle in kitty-corner squares so that the coral colored critters would be balanced on both sides of the card. As one of the little scenes appeared a bit bare, I also decided to add a little sea gull from the Sweet Summer Mini Icons sticker sheet from the Kit. Lastly, I added three yellow starfish gem stickers from the Kit to add a little sparkle.
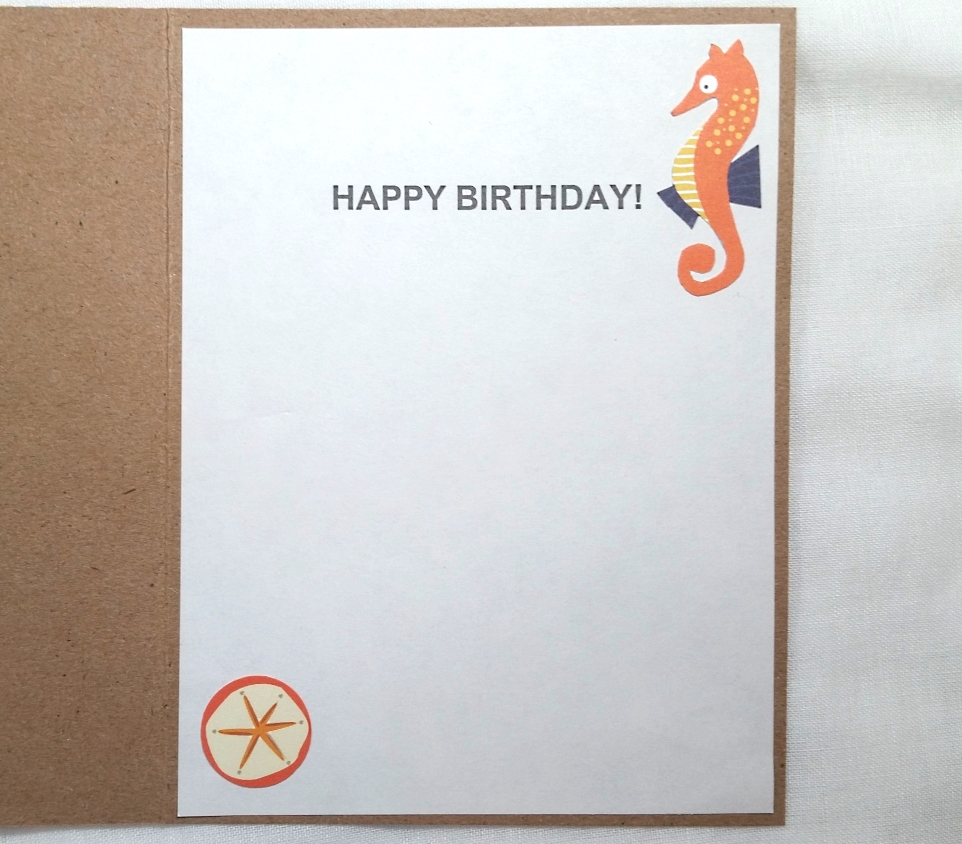
For the inside liner of the card, I simply printed out, “Happy Birthday!” onto some buff paper. Then I added a sand dollar and a sea horse image from the Carta Bella Frames and Tags (also from the Kit). The sand dollar was ready to go, but the sea horse had to be fussy cut out of a tag. Adding these little embellishments seemed to finish off the inside of the card nicely.
Please click the following picture to watch a process video of crafting this card:
Disclosure: Many of the supplies I’ve used for today’s project are linked. Some may be affiliate links, which means if you make a purchase I receive a small commission at no extra cost to you. I truly appreciate your support toward the costs of running this blog!
This card is being entered into the following challenges:
Simon Says Stamp Wednesday Use a Die or Punch Challenge
Simon Says Stamp Monday Add a Little Sparkle Challenge
Word Art Wednesday Anything Goes Challenge
Creatalicious Anything Goes with Optional No Patterned Papers Challenge
Card Mania Anything Goes Challenge
Lil Patch of Crafty Friends Anything Goes Challenge
MFT Birthday Project Challenge
Crafter’s Castle Anything Goes with Optional Christmas in July Challenge
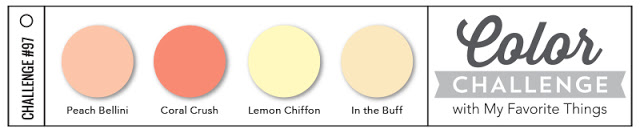
MFT Color Challenge 97


Gorgeous card 🙂 I am sure your friends daughter will love this, so thoughtful of you 🙂 the images and whole summery design is fabulous and I love that you finished the inside too, makes it even more special 🙂
thanks for joining us on the Simon Says Stamp Monday Challenge
Luv
Lols x x x
Oh I hope you’re right. Thanks so much Lorraine!
A fun card for your friends teenage daughter, I’m sure she will make more friends once school starts. Love the bright colours and the little sea creatures are super cute. Thank you for joining us at Lil Patch of Crafty Friends… good luck in the prize draw.. Megan DT LPoCF
Thanks so much! They are starting school this week and I know you’re right and that they’ll make lots of new friends. 🙂
Pretty and cute card.Thank you for joining the Crafters Castle challenge. – Priya Satish DT
Awww you’re so sweet. Thanks so much Priya!
Love this card! What a great beach theme! Thanks for joining us at the Simon Says Stamp Wednesday Challenge 🙂
Thanks oodles, Kim!
Lovely and funny card! Cute animals and your scene is great !
Thank you for playing with us at Card Mania Challenge ! Wish you good luck !
Hugs, Veana R.-DT
https://veanar1.blogspot.com/
Awww thanks so much Veana!
You have made such a fun card, you really made me smile! Thanks for joining us at Creatalicious Challenges.
Thanks so much Rhoda!
adorable card with critters. love your colouring. Good luck and thanks for playing along with us at Card Mania Challenge. Hope to see you again
Shylaa DT@CMC
Thanks so much Shylaa!
A lovely card!
Thank you soo much for taking part in our “anything goes with optional no patterned papers” challenge over at Creatalicious & good luck in the draw.
Hope to see you again in our new challenge as well…
Hugs,
Melanie
(DT-Coordinator Creatalicious Challenges)
(DT Crafty Friends)
(DT The Sketchy Challenges)
PS: Sorry for the late comment, life had been very busy these past weeks…
Thanks bunches Melanie!