
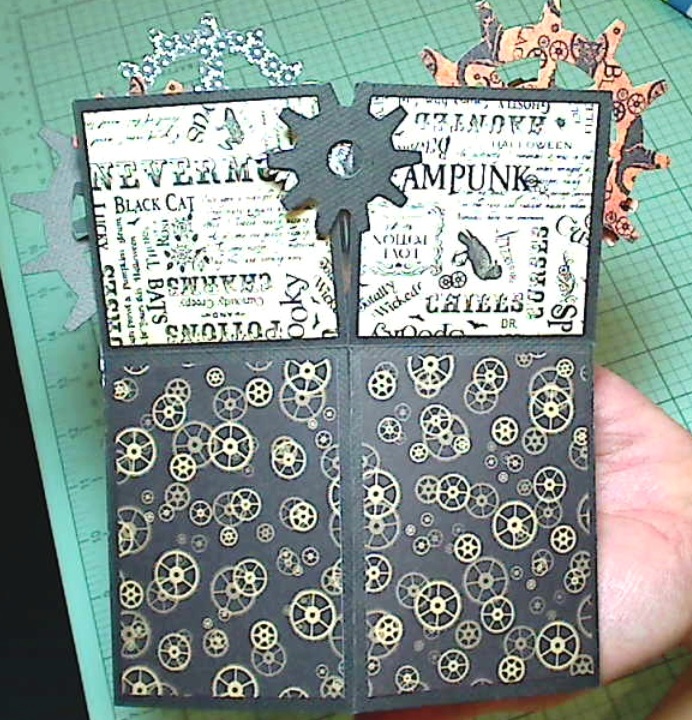
Closed Card Front
Oh my gosh I LOVE this style of card! The card-in-a-box is not as difficult as it appears (tutorial video is at the bottom of this post), and it has so much room for decorating and really creating a whole environment.
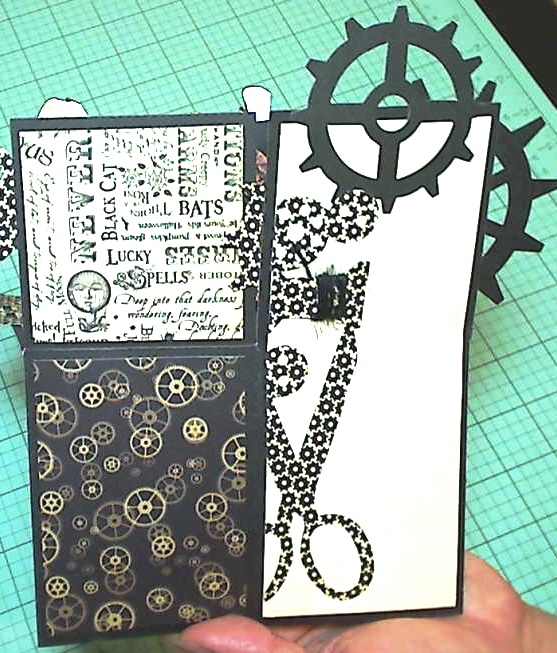
Back and Message Area
The following are the measurements of the papers I used for the card structure:
1 sheet of card stock – 12″ x 8.5″ – for the base.
Patterned paper A for lower sides of box – 3 rectangles – 2.5″ x 3.5″.
Patterned paper B for upper sides of box (inside and out) – 7 squares – 2.5″ x 2.5″.
1 sheet of pale colored card stock to write the message – 2.5″ x 6.25″.
After creating the structure of the card-in-a-box, I used three 6″ x 6″ sheets of Steampunk Spells Graphic 45 paper (that is all you need for patterned paper A and B noted above) and lots of gears cut from different scrap papers using my Tim Holtz Alterations “Gadget Gears” die. To add more interest, I chose some images from the cut apart page of the Steampunk Spells collection. I picked those images of things that fly (i.e., clock with wings, hot air balloon, owl) to fussy cut and adhere to strips of acetate (upcycled from some sticker packaging) to attach to the various layers of the card-in-a-box. For good measure (and to fill in a little gap) I also fussy cut and added the black cat from that cut apart page (since the friend who will receive this card loves cats (and dogs)). 🙂
I decorated the back of the card (where the longer pale card stock is adhered for writing a message to the card recipient) using another Tim Holtz Alterations die called “Sewing Edge”. I added a little extra fun by wrapping the spool part of the die cut with some black twine.
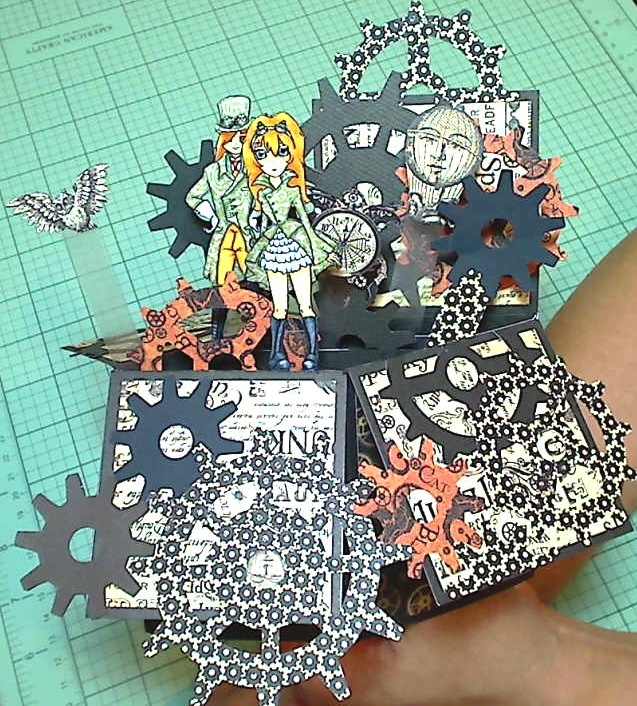
Opened Card
The focal points of this card-in-a-box were two of my free digis (available HERE), Steampunk Willy and Steampunk Barbie. I printed them out in a small format (what you get when you print 9 images on an 8.5″ x 11″ sheet of paper), colored them with Copic markers (skin: E50, 51, 53; cheeks: R30; hair: YR20, 31, 24, and E13; boots: C3, 5, 7) and paper pieced their coats with a beautiful small print tapestry patterned paper from the MME “Traveler” collection. To add a little depth to the tapestry coats, the “white” gloves of Willy, and the “white” lace skirt of Barbie, I added some shadows with Copic C3. Finally I added a little shimmer to Willy’s goggles with my clear star color Gelly Roll pen and put Glossy Accents on the boots, eyes, and goggles of both images.
 Ok, I confess that this card (with lots of breaks since I had my mother-in-law over for an impromptu visit this weekend) took me 2 days to create. I am a slow crafter so if you do a more simple version with less detailed fussy cutting I’m sure you could make similar cards much faster. While the card construction is not hard, the decorating can take some time. If you have the time, it is a card that you’ll enjoy making with results that can be spectacular!
This card is being entered for the Simon Says Stamp Wednesday Challenge
This is my video tutorial for this card:
Thanks for stopping by. Please subscribe if you wish, and have a great day! WOOF


This is seriously amazing! I love everything about it. Thanks so much for playing along with the Simon Says Stamp Wednesday Challenge: Die Crazy!
Oh thanks so much! I really had fun with this Steampunk box card, and it was great to be able to share it with Simon Says Stamp. Thanks for another wonderful challenge! Hugs, Kristina
Hi my Love Kristina, oh my goodness, this is just amazing !! Tfs Love ya’ Patricia
I just love what you did here. Using the two images together really looks great. Thank you for sharing your creations with us.
Hugs,