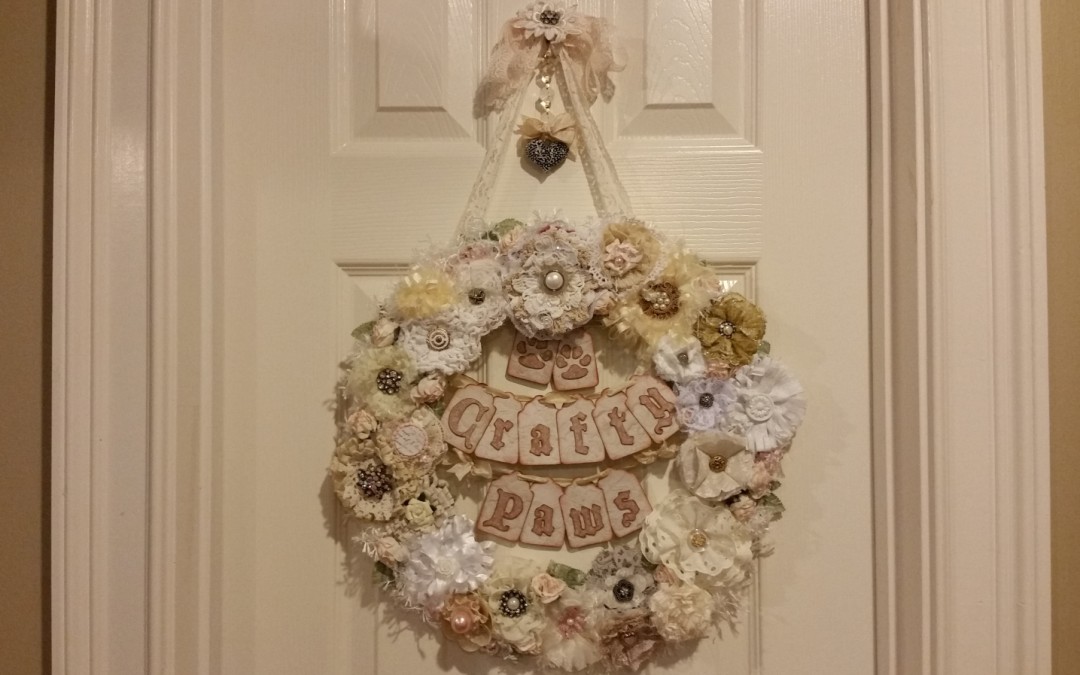
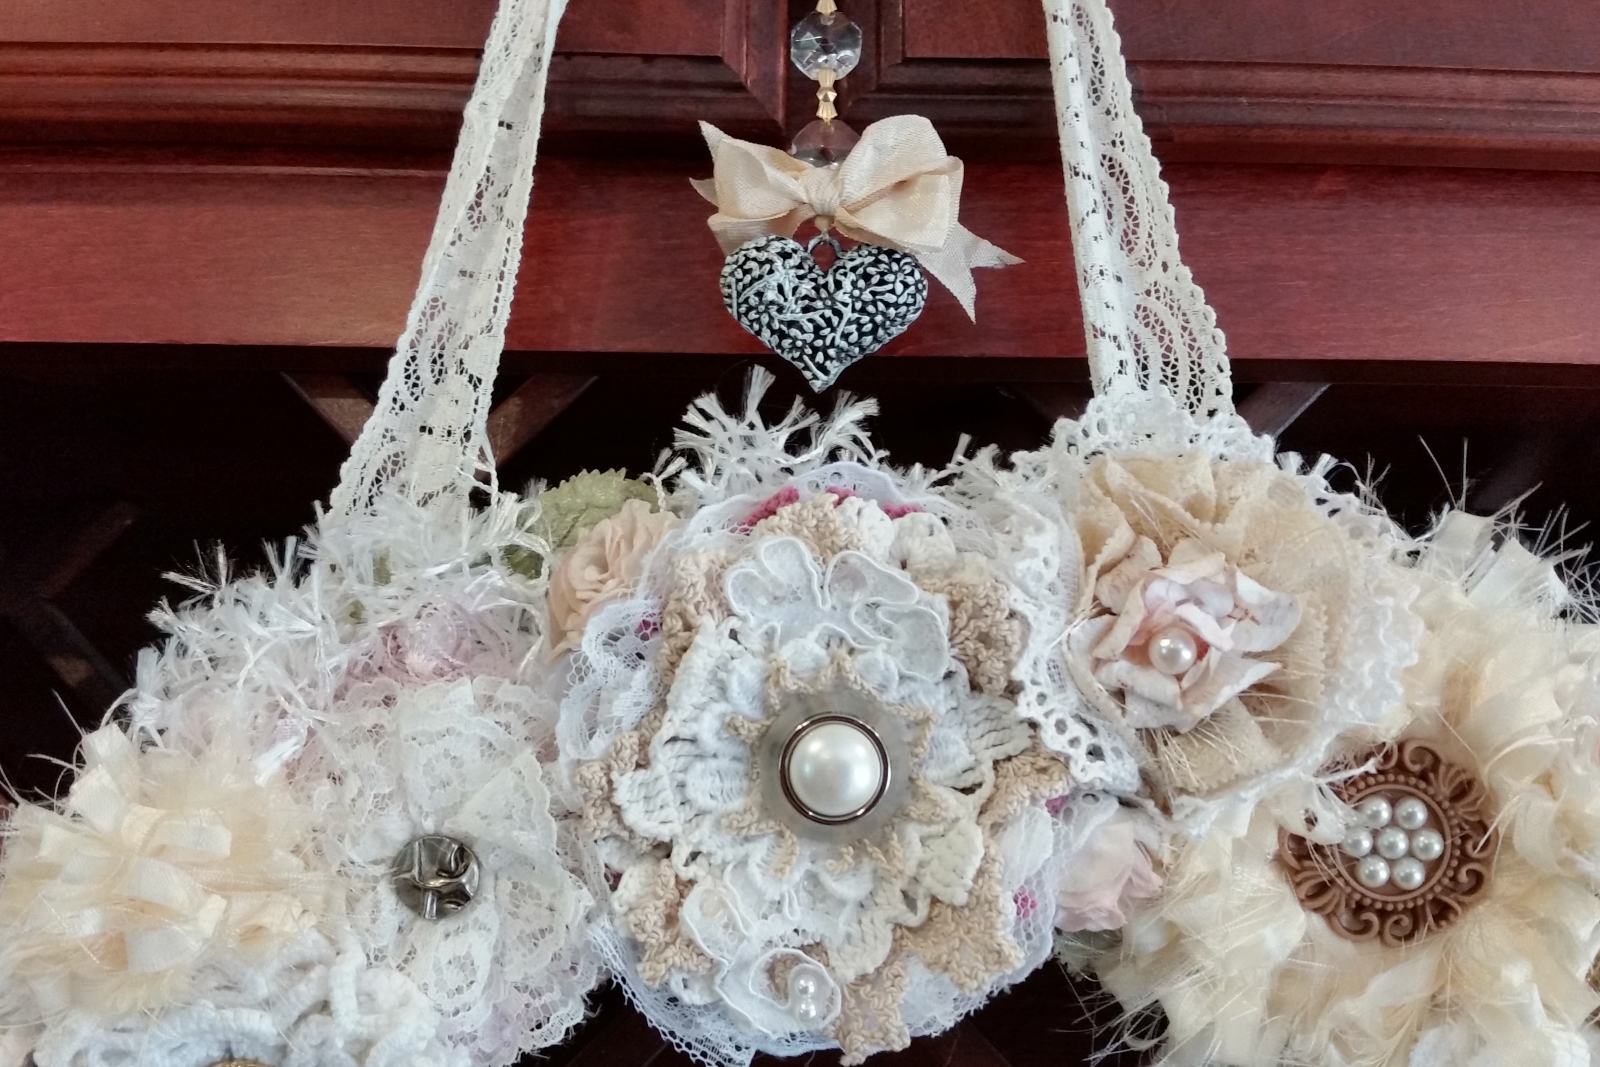
Top with Metal Heart Dangling from Chandelier Crystals
This project hits so many wonderful points for me. First, it is an upcycling project; I use a cardboard box for the base and old book pages to decoupage over it. Second, I got to use my Silhouette (a pricey crafty tool that I have not used nearly enough to justify it’s cost) to create the DIY Thicker-style letters with a free downloaded font called Black Castle. Third, I got to use loads of handmade fabric, lace and doily flowers that were gifted to me by so many crafty friends. All the love they put into these flowers is now incorporated into this special wreath name sign, and every time I look at it I will be reminded of their kindness how blessed I am to be part of this amazing crafty community.
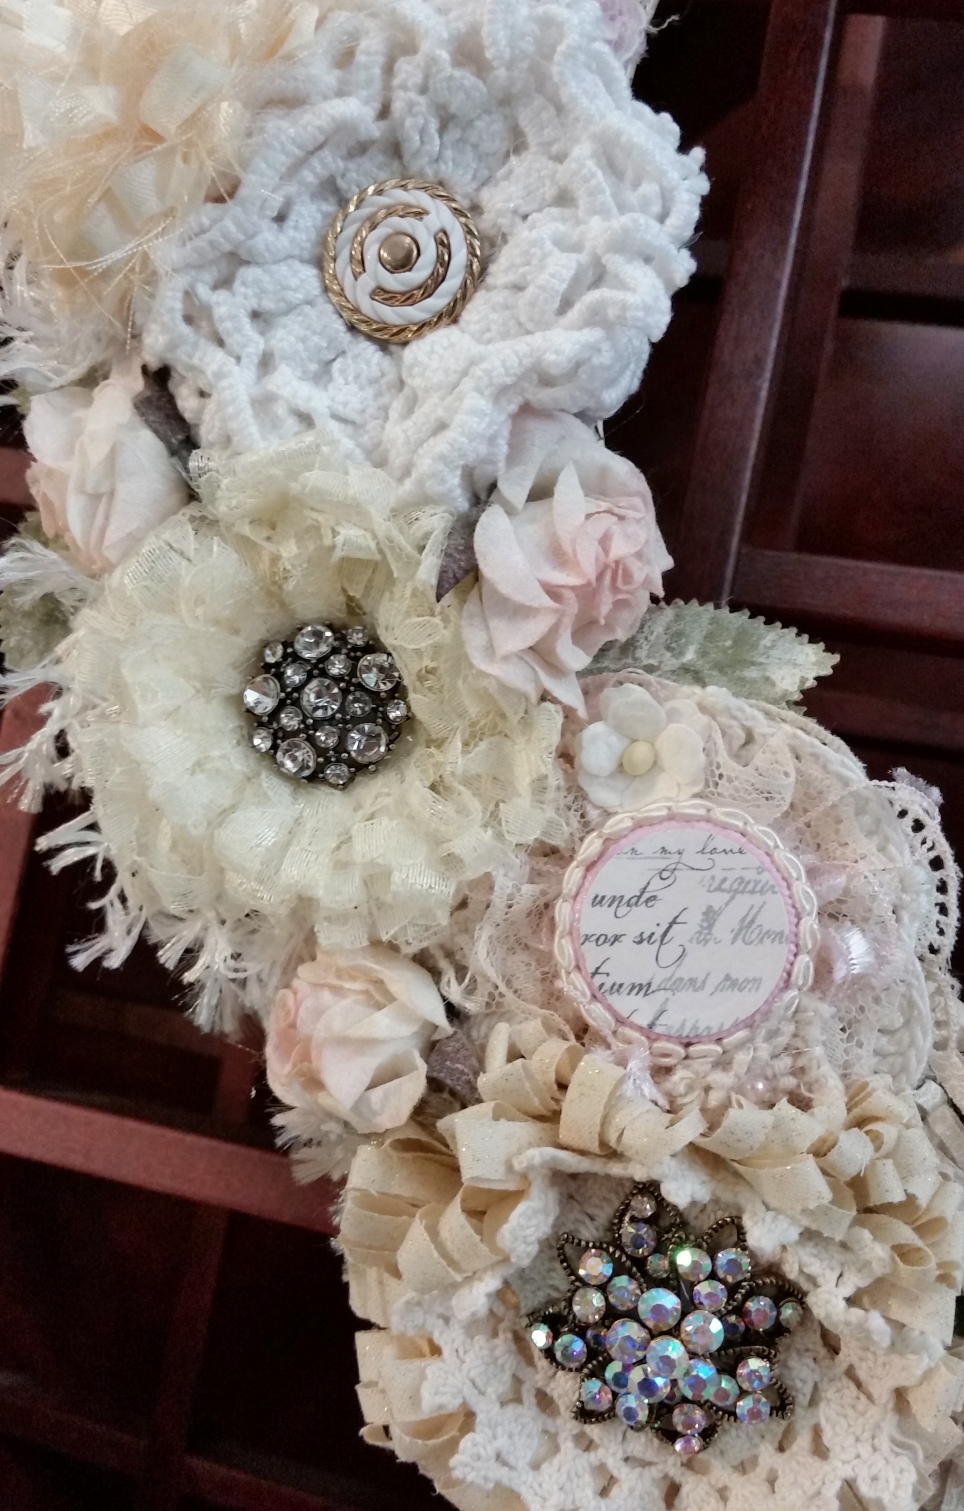
Top Right
I first took the cardboard and used a make-shift compass with a string and a pencil to draw the wreath form. I then cut out the shape with heavy duty scissors. Tearing up old French book pages into small pieces, I decoupaged the wreath form, front and back using Mod Podge. I next used a couple pieces of furry trims that I hot glued around the front to soften the outside edge of the wreath.
Center Bottom
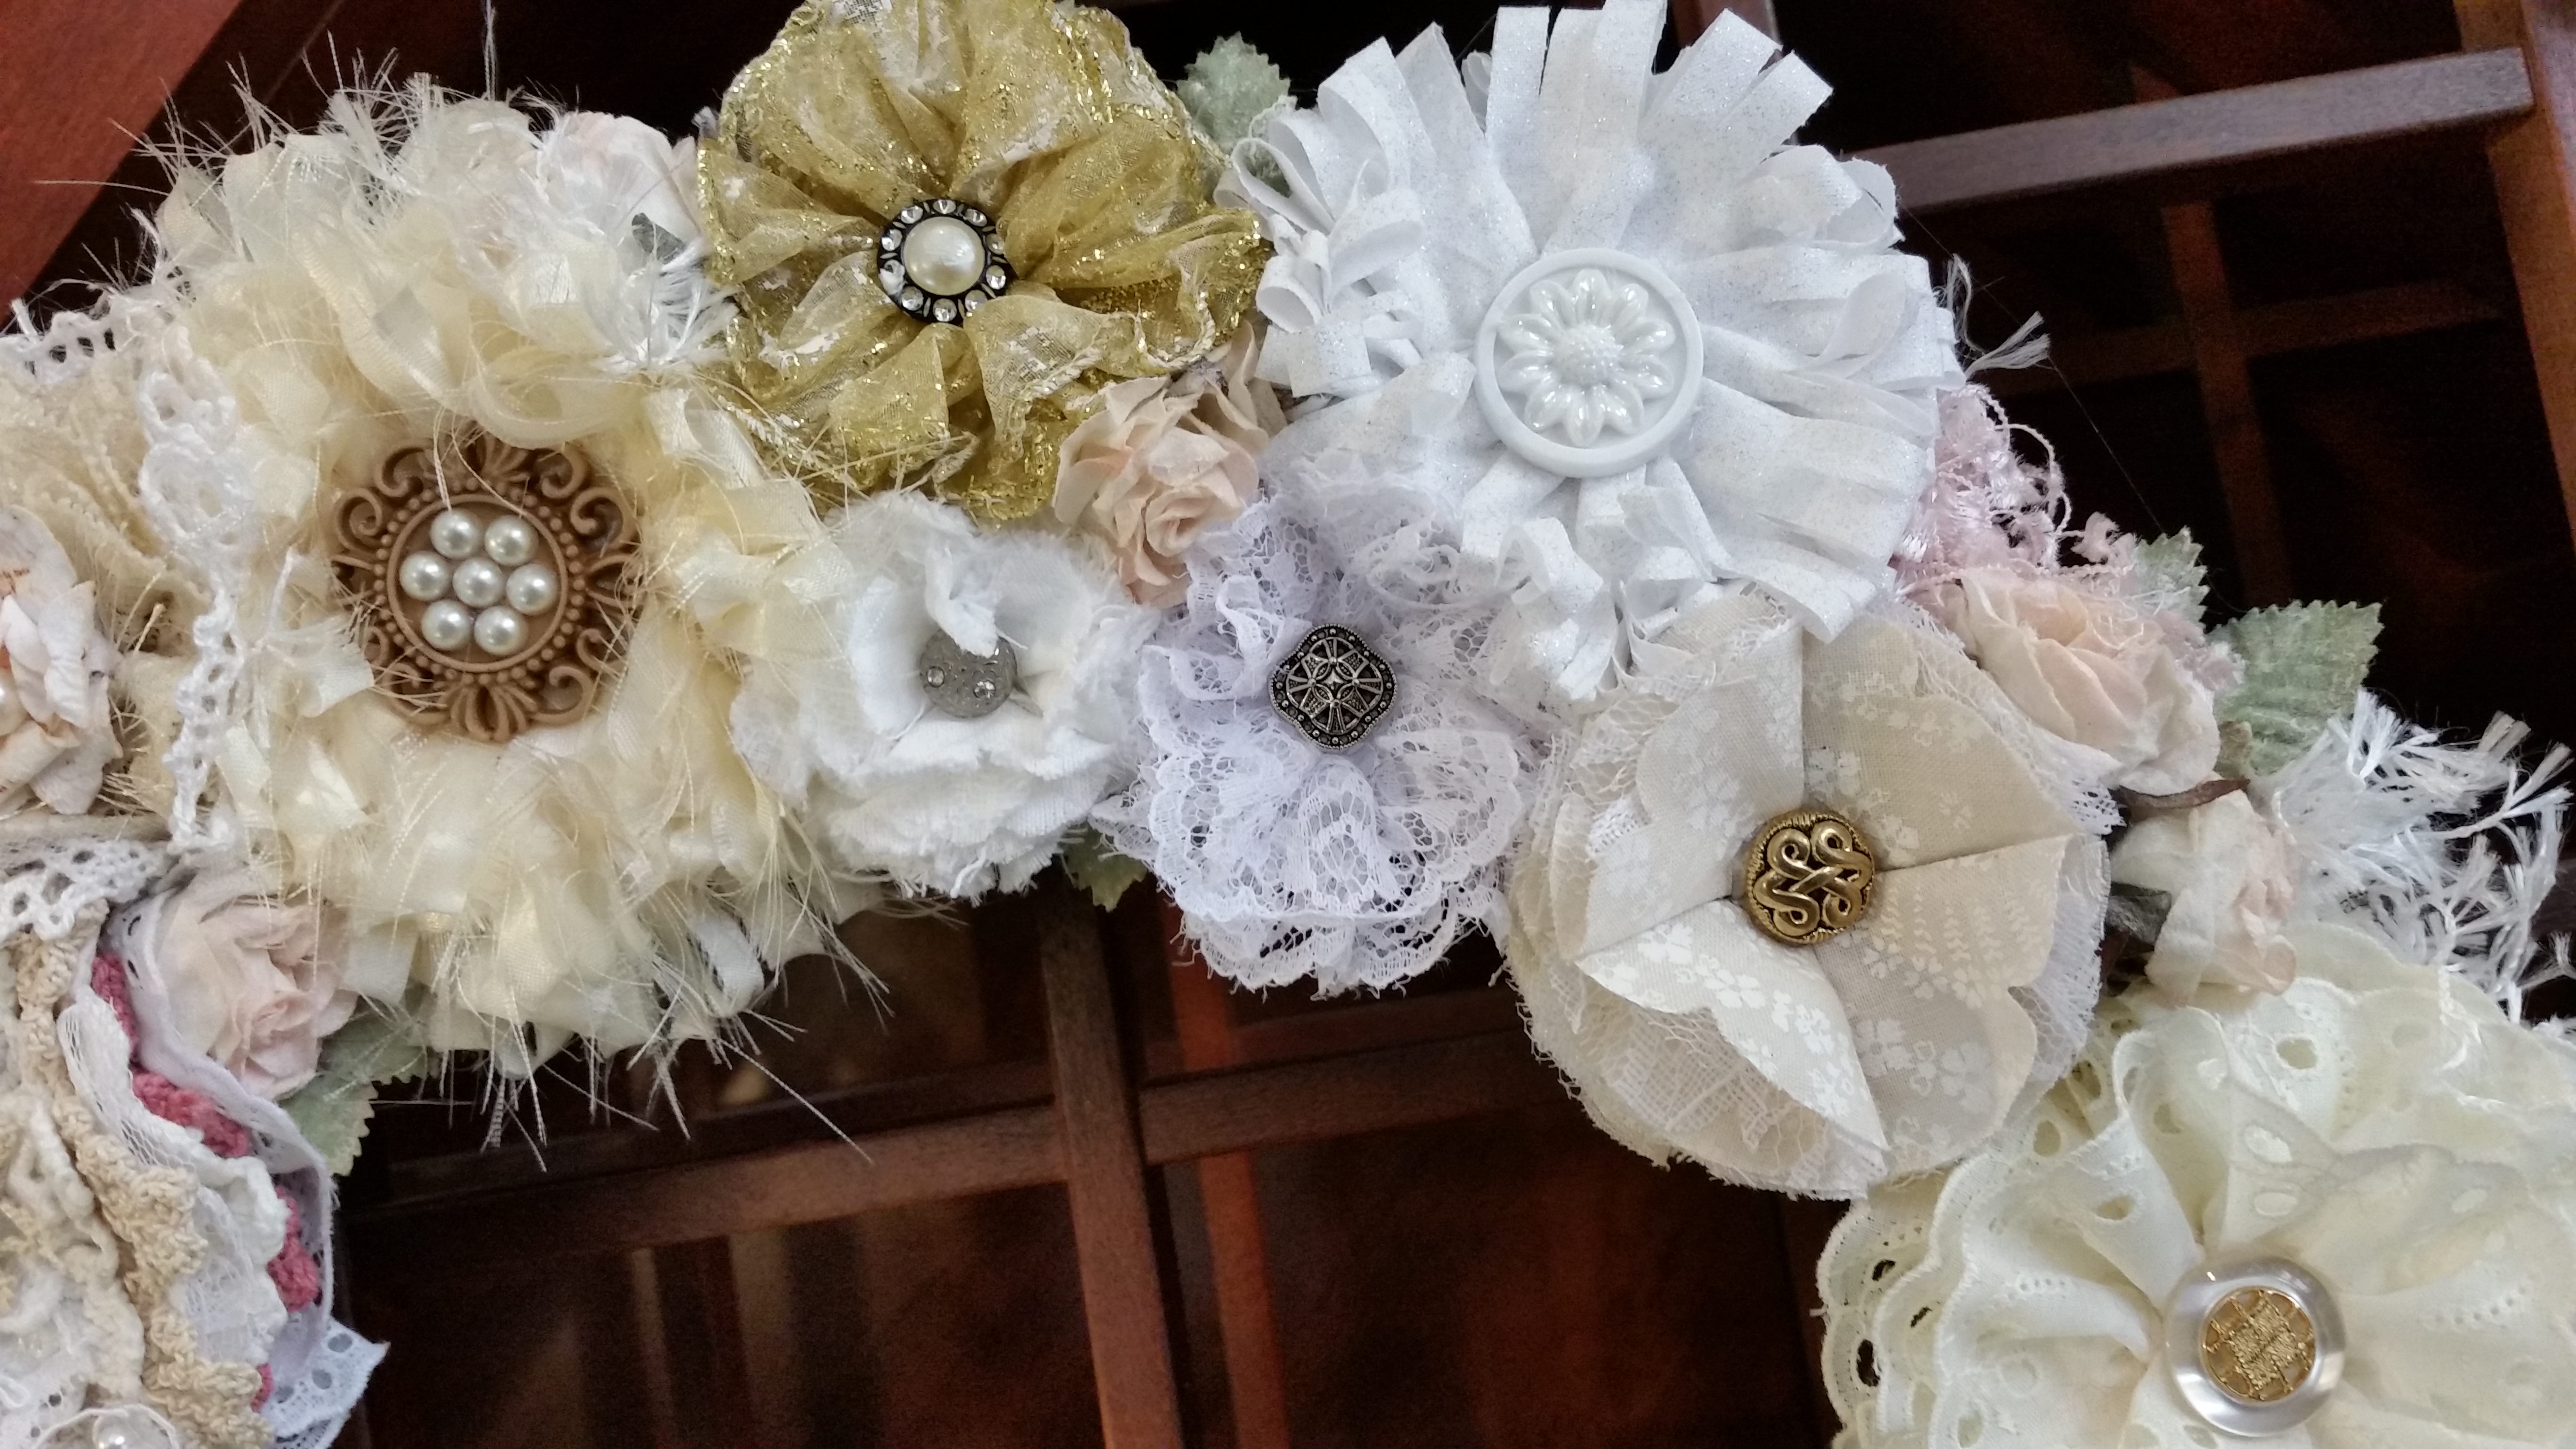
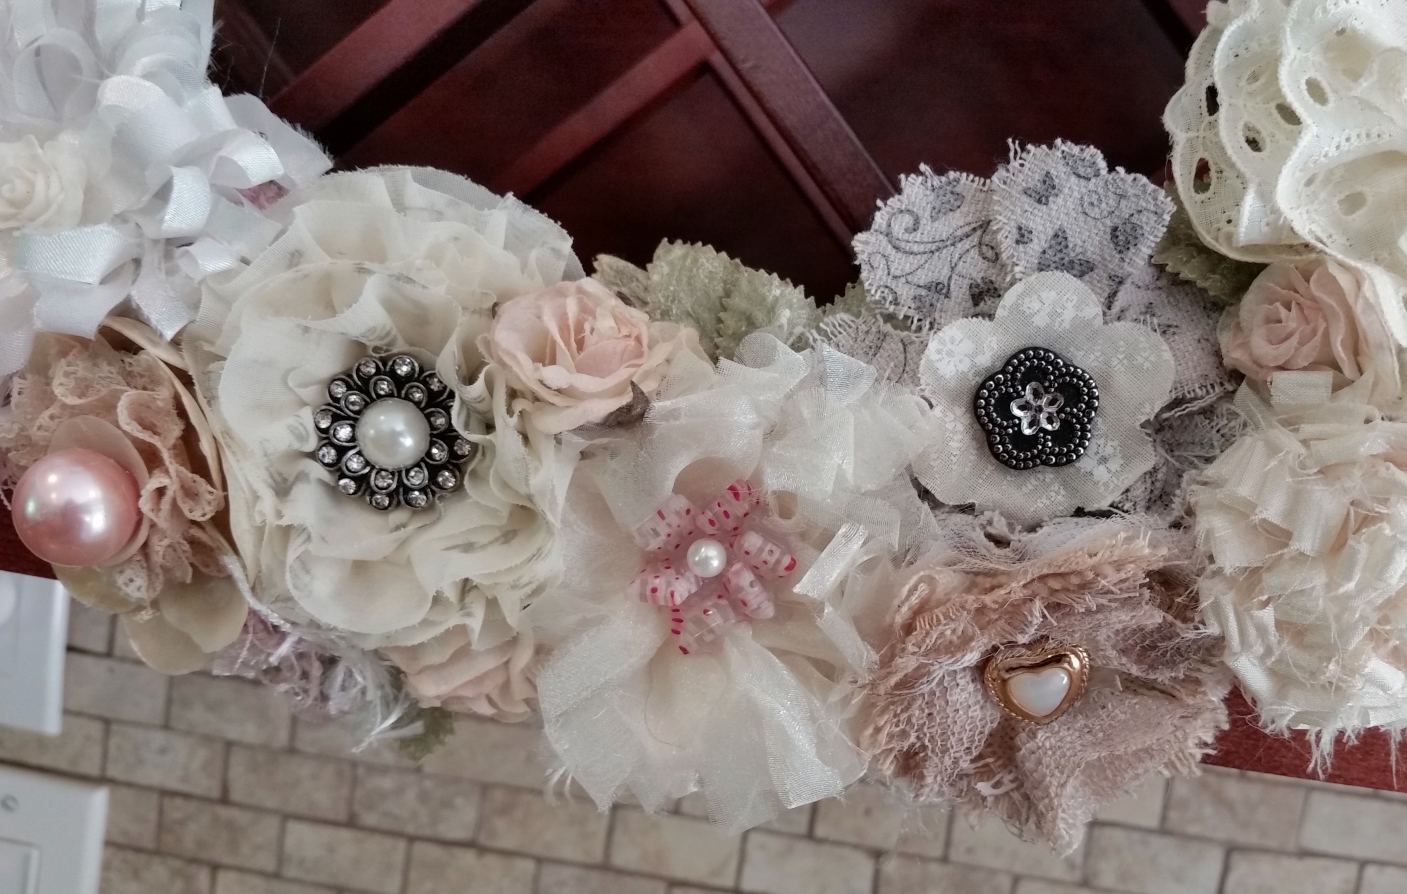
Now for the fun part. I pulled out all the handmade flowers I have received from friends in white, cream or pale tans with occasional hints of pale pink. Originally I had planned to use all the handmade flowers I had been gifted, but there were so many that I decided to divide them up between these neutrals and other brights, which I will save for another project. I futzed with these flowers for a long time, moving them around until I felt like they were well dispersed around the wreath in terms of different sizes, types (can you spot the seashell one?), colors, and textures. When I was finally satisfied with the dry fit, I started to hot glue each one into place. I was surprised to find that when I was all the way around the wreath I had some open spaces; I guess I glued the flowers in closer together than I had mapped out. 🙂 I filled in those gaps with dusty peach paper roses and leaves from my stash; these flowers are much larger those that would work well on most cards or layouts so this was a great way to use them up.
Blingy Left
For the hanger, I used some laces for the hanging strap as well as to tie a triple loop bow, a few doilies and appliques to layer up with a rhinestone bling center for a quick flower topper (this was the only flower I actually made for this project!), some crystal chandelier pieces, and a heavily detailed dimensional metal heart that I lightened with white gesso and topped with a small triple loop seam binding bow.
To create the tags to spell out my YouTube name, I used my Silhouette to cut out letters to spell out CraftyPaws four times so that I could layer up the letters to create Thicker-style pieces. I also used a a Fiskars dog paw print hand punch 8 times to make Thickers-style paw prints for the top two tags. I cut out the tag bases using the second smallest of the Diemond Dies Nesting Tag Die Set. The papers I used to create these alpha banners were from the DCWV Laces and Linen Stack. I inked the edges of the letters with Tim Holtz Distress Ink in Antique Photo and added a little more inking around the tags with Antique Photo and Spun Sugar (this pink helped coordinate the banners with the soft pink touches in some of the flowers and trim). To position the tags just where I wanted them, I glued them in place before I strung through the hand dyed seam binding, which I secured on the back with more hot glue and covered with more vintage book paper scraps. To weigh down the bottom banner a bit and add a little more decoration to the seam binding, I tied two small seam binding bows on either side of the tags that spelled out “Paws”. They were the perfect small finishing touches.
The following is a video share and process video creating this wreath name sign:
This wreath name sign is being entered into the following challenges:
SaCrafters LLC’s Name Sign Challenge (see video for the links to all the super generous Sponsors!)
The Pink Elephant Anything Goes Challenge
Simon Says Stamp Wednesday Anything Goes Challenge
Addicted to Stamps Anything Goes Challenge
Craft-Dee BowZ Anything Goes with a Handmade Bow Challenge
My readers can get 10% off their purchase at Diemond Dies and free worldwide shipping on orders of $35 or more by using the coupon code: thankskristina
Thanks for stopping by. I hope you are having a shabbilicious day! WOOF


The wreath is gorgeous! The beautiful details and soft colors are so pleasing to the eyes! Thanks so much for playing Simon Says Stamp Wednesday “Anything Goes” Challenge!
Your wreath is stunning and I love the pretty colours:) Thanks for joining us this week at ATSM xx
Gorgeous wreath, with lovely soft colors, thanks for joining us at ATM.
Lovely wreath! Do I assume you used your Craft-Dee BowZ prize for the bow? :). Thanks for joining the Craft-Dee BowZ challenge with your art.
Lovely wreath/name tag!!! I love that you upcycled and that you brought it altogether beautifully. I want one. Now I will need to shy away from my brights and shop gorgeous neutrals.
Nice friends by the way: )
Wow!!! Gorgeous wreath!! The flowers are beautiful!! Thanks for playing with us at Addicted to Stamps and More!!