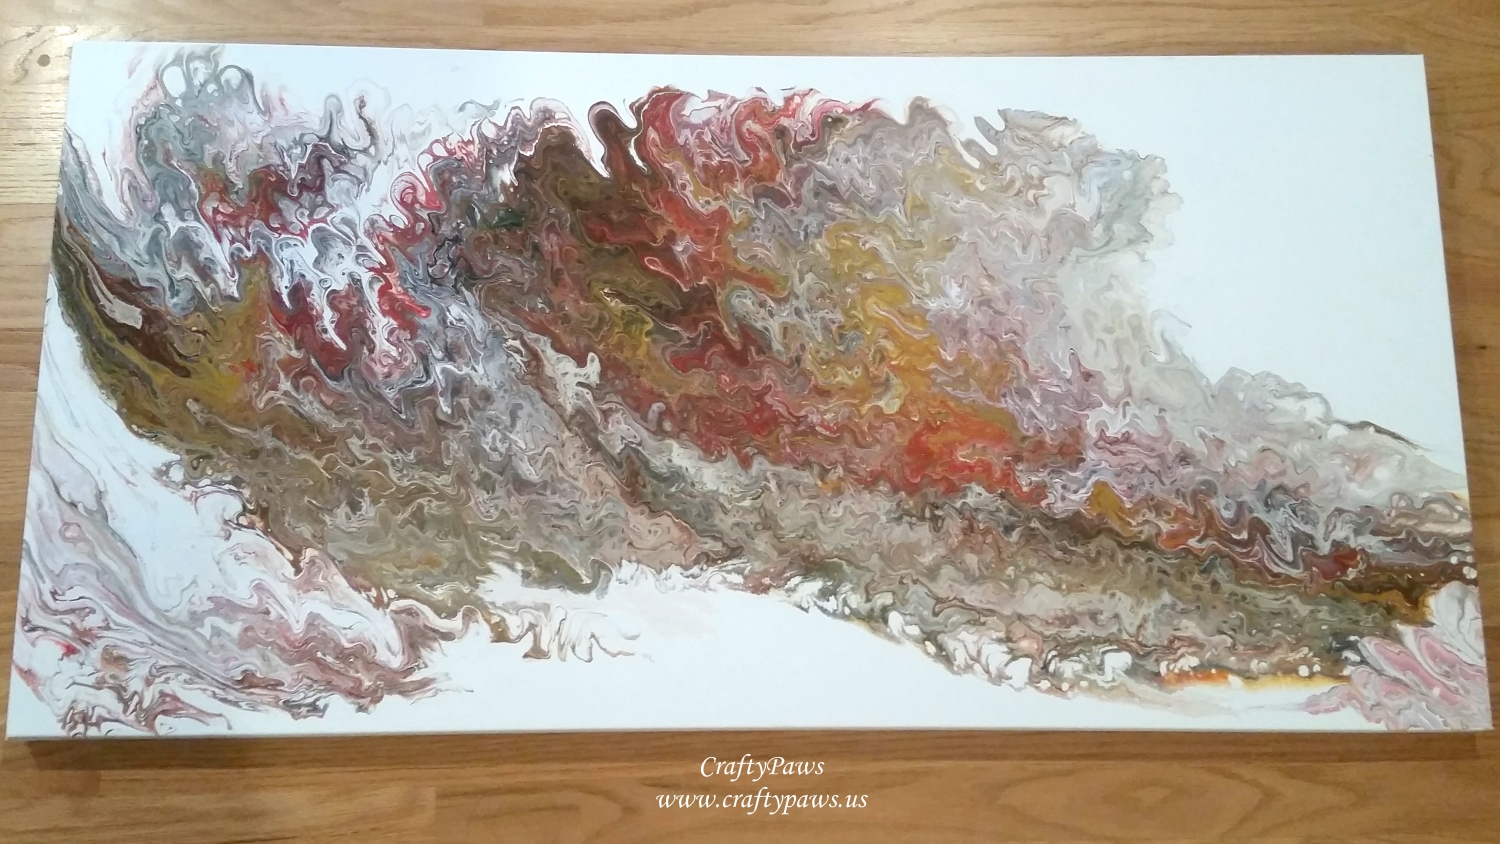
I had a commission to create art for a huge wall in an office lobby. I have been wanting to try acrylic flow art painting for a while and I thought this would be a perfect opportunity to give this a try. Little did I know when I committed to this, that flow art is usually done on small format canvases or boards. I wanted to do three 24″ x 48″ canvases, and do them all in one weekend (it normally takes 3-4 days for flow art to dry (and at least a week to fully cure before cleaning and varnishing) and this weekend I had the whole house to myself so I had to seize the opportunity to have wet art spread out all over the house – LOL).
Over 4 days, I watched a LOT of YouTube videos and read a lot of blogs about acrylic flow art painting and picked up tips, product recommendations, sample ideas, etc. I had a bunch of different paints in my stash that I wanted to use and it seemed mixing different brands and types really didn’t matter (some people even used left over house paint). YAY!
The formula I used for plain acrylic paints is:
A. 2 parts Flood Floetrol (available at home improvement stores like Lowes) to 1 part paint
B. Water to thin out the mixture to a thin, drippy consistency (amount needed varies by thickness of paint); and
C. 5-8 drops of silicone (I used treadmill silicone lubricant because we had it in the house, but other folks use rubbing alcohol, or certain hair oils) for about 1 cup – 3/4 pint of paint/Floetrol mixture.
Mix A-B well until smooth and then add in the silicone and stir lightly.
The formula for metallics, white acrylic paint for negative space paintings, and glitter (yes, GLITTER) paints was the same, except I did not add any silicone (some people used an Elmer’s glue with water solution rather than Floetrol for metallic paints because they claimed Floetrol dulled the metallics, but others said it made no difference). I chose to stick with Floetrol (primarily because I purchased a gallon and I wanted to use it up and not dirty up another container).
The following are the paints I used:
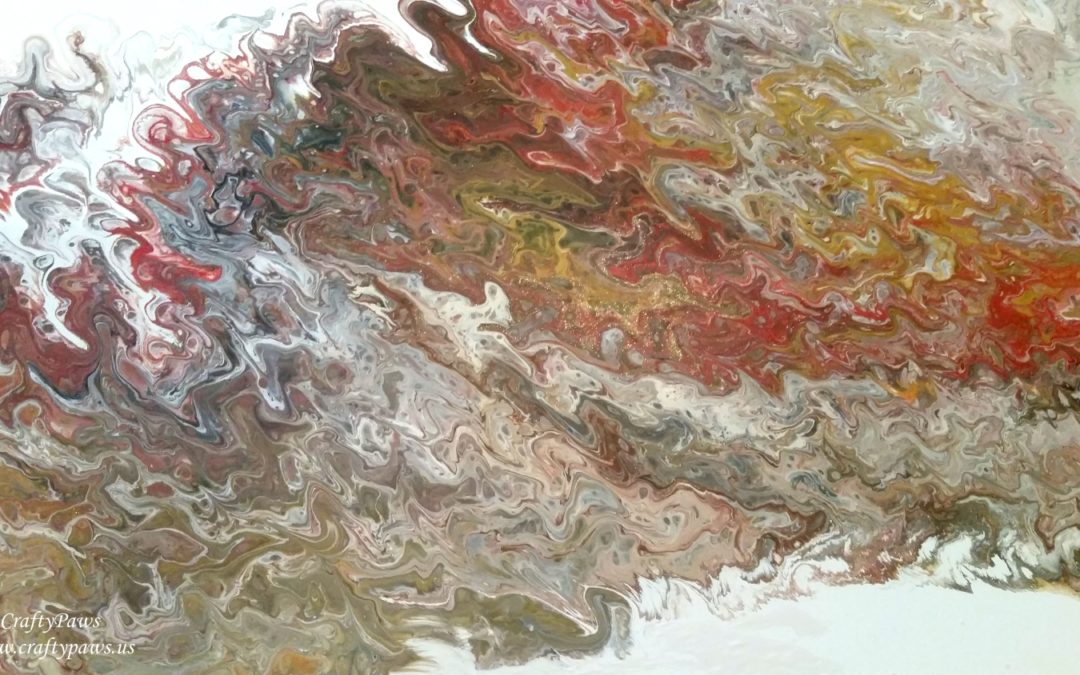
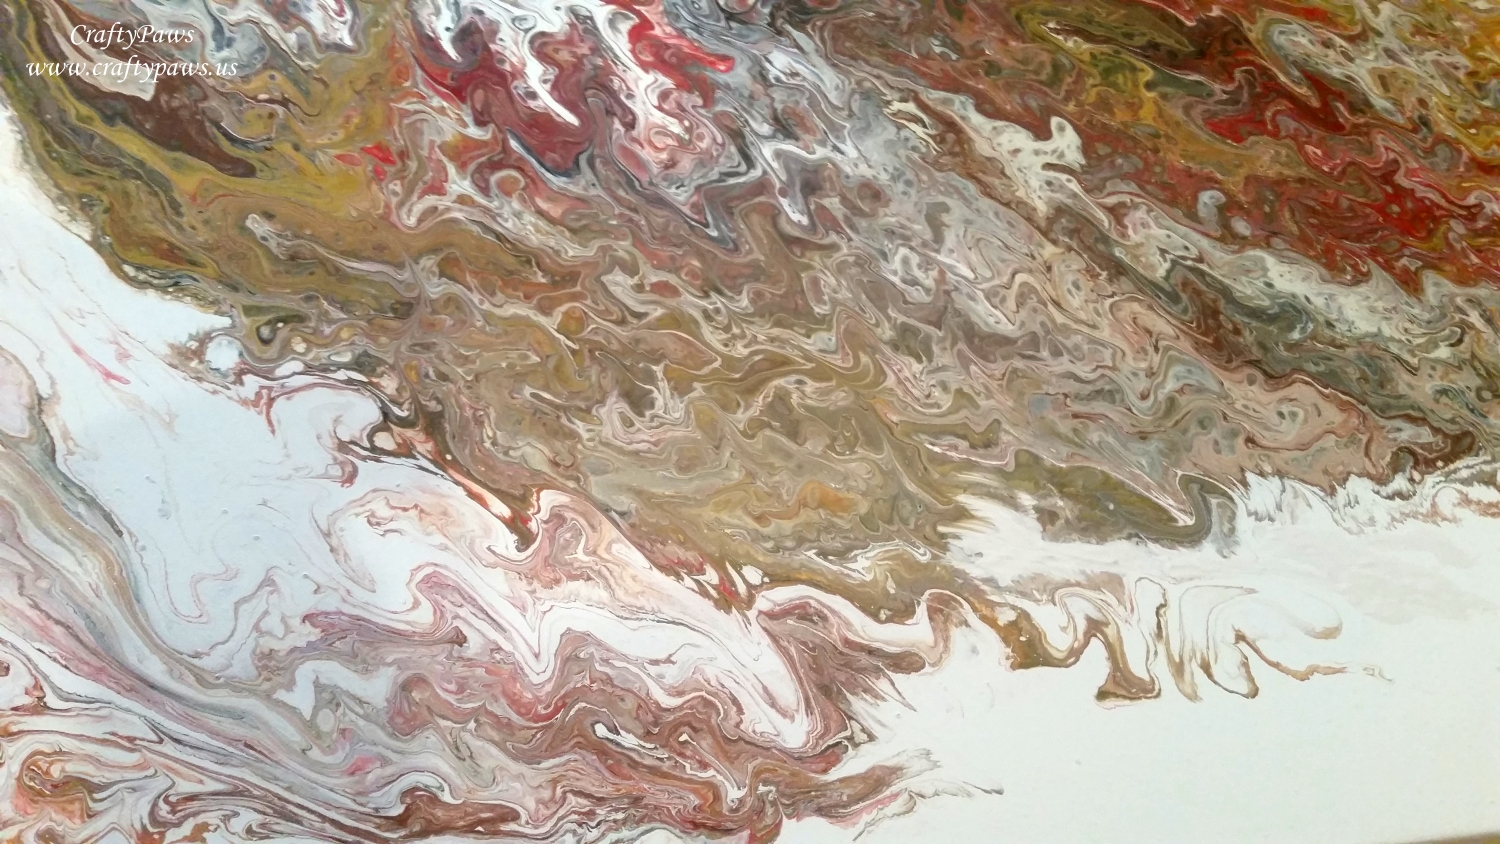
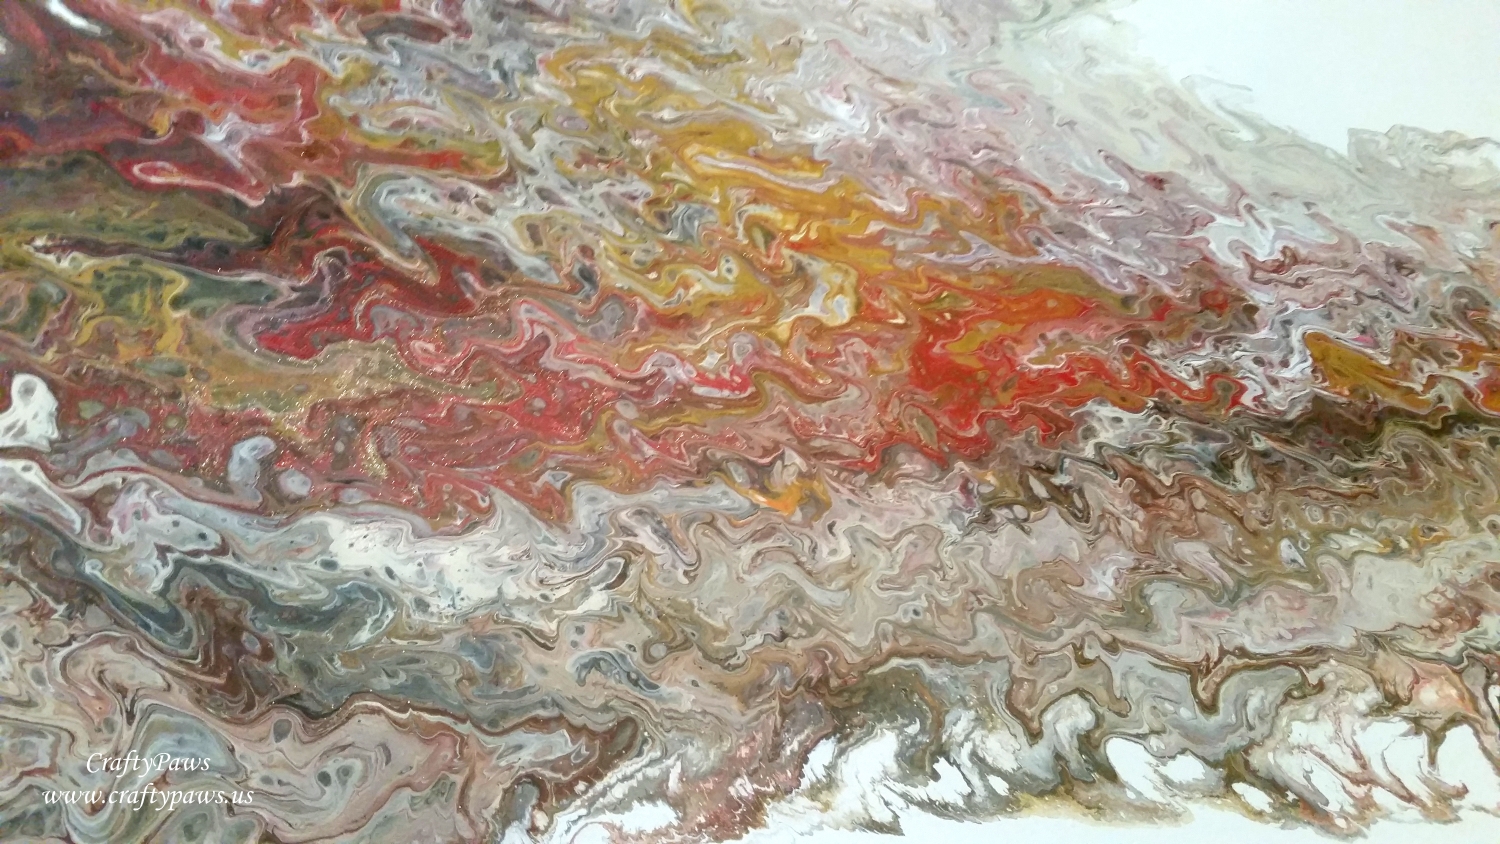
For an earth tones canvas (my first), I used: DecoArt Fluid Acrylics in Yellow Ochre, Metallic GOLD, Pyrrole Red, and Titan Buff; Craft Smart Brown and White; Sargent Art Black Acrylic Paint; and Martha Stewart Glitter Acrylic Craft Paint in Florentine Gold. To cover a canvas this size it took about 2.5 qts of paint/floetrol/water mixture.
Some other tips and supplies I used:
1. Wooden craft sticks to mix the paint-Floetrol-silicone solutions (chopsticks or plastic spoons work just as well, but I had a bunch of these in my stash from the dollar store).
2. To-go plastic containers for mixing each paint color as well as larger ones for creating the dirty pour mixtures (other folks use plastic cups from the dollar store or recycled empty apple sauce or yogurt cups).
3. Gesso to prep my canvases (I wanted to make sure I did everything I could to assure clean, smooth pours) even though I had purchased pre-gessoed canvases
4. Scale to simplify measuring paints and Floetrol
5. Pipette to add varying amounts of water into paint-Floetrol mixtures as needed to thin out for pouring
6. Wilton offset spatula to move around paint on the canvas
7. Michaels 24″ x 48″ canvases in the best Level 3 quality (I thought thicker framing on Level 3 canvases would be helpful for such large canvases that would have to support a lot of paint weight while drying) were 70% off during a flash sale.
The quantities of each paint color varied and the way the dirty pour mixture came out was totally unexpected. My OCD nature made me a bit uneasy, but the adventurer in me was THRILLED! I loved how this came out and my clients did too! I am really in love with this new craft technique.
The following is a video sharing the paint mixing and pouring process:
Disclosure: Many of the supplies I’ve used for today’s project are linked. Some may be affiliate links, which means if you make a purchase I receive a small commission at no extra cost to you. I truly appreciate your support toward the costs of running this blog!
This canvas is being entered into the following challenges:
Lil Patch of Crafty Friends Anything Goes Challenge
Addicted to CAS Gold Challenge
Card Mania Anything But a Card Challenge
Crafters Castle Anything Goes with Optional Share a Favorite Technique Challenge


Fabulous!!! Beautiful!!! Awesome!!! You did an amazing job and I can’t wait to watch the video! Thank you so much for entering our challenge at Crafter’s Castle this month….good luck 🙂
Hugs… Janie
DT
Crafter’s Castle
crafterscastle.blogspot.com
Thanks so very much, Janie! I have a part 2 with 2 more canvases hopefully coming out in a process video tomorrow (provided my computer doesn’t keep crashing on me). TFStopping by! Big hugs, Kristina
Your pour piece is gorgeous. It looks like you have been doing it for years! The colors are so warm and inviting.
Oh you are so sweet! Thanks so much Cynthia!
Beautiful work. Thanks for joining us at Card Mania Challenges. Good luck and hope you’ll join us again.
Thank you so much Miss Emerald!
Beautiful creation!
Thanks for playing at Card Mania Challenge. Sorry for the late comment.
Ileanaxx
Thank you so much Ileana!