When I first laid eyes on Hello Jason, Hello Hannibal, Hello Pinhead and Hello Freddy from Dr. Digis House of Stamps, I was totally smitten by these killer kittens. They are a cross between Hello Kitty and some of the scariest horror film characters (which is a genre I love), and OMGEE, could these killer kitties be any spooky cuter?
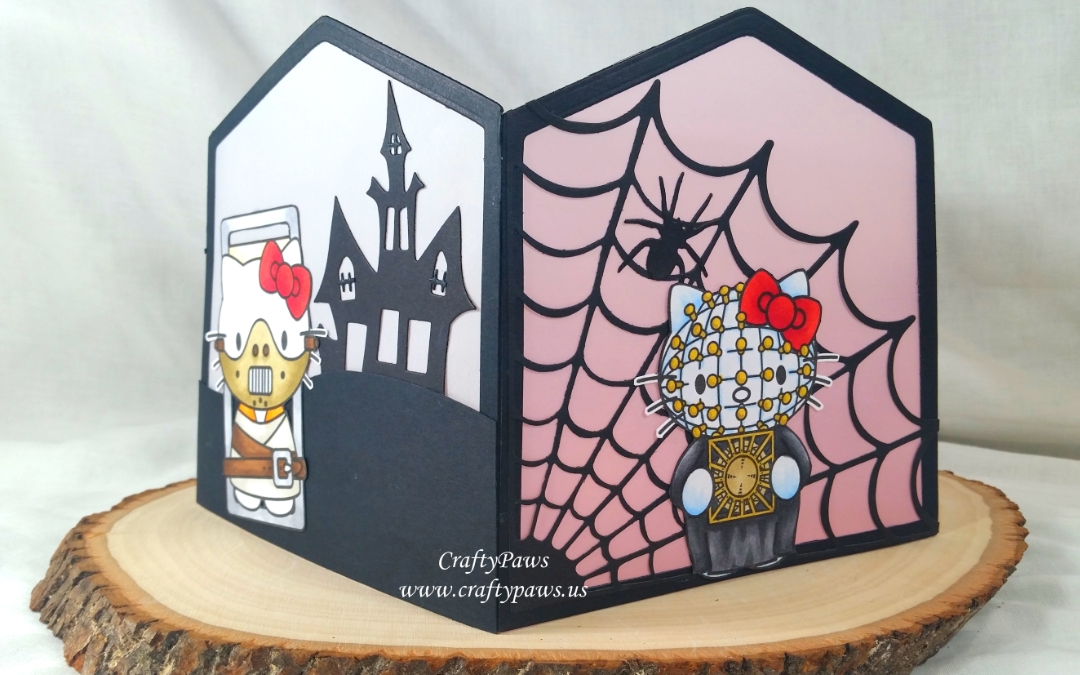
I decided to feature each Killer Kitty in an eerie scene that would form one panel of a 4-sided luminary. For the construction of the luminary, I used premium extra-heavy (100 lb) black cardstock and the two largest of the Diemond Dies Nesting Pockets Die Set (which when flipped upside down creates a tombstone shaped frame!). I seemed each tombstone frame together with small strips of folded card stock, glued to each frame side. Then I lined the backs of each frame with vellum, also cut with the largest of the pocket dies. To ensure that the vellum did not show along the edges of the frame, I trimmed a tiny bit off of each side and the bottom before gluing them onto the frames. I also used the largest of the Diemond Dies Nesting Pockets Die Set to cut out the bases of some foregrounds for the scenes, hand fussy cutting the hillside tops with scissors.
Then it was a matter of having fun decorating the silhouette scenes with lots of black die cuts of spooky images. I used the following Diemond Dies to create each panel scene:
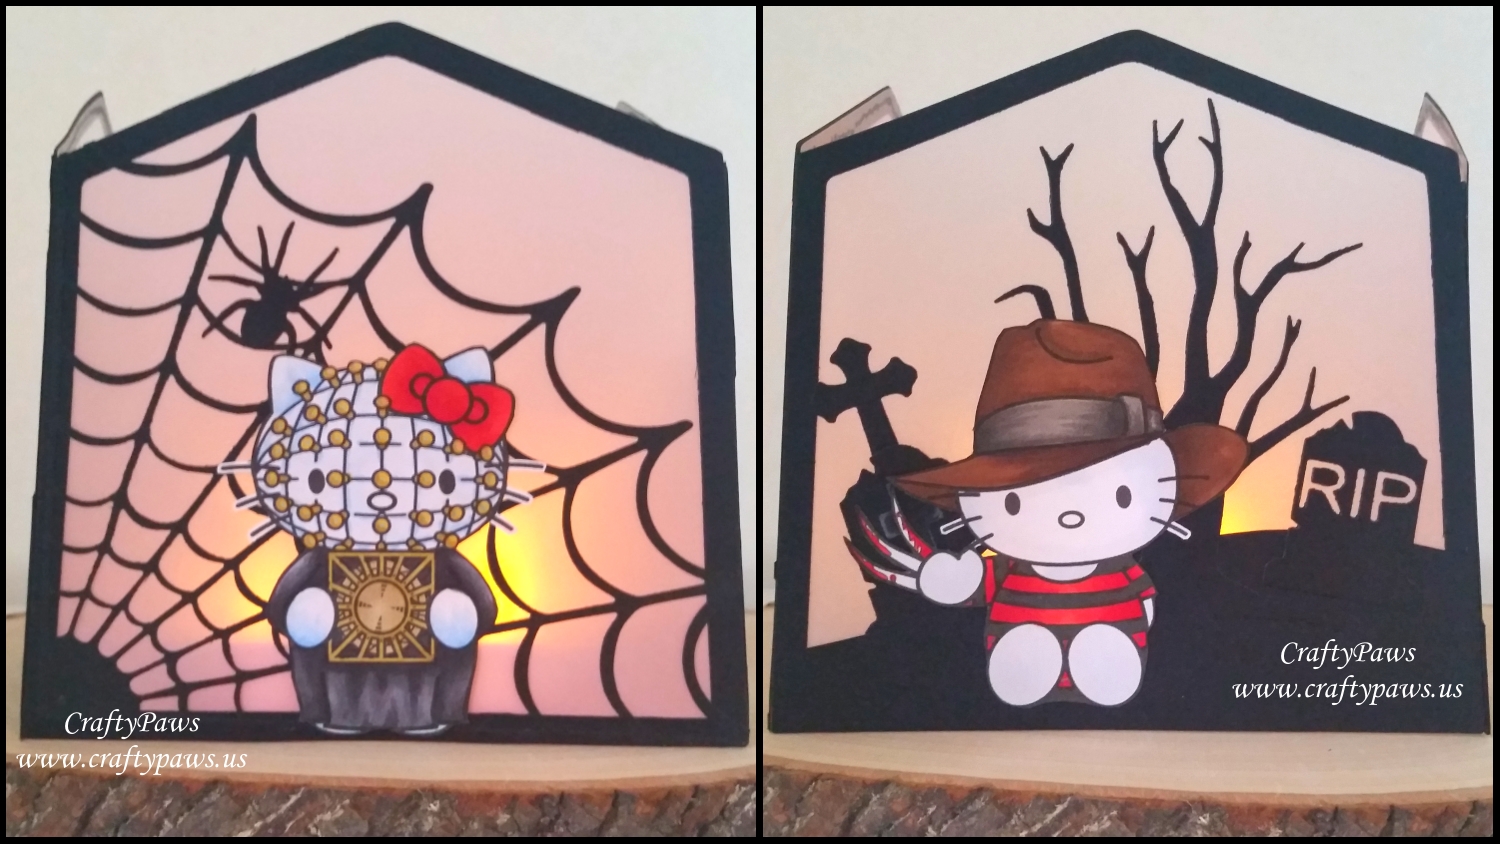
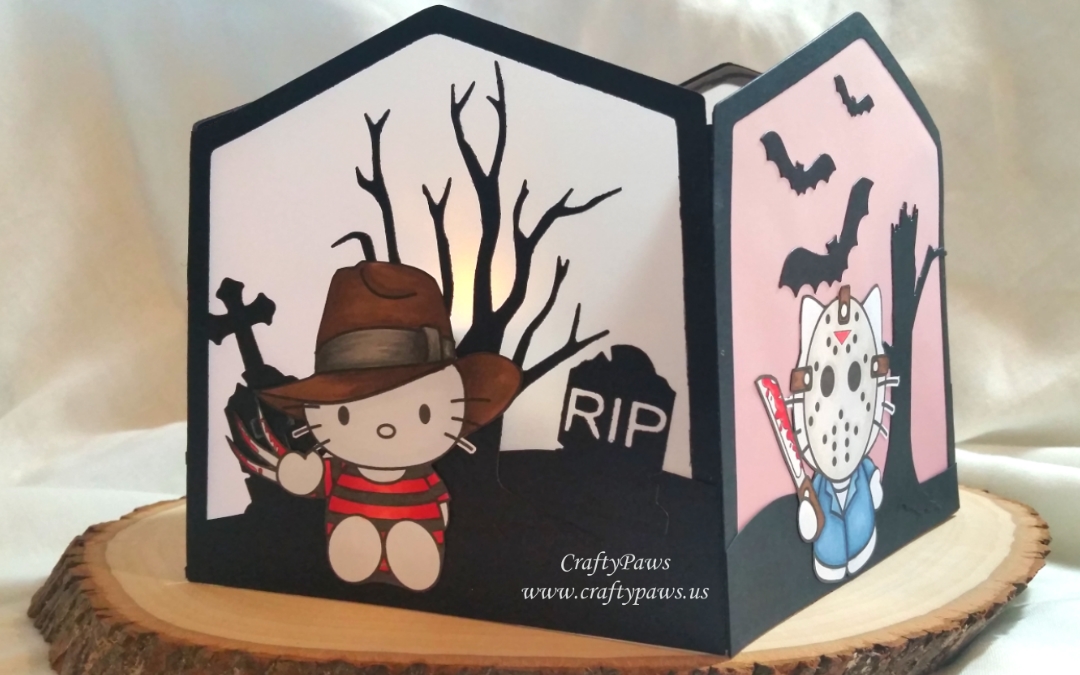
Cemetery behind Hello Freddy: Tombstone Die Set, Cross from Coffin Die Set and Spooky Tree Die
Spiderweb behind Hello Pinhead: Spooky Spiderweb Mini Album Die Set and Spider from Spooky Spiderweb Die Set
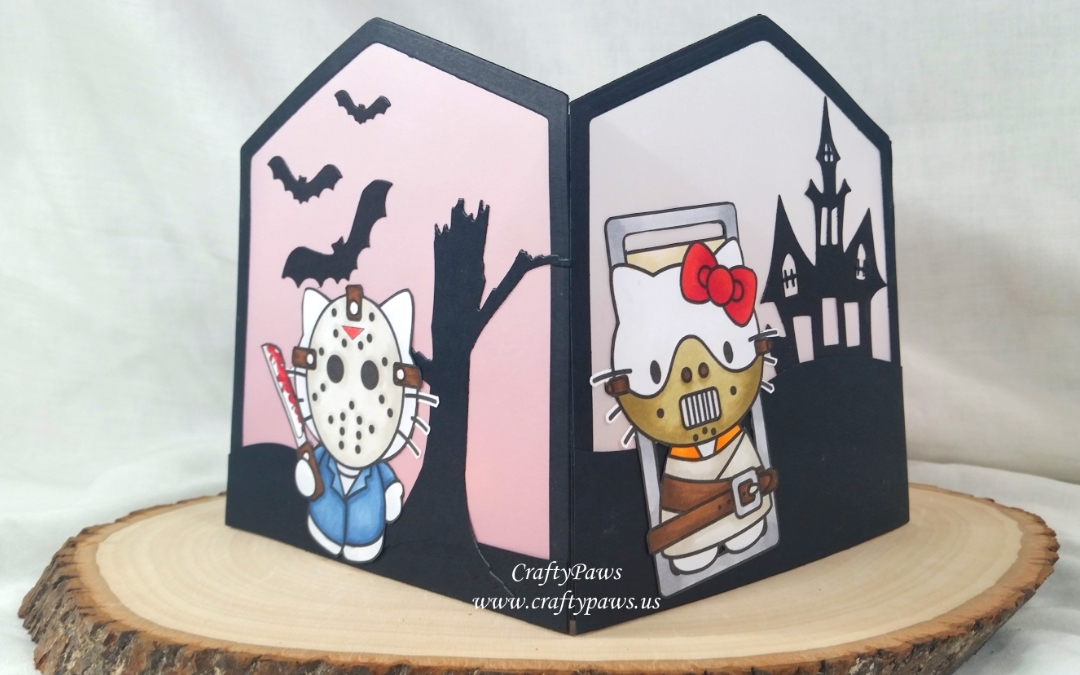
Haunted house behind Hello Hannibal: Spooky House Die and Stitches from Frankenstein Die Set
Bats behind Hello Freddy: Flying Bats Die Set and C.C. Designs Spooky Tree (retired)

Next I Copic colored the Killer Kitties to bring them to life:
Hello Freddy (Nightmare on Elm Street): Kitty: C00; Hat: E57, E59, W5 and W7; Shirt and blood on blade/claws: R24, R27 and R29
Hello Pinhead (Hellraiser): Kitty: B32 and C00; Cloak: N3, N5 and N7; Bow: R24, R27 and R29; Pins and Puzzle Box: Y26 and Y28
Hello Hannibal (Silence of the Lambs): Kitty: C00 and C0; Bow: R24, R27 and R29; Straight jacket: W0 and W1; Orange shirt: YR61 and YR16; Pillow: E41 and E81; Mask: E81, E84; Leather straps: E57 and E59; Frame of restraint cart: N2
Hello Jason (Friday the 13th): Kitty: C00; Coat: B93, B95 and B97; Shirt: V20; Mask: W0 and W1; Leather straps on mask and knife handle: E57 and E59; Blood on knife: R24, R27 and R29; Blade of knife: N0
Although the images are relatively simple in the style of Hello Kitty, I took care when fussy cutting them with my Fiskars Spring Loaded Scissors to leave a little white edge around the whiskers so that the whiskers wouldn’t tear and would be visible even in front of the black die cut background pieces. I also took the extra step of inking around the images (except the whiskers) with a Tuxedo Black Momento Marker to finish off the edges and hide the white of the cardstock. This was so much fun to create, and I love how the luminary looks with the lights turned down and the flame-less candles lit (I use 4 flame-less tea lights to get a lot of illumination and there is plenty of room for more if you like) now I have a great centerpiece for my buffet table for our Halloween party!
Note: My readers can get 10% off and free worldwide shipping on all orders of $35 or more at Diemond Dies by using the coupon code: thankskristina.
Disclosure: Many of the supplies I’ve used for today’s project are linked. Some may be affiliate links, which means if you make a purchase I receive a small commission at no extra cost to you. I truly appreciate your support toward the costs of running this blog!
The following is a video tutorial for how to create the luminary and also includes the Copic coloring of a couple of the Killer Kitties:
This Halloween luminary is being entered into the following challenges:
Digi Chooseday Anything Goes Challenge
Art Impressions 3rd Dimension Challenge
Simon Says Stamp Monday All Creatures Great and Small Challenge – cutsie horror creatures
Simon Says Stamp Wednesday Anything Goes Challenge
613 Avenue Create Anything Goes with Optional Masculine Card Challenge
Lil Patch of Crafty Friends Anything Goes Challenge
Crafty Gals Corner Anything Goes Challenge
Not Just Cards Anything Goes Challenge
Oddball Art Cemeteries Challenge


This is awesome! Fun idea to use as a centerpiece on your table for Halloween… I bet you get lots of comments on it!
Thank you for joining us as our Guest Designer at Through the Craft Room Door
(Hugs) Cara
Awww thanks so much! Yes, it was a hit! 🙂
adorable, so many cute details! I am so glad you played along with us at simon says stamp wednesday challenge!
blog-paperie blooms
ig-2klines
sparkle & shine, kindness *~*
Thank you so much Teresa!
Wonderful make! Thanks for joining us for Oddball Stamps Blog Challenge.
Angie DT
Thanks so much Angie!
Stunning set of makes,with fantastic image and fabulous design..thank you for joining us at DIGI CHOOSDAY CHALLENGE this week,hope to see you again
Željka DT xx
Thanks so much for stopping by and leaving crafty love!
This is so cute! That is a great alternate use of the pocket dies. So clever.
This is such a fun and awesome Halloween creation! Thank you so much for staring with us at Simon Says Stamp Monday Challenge. 🙂
Awesome! Love it! Thanks for joining the Oddball Art Stamps Blog Challenge!
Wow… cool little horror trip.
Thank you so much for joining us at Oddball Art Stamps Blog Challenge.
Hugs, Tina – DT
Oddball Challenge
Awww thanks so much Tina!
such a cute little card I love it! Thank you so much for joining us at Oddball Art Challenge! ~Lizzy
Awww thanks oodles, Lizzy!
OMGosh those Cats are too cool, love them all. Wonderful project, love it.
Thanks for joining us at the Oddball Art Stamps Challenge.
Hugs
Suzi
xxx
Awww thanks so much Suzi!