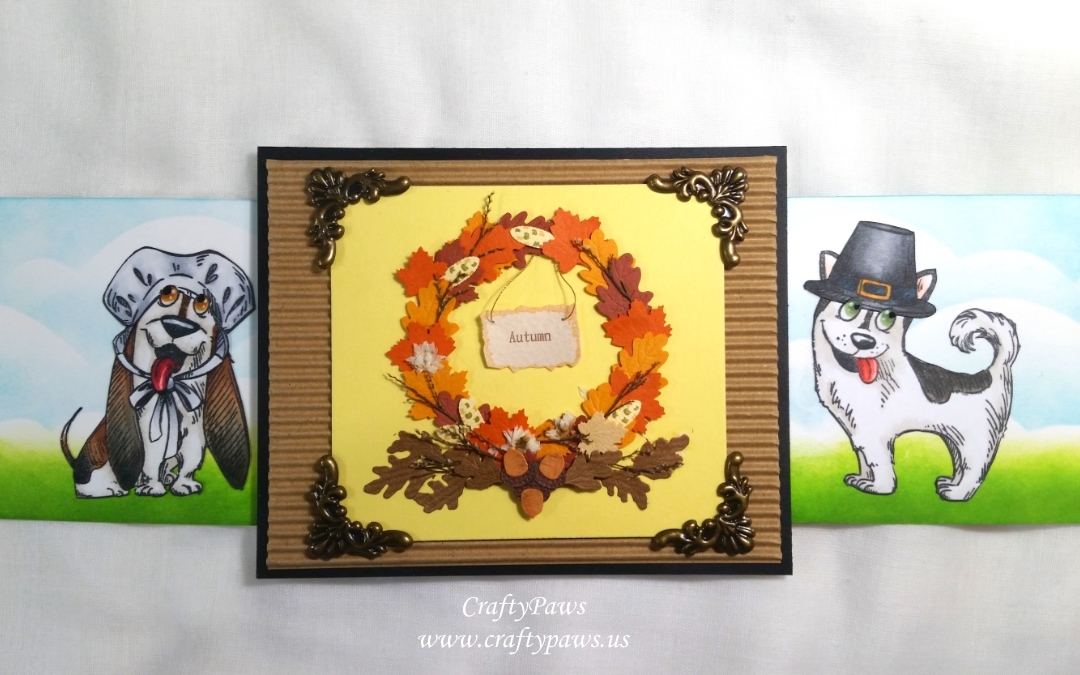
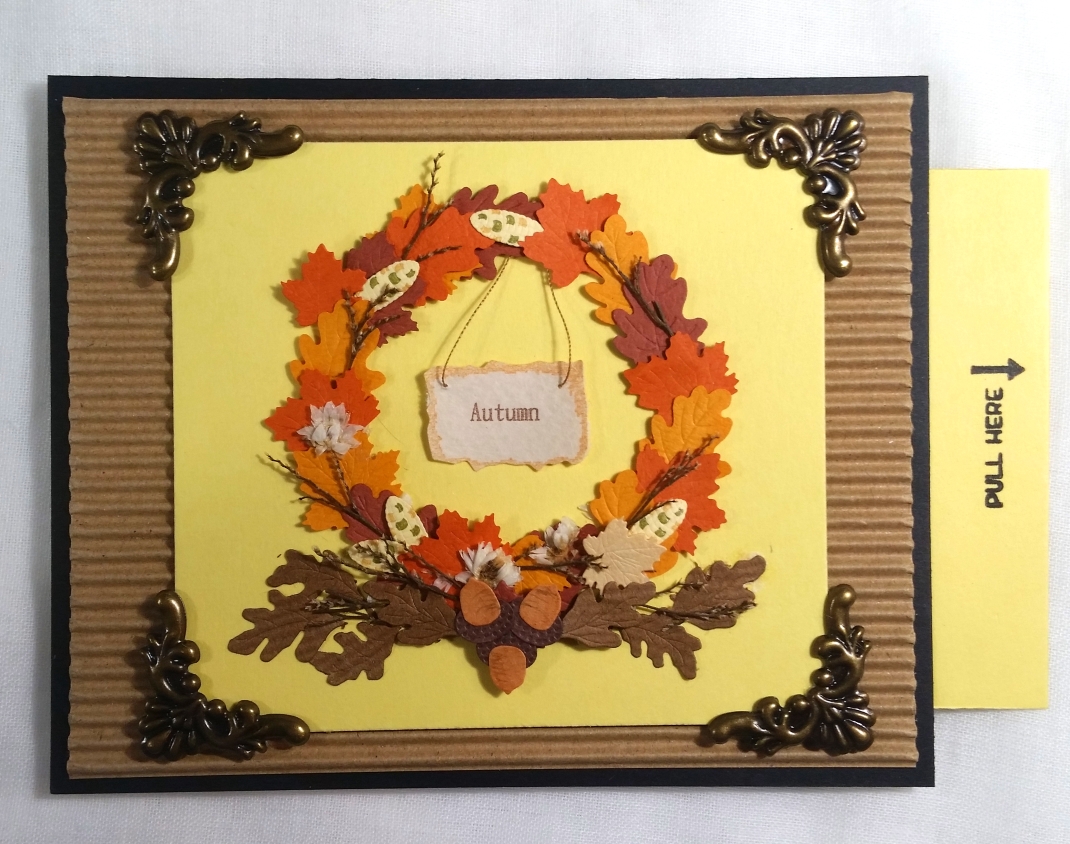
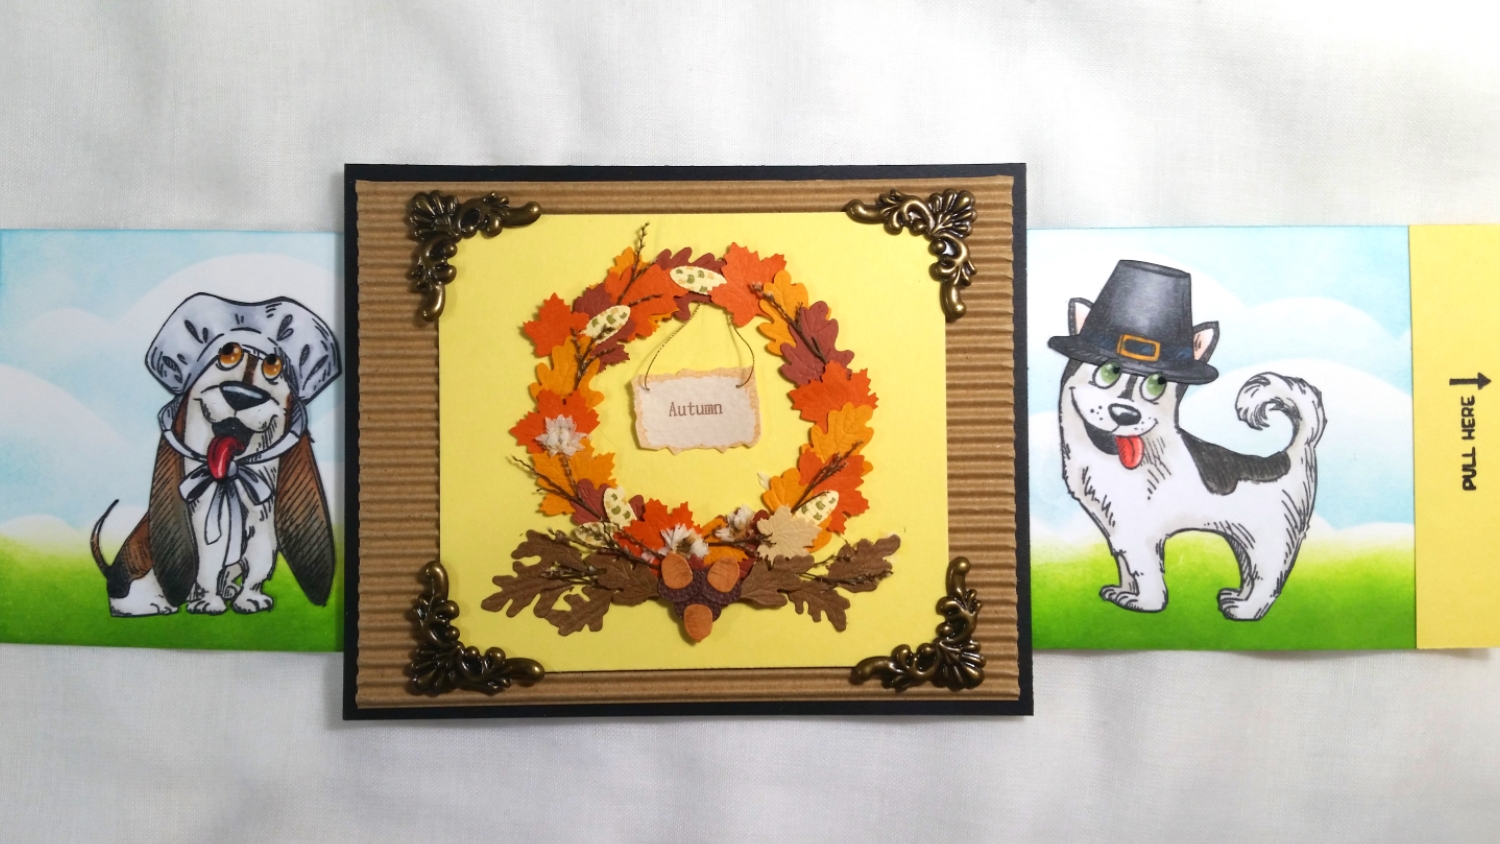
Ever since I saw a demonstration of a double slider card at the Scrapbook Expo this year, I’ve been wanting to try to make a double slider card (with no special dies). And with the idea of a creating a celebratory, doubly bountiful Thanksgiving card, I went for it using the Katzelkraft Dogs dressed in a Pilgrim bonnet and top hat from the Katzelkraft Pilgrim stamp set from Topflight Stamps (this is a guest designer project for them).
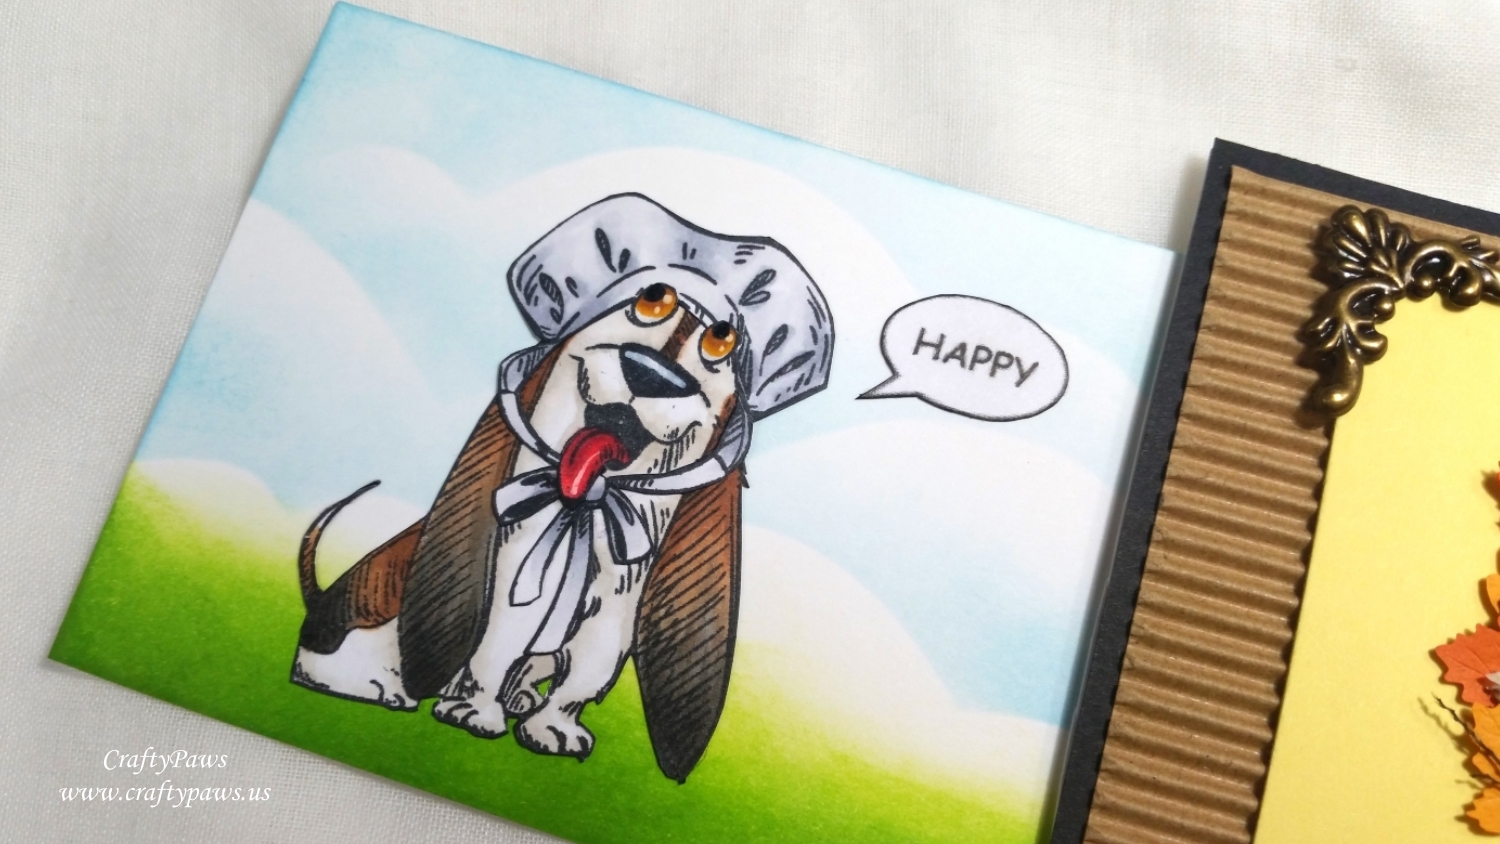
I first Copic colored the Husky and the Basset Hound as well as the Pilgrim bonnet and top hat with the following Copic colors:
Basset Hound: Tongue: R35 and R39; White: W0 and W1; Dark areas: W5 and W7; Brown areas: E23 and E25; Eyes YR24 and E23; Nose: C8
Husky: White: W0 and W1; Black: W5 and W7; Tongue: R22 and R24; Inner Ear: R30; Eyes: G24, G94 and G46 with Signo Uniball White Gel Pen and Sakura Black Glaze Pen
Pilgrim Bonnet: C00, C0, C1, C2 and C3
Pilgrim Top Hat: N3, N4, N5, N7, Y38, and B99
Then I fussy cut them and inked the edges with a Momento Tuxedo Black Marker.
Then I prepped the various panels to create the double slider card structure as follows:
- Front Panel, Slider Mechanism Panel and Back Panel: 4.25″ x 5.25″
- Slider Mechanism Panel (positioned horizontally) is then prepped using an X-Acto blade to cut vertical slits 0.25″ away from either side, and 0.75″ away from the top and bottom
- Left Slider Panel is cut 3.25″ x 4 5/8″
- Right Slider Panel is cut 3.25″ x 5 1/8″
- Then a strip of heavy duty plastic is cut to 2.5″ x 11″, this is looped through the slits of the Slider Mechanism Panel and secured with strong double sided tape like Scor-Tape


Word Art Wednesday Anything Goes Challenge
Creatalicious Anything Goes with Optional Circles Challenge
Simon Says Stamp Work it Wednesday Celebration or Birthday Challenge
Lil Patch of Crafty Friends Anything Goes Challenge
Through the Craft Room Door Anything Goes Challenge
Crafts Galore Encore Anything Goes Challenge
613 Avenue Create Anything Goes with Optional Clean and Simple Challenge
Crafty Gals Corner 3+ Layers Challenge
Stamping Sensations I Spy with My Little Eye Something Beginning with B Challenge – Basset Hound, Pilgrim Bonnet, speech Bubbles, Blue skys
Simon Says Stamp Wednesday Pop it Up Challenge


Oh this is the most adorable slider card. Those dogs are so cute. Great coloring!! Thanks for joining us at the Lil Patch of Crafty Friends Challenges for our latest challenge. {Lil Patch of Crafty Friends Challenges}Good luck and join us again soon. Hugs, Barbara
Awww thanks so much Barbara!
Those doggies are such fun and the front panel full of lovely Autumnal colours, many thanks for joining in with our ‘I Spy’ theme at Stamping Sensations challenge.
B x
Thanks so very much Brenda!
Hahaha love those dogs…. Beautiful and fun card. Thank you so much for entering our ATG challenge at Through The Craft Room Door this week. Looking forward to see you again next challenge.
Regards,
Ann-Marie
TTCRD DT
Annemi {My Blog}
Through The Craft Room Door
ttcrd.blogspot.com
Awww thanks so much Ann-Marie!
Wonderful card, I love your colouring and your design I will have to try that myself now! Thanks so much, for joining us at Creatalicious Challenges, hopefully we will see you again!
Thanks so very much!
Such a beautiful fall card! Love it !!Thank you so much for playing along with us at the Simon Says Stamp Wednesday
awww thanks bunches, Karin!
A lovely card. Cute images and clever design.
Thank you for joining in with the Crafts Galore Encore September Challenge “Anything Goes”. Good luck x
Thanks so much Andree!
What a great design!! And such lovely images. Thanks for sharing with us at Stamping Sensations.
Pinky
Awww thanks so very much Pinky!
Such great images! They made me smile! The wreath and the corner embellishments are beautifully detailed.
Thank you for joining us at Crafty Gals Corner for our 3+ Layers challenge.
Thanks so very much Rae Ann!
beautiful cards! Thanks for joining us at Stamping Sensations for our B challenge
Thanks so much Sally!
A lovely fall card!
Thank you soo much for taking part in our “anything goes with circles” challenge over at Creatalicious & good luck in the draw.
Hope to see you again in our new challenge as well…
Hugs,
Melanie
(DT-Coordinator Creatalicious Challenges)
(DT Crafty Friends)
(DT The Sketchy Challenges)
Thanks so much Melanie!