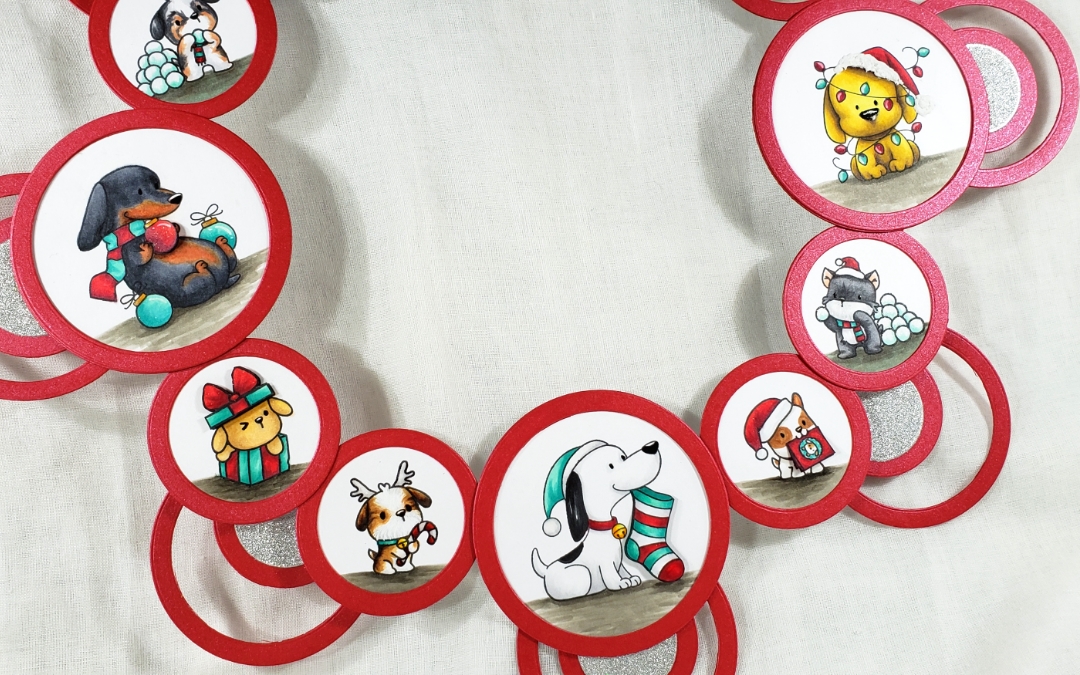
Finally, I finished Copic coloring and designing of each component of the holiday doggy wreath I have been working on for the past 2 weeks! This is the first time I’m trying to craft something like this, and I’m so excited. I wanted to celebrate my love of puppies and Christmas with each of these puppies PARTYING through the holiday season (If you are interested in any details about any of the puppy circles that are part of the wreath, please check out the past 5 blog posts, which will have all the materials used as well as YouTube process videos for creating each piece).
To create this wreath, I used a pot lid to trace a large circle on some foam core board and then used an X-Acto blade to cut it out. Then I found the center of the circle and used a ruler with a hole at one end to trace a smaller circle, using the ruler as a kind of jerry-rigged compass. I cut out this smaller concentric circle to create the wreath base.
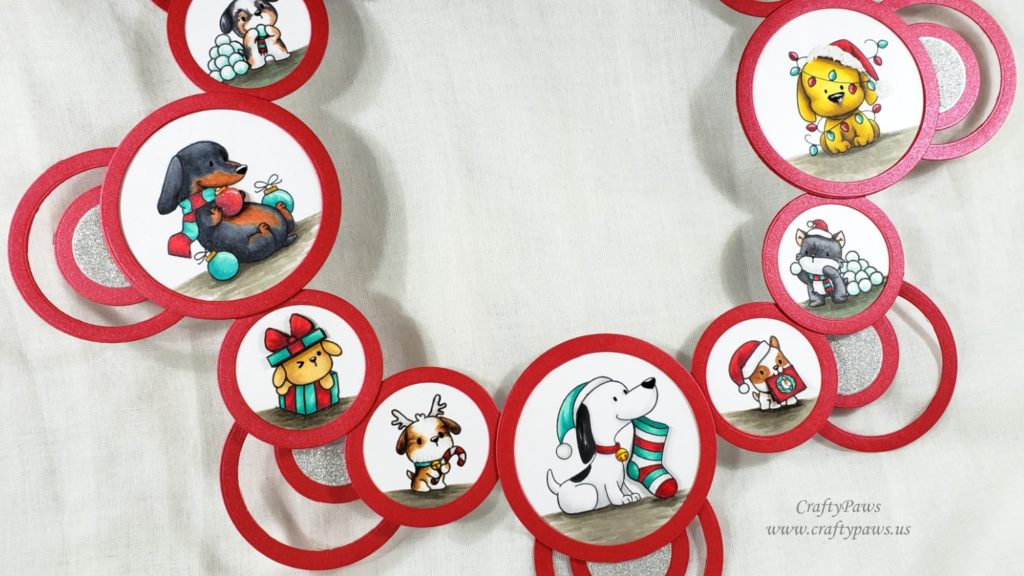
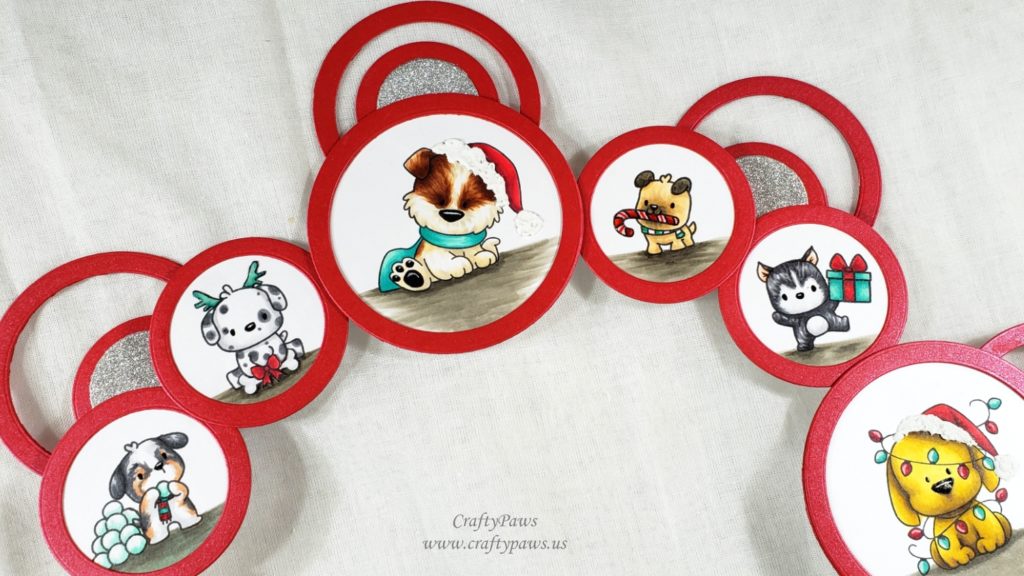
Then it was a matter of deciding where to position each Copic colored and framed puppy. When I had done a LOT of futzing, I glued all the puppies into place, the larger ones at the 12, 3, 6 and 9 o’clock positions and the smaller ones at the 1, 2, 4, 5, 7, 8, 10 and 11 o’clock positions. Spacing was a little tricky, but using my favorite Art Glitter Glue and Fine Tip Nozzle really helped with a little bit of wriggle room in the drying time.
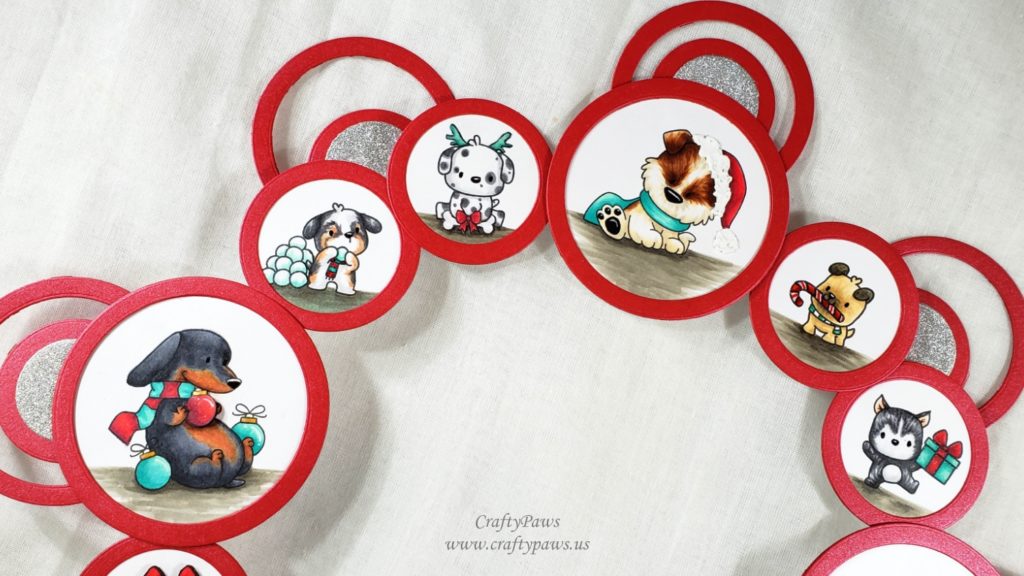
Lastly, I decided to add some extra embellishments with all the die cut red circles and rings that I had left over after cutting out all those frames for the puppy images. I had just enough to completely add an extra layer around the wreath of circles and circles with rings around the base wreath. To add a little sparkle, I used the 3rd largest circle from the Diemond Dies Die-Normous Stack-Ems Circle Nesting Die Set on some silver glitter card stock to add a sparkly center to all the red circles.
CLICK on the picture below link to watch the whole wreath making process tutorial:
Disclosure: Many of the supplies I’ve used for today’s project are linked. Some may be affiliate links, which means if you make a purchase I receive a small commission at no extra cost to you. I truly appreciate your support toward the costs of running this blog!
This Christmas puppy wreath is being entered into the following challenges:
Word Art Wednesday Anything Goes Challenge
Simon Says Stamp Monday Party Time Challenge
Simon Says Stamps Work it Wednesday Try Something New Challenge
Card Mania Christmas Challenge
Lil Patch of Crafty Friends Anything Goes Challenge
Fab ‘n’ Funky Cute Christmas Challenge – WINNER
ABC Christmas Y – favorite (dogs) and Z – zero embellishments Challenge – WINNER
Simon Says Stamp Wednesday Party Time Challenge
Stamping Sensations Winter Sparkle Challenge
Crafty Gals Corner Anything Goes Challenge – WINNER


Great wreath. Thank you for joining in the Anything Goes Challenge at Lil Patch of Crafty Friends.
Thank you so very much Suze! Happy new year!
The finished wreath is adorable and it was certainly worth all the work you put in! Each little circle is so cute.
Thanks for sharing with us at ABC Christmas Challenges and I hope you will join us again and have a wonderful 2019.
Thanks so very much Carol! I’m so thrilled to be one of the top 3. Thank you and happy new year!
This is simply adorable Kristina, very well done.
Thanks so much Teresa!
So cute! I pray you had a ‘Pawesome Holiday and have a Blessed New Year.
Julie
Right back at you Julie! May 2019 bring you and yours peace and prosperity!
You always amaze me with your projects! Love your wreath! Thank you so much for entering our challenge at Crafty Gals Corner Challenges this week. Be sure to join us next time too!
Blessings,
CGC DT
Scrapbookingmamaw {My Blog}
Crafty Gals Corner Challenges
Right back at you Jeanie! May 2019 bring you and yours peace and prosperity!
Oh wow, I love the finished wreath! Is´t stunning. Thank you so much for sharing with us at ABC Christmas Challenge and we love to see your Christmas cards next year! Luv, Wilma
Awww thanks so much Wilma!
CONGRATULATIONS!
You were one of the lucky winners from our Anything Goes Blogiversary Challenge at the Crafty Gals Corner!
Please visit the blog to claim your prize 🙂
Thank so very much! I emailed to claim my prize! I’m so happy! I love those little kitty digis
fabulous! – thank you for playing along with us at fab’n’Funky challenges for our cute christmas challenge hugs judith x
Awww thank you so much Judith! I loved crafting this puppy Christmas wreath!
such a great idea and those pups are just adorable,thank you so much for sharing with us at Simon Says Stamp Monday Challenge.Happy 2019 to you, hugs kath xxx
Thank so much Kath! I love all those Christmas pups!