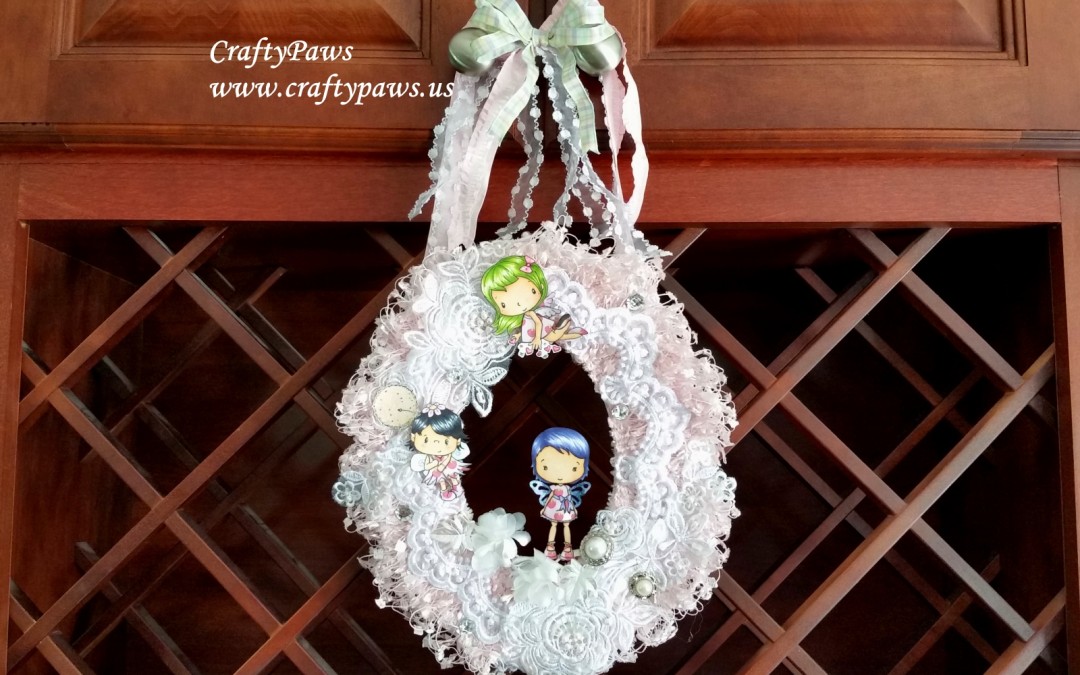
 Oh I have so fallen in love with these adorable images from the Not2ShabbyShop — C.C. Designs Cupid, Pixie, and Garden Party Olivia. I wanted to use them in a Easter/spring wreath that I could use to decorate our front door for our upcoming Easter Sunday brunch.
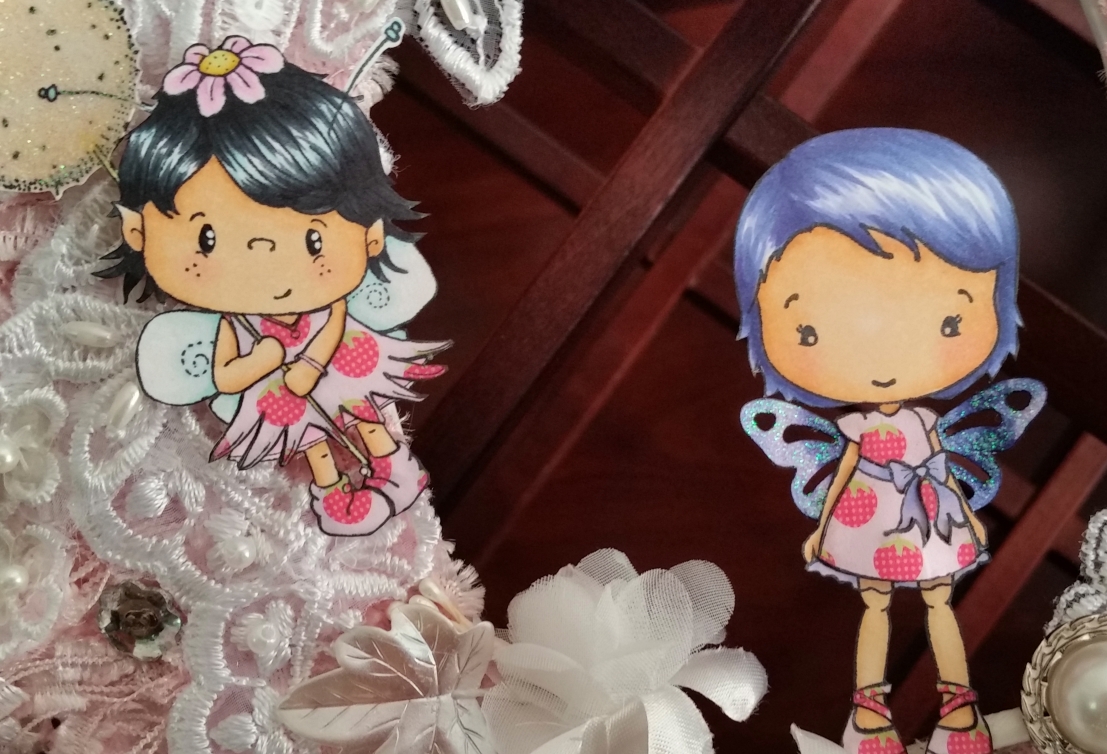
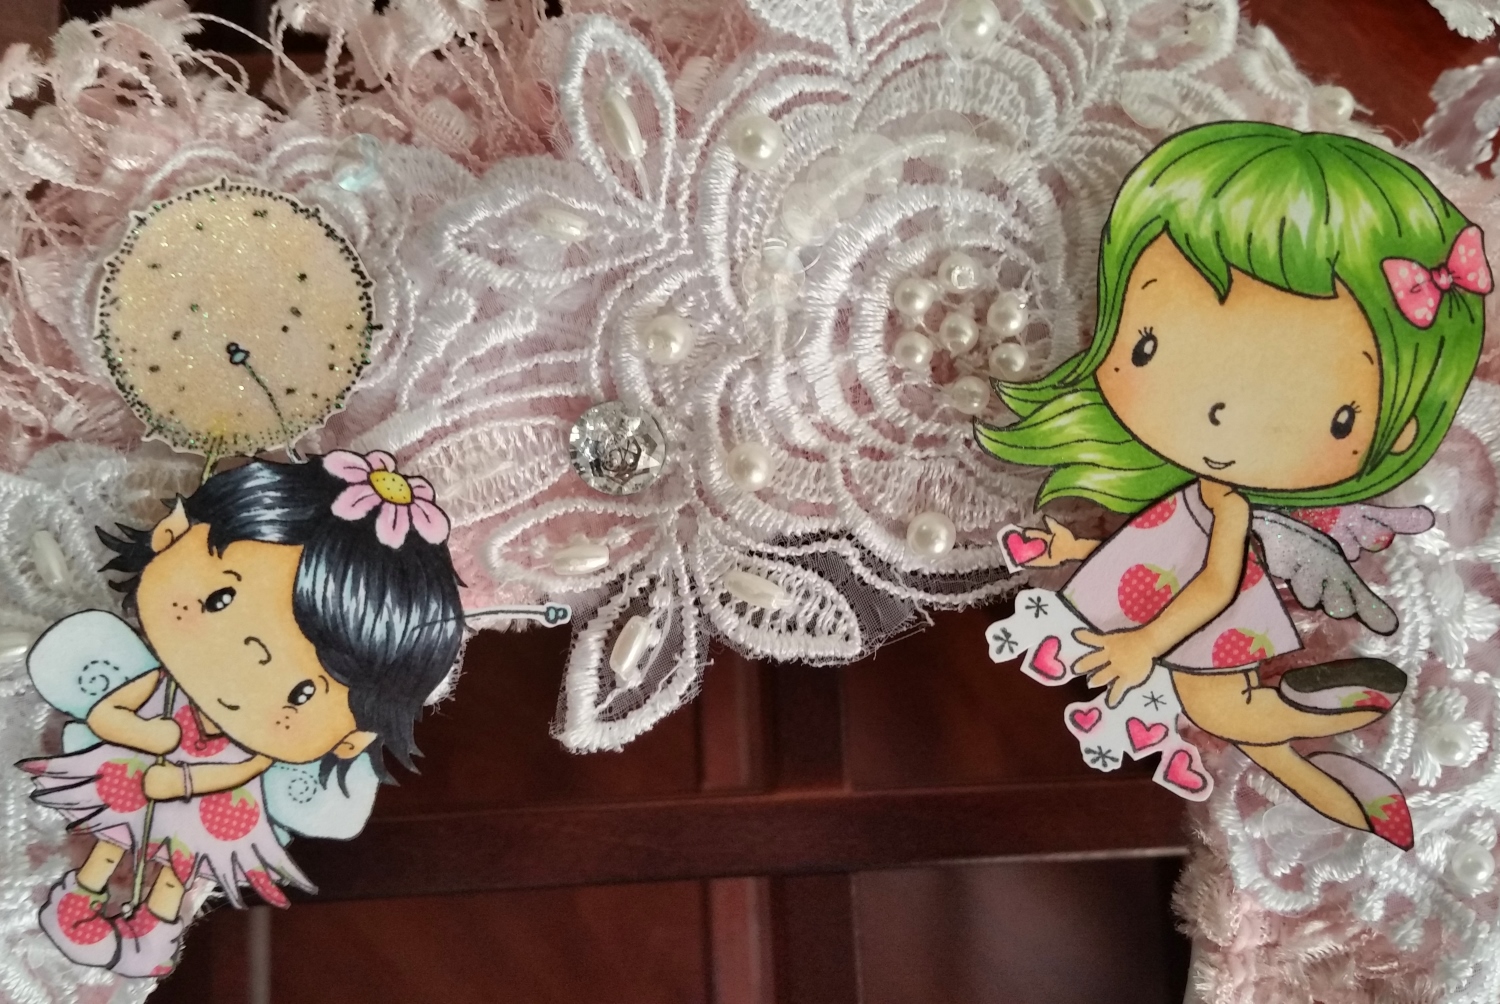
I colored them all up with Copic markers, paper pieced each of them from a scrap of strawberry print patterned paper, added glitter glue to all their wings (I made Olivia’s using the medium Martha Stewart monarch butterfly punch), and Wink of Stella for shimmer to their hair.
 The following are the Copic colors I used:
Skin: E50, 51, 53 with blush R30
Pixie’s black hair: C7, C9 and B00
Cupid’s green hair: YG01, 11, 25 and 17
Olivia’s purple hair and wings : BV00, 02, 04 and 08
Shading everywhere: W1
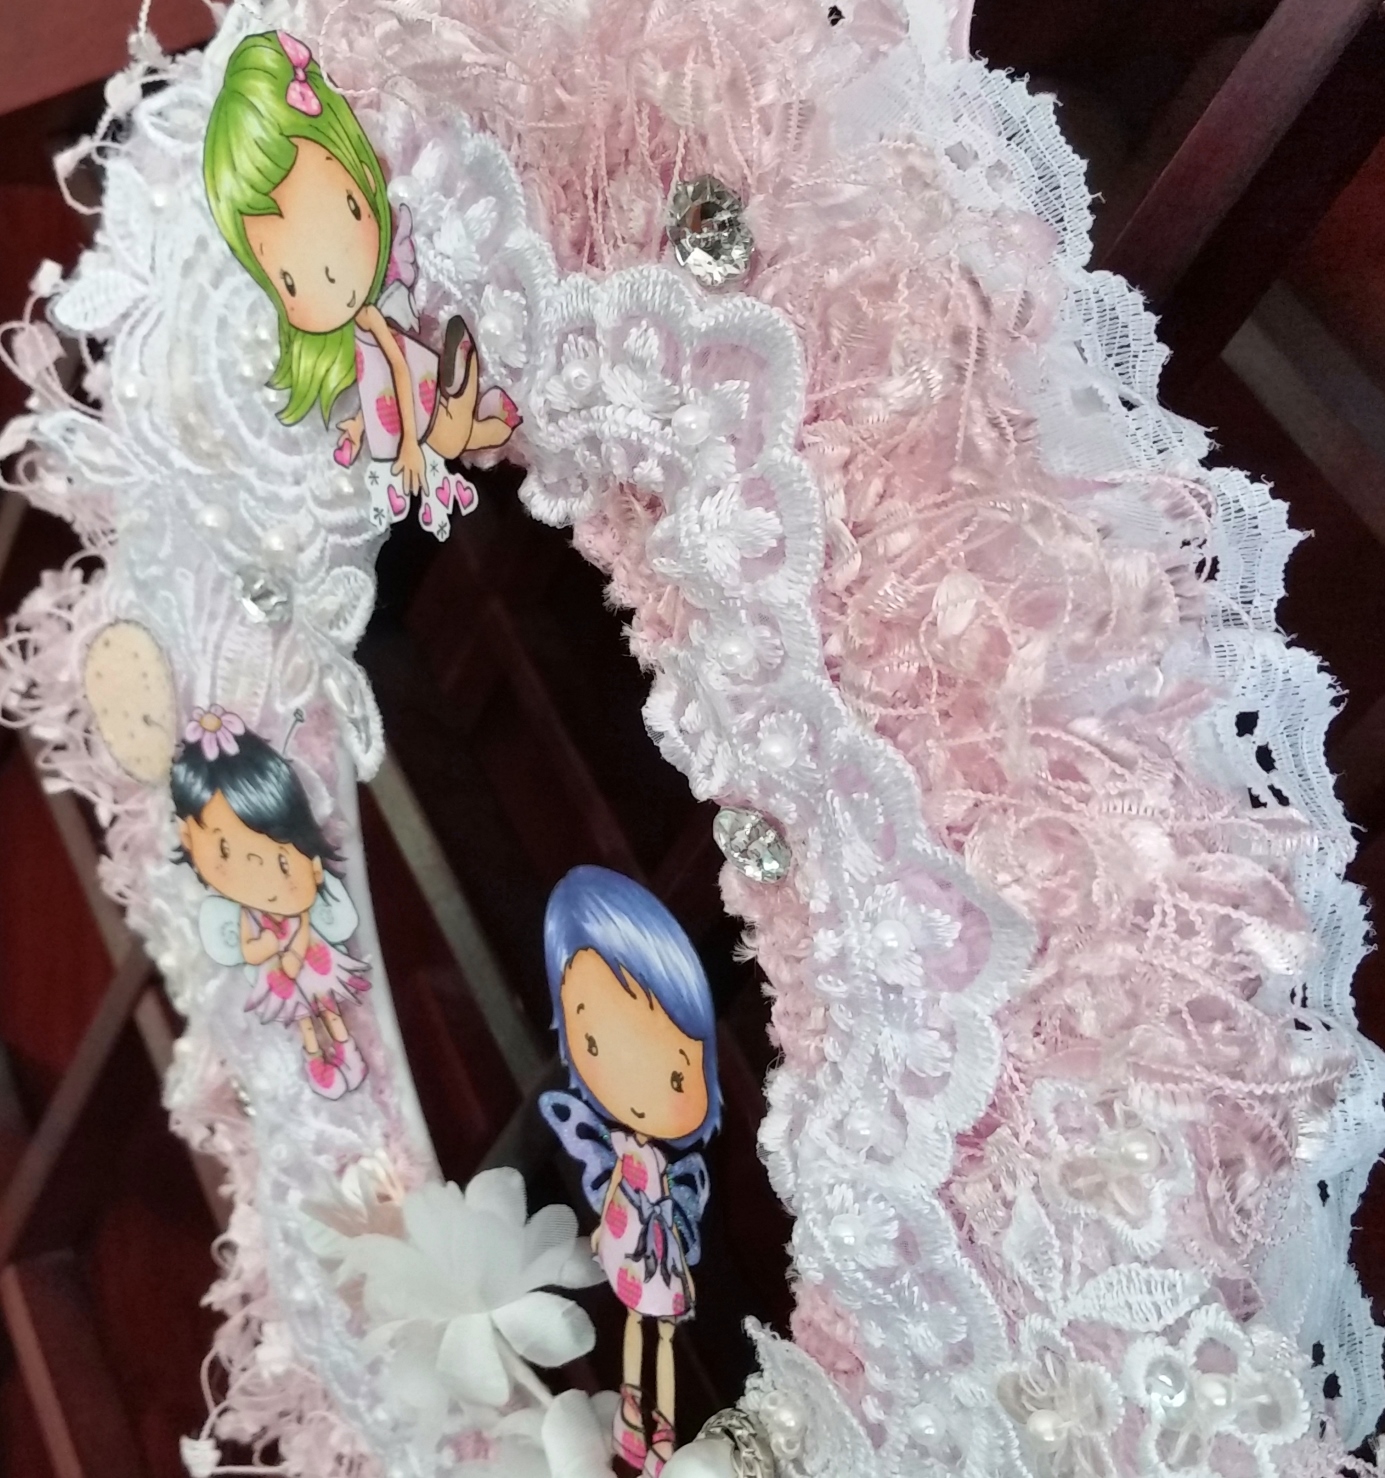 The paper piecing was probably the most time consuming. I wanted to use the same sweet strawberry print paper for all their dresses and shoes. However, the pattern was not tight enough to get a strawberry on each section so I stamped out smaller sections like Olivia’s shoes and shoe straps, Cupid’s wing, and Pixie’s dress sections multiple times. That way I could pick and chose the stamped sections I wanted to fussy cut them out to piece together.
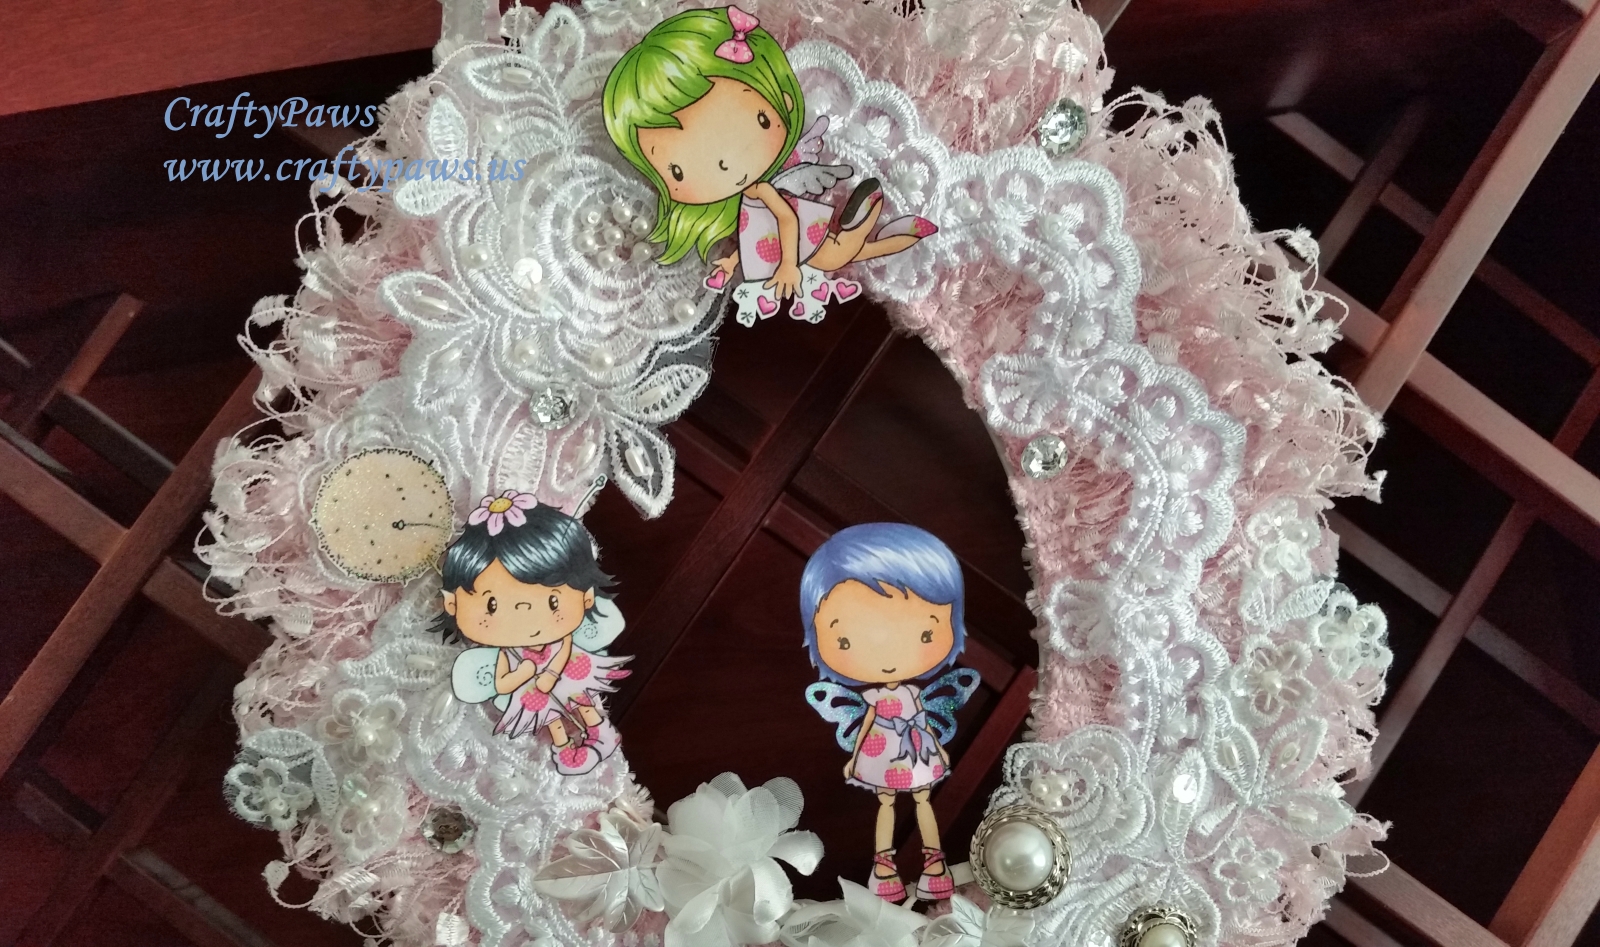 Also when I paper piece images, I make sure I use Copic W1 (or another soft grey color) to add shading to the patterned papers. Then I use a black marker along the edges of each piece (no matter how tiny) so that the white of the paper edge does not show. This order of shading before edging is important so that the shading does not pick up and smear the black edging ink. Finally after I glue each piece into place, I again go over the entire image (which I have also fussy cut), along the edges with a black marker.
The following is a process video sharing the entire wreath assembly, including all the laces, trims, bling, and the single and triple loop bows:
The Not2ShabbyShop is having an Easter SALE (until April 6, 2015): Use coupon code EASTER20 for 20% off everything in the store! After April 6, 2015, my readers can get 10% off using the code CRAFTYPAWS. All orders of $60 or more get free U.S. shipping.
This Easter wreath is being entered into the following challenges:
Simon Says Stamp Monday Pastel Challenge
The Pink Elephant Anything Goes Challenge
MarkerPOP Easter Challenge
Craft-Dee BowZ Anything Goes with a Bow Challenge
Thanks for stopping by and have a great crafty day! WOOF


omgosh, this is stunning! I just had to pop over and look at it in more detail. I can’t wait to watch the video. 😀 Thanks for joining in our Easter Challenge at MarkerPop!!!
Thank you so much Carisa! I had so much fun making this little wreath and planned to hang it on my front door for Easter brunch with my hubby’s side of the family. My mom, however, saw it the day I finished it and asked for it! She never asks for anything so I was just thrilled to give it to her! 🙂 TF stopping by and your super kind comment. Big hugs, Kristina
This is a stunning piece!! I am so impressed at your attention to detail and how you paper-pieced these adorable little fairies and their outfits! WOW! And I also thought it was so clever to make them part of a wreath. It will no doubt be a topic of conversation at your brunch. The different layers of lace are so very pretty and your Copic coloring skills are impressive! I love both the whimsicality and the sophistication of your design and can’t image a better “home” for fairies to live! Thank you so much for sharing this stunning piece with us for this week’s Simon Says Stamp Monday Challenge!
Love this so much. It looks just super gorgeous. The layering of all the laces and the appliques is so beautiful, not to mention the coloured fairy images. Great job and project.
WOW how cute are these little fairies. They look great on your wreath.Thanks for joining us at the Craft-Dee BowZ challenge this month. We look forward to seeing more of your beautiful work. Hugs, Barbara { Craft-Dee BowZ}
Thanks so much Barbara! I had made this little wreath for Easter brunch for my front door, but when my mom came by to visit the day I finished this, she asked for it. I was beyond thrilled. My mother never asks for anything so I was giddy when she wanted something I had created. 🙂 Needless to say it found a new home at my mom’s house. Thanks for always leaving such kind comments! Big hugs, Kristina
Very beautiful Easter wreath Ms. Kristina!! The stamp images are so adorable. Hug~Mel
Thanks so much Mel! Your beautiful trims and laces continue to bless me and my home. 🙂 I hope you are having a wonderful spring! Big hugs my friend! xoxo, Kristina