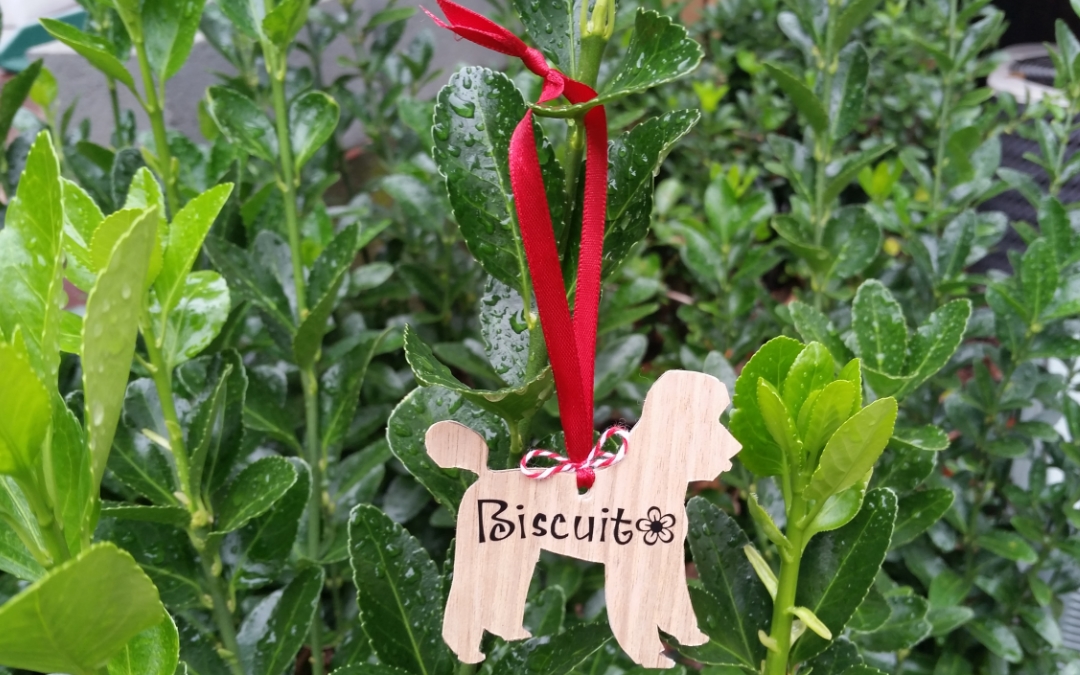
I’ve had a little Poodle chipboard piece from Leaky Shed Studio for over 3 years, and I finally decided to make this into a couple of CAS Poodle holiday ornaments/tags – one for me of my Biscuit and one for my sister’s Poodle, Zoe, who passed away earlier this year.

I lined both sides of the chipboard Poodle with some EK Tools wood sheets that I’ve also had in my stash for about 3 years. Using a sharp X-Acto blade, I cut around the chipboard, making sure to cut on the wrong side of the wood grain paper (any scratches or slips wouldn’t show on the back side). These wood sheets adhered securely just like regular paper with Art Glitter Glue (using the Fine Tip Nozzle helps get into the nooks and crannies of silhouettes). For the angel poodle, I hand drew and fussy cut out a couple of wings to add to both sides along the poodle’s back.
I wanted to personalize the ornaments and found that any marker I tried would bleed along the grain of the wood paper so I ended up using some old rub-on words I had in my stash, deconstructing and re-constructing some of the letters from “Birthday Girl” and an “s” from “special” to spell out “Biscuit”. The other ornament, which I’m going to add to a holiday gift tag for my sister, simply says “believe”.
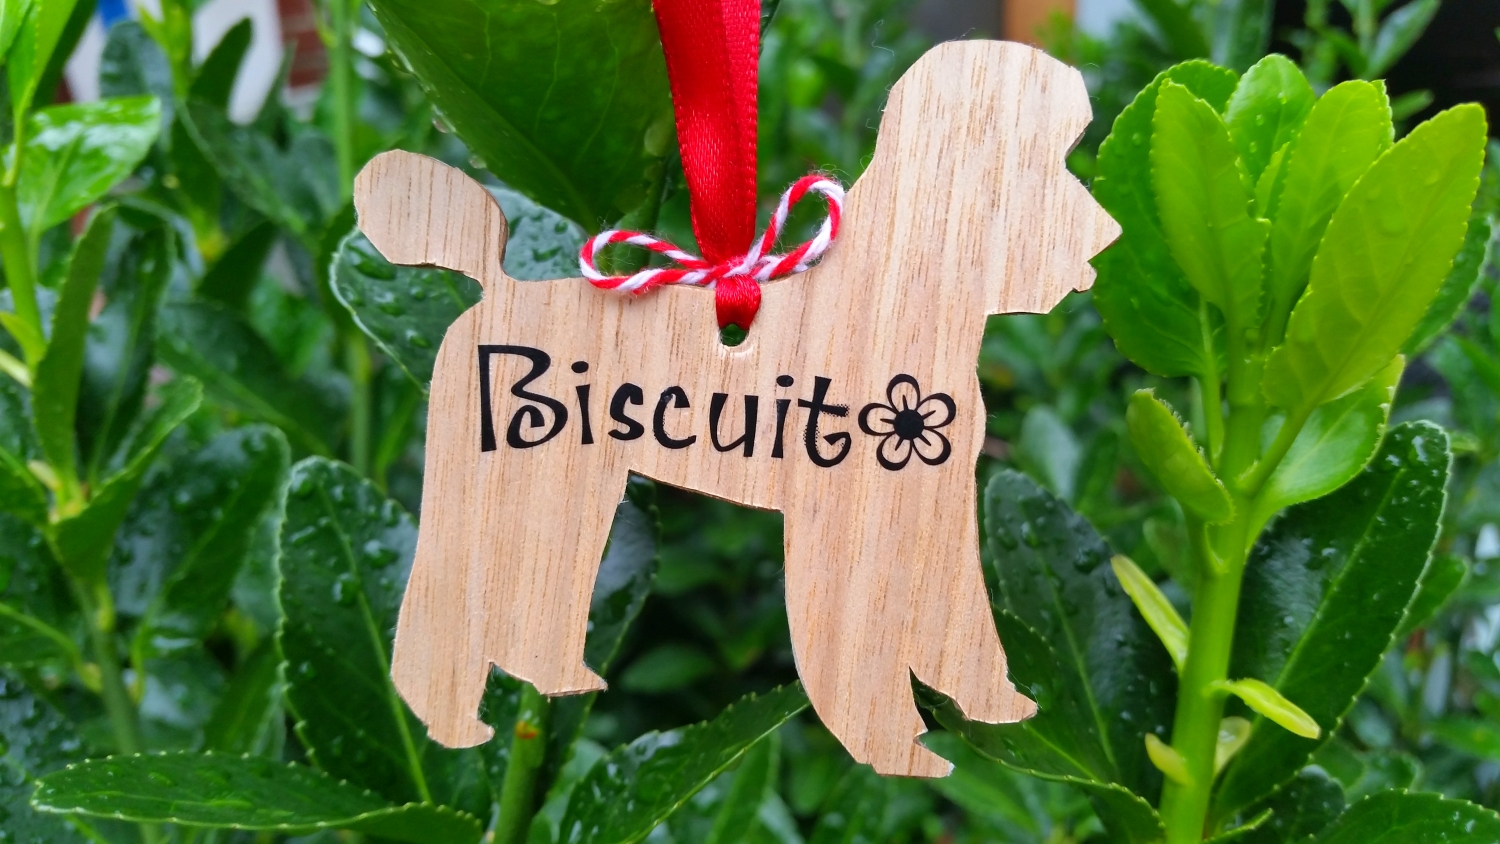
To punch through the heavy-weight chip board, I used a We R Memory Keepers Crop-A-Dile. Nothing else seems to get through this heavy chipboard as well as this tool. For the wooden sheets, I used my normal McGill 1/8″ hole punch. Then to create the hanging loops, I used some 1/4″ red satin ribbon and some red and white bakers twine to add a festive pop of color.
Disclosure: Many of the supplies I’ve used for today’s project are linked. Some may be affiliate links, which means if you make a purchase I receive a small commission at no extra cost to you. I truly appreciate your support toward the costs of running this blog!
The following is a process video sharing how I made these tags/ornaments:
These tag/ornaments are being entered into the following challenges:
Creatalicious Anything Goes with Optional Blue and Silver Challenge
CAS-ual Fridays Anything But a Card Challenge
Simon Says Stamp Wednesday Christmas Gift Tag Challenge
Simon Says Stamp Monday All Creatures Great and Small Challenge
Card Mania Anything Goes Challenge
Lil Patch of Crafty Friends Anything Goes Challenge
Crafts Galore Encore Anything Goes Challenge
Word Art Wednesday Anything Goes Challenge
Not Just Cards Anything Goes Challenge
613 Avenue Create Anything Goes with Optional 3D Cards Challenge


lovely ornaments!
Thank you soo much for taking part in our “anything goes with optional use blue & silver” challenge over at Creatalicious & good luck in the draw.
Hope to see you again in our new challenge as well…
Hugs,
Melanie
(DT-Coordinator Creatalicious Challenges)
(DT Crafty Friends)
(DT The Sketchy Challenges)
Super cute!!! Thank you for joining us at Lil Patch, good luck!!! Amy DT
Thanks so much Amy!
These cute ornaments are fantastic, super clever idea! Thanks for joining us this wee on Simon Says Stamp Monday CHallenge Blog! barbara
Awww thanks so much Barbara!
your onaments are adorable, thank you for sharing with us at Simon Says Stamp Monday Challenge…hugs kath xxx
Awww thanks so much Kath!
They are both beautiful and love the little wings.
Thank you joining us at Simon Says Stamp Wednesday Challenge x
Thanks so very much Tracy!
What a great idea!
Hugz Tinz
Thanks so much Tinz!
Very cute little poodles!
Awww thanks oodles Ann!
How adorable!Thank-you for joining us at the Crafts Galore Encore Anything Goes November Challenge. Good luck. Lynda x
Those are wonderful!!!
Awww thanks so much for your sweet comment!