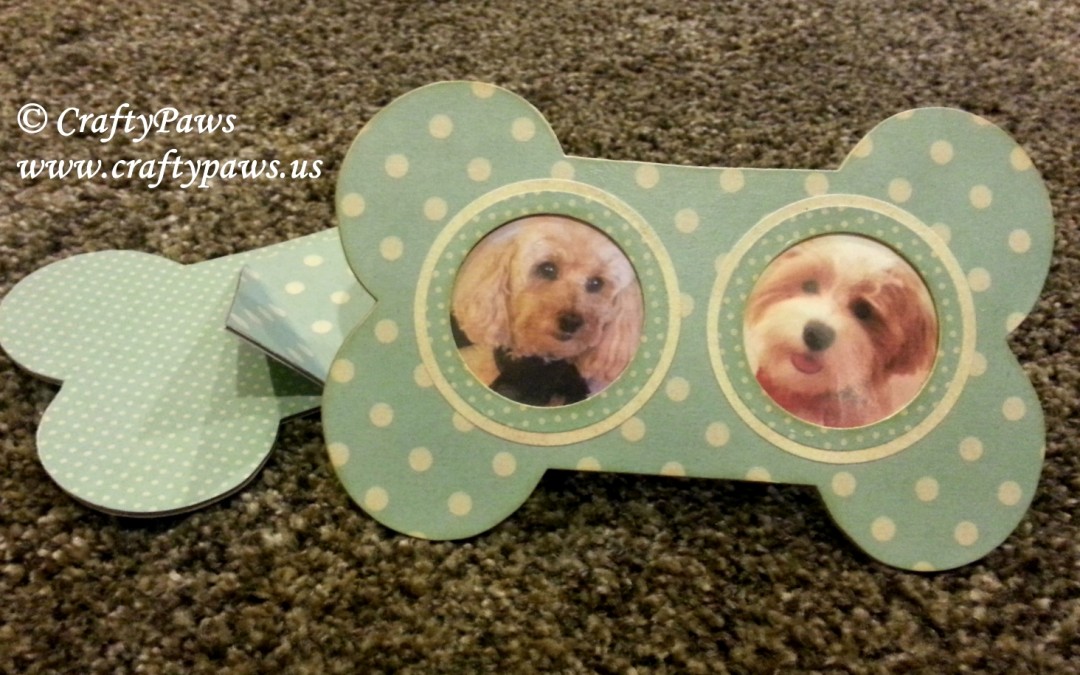
Ok, I know what you’re thinking. How is a bone-shaped picture frame a winter-themed project? Well, I used 3 sheets of the My Mind’s Eye “All Is Bright” holiday paper pad. 🙂
Actually, I have wanted to make this picture frame since I first laid eyes on the Diemond Dies Dog Bone Mini Album Die, and now that my hubby’s birthday is next week, I thought this was the perfect opportunity to make these as a gift for him. REMEMBER to use the coupon code, thankskristina, for 10% off your entire order at Diemond Dies and if your order is $35 or more, the coupon code also provides FREE worldwide shipping!
 Other than the patterned paper and the adhesives, everything else is upcycled too. YAY! I used light weight chip board that I salvaged from a cereal box and medium weight chip board that I saved from the backing of a 12″ x 12″ paper pad that I had used up!
Construction:
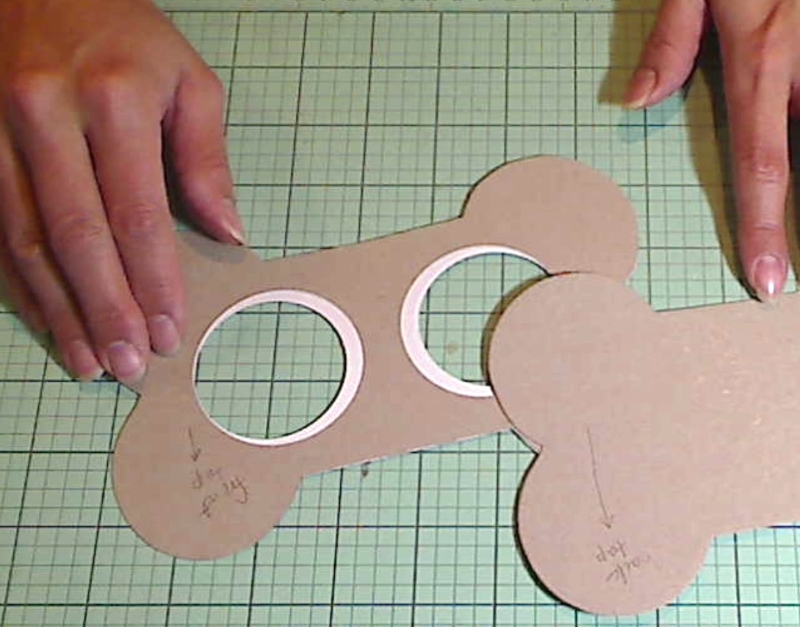
I used the bone die to cut out 1 piece of light weight chipboard (for the front), 1 piece of medium chipboard (for the back), and 2 pieces of patterned paper to cover the front and back chipboard pieces. HINT: The trickiest part of this construction is making sure you line up the die on the correct side of the paper. The die is not exactly symmetrical so keeping clear on what is the top and bottom of each die cut piece is also important to make assembly go smoothly. I noted on the back sides of the various pieces the “top” so that I could keep it all straight.
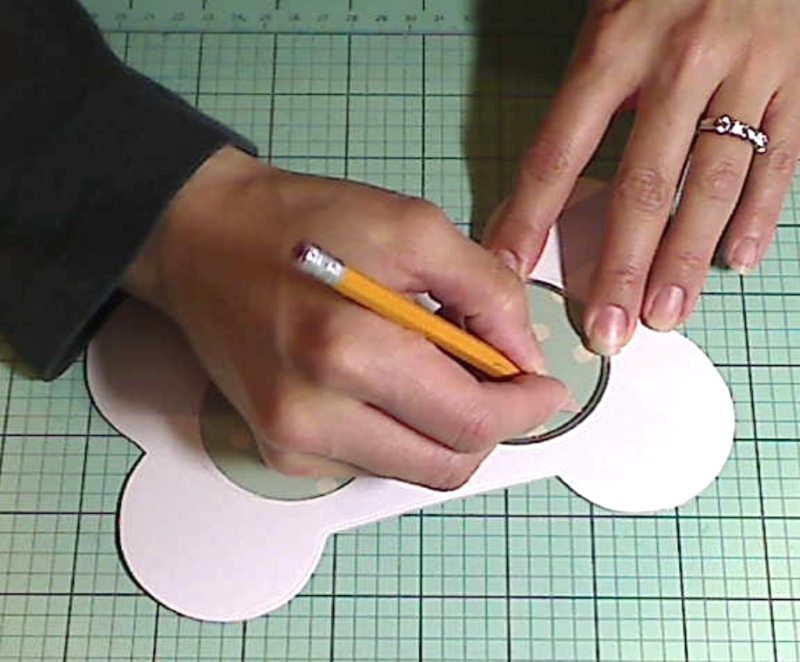 I measured out on the front chipboard+patterned paper piece where I wanted my frame openings and traced the inside of a circle die from the Diemond Dies Die-Normous Stack-Ems Circle Nesting Die Set. I used the 7th smallest from the set. Then I used that circle die to cut out the frame openings on the front chipboard piece as well as the front cover patterned paper, which I glued together using Matte Mod Podge
.
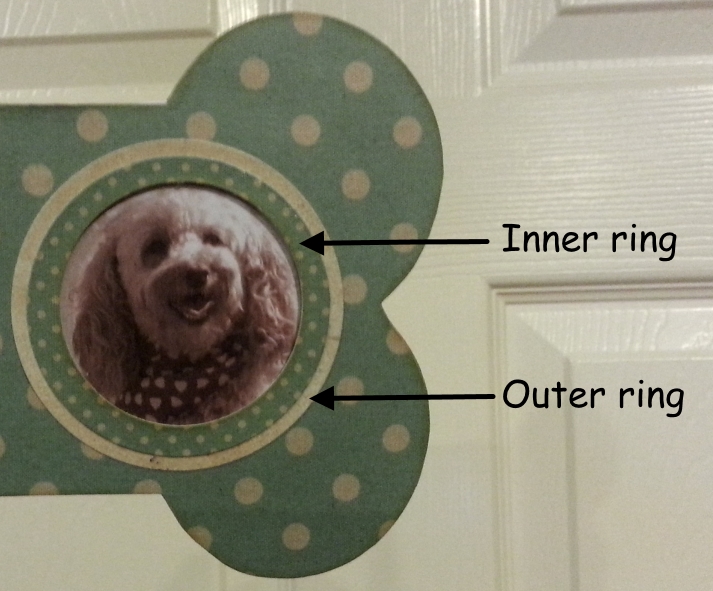
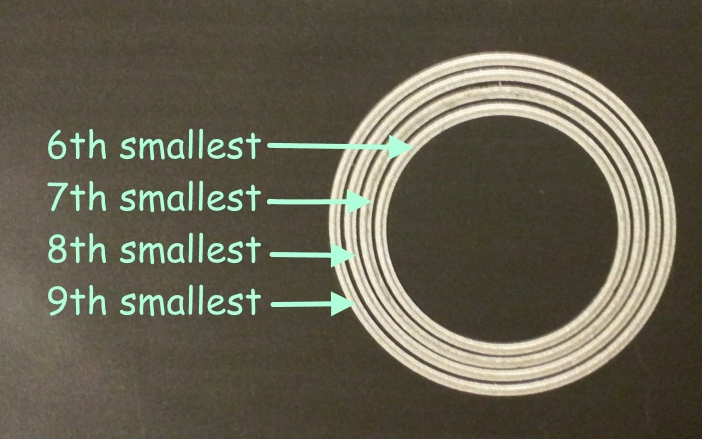 For the inner decorative ring around the frame openings, I used the 6th and 8th smallest circle dies. This ensures that the raw edges of the picture frame holes in the bone are not visible. For the second outer decorative ring around the frame openings, I used the 7th and 9th smallest circle dies. Using these sizes ensures that the inside edge of this second ring is not visible beyond the clean edge of the inner ring.
 To cover the frame openings and protect these precious pictures of my best furry friends, I upcycled some heavy plastic packaging from some dog flea and tick control medicine. I adhered that with E6000® Craft Adhesive, which is great for adhering non-porous materials like plastic. I adhered the front and back bone frame pieces using Scor-Pal Scor-Tape
 for an extra strong hold, making sure to leave the top side open so that pictures could be slid in.
Lastly, all you need to do is construct the stand that props up the frame on any desk or tabletop. Again, you just need a small piece of medium weight chipboard and cut it down to a trapezoid shape with the following dimensions: 1.5″ across the top, 2.75″ high, and 5″ across the bottom. The following video is a share of this bone project (as well as links to all the 7 other Diemond Dies Winter Youtube Hop Stops for up to 8 chances to win a $10 gift certificate to Diemond Dies) and includes a detailed tutorial on how to make this back stand:
I hope you’ll try making a cute doggy bone frame like this. It is pretty easy and makes a great gift for any dog loving friend!
Thanks for stopping by and have a great day! WOOF
These frames are being entered into the CASology Week 130 Friend Challenge


Oh How sweet is this photo frame ! Very creative way to use the dies . 🙂 happy crafting !
Adorable picture frame! I can envision many different styles. Thank you for sharing with us!
Aw, love that with your sweet little doggie’s pics in it! Adorable! 🙂
Awww a supercute frame and your pups are gorgeous! Thanks for playing along with CASology this week!
awesome cuteness 😀
Well, if that isn’t the cutest picture frame and if they aren’t the most adorable pups! What a fun project! Thanks for joining us at CASology this week!
My Goodness! No one should be allowed to have two of the world’s cutest dogs in the same household!! Enjoy every minute. Thank you for the video tutorial and providing such clear instructions. Darling project.
LOL You are too sweet! Thanks so much for stopping by and for your super kind comment. I hope you try this project. It makes great little gifts! 🙂 Thanks for stopping by! Hugs! Kristina