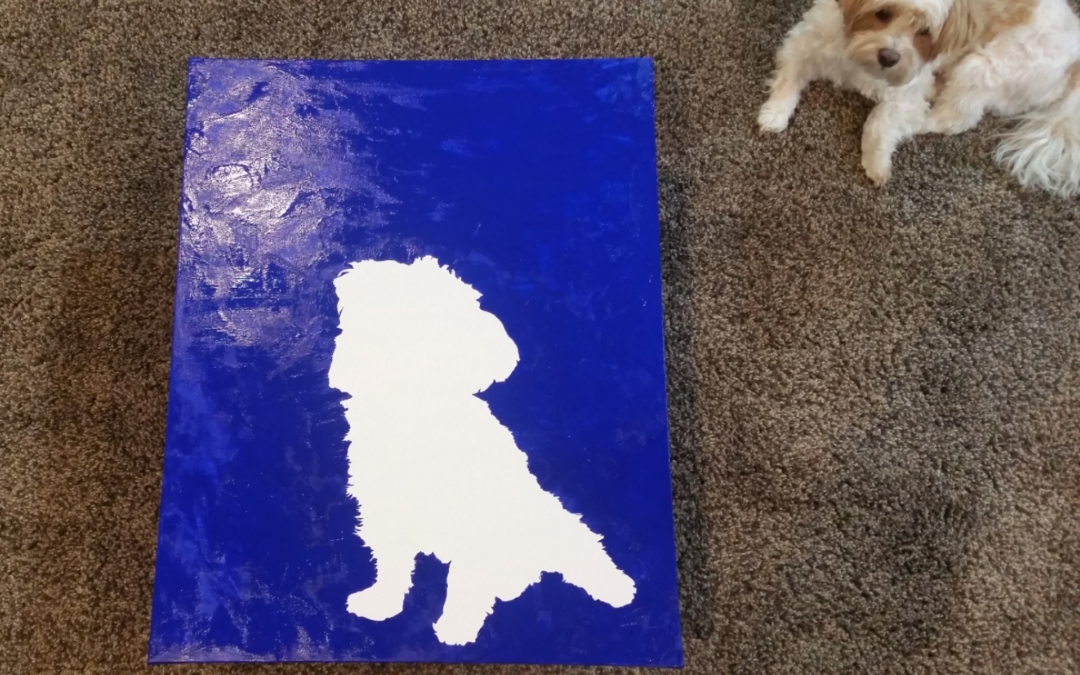
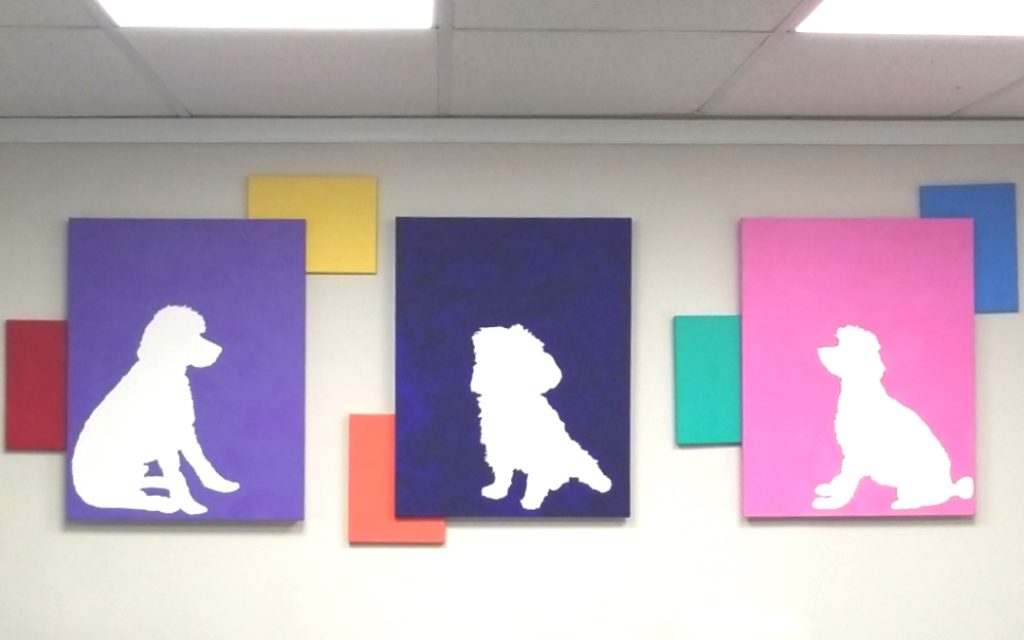
Mr. CraftyPaws had another large wall to fill at his office, so this time I thought I’d create a composite canvas piece that was totally personalized with something we cherish — our dogs (but this can be done for cats, children — just about anything that has a distinctive form).
I got three large (22″ x 28″) canvases when Michaels had their 70% off sale (they often have buy 3 for the price of 1 OR you can use their ever present 40% or 50% off any regularly priced item) and a super value pack of smaller (9″ x 12″) canvases when they were 50% off.
Then I used Liquitex white gesso on all of them to prep them to accept acrylic paint (BTW, for darker color canvases I ended up using DecoArt black gesso rather than white for better/easier coverage).
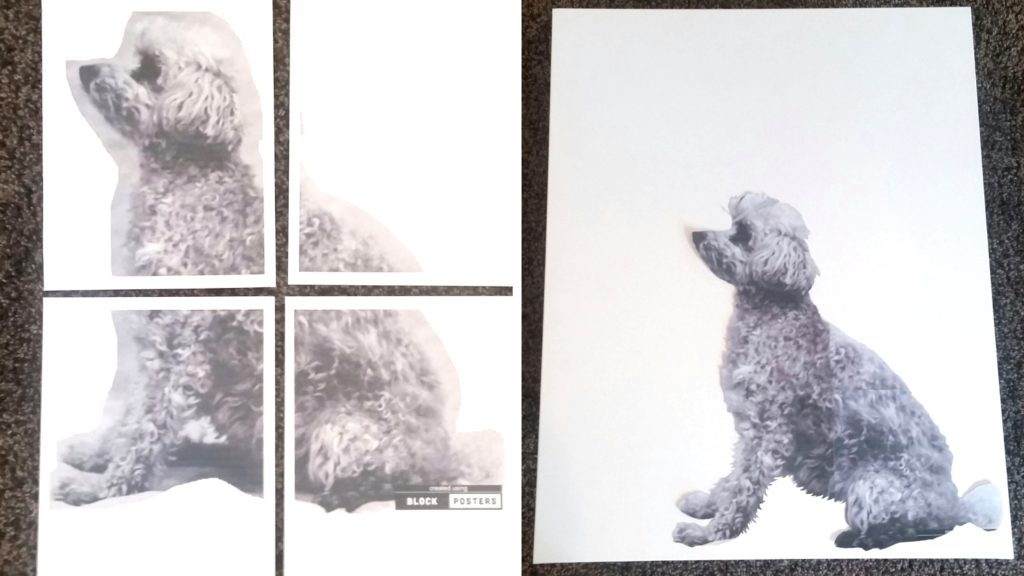
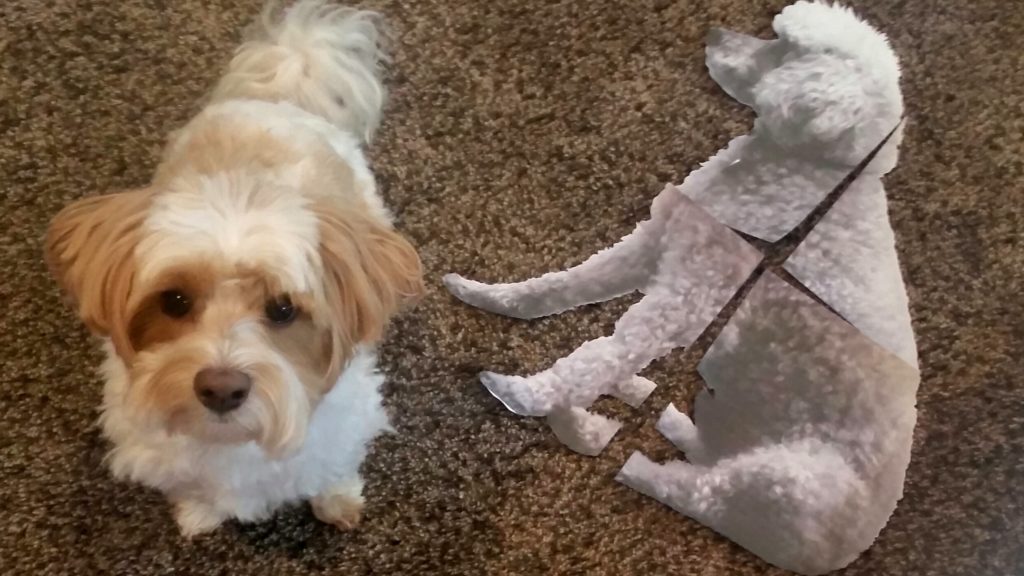
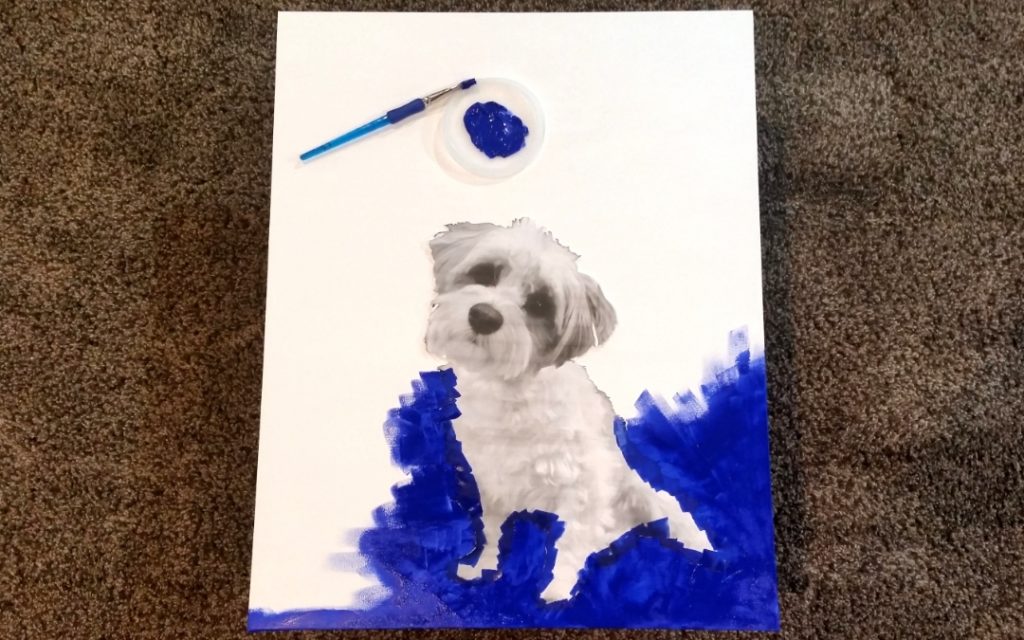
Then I found 3 pictures of our dogs (our 2 and my sister’s 1) that I thought would make good silhouettes. I loaded them into a free program called Block Posters to blow them up and break them up so they could be printed out on standard 8.5″ x 11″ printer paper. Then I painstakingly fussy cut out each segment with my hand-saving Fiskars spring loaded scissors. For images that are less textured (like smooth coated dogs or cats), this step could be super quick, but mine took several hours.
Next I used standard invisible tape to piece each segment together. This created the masks that would be the silhouettes for each large canvas. Note that I veered from the actual images in some cases because as silhouettes some of the photographic details (like bits of tail showing or gaps in fur) aren’t easily recognized. I think the lack of photographic context and the two dimensional aspect of silhouettes requires them to be simplified to come across easily. HINT: I think profiles are easier to recognize than front-facing images unless the image has distinctive front facing attributes (like a French Bulldogs’ ears).
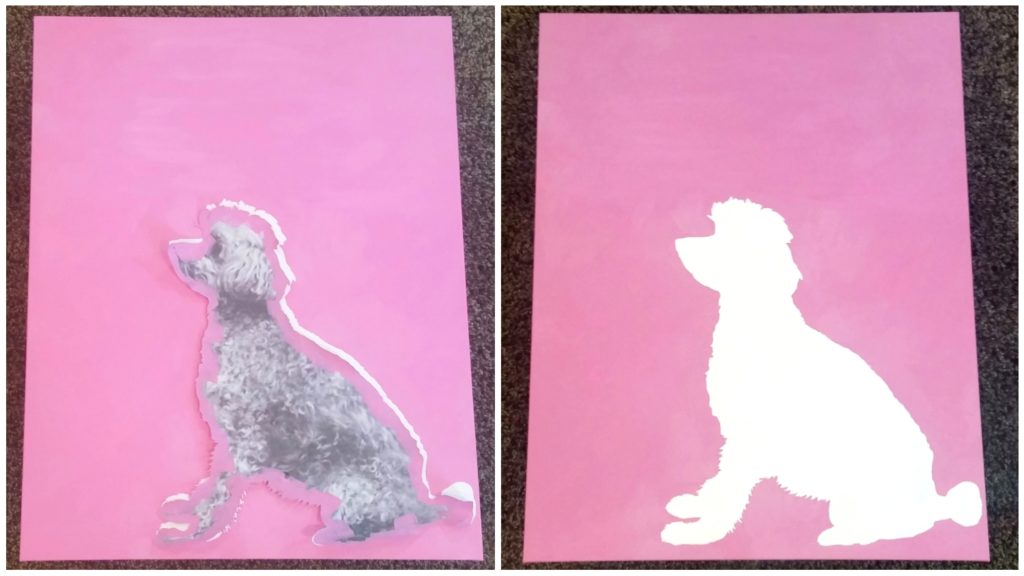
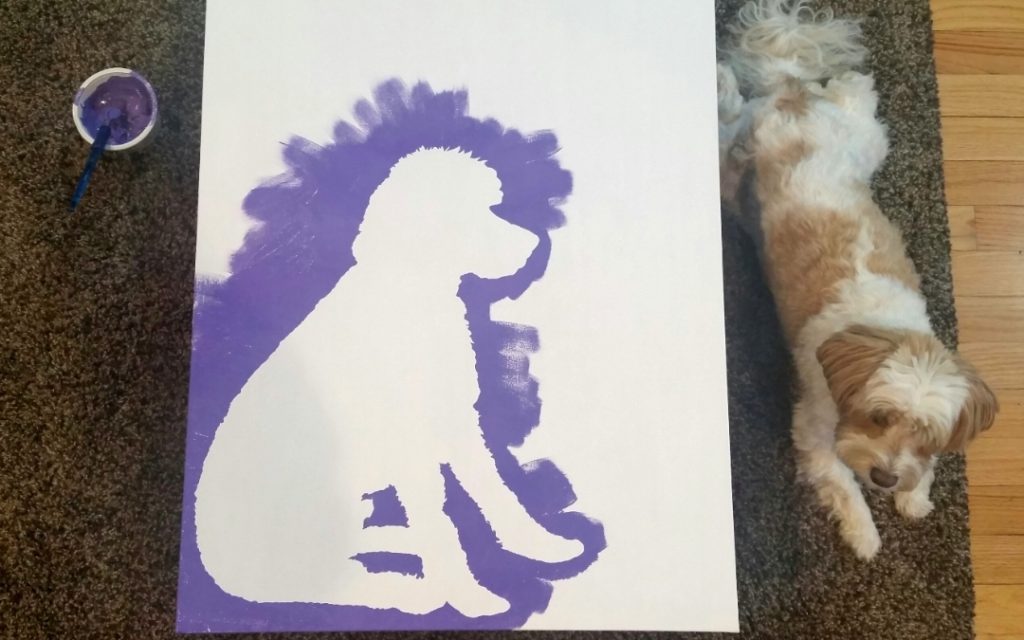
I used temporary glue dots to secure the large masks onto the canvases so they wouldn’t shift during the painting process, and these were really easy to rub off afterwards. Then it was a matter of picking colors for each canvas. You could use spray paint for this step, but I had a bucket full of acrylic paints so I mixed up and used various of these (ranging from Craftsmart to Winsor & Newton acrylic paints) from my stash.
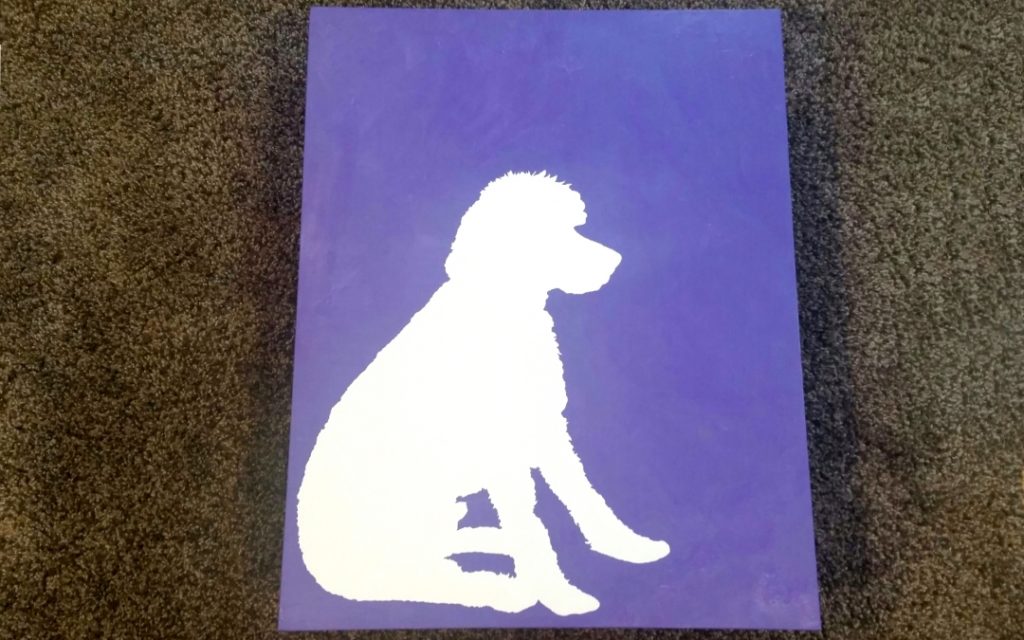
Starting from on top of the mask and brushing the paint outward seemed to work well for getting a clean crisp silhouette. I went around each mask once and that seemed to be enough for the lighter canvases (purple and pink) but for the darker blue one I had to go around twice for better opaque coverage. Then before the paint fully dried (about 15 minutes), I carefully pulled off the masks. Lastly, with a small detailed paint brush, I was able to touch up the few areas where the paint had seeped under the mask with Winsor & Newton titanium white acrylic paint. HINT: To minimize under mask seepage, I’d recommend not over-loading your paint brush with paint and also holding the brush close to 90 degrees from your canvas when applying the paint.
To create the whole composite piece, I also painted five of the smaller canvases with solid colors that I thought would coordinate with the three large silhouette canvases. I liked the effect of the color blocking (an homage to Mondrian’s work?), and I thought these smaller pops of color would brighten up the office.
The following is a step by step tutorial video of how to create silhouette canvas wall art:
These canvases are being entered into the following challenges:
Simon Says Stamp Wednesday Anything Goes Challenge
CASology Cherish Challenge
Lil Patch of Crafty Friends Anything Goes Challenge
Word Art Wednesday Anything Goes Challenge
Just Keep on Creating Anything Goes Challenge
Not Just Cards Challenge
Crafty Gals Corner Anything Goes Challenge
Creatalicious Anything Goes with Optional Halloween Challenge
Through the Craft Room Door Anything Goes Challenge
613 Avenue Create Anything Goes with Optional Masculine Card Challenge



















What a cool idea. A great way to create a piece of wall art.
Thanks for dropping by at 613 Avenue Create.
Hugs Sheryl DT member xx
Thanks so much Sheryl! My hubby hung them in his office and they look great — so happy!
Great project, thanks for sharing your creation with us at Creatalicious. We hope to see you back again.
Thanks so much!
What a cool project! I like the idea of the sillouette.
Awww thanks so much Victoria!
That is so awesome. The color block idea was great. I love all the colors because our fur babies bring color into our lives!
Thanks so much Cynthia! Yes, our fur babies do color up our lives! 🙂
Such a cool project! I need to try this sometime…very fun! Thanks for joining us at CASology this week!
Oh I hope you do give this a try. I love it and know my hubby does too, since he sent me a picture of them all hung up in his office. 🙂
I love this idea! Thanks so much for sharing with us at CASology this week!
Thanks so much Jacquie! This was so fun to create!
Wonderful idea and wonderful dog!! Love this idea you come up with
Thank you so much for entering our ATG challenge at Through The Craft Room Door this week. Looking forward to see you again next challenge.
HUGS Cicci
TTCRD DT
Cicci With the Pen {welcome to vistit and follow my blog}
Through The Craft Room Door
ttcrd.blogspot.com
Awww thanks so much Cicci! I had a blast creating these pieces!
Wonderful idea! So happy you could join in the fun at CASology this week.
Thanks so much Janet!
Awww thanks so much Janet!
Wow. what a fabulous job making such a unique piece of art. One of a kind. pjs-projects.blogspot.com
Awww thanks so much PJ! It was really easy to do (just a bit time consuming), and so worthwhile to have a big piece like this. 🙂
They are awesome and so much fun ! what a fun and fab why to display your fubabies.
Thank you for joining us at Simon Says Stamp Wednesday Challenge x
Thanks so much! Yes, it was fun to make this big piece of our fur babies. 🙂
Super Cute !!… Thanxx For Joining Us At Lil Patch Of Crafty Friends Challenge..
Sherry Lynn
DT @LPOCF
Thanks so much Sherry!
A great project!
Thank you soo much for taking part in our “anything goes with optional Halloween” challenge over at Creatalicious & good luck in the draw.
Hope to see you again in our new challenge as well…
Hugs,
Melanie
(DT-Coordinator Creatalicious Challenges)
(DT Crafty Friends)
(DT The Sketchy Challenges)
Thanks so much for your sweet comment!
Gorgeous!! I love them ❤️❤️❤️ <—– one heart each 🙂
You are absolutely an amazing artist.
I'm sorry about boomer
I don’t know why I wrote boomer 🙁 I’m sorry about Zoe
You are sooo thoughtful. Thank you for your incredible kindness and sweet words
Awww thanks so much Michelle!
So very original and clever, love it.
Thanks so much for sharing your creation at Just Keep On Creating. I am so sorry I have taken so long to leave a comment, I couldn’t run my blog for the last year but everything is up and running again at Just Keep On Creating, I would love to see you back xxx
Thanks so much Susan!