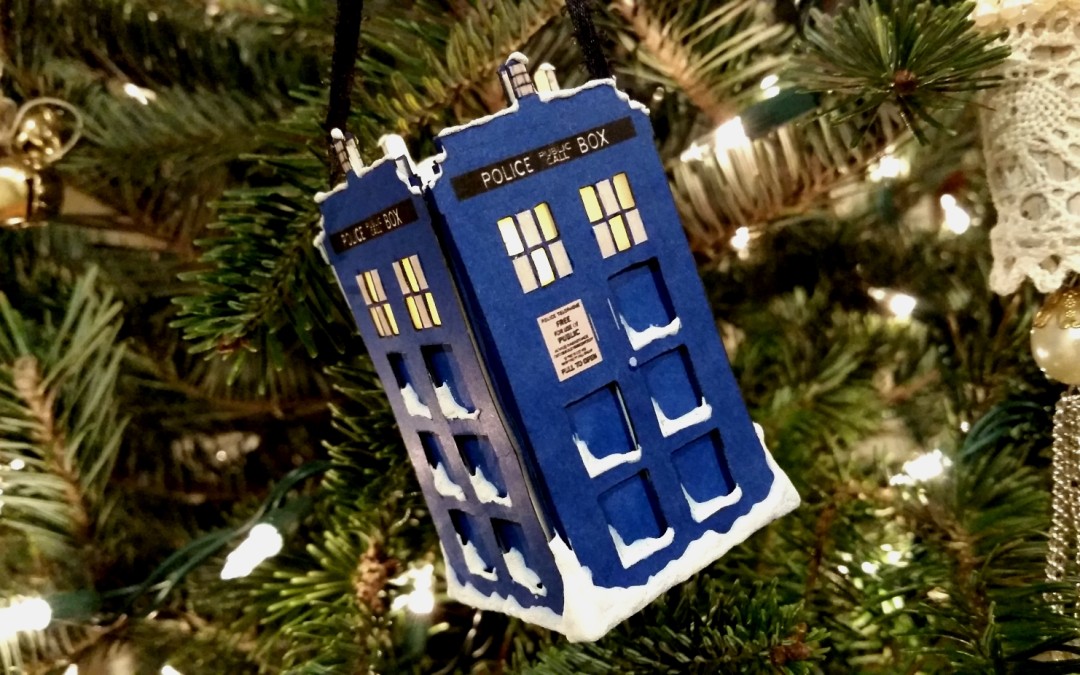
Ok, I couldn’t stop at just those Doctor Who projects that I made for my friend’s brother, James, over the last few days. I wanted a Doctor Who ornament for my own tree! Is that bad? LOL
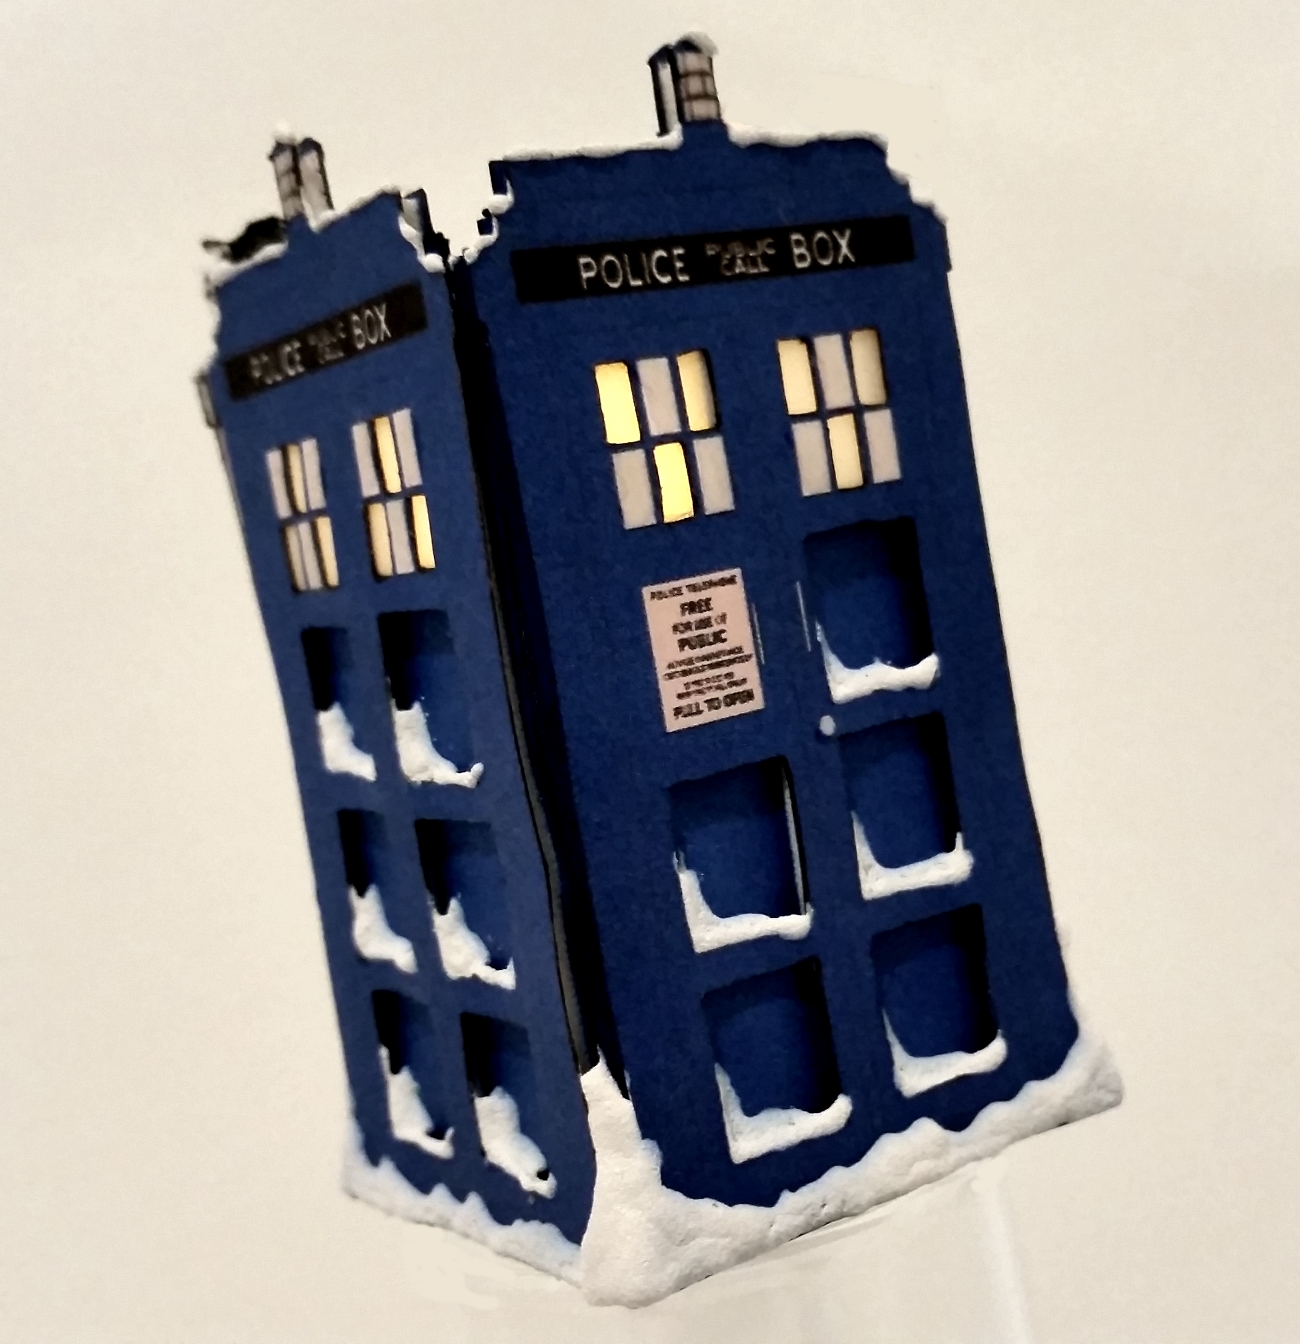 I found online a clean front door image of the Tardis (Doctor Who’s time traveling space ship), then I used paint.net to alter it to make it look like one of the side walls and replicated it 2 more times (3 sides total). I printed out 2 images of each side of the Tardis and fussy cut each of them out. Then I used an Xacto knife and cut out all the panels on the doors of half of the images. I also used an Xacto knife to cut out half of the windows at the top of each door (alternating every other window panel so as not to accidentally cut away or rip the window sills) and lined them with vellum. For the second set of Tardis sides (the ones I’ll put behind the ones with the panels cut out), I cut out the windows completely. Then I painstakingly inked all the cut edges (yes, even inside every window pane) with a black felt tip marker to hide the white of the paper and give a finished look. Finally, I layered all of sides using double sided foam adhesive, creating a dimensional paneled look for each wall.
With some black card stock, I constructed a little box about 1.5″ square at the base and 1″ high. I flipped this over so the bottom was on the top and then adhered each side of the Tardis to each side of the box. This created a great 3D look as well as a platform on which to inset a battery operated tea light. This tea light addition adds a great glow behind the cut out windows that I had lined with vellum and took this little 3D ornament to the next level (my hubby said he thought this was the best craft project I had ever made! hehehe).
To add a little extra interest, I also added DecoArt Snow Writer on the tops and bottoms of each side of the Tardis and along the left side and bottom of each inset panel. As it takes 2-3 hours for each side to dry enough to move on to the next wall, this was a great lesson in patience for me. :o) What is fantastic about this product, though, is that it dries completely hard and secure (no more deflated puffy texture like from Liquid Applique). As a finishing touch, I added just a pinch of Glossy Accents to add shine and a glassy look to the windows that were not cut out and lined with vellum. I used a remnant black satin ribbon to create a hanging loop, making sure to leave space so that I could turn on and off the tea light inside as needed.
This 3D Light Up Doctor Who Ornament is being entered into the following challenges:
Simon Says Stamp Monday Just A Pinch Challenge
613 Avenue Create Anything Goes Challenge
Through the Craft Room Door Anything Goes Challenge – WINNER
Craft Your Passion Challenges Anything Goes
Card Mania Christmas Challenge
Thanks for stopping by, and I hope you are having a wonderful crafty day! WOOF


As a Whovian, I had to comment on this. I love it! The snowy touches are wonderful.
Aww thanks so much Debbie! I loved making this little ornament–thinking it up and designing it was so much fun. 🙂 TF stopping by and taking the time to leave a sweet comment! Whovians unite! 😀
Oh, I love this! My students gave me a tardis ornament, so yes, I think you should have one! It’s awesome!
Aww how sweet! After making all the Who projects for my friend’s brother, I just had to make one for me and my hubby too. LOL 🙂 I hope you are enjoying you Doctor Who ornament too! Happy holidays!
this is just awesome. my boys would love it xx
Thanks so much Theresa! It is not too tough to make–just a lot of fussy cutting. LOL TF stopping by! Big hugs, Kristina
Wow! What patience you have for all the tiny details! Incredible ornament! Thank you for sharing with us at TTCRD!
Awww thanks so much Sandy! Yep, a lot of fussy cutting, inking, and little touches of snow and vellum. It was a lot of little details, but that is what we crafters do, right?! 🙂 TF stopping by! Big hugs, Kristina
This is just….fantastic. To quote one of my favorite doctors. LOL
Awww thanks Jennie! My hubby and I really love Doctor Who so this little ornament was a labor of love for my hubby. 🙂 TF stopping by! Big hugs, Kristina
My son and his fiancé would love this for their tree. The detail is amazing. I wish you would a tutorial on this.
Awww thanks. Normally I try to do tutorials, but I have been so behind with work while I help out with my hubby and my brother’s surgeries and their recoveries. Sorry, but I’ll try to fit it in in the new year. TF stopping by! Big hugs, Kristina
oops….I sent by mistake. As I commented, would love If you did a tutorial on this. Crafty Hugs, Chris
love Dr Who and have been there with more Doctors then i should admit to, so i feel qualified to say “He would love this ornament made by You”
Oh thank you so so much! I started watching Doctor Who with the reboot with Eccleston, and I have loved it! I have yet to go back and watch any of the originals, but hope to as time permits. Your compliment was the best and made my day! 😀 Merry Christmas and happy new year to you and yours! Big hugs, Kristina
I love this!! Saw it on the TTCRD website and I had to come see it in person – WOW!! It’s amazing!! 🙂
Thank you so much Christi! I so appreciate you taking the time to come over and check out my blog. TF stopping by and happy holidays! Big hugs, Kristina
Love your beautiful and creative ornament! Thank you so much for sharing with us at Simon Says Stamp Monday Challenge. 🙂
Thank you so much for stopping by! It was fun to try to make an ornament that included a little light up feature and incorporated my hubby’s favorite TV show. LOL 🙂
I love it. I love Dr. Who however, the verdict is still out with the new Dr but I think he will okay. lol. I am currently watching all of them again. This is awesome.
Tammi
TTCRD, DT
You and I must be on the same wavelength. I’ve been re-watching old opisodes. I really love David Tennant and Matt Smith, but I had quit watching Peter Capaldi after the 5th episode last year. I’m hoping Stephen Moffat’s writing the last few episodes of last season will make this latest Doctor more likeable and have started watching again. Fingers crossed. I really want to like him. Peter was so cute briefly on the Vicar of Dibley. 🙂
Oh, my! I’m so happy for you! This is an outstanding ornament! And congratulations for the win over at Through the Craft Room Door! {Hugs!}
Thank you so much Jeanie! I really appreciate their picking my little ornament, and thanks so much for stopping by and taking the time to leave this encouraging comment! Big hugs, Kristina