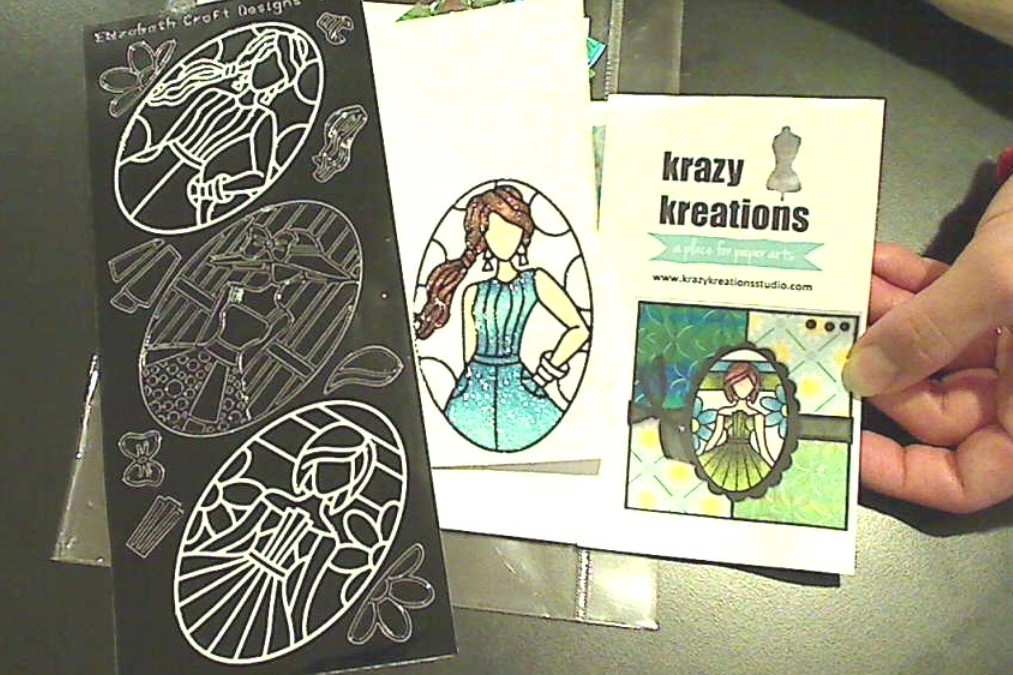
When I attended the Expo last month, I got to see some pretty cool crafty items and techniques. One of my favorite things was a Copic coloring on glitter paper class that I took hosted by Krazy Kreations (www.krazykreationsstudio.com).
The process requires some special micro fine glitter paper (according to the folks at Krazy Kreations, regular glitter paper is too coarse and will ruin your Copic markers, globbing up the ink and fraying the nibs), vinyl stickers to color around, and (obviously) Copic markers (I’m assuming other alcohol markers would work as well).
The coloring on glitter paper differs from coloring on regular paper in a couple of significant ways. First, each color really requires only 2 colors. The blending is done by laying down the light color then the darker color and then lifting the darker color away with the lighter color to create a midtone. Second, as you can probably guess from the color range created, the colors you choose should not be adjacent to each other. There should be a large contrast.
Pros: The results are really spectacular. The glittery shimmer creates an amazing faux stained glass look. Best of all? The vinyl stickers create a large border so messy colorers like me have a much easier time staying within the lines! You need fewer Copic marker colors to create great blended looks.
Cons: The materials are rather pricey (2 small sheets of the glitter paper are $5). Also, the kit that was included in my class had some rather shoddily cut pieces and a crookedly folded base so I had to make a new card base and re-cut many of the parts to fit properly on the card. Hopefully the kits they sell are made more carefully.
This card is also being entered into the Simon Says Stamp Wednesday Sparkle Challenge
The following is a video share of the card I made from the kit:
Thanks for stopping by and have a great day! WOOF


Wow! What a beautiful card!! Love that technique! It actually does look like stained glass! Love it!!
Thank you very much for joining us this week at the Simon Says Stamp Wednesday Challenge Blog!
hugs…
Melissa
Thanks so much for stopping by. I love this glittered paper coloring. 🙂 Big hugs, Kristina
gorgeous card 😀
Thanks so much Rosa! xoxo