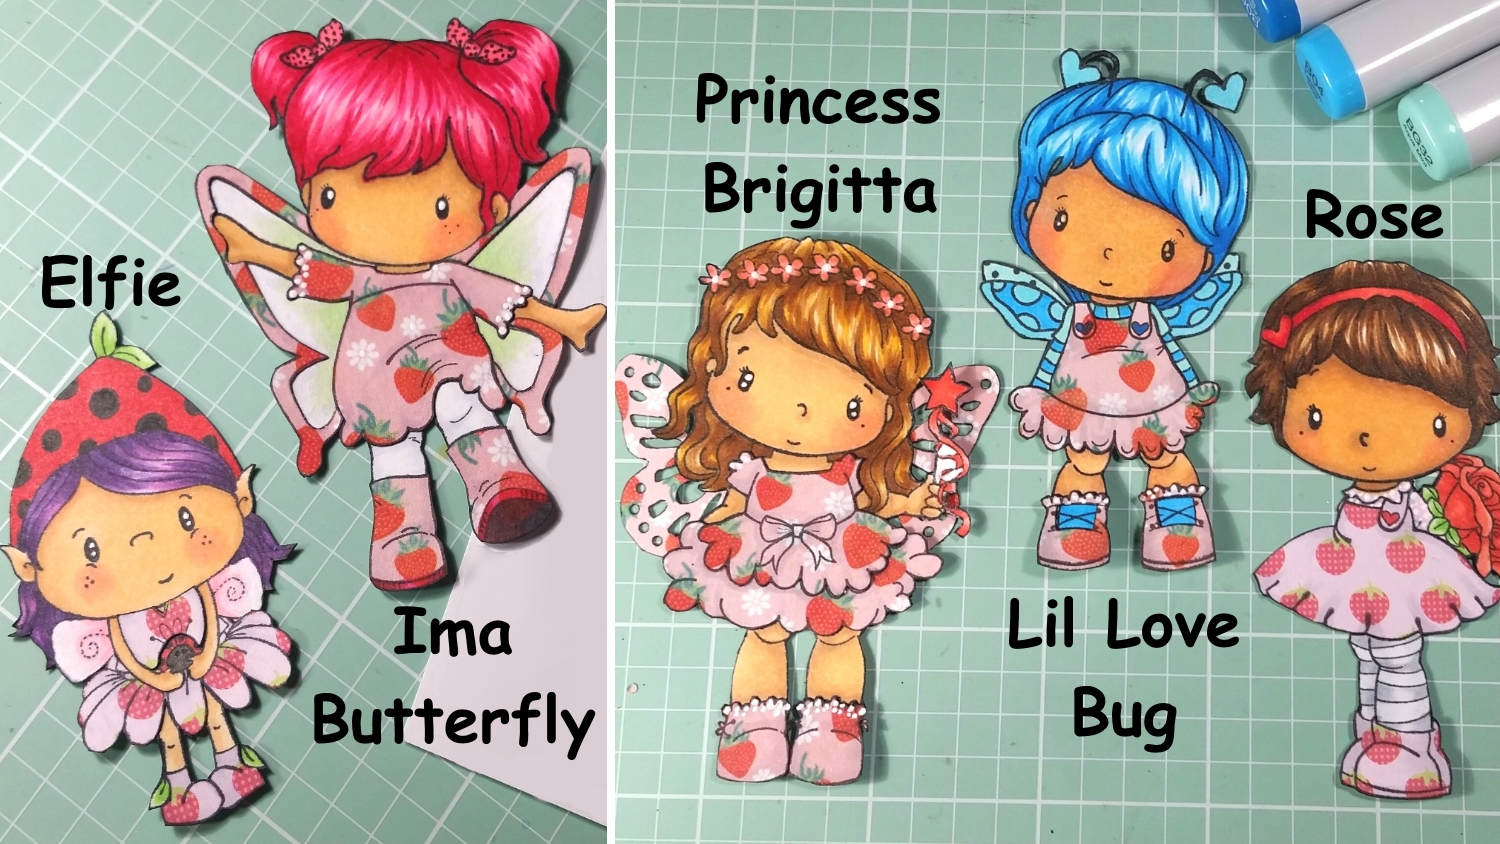
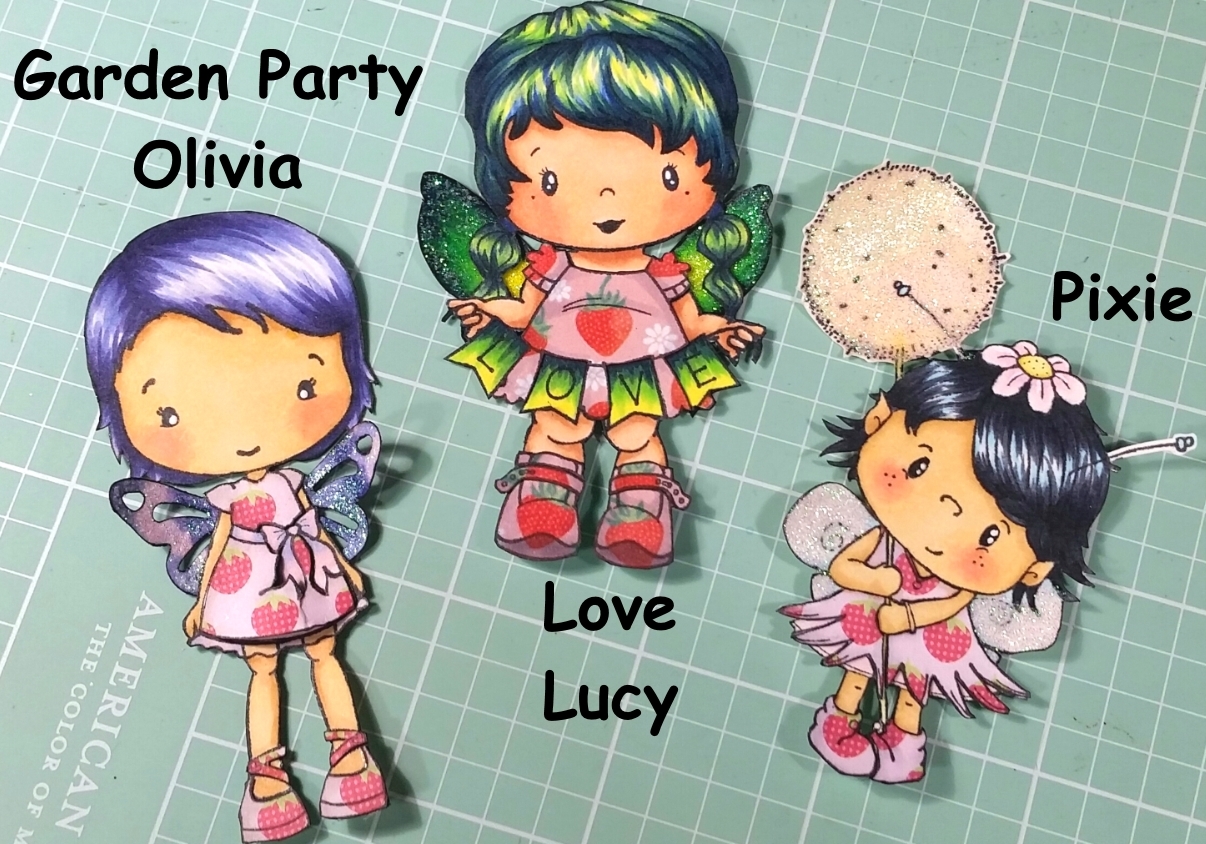
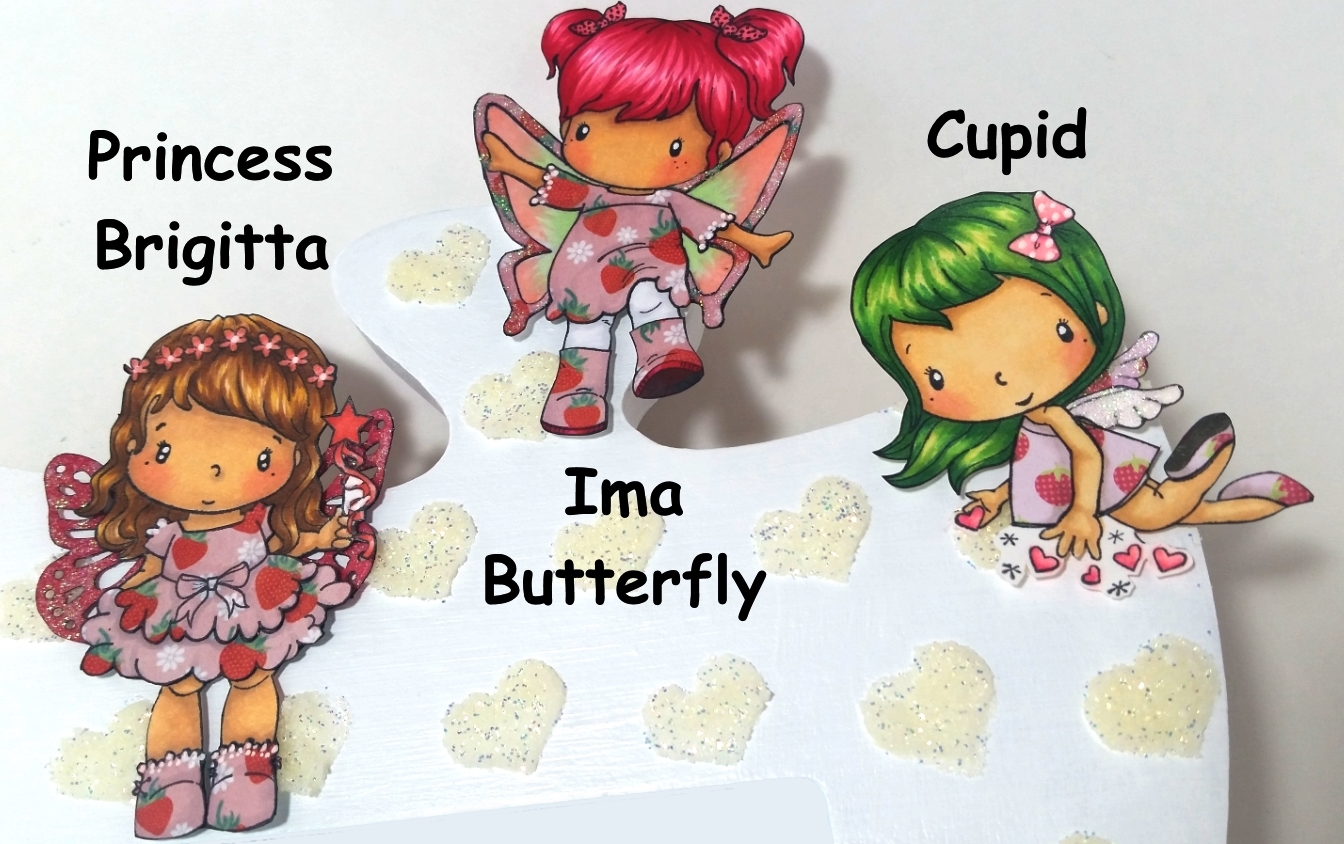
I have been searching for my crafty mojo (sorry for skipping last week on the blog), which seemed to have taken an unapproved leave of absence for the last couple of weeks. After spending time buying/upgrading my YT videoing equipment (it’s going to take me a while to get used to all this new technology) and cleaning and organizing my office/studio, I finally think I was able to lure my mojo back with some wild hair Copic coloring, paper piecing and fussy cutting with the following bunch of C.C. Designs cuties: Garden Party Olivia (retired), Princess Brigitta (retired), Ima Butterfly, Cupid, Sweetheart, Cupcake Brigitta, Lil’ Love Bug, Pixie, Love Lucy, Elfie, and Rose (whew! that’s cuteness overload!).
There are so many Copic colors I used so please forgive any omissions, but here is a general list:
Skin:
Option 1 (medium pink undertone): E00, E21, E11, and R20
Option 2 (yellow and shadowed undertone): E50, E51, E21, BV000 and R20
Option 3 (darker tan): E51, E53, BV00 and R20
Option 4 (simple and palest): E50, E51, E53 and R20
Hair:
Garden Party Olivia: BV00, BV02, BV04, BV08, and RV02
Princess Brigitta: YR20, YR24, E35, and E37
Ima Butterfly: RV21, RV23, RV25 and RV29
Cupid: YG01, YG11,YG25, YG17, G14, G17 and Y02
Sweetheart: Y00, Y15, Y17, YR16 and YR07
Cupcake Brigitta: R32, R33, R37, R39 and W7
Lil’ Love Bug: B000, B01, B04, B06, BG32 and BG45
Pixie: C7, C9, B00 and B01
Love Lucy: Y02, YG07< G09< B34, B37 and B39
Elfie: V12, V05, V17 and V09
Rose: E55, E57 and E59
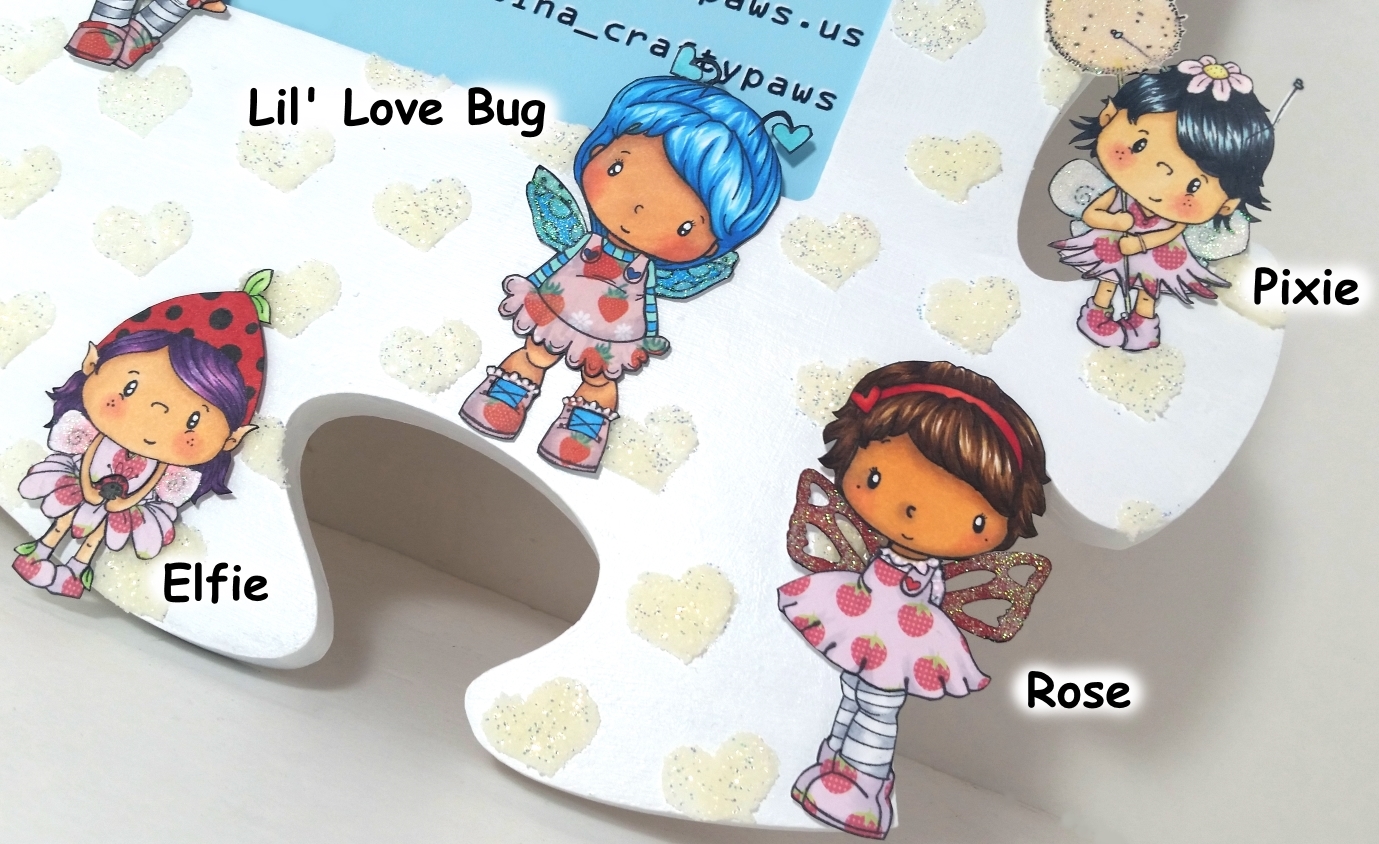
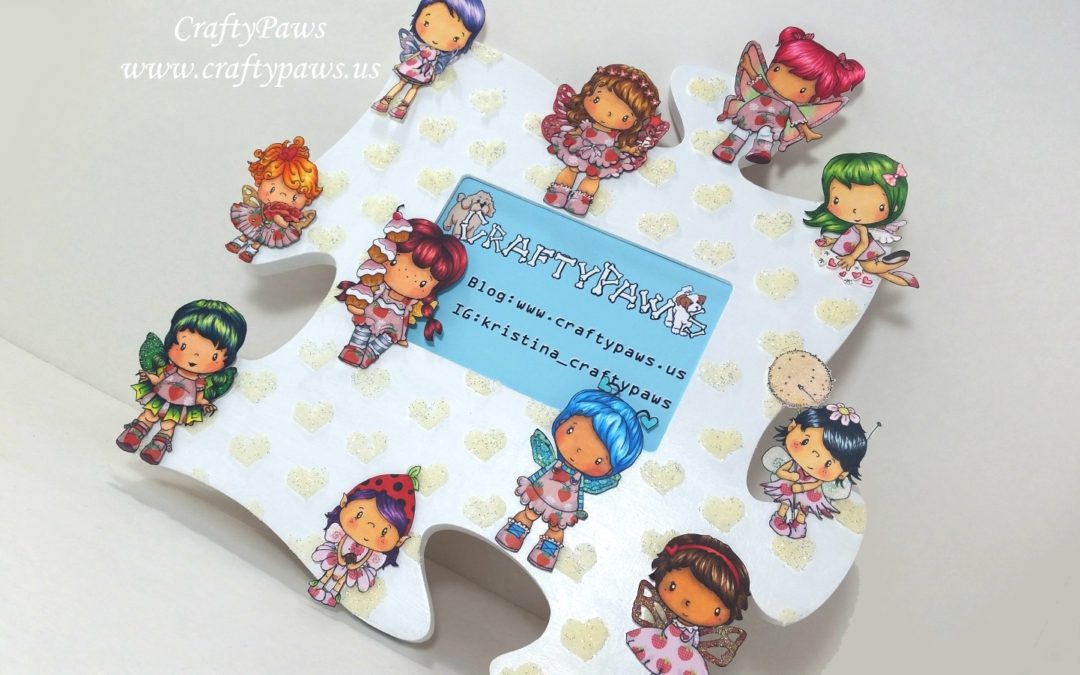
Some of these images were pixies and fairies, but others were little girls. Inspired by the children’s book series called The Rainbow Fairies, I made them all into fairies by adding butterfly wings various Martha Stewart butterfly punches or drawing and cutting out my own to add to them. To add a bit of magic to their wings, I topped all of them with Studio G glitter glue. I also used some old scraps of strawberry print papers to paper piece all of their dresses and shoes–I wanted to make them all cohesive this way since I went to town on all their wild hair colors.
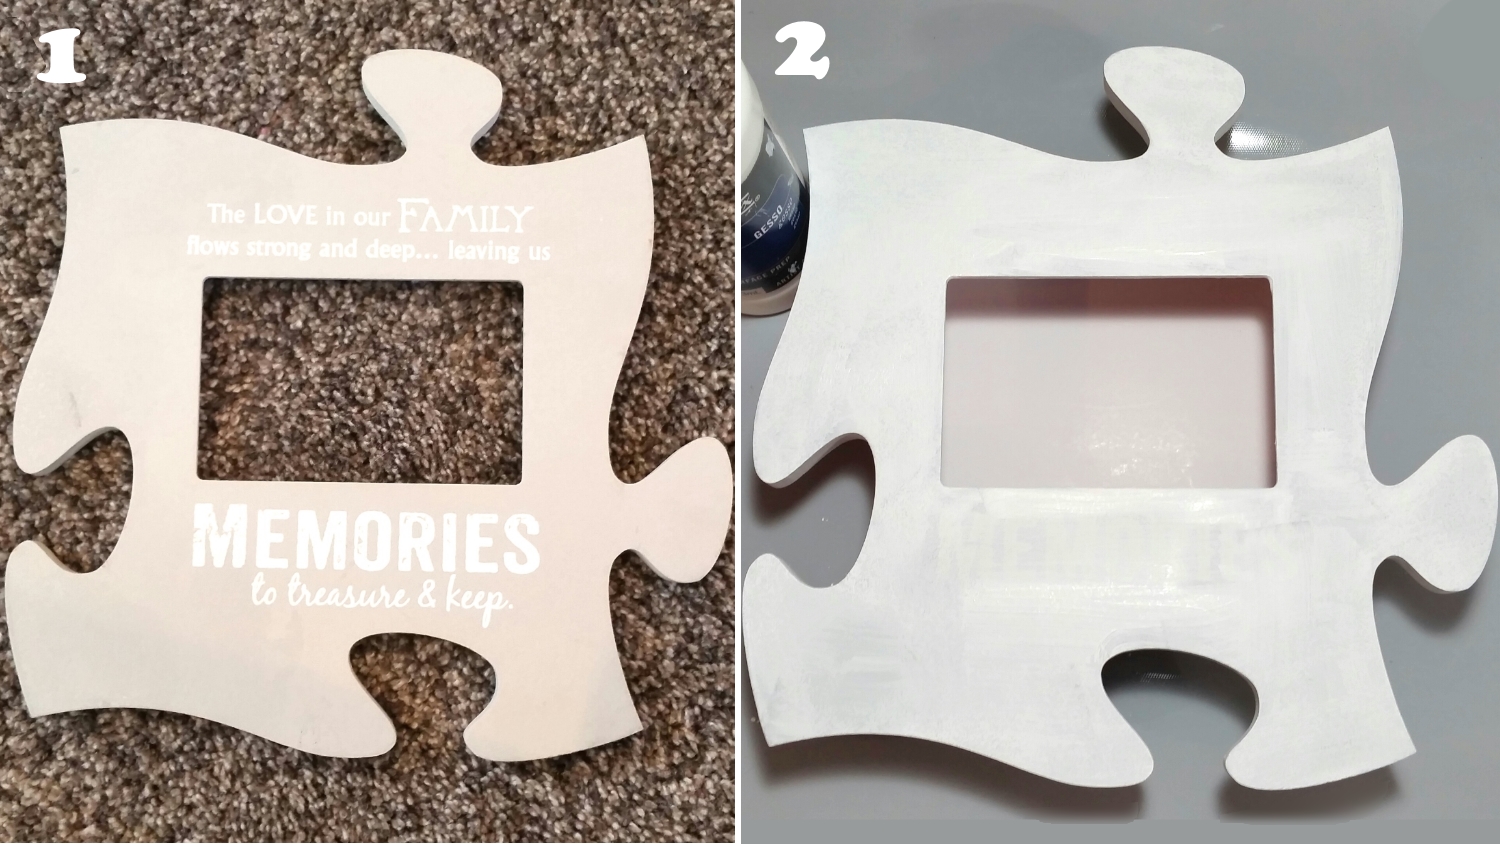
When I first started this project I didn’t know how I would use all these fairies (remember, this was just an attempt to jump-start my crafty mojo when I started). When Mr. CraftyPaws saw all of them, he said they needed to go on a white background so they could pop and be appreciated for all their color and detail. I remembered an old puzzle-piece shaped frame that I had found at a thrift store a couple years ago (one of the benefits of cleaning/organizing the ol’ office/studio) and decided this would be a great time to upcycle that hoarded (erm, forgotten) piece. I figured all the fairies could be loving on and protecting whatever is pictured in the photo window.
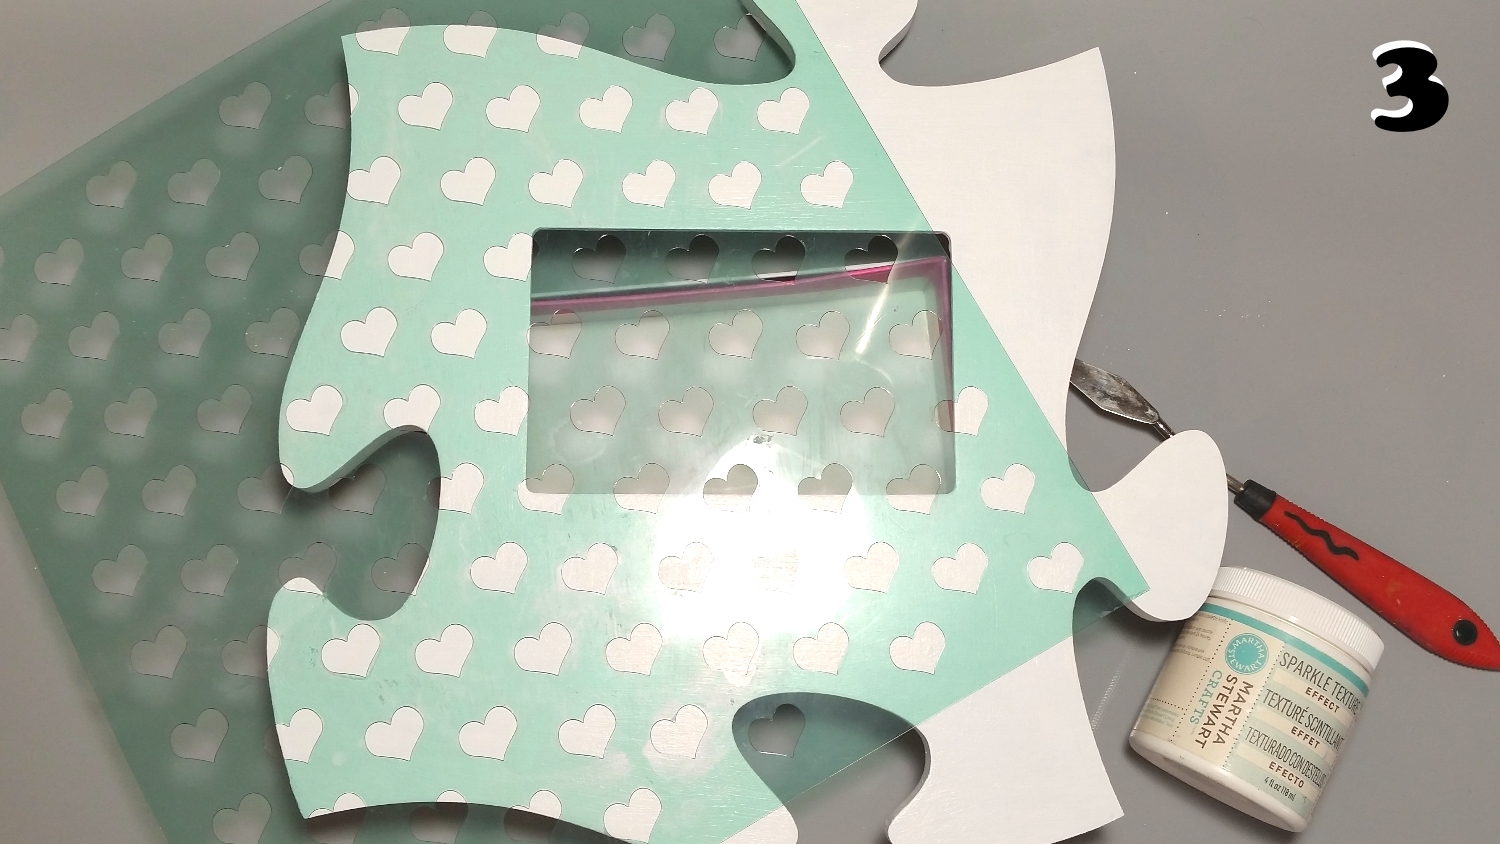
I cleaned off the frame with Goo Gone (there was a sticky residue where the price sticker had been), let it dry, and then painted the frame with two coats of Liquitex Gesso. Then I painted it with white acrylic paint. Lastly for some more “magic” I used a Heidi Swapp heart stenci; (this is a similar lattice stencil; I couldn’t find the hearts one) and Martha Stewart Sparkle Texture Effects Paste to add some cream colored glitter-filled 3D hearts all over the frame.

Then it was just a matter of figuring out where to place each of the fairies around the frame. I used double sided foam adhesive and hot glue to secure each one in place, spacing them around in a seemingly random way. I didn’t want them to look lined up and I wanted them to be spaced out from each other with similar amounts of “white space” between each of them so this “random” arrangement was anything but and took hours! LOL
I printed out a my logo, blog and IG info on my printer and slid that into the photo spot so (at least temporarily until I find a better picture) this is my new name sign for my crafting. The following is a share video including a quick tutorial on paper piecing:
This altered fairy frame is being entered into the following challenges:
Simon Says Stamp Wednesday Anything Goes Challenge
Word Art Wednesday Anything Goes Challenge
Simon Says Stamp Monday Based on a Book Challenge
Simon Says Stamp Work It Wednesday Green Challenge
Lil Patch of Crafty Friends Anything Goes Challenge
Crafty Gals Corner Anything Goes Challenge
Not Just Cards Spring Challenge
Through the Craft Room Door Anything Goes Challenge
Crafty Purple Frog Love is All Around Challenge


Oh my goodness! So clever! And cute!
Thanks so much Jeanie! I love upcycling projects! 🙂
Gorgeous altered frame! The images are adorable & so beautifully coloured.
Thanks for joining us at Simon Says Stamp Wednesday Challenge
Mandy xx
Thank you so much Mandy!
Cuteness overload indeed!- I just love your gorgeous altered frame – Thankyou so much for playing along at crafty purple frog this month hugs Judith x
Thanks so much Judith! I really was filled with love while coloring up all these cuties. 🙂
This is darling and so, so pretty…what a fabulous project and so beautifully coloured! Thanks so much for sharing and for playing along with us over on the Simon Says Stamp Monday Challenge Blog… 🙂
Thanks so much for stopping by Emma! I had a blast coloring up all these cute fairies. 🙂
What an amazing project!! I LOVE all those cuties and you have coloured them so perfectly 🙂
Thank you for joining us at Crafty Purple Frog.
Amy xx
Thanks oodles, Amy! I really had fun coloring up all these cute fairies. TFStopping by! Hugs, Kristina
This is fabulous, pretty fairies.
Thank you for joining us at Crafty Purple Frog.
Pauline – Crafting with Cotnob
x
Thanks bunches Pauline! I really had fun creating this altered frame. 🙂