I am participating in a YouTube hop to help introduce a crafty friend, Kaja (YT: kajcyika.crafts), to the YouTube crafting community. There are 7 stops along the hop, and there are fantastic prizes that will be given away to 4 lucky people chosen randomly among those who leave comments on each hop stop (the more comments you leave, the better your chances)! All the stops for the hop will be linked in my YouTube video (below).
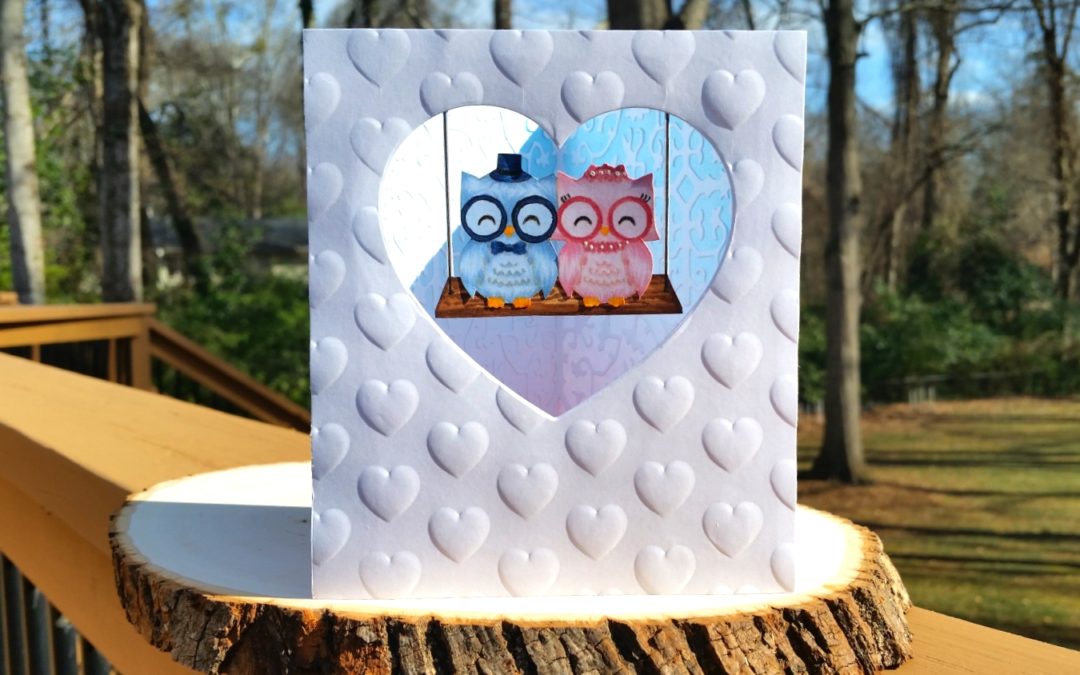
 For my project, I wanted to try a new-to-me 3D triangular swing card (this is for my cousin’s daughter who got engaged on new year’s eve — I wanted to create something extra special to wish the happy couple all good things!). I didn’t have any technical instructions to follow, so I just winged the construction, but I think it turned out ok!
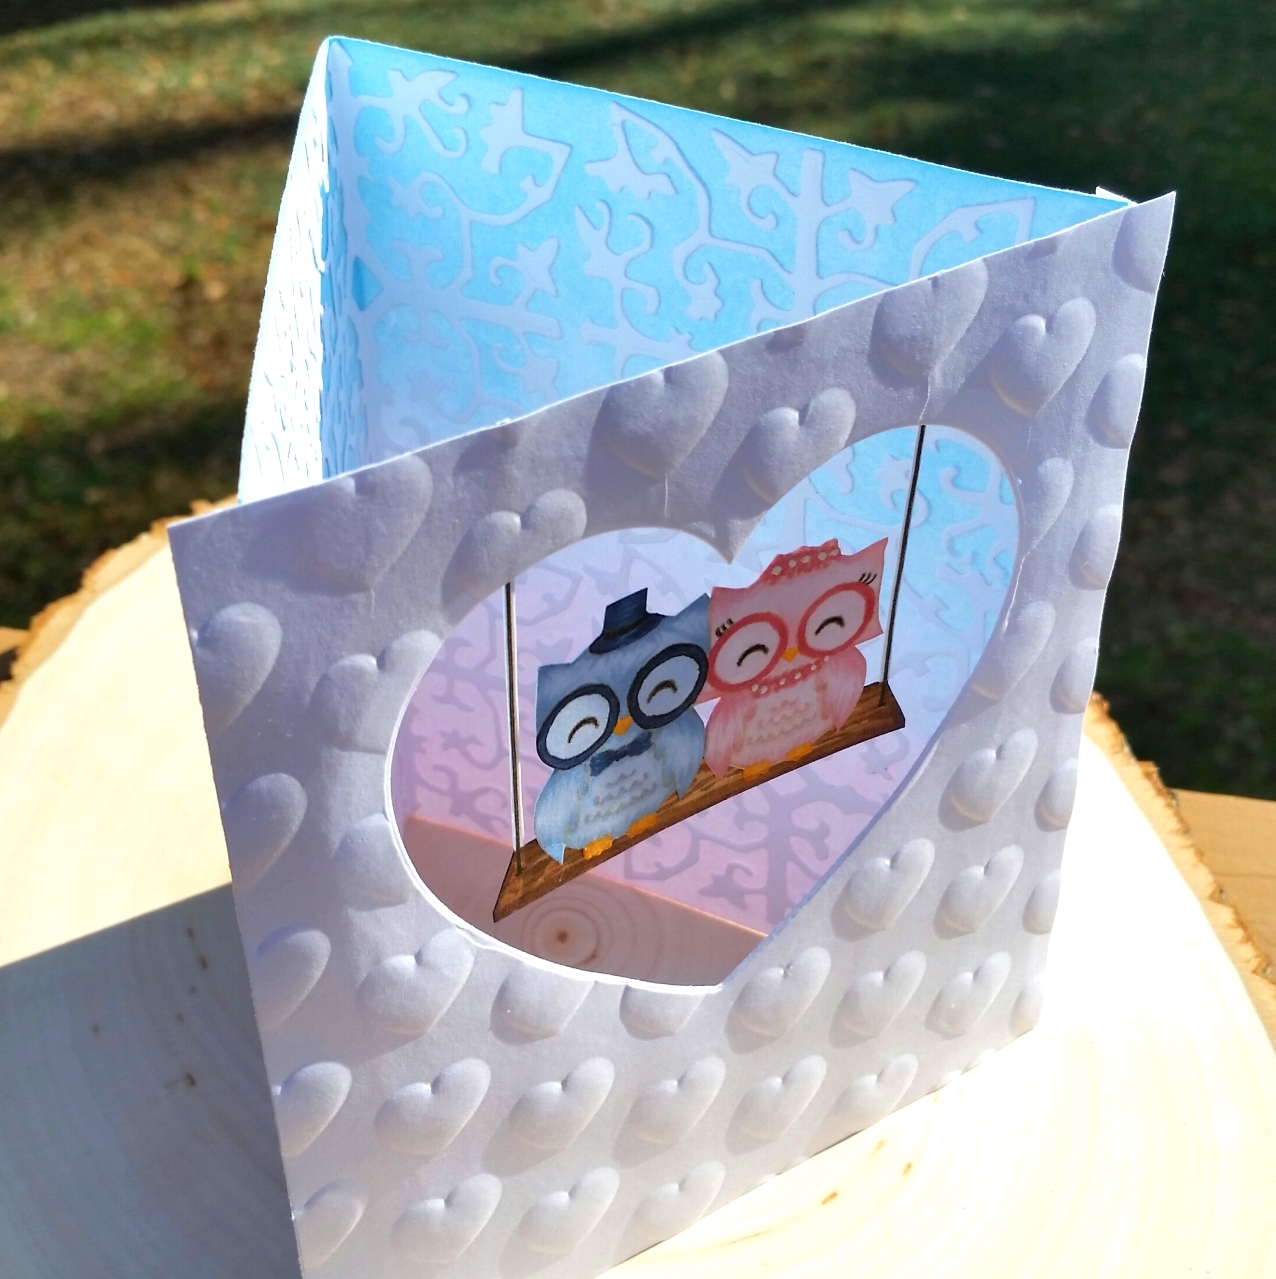
The background base is a standard A2 size (4 1/4″ x 5 1/2″), colored using blending tools and Tim Holtz Distress Ink in Tumbled Glass and Spun Sugar. To create a trellis or filigree look, I die cut 6 pieces of white card stock with my new Spellbinders D-Lites “Grate Works” Die and glued them into place with my favorite wet glue, Art Glitter glue.
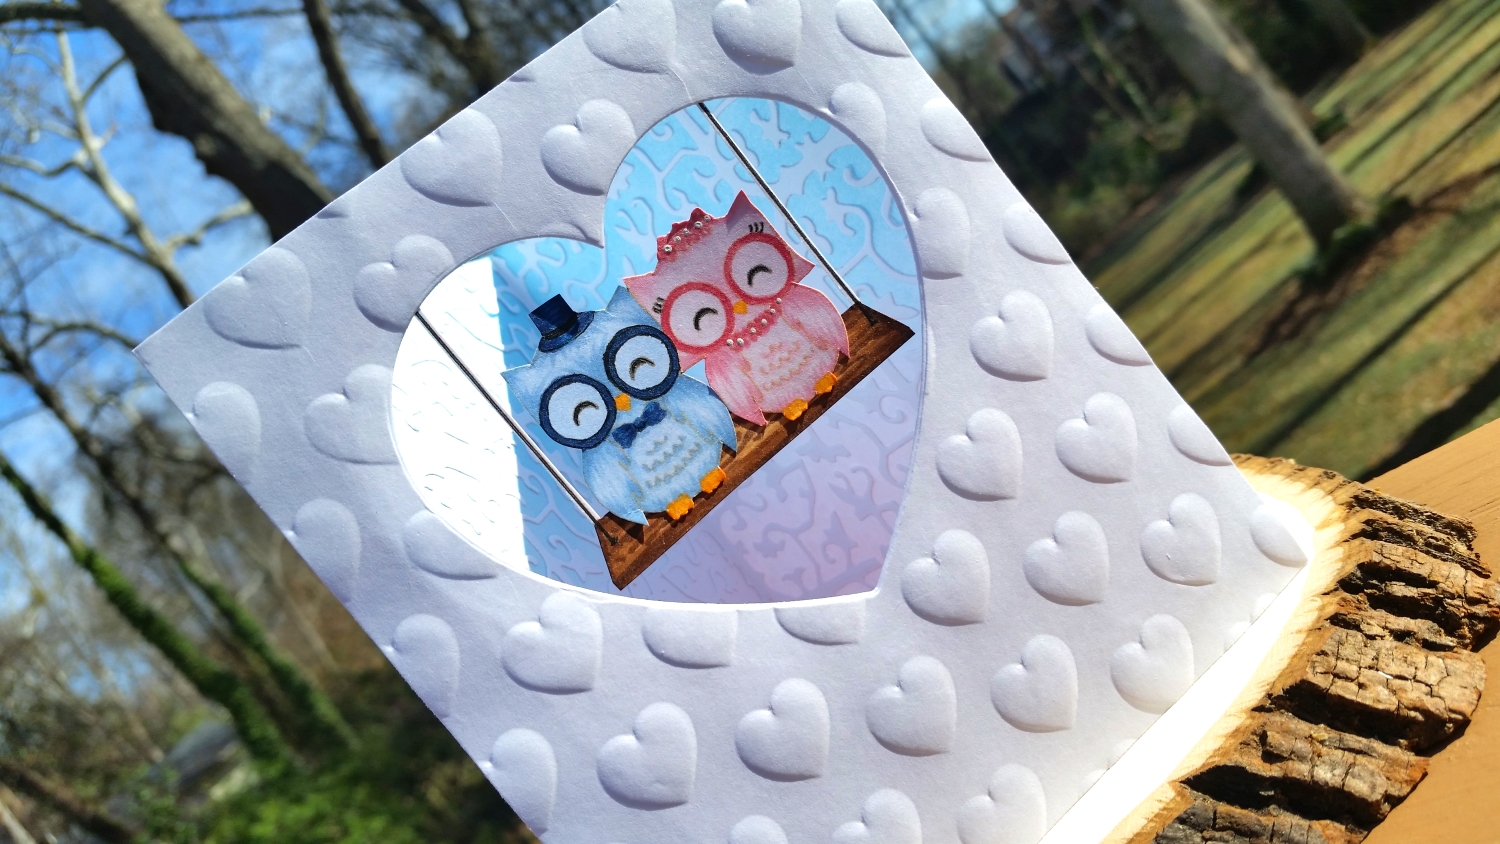
For the card front, I cut 2 panels at 4 1/2″ x 5 1/2″ and die cut a heart window using the fourth largest heart from the Diemond Dies Nesting Hearts Die Set. The back panel I scored 1/4″ on both the left and right sides. The front panel, I embossed with my new heart background embossing folder from the We R Memory Keepers The Next Level “Dotted” set. The two panels are layered one on top of the other with the swinging owl couple sandwiched between.
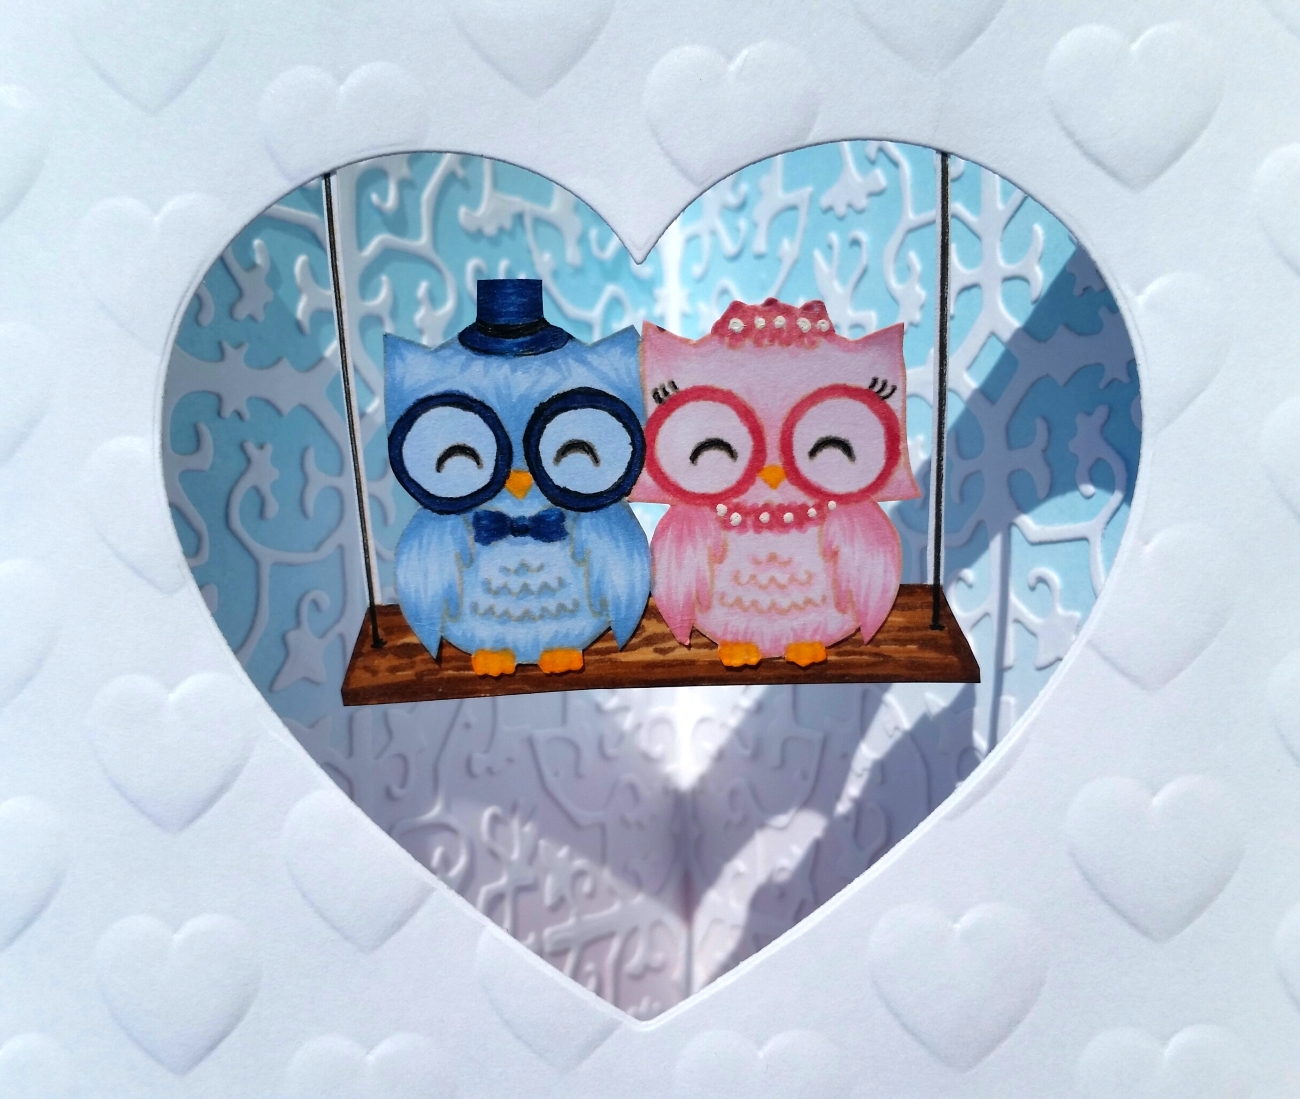 For the main focal point, I used the swing and owl couple from the Clearly Besotted “Mr. and Mrs. Hoot” stamp set. I stamped them with Momento Desert Sand ink for a softer look, and used the following Copic colors:
Mr. Hoot: B91, B41, B93, B37 and B39
Mrs. Hoot: RV91, 81, R83, and R85
Beaks and claws: Y38
Wooden swing: E53, E55, E57 and E59
I also used a black Copic multiliner pens to extend the 2 sides of the swing, a warm gray Copic multiliner to darken in the owls’ eyes, and a Signo white Uniball gell pen to add some white details to Mrs. Hoot’s flowers.
I sandwiched the top of the swing between the 2 card front panels and glued those pieces together. Then I used 1/8″ Scor-Tape to adhere the folded back left flap of the back panel to the background base. I added another strip of Scor-Tape to the right flap of the back panel but didn’t take off the release paper so that I could fold the card down for mailing. The recipient can remove that release paper when she wants to prop the card up for display. I know these instructions may be hard to picture, so if you watch the video below, I promise this construction will all be clear. 🙂
The following is a video start-to-finish tutorial on how to construct this card: [to go live at 12 noon ET 1/14/2017]
This card is being entered into the following challenges:
Simon Says Stamp Work It Wednesday Make Something New with New Product Challenge
Card Mania Layer It Challenge
Word Art Wednesday Anything Goes Challenge
Lil Patch of Crafty Friends Anything Goes Challenge
Crafty Purple Frog New Beginnings Challenge
Creatalicious Anything Goes Challenge with Optional New Year/Wishes
Through the Craft Room Door Anything Goes Challenge
613 Avenue Create Anything Goes with Optional Totally Technical Challenge
Penny Black and More Anything Goes Challenge


Oh… you are a tease.. Can’t wait to see your video.
xo Nana
Awww sorry, I didn’t mean to be a tease. The video is up now. Hope you enjoy it! Thanks for stopping by and taking the time to leave a sweet comment! Big hugs, Kristina
LOVE this card so much, it’s darling!! And your photography!! wow! I am learning lots from you 🙂 TFS xoxo Jen
Thanks so much Jen! You are so kind! I think next on my list is a microphone and a better focusing camera for my videos (I bought a new Logitech camera a couple months back, but the audio I think got worse and the focusing is so erratic). If you have any suggestions, I’m all ears! TFStopping by! oxo, Kristina
Lovely card Kristina! So cute for the newly engaged couple!
Thanks so much Ann! I hope they enjoy it. It was fun to design and craft. 🙂
You are SO talented!! Love the card, super sweet!! Love you videos too!!
Awww you are so kind and encouraging, Sandra! You’ve just put a huge smile on my face! Hugs, Kristina
I have never seen a card of yours I didn’t like! Once again, beautiful job! Thank you so much for entering our ATG challenge at Through The Craft Room Door this week. Looking forward to see you again next challenge.
Regards,
TTCRD DT
Scrapbookingmamaw {My Blog}
Through The Craft Room Door
ttcrd.blogspot.com
Thanks so much Jeanie! I had fun thinking up and creating this card. 🙂
This is just awesome, love it!!
Thank you for sharing with us at Crafty Purple Frog this month, good luck in the draw!
Hugs Shell xx
Thanks so much Shell! It was a fun card to think up, design and craft. 🙂 I love interactive and 3D cards.
Oooo absolutely fabby, thanks for the tutorial, i’m going to check this out and thanks for joining us at Penny Black And More this month, Luv Sam x
Thanks so much Samantha! I really had fun creating this 3D card!
This is so amazing! Such a clever idea.
Glad you stopped by at 613 Avenue Create this month.
Hugs Sheryl DT member xx
Awww you’re so sweet! Thanks for spreading the crafty love!
A wonderful card!
Thank you soo much for taking part in our “anything goes with optional Happy New Year / Wishes” challenge over at Creatalicious & good luck in the draw.
Hope to see you again in our new challenge as well…
Hugs,
Melanie
(DT-Coordinator Creatalicious Challenges)
(DT Crafty Friends)
(DT The Sketchy Challenges)
PS: Sorry for the late comment, life had been very busy the past couple of weeks…
Thanks so much Melanie! TFStopping by!
Comment
What a super cute card! I LOVE those little owls 😀
Thank you for joining us at Crafty Purple Frog.
Huge hugs
Amy xx
Awww thanks so much Amy! It was fun designing and crafting this card. 🙂