I was making two 3″ x 5″ (index card size) love-themed cards for my crafty friend Pam’s (YT: theoneandonlygrand), challenge celebrating 1000+ subbies on YT. Woot woot! These are a clean and simple (CAS) styel, and I thought these digis would be perfect for this project.
I shared the colors I used on the “Believe” digi in yesterday’s post, and the following are the markers I used for this digi: Elephant: W1 and W3; Blush and water/hearts: R30 and R20. I also added a little Clear Wink of Stella on the hearts to add a little shimmer.
 I used paper from the new-to-me My Mind’s Eye Lost & Found Record It! Double-Sided Cardstock 12″X12″- Heirloom Glamorous
, the matching Layered Stickers
, and Adhesive Enamel Dots
. I love the sparkle from the red glitter in combination with the vintage feel of the more muted colors. The main thing that took more time (other than drawing and cleaning up the digis) was the fussy cutting of that intricate lacy heart behind the elephant (I added clear Wink of Stella on the lacy part of this heart too).
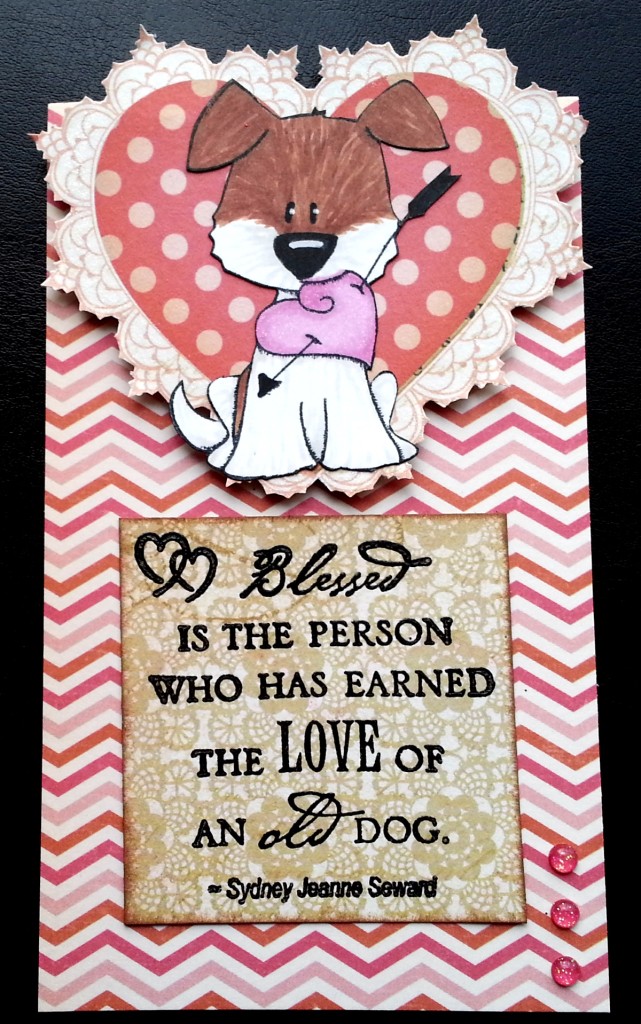
Because I couldn’t leave it at two non-doggy cards, I made an extra card with this adorable Tiddly Inks pup from the “I Wuf You” stamp set. I colored it up with Copic markers: E23, E25, and W1. The Sentiment is from one of my all time favorite sentiment stamp sets from Fiskars Cloud 9 Designs called “Simple Thoughts – Dog,” which was gifted to me by my crafty friend, Laura (YT: littleluluscraps). I used Memento Luxe Tuxedo Black Ink and clear Recollections embossing powder to lend a little elegance and shine to the sentiment, which reads: “Blessed is the person who has earned the love of an old dog. – Sydney Jeanne Seward” Again, to add a little extra shimmer, I used clear Wink of Stella on the heart in the dog’s mouth as well as on the lacy parts of the fussy cut heart behind the dog (yep, I cut out another one–LOL).
These cards are being entered into the following challenges:
CARDZ TV Any Occasion Challenge and
CASology NBUS Challenge
The dog card is being entered into the Tiddly Inks New Beginnings Challenge
Thanks for stopping by, and have a great day! WOOF
]]>
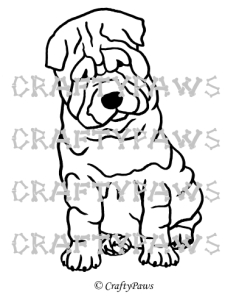 This digi is dedicated to a sweet princess who’s gone through some very trying times but has come out the other side as strong and beautiful as ever. My friend, Jamie (YT: ScrappinStampers and the owner of the Not2ShabbyShop on Zibbet) has an adorable Shar Pei who went through serious cancer surgery. With my Biscuit’s recent cancer scare, this hit very close to home. Happily, she is doing great after the surgery, and I wanted to draw this digi for all those dog lovers out there who love their fur babies like family members, and especially Jamie. 🙂
I know it is the holiday season and some folks might be wondering why I didn’t add a Santa cap or jingle bells or something, but I wanted to make this digi more versatile and usable year round.
For the card I made, I created a background using a stamped and stenciled background patterned paper created and gifted to me by my friend Rosa (YT: ColorXplosion by Rosa). I thought the primarily turquoise color matched well with the card base and helped the light browns of the Shar Pei pop nicely. I then hand cut a little snow ground (which I shimmered up using Clear Wink of Stella) around which I scattered bits of a snowman (LOL) from the Diemond Dies Build a Snowman Die Set.
Coupon code for Diemond Dies: “thankskristina” gets you 10% off your entire purchase, and if your order is $35 or more, you also get free worldwide shipping. PLUS Diemond Dies is having a fantastic Christmas Giveaway. Check it out HERE on their Facebook page!
I colored up the digi with the following Copic colors: Muzzle and paw pads: W5 and 7; Shar Pei: E50, 51, 53, 23; and Shadow in snow: C1. To add a little more realism, I also used Glossy Accents on the nose, eyes, claws, and paw pads of the Shar Pei and the discarded carrot. 🙂
Lastly I used a stamp from the C.C. Designs “Snarky Christmas” stamp set that says, “Dear Santa, define naughty…” I thought this was perfect for the expression and stance of the Shar Pei surrounded by the bits of the snowman.
The following is a video share of this card:
This card is being entered into the Naughty or Nice Winter Holiday Challenge
The winner of the Christmas Blog Candy Winner is: Barbara Alexander! YAAAAY!
Barbara Alexander commented: Congrats on all the subbies…love this cute little kitty..hugs barb
Thanks for stopping by and have a great day! WOOF
]]>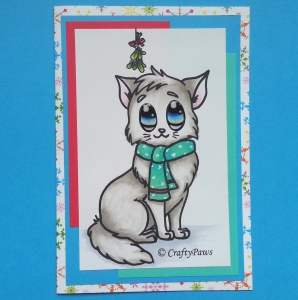 I colored her up with the following Copic markers: Fur: W1 and 3; Ears: RV00; Eyes: B21, 24, 18 and G40; Scarf stripe: R08; Scarf: BG23 and 45; Mistletoe: YG13 and 17; Red bow: R08. The colors are totally influenced by the beautiful card created by Kristie Marcotte in her OWH Red Friday Blog Hop card. I just loved it and was thinking of it when I created this loving kitty card. 🙂
I also used a White Sakura Gelly Roll Medium Point Gel Pen, to clean up the white berries on the mistletoe as well as draw in the little hearts on the kitty’s scarf. This is by far my favorite white pen, and I’ve linked to where I’ve found it for the best price (Amazon). To give a shimmery look to the scarf, I also coated it with Clear Wink of Stella
. There is a special Christmas 3 pack of Silver, Gold and Clear Wink of Stella at a great price HERE
. Lastly, I added a nice shine to even further accentuate the big sweet eyes of the kitty with Ranger Inkssentials Glossy Accents.
Hope you like “PURRker Up” as much as I enjoyed drawing her up to share with you.
This card is being entered into the following challenges:
Simon Says Stamp Monday Holiday Cards Challenge
Simon Says Stamp Wednesday Christmas/Holidays Challenge
Naughty or Nice Winter Holiday Card Challenge
The Aviary Holiday Challenge
OWH Red Friday Blog Hop
Thanks for stopping by and have a great day! WOOF
]]> I started with the same star burst background and picked another stamped image that looked like me and Bandito. This stamp is by A Random Fan and is called “Wanderlust,” and I think it is absolutely adorable! I paper pieced the Vespa, the girl’s goggles, and the girl’s skirt and scarf using small scraps from my scrap box. HINT: The key to creating a realistic look with paper piecing is to first color all the areas of the image that you are not going to paper piece. Then make sure you add shadows to those tiny paper pieces. Fussy cut them out and then edge each piece with black marker (I use a Faber-Castell PITT artist pen in SB size to do the edging). Finally adhere the paper piecing to the underlying image. The order of this process is important to create a finished look and not create any muddy areas; if you shade after edging the black marker may leach into the shaded areas.
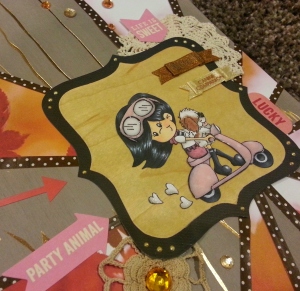 Because there wasn’t a poodle I could add readily to the stamped image that would make sense, I used a white poodle sticker that I had from Sandylion Essentials, colored it up to look like my Biscuit, and added it to the layout as the main part of the the secondary cluster. The Copic colors I used are: Skin: E50, 51, and 53 with R20 for blush; Vespa and goggle shading: C1 and 3; White shirt shading W1 and 3; Hair: C7, C9 and B32; Boots and Vespa tires: C5, 7, and 9; Brown and white dog fur: E23, E25, W1 and W3 with R20 for blush and tongue; and Poodle fur: E31 and 33. I put a coating of Glossy Accents on the Vespa and the girl’s goggles and a lot of clear Wink of Stella on the heart puffs of exhaust to add some shine and shimmer.
The stamped image was relatively small for the layout and I wanted it to stand out from the busy background so I created a framed area using the Diemond Dies Labels 2 Nesting Die Set with some black card stock and wood veneer paper. I love the way the wood veneer contrasts but reflects the faux bois patterned paper with the foiled gold in the background. To carry the golden elements throughout the layout, I also added little drops of gold Liquid Pearl around the black frame and added orange and champagne gold rhinestones in clusters around the layout. Check out the SALE at Diemond Dies (through November 2014)!!! Currently everything in the store (except the latest release) is 10% off or more. The Labels 1 Nesting Die Set and the Fishtail Banners Nesting Die Set are 20% off. Plus if you use the coupon code: “thankskristina” you get and EXTRA 10% off of the sale prices and free worldwide shipping on orders of $35 or more!
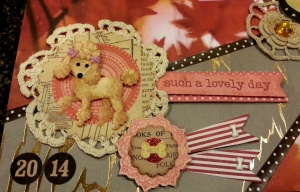
I wanted to add some softness to the layout so I picked out three crocheted doily flowers in cream, which I layered with stickers, rhinestones, and/or tucked behind the main framed image. I also had fun picking out some dimensional stickers from the My Mind’s Eye’s Lost & Found “Record It” collection and the Jillibean Soup’s “Birthday Bisque” collection. Lastly I had some satin ribbon salutation banner doggy stickers by Offray that seemed perfect for this layout. One says “Pooch Patrol” and the other says “Canine Companion.” How cute is that?
The following is a video share of this layout:
This layout is being entered into The Pink Elephant Anything But a Card Challenge
Thanks for stopping by. Please subscribe if you wish, and have a great day! WOOF
]]>
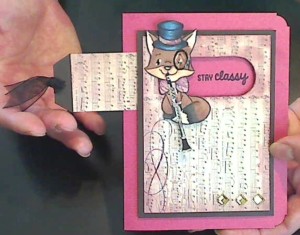 I followed a tutorial by Sandy Allnock for this peekaboo card. Rather than stamping out background papers like Sandy did, I used musical paper from the Lost and Found Two paper stack, inking around the edges to distress everything with Victorian Velvet Distress Ink.
I have been wanting to use this Some Odd Girl Hipster Pets stamp set for a while now, and I thought this classy but super cute fox with a top hat, a monocle, and a bow tie, would be a great focal point for this interactive card. I stamped out the fox and his accessories, colored them up with the following Copic markers, and fussy cut everything out. Top hat: B95, 97, 39 and N10; Dark part of fox: E25, and 23; Light part of fox: E21 and 23; Fox feet and middle of tail: W9 and 7; Tip of tail and inside of ears: W1 and R20. I paper pieced the sash on the top hat and the bow tie from some scrap patterned paper and used clear Wink of Stella on them to add shimmer. Finally I added highlights on the monocle, nose and eyes using my white Gelly Roll pen and Glossy Accents over the monocle, eye, and nose to add shine.
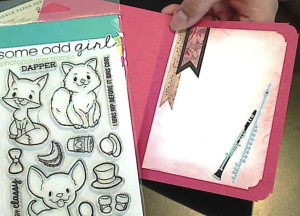 Some finishing details include adding amber square bling to the lower front right of the card, reinforcing the tag with dark brown cardstock (the same that I used to back the musical paper background) before adding sheer black ribbon, rounding two of the card corners (and the liner paper) using my deco Crop O Dile, and distress inking the edges of the white liner paper that I added in order make note writing easier and more legible.
The following is a video sharing this card:
This card is also being added to the Naughty or Nice Challenge #7 Anything Goes,
The Simon Says Stamp Monday Scratched Up Challenge, and
The Simon Says Stamp Work It Wednesday Blue Challenge
This post is being edited to add (ETA) to be entered into the Moxie Fab World Foxes Challenge!
Thanks for stopping by! Please subscribe if you wish, and have a great day! WOOF
]]>
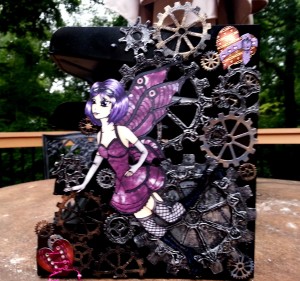 The colors I chose to color the two Steampunk Fairy images, which you can download for free on the Digi Page, came from a Jolees Boutique Steampunk hearts stickers pack. The hearts were fantastic, and helped carry the color scheme through the project without distracting from the focal point Steampunk Fairy images.
For the red violet haired Steampunk Fairy, I used a paper from the DCWV One Upon a Time paper stack to paper piece the dress and wings, shading with W1 and W3 directly on the patterned paper to add depth. I used the following Copic colors. Hair: YR00, RV10, RV34, RV66, RV69 and E79. Fishnet stockings and gloves: W1, 3, 5, and 7. Eyes: YG 95, 97. Boots and goggles: C1, 3, 5, 7, 9. Skin: E50, 51, and 53 with R30 for blush. The “skeleton” of her wings were colored with W9. I added a lot of shimmer to the full body of her wings with clear Wink of Stella.
For the purple haired Steampunk Fairy, I used paper from the DCWV Tie-Dyed Stack and used the following Copic colors. Hair: V15, V17, BV08 and 10o. Eyes B34 and B97. Fishnet stockings and gloves: W1, 3, 5, and 7. Boots and goggles: C3, 5, 7, 9. Skin: E 50, 51, and 53, with R30 for blush. I added shimmer to the “skeleton” of her wings and the straps and lace on her dress after I colored them with W9 with clear Wink of Stella.
 For both Steampunk Fairies, I added shine and gloss to the lenses of the goggles, the eyes and high boots with Glossy Accents.
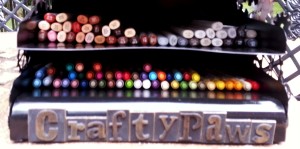
I also added my name to the front of the storage unit with my Tim Holtz Grunge Board typeset style letters so that the unit can double as a name sign. You can find the tutorial for how to use those letters from the kit HERE.
The video share of the whole project follows:
DISCOUNT!: While I am a Diemond Dies Guest Design Team member, you can enjoy 10% off your entire order (including sale items) and free worldwide shipping on orders over $35 by using the code: thankskristina
Thanks for stopping by and have a great day! WOOF
]]>