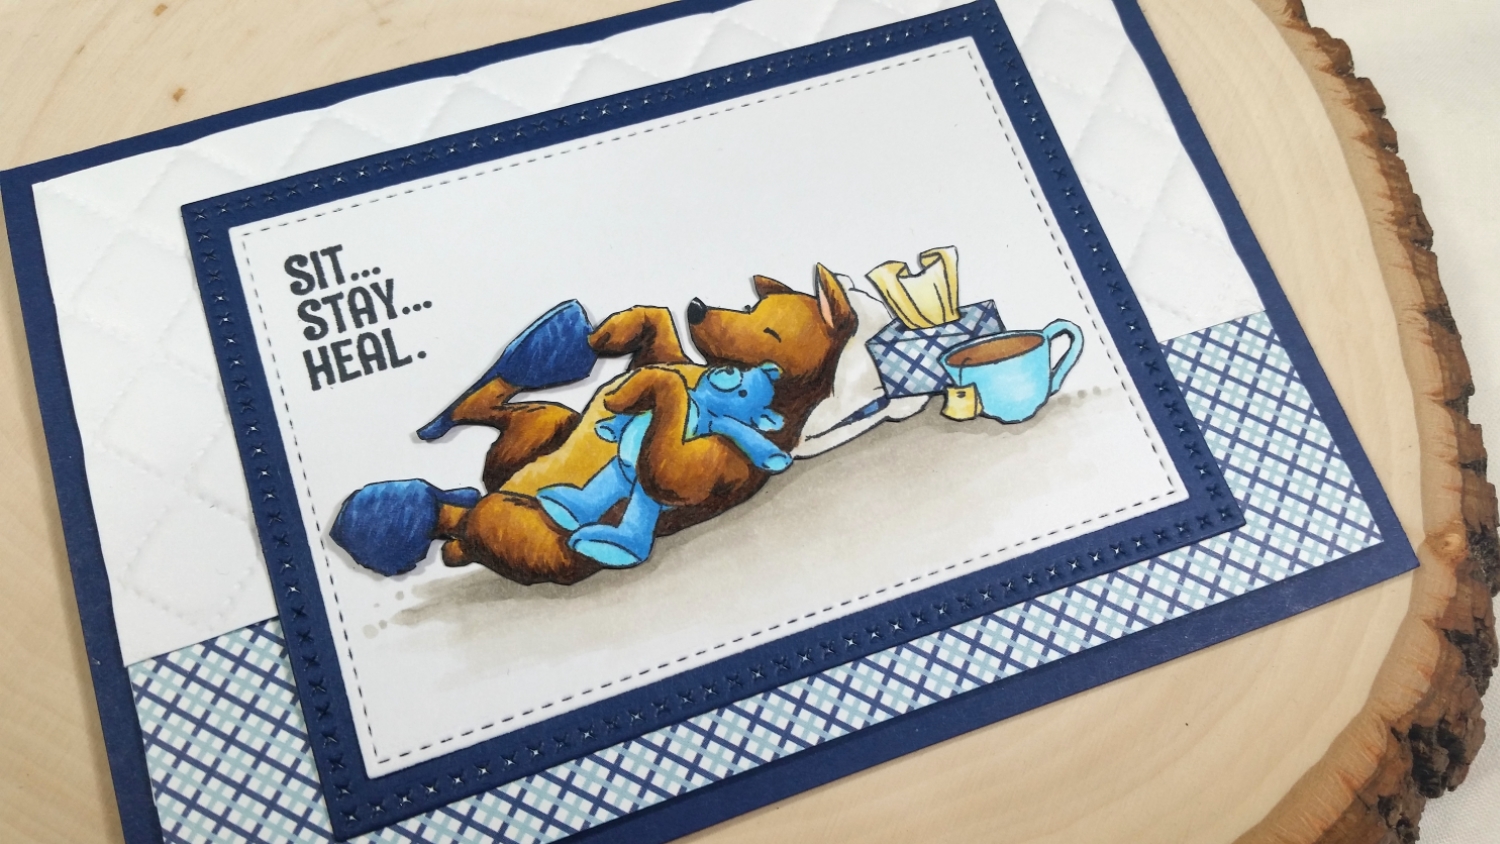
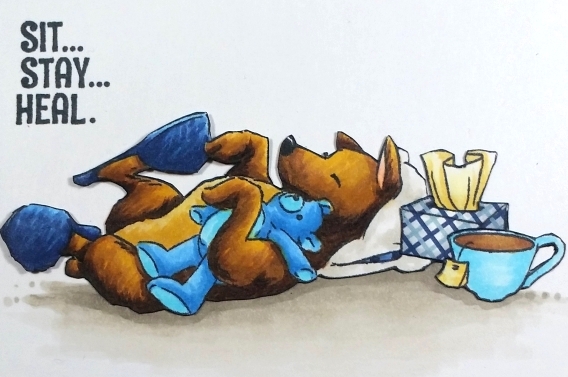
I stamped out the tissues and tea cup first, then masked that and stamped out the sweet pup napping with it’s teddy. Then I used the following Copic colors to color up this little scene:
 Dog: Y00, Y21, Y26, E31, E55, E57, E59 and R30
Tea: E55 and E23
Tissue and tea bag: Y00, Y21 and W1
Tea cup and teddy bear: B00, B01, B12 and B14
Slippers and pillow interior: B12, B34, B37 and B39
Pillow and floor: W0, W1 and W3
I fussy cut out the little scene, including paper piecing the tissue box with a blue plaid patterned paper from the My Mind’s Eye Moments Paper Pad. For the scene background, I used the second largest die from the My Favorite Things Die-Namics Stitched Rectangles Die Set to cut out a piece of white card stock. I glued down the fussy cut scene, except for the puppy’s raised paw and slippered feet, which I popped up on double sided foam dots for a little extra dimension and interest. I also stamped out the sentiment, “Sit…Stay…Heal.” from the stamp set in the upper left corner. 🙂
To frame out the scene, I used the largest die from the My Favorite Things Die-Namics Cross Stitched Rectangles Die Set to add a cozy textured layer in dark blue. To add continuity, I used more of the blue plaid patterned paper on the lower 1/3 of the card front. Then for the top 2/3 of the card front, I wanted to keep it bright but add more cozy texture, so I ran a piece of white card stock through my Big Shot with a We R Memory Keepers Next Level Quilted embossing folder.
The following is a Copic coloring and paper piecing process video for this card:
Disclosure: Many of the supplies I’ve used for today’s project are linked. Some may be affiliate links, which means if you make a purchase I receive a small commission at no extra cost to you. I truly appreciate your support toward the costs of running this blog!
This card is being entered into the following challenges
Art Impressions Anything Goes Challenge
Card Mania Monochromatic Challenge – blues
CASology Hugs Challenge
Simon Says Stamp Monday Winter Blues Challenge
Simon Says Stamp Wednesday Patterned Paper Challenge
Creatalicious Anything Goes with Optional Wish Challenge
Word Art Wednesday Anything Goes Challenge
Lil Patch of Crafty Friends Anything Goes Challenge
613 Avenue Create Anything Goes with Optional Twist Something New Challenge
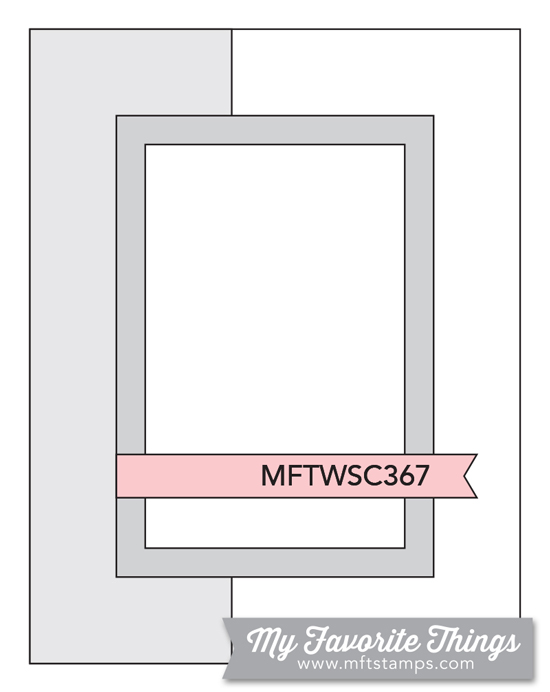
MFT Sketch Challenge #367
]]>
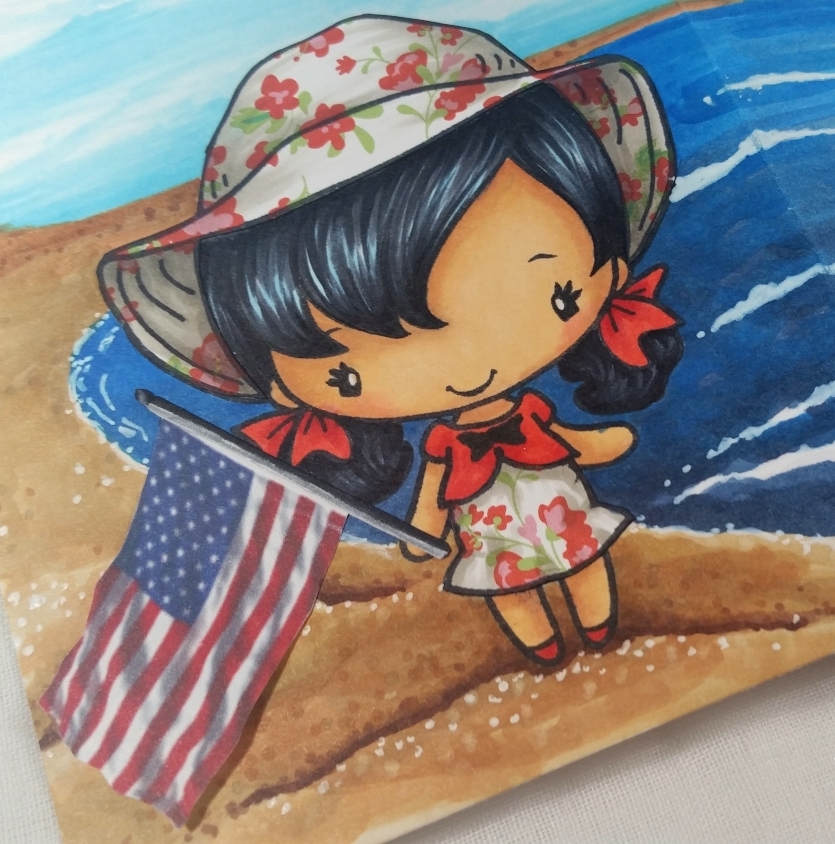 Well, of course I wanted to make a special card so I decided to create patriotic and summer beach-y scene card with a cutie representing my friend who lives in the U.S. on one side a senior cutie representing her grandmother on the other side.
I printed out U.S. and South Korean flags from my computer and fussy cut them out so the ladies could each hold a flag showing where they are. I glued down the staffs and popped up the ends of the flags with double side foam dots for a bit of dimension (I don’t want too much dimension since this will have to be mailed to South Korea).
While an ocean separates them, they are joined in love. The sentiment is stamped out with Hangul alpha stamps, and says “Congratulations!” and “I love you!” in Korean. I doodled some wonky hearts with a Black Copic Multiliner Pen in 0.03 and 0.1 pt to fill out the off-kilter sentiments (the Hangul alpha stamps are very blocky and had a childish crooked look so I thought these hearts added to that free spirit).
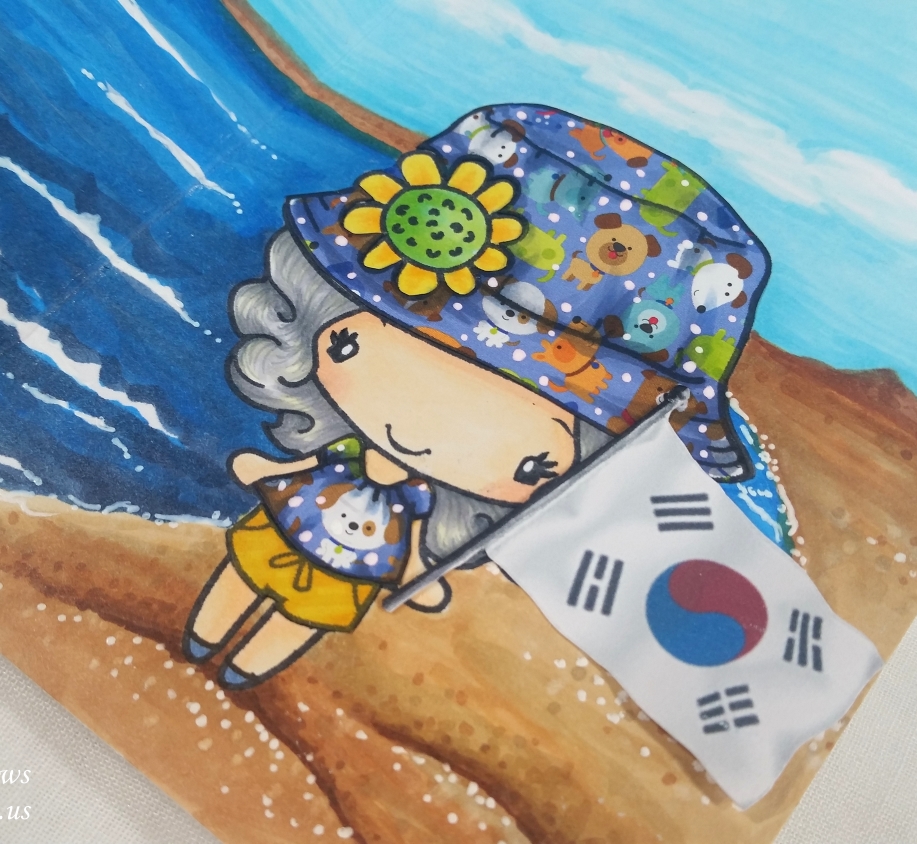 I Copic colored the ladies, who are from The Greeting Farm’s “Sunny Kit”, and I paper pieced their hats and outfits with papers from American Crafts “Spring” collection and the Doodlebug Designs “Puppy Love” collection. For the puppy paper, I also added some white Gel Pen dots to brighten up the patterned paper a bit. I used the following Copic colors:
Young girl: Hair: B01, C7 and C9; Skin: E51, E21, E53, E11 and R20; Bows and jacket: R14 and R27; Shading on paper pieced hat and dress: W1, W3 and W5
Senior lady: Hair: Y00, W1, W3 and Warm Gray Copic Multiliner Pen for detailed strands; Skin: E00, E50, E51, and R30; Shading for Hat and top: B45, C3, and C5
As you may have noticed, I slightly altered the stamped images to remove the bare midriff of the younger girl and eliminate the stripes and adding short sleeves for the older lady. Since this is a birthday card for a 99 year old, I thought making the outfits a bit more modest would be the way to go. 🙂
For the scene, I used lots of Copic colors to create two coasts for the ladies to stand on, an ocean to separate them, and a sky that connects them all together. These are the colors I used:
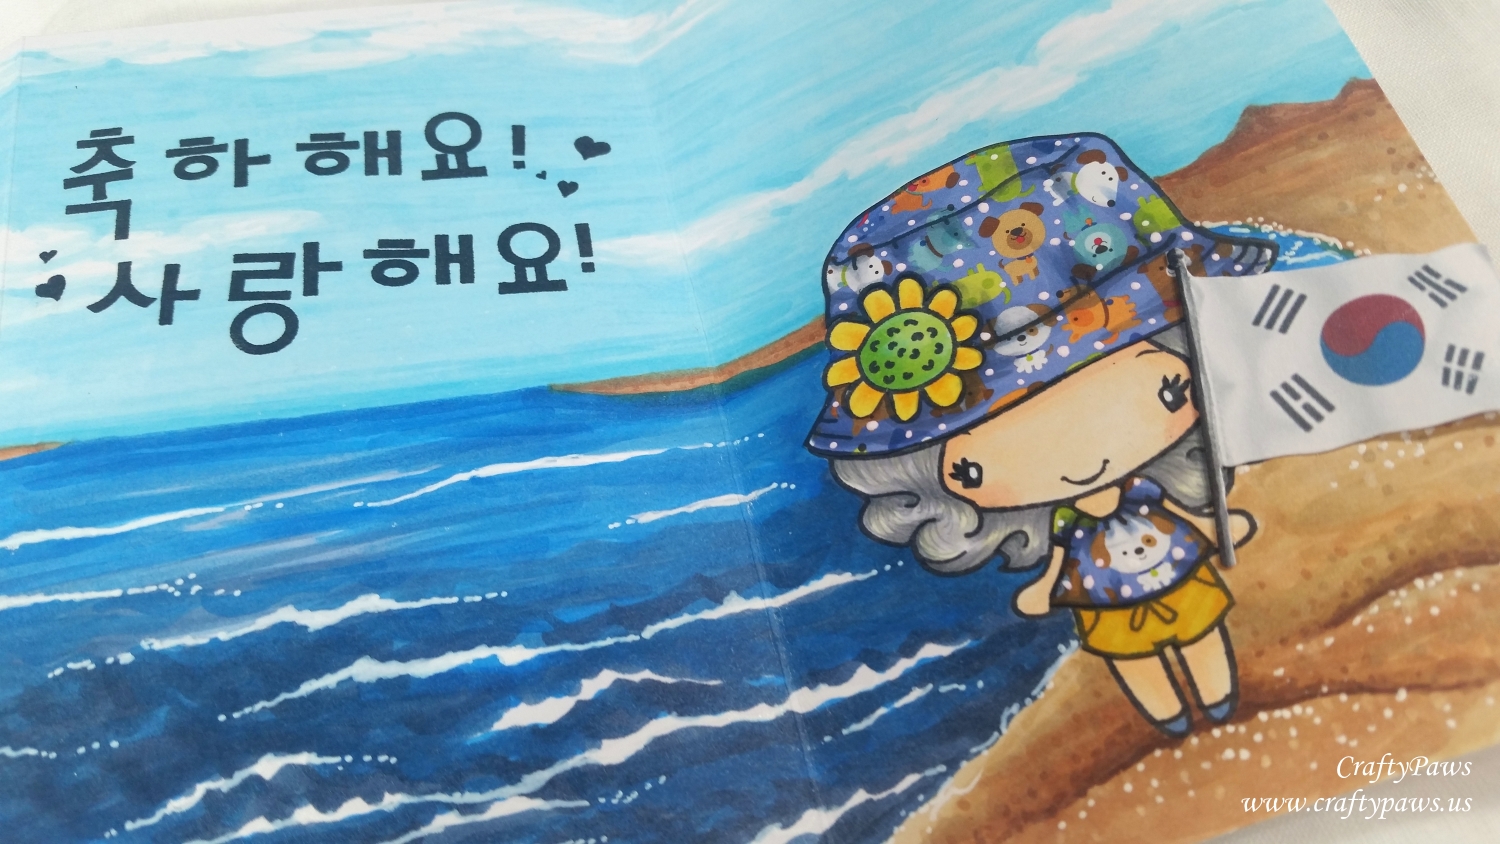
Coasts: E31, E33, E41, E43, E55, E25 and Stabilo Uni-ball White Gel Pen for extra highlight dots for sandy texture
Ocean: B93, B06, B95, B97, B99 with the bare white card stock and added Stabilo Uni-ball White Gel Pen highlights for the foaming waves
Sky: Bare white card stock left for clouds and B000, B00 and B01
The following is a video sharing the card and includes a tutorial on how to paper piece stamped images with patterned paper:
This special birthday card is being entered into the following challenges:
The Greeting Farm Farm Fresh Summer Fun Challenge
Simon Says Stamp Work It Wednesday Summer Challenge
Simon Says Stamp Wednesday Anything Goes Challenge
Creatalicious Anything Goes Challenge with Optional Red White and Blue
Word Art Wednesday Anything Goes Challenge
Through the Craft Room Door Anything Goes Challenge
Crafty Gals Corner Anything Goes Challenge
MarkerPOP Summer Fun Challenge
]]>
 fully brighten their day, let them know they are loved and in our thoughts and prayers, and be useful too!
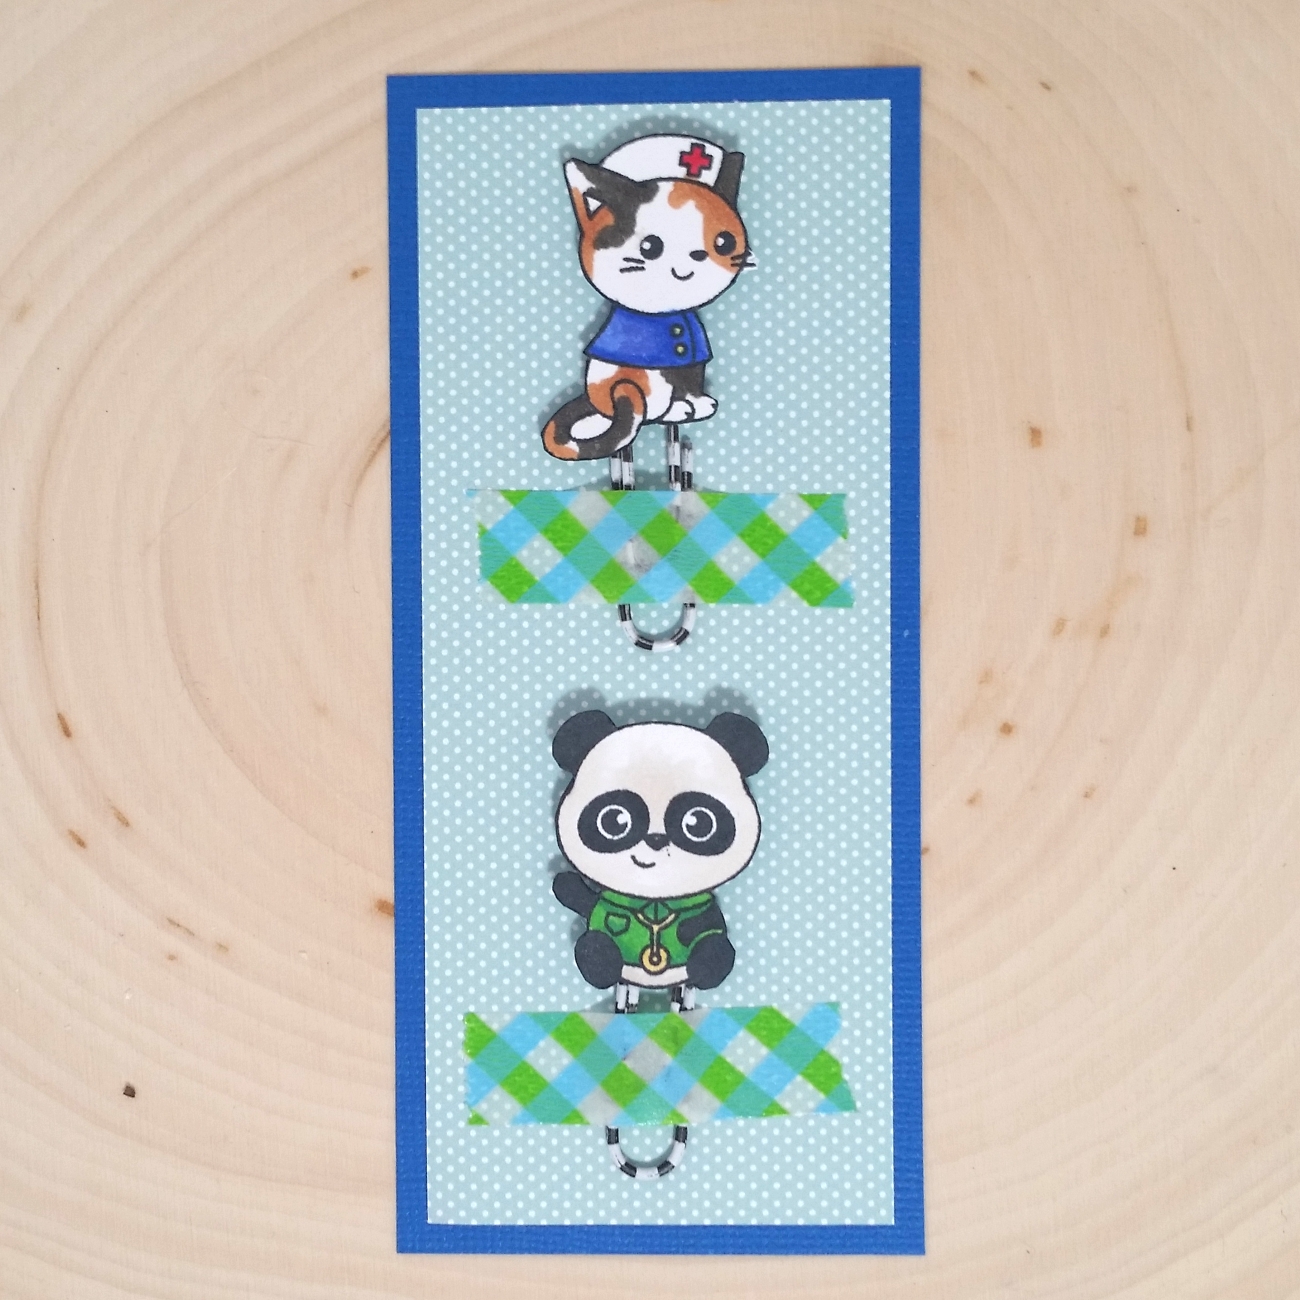
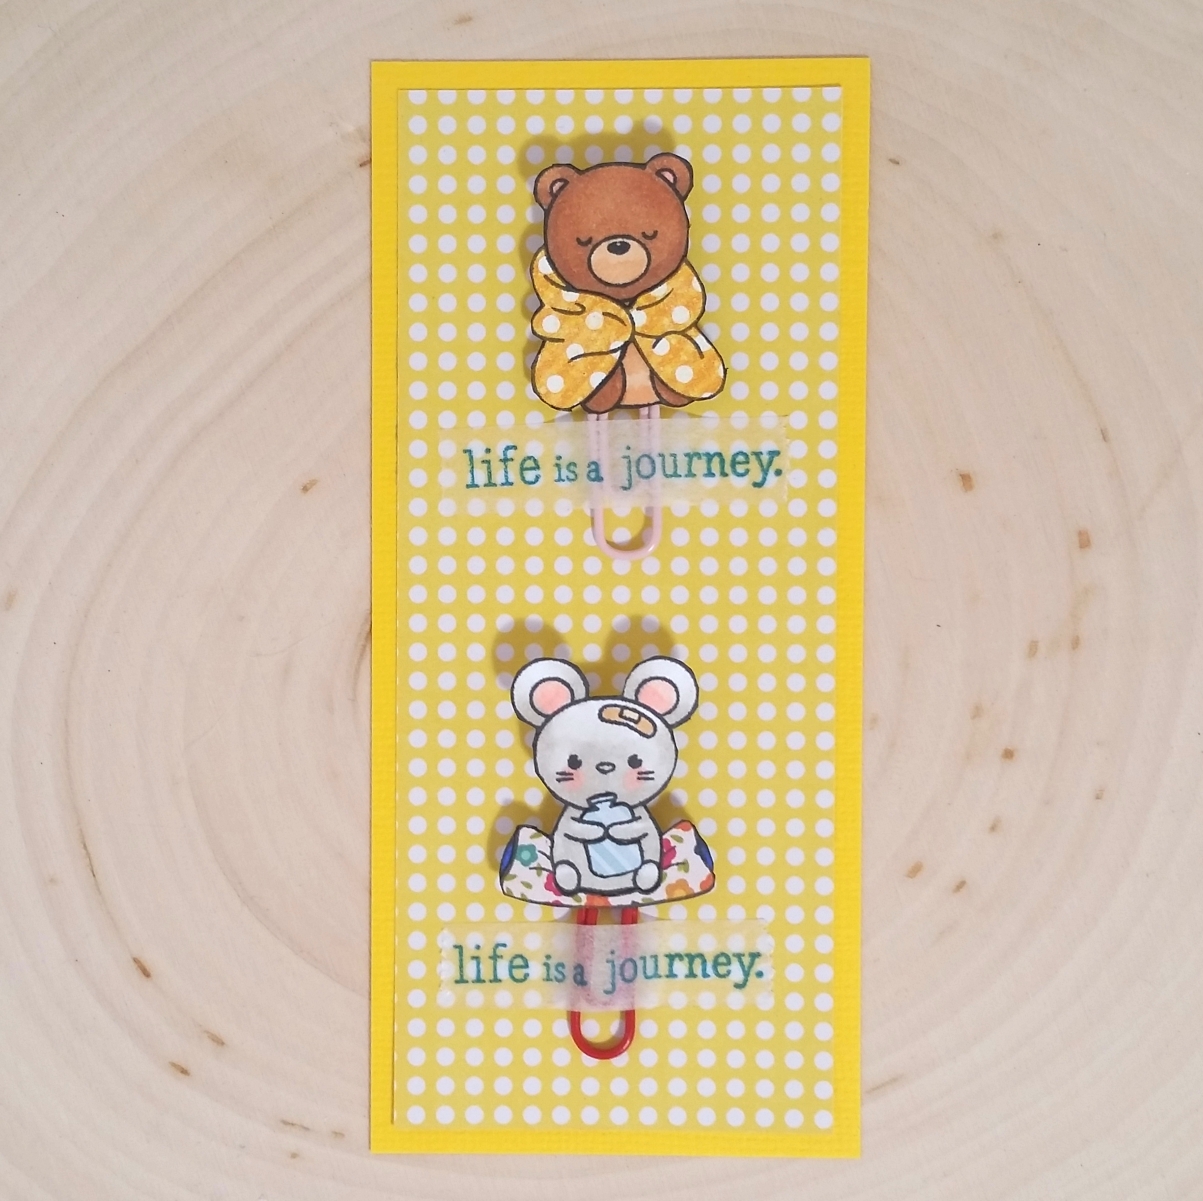
I had been gifted from a wonderful crafty IG friend, Mandy (@littlespaceofmyown), adorable critter stamp sets from Clearly Besotted, called “Hooray for Heroes” and “Under the Weather” that I thought would be perfect for this project. I colored each critter up with the following Copic colors:
Panda doctor: G14, G17, W0, W1, and YR31
Kitty nurse: E23, E33, W7, B21, B66, B29 and R29
Sleeping bear under gingham blanket: E23, E25, and R20
Sitting bear in yellow polka dot blanket: E33, E23, and E53
 Giraffe with thermometer: E51, E21, E53, E23 and E25
Mouse with hot water bottle: W0, W1, R30, and R20
Using up a variety of brightly patterned paper scraps, I also paper pieced the blankets, cushion and water bottle of the 4 Under the Weather critters. I wanted these paper clips to be cheerful and uplifting and I thought using these bright papers would help accomplish that.
After fussing cutting all the critters and their paper pieced accessories, I edged each piece with Momento Tuxedo Black Marker to give a nice finished look. Then I hot glued each completed critter onto a paper clip, backing each one with coordinating patterned paper for stability.
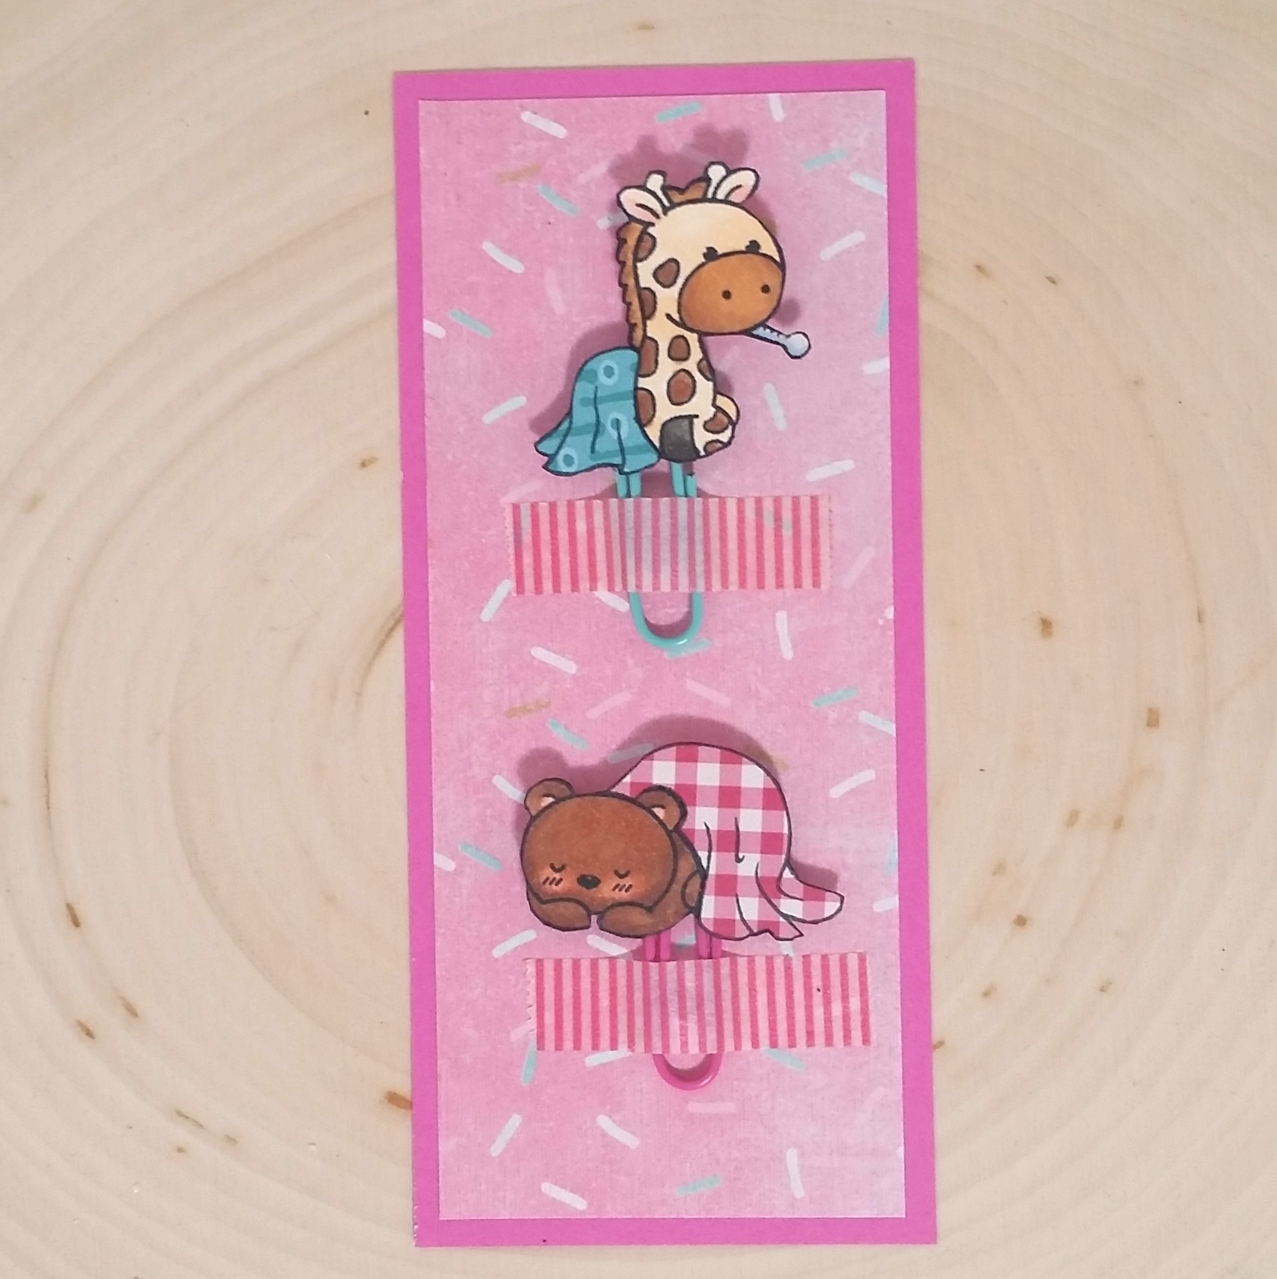
Then I took the extra step (which I rarely do) to try to package up these paper clips on pretty patterned and polka dot paper scraps that I matted with sturdy matching card stock. All of them were finally adhered with fun washi tape, which could be removed for use.
The following is a video share of this project made with love:
These paper clips are being entered into the following challenges:
Simon Says Stamp Wednesday For a Special Girl Challenge
Lil Patch of Crafty Friends Anything Goes Challenge
Word Art Wednesday Anything Goes Challenge
Crafty Purple Frog Love is All Around Challenge
Crafty Gals Corner Polka Dots or Stripes Challenge
Addicted to Stamps and More Make Your Mark Challenge
Penny Black and More Anything Goes Challenge
613 Avenue Create Anything Goes with Optional Rubber Room – No Digis Challenge
Crafts Galore Encore Anything Goes Challenge
Through the Craft Room Door Anything Goes Challenge
]]>
There are so many Copic colors I used so please forgive any omissions, but here is a general list:
Skin:
Option 1 (medium pink undertone): E00, E21, E11, and R20
Option 2 (yellow and shadowed undertone): E50, E51, E21, BV000 and R20
Option 3 (darker tan): E51, E53, BV00 and R20
Option 4 (simple and palest): E50, E51, E53 and R20
Hair:
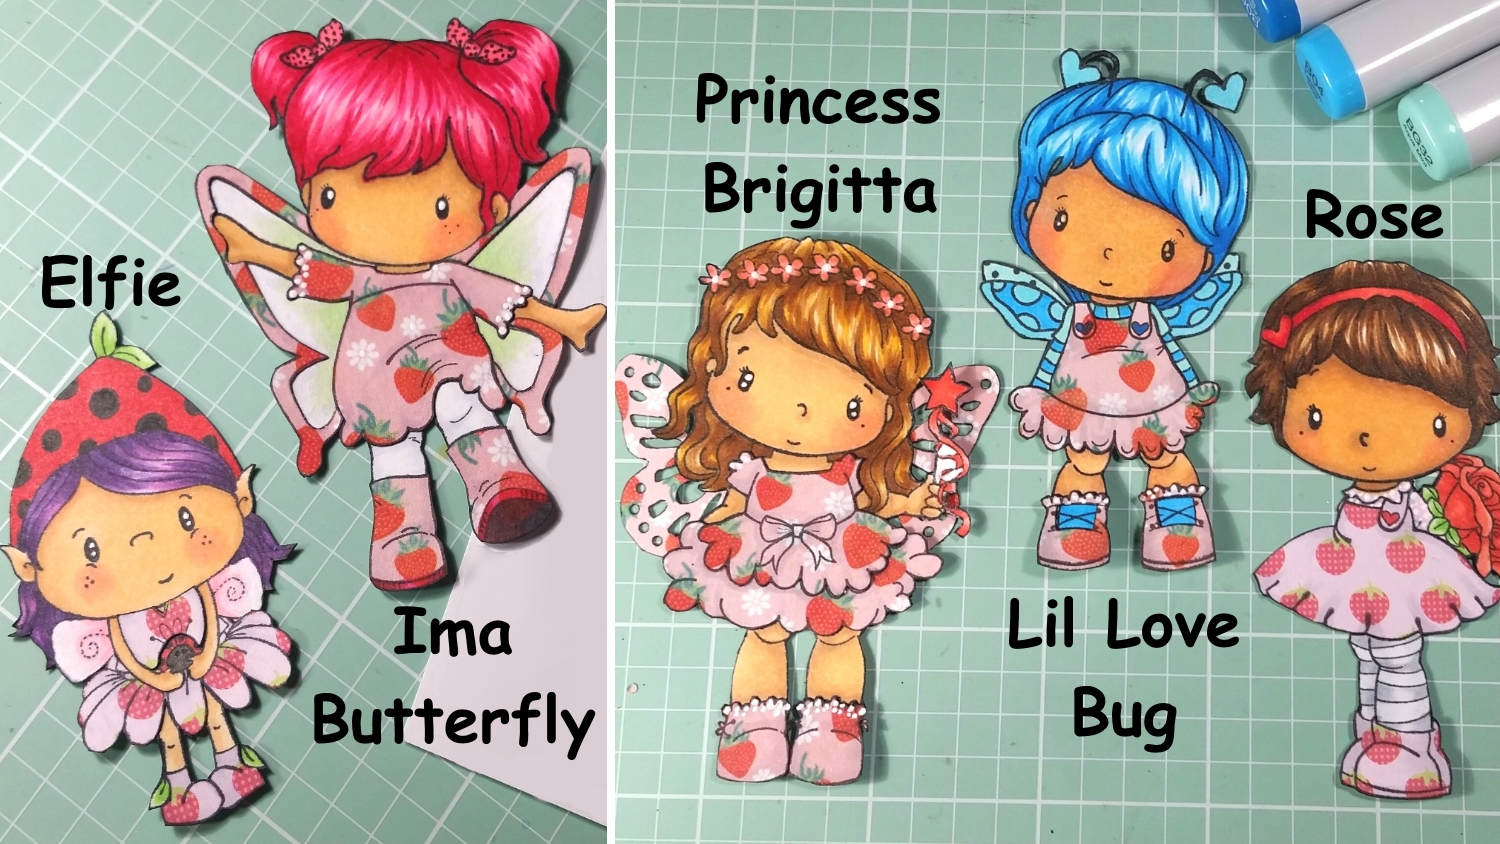
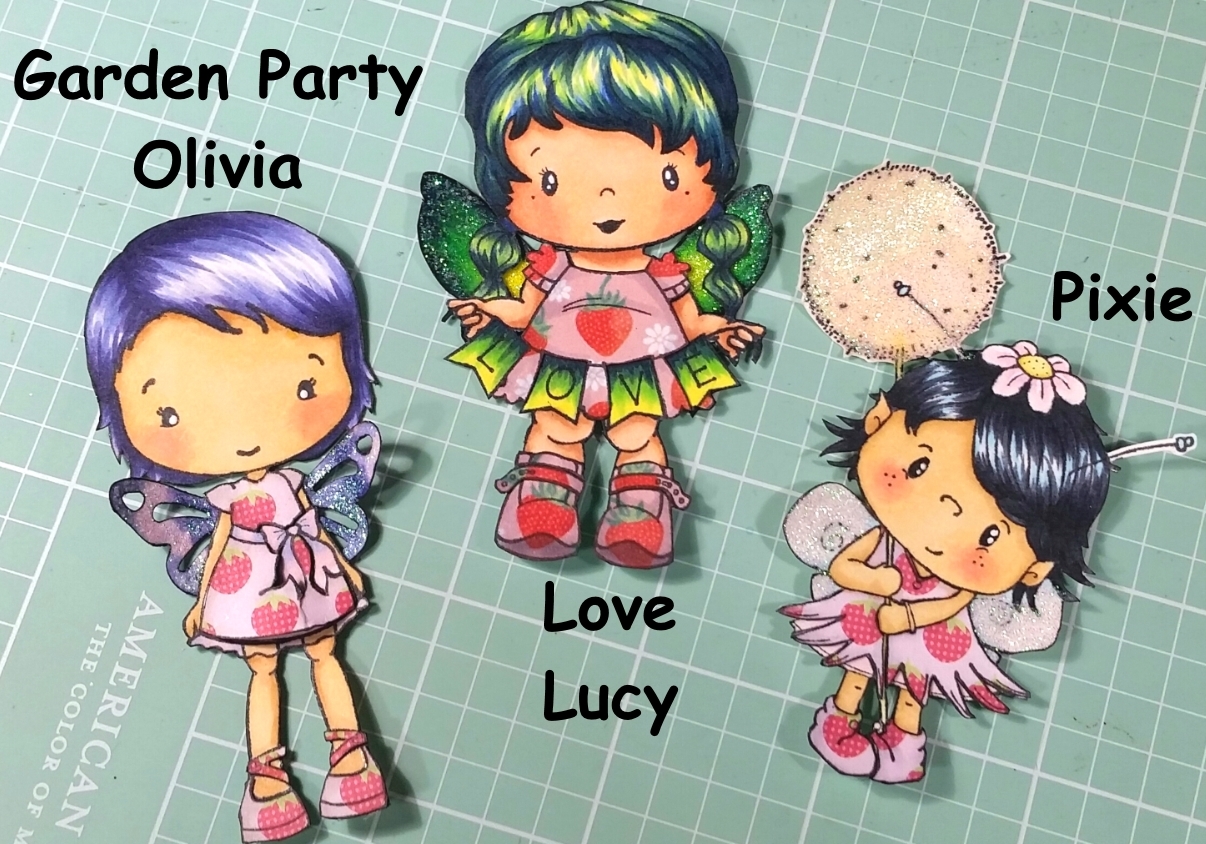
Garden Party Olivia: BV00, BV02, BV04, BV08, and RV02
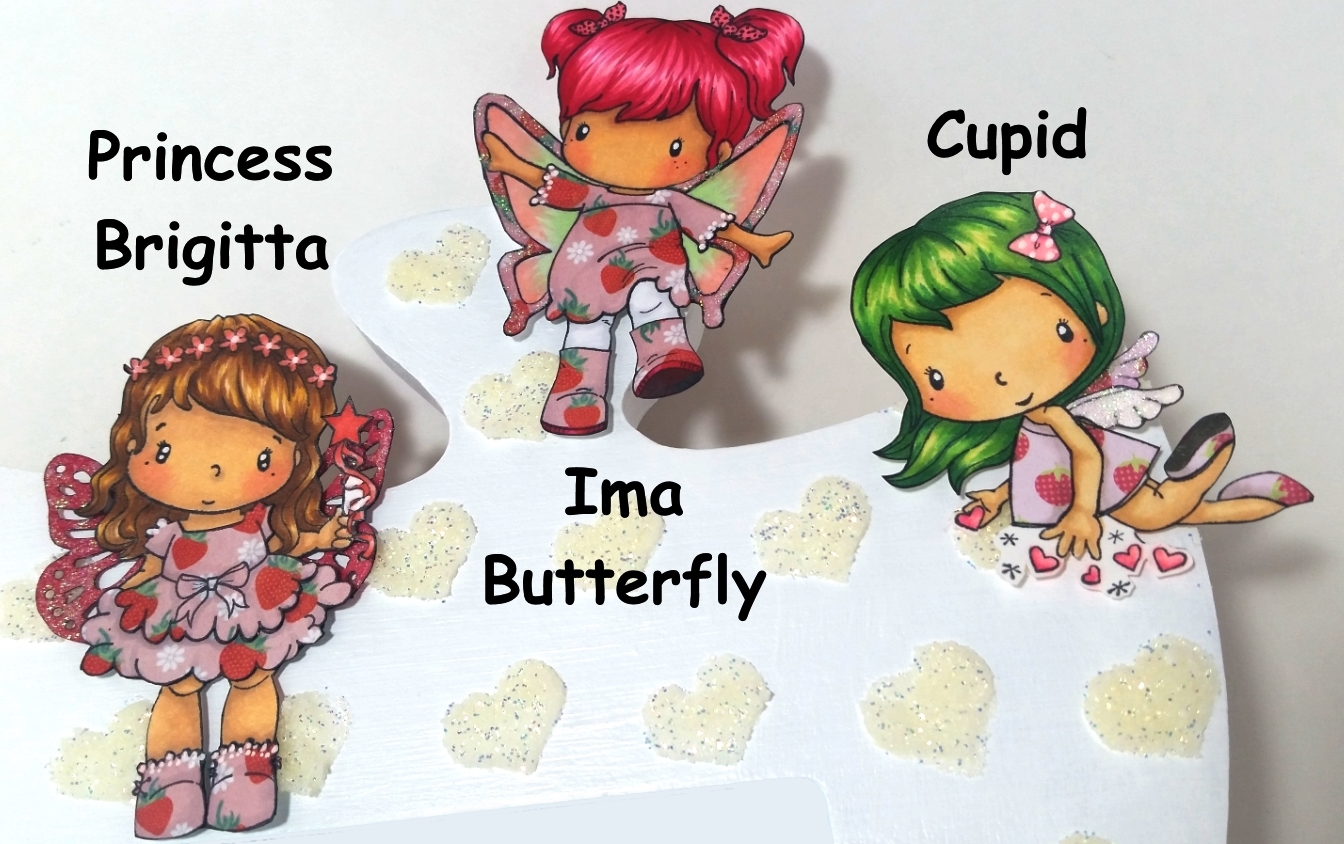
Princess Brigitta: YR20, YR24, E35, and E37
Ima Butterfly: RV21, RV23, RV25 and RV29
Cupid: YG01, YG11,YG25, YG17, G14, G17 and Y02
Sweetheart: Y00, Y15, Y17, YR16 and YR07
Cupcake Brigitta: R32, R33, R37, R39 and W7
Lil’ Love Bug: B000, B01, B04, B06, BG32 and BG45
Pixie: C7, C9, B00 and B01
Love Lucy: Y02, YG07< G09< B34, B37 and B39
Elfie: V12, V05, V17 and V09
Rose: E55, E57 and E59
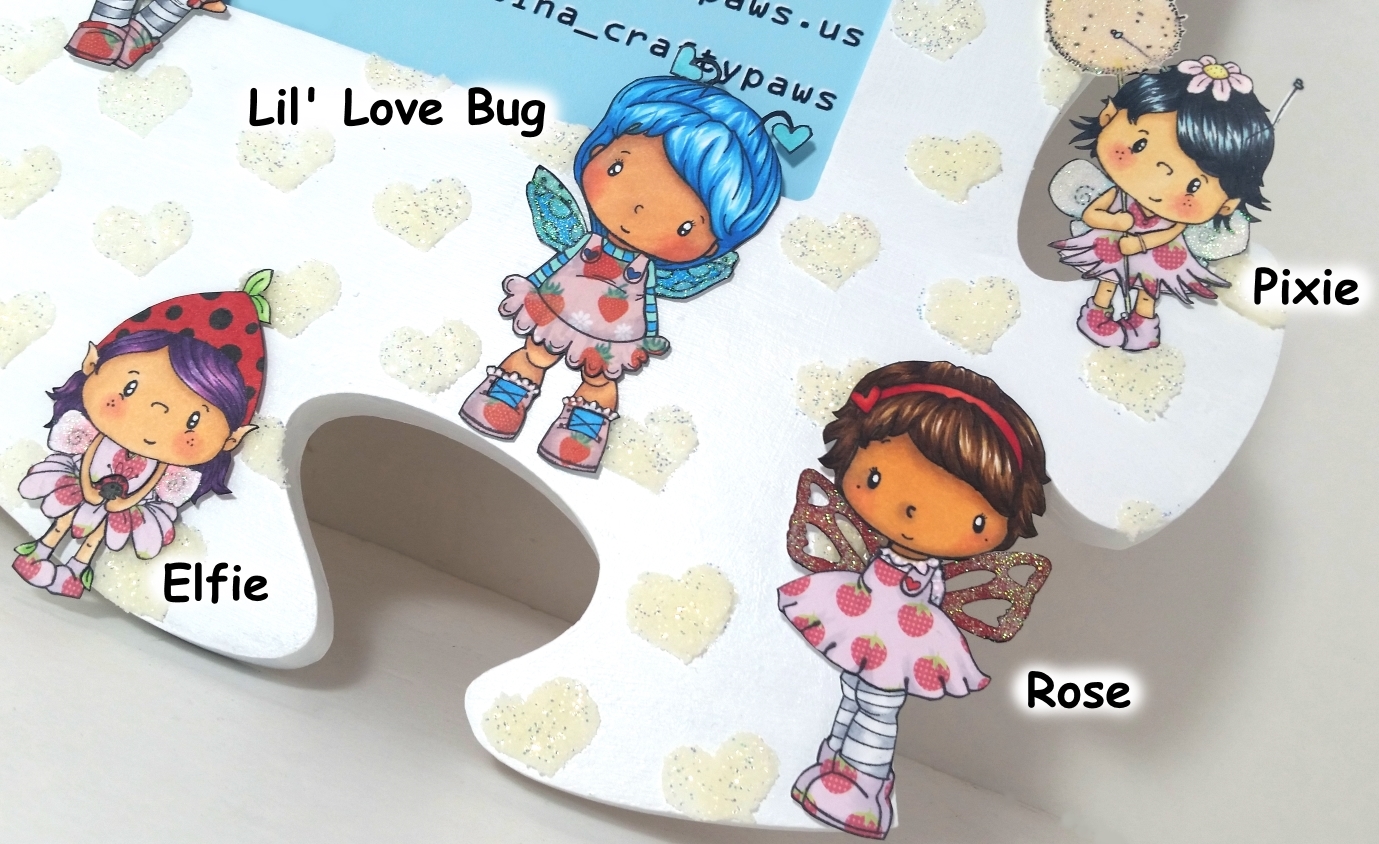
Some of these images were pixies and fairies, but others were little girls. Inspired by the children’s book series called The Rainbow Fairies, I made them all into fairies by adding butterfly wings various Martha Stewart butterfly punches or drawing and cutting out my own to add to them. To add a bit of magic to their wings, I topped all of them with Studio G glitter glue. I also used some old scraps of strawberry print papers to paper piece all of their dresses and shoes–I wanted to make them all cohesive this way since I went to town on all their wild hair colors.
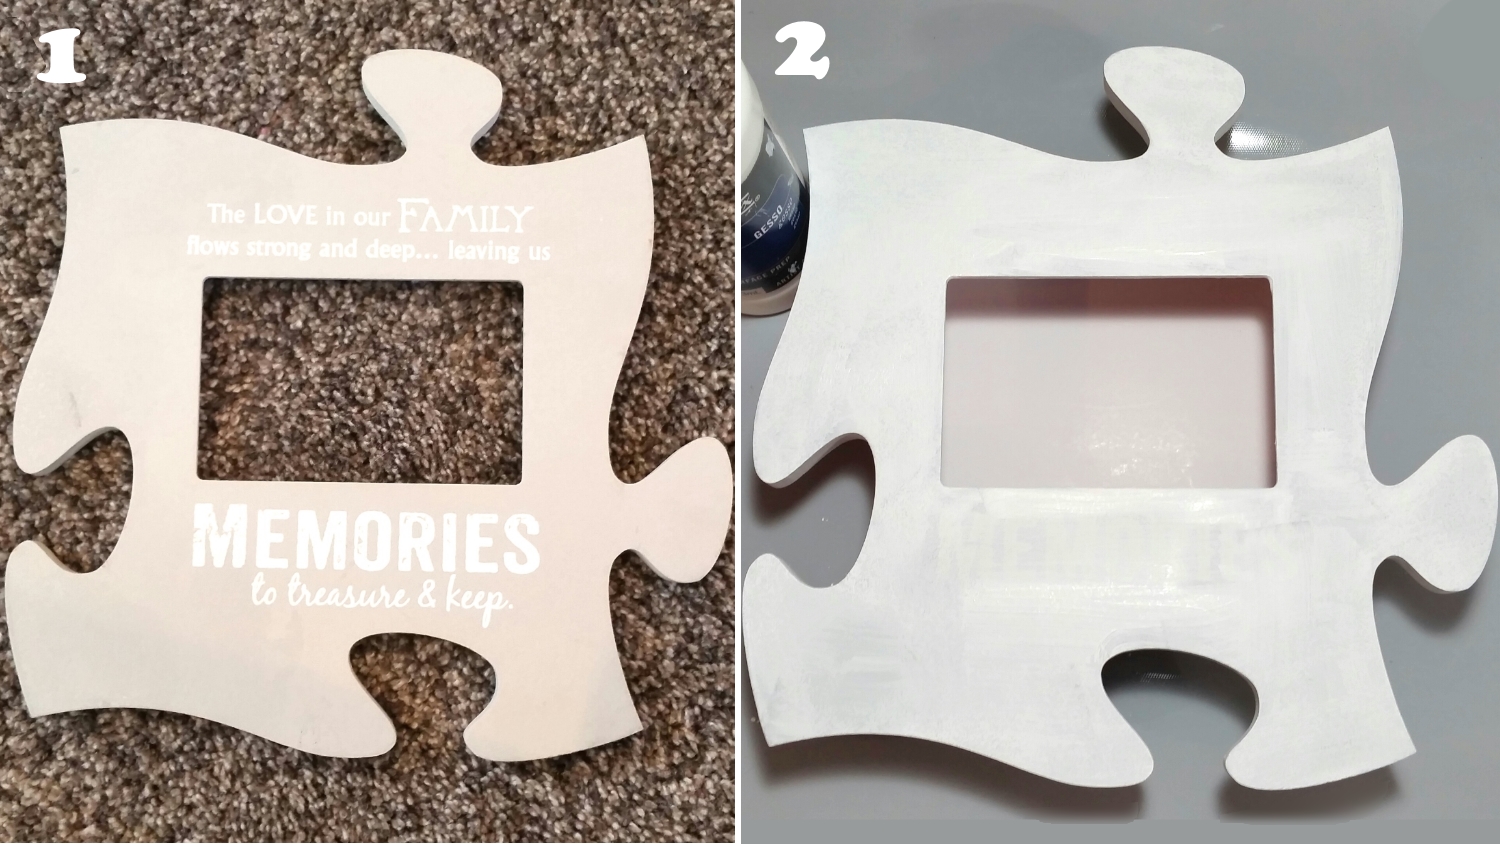
When I first started this project I didn’t know how I would use all these fairies (remember, this was just an attempt to jump-start my crafty mojo when I started). When Mr. CraftyPaws saw all of them, he said they needed to go on a white background so they could pop and be appreciated for all their color and detail. I remembered an old puzzle-piece shaped frame that I had found at a thrift store a couple years ago (one of the benefits of cleaning/organizing the ol’ office/studio) and decided this would be a great time to upcycle that hoarded (erm, forgotten) piece. I figured all the fairies could be loving on and protecting whatever is pictured in the photo window.
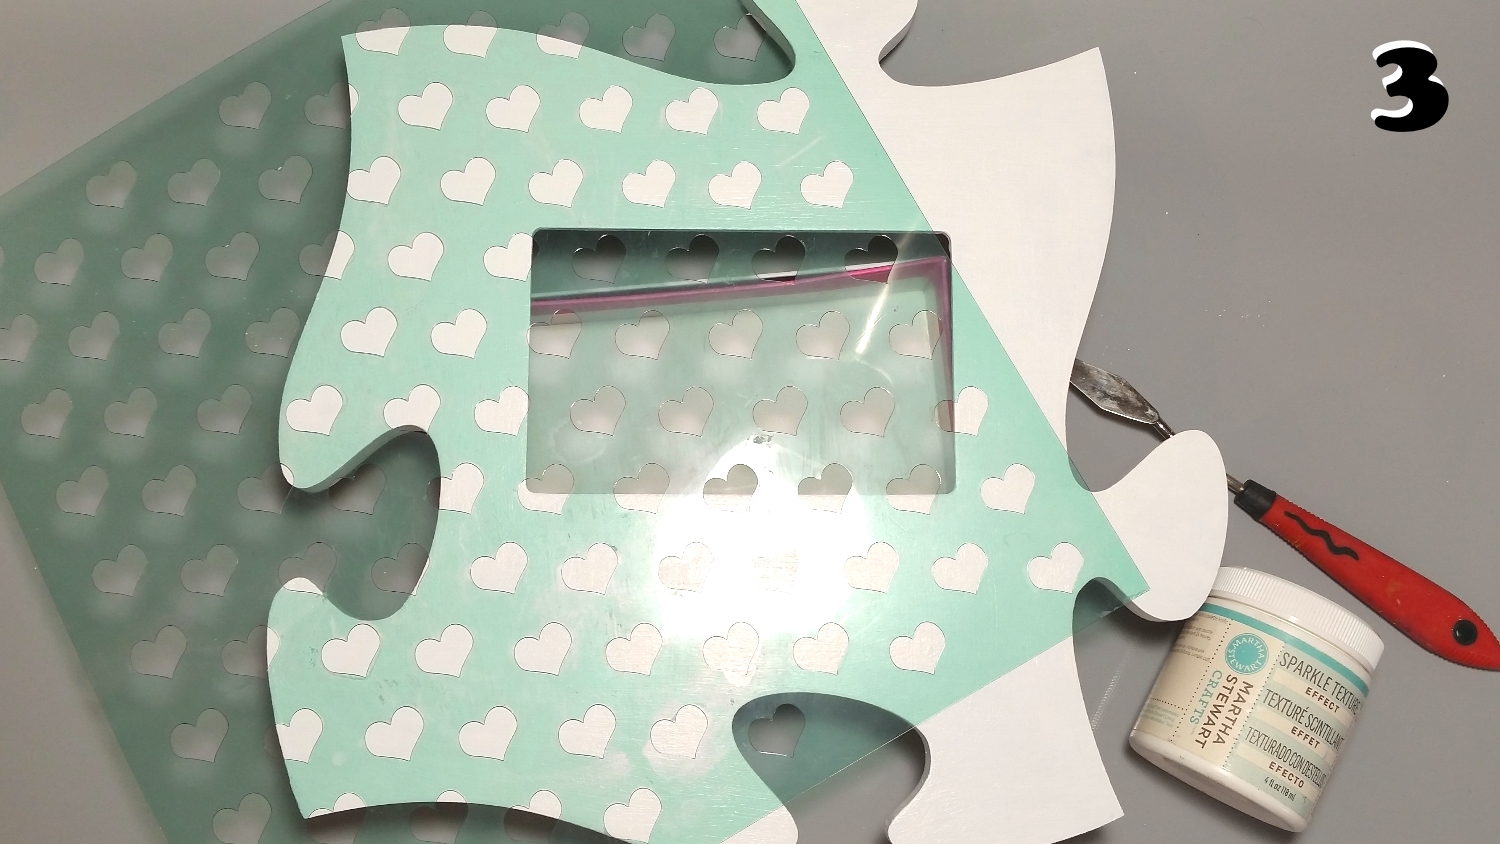
I cleaned off the frame with Goo Gone (there was a sticky residue where the price sticker had been), let it dry, and then painted the frame with two coats of Liquitex Gesso. Then I painted it with white acrylic paint. Lastly for some more “magic” I used a Heidi Swapp heart stenci; (this is a similar lattice stencil; I couldn’t find the hearts one) and Martha Stewart Sparkle Texture Effects Paste to add some cream colored glitter-filled 3D hearts all over the frame.

Then it was just a matter of figuring out where to place each of the fairies around the frame. I used double sided foam adhesive and hot glue to secure each one in place, spacing them around in a seemingly random way. I didn’t want them to look lined up and I wanted them to be spaced out from each other with similar amounts of “white space” between each of them so this “random” arrangement was anything but and took hours! LOL
I printed out a my logo, blog and IG info on my printer and slid that into the photo spot so (at least temporarily until I find a better picture) this is my new name sign for my crafting. The following is a share video including a quick tutorial on paper piecing:
This altered fairy frame is being entered into the following challenges:
Simon Says Stamp Wednesday Anything Goes Challenge
Word Art Wednesday Anything Goes Challenge
Simon Says Stamp Monday Based on a Book Challenge
Simon Says Stamp Work It Wednesday Green Challenge
Lil Patch of Crafty Friends Anything Goes Challenge
Crafty Gals Corner Anything Goes Challenge
Not Just Cards Spring Challenge
Through the Craft Room Door Anything Goes Challenge
Crafty Purple Frog Love is All Around Challenge
]]>
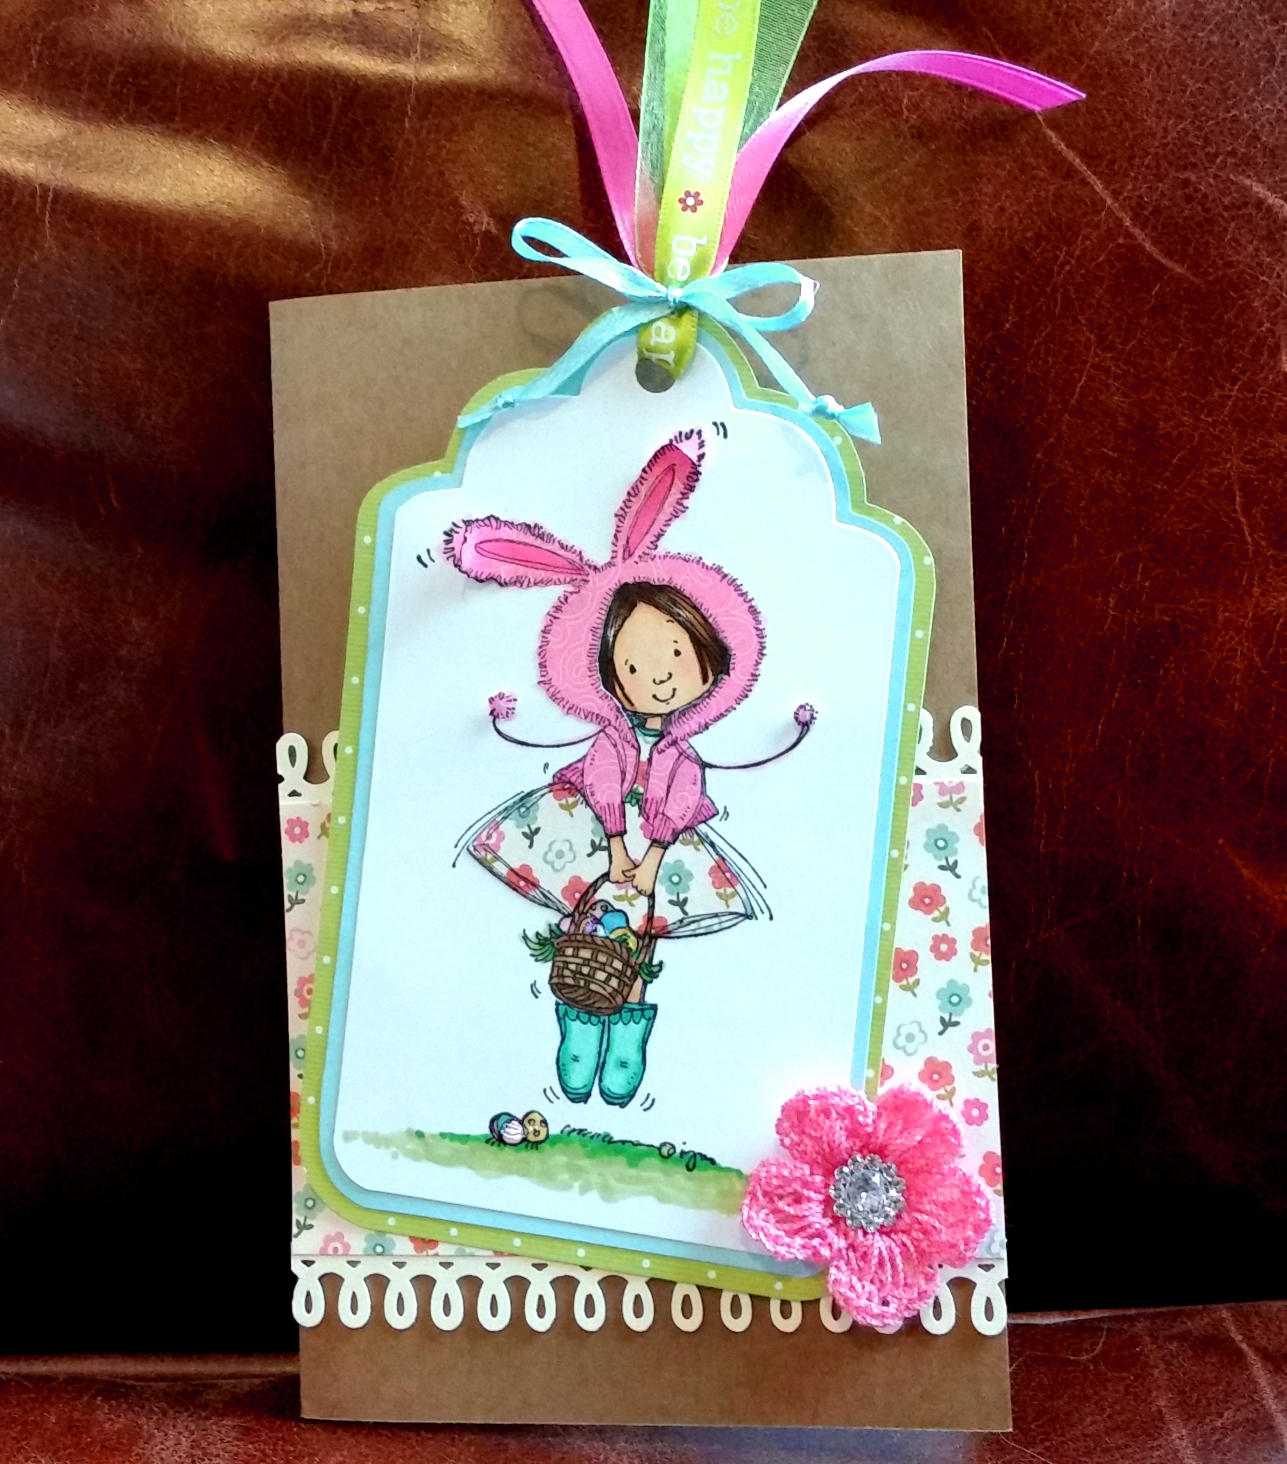 I made this tag card using the Stamping Bella “Valerie Bunny” stamp. She is so adorable, hopping along there in her fuzzy bunny jacket and her springy dress. I stamped it out a few times on different patterned papers so that I could do some fun paper piecing with scraps from my scrap box. I also added some dimension by curling the bunny ears of her hoody and popping up on tiny foam adhesive the pom poms of her strings. I thought that tiny bit of dimension helped give the illusion of Valerie hopping! LOL
I colored up the non-paper pieced parts with the following Copic colors:
Hair: E55, 57 and 59;
Skin: E50, 51, 53 and R30
Boots: BG10 and 24
Grass on ground and in basket: G43 and 09
Easter eggs: RV1, Y17, BG10 and B02
Lastly, I added a little shine to the eggs with Glossy Accents.
The tag part was relatively simple. I used the Diemond Dies Nesting Tag die set and then fussy cut around two more layers with more blue and green paper from my scrap box. I used an old McGill hole punch tat the top and used bits of various pink, green and blue ribbons to make a little tassle secured with a delicate bow (repeating the colors I used on the image an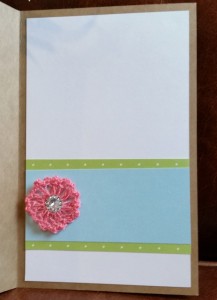 d the scrap papers I had used on the tag frame). Remember if making a purchase at Diemond Dies, use coupon code: thankskristina for an extra 10% off and free shipping on all orders of $35 or more!
I also decided to add a little background layering piece with the same patterned paper I used to paper piece Valerie’s dress and edged it with the border punch from the Martha Stewart Crafts Punch Around the Page, Loops Punch Set.
To add a little more softness, I added a crocheted pink flower from Michaels with a rhinestone center from my stash to the lower right corner. That ended up looking so sweet, that I decided to embellish the inside of the card a bit too and used some more scraps of patterned paper (the same that I had framed the tag with) and another crocheted flower.
The following is a video share of this tag/card:
This tag/card is being entered into the following challenges:
Simon Says Stamp Wednesday Spring Pinterest Inspiration Challenge
Craft-Dee BowZ Anything Goes with a Handmade Bow
Card Mania Spring Challenge
The Pink Elephant Green Challenge
Thanks for stopping by! WOOF
]]>
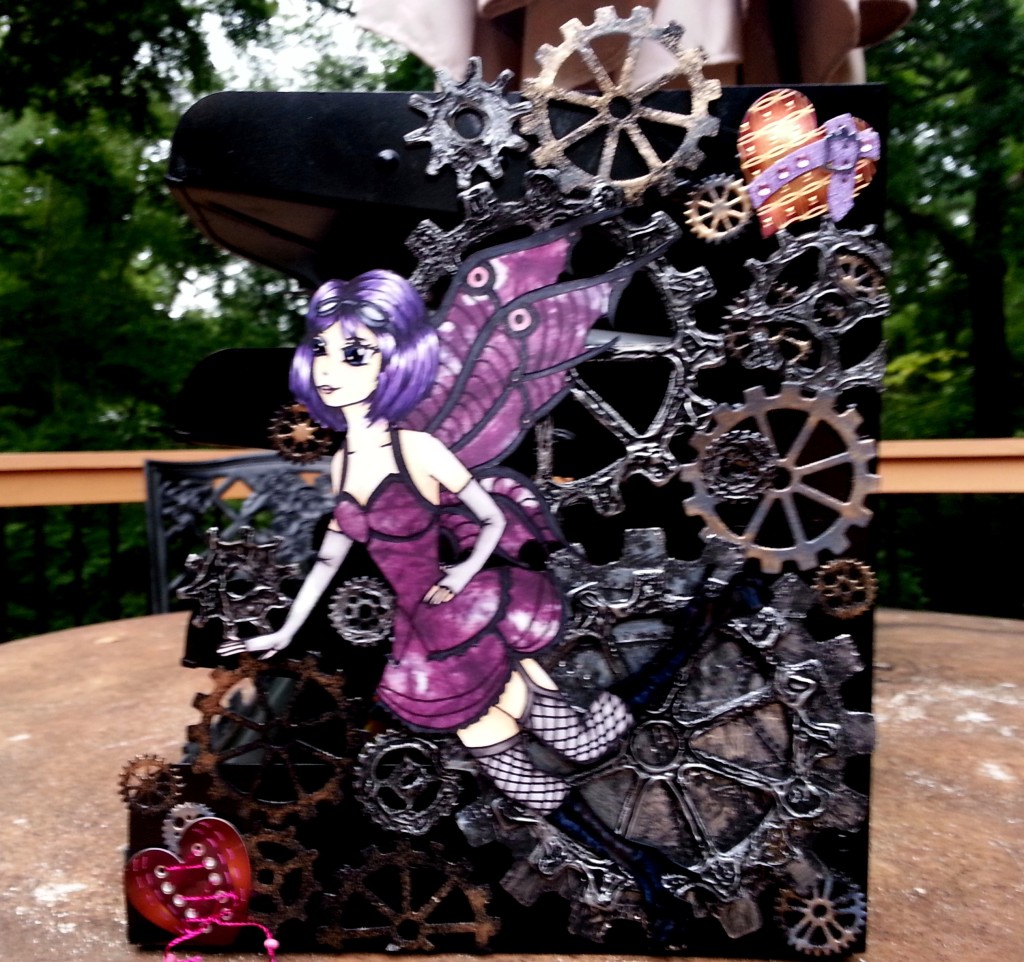 The colors I chose to color the two Steampunk Fairy images, which you can download for free on the Digi Page, came from a Jolees Boutique Steampunk hearts stickers pack. The hearts were fantastic, and helped carry the color scheme through the project without distracting from the focal point Steampunk Fairy images.
For the red violet haired Steampunk Fairy, I used a paper from the DCWV One Upon a Time paper stack to paper piece the dress and wings, shading with W1 and W3 directly on the patterned paper to add depth. I used the following Copic colors. Hair: YR00, RV10, RV34, RV66, RV69 and E79. Fishnet stockings and gloves: W1, 3, 5, and 7. Eyes: YG 95, 97. Boots and goggles: C1, 3, 5, 7, 9. Skin: E50, 51, and 53 with R30 for blush. The “skeleton” of her wings were colored with W9. I added a lot of shimmer to the full body of her wings with clear Wink of Stella.
For the purple haired Steampunk Fairy, I used paper from the DCWV Tie-Dyed Stack and used the following Copic colors. Hair: V15, V17, BV08 and 10o. Eyes B34 and B97. Fishnet stockings and gloves: W1, 3, 5, and 7. Boots and goggles: C3, 5, 7, 9. Skin: E 50, 51, and 53, with R30 for blush. I added shimmer to the “skeleton” of her wings and the straps and lace on her dress after I colored them with W9 with clear Wink of Stella.
 For both Steampunk Fairies, I added shine and gloss to the lenses of the goggles, the eyes and high boots with Glossy Accents.
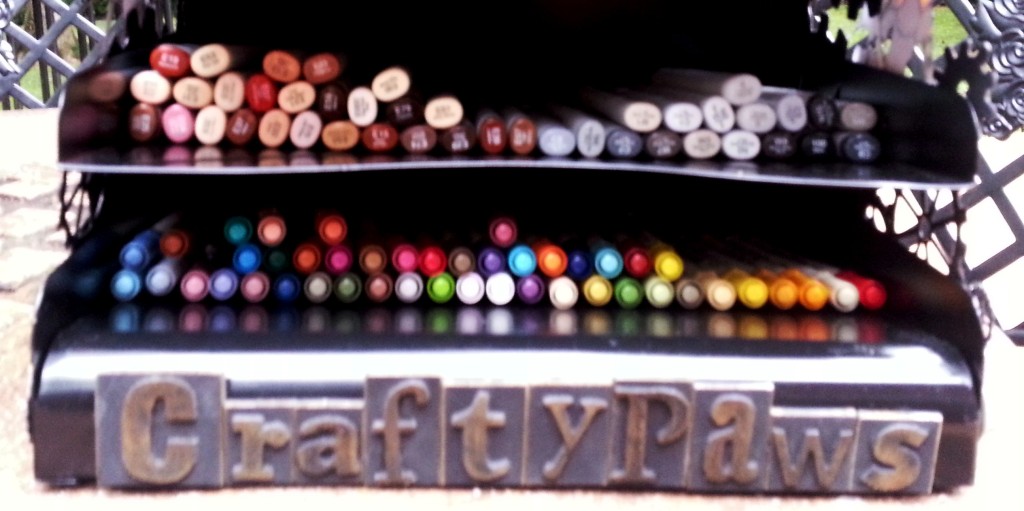
I also added my name to the front of the storage unit with my Tim Holtz Grunge Board typeset style letters so that the unit can double as a name sign. You can find the tutorial for how to use those letters from the kit HERE.
The video share of the whole project follows:
DISCOUNT!: While I am a Diemond Dies Guest Design Team member, you can enjoy 10% off your entire order (including sale items) and free worldwide shipping on orders over $35 by using the code: thankskristina
Thanks for stopping by and have a great day! WOOF
]]>