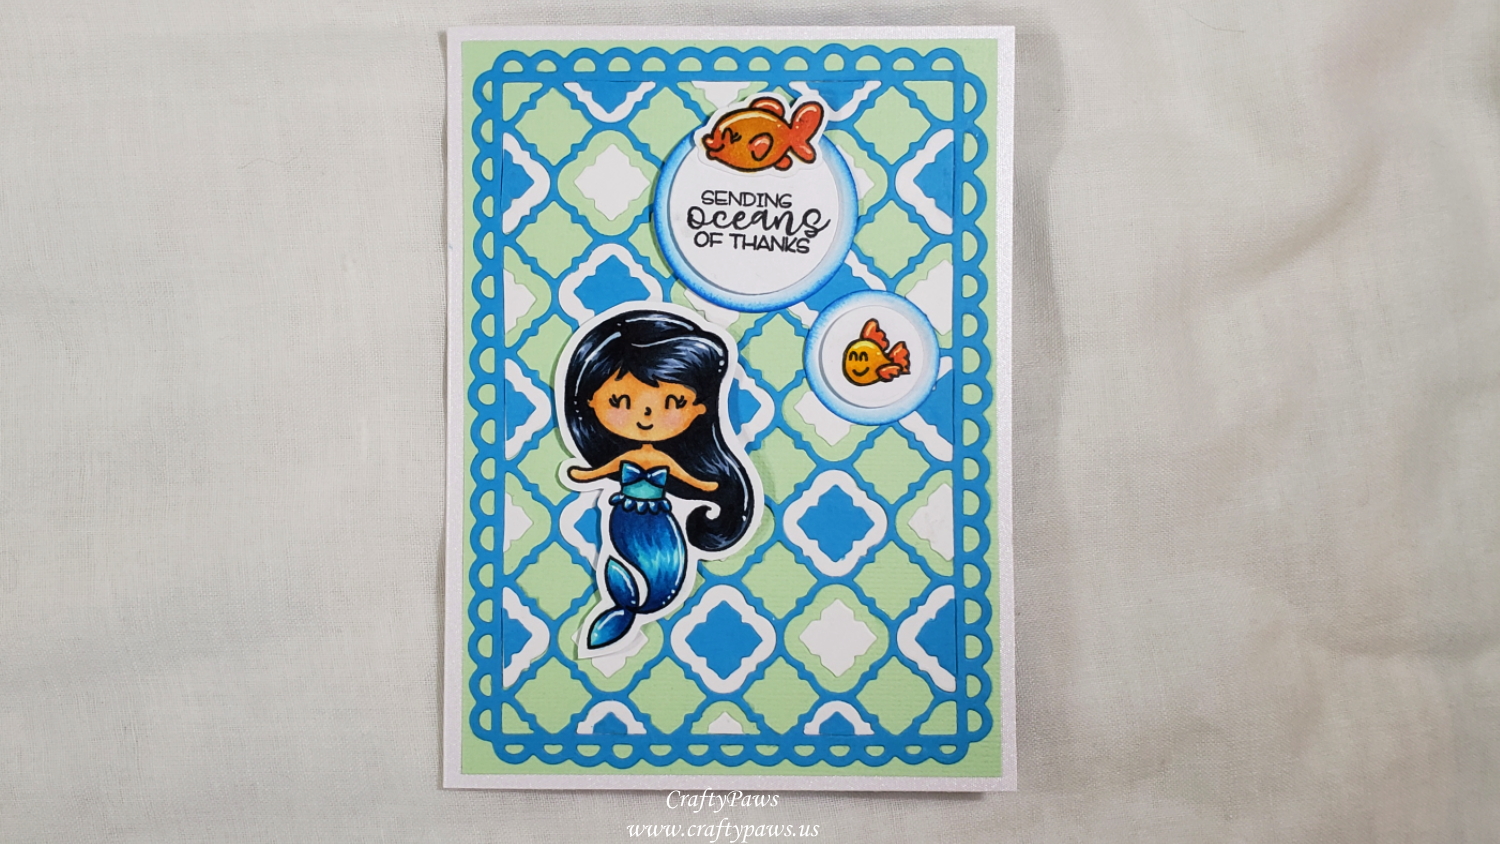
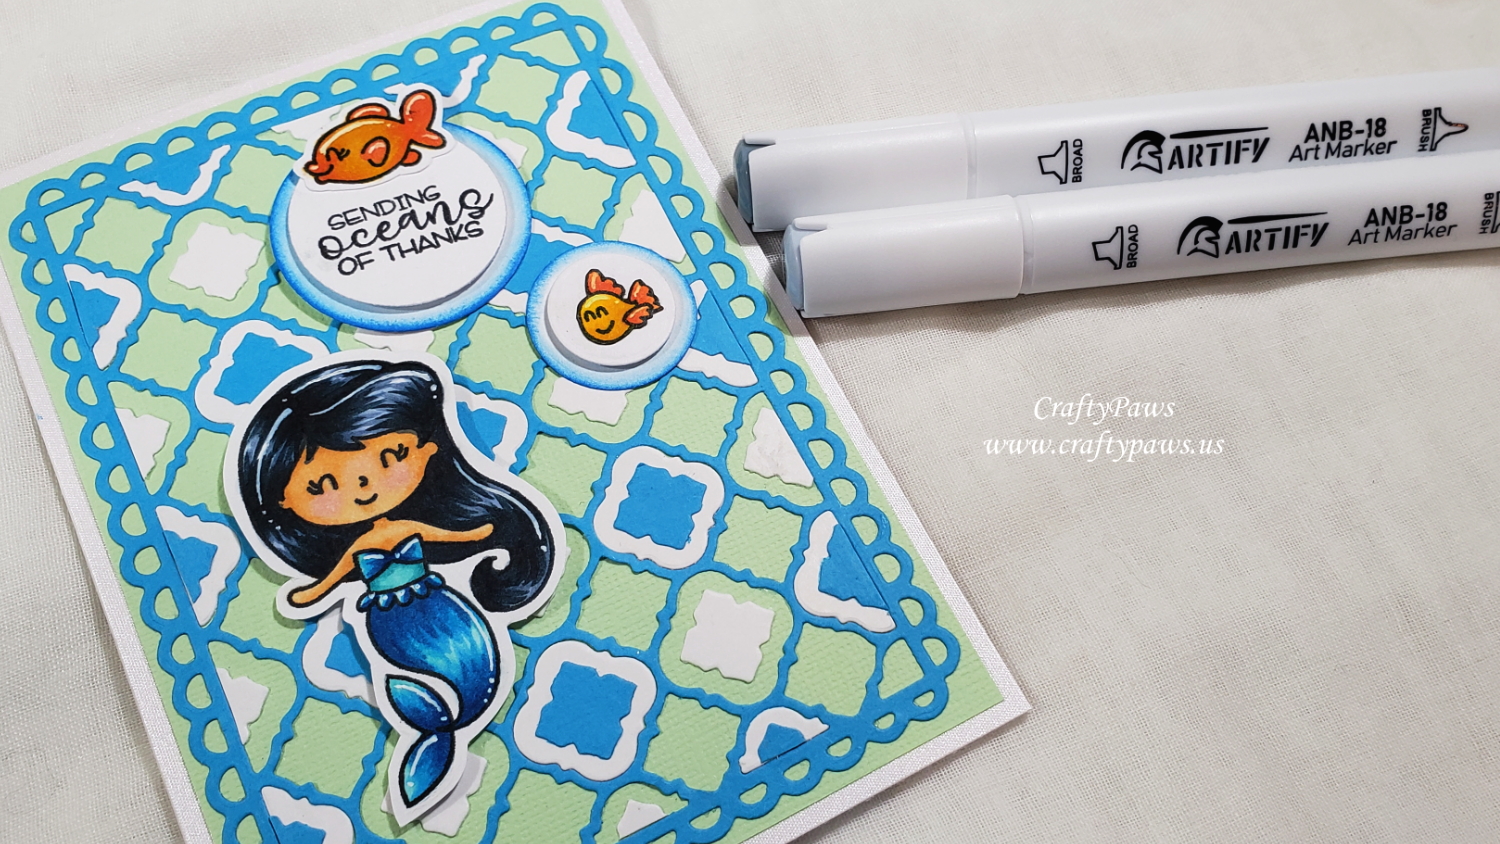
Then I got to coloring up the mermaid and the little fishes from the Avery Elle “Sea Babies” mini stamp set (retired). To coordinate with the cardstock colors I used in the background, I used these Artify marker colors:
Mermaid Body suit/tail: B502, B514, B204, B227
Mermaid Hair: CG01, BG05, BG09
Mermaid Skin: Y900, Y701, Y811, R501
Fishes: Y414, Y505, Y715, Y204, Y207, WG09
The colors blended well, but I was not used to the quantity of the ink that came out (I guess my Copic markers are dry — LOL). These markers are really juicy so I had to try to keep a lighter touch. I was really impressed with the coverage and brightness of these markers and I would recommend them as a budget-friendly alternative to Copic markers. I also added highlights with my trusty Uniball Signo White Gel Pen.
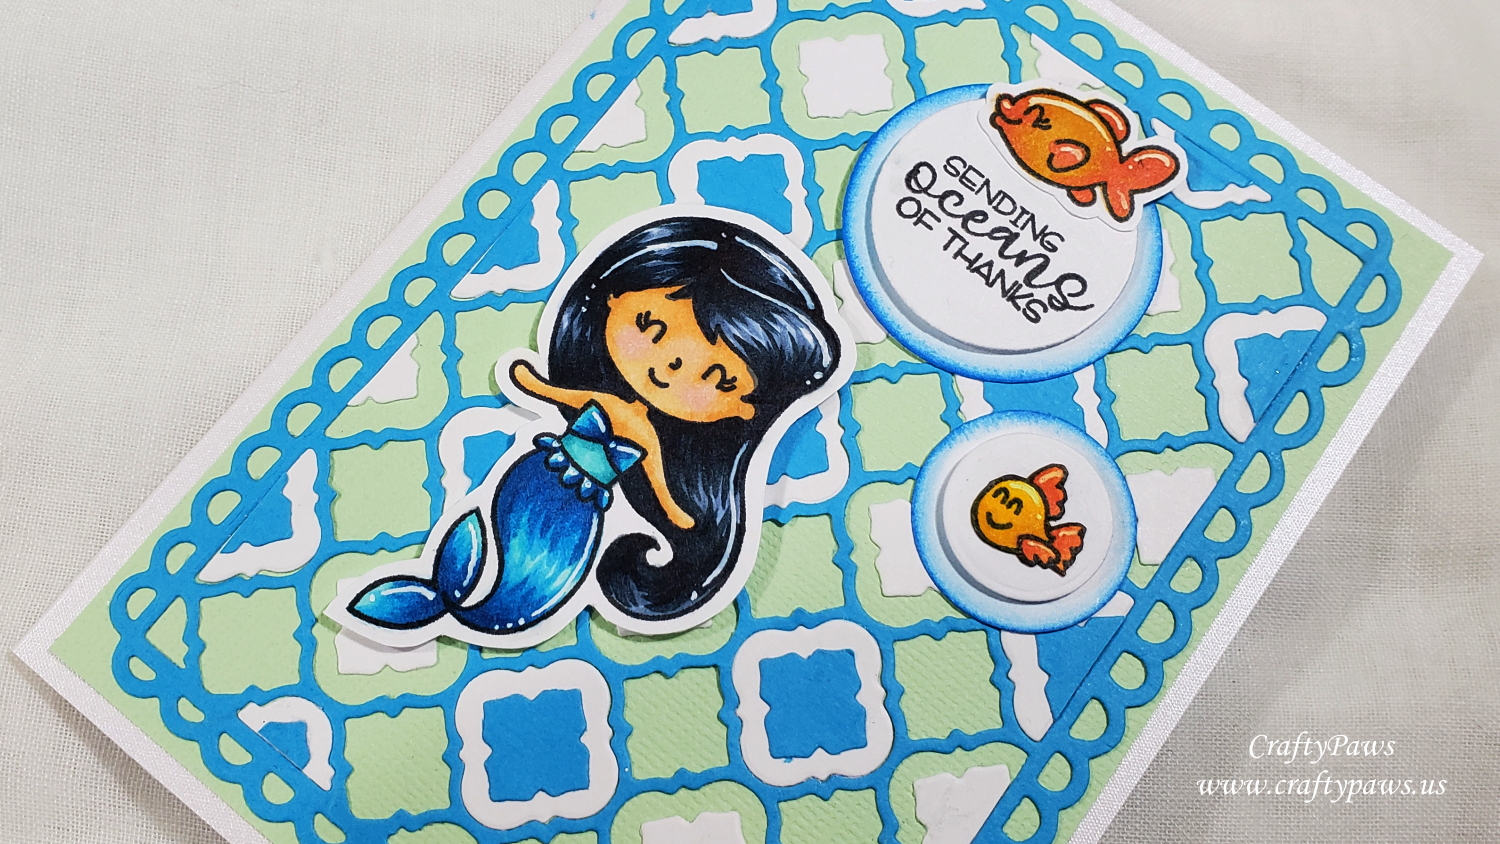
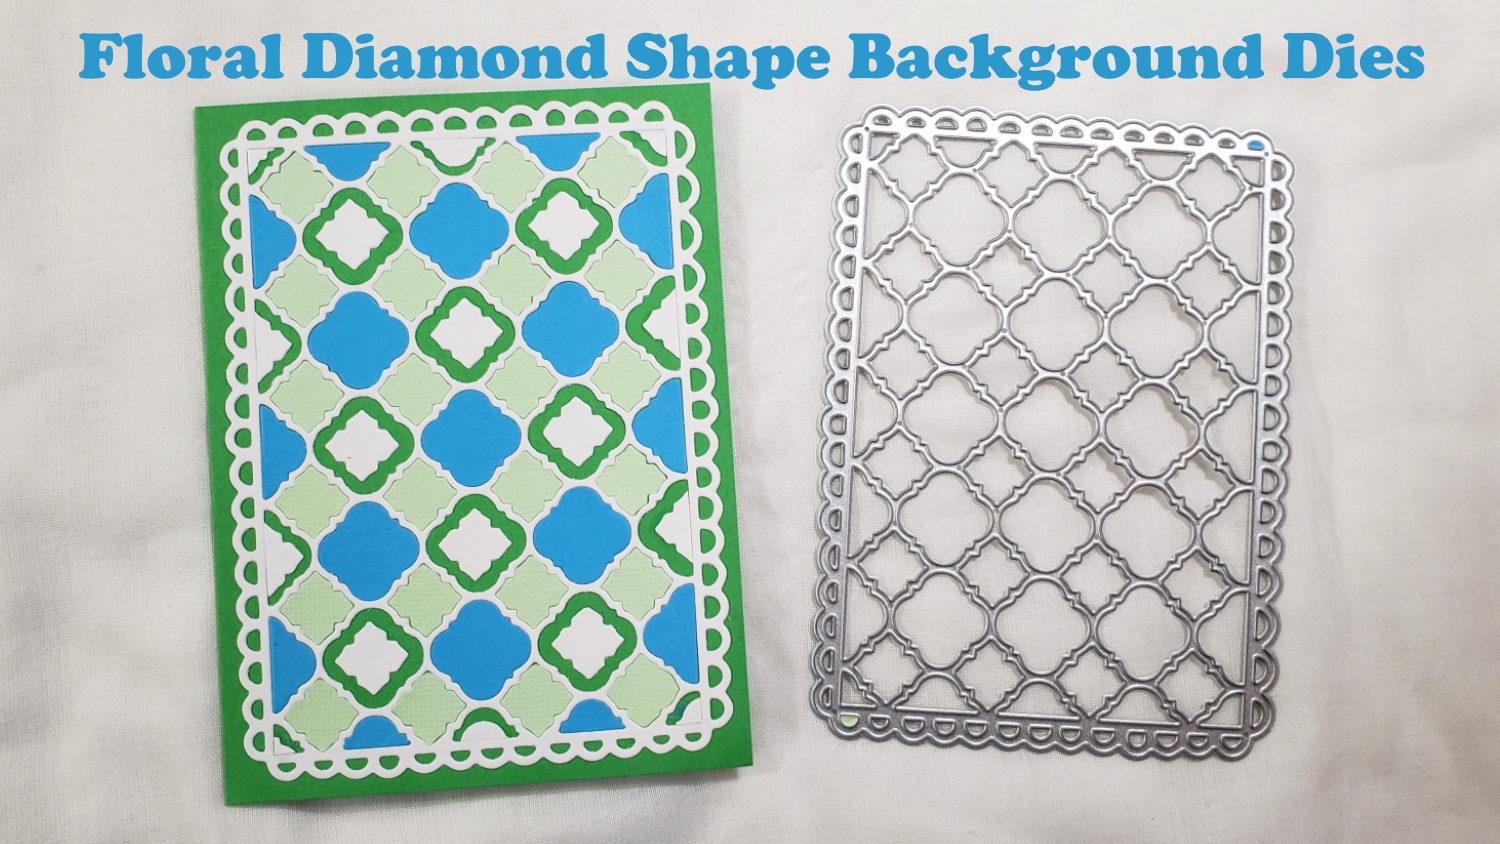
I fussy cut out the mermaid and the fishes with my Fiskars Spring Loaded Reverse Scissors, leaving a bit of a white margin all around so that she would pop a bit from the busy background. For the fishes, I decided that even with the white margin, they were too small and might be fighting with the busy background so I decided to put them on “bubbles” that I die cut using the four smallest circles from the Diemond Dies Die-Normous Stack-Ems Circle Nesting Die Set. I stacked two circle die cuts, added some depth with double sided foam adhesive between them, and blended some Salty Ocean Distress Ink on the lower circle. For the larger circle and fish, I also stamped in the combined sentiment from the stamp set: “Sending Oceans of Thanks”. So that the mermaid would not be overshadowed by the bubbles, I popped her up on double sided foam adhesive too.
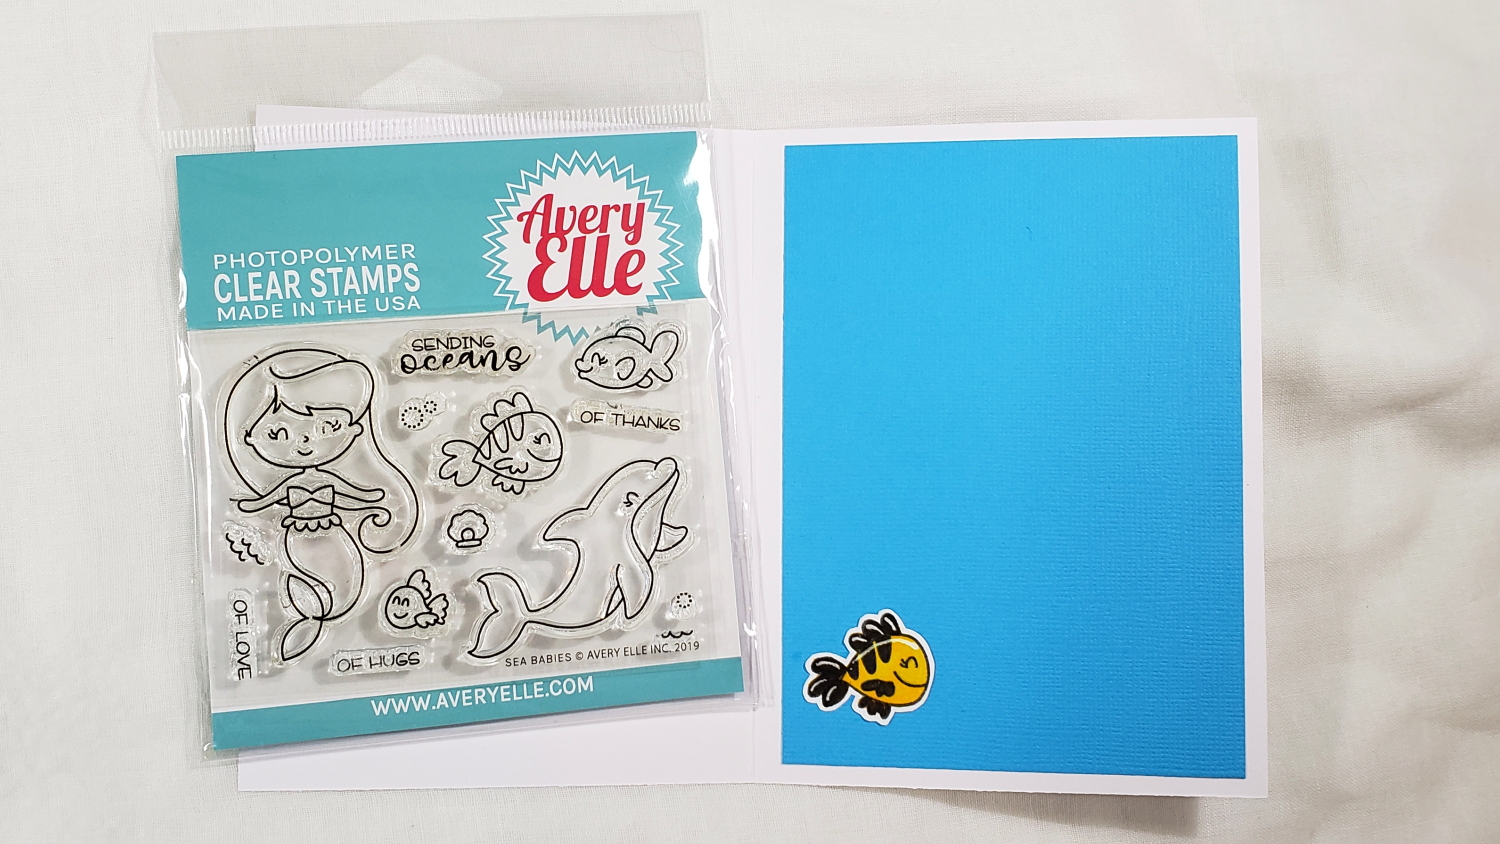
For the inside card liner, I simply used a scrap of aquamarine cardstock to match one of the background cardstock colors. And for a finishing touch, I added a third Artify-colored fish from the stamp set that I fussy cut and glued to the lower left.
CLICK on the following picture to watch the card making process video:
This card is being entered into the following challenges:
Crafts Galore Encore Anything Goes Challenge
Creatalicious Anything Goes with Optional Slim Line Card Challenge
Word Art Wednesday Anything Goes Challenge
Through the Craft Room Door Anything Goes Challenge
Stamping Sensations Fantasy and Magical Challenge
]]>
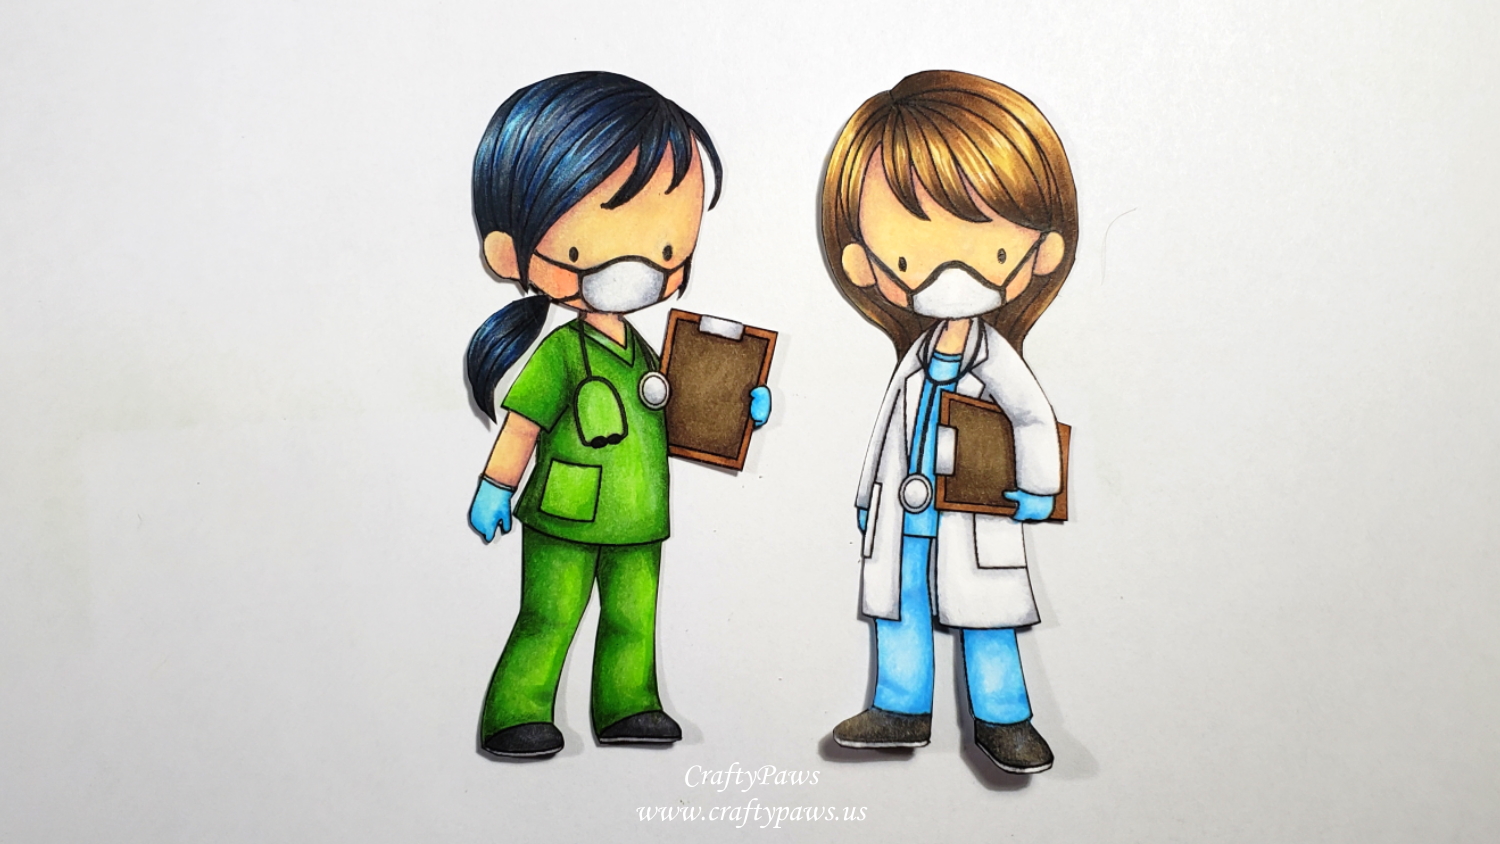
To highlight the Personal Protection Equipment (PPE) that our EVERYDAY ESSENTIAL HEROES sorely need, I downloaded the digis and then converted them to jpg using a screen grab. I erased the noses and mouths using paint.net. Then I was able to doodle on face masks and gloves using a 0.05 pt black Copic Multiliner Pen.

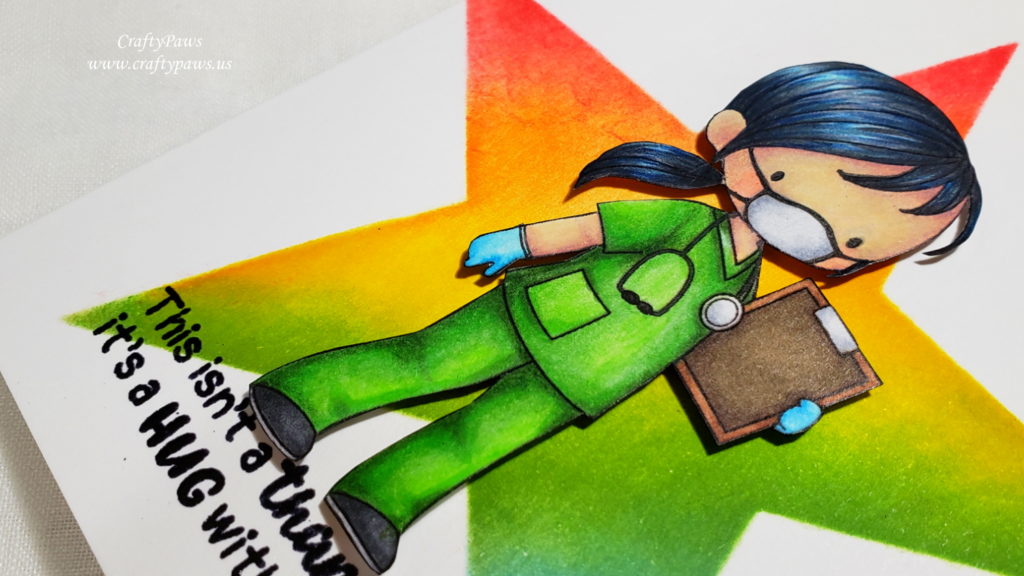
I colored the female nurse with my Copics, and then I had some fun add more vibrancy and detail with Prismacolor Premium Colored Pencils:
Wood Clipboard and Stethoscope: C00, C0 and C3 (for metal parts) and E23, E57 and E44 (for HIPPA compliant (no patient information visible on wooden clipboards)
Skin: E50, E51, E01, R20 (blush) with Prismacolor Beige (997); Light Peach (927); Shell Pink (1093); Ruby Beige (1019)l and Clay Rose (1017)
Shoes: N5 and N7 with C3 for soles
Blue Gloves: B0000, B01, B02, and B04 with Prismacolor Sky Blue Light (1086) and Non-Photo Blue (919)
Black Hair: B01, C4, C6 and C8 with Prismacolor Indigo Blue (901) and 99% Cool Grey (1067)
Green Scrubs: B12, G14 and G46 with Prismacolor Spring Green (913), Apple Green (912 and Kelp Green (1090)
I then fussy cut the nurse with my Fiskars Reverse Spring Loaded Scissors and inked the edges with a Memento Tuxedo Black Marker for a clean finished look. To add some dimension, I also popped her up on double sided foam adhesive.
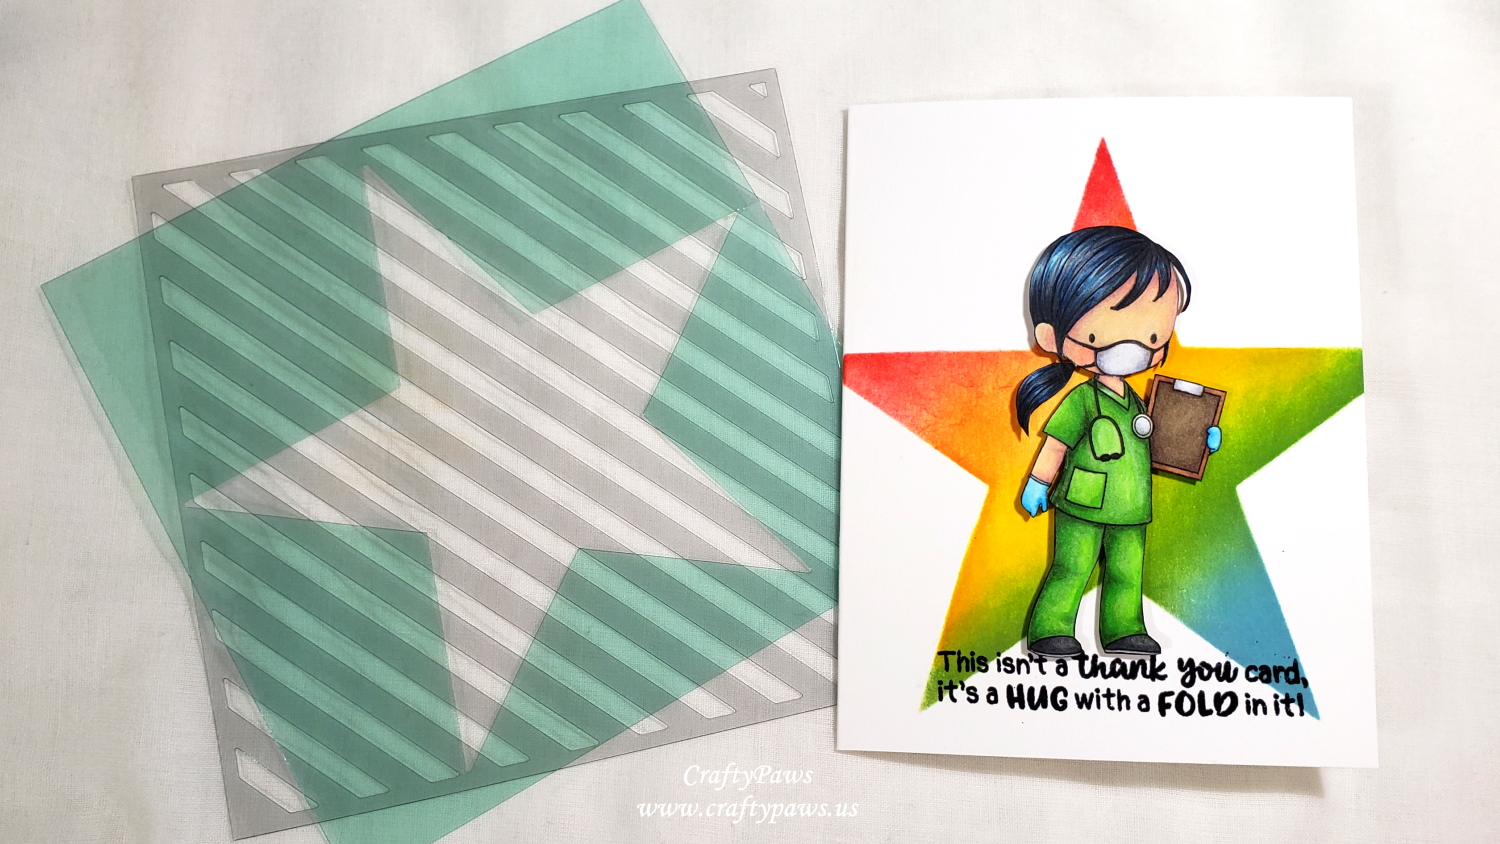
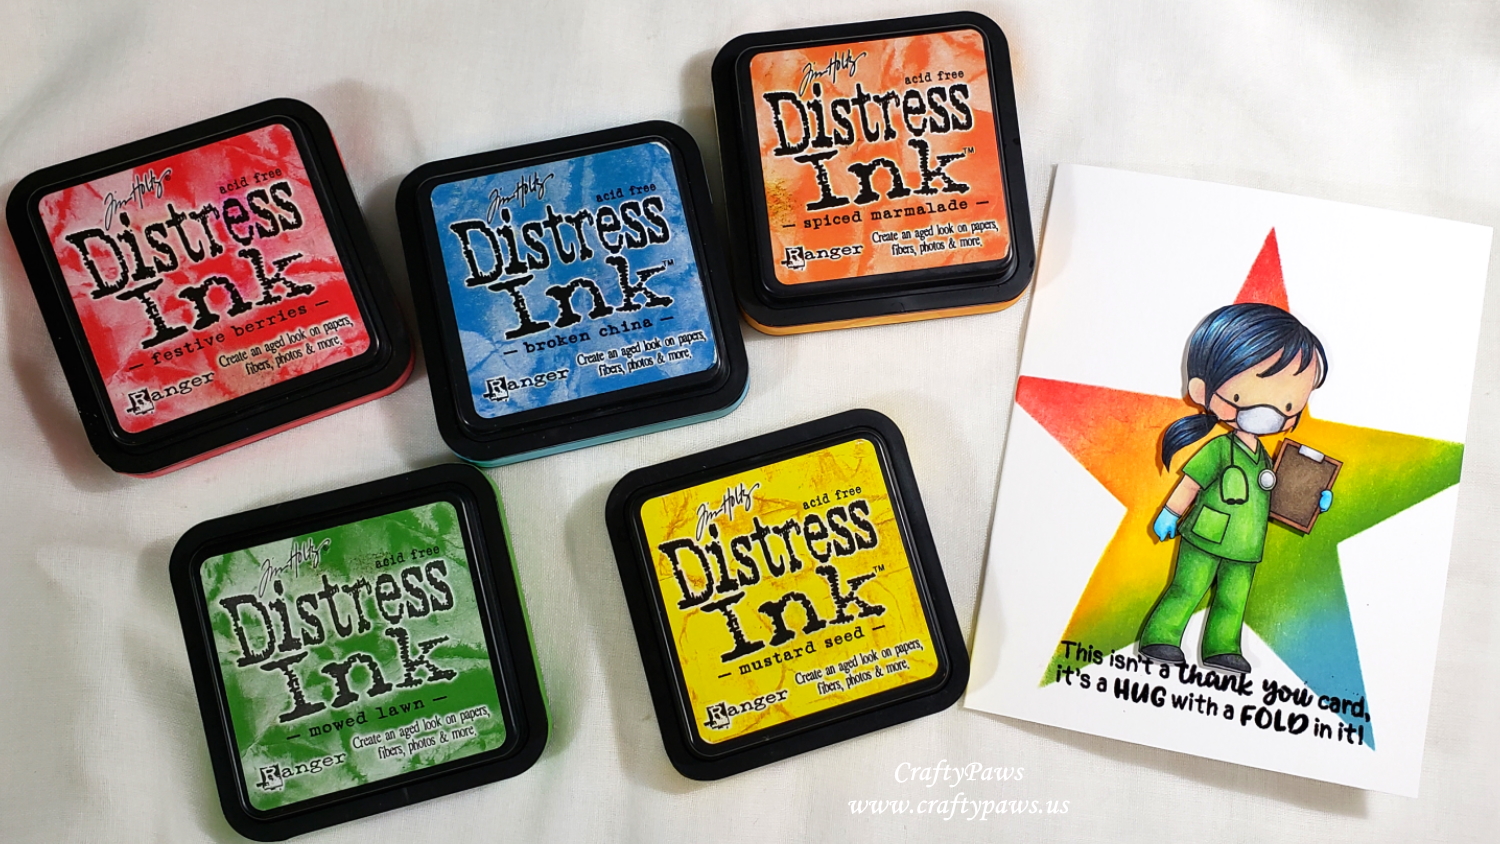
For a sharp CAS background, I used an old Heidi Swapp Star Stencil (retired) and blended on a rainbow of spring Tim Holtz Distress Inks in Festive Berries, Spiced Marmalade, Mustard Seed, Mowed Lawn (which seems to match the green scrubs perfectly) and Broken China. I thought the star could reference how I believe all these medical personnel are super stars for continuing their courageous work to help all of us right now.
To keep the nurse looking like she is just floating, I also decided to give her a sentiment to “stand on”. I used the “This isn’t a thank you card, it’s a HUG with a FOLD in it!” sentiment from the Newton’s Nook Designs “Thankful Thoughts” stamp set. To add a bit of shine and subtle dimension, I stamped the sentiment out with VersaMark Ink and heat embossed it with Black Ranger Embossing Powder.
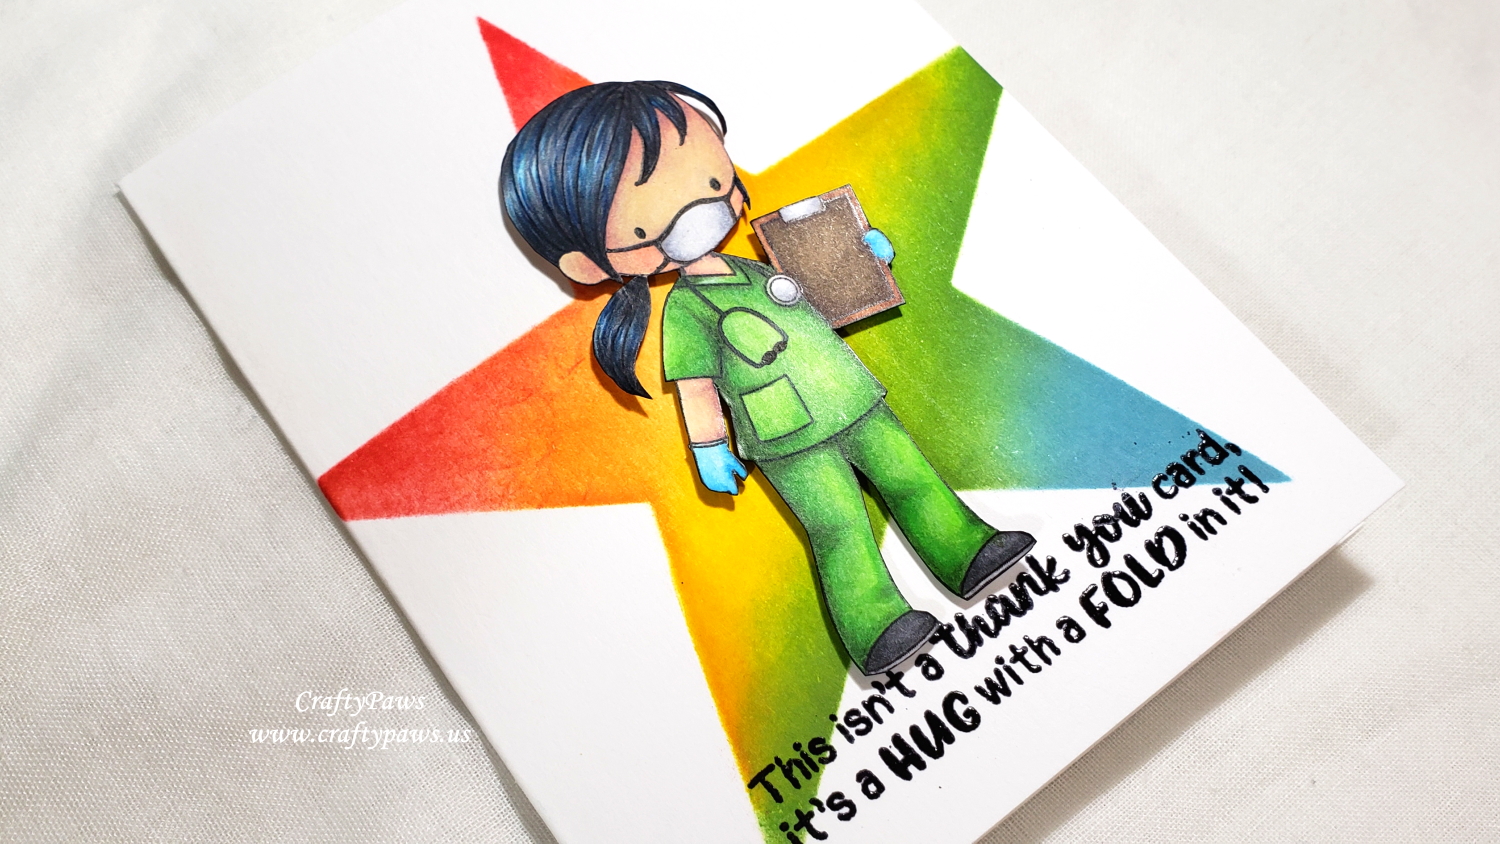
I love how it all came out! I hope the nurse who receives the card can feel the love and appreciation with which it was made. CLICK on the following picture to watch the process video:
Disclosure: Many of the supplies I’ve used for today’s project are linked. Some may be affiliate links, which means if you make a purchase I receive a small commission at no extra cost to you. I truly appreciate your support toward the costs of running this blog!
This thank you card for an everyday heroine doctor is being entered into the following challenges:
Simon Says Stamp Monday E Challenge – Everyday Essential hero and embossing
Penny Black and More Anything Goes Challenge
Lil Patch of Crafty Friends Anything Goes Challenge
Creatalicious Anything Goes with Optional Marble Background Challenge
Word Art Wednesday Anything Goes Challenge
Through the Craft Room Door Anything Goes Challenge – WINNER
Crafts Galore Encore Anything Goes Challenge
Stamping Sensations Somewhere Over the Rainbow Challenge
Simon Says Stamp Wednesday Knock on Wood Challenge – HIPPA compliant wood clipboard 😁
]]>

The daughter of one of my neighbors is an attending there, and during these hard and scary times, she said it would mean the world to these residents to hear and feel the community’s support for their work. She said that if we’d like to help give these brave folks a badly needed shot in the arm, to drop off encouraging cards or notes. Now I was charged up. I dug through my handmade card stash and found 7 cards that would work perfectly once I hand wrote a grateful message inside each one.
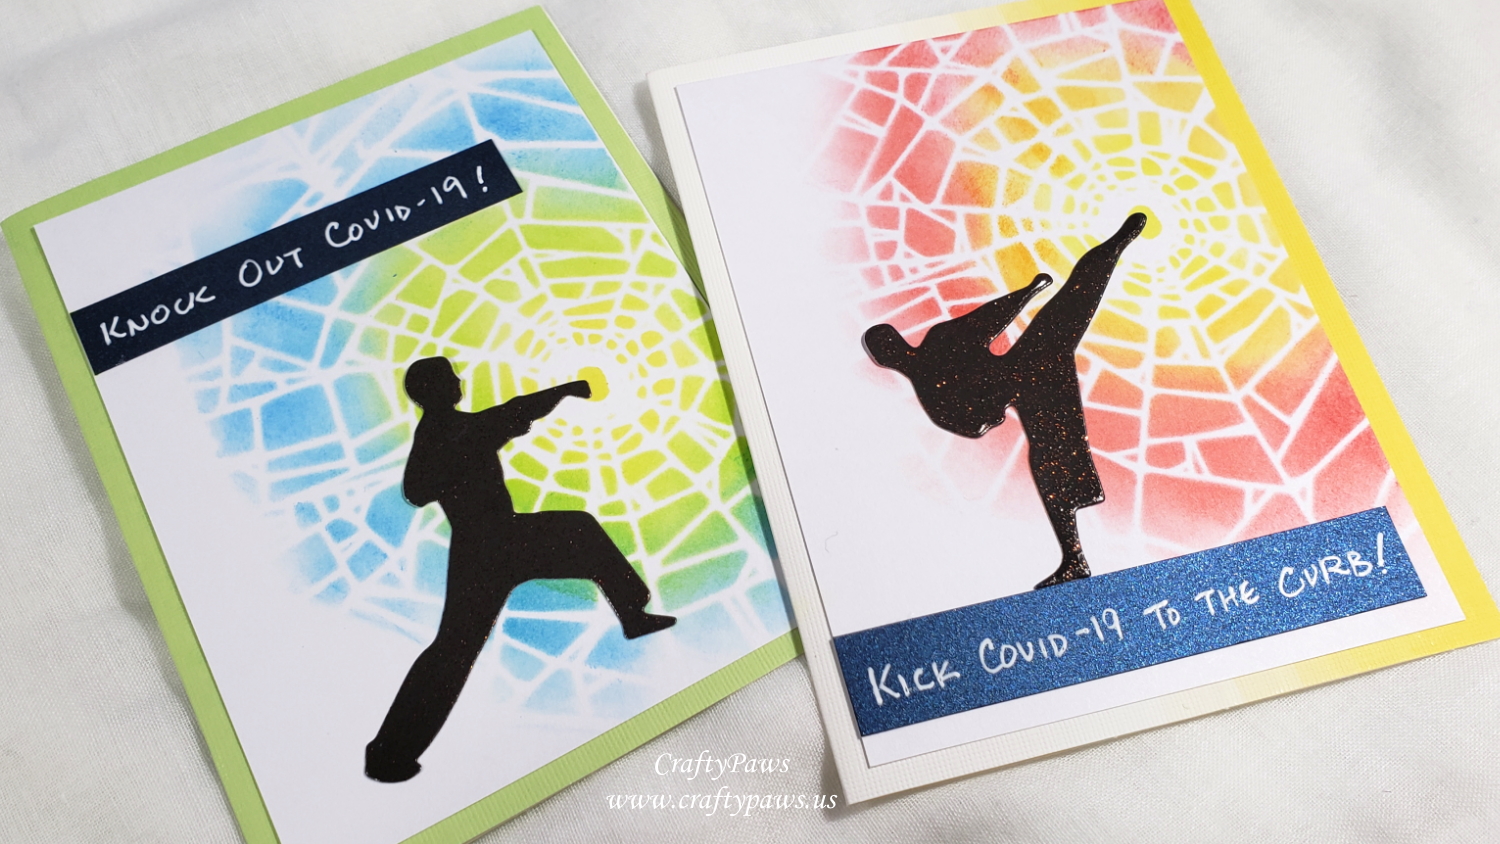
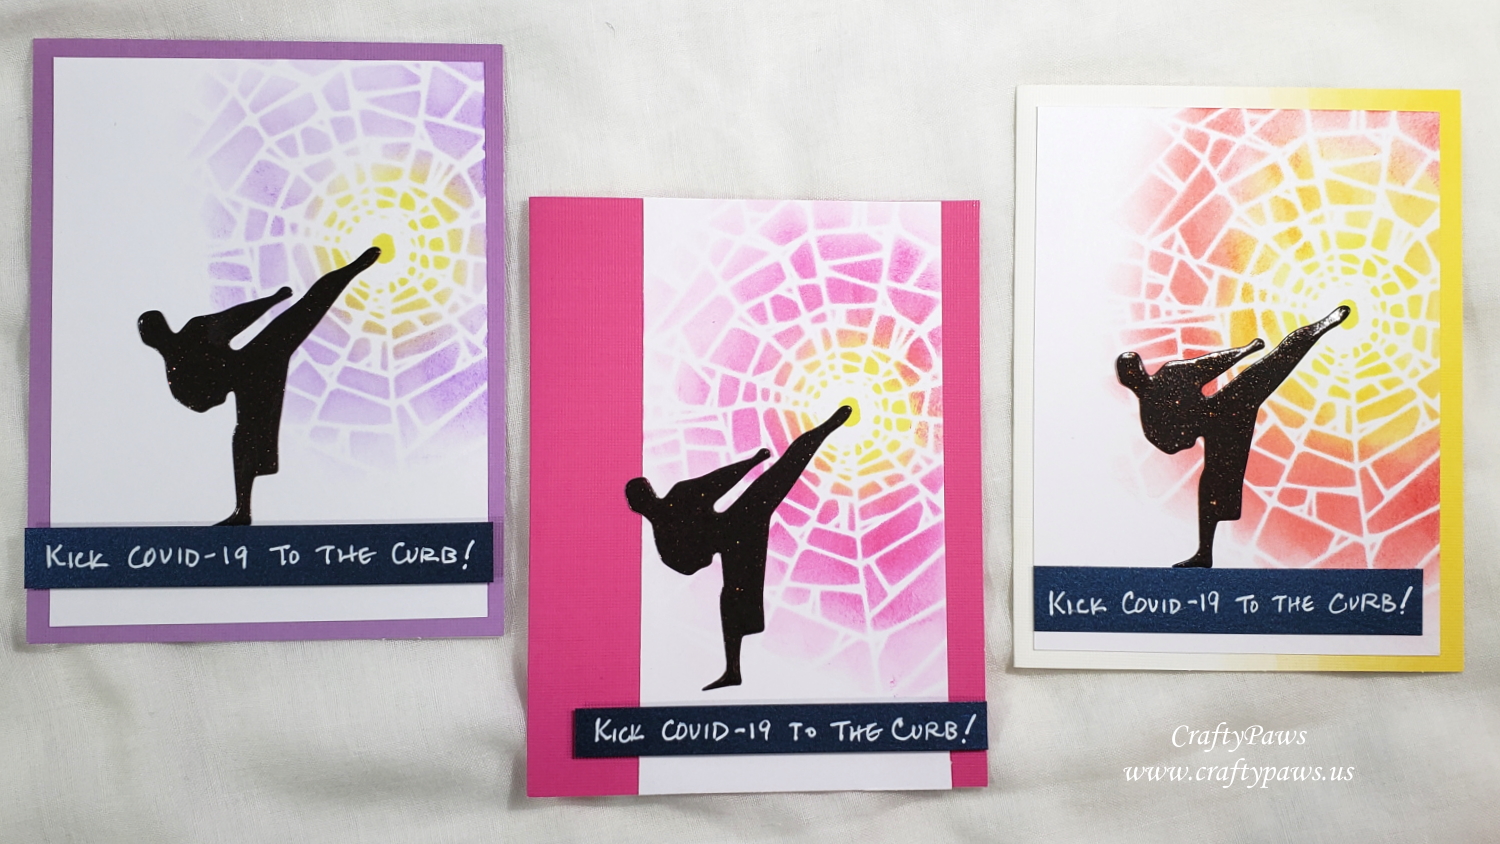
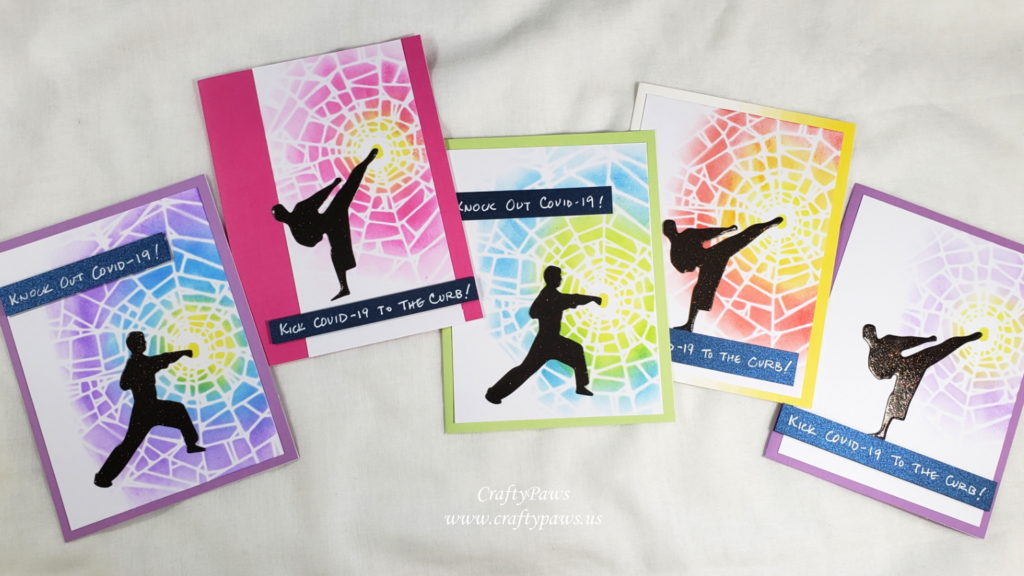
Then I decided to design a card that I could easily make multiples of by using the punching and kicking dies from the DiemondDies Karate Dies Set #1, the Tim Holtz Shatter Stencil, and the Tim Holtz Distress Inks in Picked Raspberry, Festive Berries, Spiced Marmalade, Squeezed Lemonade, Twisted Citron, Salty Ocean and Wilted Lavender (achieving a bright and hopeful rainbow of colors).
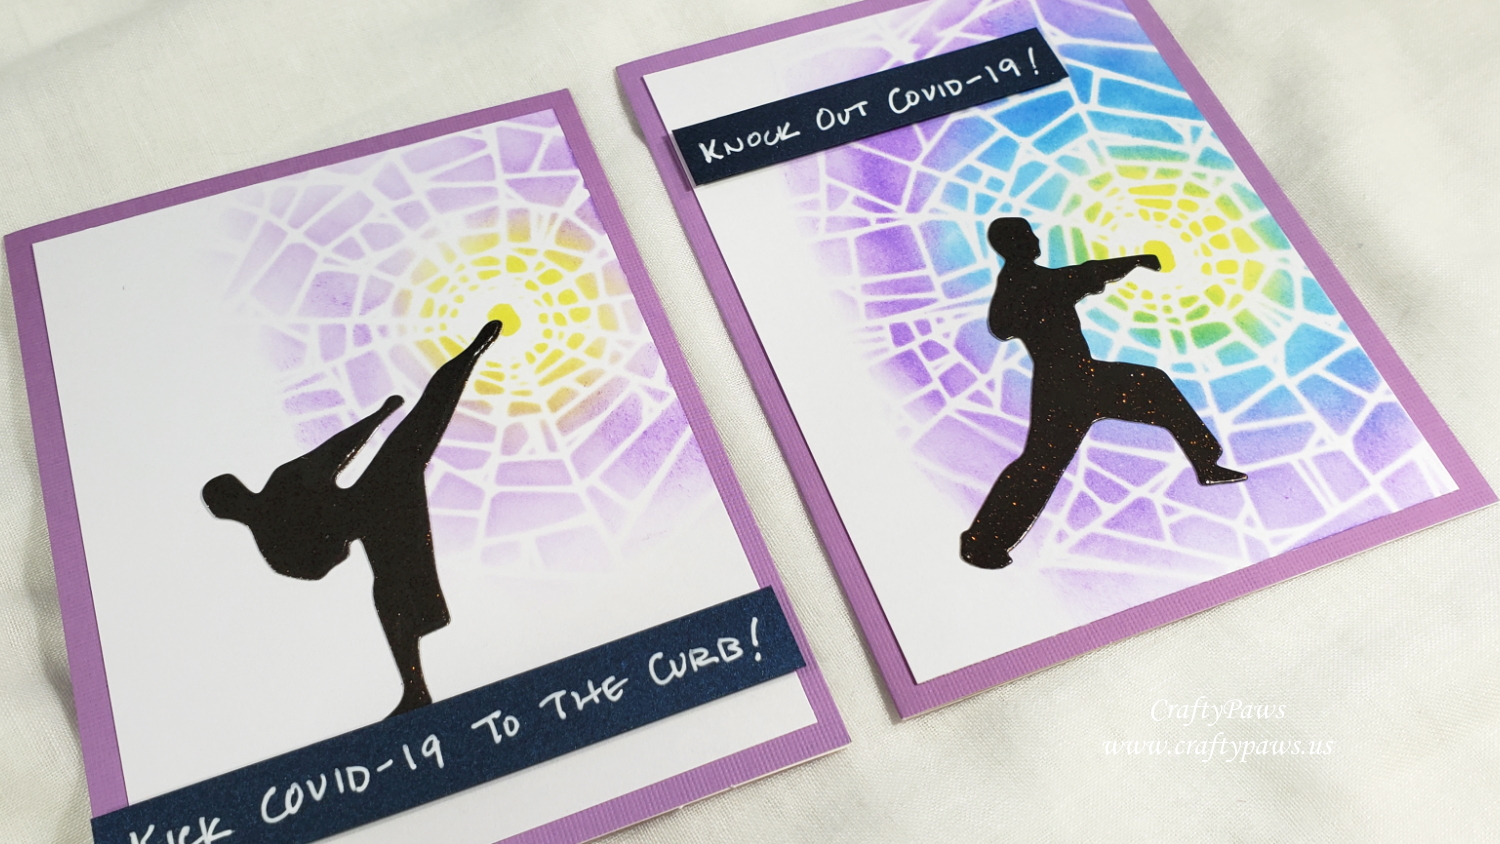
I blended on combinations of the Distress Inks through the Shattered Stencil onto plain white cardstock card fronts and then mounted them on card bases from an old Michaels Hot Buys card bases in coordinating colors. I die cut the kicking and punching figures from a thick scrap of glittered mocha card stock. For the sentiments, I hand wrote “Kick Covid-19 to the Curb!” and “Knock Out Covid-19!” using a Uniball Signo White Gel Pen on shimmery dark blue card stock strips, which I popped up on foam dots to add extra interest and dimension.
I’ll be writing heartfelt notes of appreciation and gratitude for all these medical warriors, and along with my stash cards, I’ll be able to drop off an even dozen cards tomorrow. I feel so blessed and thankful that so far my family members are safe and healthy. I am especially worried about 3 of them who are doctors and all whom are immuno-compromised. I’m also worried about my parents and my husband’s parents who are all in their late 70s and 80s and have underlying illnesses that make them vulnerable. I think all the worrying was making me depressed, but today (after my migraine subsided), I felt energized and with a little purpose making these cards. I know it isn’t much, but it’s something that I hope will brighten these health care workers’ days.
CLICK on the following picture to watch the process video for making all these cards for our medical heroes:
Disclosure: Many of the supplies I’ve used for today’s project are linked. Some may be affiliate links, which means if you make a purchase I receive a small commission at no extra cost to you. I truly appreciate your support toward the costs of running this blog!
These cards are being entered into the following challenges:
Creatalicious Anything Goes with Optional Wedding Challenge
Lil Patch of Crafty Friends Anything Goes Challenge
Through the Craft Room Door Anything Goes Challenge
Word Art Wednesday Anything Goes Challenge
Simon Says Stamp Wednesday Anything Goes Challenge
Simon Says Stamp Monday Mood Board Challenge
]]>
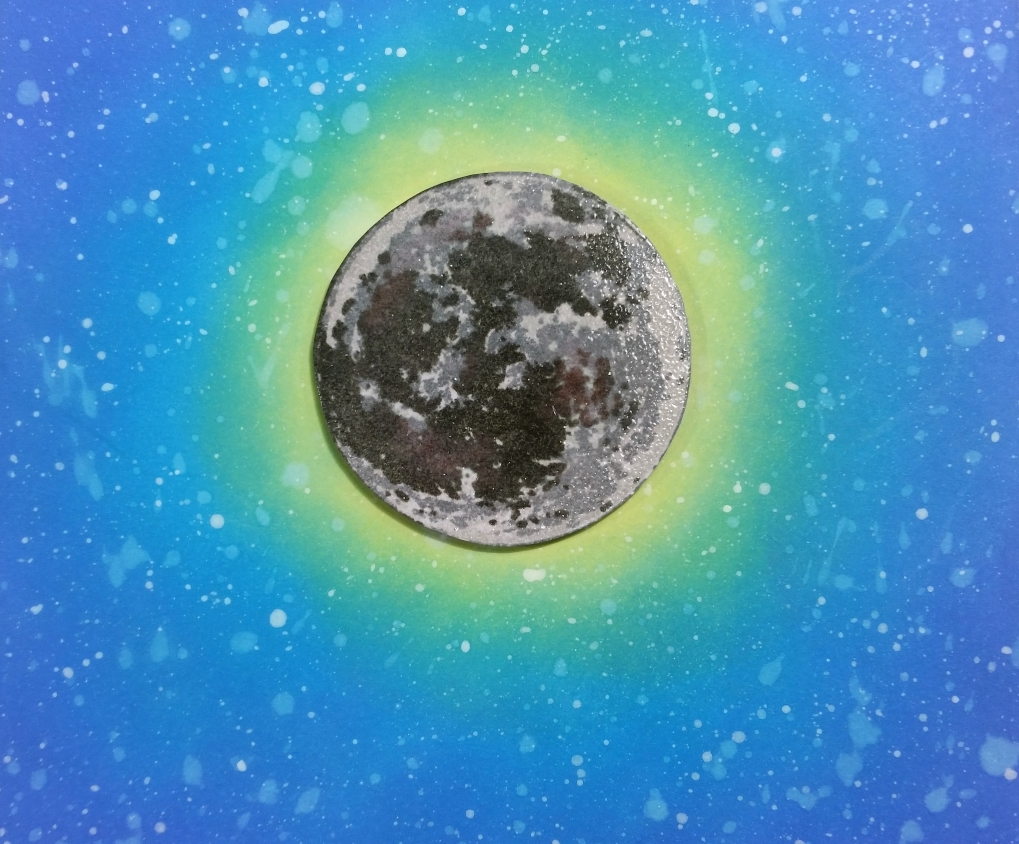
The sky background was created by blending Tim Holtz Distress Oxide Inks in Squeezed Lemonade, Mermaid Lagoon and Blueprint Sketch. In order to achieve a yellow glow around the moon, I first stamped the moon on the card base and blended the inks around that circle. For a starry night look, I splattered some water with my fingers to bleach out the ink, and I also splattered on some watered-down white acrylic paint with a toothbrush to create a wealth of stars.
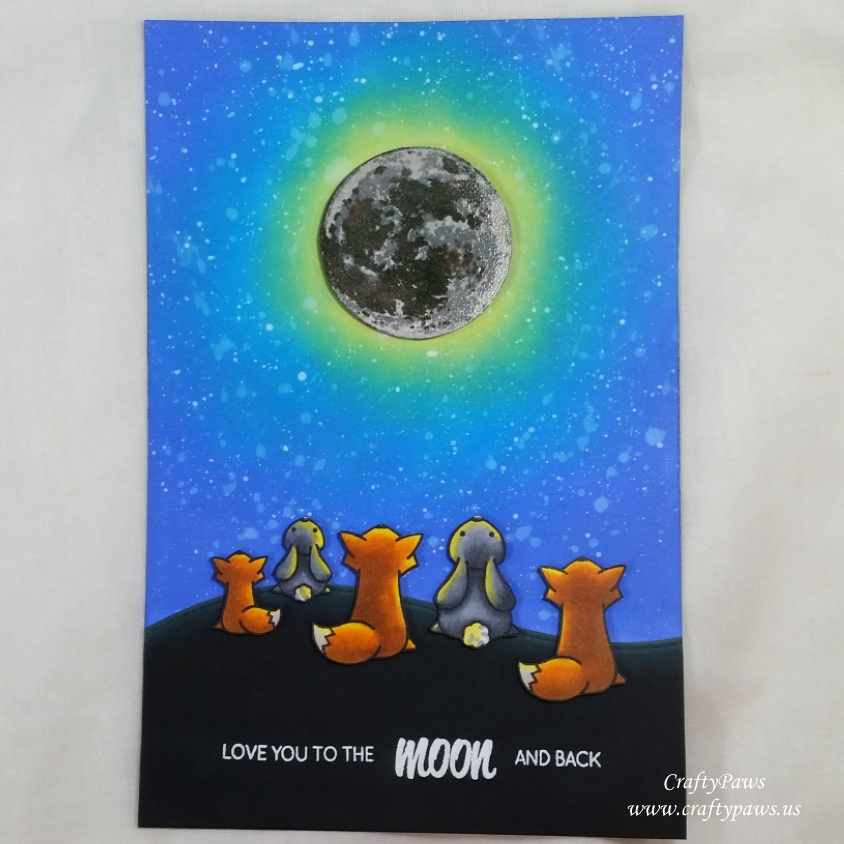 To create the moon, used the layering moon stamps from the Altenew “To the Moon and Back” stamp set. To give it visual depth, I stamped the base circle stamp with the Tsukineko Brilliance Moonlight White Pigment Ink and the Lawn Fawn Manatee Premium Dye Ink. For the next layer, I used Lawn Fawn Hippo and for the last layer, I used Lawn Fawn Storm Cloud Premium Dye Inks. After fussy cutting out the moon, for a bit of shine and subtle visual texture, I used VersaMark Ink with clear embossing powder and heat embossed the whole moon. I popped this up on fun foam for added dimension when I adhered it to the night sky background.
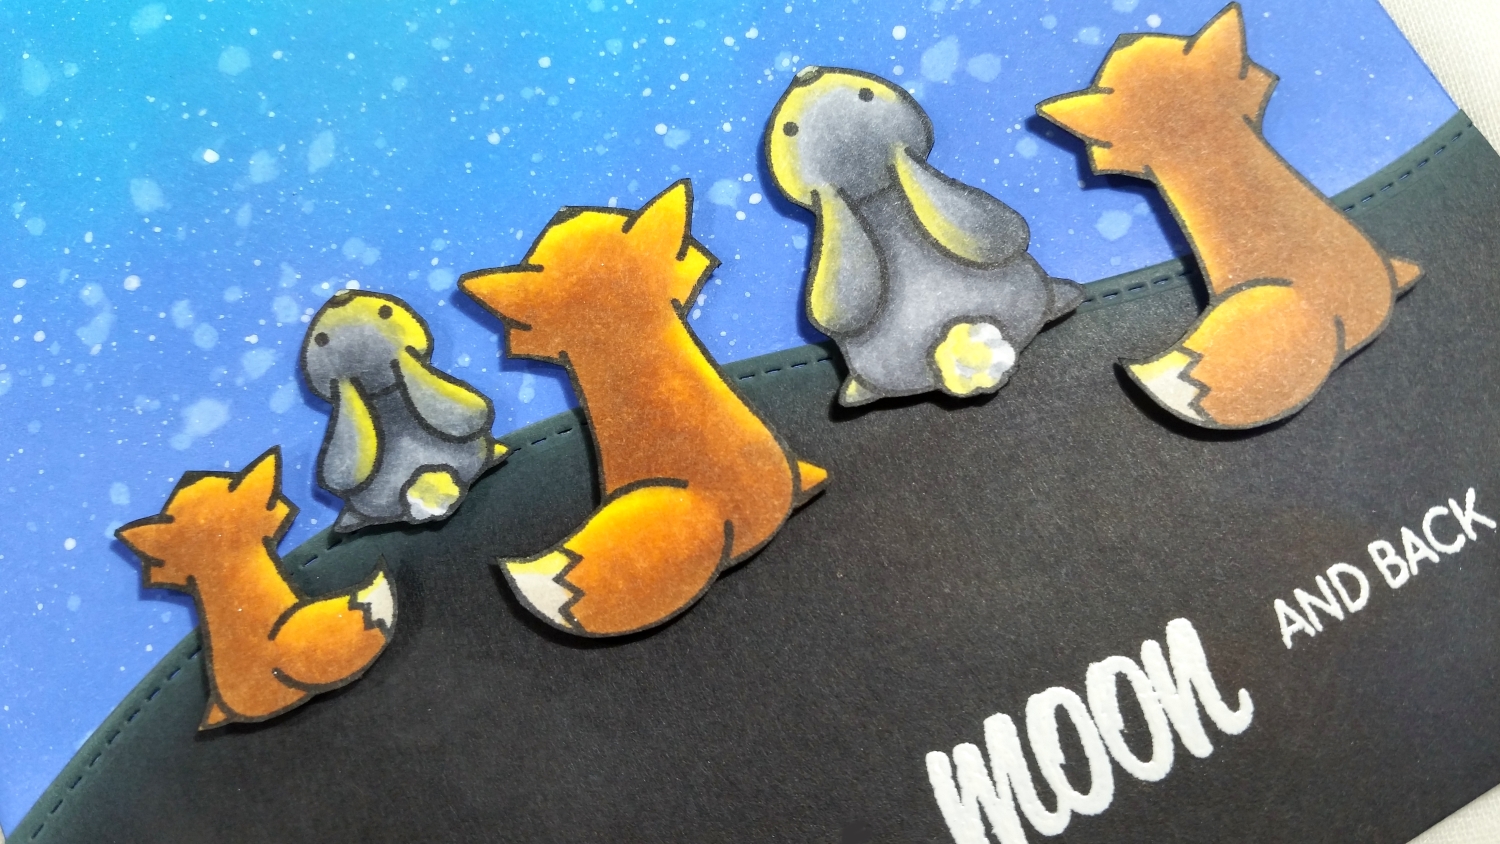
The foxes and rabbits looking up at the moon are from the Lawn Fawn “Upon a Star” stamp set. I know this odd pack of rabbits and foxes would never happen in reality but these adorable animals represent my sister-in-law’s family: the bunnies are the girls and the foxes represent the boys. I used the following Copic colors to give them all a warm moon-lit glow:
Moonlight: Y02
Foxes: YE12, E35 with W1 for tail
Rabbits: C2, C4 and C6
 I used a Lawn Fawn Stitched Hillside Die to create a silhouetted foreground on which the family of foxes and rabbits could stand. But before I used foam dots to pop them on, I blended on some Squeezed Lemonade Tim Holtz Distress Oxide Ink to give the ground a bit of moonlight glow too. I also decided to heat emboss the sentiment, “LOVE YOU TO THE MOON AND BACK” from the Altenew “To the Moon and Back” stamp set on this black base with Ranger Super Fine White Embossing Powder.
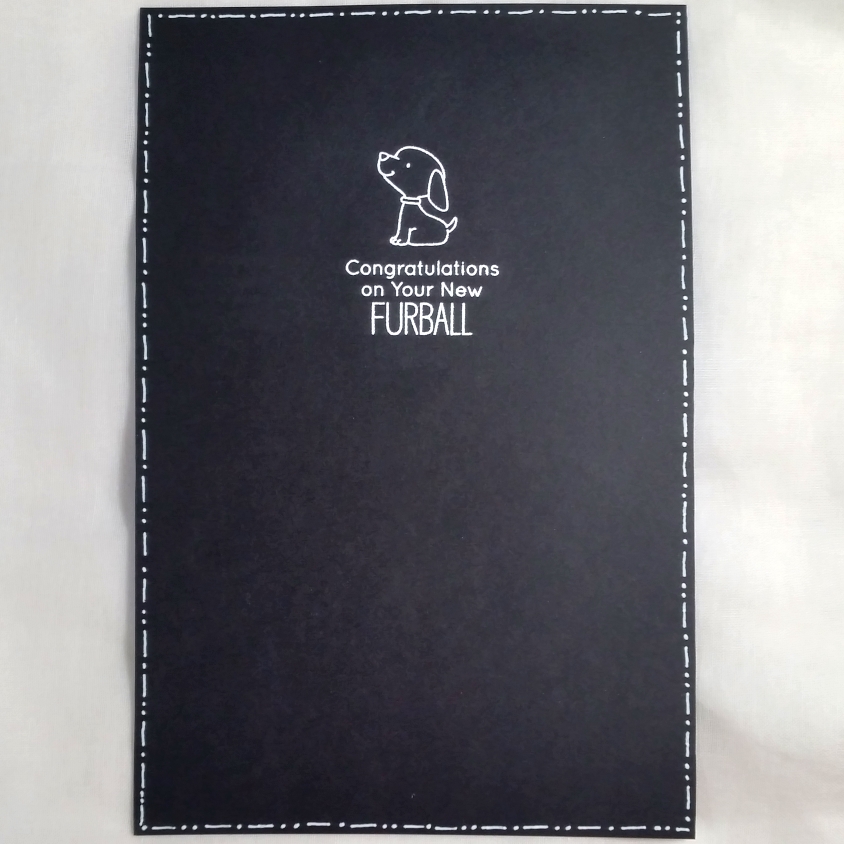
For the back of the card, I used the My Favorite Things “New Best Friend” stamp set to heat emboss the puppy and the sentiment, “Congratulations on Your New FURBALL.” Then to give it a finished look, I doodled some dots and dashes around the edges. I decided to back the card with black card stock and heat emboss this with more Ranger Super Fine White Embossing Powder rather than create a traditional card that opens so that this could easily be framed in a shadow box frame (which I’m sending in the new puppy care package that I’m sending with this card) without adding too much additional bulk.
Disclosure: Many of the supplies I’ve used for today’s project are linked. Some may be affiliate links, which means if you make a purchase I receive a small commission at no extra cost to you. I truly appreciate your support toward the costs of running this blog!
The following is a process video of creating this card:
This card is being entered into the following challenges:
Word Art Wednesday Anything Goes Challenge
Creatalicious Anything Goes with Optional Photo Inspiration Challenge – WINNER
Lawn Fawnatics For the Guys Challenge
Lil Patch of Crafty Friends Anything Goes Challenge
Through the Craft Room Door Anything Goes Challenge
Crafts Galore Encore Anything Goes Challenge
613 Avenue Create Anything Goes with Optional Buttons and Bows Challenge
Crafters Castle Anything Goes with Optional More than One Fold Challenge
Art Impressions Odd Animals Challenge
]]>
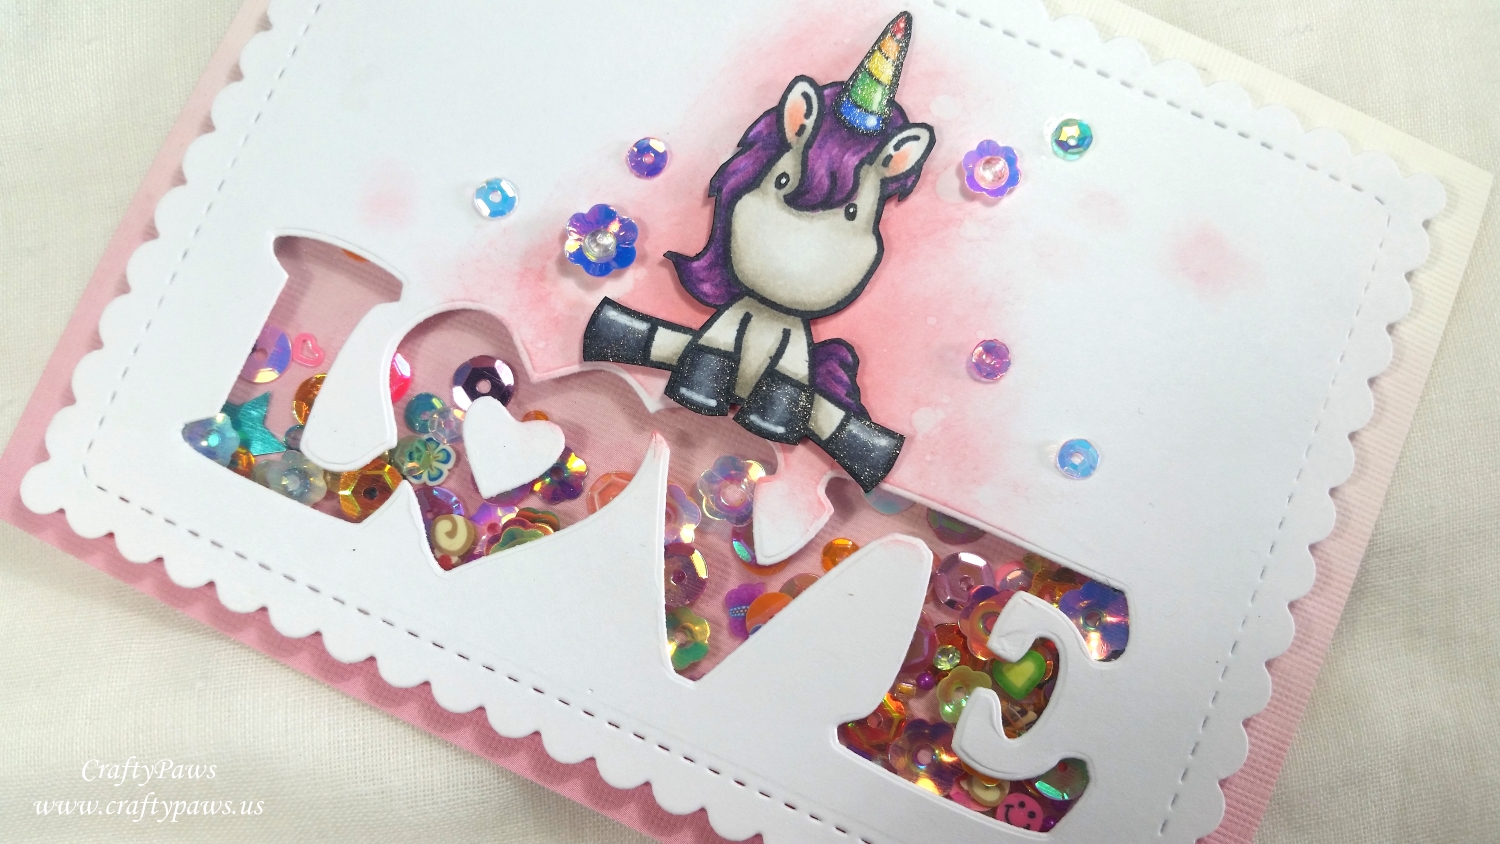
So I was excited to try out this idea with this unicorn love card. I first Copic colored up the cute unicorn from the C.C. Designs “Unicorn Dreams” stamp set:
Unicorn body and ears: W0, W1, W3 and R20
Unicorn hooves: C3, C5 and C7 with Uniball Signo White Gel Pen highlights
Main and tail: V01, V04, V06 and V09
Rainbow horn: B24 and B28; YG07 and G09; Y13 and Y08; YR00 and YR04; and R14 and R37 with Uniball Signo White Gel Pen highlights
I fussy cut that out with my favorite Fiskars Spring Loaded Scissors and inked the cut edges with a Momento Tuxedo Black Marker to give a nice finished look.
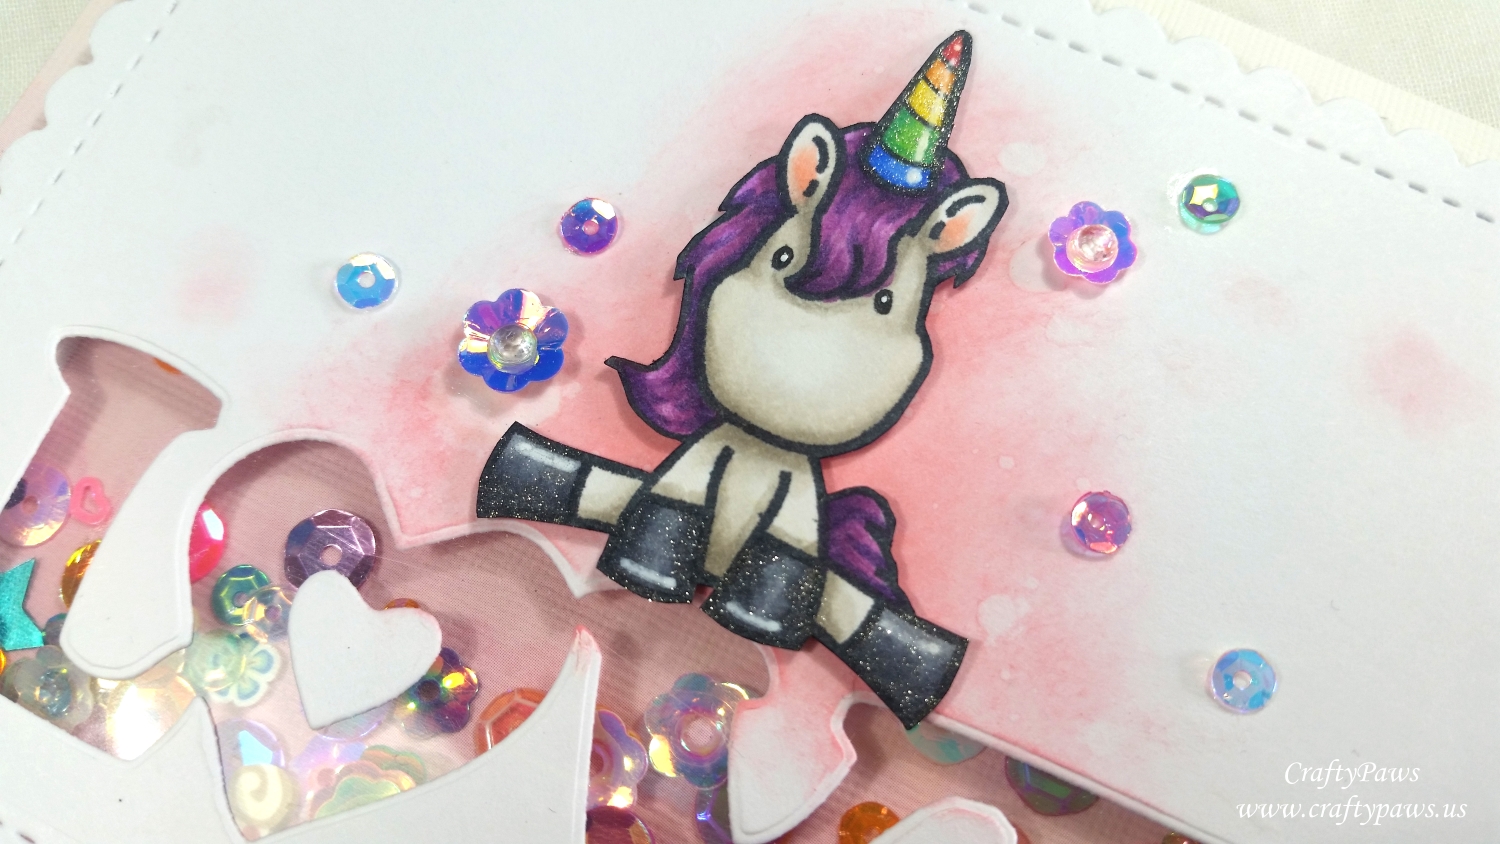
I die cut the card front with the scalloped stitched rectangle die from the WPlus9 “Sunshine Layers” die set. Then I die cut the love shaker window with the Diemond Dies Bold Love Word Die. With a scrap of plastic from some sticker packaging, I then framed in the shaker window using Beacon 3-in-1 Adhesive (which works great on non-porous substances like plastic). Then I created a double thickness double sided foam adhesive well all around the love word window. I also added double sided foam dots around the rest of the card front so that the card front would be level and fully supported. I next used my EK Tools Powder Tool to remove the stickiness around the edges of the double sided foam adhesive in the love word window area so that the Doodles Paper Playground Unicorn Sparkle Blend shaker pieces wouldn’t stick to the edges when I poured them in the well. I next removed all the release paper from the foam dots and foam adhesive strips and carefully aligned the ready-made pink ombre card base over top.
For the card front, I decided to blend on some Tim Holtz Distress Oxide Worn Lipstick behind where I was going to position the unicorn as well as a couple of smaller dots on the upper right and lower left hoof area of the unicorn. I sprinkled a bit of water on the ink and used a paper towel to get a nice splotchy look. Then after adding some thin double sided foam adhesive behind the unicorn, I placed him into place as if he was doing the splits on the love shaker window. For finishing touches I added seven additional shaker pieces around the unicorn for some sparkle and coated the unicorn’s horn and hooves with a coating of Clear Wink of Stella for some shine.
The following is a process video of creating this fun shaker card:
Disclosure: Many of the supplies I’ve used for today’s project are linked. Some may be affiliate links, which means if you make a purchase I receive a small commission at no extra cost to you. I truly appreciate your support toward the costs of running this blog!
This card is being entered into the following challenges:
Through the Craft Room Door Anything Goes Challenge
613 Avenue Create Something New Challenge
Crafty Gals Anything Goes Challenge
Simon Says Stamp Wednesday Anything Goes Challenge
Creatalicious Anything Goes With Optional Love/Anniversary/Thinking of You Challenge
Simon Says Stamp Work It Wednesday Love Challenge
Lil Patch of Crafty Friends Anything Goes Challenge
Art Impressions Feel the Love Challenge
MFT Sketch Challenge #370
]]>
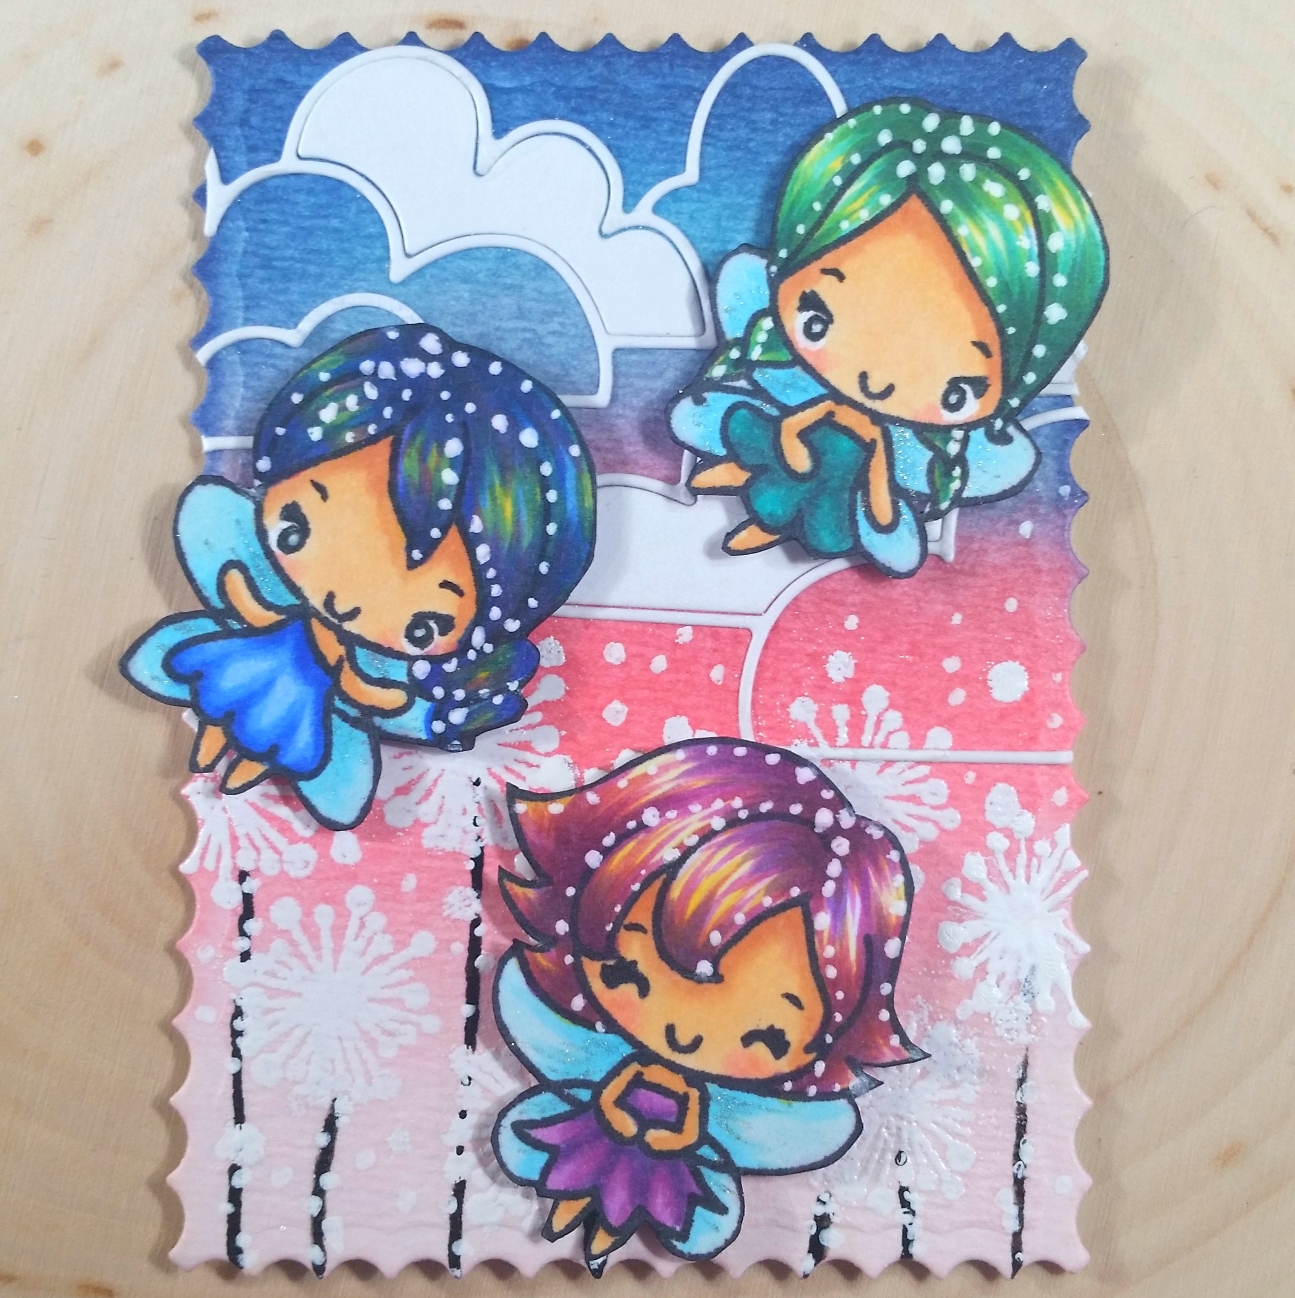 Then I set the scene for the sky with a Simon Says Stamp Cloud Bank Die, leaving a few of the cloud insets in place and otherwise using the outline of the clouds. Then I stamped out the dandelion heads from the Little Fairies stamp set with VersaMark ink and heat embossed some Recollections Snow embossing powder to get a little bit of texture and shine. For the Dandelion stems, I used a Black Sakura Glaze Pen, which gave a similar texture and shine to the embossed areas. For an area that I had inadvertently smeared with VersaMark ink and could no longer get a clear dandelion head impression, I hand painted in a dandelion head with Copic Opaque White (this too had a similar raised, shiny look). I also used a VersaMarker to dot the background a bit more and heat embossed some fairy dust (or dandelion fluff). For even more fine dots, I used a Uni-ball Signo white Gel Pen. Amazingly, all of these mediums (Glaze Pen, Gel Pen, Copic Opaque White, and VersaMark Ink or VersaMarker with embossing powder) had similar shine and slightly raised texture like heat embossing!
Finally, for the little fairies, I used the following Copics: For all the fairies, the skin was colored with: E50, E51, E21, E11, and R20; the wings with: B000 and B01 (topped with Clear Wink of Stella); and hair highlights with: Y11 and Y15
Purple-haired Fairy: Hair and dress: V12, V06, V17
Blue/Purple-haired Fairy: Hair and dress: B21, B24, B18, V06, V17
Green-haired Fairy: Hair and dress: BG15, BG18, BG78
To add to the magical look of the fairies, I added a lot of dots with a Uni-ball Signo White Gel Pen in their hair. After fussy cutting them out, I inked the edges with a Tuxedo Black Momento Marker to cover up the white edge of the paper, and I popped them all up from the background with double sided foam adhesive for a little dimension.
The following is a video share of this ATC:
This ATC is being entered into the following challenges:
Creatalicious Anything Goes with Optional Mythical Creatures Challenge
Simon Says Stamp Wednesday Anything Goes Challenge
Simon Says Stamp Work It Wednesday Favorite Stamps Stamptember Challenge
Word Art Wednesday Anything Goes Challenge
Through the Craft Room Door Anything Goes Challenge
Crafts Galore Encore Anything Goes Challenge – WINNER
Not Just Cards Anything Goes Challenge
Crafty Gals Corner Anything Goes Challenge
 For the ATC base, I upcycled a bit of chipboard packaging and covered it with a glue stick to cover one side with a patterned paper scrap and the other side with some Bristol paper. I cut down the Bristol paper with a Die-namics Stitched Rectangle STAX Die Set. It was a bit too long for an ATC, but I knew that wouldn’t be a problem since I was covering the lower part of the ATC in the scene I was planning. I blended on Tim Holtz Distress Ink in Squeezed Lemonade, Wilted Violet and Chipped Sapphire to create a sun setting sky background.
For the silhouetted city skyline, I cut down some black card stock with the Paper Smooches Super 2 Cityscape Die. All the windows cut out with this die, so I backed the building windows with gold glittered card stock and re-filled some of the windows with the black card stock window cut outs. This adds a nice sparkle to the scene without making it look like all the windows are lit up in an unrealistic way.
For our Super Girl superhero, I used The Greeting Farm “Little Heroes” stamp set. I stamped out the little girl who looks like she is in mid flight with her cape streaming behind her, as well as a big mask with the eyes peeking out. I was happy to have the option to give this flying girl open eyes with this mask accessory stamp since to me a super hero should fly with her eyes closed. 😀 hehehe I used the following Copic colors to color both images:
Skin: E50, E51, E21, and R20
Hair: B01, C5, C7 and C9
Costume: R24, R27, B02, B05, Y11, Y15, B01, C7 and C9
I next fussy cut both of the images. To cover the white edges of the cut images, I inked the edges with a Momento Tuxedo Black Marker. Then I glued the mask onto the girl and then popped up the whole Super Girl onto foam dots to raise her up off the ATC base. Lastly, to add a little extra shimmer, I coated the red parts of the super hero costume with Clear Wink of Stella.
The following is a process video of making this Super Hero Scene ATC:
This ATC is being entered into the following challenges:
The Greeting Farm Farm Fresh Make a Scene Challenge
Simon Says Stamp Monday ATC Challenge
Stamp Sensations Anything Goes Challenge
Word Art Wednesday Anything Goes Challenge
Creatalicious Anything Goes with Optional Glitter/Bling
Crafty Gals Corner Punches and/or Dies Challenge
Lil Patch of Crafty Friends Anything Goes Challenge – WINNER
613 Avenue Create Anything Goes with Optional Shabby Chic Challenge
Not Just Cards Anything Goes Challenge
]]>
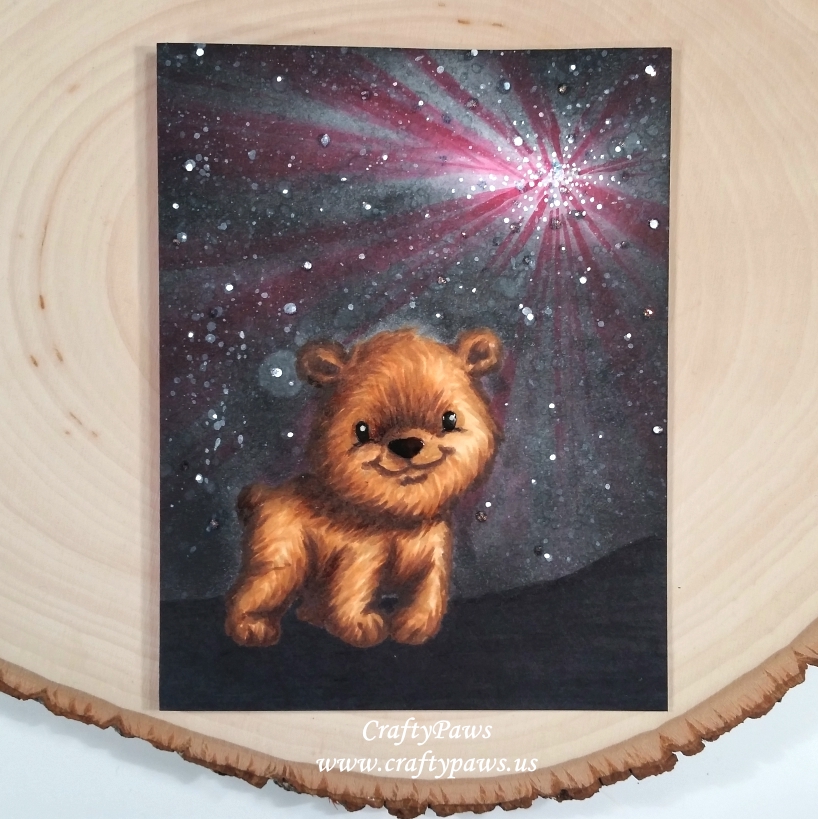 I did some no line coloring, stamping out the bear cub from the Some Odd Girl “Winter Friends” stamp set (retired) but changed it from a polar bear to a brown bear (since my friend is moving to an area with brown bears). I used Momento Desert Sand ink and used the following Copic colors: Silhouetted ground: N9, N10 and 100; Bear cub: E51, E53, E55, E57, E59 and E79; Pink streaky sky: R81, R83, R85 and R37.
To make it into a warm summer night sky, I blended on Tim Holtz Distress Ink in Black Soot to darken the sky background over top of the pink streaks emanating from a point where I wanted to place a special star.
For a soft star-filled look, I splattered lots of water on the sky area and dabbed up the released ink with a paper towel. Next, to add brighter stars, I flicked on watered down Copic Opaque White with a paint brush. Lastly, to add even brighter stars, I added white dots, especially where I wanted the special star to shine brightest by dabbing a pick directly into the Copic Opaque White.
 To add that extra sumthin’ sumthin’, I also added dots of Ranger Icicle Stickles; the glitter in the Stickles dots added a rainbow of colors that in the right light (see top photo), makes the sky look magical. For a finishing touch, I added shine to the bear cub’s eyes and nose by topping both with Ranger Glossy Accents.
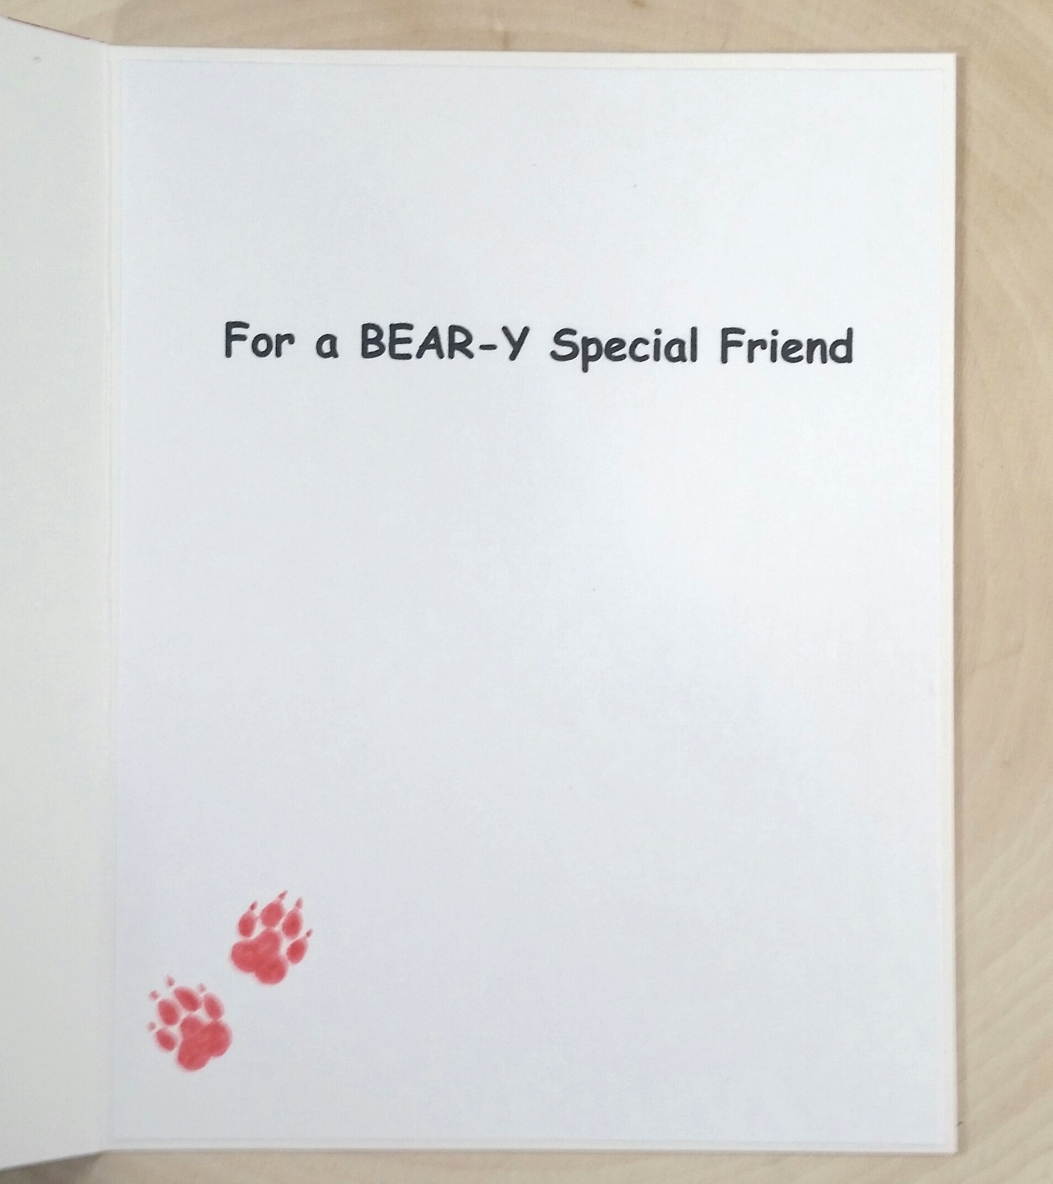
For the inside of the card, I printed out on my computer the punny sentiment, “For a BEAR-Y Special Friend”. Then, to further connect the inside of the card with the front bear image, I stamped out two dog paw prints with Tim Holtz Distress Ink in Worn Lipstick in the lower left corner. I know, dog paw prints for a bear? But yes, with the simple addition of claws using the fine point side of the matching Tim Holtz Distress Marker in Worn Lipstick, I altered the dog paw prints into bear paw prints! 🙂
The following is a no line coloring process video of the bear cub:
This card is being entered into the following challenges:
Card Mania Life is Colorful Challenge
Simon Says Stamp Wednesday A Bit of Sparkle Challenge
Simon Says Stamp Monday Little Critters Challenge
Addicted to CAS Pink Challenge
Creatalicious Anything Goes Challenge with Optional Stencils
Word Art Wednesday Anything Goes Challenge
Fab ‘n’ Funky Create a Background Challenge – WINNER
Lil Patch of Crafty Friends Anything Goes Challenge
613 Avenue Create Anything Goes with Optional Make a Container Challenge
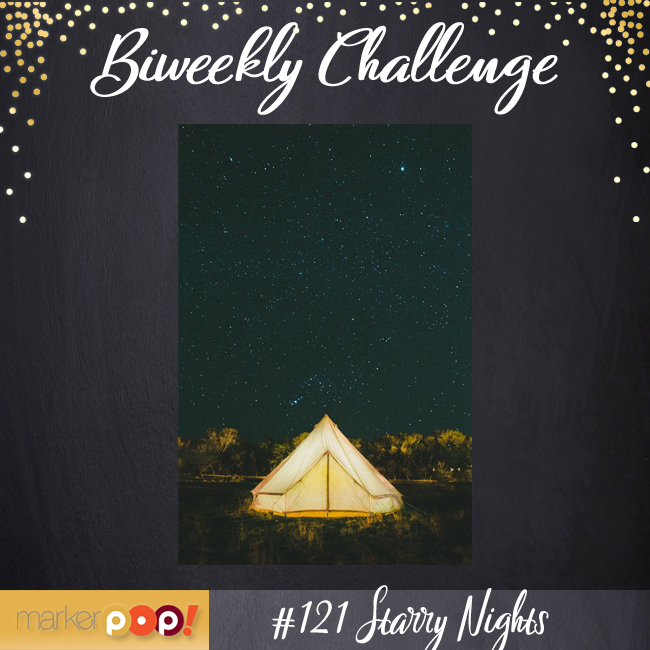
MarkerPOP Starry Nights Challenge
]]>
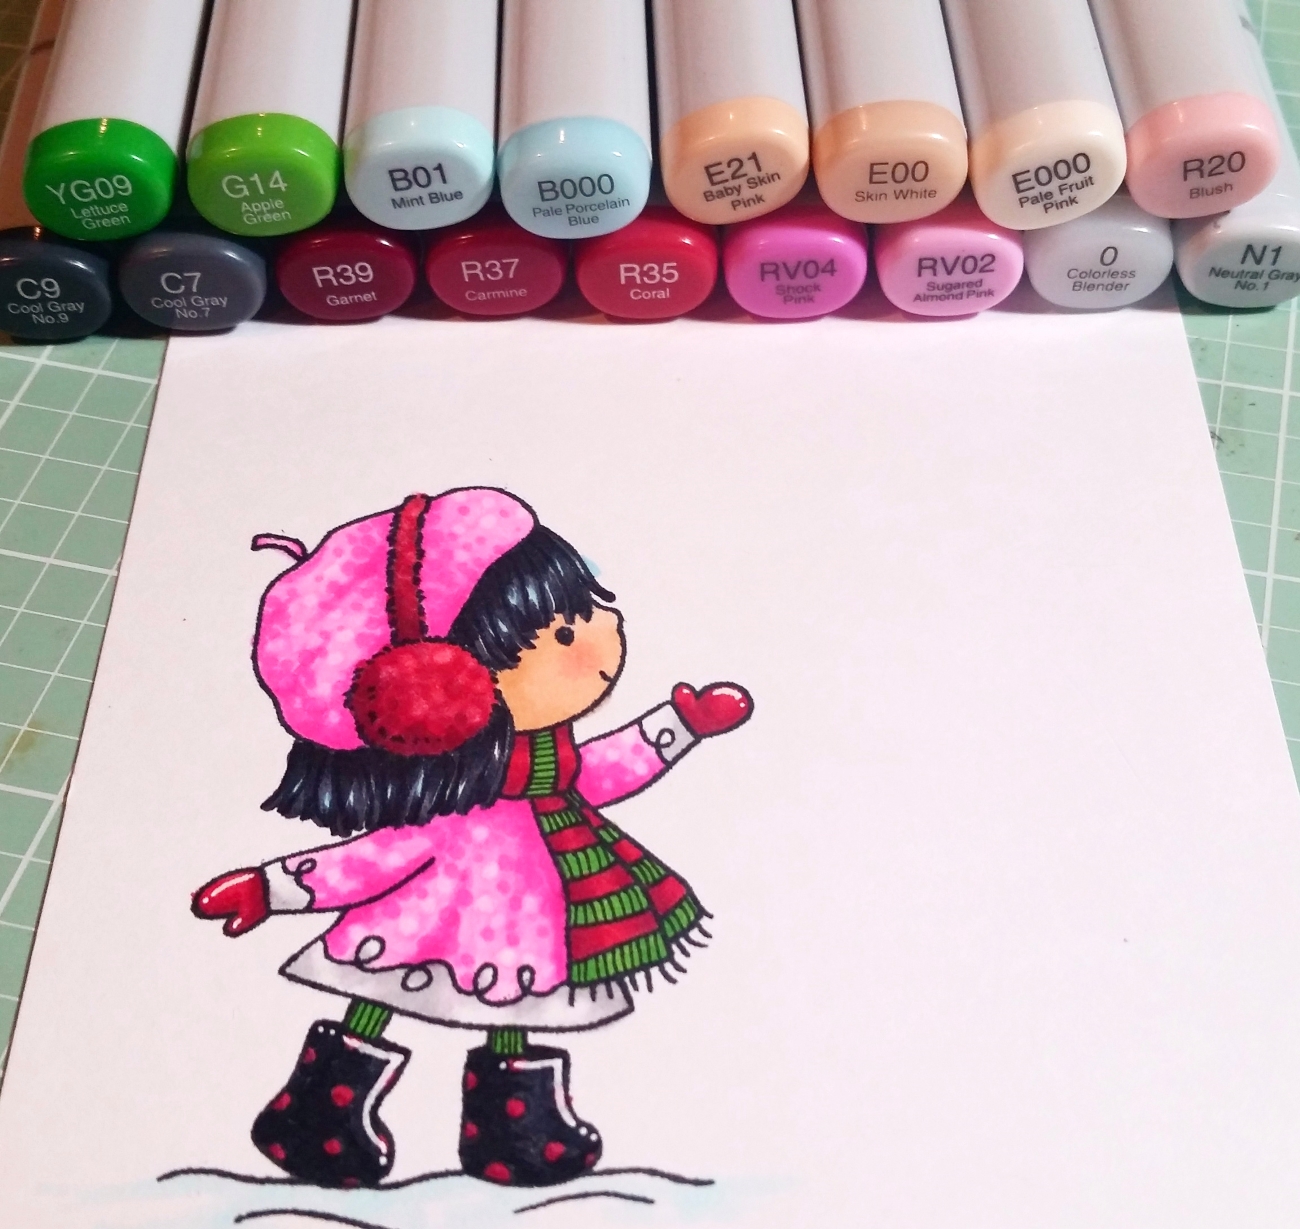 I stamped out the girl and tree pot with MFT Black Licorice Hybrid Ink and colored them with the following Copic colors:
Hair: C7, C9, B01
Skin: E000, E00, E21 and R20
Green scarf and tights: G14 and YG09 with stripes added with 0.05 pt Copic multiliner pen
Red scarf, ear muffs, polka dots on boots, mittens and bow on tree pot: R35, R37 and R39 with O for boucle effect on ear muffs
Black boots: C7 and C9
Pink coat, beret and tree pot: RV02, RV04 with 0 for boucle effect on coat and beret
White trim on coat: N0 and N1
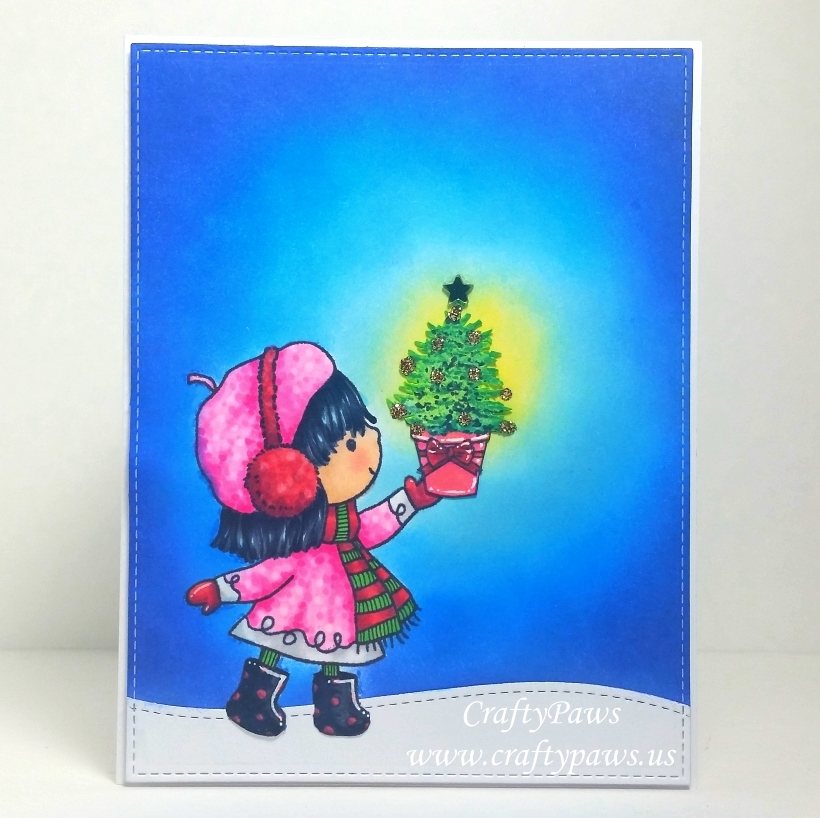 Then I applied Winsor & Newton Art Masking Fluid with an old paint brush over top of the colored image. WOW that was scary. I kept thinking I was ruining all my coloring work. Then it was a waiting game of letting the masking fluid fully dry (you can’t use a heat tool to quicken this because then you can make the masking fluid stick to the colored image). It was very humid so I let it sit for about an hour and a half. Then I did some Distress Ink blending with finger daubers to blend on the background sky with Squeezed Lemonade, Tumbled Glass, Salty Ocean and Blueprint Sketch. Afterwards, I just rubbed off the rubbery masking fluid and to my relief found that the image was completely unharmed. YAY!
While I was waiting for the masking fluid to dry, I stamped out the Christmas tree (both the tree and pot are from a Katy Sue Designs The Door stamp set) with an old American Crafts aqua pigment ink from my stash. Then I re-stamped the tree after dabbing on some Tim Holtz Distress Marker in Pine Needles to some of the branches to add depth of color. Lastly, I added some deeper shadows by dotting on some Copic C9. Whew! That’s a lot of different inks on a little tree, but I think it all looked good together in the end, especially once I fussy cut it out. 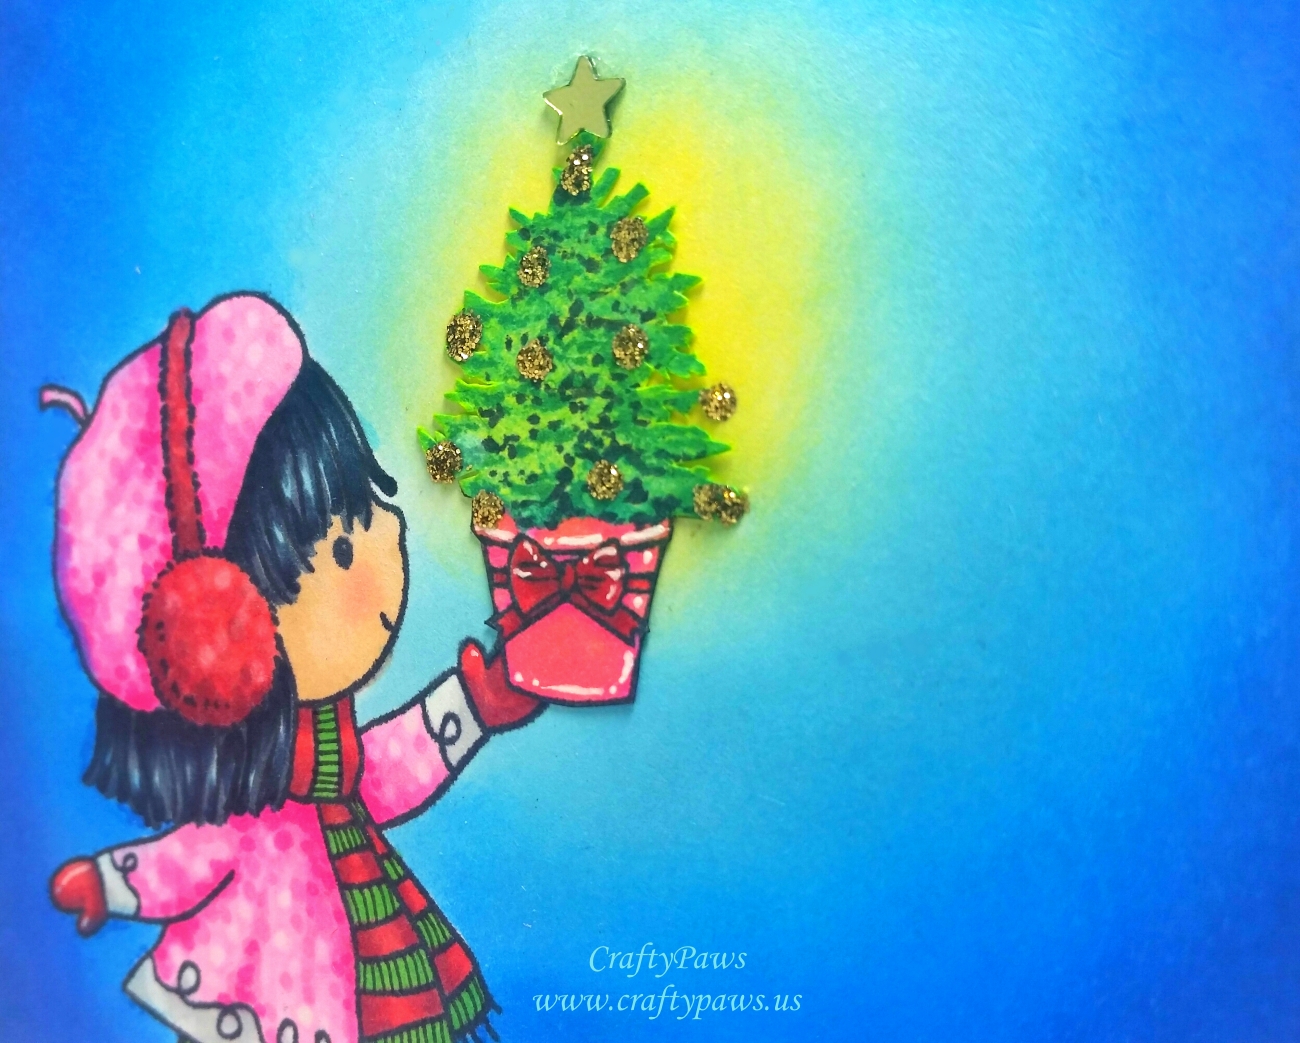 Now that fussy cutting was painstaking, but well worth the final look with the yellow blended background peeking through the tree branches. To decorate the little Christmas tree, I used Champagne Gold Stickles to add the look of sparkly baubles and a double layer of silver star confetti pieces for the star at the top.
For the snowy ground, I used a Lawn Fawn Stitched Hillside Borders Die (available HERE in the UK) on some white card stock, and I used an X-Acto blade to cut around the little girl’s boots so that it would look like she was walking on a snow bank. I used one of my all-time favorite card making dies–the large stitched rectangle die from the My Favorite Things Die-namics Blueprints 15 die set (available HERE in the UK) to cut out the whole scene. I popped up the scene on double sided foam adhesive and adhered it to a plain white card base. For the inside liner of the card, I printed out on my computer a simple sentiment, “O’ Christmas Tree, O’ Christmas Tree….” as if the little girl was singing the Christmas carol. 🙂
This card is being entered into the following challenges:
Craft Your Passion Anything Goes Challenge
Fab ‘n’ Funky Christmas Challenge
Crafty Purple Frog Magic of Christmas Challenge
Addicted to Stamps and More Make Your Mark Challenge
Crafty Gals Corner Anything Goes Challenge
Simon Says Stamp Monday O’ Christmas Tree Challenge
Simon Says Stamp Wednesday Anything Goes Challenge
Word Art Wednesday Anything Goes Challenge
Seven Hills Crafts Inspired by a Christmas Movie, Song or Carol Challenge
]]>