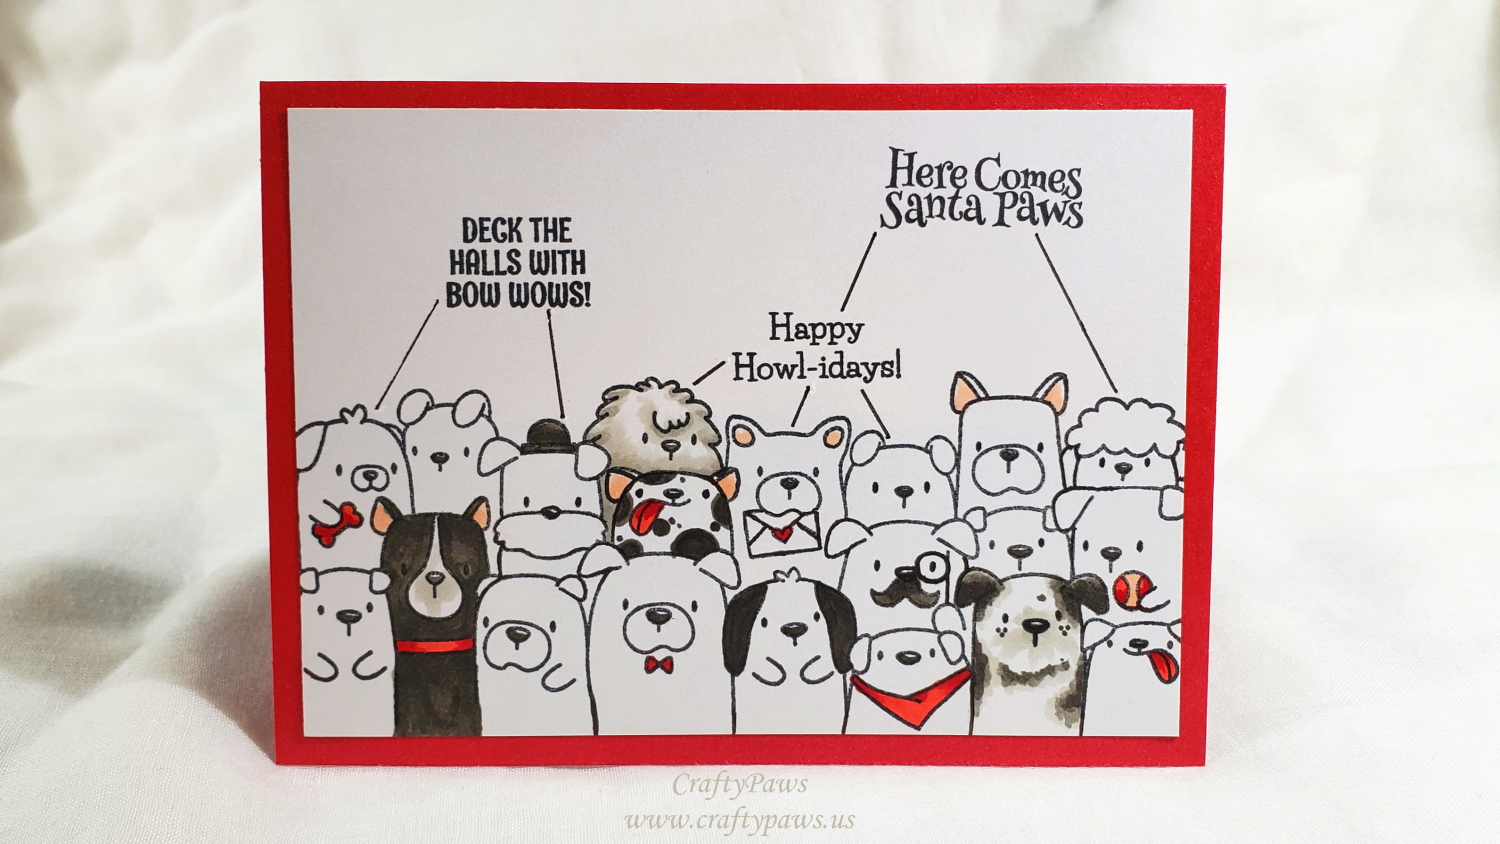
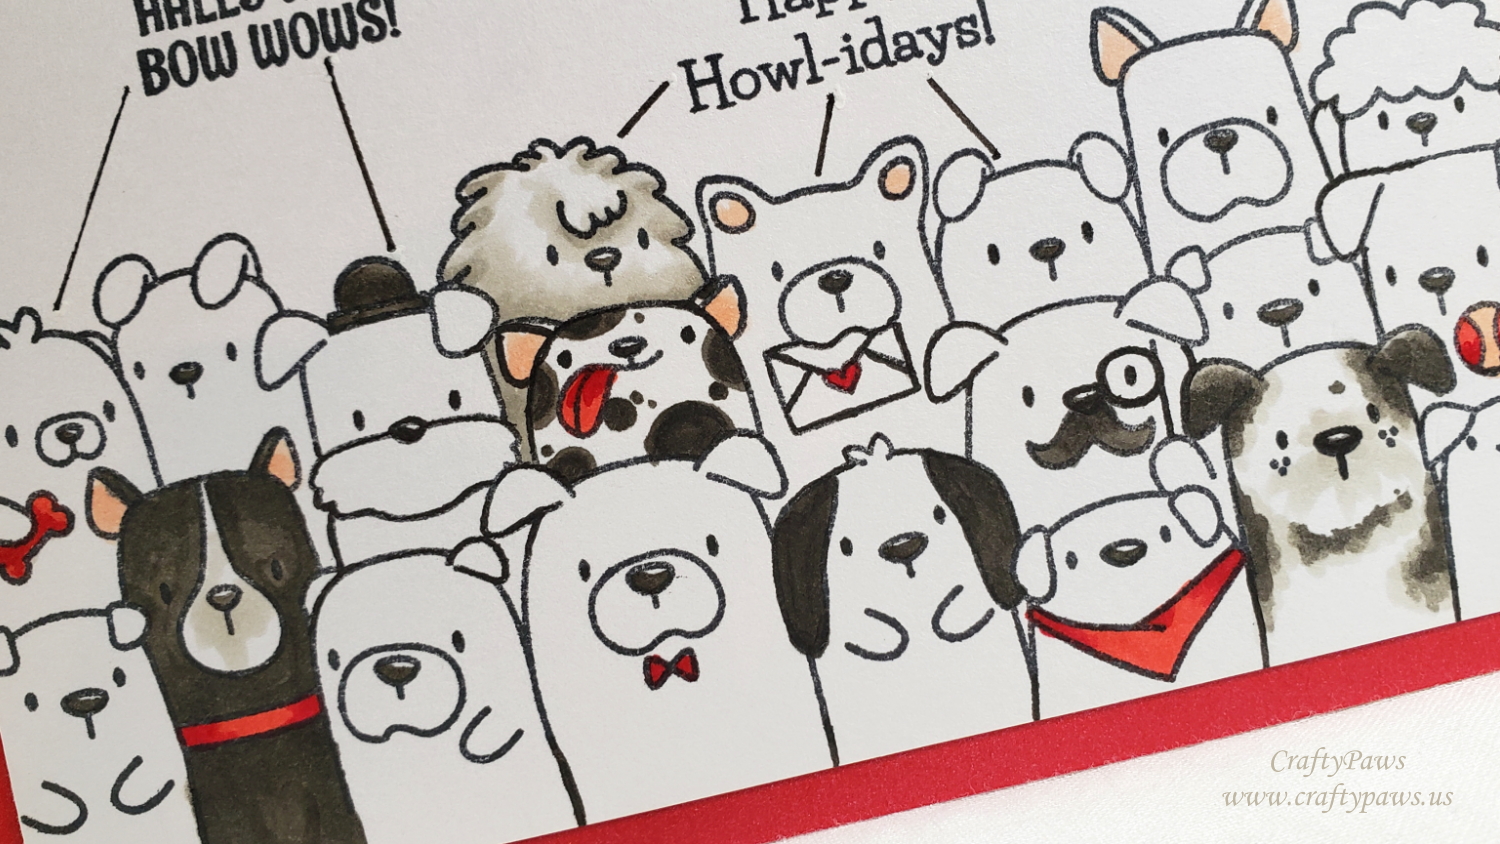
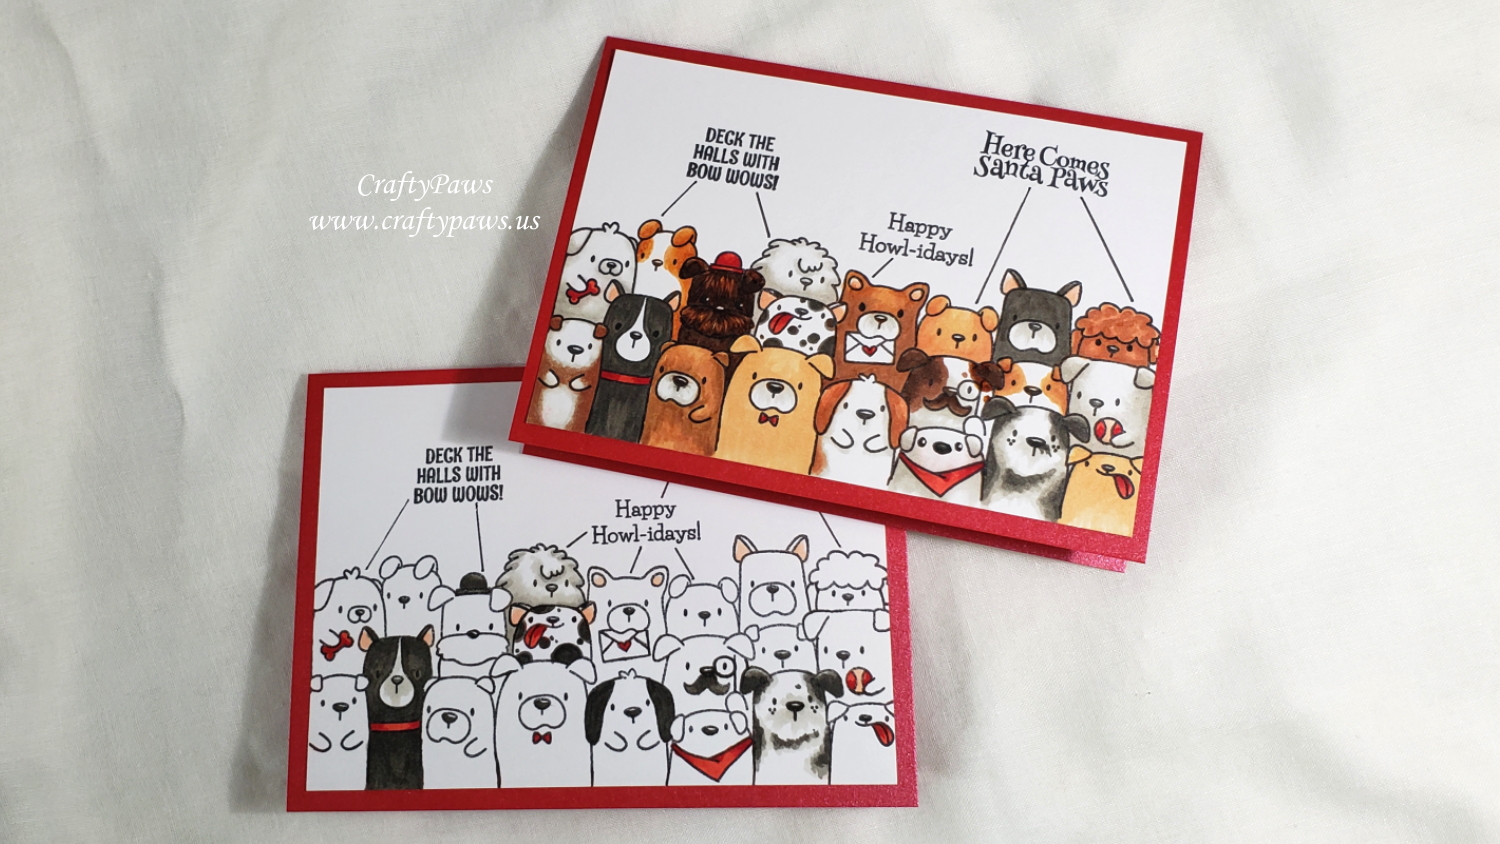
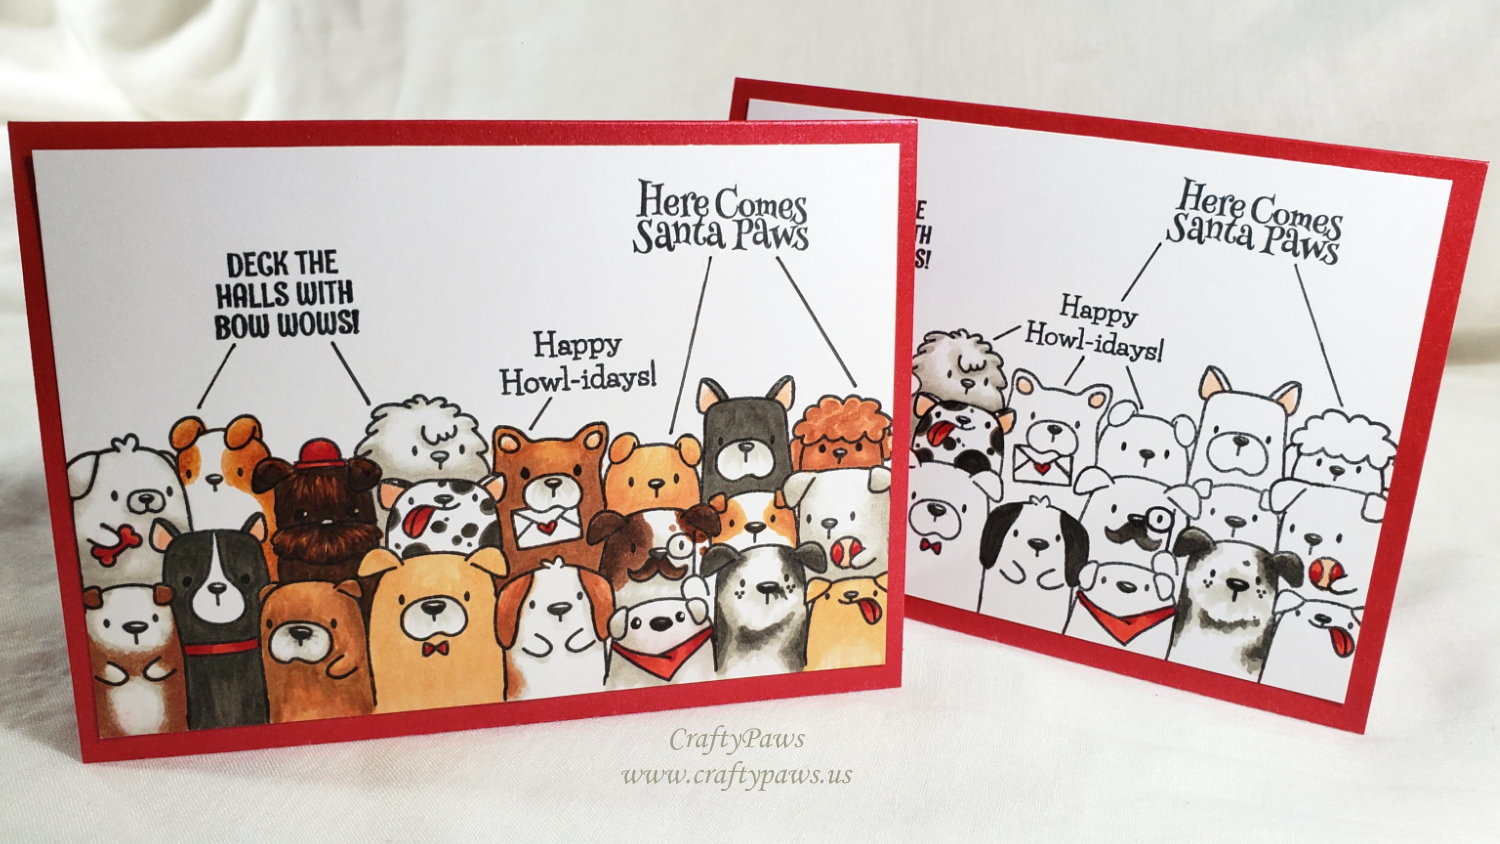
For these two cards, I used the adorable pack of pups from the Mama Elephant “The Dog’s Woof” stamp set. For one card, I limited the coloring to a few of the pups in warm greys with red highlights for pops of color. Doing this spotlight coloring also saved a lot of time. 🙂
Warm Greys and whites: W1, W2, W3, W5, W7
Reds: R30, R24, R29
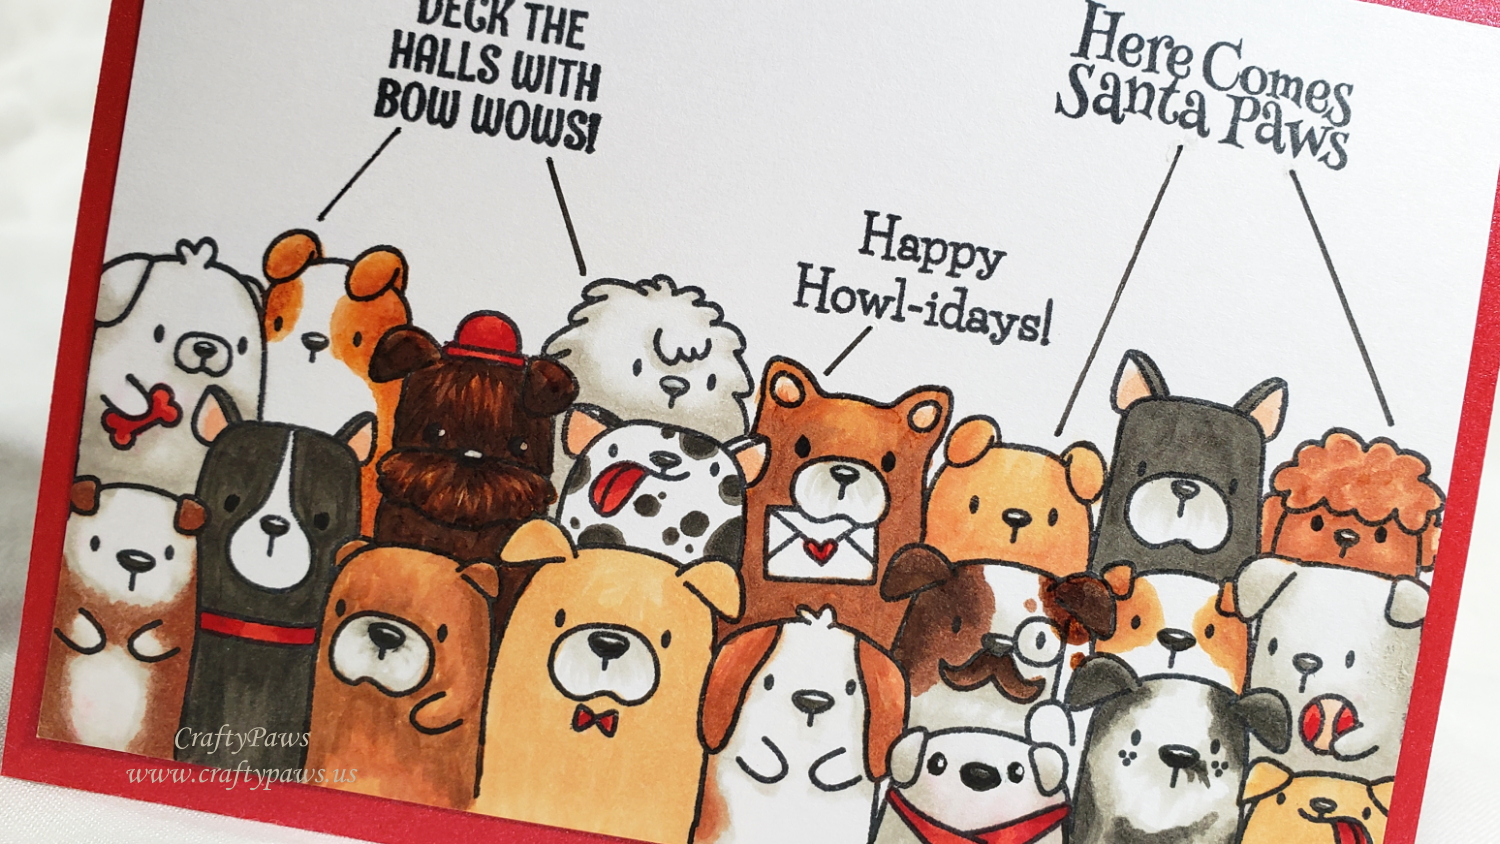
For the second card, I used the same warm browns and reds but added some warmer golden and brown tones to color up the entire pack:
Warm Greys and whites: W1, W2, W3, W5, W7
Reds: R30, R24, R29
Golden tones: E11, E21, E13, E23
Browns: E13, E15, E23, E25, E59
Uniball Signo White Gel Pen for highlights
For the small sentiments, I used the Art Impressions “Santa Paws Set” and then drew in speech lines with a Copic Multiliner Pen in 0.1 pt Black Pen and a ruler. I loved how using these 3 different sentiments: “Deck the Halls with Wow Wows!”, “Here Comes Santa Paws”, and “Happy Howl-idays!” in the otherwise blank top half of the card front adds interest and a kind of rhythm.
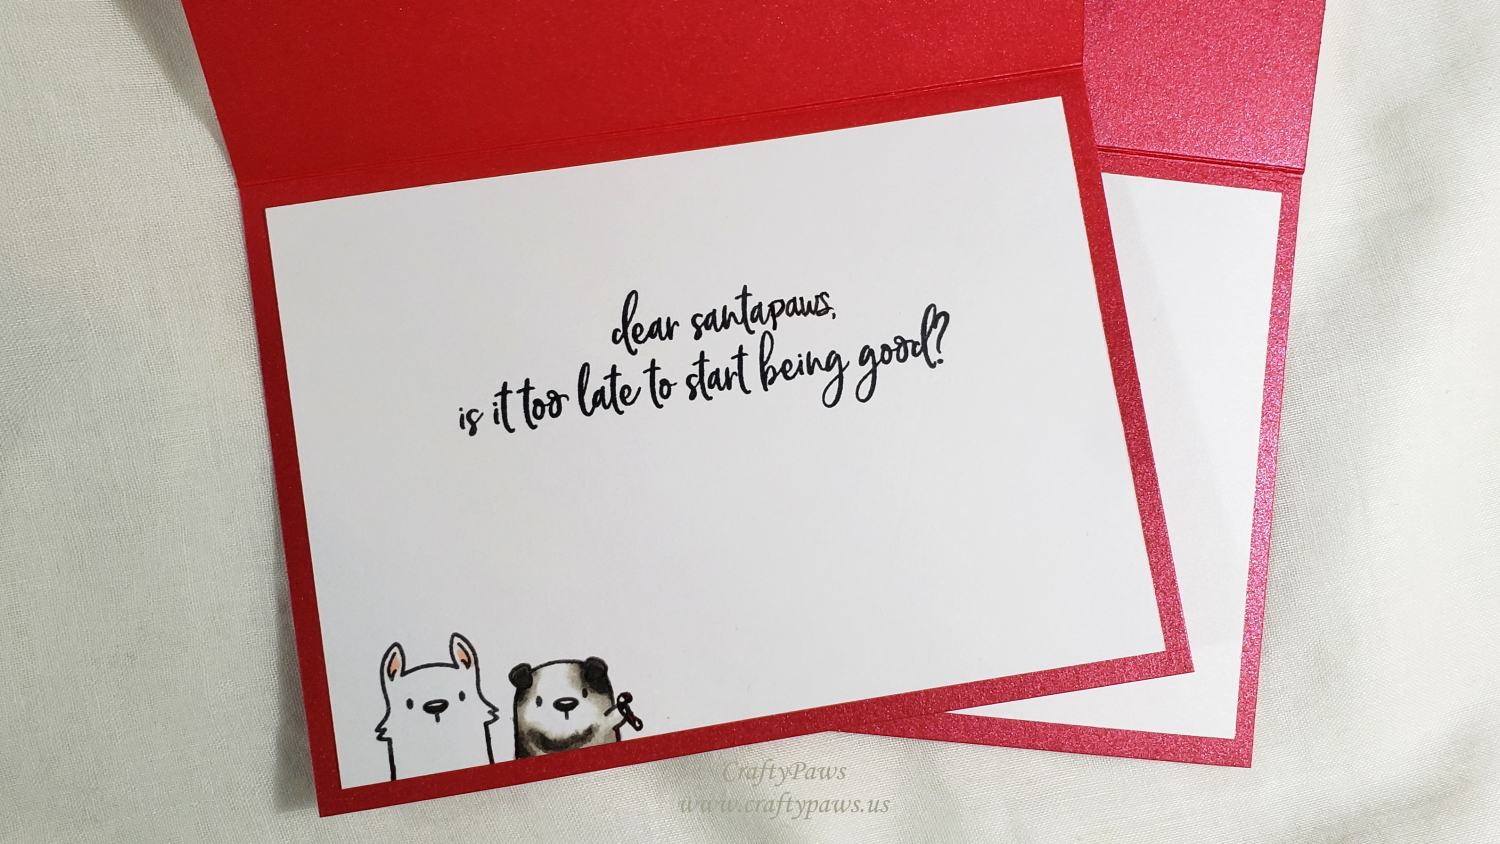
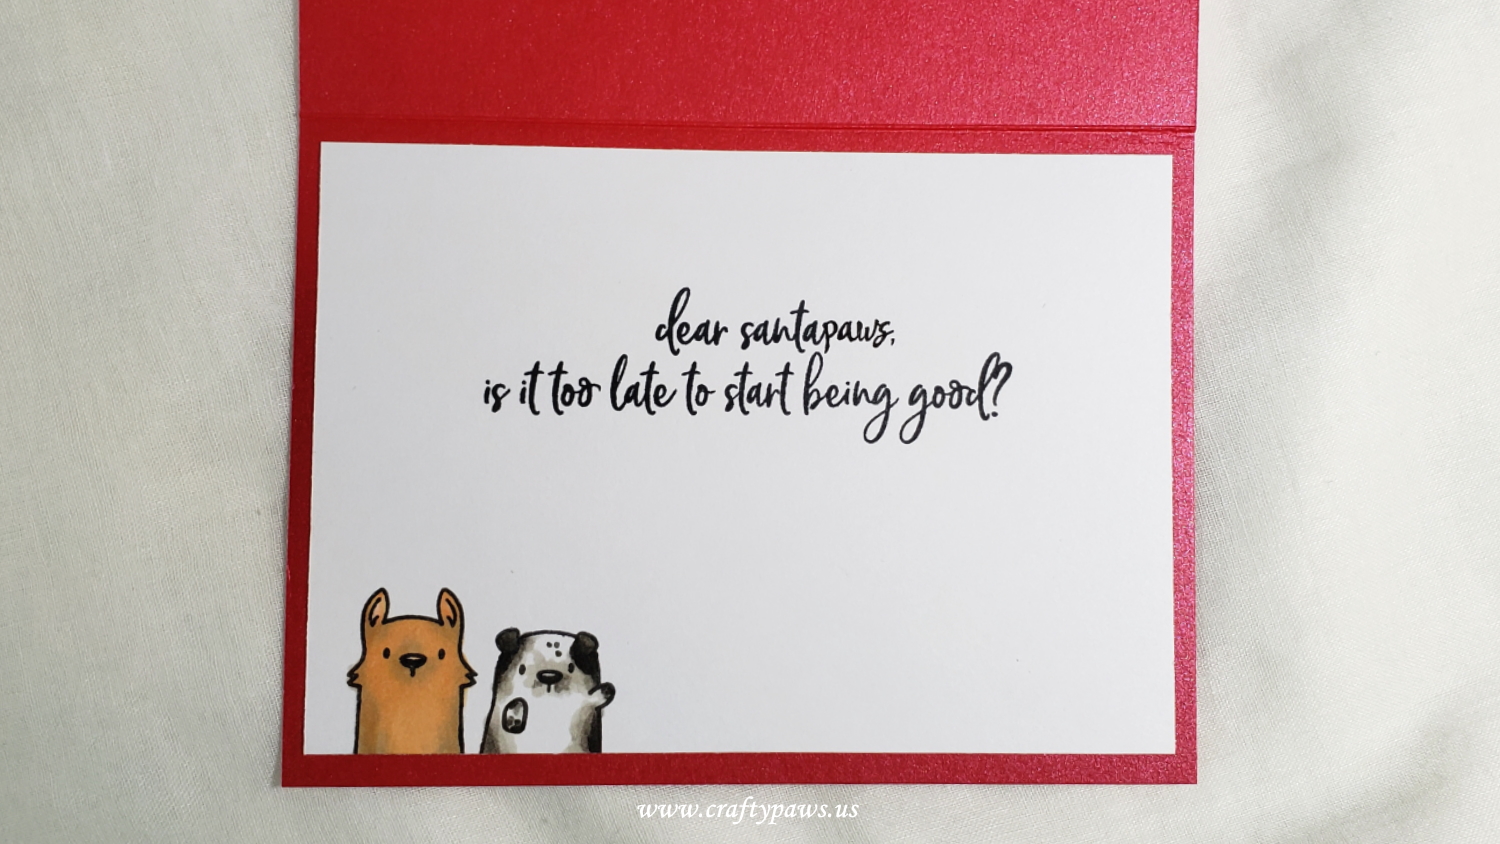
For the inside liners of the cards, I added two more pups from the Mama Elephant “The Dog’s Woof” stamp set to add a little extra somethin’ somethin’ to decorate the inside. I used a funny Picket Fence Studios sentiment from the “Inappropriate Christmas” stamp set for the main sentiment. I altered it a tiny bit using a Copic Multiliner 0.05 pt Black Pen by adding “paws” to the end of “santa” to make the sentiment read, “dear santapaws, is it too late to start being good?”
These single layer cards are relatively quick to craft and perfect to mail internationally (no bumps or extra weight). Hope you all are healthy, happy and well during this holiday season! Be safe and stay crafty. Big hugs, CraftyPaws
CLICK on the following picture to watch the process video of crafting these cards:
Disclosure: Many of the supplies I’ve used for today’s project are linked. Some may be affiliate links, which means if you make a purchase I receive a small commission at no extra cost to you. I truly appreciate your support toward the costs of running this blog!
These cards are being entered into the following challenges:
Simon Says Stamp Wednesday Christmas Critters Challenge
Creatalicious Anything Goes with Optional Christmas Challenge
Word Art Wednesday Anything Goes Challenge
Lil Patch of Crafty Friends Anything Goes Challenge
Art Impressions Reason for the Season Challenge
Through the Craft Room Door Anything Goes Challenge
Crafty Gals Corner Tis the Season Challenge
]]>
I first Copic colored all the images with the following colors:
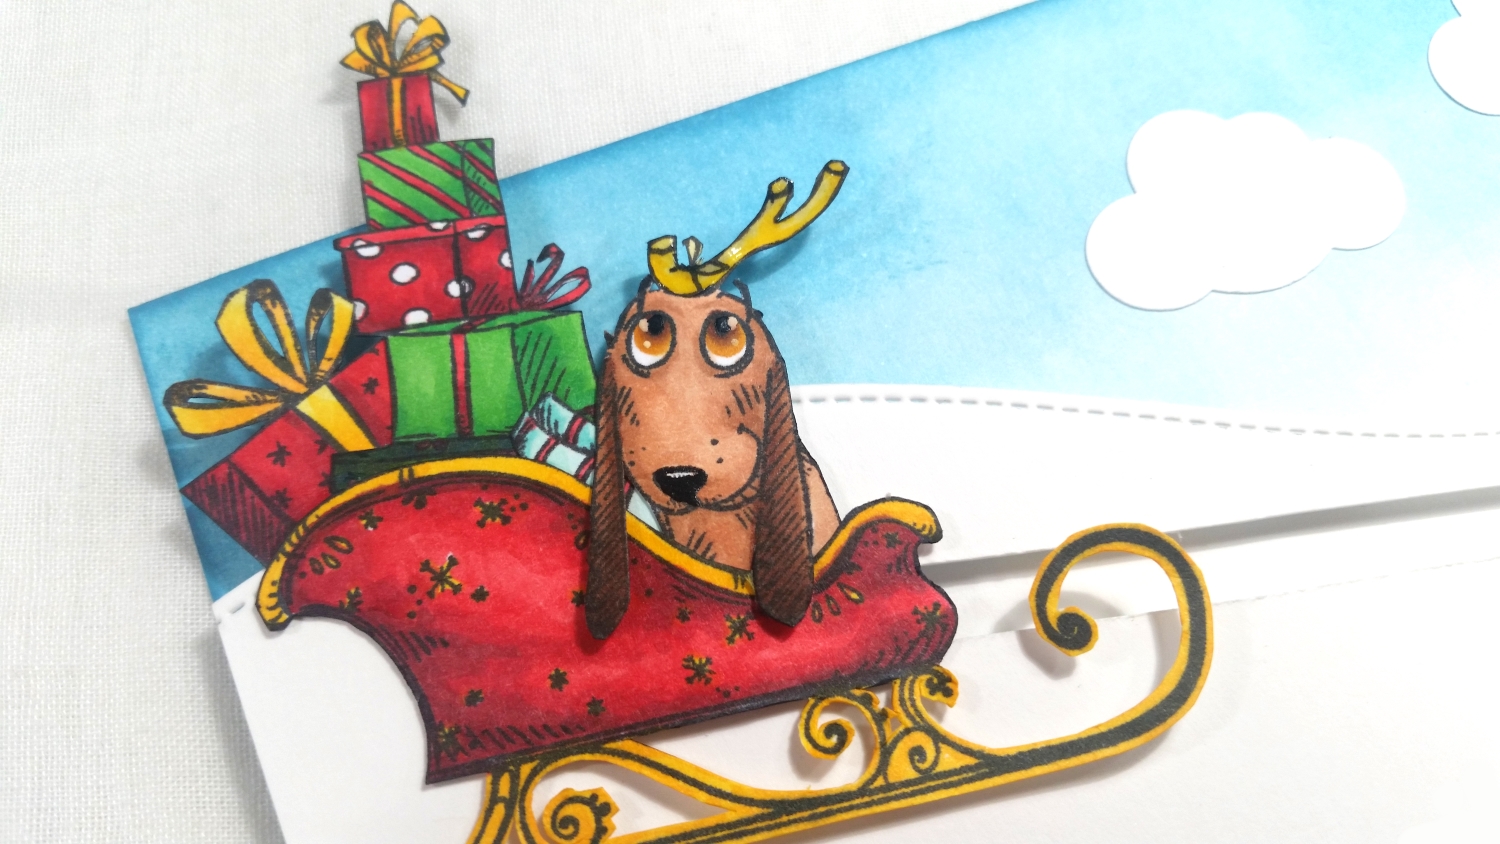
Max Dog: White: W0; Eyes: YR24, E23 and E25; Brown spots: E23, E25 and E29; Light brown face: E11, E13, E23
Faux antler: Y11 and Y19
Scarf/present: BG11, BG13, R35 and R39
Sleigh: Y19, R35, R37, and R39
Presents: G14, YG09, G09, Y19, Y38, R35, R37 and R39
Then I fussy cut out all the pieces I wanted to include in the slider assembly. Then with a bit of doodling for the faux reindeer antler and a little craft surgery to foreshorten Max’s body and keep his ears flapping freely in front of the sleigh edge, I put together Max riding in a sleigh filled with Christmas presents.
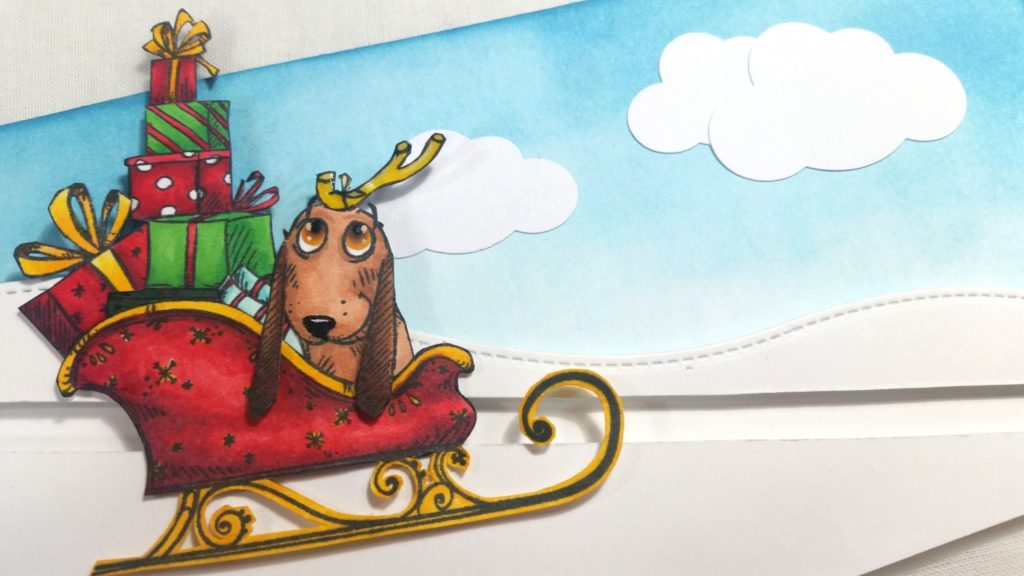
I wanted to keep the card background simple so as not to distract from the main puppy-sleigh focal point so I simply blended on some Distress Ink in Tumbled Glass and Broken China and then punched out some clouds using Fiskars X-Large and Large Cloud Punches. The slider mechanism was easy too. I used some Lawn Fawn Stitched Hillside dies to create one long wavy snowy hillside on some heavy weight card stock. Because the slider assembly was so large, I wanted the sliding distance long enough to appreciate the interactive element so I made the card 4″ x 8.5″.

I used a metal ruler and an X-Acto blade to cut out a slider opening almost the full length of the hillside. I then attached small, but thick, foam dots to a scrap of heavy weight cardstock and lined it up so that the foam dots would come through the slider opening. Then I popped up the entire outside edges of the snowy hillside piece with thick foam dots (if you only have fun foam or thinner foam dots, you can double them up). Then I attached the doggy sleigh assembly to the small foam dots from the front of the slider opening.
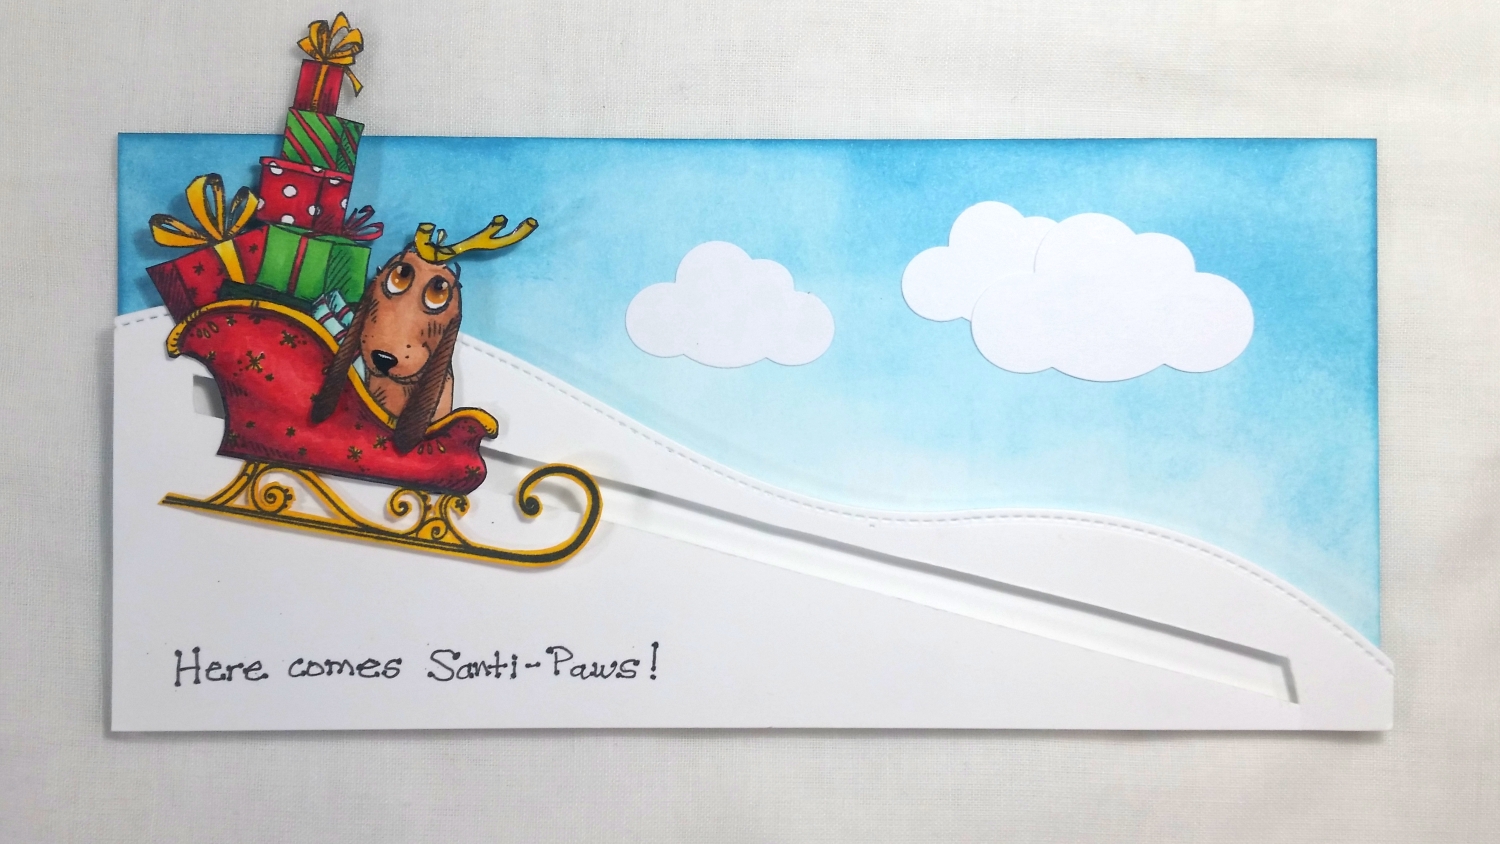
As often happens to me, I forgot to stamp my sentiment onto the snowy hillside before putting the whole card together. Because now the hillside was too unevenly popped up to stamp on, I simply wrote out with a Distress Marker in Black Soot, “Here comes Santi-Paws!” in the lower left corner. The slider mechanism works perfectly, and I think the dog and Grinch-loving recipient will really enjoy this fun, interactive card.
Please CLICK on the following picture if you’d like to watch the process video of crafting this card:
Disclosure: Many of the supplies I’ve used for today’s project are linked. Some may be affiliate links, which means if you make a purchase I receive a small commission at no extra cost to you. I truly appreciate your support toward the costs of running this blog!
This Doggy Christmas Slider Card is being entered into the following challenges:
Fab ‘n’ Funky All Creatures Great and Small Challenge
Through the Craft Room Door Anything Goes Challenge – WINNER
613 Avenue Create Anything Goes with Optional Clean and Simple Challenge
Stamping Sensations I Spy with My Little Eye Something Beginning with B Challenge – Boxes, Bows and Blue skies
Pause Dream Enjoy Cards Challenge
The Corrosive Challenge Anything Goes Challenge
Simon Says Stamp Wednesday Anything Goes Challenge
Word Art Wednesday Anything Goes Challenge
Creatalicious Anything Goes with Optional Texture Challenge
Simon Says Stamp Work it Wednesday Celebrate It Challenge
]]>
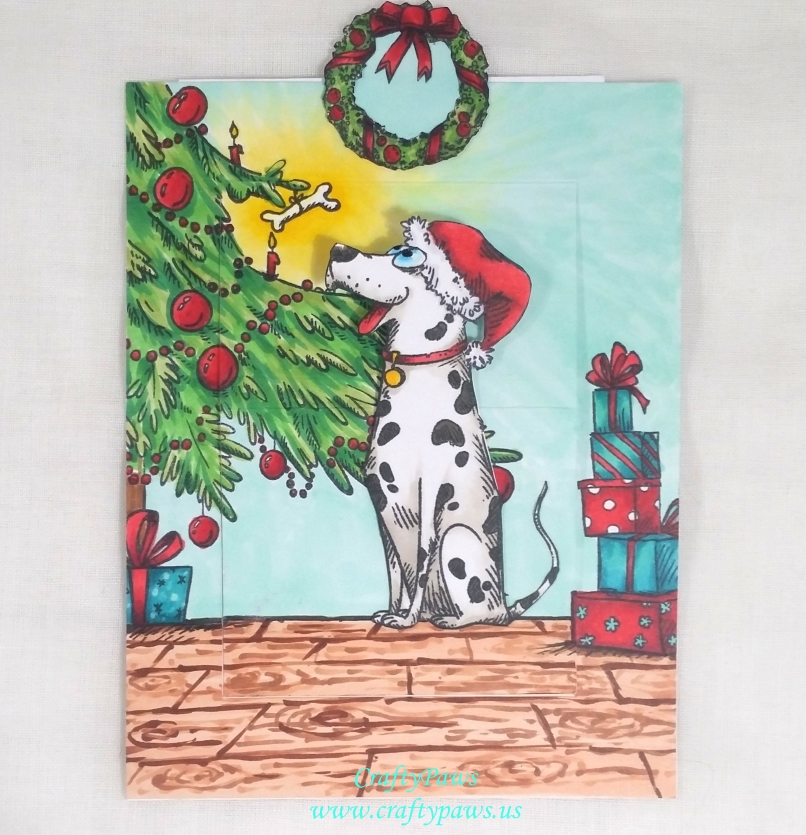
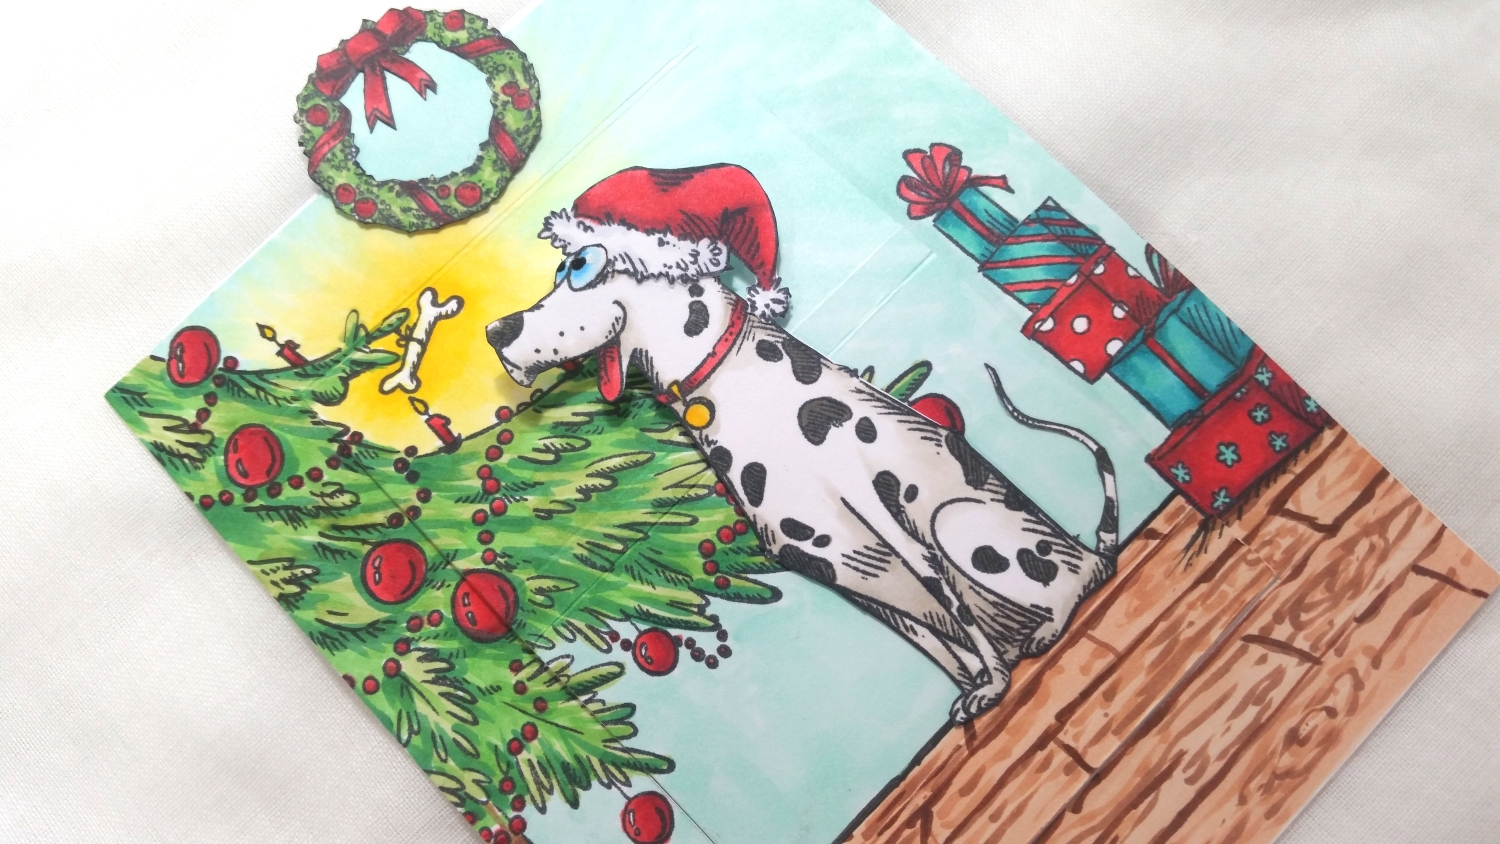
I chose the Dalmatian from the Dogs Stamp Set as the focal point of my card. I Copic colored him using the following colors:
White: W0 and W1; Black: W5;
Eyes: B000 and B02 with Signo Uniball White Gel Pen and Black Glaze Pen;
Tongue and Collar: R35 and 37;
Tag: Y15 and Y19
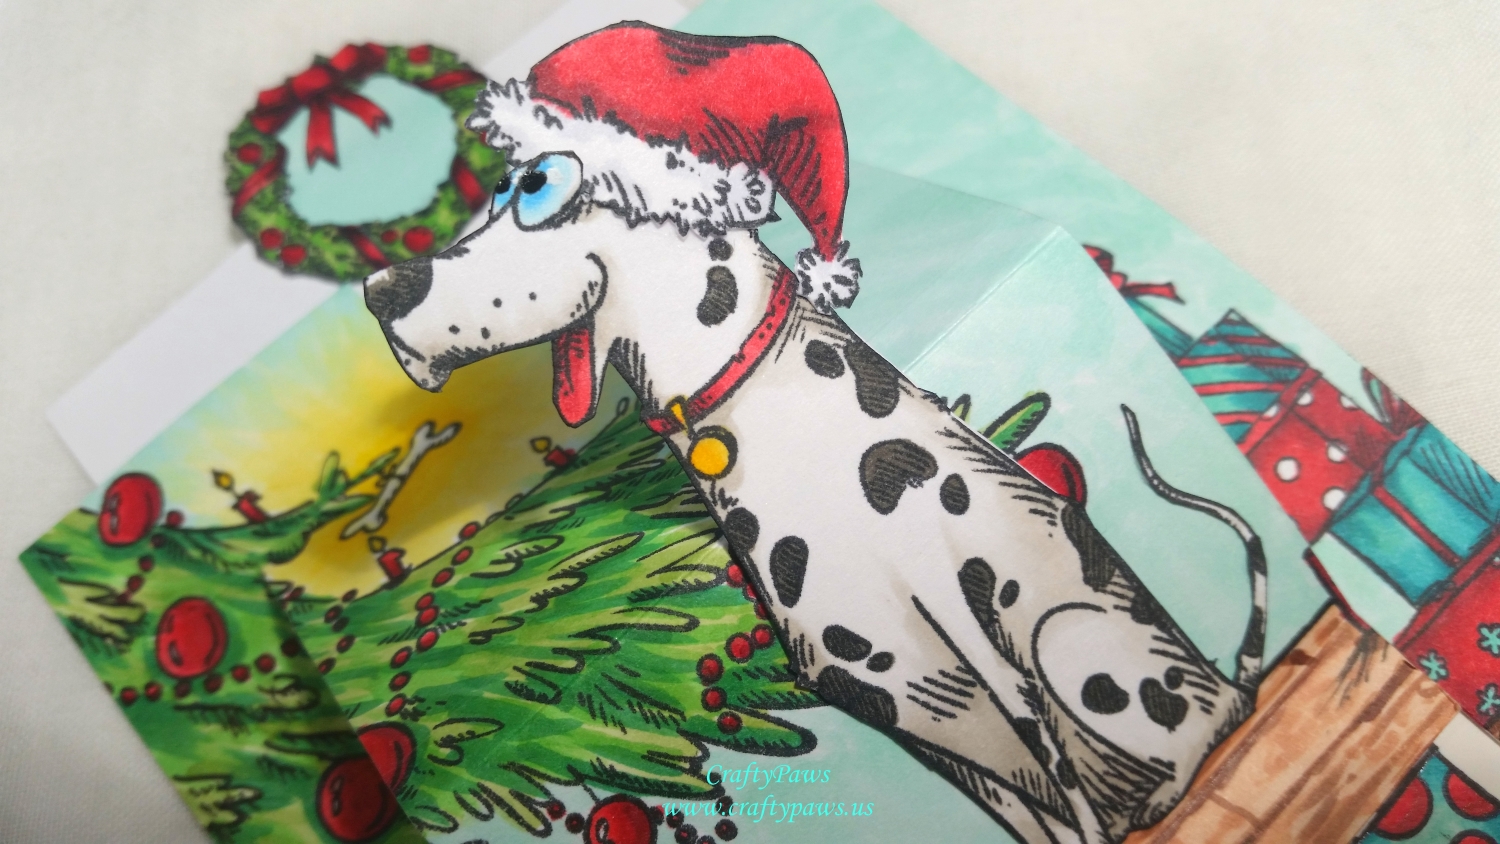
Then I fussy cut him out, taking care to also cut around his eyes about halfway down so that I could position the Santa hat from the Funny Accessories Stamp Set fully onto his head.
For the card front background, I used the Christmas tree base from the Sleigh Stamp Set and using a 0.1 pt Copic Mulit-liner Pen I doodled a bit more of the decorated Christmas tree in order to extend the height of the tree. I also doodled a dog bone hanging from a tree branch as a special doggy-themed Christmas decoration. To fill out a little more of the background scene I added a stack of presents to the right side of the panel from the Funny Accessories Stamp Set, and then Copic colored/drew in a wood floor and the rest of the scene using the following colors:
Santa Hat: R35, R37 and R39 and C1 Yellow aura around bone: Y00, Y11, Y13, Y08
Tree: G43, G14, G17 Red accents: R35, R37 and R39 Teal accents: BG32, BG23, BG45 and BG49
Wall: BG11 Wood Floor: E11, E13, E25, E29
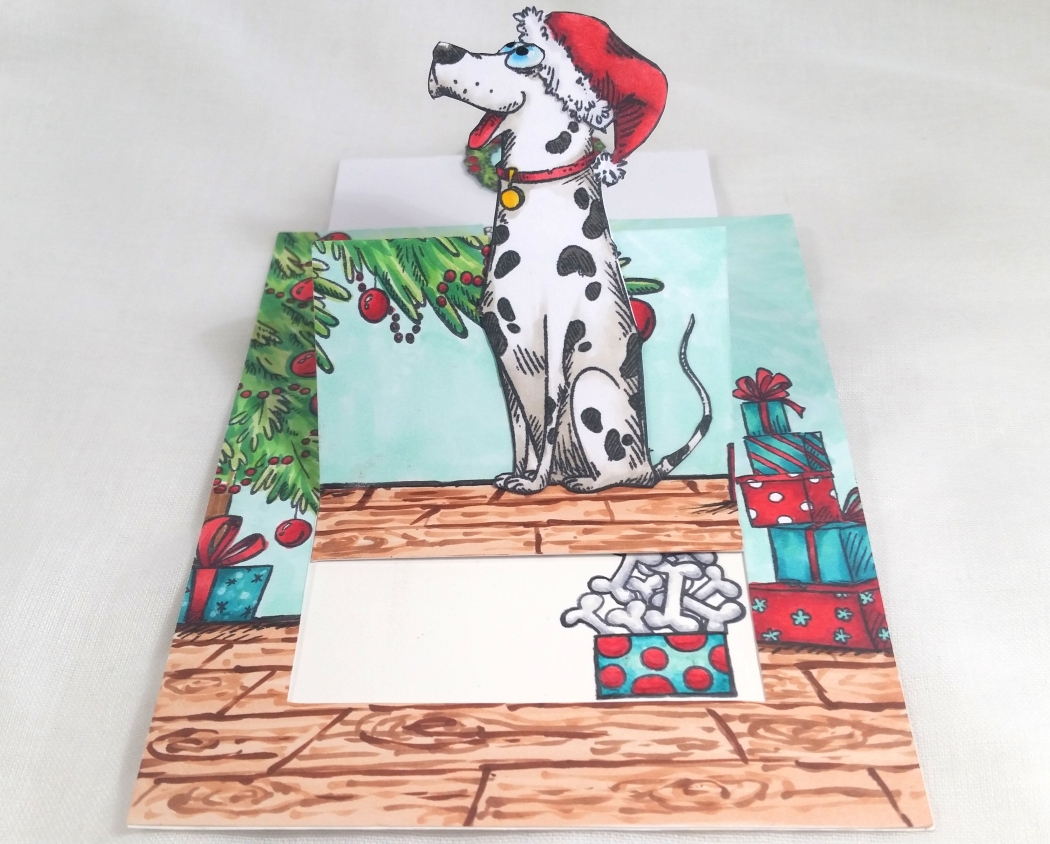
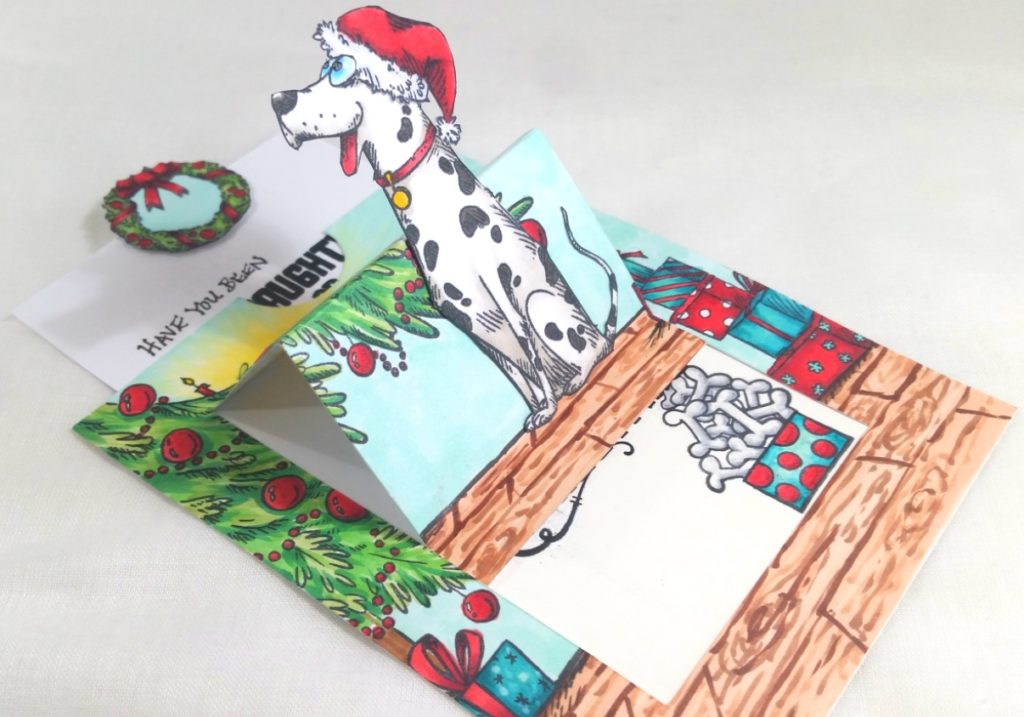
The following are the instructions to create the pop-up mechanism:
* Use the decorated card front measuring 4.25″ x 5.5″ (A2 size)
* Use an X-Acto blade and cut 0.75″ from the left, bottom and right sides of the card; take care to leave the top 0.75″ at the top side uncut.
* Turn the card 90° so the top of the card front is now on the left and use a score board to score at: 0.75″, 2.5″ and 4.25″ between the cut lines.
* Burnish the scored lines so that you form a valley at the 4.25″ line, a hill at the 2.5″ line and a valley at the 0.75″ line.
The following are the directions to create the slider mechanism:
* Cut a smaller slider piece of cardstock to 3.25″ 4.75″
* Use Scor-Tape (glue works too) on the back of the bottom smallest section of the pop-Up mechanism you made above.
* Attach the smaller slider piece of cardstock, centered and lined up to the edge of the bottom smallest section of the pop-Up mechanism.
* Now use Scor-Tape (glue works too) on the back of the card front around the left, bottom and right sides, beyond the center-cut pop-up mechanism area and attach this to an A2 sized card base.
* Optional: You can cut out a thumb window at the top of the cardfront and/or add a pull tab to the top of the smaller slider piece of cardstock. I did both and took the opportunity to create a pull tab using the Christmas wreath from the Katzelkraft Sleigh Stamp Set.
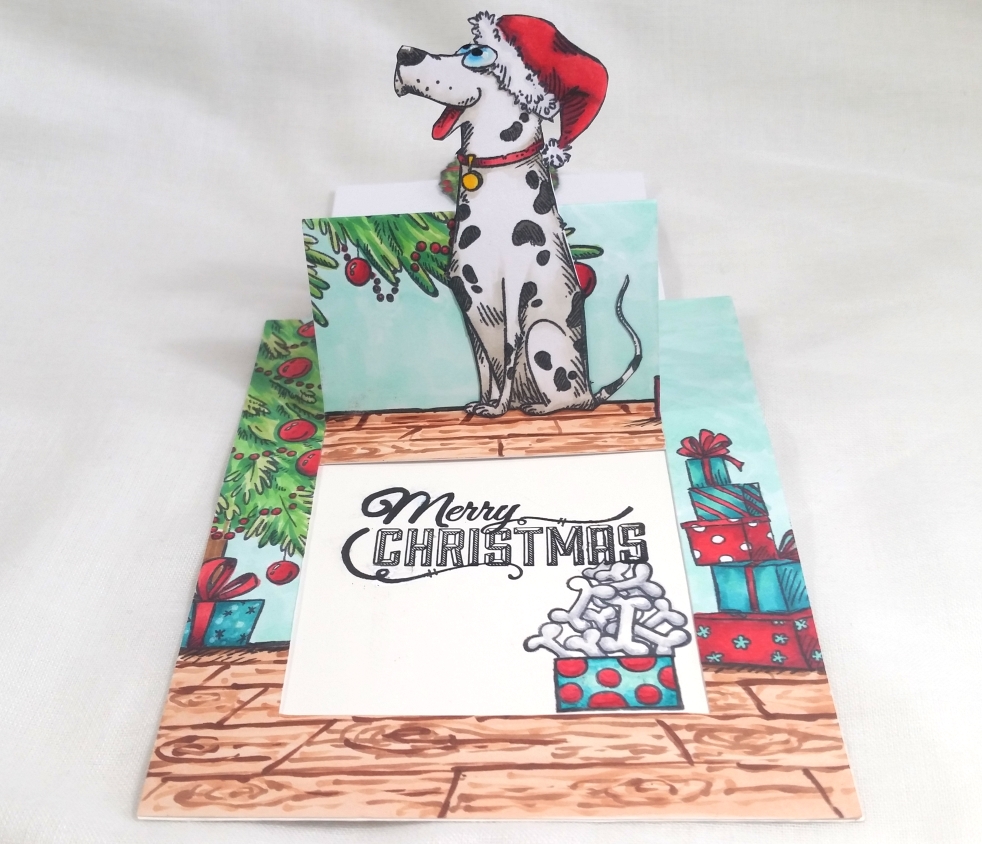
 I hand wrote and used a couple of stamps from a Prima “Merry Nice” Stamp Set to add a sentiment on the top half of the slider piece that says: “Have you been naughty or nice?” and a stamp on the bottom half of the slider piece that says: “Merry Christmas”. For a bit more embellishment inside the card, I also stamped a box full of bones from an old Hampton Art Furry Christmas Stamp Set, and I colored it up to match the stack of presents on the right side of the card.
CLICK THE FOLLOWING PICTURE to watch the process tutorial video of crafting this slider pop up card:
Disclosure: Many of the supplies I’ve used for today’s project are linked. Some may be affiliate links, which means if you make a purchase I receive a small commission at no extra cost to you. I truly appreciate your support toward the costs of running this blog!
This card is being entered into the following challenges:
The Corrosive Challenge Anything Goes
Simon Says Stamp Work it Wednesday Celebrate it Challenge
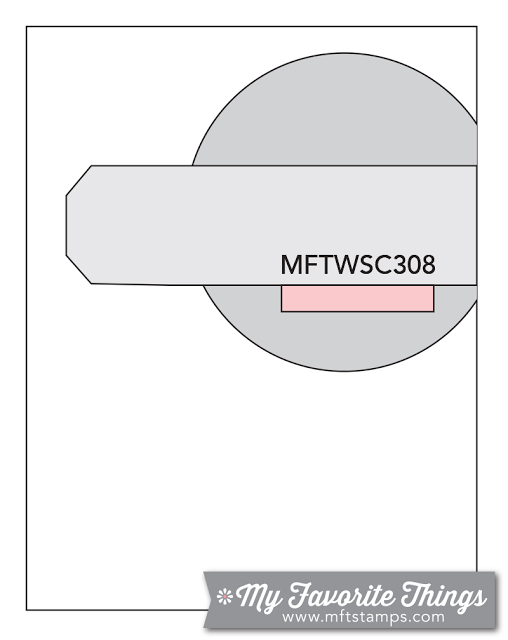
Creatalicious Anything Goes with Optional Circles Challenge
Word Art Wednesday Anything Goes Challenge
Lil Patch of Crafty Friends Anything Goes Challenge
Fab ‘n’ Funky Christmas Challenge
613 Avenue Create Anything Goes with Optional Clean and Simple Challenge
Through the Craft Room Door Anything Goes Challenge
Crafty Gals Corner 3+ Layers Challenge
Stamp Sensations I Spy Something with a B Challenge – Baubles, Boxes, Bows, Bones
]]>
 I colored it up with Copic colors, coated the white fuzzy areas of the Santa hat with Studio G glitter glue for sparkle, colored the eyes and nose with a Sakura black Glaze Pen for shine, and fussy cut it out. Then I popped it up on double sided foam adhesive and positioned it on a variety of layers of patterned and plain card stock from my scrap box in red, teal/mint, and pink. The red reverse scallop layer (that I think looks a little like the edges of a postage stamp) is actually the negative of the die cut from the Pretty Pink Posh Scallop Frames Dies that I used on the card I shared in the previous post! The whole card front is glued onto a mint card base and that’s really it!
This is going into a surprise RAK (random act of kindness) package of crafty goodies for a friend who is in need of a boost during these emotional and often difficult holiday season. I hope she enjoys it and all the crafty yumminess I’m sending her. 🙂
This card is being entered into the following challenges:
Simon Says Stamp Wednesday Gift It Challenge
Simon Says Stamp Work It Wednesday Die-Cember Challenge
Word Art Wednesday Anything Goes Challenge
Lil Patch of Crafty Friends Anything Goes Challenge
CAS-ual Friday Christmas and Hanukkah Challenge
Card Mania Anything Goes Challenge
Through the Craft Room Door Anything Goes Challenge
Not Just Cards Anything Goes Challenge
Creatalicious Anything Goes with Optional Christmas Challenge
Paper Sweeties December Inspiration Challenge
]]>
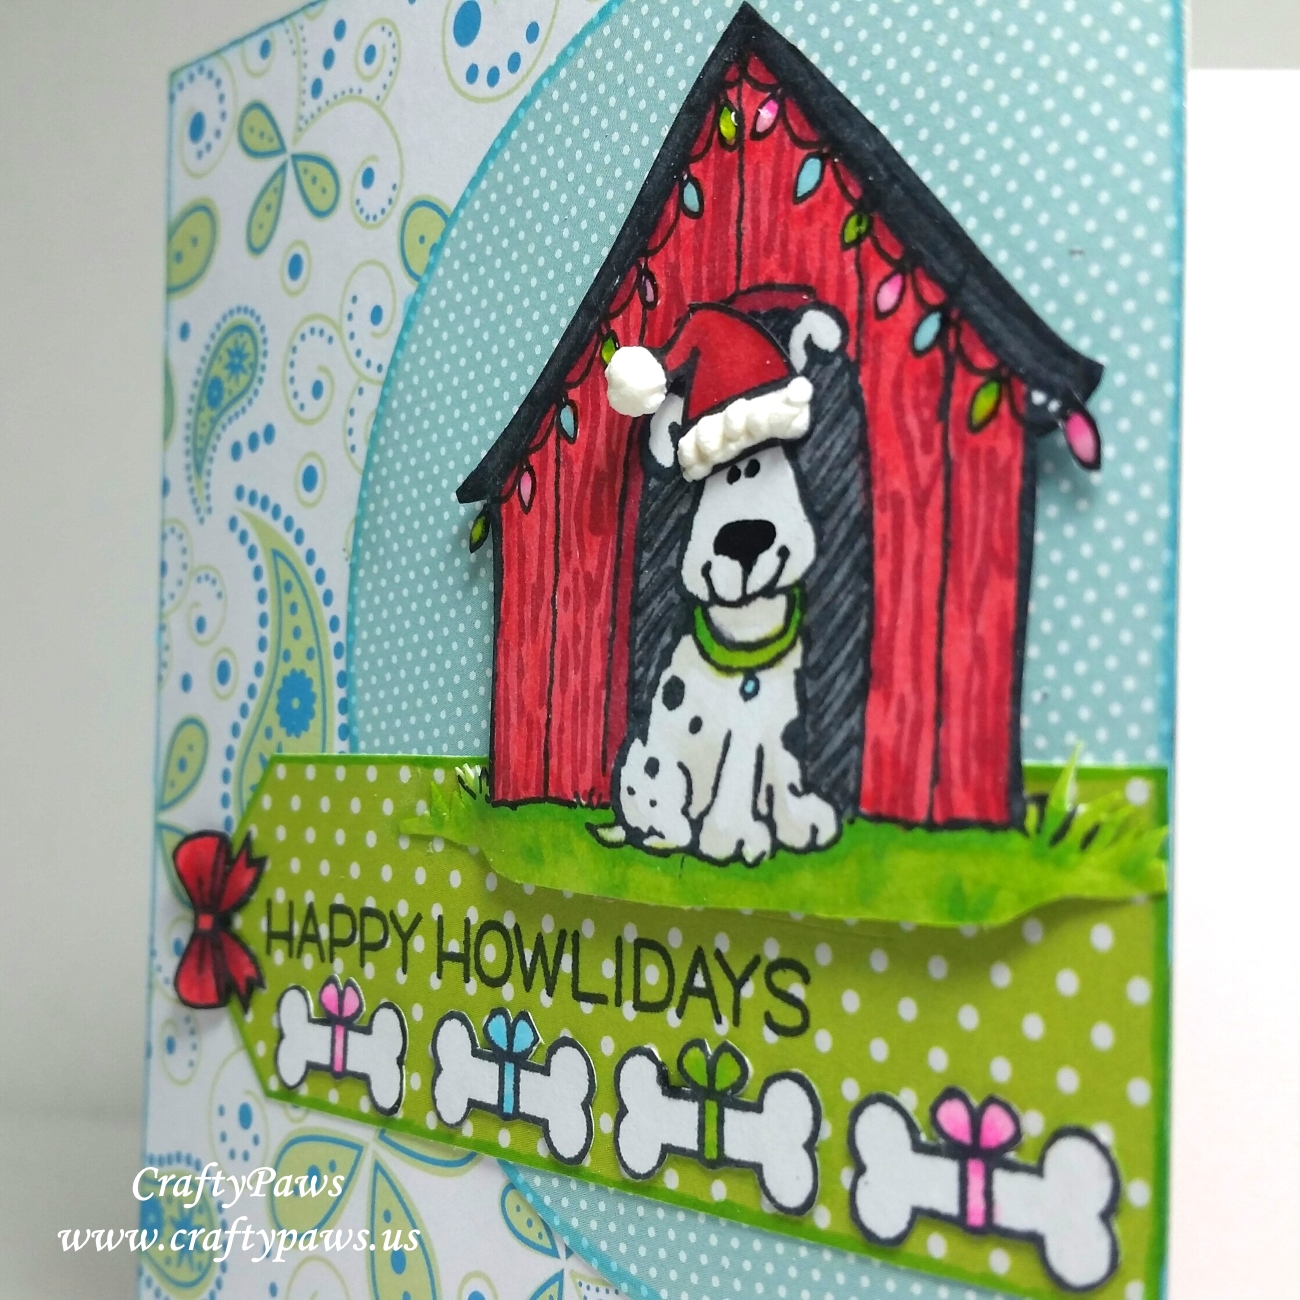 I doodled on a string of holiday lights onto the dog house and I gave the pup a Santa hat from the Lawn Fawn “Baaah Humbug” stamp set (available HERE in the UK). Then, I added a little tag-banner and stamped “Happy Howlidays” from the Lawn Fawn stamp set of the same name and decorated it with a line of present bones (from Happy Howlidays) and a red bow (from Baaah Humbug). I think the little scene came out super cute, and I don’t think anyone that receives this card would imagine that I used a non-Christmas stamp as the main image. Success!
I stamped out the images with MFT Black Licorice Hybrid Ink (available HERE in the UK) and used the following Copic colors to color them up:
Dog shading: W0 and 1
Dog house (it’s easy to create a wood grain look by adding simple shaky line details), Santa hat, and bow: R35, 37 and 39
Dog house interior and roof: N5 and 7
Holiday lights and bows on dog bone presents: RV02, RV04, YG25, YG07, B01
Dog collar and grass: YG25, 07 and 09
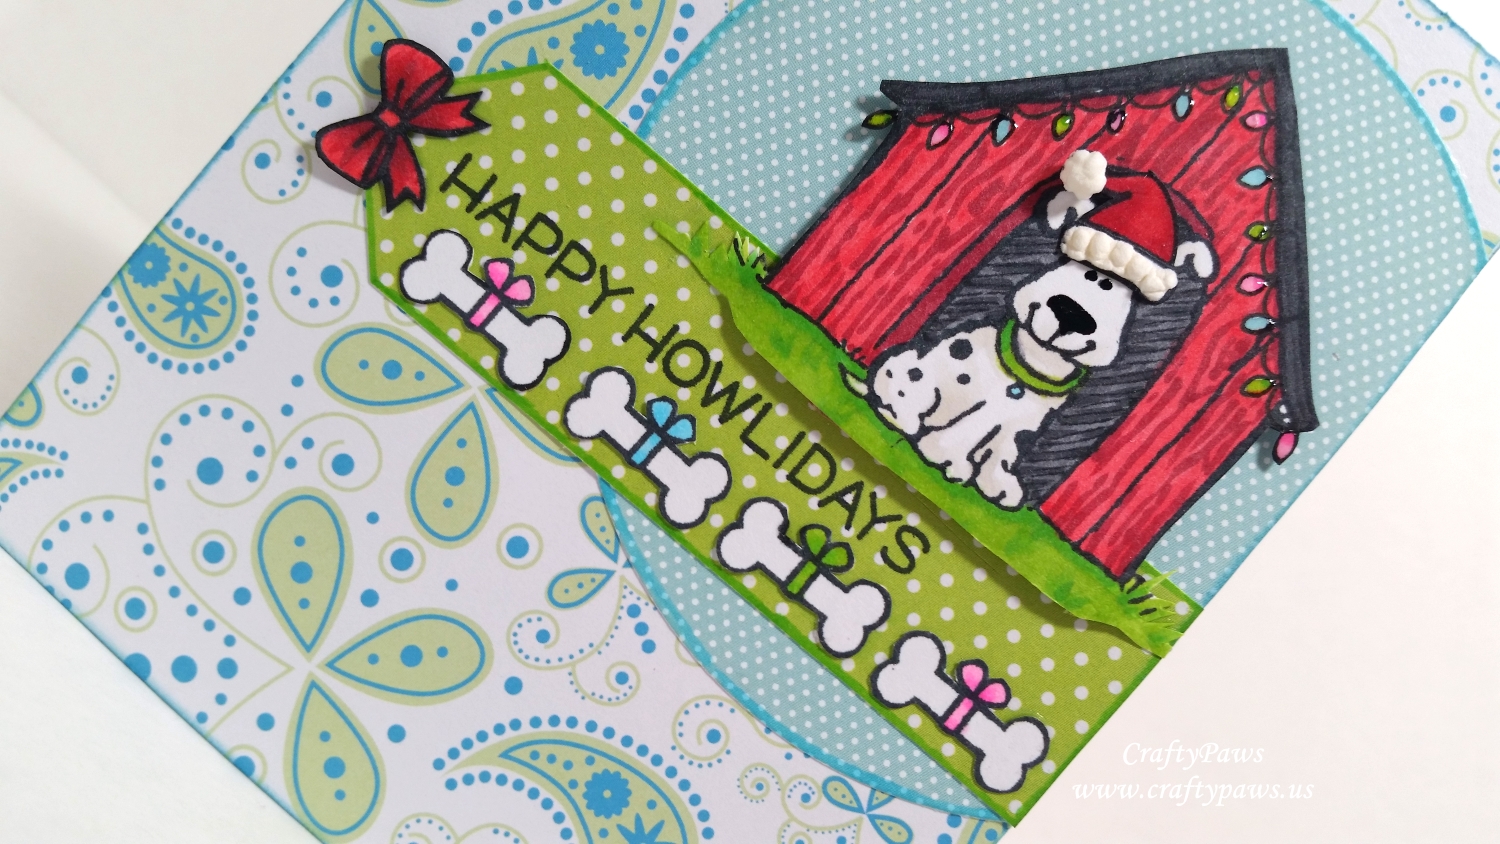
For the papers, I got to use up 3 scraps from my paper scrap box! I had a pale blue tiny polka dot that I die cut into a circle using the Diemond Dies circle nesting die set. I hand cut a tag-banner from a pale green slightly larger polka dot paper, and I used a larger thin paper with a blue and green paisley for the background. Lastly, to add some texture and interest, I added Liquid Applique that I heated with my heat tool to make the Santa hat white trim soft and fluffy, Glossy Accents to all the holiday lights, and a coating of black Glaze pen on the dogs eyes and nose.
This card is being entered into the following challenges:
Penny Black and More Anything Christmas Challenge
Simon Says Stamp Wednesday Christmas to Die For Challenge
Word Art Wednesday Anything Goes Challenge
Creatalicious Anything Goes with an Optional Sentiment Challenge
Just Keep on Creating Anything Goes Challenge
Crafty Purple Frog Magic of Christmas Challenge
Craft Your Passion Anything Goes Challenge
Seven Hills Crafts Christmas Song, Movie or Carole November Challenge
]]>
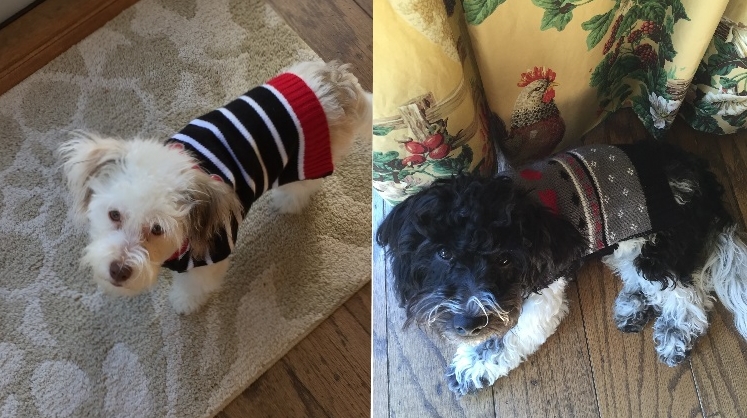
Sam and Toby
The mostly white dog with light brown ears is colored with Copic markers: W1, W3, and E23. The black and white dog is colored up with W1, 3, 5, 7 and 9. The two Santa hats are colored with R24, 29, and 39 with the white fluffy dimension added with some Deco Art Snow Writer Paint. To make them look a little more lifelike, I also added white highlights on the eyes and noses and furry details with a white Sakura Gelly Roll pen
and touched the eyes and noses with Glossy Accents.
For the card front, I used up an old scrap of pale green damask patterned paper from my scrap box. I layered it with a piece of vellum die cut with the largest rectangle from the My Favorite Things Cross Stitched STAX Rectangle Die Set, which I heat embossed with a nice, substantial “Happy Holidays” stamp from Unity’s Christmas Eve Chowder stamp set and some charcoal grey Zing! embossing powder.
Then I went to town designing the card with the Diemond Dies Pine Branch Die and the Diemond Dies Christmas Ornament Die. I die cut the branches with white card stock (rather than green) to give a more clean, winter wonderland look, and I die cut the ornaments from pale green an silver glitter paper to add sparkle and shine. I snipped off the top of the ornaments to alternate the colors and did the same for the stars and tiny dots that were die cut from the ornaments. I glued them back into the alternate colored ornaments to add a little extra interest. Lastly I used silver Stickles to draw in the strings for the ornaments.
Diemond Dies is having a Christmas/end-of-year sale through December 31, 2015. Use the code christmas15 and get 15% off your entire order, free worldwide shipping with no minimum purchase required! Now that’s a deal!
The following is a process video:
This card is being entered into the following challenges:
Whimsy Stamps Anything Goes Winter Challenge
Simon Says Stamp Monday Winter Wonderland Challenge
Simon Says Stamp Wednesday Die Crazy Challenge
Raisin Boat Christmas and New Years Challenge
Penny Black and More Anything Goes with a Stamp Challenge
Unity Be Inspired Challenge
613 Avenue Create Anything Goes Challenge
Lil Patch of Crafty Friends Anything Goes Challenge
The Shabby Tea Room Winter Wonderland Challenge – mostly 2 colors and little critters like in the inspiration photo:

Thanks for stopping by, and have a fabulous winter day! WOOF
]]>
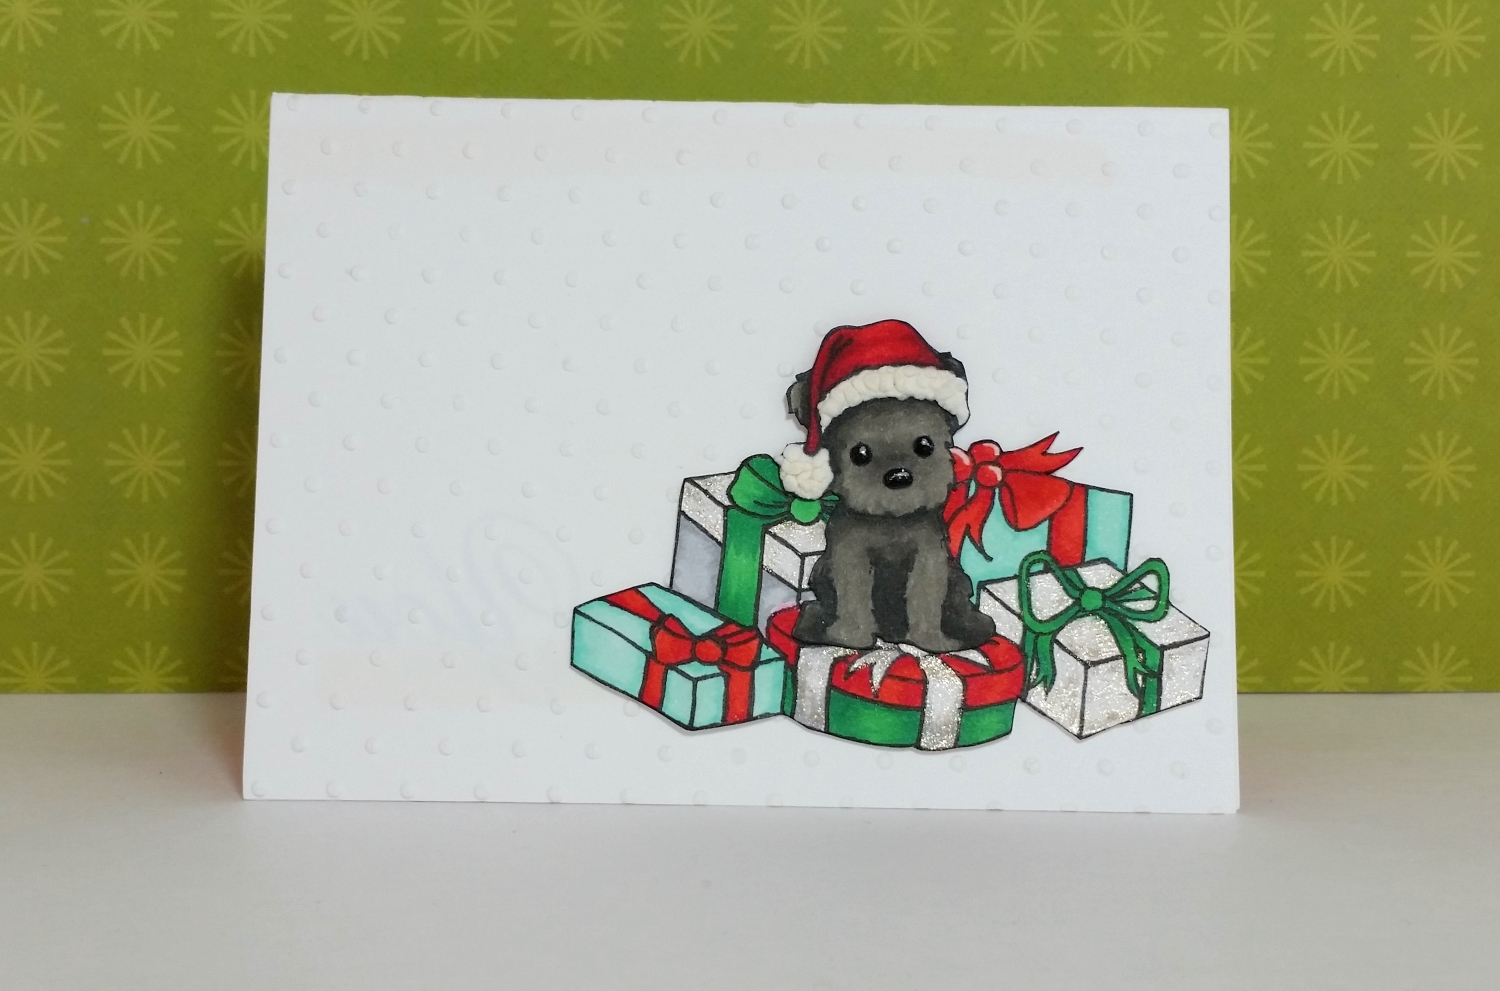 I embossed some thick card stock with a polka dot embossing folder to give a little texture and interest to the white background. Then I rummaged through my pile of unused bits and pieces scrap box that had this pile of presents that I had drawn with a Copic multi-liner pen a couple months ago.
I colored the pile of presents in one of my favorite Christmas color combinations — red, green, aqua and silver — with the following Copic colors: Red: R05 and 29; Green: G05 and 16; Aqua: BG10 and 32; Silver: N1 and 3. I also used Sakura Gelly Roll pens in Metallic Gold and Clear Star to add sparkle and shimmer. I colored up the My Creative Time “Christmas Doggy” to make a black puppy, trying to make sure the face wasn’t too dark to see the adorable facial features: W3, 5, 7, 9. The Santa hat was colored with R24, 29 and 39.
Then I added lots of special little details to the puppy. I added my new favorite faux fur/snow texture to the pom pom and hat brim with the DecoArt Snow Writer. I added highlights to the eyes and nose with a white Sakura Gelly Roll pen. Lastly, I used just a pinch of Glossy Accents to add shine to the tiny eyes and nose. It’s amazing all the teeny details we crafters can add to a stamped image! LOL Doesn’t he look like a little stuffed animal toy puppy sitting on top of a pile of Christmas presents? So cute!
This card is being entered into the following challenges:
Whimsy Stamps Anything Goes Winter Challenge
MarkerPOP Anything Goes Challenge
CASology Toy Challenge
Card Mania Christmas Challenge
Craft Your Passion Anything Goes Challenge
Simon Says Stamp Work It Wednesday Holiday Card Challenge
Simon Says Stamp Monday Just A Pinch Challenge
Thanks for stopping by, and I hope you are having a wonderful crafty day! WOOF
]]>
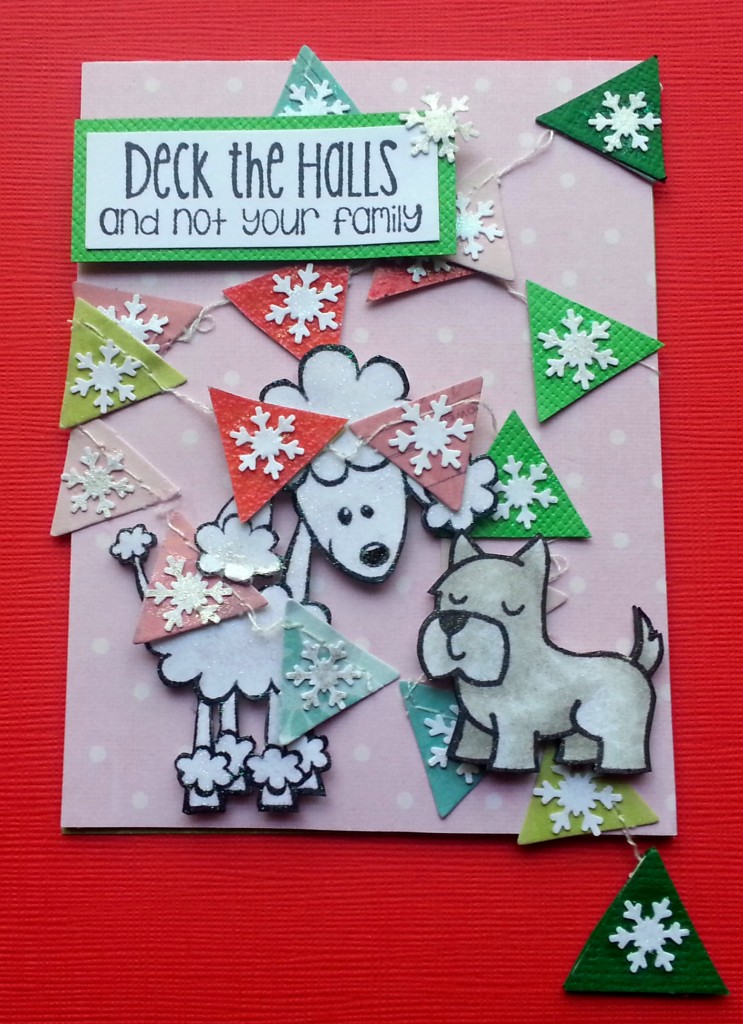 This led me to think about making a card with this sentiment using some doggy stamps (since I consider my dogs family members). 🙂 As the person who is receiving this card loves Lawn Fawn, I knew I had to include a dog from their “Critters in the Dog Park” set. However, when I added him to the card, he seemed too small. So I decided to add a larger poodle from the Recollections “Woof Woof” set. In my mind, the Scottie has been a little mischievous and decked out his big sister with this holiday banner. *wink*
Now these dogs are not supposed to represent my dogs (although if the terrier had drop ears, I could have colored him like Bandito). In fact, because I wanted to keep the color story very tight on this card (I only used shades of pink, green, red and white), these dogs stayed white (one a little dirtier with a little Copic W1–LOL). I fussy cut each of the dogs out twice and layered them up with some foam adhesive to add some interest and dimension. HINT: When doing this kind of layering, I think it is important to take the time to edge the fussy cut images out with black marker so the white edges of the paper don’t show. This gives a much more finished look. I use an SB width Faber-Castell PITT artist pen, but I know some folks even use a black Sharpie.
To create the Christmas banner decor, I used the Dear Lizzy 5th and Frolic Flutterbys. However, because these ready made pennants were in the typical sorbet colors of that collection, I had to hand cut small triangles in red and green to maintain the Christmas-y feel of the card and the tight color palette. I also used my Martha Stewart snowflake border punch to punch out some snowflakes that I could adhere to each pennant. All this took a lot of detail work but the final results seem worth it. I coated each of the snowflakes, the Poodle, and the Scottie dog, with Folk Art Extreme Glitter acrylic paint in hologram to get a very sparkly look (this is much more sparkly than Wink of Stella). I left the last pennant (which I decorated on both sides) dangling off the bottom edge of the card for a little added whimsy and some movement.
The following is a video share of this card:
This card is also being entered into the following challenge:
Raisin Boat Christmas and Holiday Challenge
Naughty or Nice Festive Furballs Challenge in the naughty category
CARDZ TV Color My Christmas Challenge
The Paper Nest Dolls Anything Goes Challenge
For the first card, I used the Diemond Dies Pine Tree Die Set (these trees are a little more irregular and thinner than the Christmas tree dies by Diemond Dies) to make a kind of simplified outdoor forest scene. I inked the edges of the die cut trees with Tim Holtz Distress Ink in peacock feathers and decided to decorate the largest of them in the center with clear rhinestones and white and silver sequins of different sizes. I used Recollections glitz glitter glue in the centers of the sequins to cover up the holes and added a smattering of glitter glue dots on the trees for a little added sparkle. To add even more shimmer, I also colored in some of the circles on the patterned paper I used with a clear star Sakura Gelly Roll pen. To ground the trees and the dogs, I used a Copic C1 marker to add some shadow and a reference to a snowy ground.
Like my cards from yesterday, I also fussy cut the little dogs from my free digi, “Thanksgiving Boost,” and added them to one side of the largest tree. However, this time, I wanted to tell a different story. If you’ll notice, there are some rhinestones and sequins on the ground. These mischievous, naughty dogs are knocking off ornies from the tree! LOL The sentiment, which is from the C.C. Designs “Snarky Christmas” stamp set, says “Dear Santa, define naughty….”
Please consider using the code: thankskristina for 10% off your entire purchase at Diemond Dies and free worldwide shipping on orders of $35 or more.
For the second card, I used the same dogs but had them working together to peer through a cut out to gaze wistfully at a Christmas wreath made of doggy bones. I made the wreath using a Marvy Uchida dog bone punch and lots of little scraps from my scrap box. To give it a finished look, I covered all the bones with Glossy Accents and topped the wreath with a teeny tiny red satin bow (which I made using the Craft-Dee BowZ tool–oh my gosh this tool is amazing. I thought I was pretty good at making bows by hand, but this tool eliminates all the fussing and guess work!). I wrapped some green and white bakers twine around to give the Rottweiler something to “stand” on. I used another sentiment from the Snarky Christmas set, but this one sweetly just says what I image that Chihuahua is thinking, “It’s the most wonderful time of the year” as he peeks in and sees that amazing dog bone wreath. 🙂
The following is a video share of these two cards and the cards from yesterday’s post as well:
The first card is being entered into the Naughty or Nice Festive Furballs November Challenge in the naughty category and
the Tree-mendous Tree Challenge in the Moxie Fab World
The second card is being entered into the Craft-Dee BowZ Anything Goes with a Handmade Bow November Challenge and
The Paper Nest Dolls Anything Goes Challenge #23
Thanks for stopping by! Please subscribe if you wish, and have a great day! WOOF
]]>
I made these two cards using the large Christmas tree die and the mini album dog bone die from Diemond Dies. Remember, use the Diemond Dies coupon code “thankskristina” for 10% off of your entire order and free worldwide shipping on orders of $35 or more.
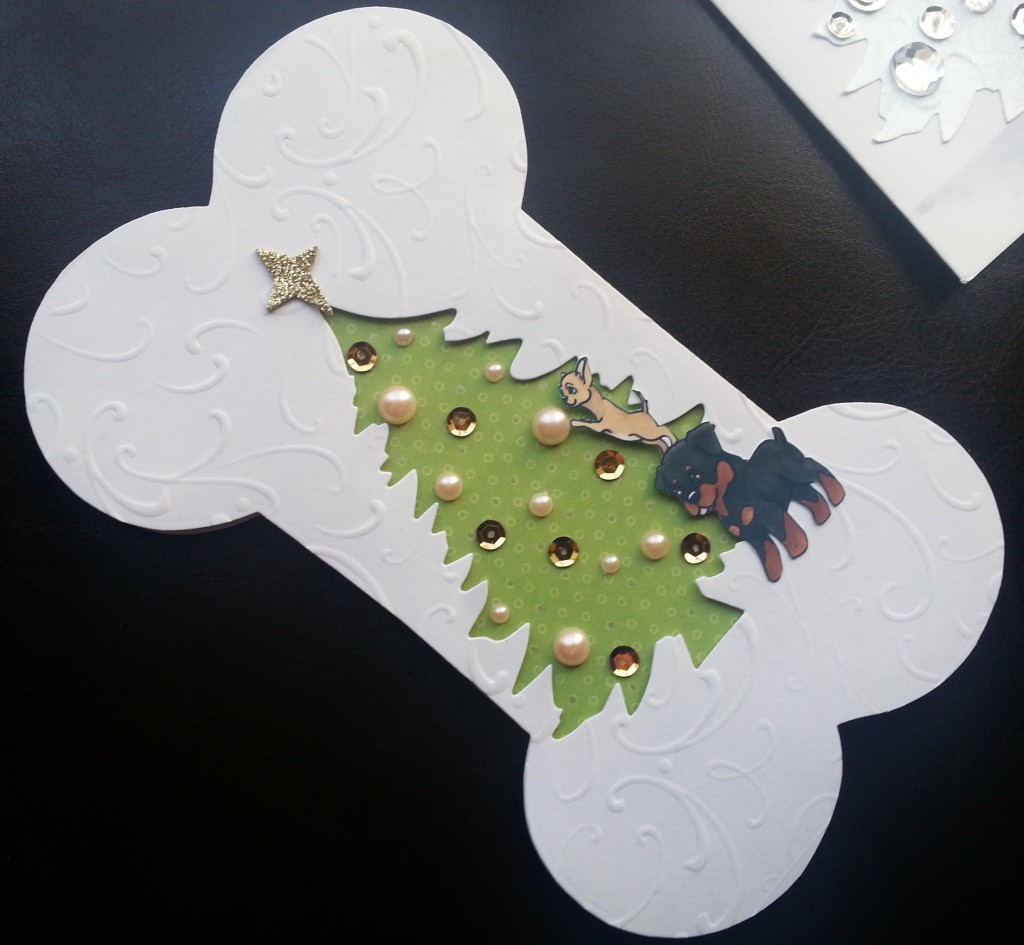 I made a dog bone hinge card using plain white card stock and embossed the top layer of the bone with some swirly designs (to give the illusion of swirling snow?). From the top layer, I die cut out a Christmas tree. Using some foam adhesive I backed the Christmas tree opening with a scrap of pale green patterned paper so that the tree would be recessed. I added just the dogs from the Thanksgiving Boost digi so that the dogs looked like they were working together to decorate the tree. 🙂 Then I had fun embellishing the tree with flat back pearls, gold sequins and a gold glittery hand cut star.
The second card I made with the Christmas tree that was die cut out of the first. I glittered it up using Folk Art Extreme Glitter paint in hologram and embellished it with clear rhinestones and silver sequins of different sizes. I added glitz Recollections glitter glue to the centers of all the sequins to cover up the little holes and add more sparkle! Again I used the dogs from the digi to add a little furry fun.
These cards are being entered into the following challenges:
Naughty or Nice Festive Furballs November Challenge – nice category
Tree-Mendous Tree Challenge in the Moxie Fab World
The Paper Nest Dolls Anything Goes Challenge
The Pink Elephant CAS Challenge
Thanks for stopping by and have a great day! WOOF
]]>