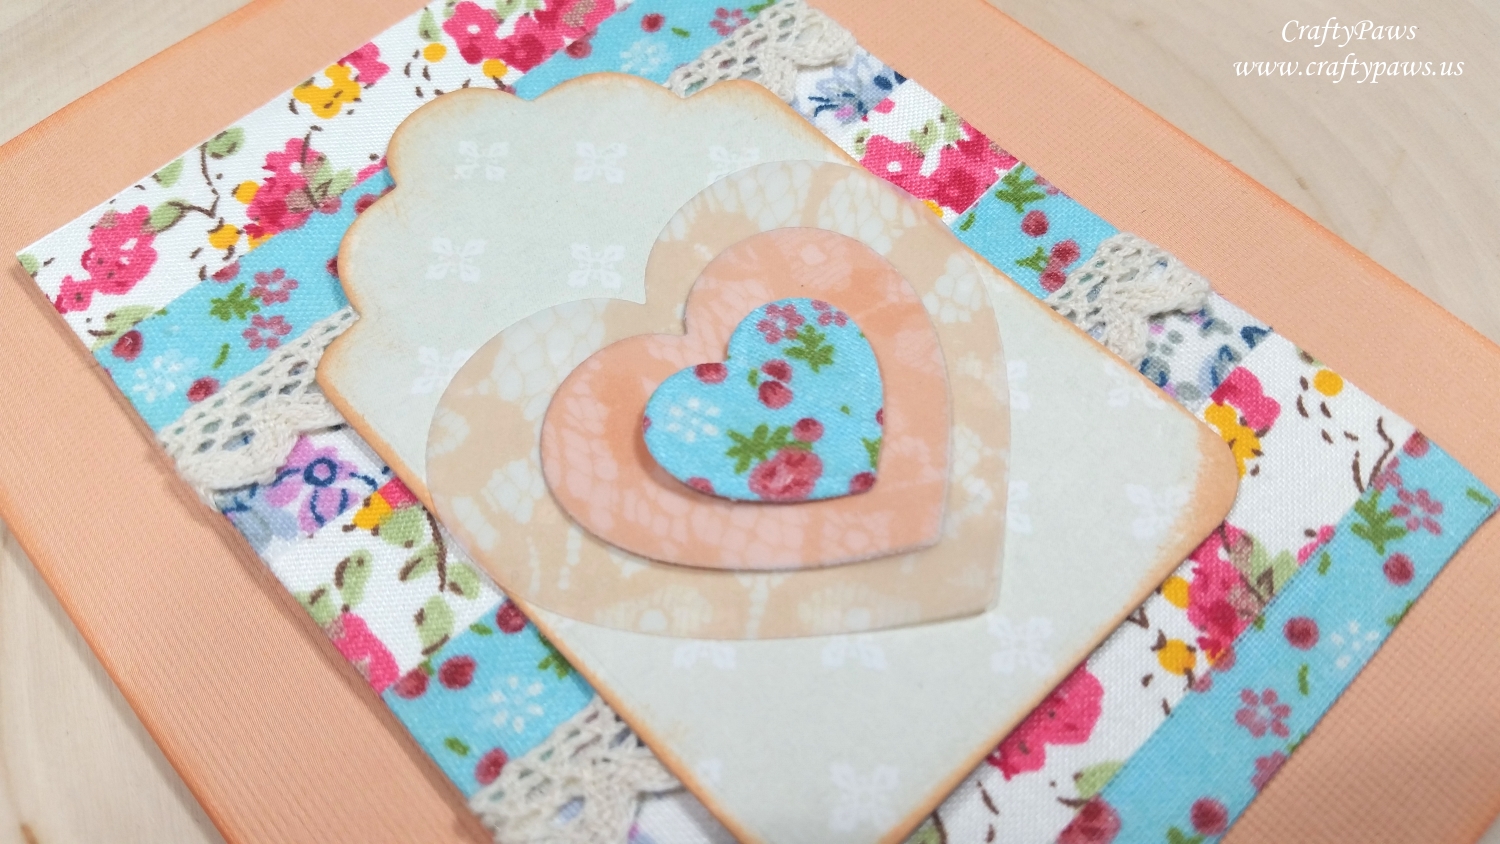
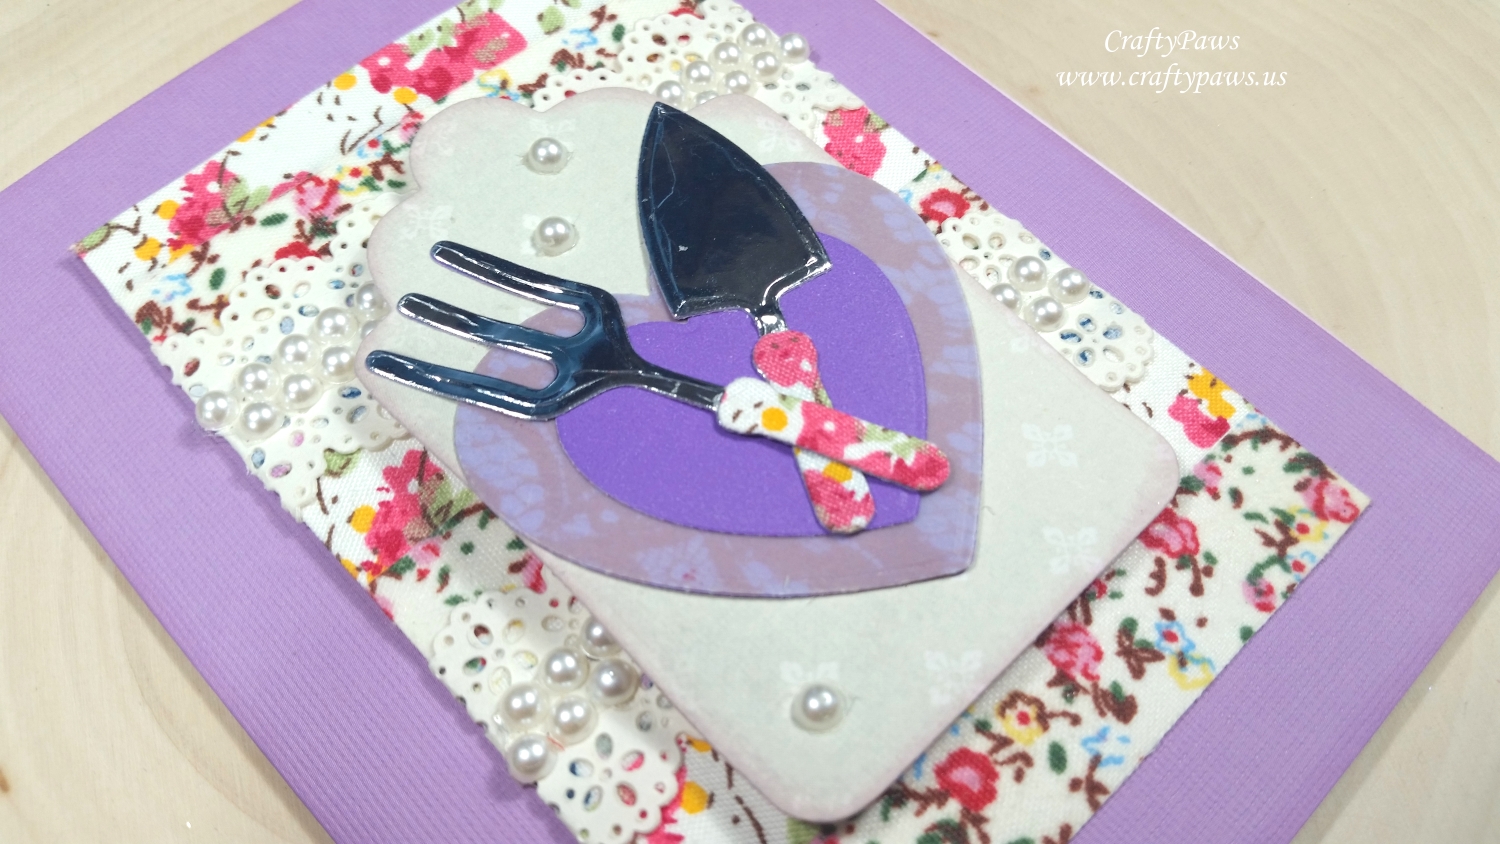
I am normally a very slow crafter, but I put my mind to making a couple sets of handmade note card gift sets that I was actually able to whip up in a day! With very limited supplies — scraps of paper, a few Diemond Dies die sets, and some old fabric washi (I’ve been hoarding these for so long that some of the adhesive has disintegrated!), some Recollections Bling on a Roll (for the purple base card), and handful of Tim Holtz Distress Inks (Dried Marigold, Milled Lavender, Twisted Citron, Squeezed Lemonade, and Broken China), I was able to create these 6 Shabby Chic or Prim style note cards. These are going to be gifted as two sets of 3 cards and mailed to crafty friends who love this style just to let them know I’m thinking of them (the one getting the ones with the garden tools is an avid gardener!).

There is a tutorial/process video below that shows everything in lots of detail, so I’ll just list the items I used here:
Diemond Dies Nesting Heart Die Set
Diemond Dies Nesting Tag Die Set
Diemond Dies Garden Tools Die Set
and you could have used any of the many Diemond Dies flower die sets, the Fluttering Butterfly Die Set, or even the Vintage Buttons Die Set to embellish these sweet cards.
GREAT COUPON!!!: My readers can get 20% off and free worldwide shipping on all Diemond Dies orders of $20 or more by using the coupon code: 30days
The following is a process video of making these card sets:
These cards are being entered into the following challenges:
Word Art Wednesday Anything Goes Challenge
Creatalicious Anything Goes with Optional Add Glitter/Bling
Lil Patch of Crafty Friends Anything Goes Challenge
Fab ‘n’ Funky Anything Goes Challenge
Not Just Cards Anything Goes Challenge
Through the Craft Room Door Anything Goes Challenge
Crafts Galore Encore Anything Goes Challenge
613 Avenue Create Anything Goes with Optional Twist Shabby Chic
CAS-ual Fridays Friendship Challenge
Reindeer Backs Drawn to Match Mama Elephant Reindeer Games Fronts
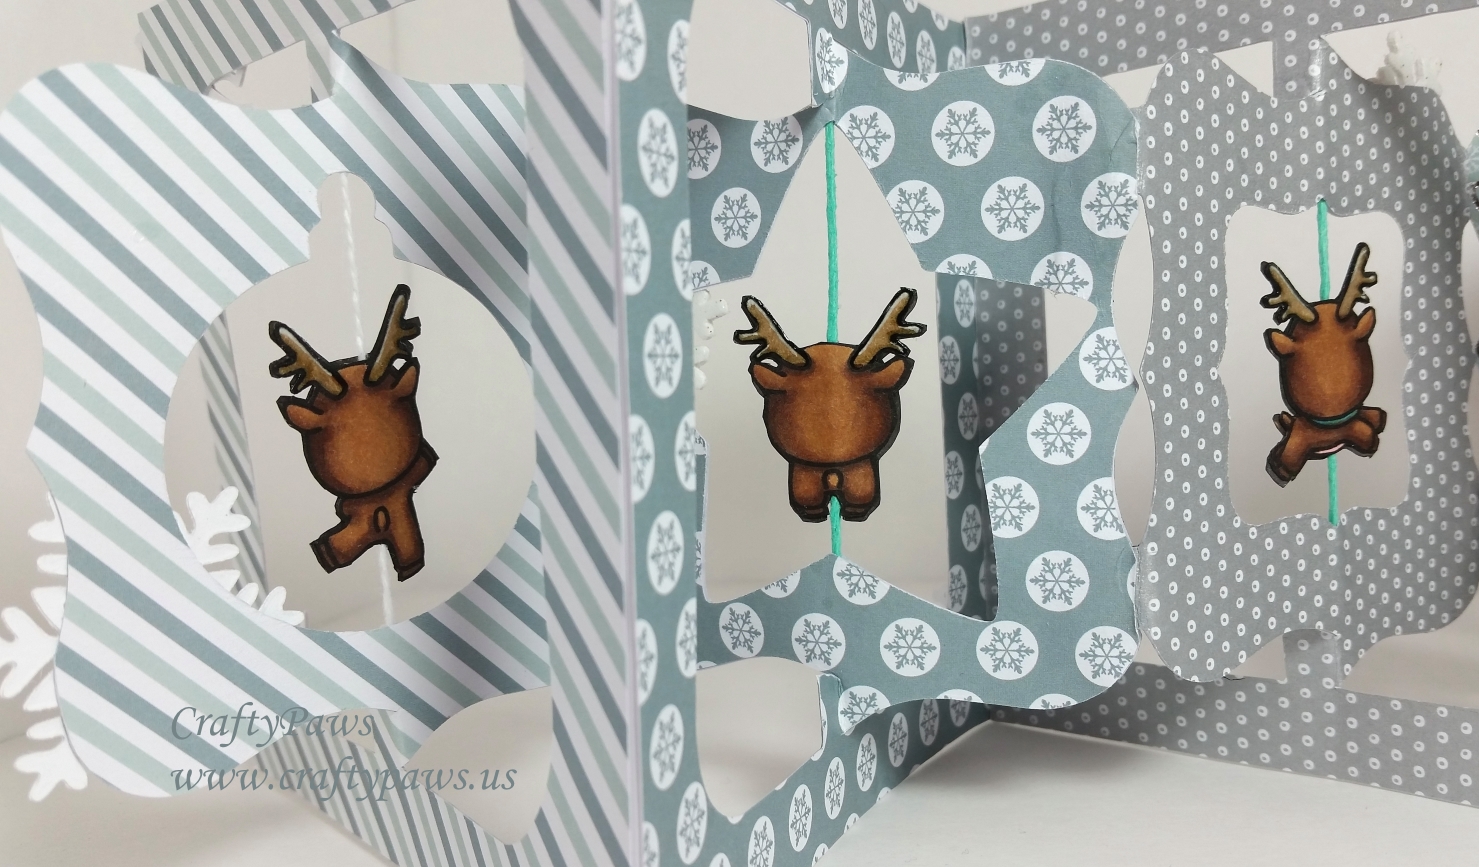
First off, I needed to draw the backs of each of the Mama Elephant reindeer. I know a lot of folks have made spinners using the mirrored stamps, but I just didn’t want the deer to have 2 heads. LOL Anyway, I drew the backs on my computer, Copic colored all the reindeer, and fussy cut each of them out. That’s a LOT of fussy cutting, inking the backs and edges, and gluing, but they are soooo stinkin cute, they were worth every minute.
Left Side of Accordion: View of 4+ of the 8 Panels
Copic colors used: Bodies and hooves: E55, 57, and 59; Muzzles: E53, E55 and R20; Antlers: E43 and E87 with white Sakura Gelly Roll pen highlights and topped with Glossy Accents for shine; Collars: B05 with Clear Star Sakura Gelly Roll pen for the tags; and Rudolph’s Nose: R29 covered with Cranberry Stickles for sparkle.
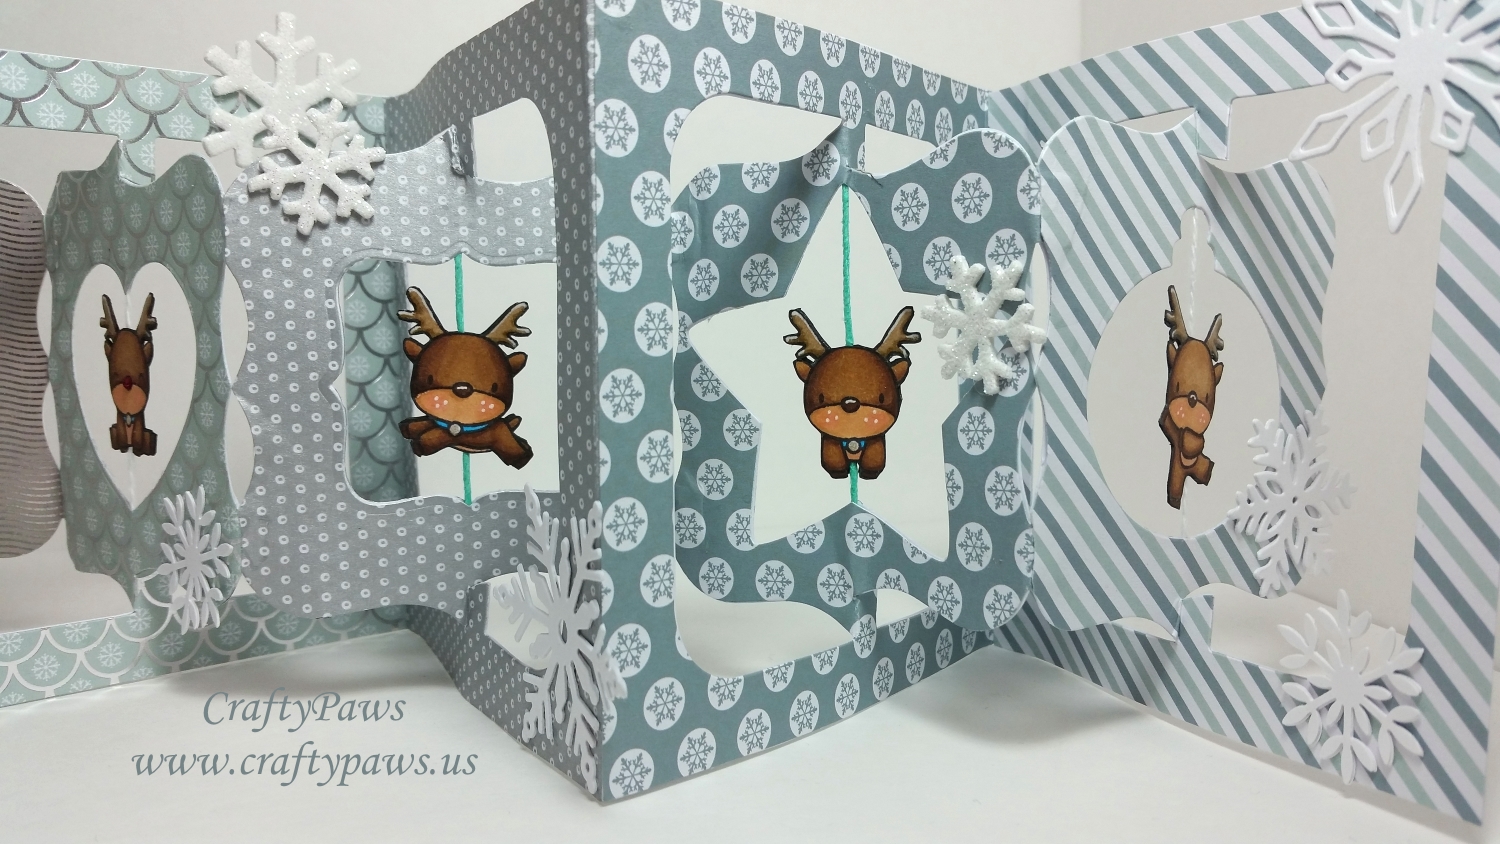
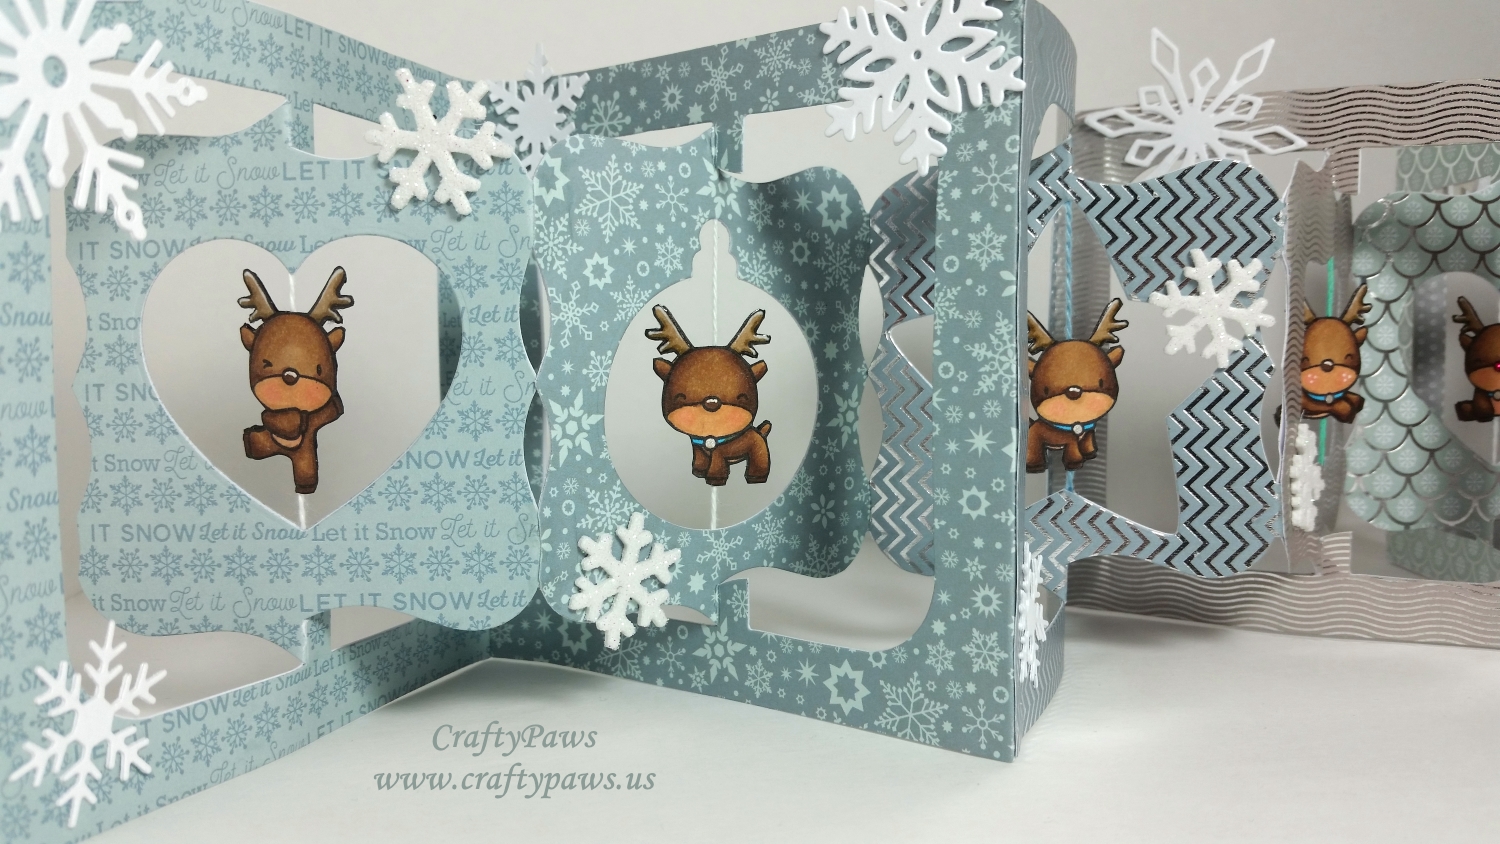
Right Side of Accordion: View of 3+ of 8 Panels
I next cut out each of the panels of the accordion using the Recollections Winter Frost collection paper pad. Then I chose some fun shapes to die cut windows in which each of the reindeer could spin (and keep an eye out in every direction). I chose the Diemond Dies Christmas Ornament Die, the third smallest heart from the Diemond Dies Nesting Heart Die Set, the third smallest of the Diemond Dies Labels 2 Top Note Nesting Die Set, and the third smallest star from the Lawn Fawn Puffy Star Stackables die set. Then it was a matter of figuring out how to assemble each of the panels I cut out and insert the spinning reindeer. The following video includes a tutorial on the assembly (hopefully this will save you from all the mistakes I made and had to re-do):
Lastly I added left over glitter foam snowflake stickers from the Dollar Tree, dusting the backs with baby powder after adhering them to the project so the exposed parts wouldn’t stay sticky. I also punched out snowflakes using the Martha Stewart Glacial Snowflake Punch and Martha Stewart Alpine Snowflake Punch and die cut the Diemond Dies Winter Snowflake Die Set and the Diemond Dies Snowflake #1 Die, gluing 2 of each snowflake together to give them added sturdiness. I want to be able to use this accordion project as table-top home decor to celebrate the winter in the new year even after the Christmas tree is taken down. Cuz, really, rather than reindeer guards, don’t they look like they are dancing reindeer celebrating the new year?! 🙂
My readers can get 10% off and free worldwide shipping on all orders of $35 or more at Diemond Dies by using the coupon code “thankskristina” at checkout.
This accordion folder is being entered into the following challenges:
Simon Says Stamp Monday Winter Wonderland Challenge
Simon Says Stamp Wednesday Party! Challenge
Through the Craft Room Door Anything Goes Challenge
Raisin Boat Christmas and New Year’s Challenge – WINNER
613 Avenue Create Anything Goes Challenge – WINNER
The Shabby Tea Room Winter Wonderland Challenge

Thanks for stopping by, and I hope you and yours have a safe and wonderful 2016!
]]>
I used the new-to-me Diemond Dies Die-Normous Stack-Ems Circle Nesting Die Set to make the hinge card base (you can find a hinge card tutorial HERE). Then I found some pretty rose patterned papers to create a dimensional frame by fussy cutting a LOT of roses and adhering them all around the image. I used Aleene’s Tacky Glue, Stampin Up Dimensionals and EK Tools 3-D Dots to create a lot of dimension to the rose frame.
Use the Diemond Dies Coupon Code: thankskristina for 10% off your entire order (including sale items) and if your order is $35 or more you get FREE worldwide shipping too!
The following is a video share of this card:
This card is being entered into the Simon Says Stamp Work it Wednesday Challenge
the Simon Says Stamp Wednesday Something New Challenge
the Naughty or Nice New New New Challenge and
the Seize the Birthday Anything Goes Challenge
![]()
Thanks for stopping by! WOOF
]]>
The top photo is of my hubby opening up a present (his face is covered to protect his anonymity), with Biscuit overseeing progress. I thought this was so sweet because in our family we normally don’t give gifts to adults, but my niece (who is a sophomore in college) insisted on getting gifts for me and my hubby. She is really growing up into a fantastic young lady. I thought this picture was especially funny because my hubby was opening a package of chocolate covered biscotti, and Biscuit was so very interested.
The bottom photo is of my dad (his face is not covered because he loves publicity! LOL) tasting some home made beef jerky that my hubby made for him. My dad is not very fond of dogs, but as you can see Bandito is undaunted and is sidling up to him as best he can. 🙂
The following video is a share of this page and includes a tutorial for how to stretch your dies–I lengthened a tag die to make it fit my journaling needs:
Diemond Dies is having a sale through Dec 31, 2014 and you can layer on my coupon code: thankskristina for an extra 10% off plus free worldwide shipping!
This Dec Daily page is being entered into the Simon Says Stamp Wednesday Anything Goes Challenge and The Pink Elephant Inspiration Challenge
Thanks for stopping by! Hope you are enjoying the holiday season. WOOF
]]>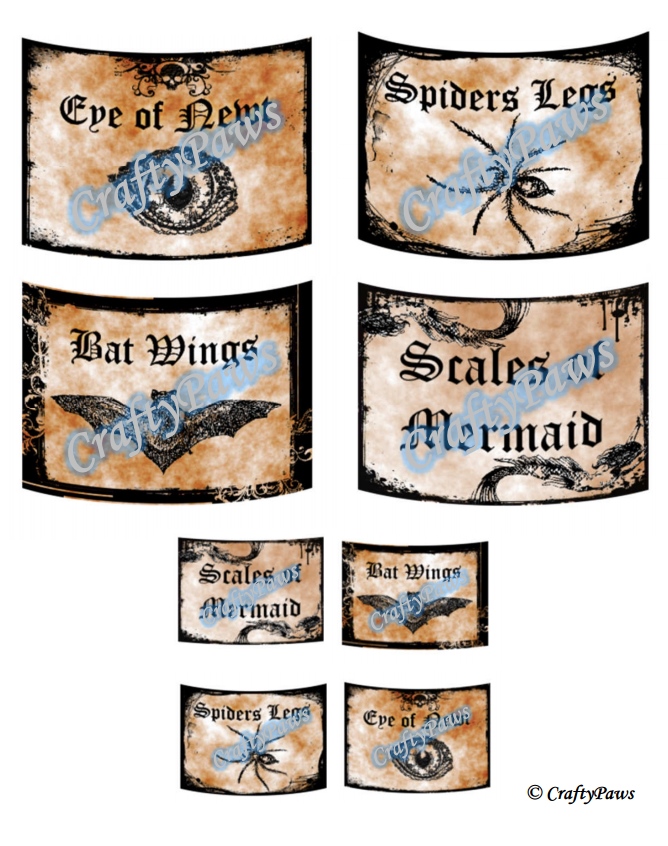 Most labels you see are actually straight rectangular or circular labels, which is great for adding them to 3D projects like actual bottles or jars. However, I wanted to use the fabulous mason jar mini album die and regular size mason jar die from Diemond Dies for my Halloween layouts for the Diemond Dies 2nd Annual Halloween YouTube Hop so I made my own curved labels, giving the look of dimension or the sense of a curve around a 2D image (like die cut mason jars or bottles). The labels, which are perfectly sized to fit the two Diemond Dies mason jars, are available HERE for free download. Hope you enjoy them.
 For the layout, I used pictures of my Biscuit and Bandito, to which I added a cartoon witch hat and warlock hat. I used the fabulous “Once Upon a Time” DCWV 12×12 papers for the base and then went to town adding spider webs using the Diemond Dies Spooky Spider Web Die Set.
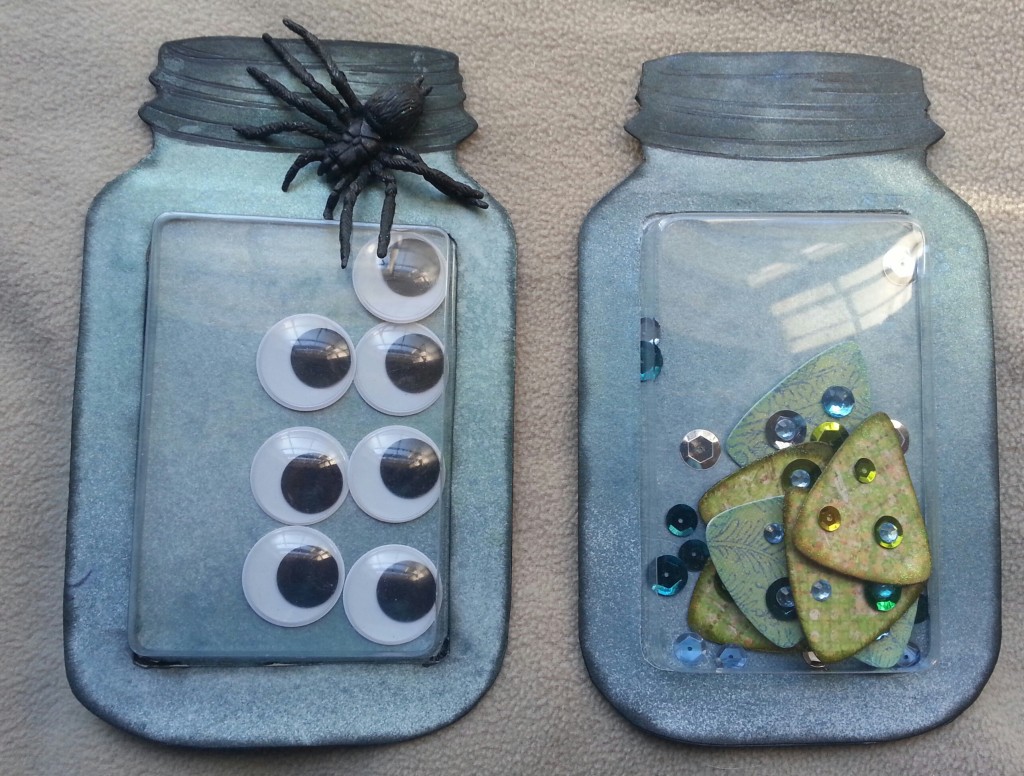
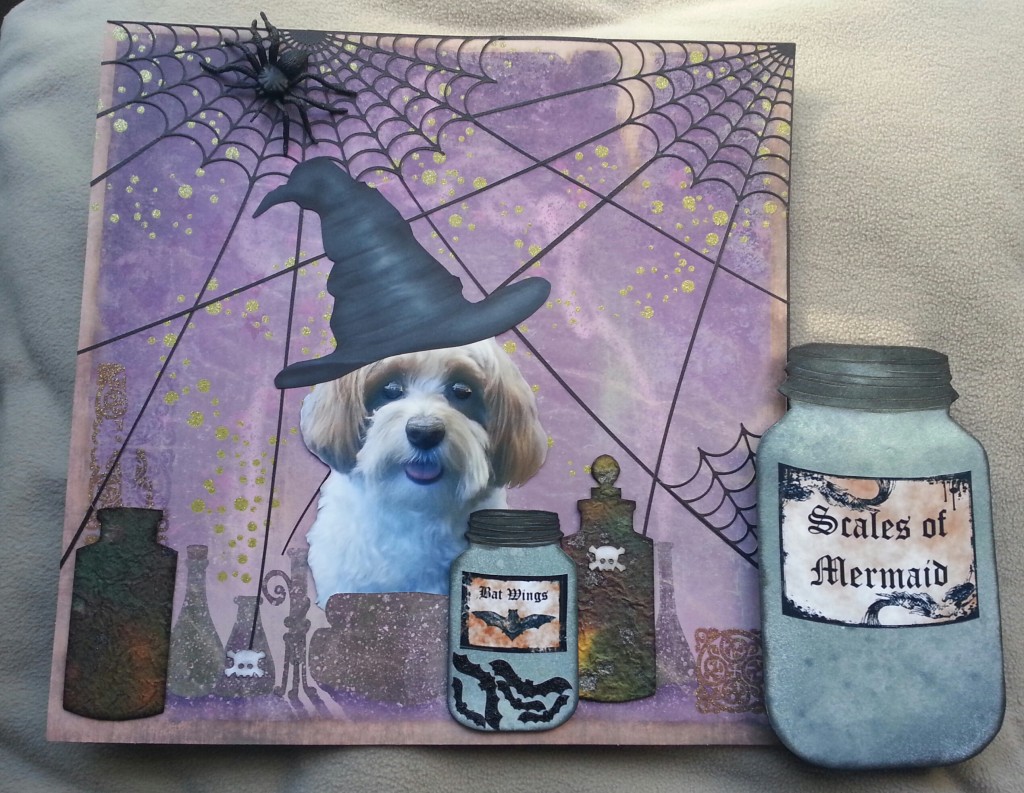 To make the layouts a little interactive, I also made a couple of shakers from the large mason jars. I used a little plastic from left over packaging material from some embellishments to create the space for the shaker pieces and just used E6000 to adhere the plastic to the die cut mason jars. The paper that I used to cut out the mason jars started out as plain white card stock, which I sprayed with Heidi Swapp Navy and Seafoam as well as Recollections Silver. I distressed the edges with VersaFine black ink and a finger dauber. I love the color and shimmer in the final jars. The shaker of the one that is labeled with “Eye of Newt” has giant googly eyes I picked up at the Dollar Tree (LOL), and the one that is labeled “Scales of Mermaid” has “scales” that I made using the candy corn die from the Diemond Dies Candy Die Set. I inked the edges of each scale, painted them with Folk Art Extreme Glitter hologram acrylic paint to give them a glittery look, and added sequins and rhinestones for that magical sparkle.
For the smaller jar labeled “Spiders Legs,” I simply glued on spiders from the Diemond Dies Spooky Spider Web die set which I coated with Glossy Accents, and for the small jar labelled, “Bat Wings” I glued on the small and medium bats (which I glittered with black Recollections glitter glue) from the Diemond Dies Flying Bats Die Set.
The following is a video share of the layouts:
Thanks for stopping by and have a great day! Hope you hop along on the Diemond Dies YT hop (through October 25, 2014) for ten chances to win $10 gift certificates from Diemond Dies! DIEMOND DIES SALE: Everything in the shop is 10% off from now through October 20, 2014. PLUS use the coupon code: thankskristina for an EXTRA 10% off and FREE shipping on orders of $35 or more. WHAT A DEAL!
The layouts and shakers are being entered into the Moxie Fab World Canning Jar Challenge and
The Paper Nest Dolls Anything Goes Challenge and
The Simon Says Stamp Monday O Challenge
]]>
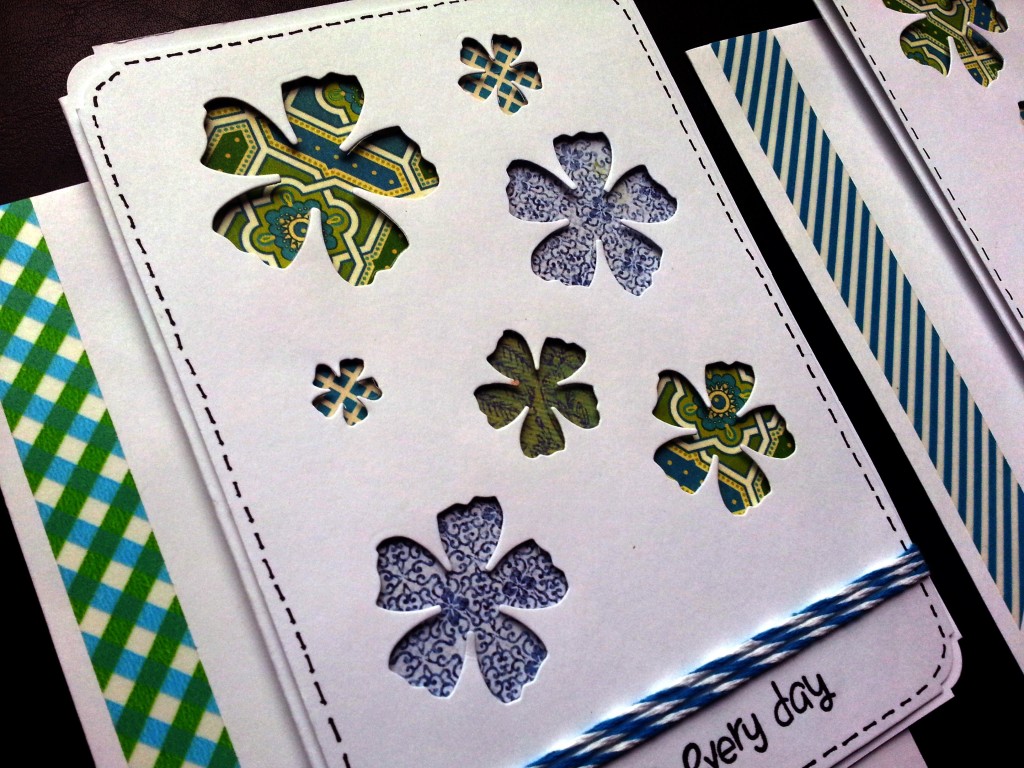 These cards take advantage of the negative space created by small dies. I used the whole 7 piece set of the Diemond Dies sugarplum flower die set. [DIEMOND DIES COUPON CODE: thankskristina is still active for 10% off your entire Diemond Dies purchase and free shipping on orders of $35 or more!] Then I “back-filled” each cut out with some small scraps of patterned paper (If you recognize some of these, it could be because they are the bits left over from the Steampunk Scarlett tag I made last week), using strips of foam tape to add a little depth and shadow interest. The papers I used were from My Mind’s Eye “Everyday Tango” and Graphic 45 “Bohemian Bazaar”.
For the sentiments, I used the Lawn Fawn’s “Critters at the Dog Park” and “Love You S’more” stamp sets. For the “love everyday”, I had to do a little masking, as it was two different stamps, but it was quick and easy (the tutorial video below shows how easy!).
To add a little more interest, I used a Faber-Castell M size PITT artist pen to draw in some faux stitch lines. On one of the cards I also added some teal and white bakers twine. Finally, just to make the gift set a little more special, I took some washi in a similar color family to the patterned papers I used and put a little banner all around the envelopes.
The following is a video share of these cards including a step-by-step tutorial:
This card is being entered into the Lawnscaping Patterned Paper Challenge and
The Paper Nest Dolls Anything Goes Challenge
Thanks for stopping by and have a great day. WOOF!
]]>
 I used a little paper doily, some pink satin ribbon and a little crinkled pink seam binding to add some softness to the front. At the bottom, to add a little more interest, I punched out a little border using my Martha Stewart iron gate border punch. This is one of my favorites because of all the detail to it, but I think it is retired.
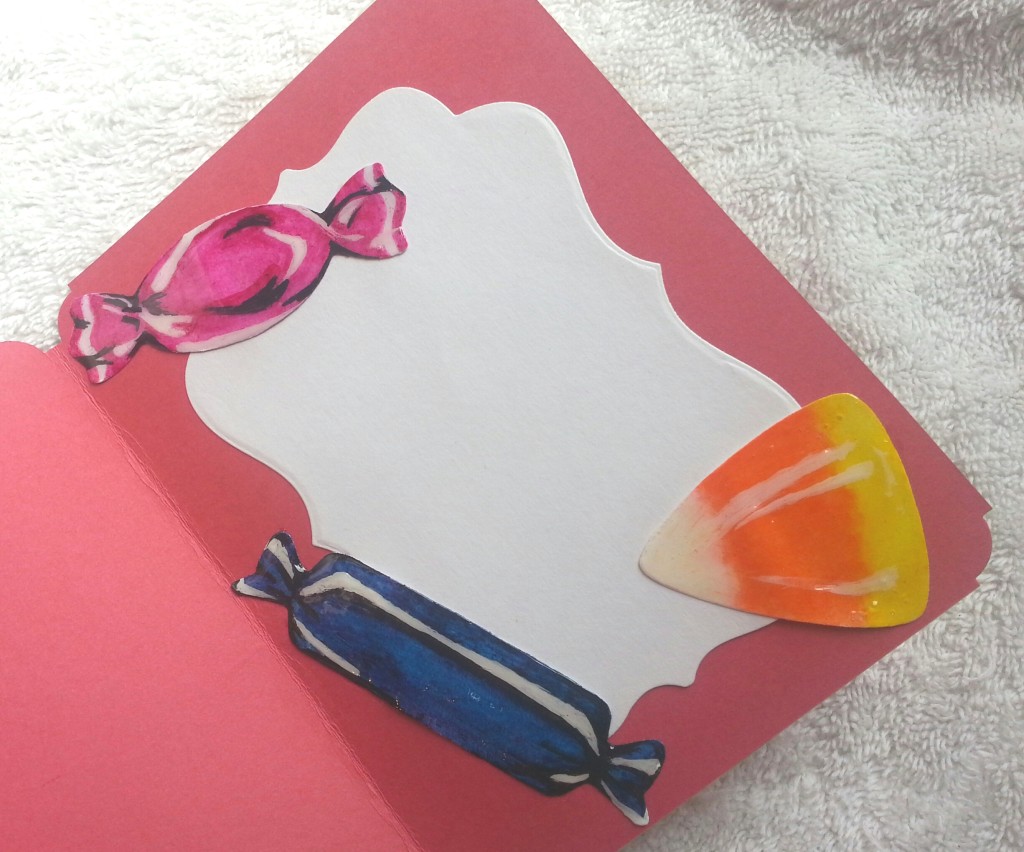
On the inside I used the largest of the Diemond Dies Labels 1 Nesting die set (I find that I use this die all the time to make cards since it is the perfect size for standard A2 card message areas) to set up a place where I could write my note and then had some fun making some candy embellishments using the Diemond Dies candy die set. Remember, use Diemond Dies coupon code: thankskristina for 10% off your entire purchase and free worldwide shipping on orders of $35 or more!
The coloring of these candies was really fun to figure out. I used my Derwent Inktense watercolor pencils to color in the bases (but you could probably just cut colored card stock). Then I took my white gesso with a thin paint brush to add in highlights. The final touch came from using my M size Faber Castell black PITT pen to put in low lights or shadows. That is the trick; to create a 3-D look with 2-D images or die cuts you have to include highlights and low lights.
The following is a video share of this card:
This card is being entered into the Simon Says Stamps Wednesday Watercolor Challenge and
The Kraftin’ Kimmie Anything Goes Wonderful Wednesday Challenge and
The Paper Nest Dolls Anything Goes with a Bow Challenge and
The Aviary: Paper Wings Halloween Challenge and
Craft-Dee BowZ Anything Goes with a Handmade Bow Challenge
Thanks for stopping by and have a great day! WOOF
]]>
I colored up this little digi, I named “Bad 2 the Bone,” to look like my little Bandito, but you could color him up completely differently for a totally different look. I kept all the stripes without color so you can use whatever color combinations you might like (e.g., pinks, orange and black, etc.).
 I colored up the digi with the following Copic colors: Dark stripes: C5, 7 and 9; White stripes: C1 and 3; White parts of dog: W1 and 3; Brown parts of dog: E11, 13 and 15; Eyes E74 and 79; and Tongue R08 and W3.
I had little sparkly devil horns from an old Halloween costume of mine when I was “deviled eggs” (don’t ask–LOL). I put those on my dog along with a little red jacket to take a few pics for this LO. Actually, my little pup is anything but a bad dog or a little devil. He is as sweet as they come, but I think that’s what makes this “bad dog” layout funny. I used papers and cut outs from the American Crafts “Night Fall” collection, which was from last Halloween, for all the papers and embellishments. To add a little dimension I cut some of the cut outs a couple of times and used foam adhesive behind the top layer.
I also used my Diemond Dies spider web set to kind of “frame” the layout with these incredibly detailed and delicate spider web and spider. I love the interest and balance that they add to the layout. Remember, all the new Halloween dies have recently been released and there is a sale going on right now; everything is 10% off through October 5, 2014. Also, if you use my coupon code: thankskristina, you’ll receive an additional 10% off and free worldwide shipping on orders of $35 or more. Now’s the time to stock up!
Lastly, to add a little softness, I added a triple loop bow that I made with sheer black wire edged ribbon. I cinched the center with black and white twine, and tucked it under the popped up embellishment that is supposed to represent what the little digi dog is saying. 🙂
The following is a video share of this layout:
This layout is being entered into the Aviary Halloween October Challenge and
the Kraftin’ Kimmie Stamps Wonderful Wednesday Anything Goes Challenge and
The Paper Nest Dolls Anything Goes plus a Bow Challenge and
Craft-Dee BowZ Anything Goes plus a Bow Challenge
Thanks for stopping by and have a great day! WOOF
]]> Coupon Code and Sale: If you are placing an order at Diemond Dies, please use the code: “thankskristina” for 10% off your entire purchase (including sale items–everything is on sale an extra 10% from Sept 26-Oct 5, 2014) and free worldwide shipping on orders over $35!
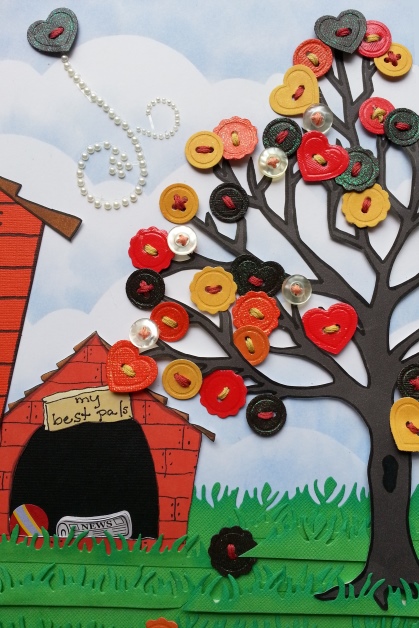 I knew I wanted to create a tree with fanciful button “leaves” (tutorial included in video share below). I used all except the largest in the Diemond Dies Vintage Button die set.
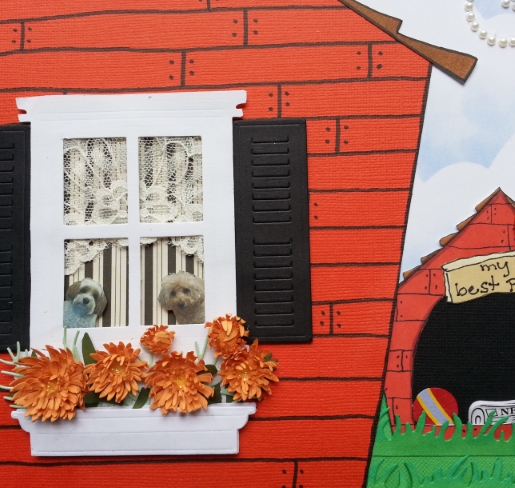
I also knew I wanted to include my dogs (who are often my muses–LOL). I took a couple of pictures of them, printed them out in thumbnail size, and fussy cut them out. I used the super cute and very versatile Diemond Dies Window die set and and popped my pups behind the window so that they looked like they were peering out of a cozy home. I adhered the window with foam adhesive so that I could give a sense of dimension behind it with “wallpaper” and a lacy curtain.
Making the yard was fun with the Diemond Dies Grass Border die (both the positive and negative). It was easy to create a sense of texture and depth by inking the edges with some green ink. I could tuck a few fallen button “leaves” behind blades of grass and some dog toys for some pops of color in the sea of grass.
Finally, I used the three smallest flowers from the Diemond Dies Asters die set to make my first handmade paper flowers for the flower box under the window. I must admit this was very time consuming, but I think the detail and richness of the chrysanthemum flowers that I was able to make are unmatched in store-bought paper flowers.
For a more detailed share of the layout, please see the video below:
This LO is being entered into the Simon Says Stamp Work it Wednesday Color Recipe Challenge and
the Simon Says Stamp Anything Goes Wednesday Challenge
Thanks for stopping by and have a great day! WOOF
]]>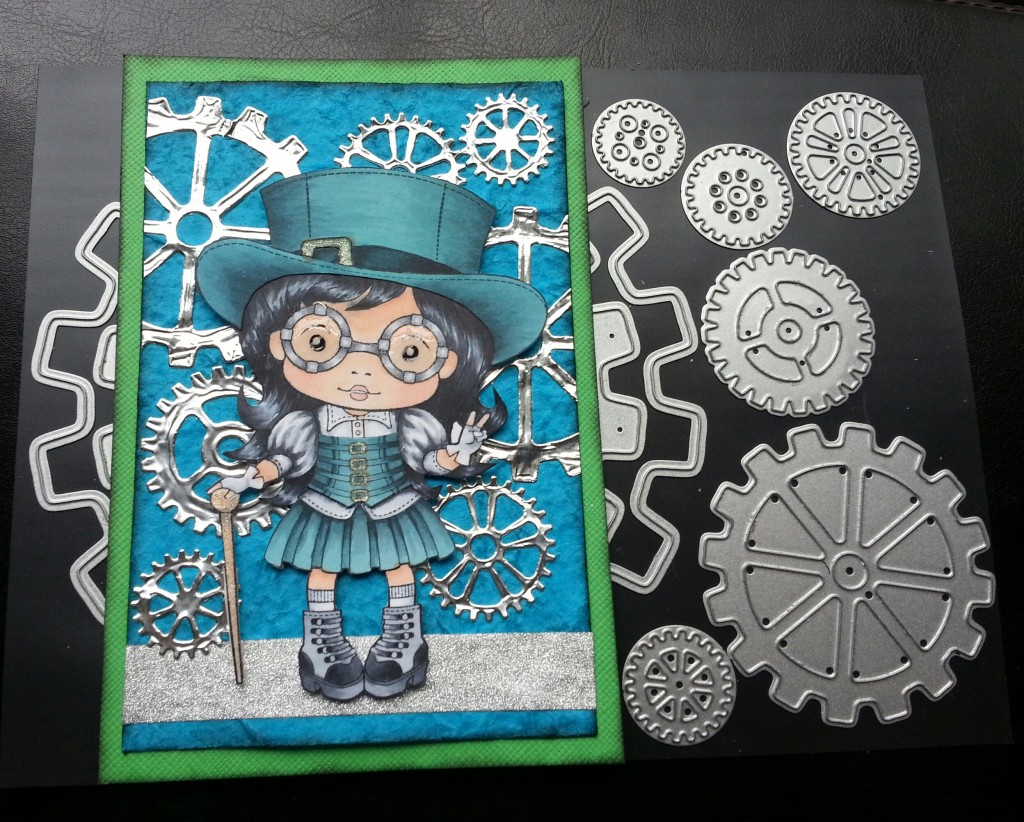 The other thing I was excited about was being able get a lot of color from just 10 markers. I colored her skin with E000, 00, and 11 and used R30 for the blush and lips. For the rest of her outfit I limited myself to C1, 3, 5, 7, and 9 (well I used the E11 again for the buckles on her vest, walking stick, and hat buckle too) . I was able to achieve the rich blue green color by starting with a pale blue patterned paper that I just shaded in as appropriate. A subtle detail that I really liked was drawing in a few “reflective” lines on the lens areas with a white Gelly Roll pen. I added a little extra sparkle with clear star Gelly Roll pen on the buckles and the walking stick and a little shine and dimension with Glossy Accents over the lenses of the glasses and on the walking stick.
I made the background using the Steampunk Gears dies from Diemond Dies and Shurtape from the hardware store (it’s in the HVAC dept.). As a continuing Guest Design Team member for Diemond Dies, I am still able to offer the coupon code: thankskristina for 10% off your entire purchase and FREE worldwide shipping on orders over $35. WOOT WOOT! I love the interest and shine it adds to the background, and I think it elevates the background to match nicely with the cute Marci image. A little strip of glitter washi tape was all I needed to finish it off and give Marci a place to “stand.”
The following is my video share of this card:
This card is being entered into the Simon Says Stamp Wednesday Background Challenge and
The Simon Says Stamp Work it Wednesday Stamp Challenge
Thanks for stopping by. Please subscribe if you wish, and have a great day! WOOF
]]>