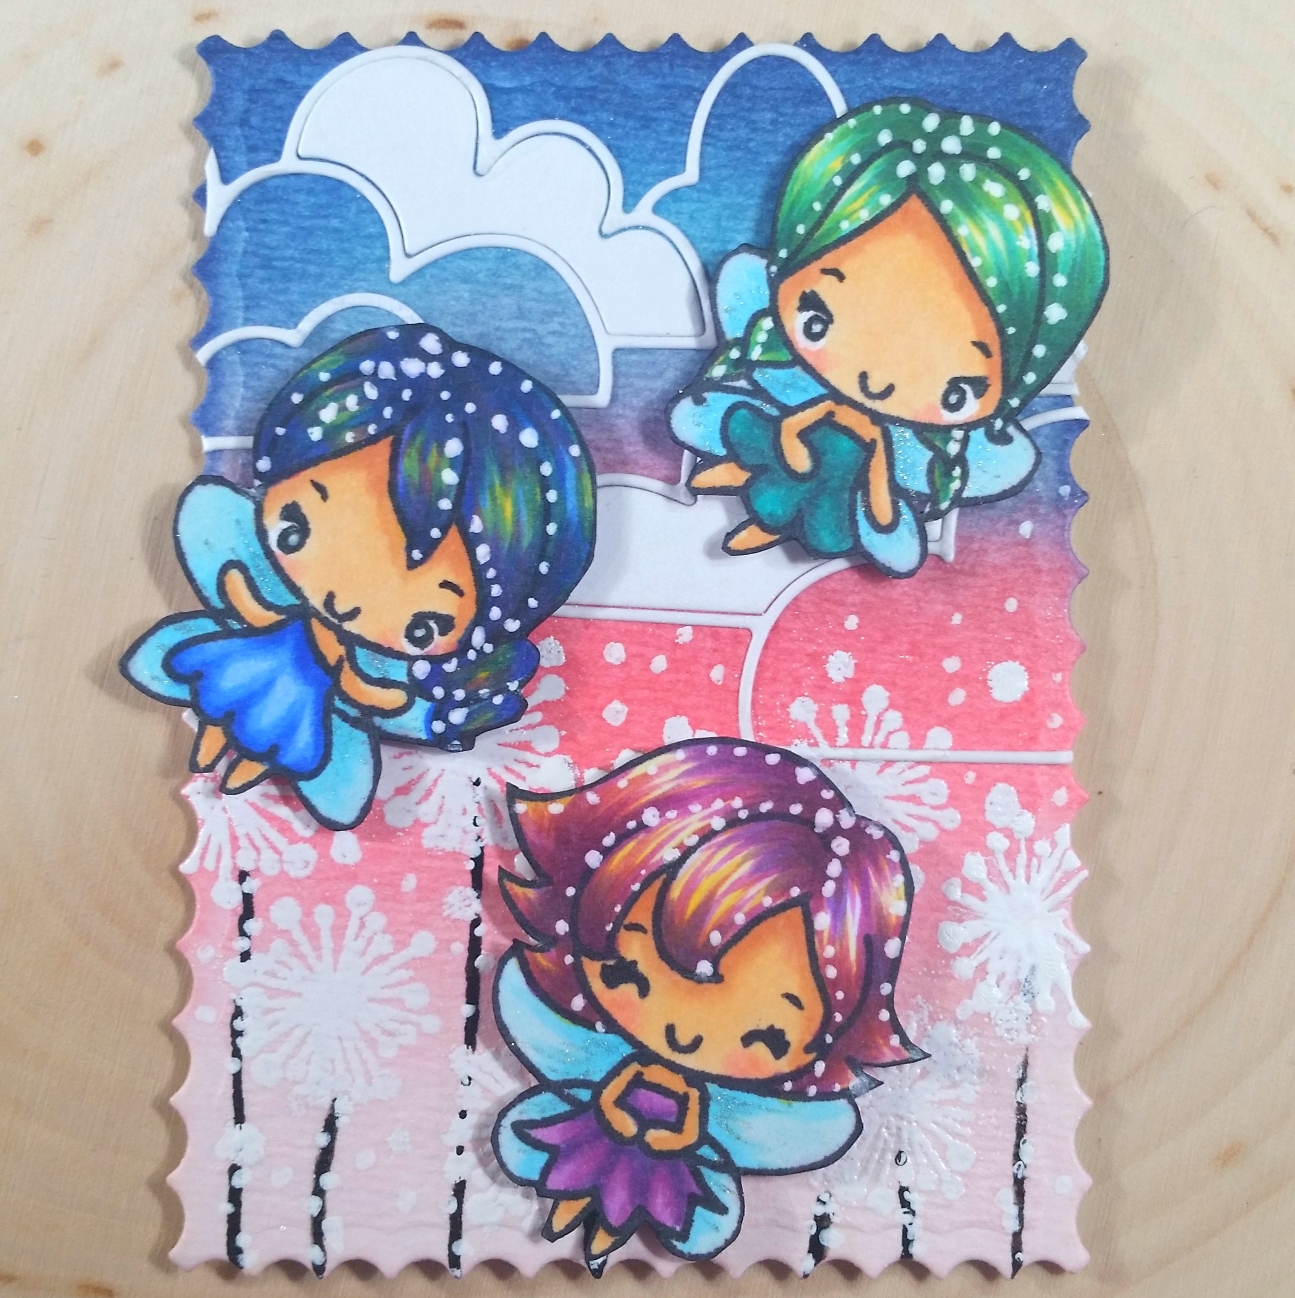
 Then I set the scene for the sky with a Simon Says Stamp Cloud Bank Die, leaving a few of the cloud insets in place and otherwise using the outline of the clouds. Then I stamped out the dandelion heads from the Little Fairies stamp set with VersaMark ink and heat embossed some Recollections Snow embossing powder to get a little bit of texture and shine. For the Dandelion stems, I used a Black Sakura Glaze Pen, which gave a similar texture and shine to the embossed areas. For an area that I had inadvertently smeared with VersaMark ink and could no longer get a clear dandelion head impression, I hand painted in a dandelion head with Copic Opaque White (this too had a similar raised, shiny look). I also used a VersaMarker to dot the background a bit more and heat embossed some fairy dust (or dandelion fluff). For even more fine dots, I used a Uni-ball Signo white Gel Pen. Amazingly, all of these mediums (Glaze Pen, Gel Pen, Copic Opaque White, and VersaMark Ink or VersaMarker with embossing powder) had similar shine and slightly raised texture like heat embossing!
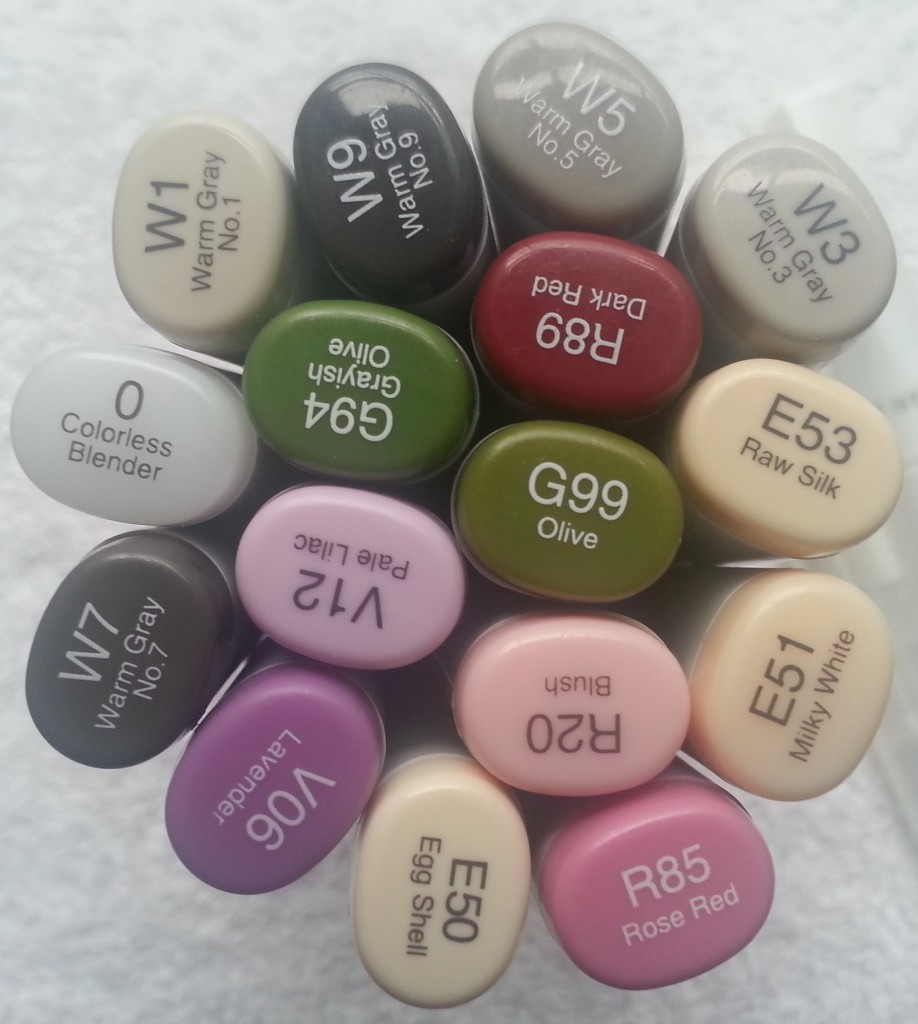
Finally, for the little fairies, I used the following Copics: For all the fairies, the skin was colored with: E50, E51, E21, E11, and R20; the wings with: B000 and B01 (topped with Clear Wink of Stella); and hair highlights with: Y11 and Y15
Purple-haired Fairy: Hair and dress: V12, V06, V17
Blue/Purple-haired Fairy: Hair and dress: B21, B24, B18, V06, V17
Green-haired Fairy: Hair and dress: BG15, BG18, BG78
To add to the magical look of the fairies, I added a lot of dots with a Uni-ball Signo White Gel Pen in their hair. After fussy cutting them out, I inked the edges with a Tuxedo Black Momento Marker to cover up the white edge of the paper, and I popped them all up from the background with double sided foam adhesive for a little dimension.
The following is a video share of this ATC:
This ATC is being entered into the following challenges:
Creatalicious Anything Goes with Optional Mythical Creatures Challenge
Simon Says Stamp Wednesday Anything Goes Challenge
Simon Says Stamp Work It Wednesday Favorite Stamps Stamptember Challenge
Word Art Wednesday Anything Goes Challenge
Through the Craft Room Door Anything Goes Challenge
Crafts Galore Encore Anything Goes Challenge – WINNER
Not Just Cards Anything Goes Challenge
Crafty Gals Corner Anything Goes Challenge
 For the ATC base, I upcycled a bit of chipboard packaging and covered it with a glue stick to cover one side with a patterned paper scrap and the other side with some Bristol paper. I cut down the Bristol paper with a Die-namics Stitched Rectangle STAX Die Set. It was a bit too long for an ATC, but I knew that wouldn’t be a problem since I was covering the lower part of the ATC in the scene I was planning. I blended on Tim Holtz Distress Ink in Squeezed Lemonade, Wilted Violet and Chipped Sapphire to create a sun setting sky background.
For the silhouetted city skyline, I cut down some black card stock with the Paper Smooches Super 2 Cityscape Die. All the windows cut out with this die, so I backed the building windows with gold glittered card stock and re-filled some of the windows with the black card stock window cut outs. This adds a nice sparkle to the scene without making it look like all the windows are lit up in an unrealistic way.
For our Super Girl superhero, I used The Greeting Farm “Little Heroes” stamp set. I stamped out the little girl who looks like she is in mid flight with her cape streaming behind her, as well as a big mask with the eyes peeking out. I was happy to have the option to give this flying girl open eyes with this mask accessory stamp since to me a super hero should fly with her eyes closed. 😀 hehehe I used the following Copic colors to color both images:
Skin: E50, E51, E21, and R20
Hair: B01, C5, C7 and C9
Costume: R24, R27, B02, B05, Y11, Y15, B01, C7 and C9
I next fussy cut both of the images. To cover the white edges of the cut images, I inked the edges with a Momento Tuxedo Black Marker. Then I glued the mask onto the girl and then popped up the whole Super Girl onto foam dots to raise her up off the ATC base. Lastly, to add a little extra shimmer, I coated the red parts of the super hero costume with Clear Wink of Stella.
The following is a process video of making this Super Hero Scene ATC:
This ATC is being entered into the following challenges:
The Greeting Farm Farm Fresh Make a Scene Challenge
Simon Says Stamp Monday ATC Challenge
Stamp Sensations Anything Goes Challenge
Word Art Wednesday Anything Goes Challenge
Creatalicious Anything Goes with Optional Glitter/Bling
Crafty Gals Corner Punches and/or Dies Challenge
Lil Patch of Crafty Friends Anything Goes Challenge – WINNER
613 Avenue Create Anything Goes with Optional Shabby Chic Challenge
Not Just Cards Anything Goes Challenge
]]>
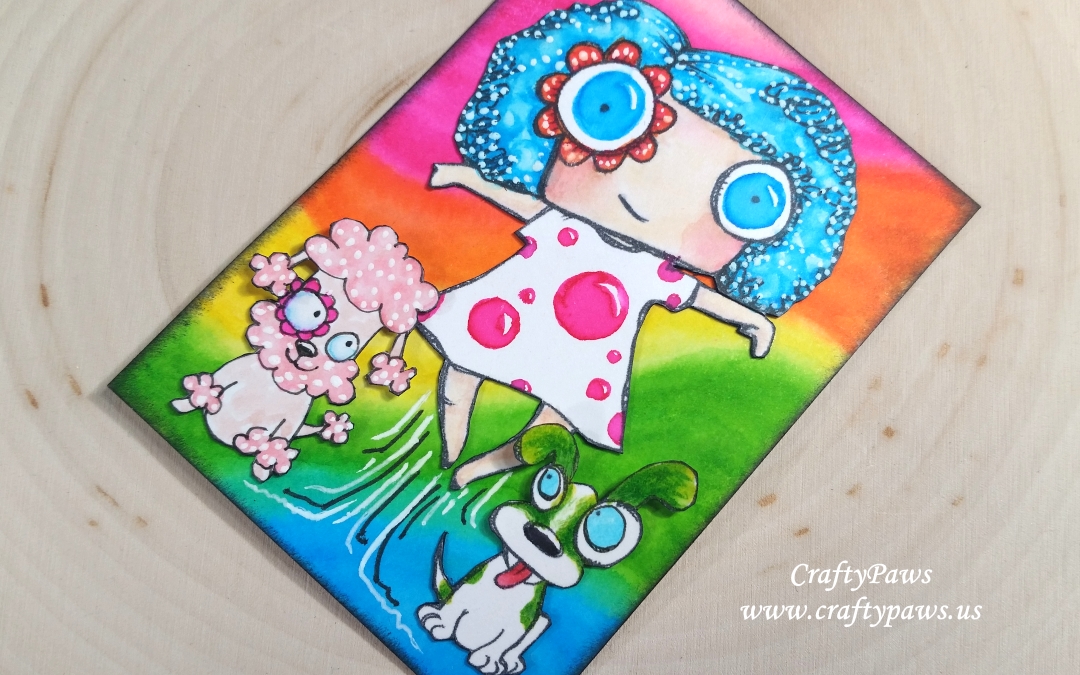
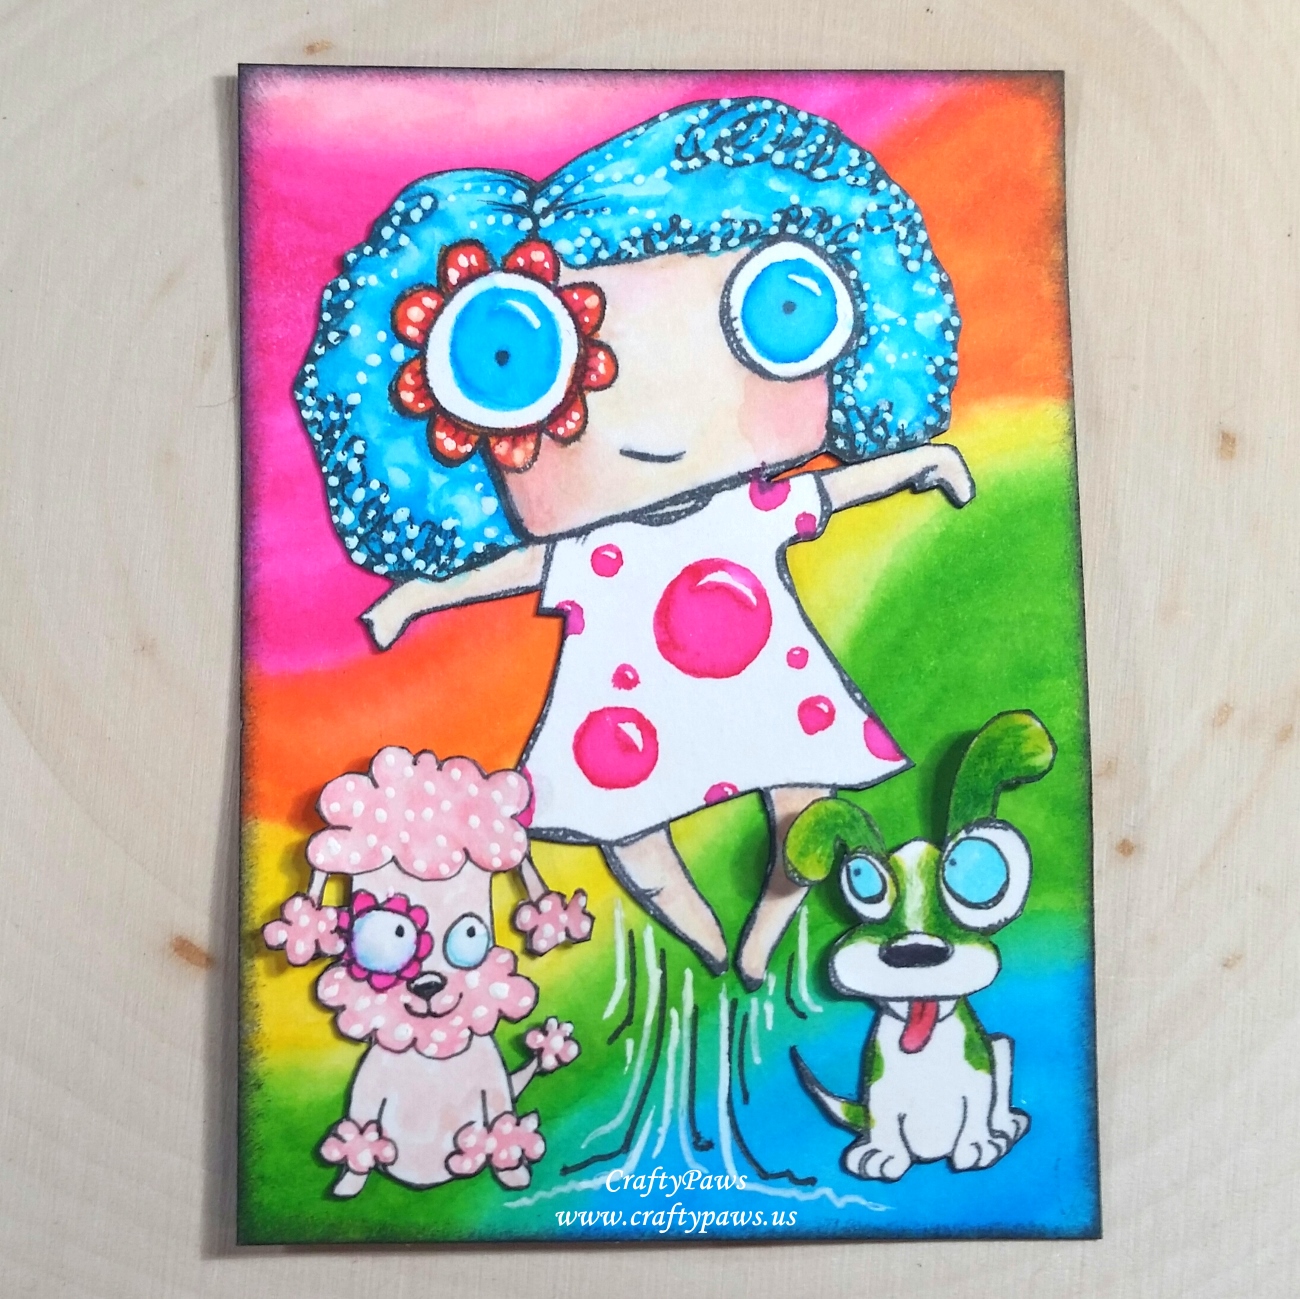 The background of the ATC (Artist Trading Card measuring 2.5″ x 3.5″), the digital images and the doodled poodle were all printed out on Strathmore Bristol Paper. Then the background was watercolored into a groovy swirly rainbow with Zig Clean Color Real Brush Markers and a Pentel waterbrush. I used Light Pink, Pink, Orange, Yellow, Light Green, and Cobalt Blue. The edges are inked with Tim Holtz Distress Ink in Black Soot.
The Poodle was water colored with Pale Pink, Light Pink, Pink (for the flower around the eye), and Light Blue for the eye balls. For extra whimsy I added dot details with a White Uniball Signo Gel Pen. The goofy pup on the right I colored up to represent my Bandito (but with green rather than brown markings) with Yellow, Light Green, Geranium Red and Light Blue. The girl jumping/dancing up into the air (representing me) is colored with: Skin: Flesh, Pale Pink; Hair and Eyes: Cobalt Blue and Light Blue; Dress Bubble Polka Dots: Pink; and Flower around Eye: Orange and Pink. Again to add some lightness to her hair and flower eye, I added more dots with the White Uniball Signo Gel Pen.
I glued the girl directly onto the background and drew some jumping up lines beneath her with a black Uniball Pen and the White Uniball Signo Gel Pen to give a sense of action. Both pups are only glued down at their bases and their heads are intentionally not glued down to give them a sense of dimension and movement too.
The ATC’s title is a derivation of one of the sentiments in the digi stamp set that reads, “the world can be amazing when you’re slightly strange.” The title is “Slightly Strange and All Kinds of Wonderful” and is a cartoon-ized portrait of me and my fur babies. 🙂
This ATC is being entered into the following challenges:
Simon Says Stamp Wednesday Going Dotty Challenge
Crafty Purple Frog Fabulously Floral Challenge
Creatalicious Anything Goes Challenge with Optional Use a Stencil
Word Art Wednesday Anything Goes Challenge
Card Mania Life is Colorful Challenge
Through the Craft Room Door Anything Goes Challenge
613 Avenue Create Anything Goes Challenge with Optional Create a Container
Lil Patch of Crafty Friends Anything Goes Challenge
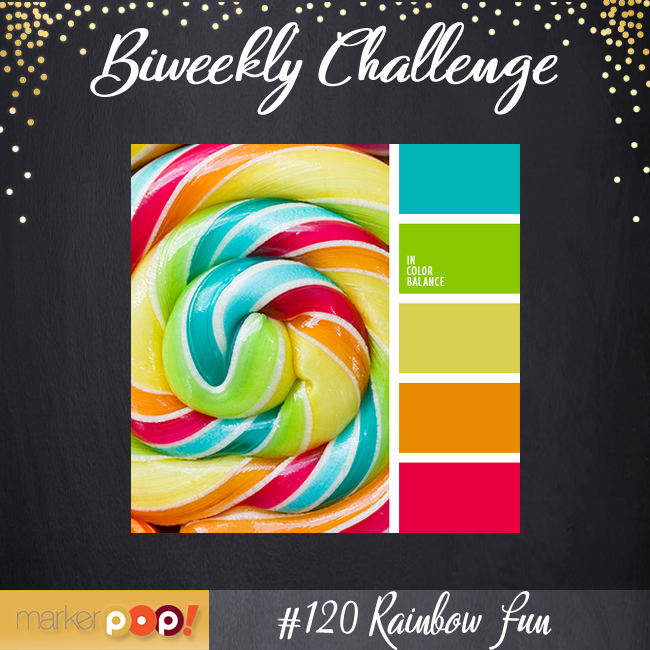
MarkerPOP Color Challenge #120: Rainbow Fun – WINNER
]]>
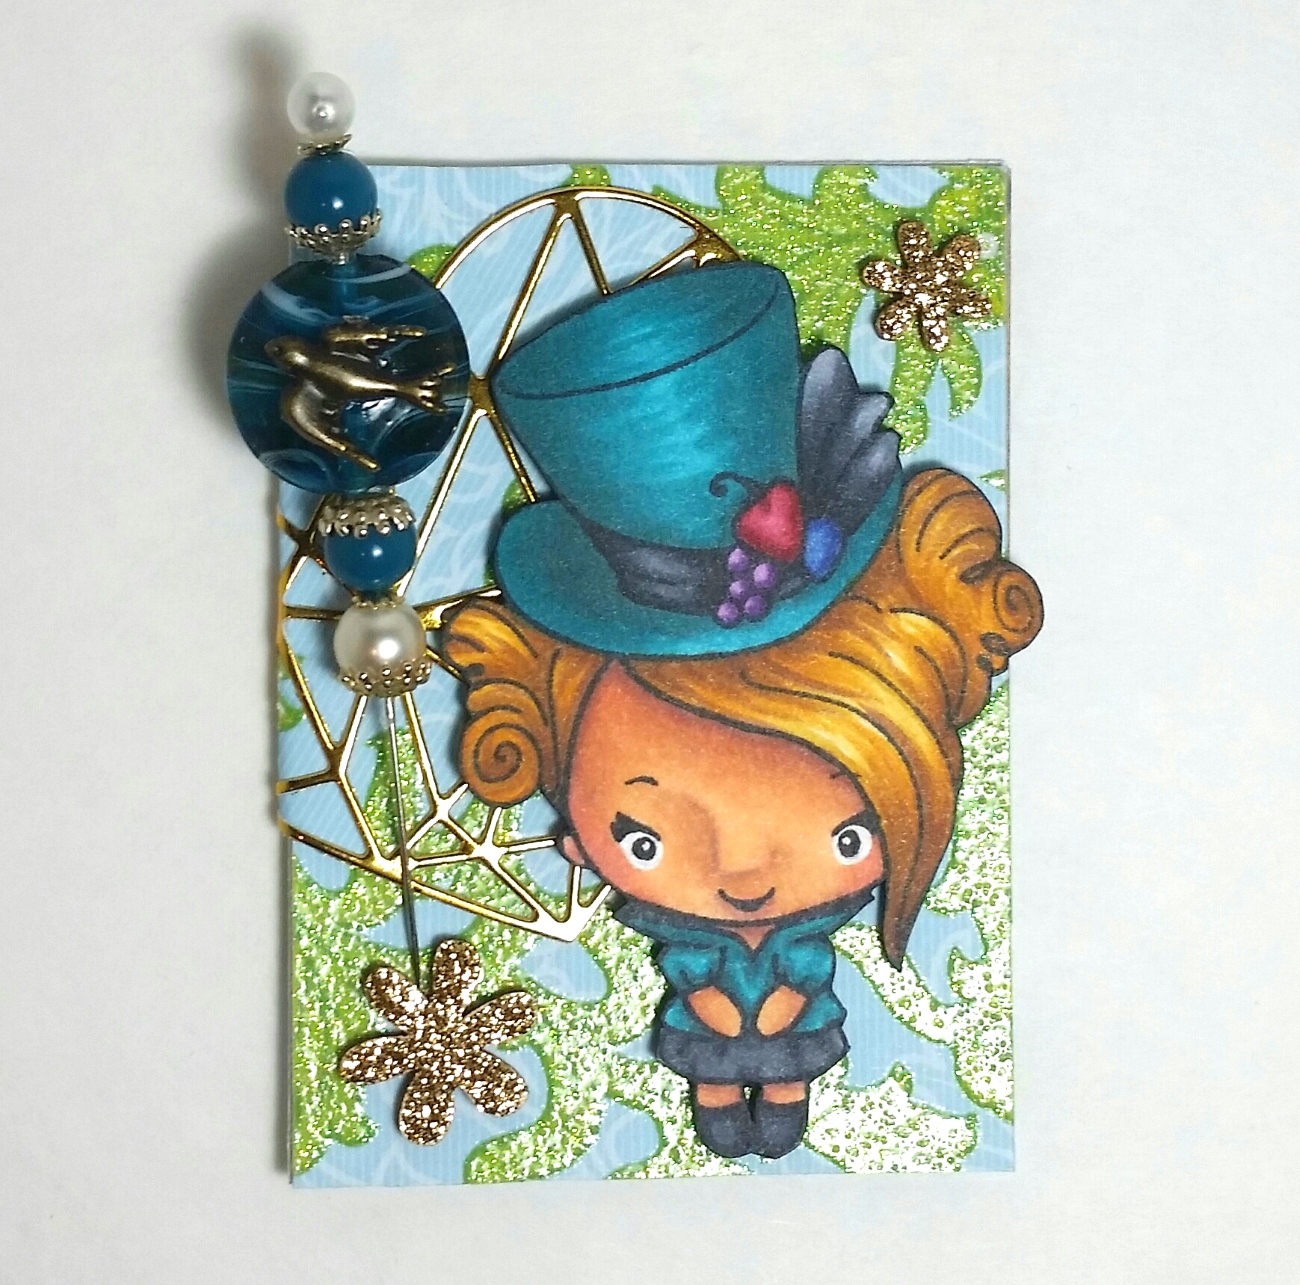 This time, I started with a chipboard base that I covered with a scrap of glittery blue and green patterned paper that I have been hoarding for years. I then added one of the Hatters from The Greeting Farm that I colored up with the following Copic colors: Skin: E000, 00, 21, 11, 04 with R20 blush; Grapes: V12, 09; Blue plum: B34 and 39; Strawberry: R83, 85 and 89; Blue-green part of outfit: BG45, 49 and 78; Hair: Y21, Y26, YR24 and E25 I fussy cut her out, inked the edges of the paper so the white edges wouldn’t show, and popped her up on double sided foam adhesive to add a little dimension.
For the background, to add more shine and shimmer, I used a gold foil paper die cut using the Winnie and Walter True Multifaceted Heart Cutaway Die and backed it with more of the glittery blue and green patterned paper but positioned so that less of the heart background would be glittery (less busy) and more of the attention could go to the beautiful heart die cut itself and to the Hatter girl. Then to add a little twist, I scored the die cut from the back so that I could wrap it around to the left side and onto the back of the ATC.
Then to add even more sparkle, I glued on a couple of flower wood veneers that I coated twice with Champagne Gold Stickles. One coat left some of the wood showing (which I didn’t like), but after letting the first coat fully dry, adding the second coating really made the flowers look like thick pieces of glittery metal.
Lastly, to take this from a card to a more elaborate ATC, I added an altered hat pin that I made with teal and pearl glass beads. To set off each bead, I added small and medium sized silver metal spacers, and to take the pin over the top, I added an antique brass bird charm (I clipped off the eye of the charm) to the face of the largest bead with E6000.
This ATC is being entered into the following challenges:
Winnie & Walter Precious Metals Challenge
Simon Says Stamp Wednesday Anything Goes Challenge
Word Art Wednesday Anything Goes Challenge
613 Avenue Create Anything Goes with Optional Twist of Green and Gold Challenge
Not Just Cards Anything Goes Challenge
Crafty Gals Corner Anything Goes Challenge – WINNER
Just Keep Creating Anything Goes Challenge
Crafts Galore Encore Anything Goes Challenge
Card Mania Let It Shine Challenge
]]>
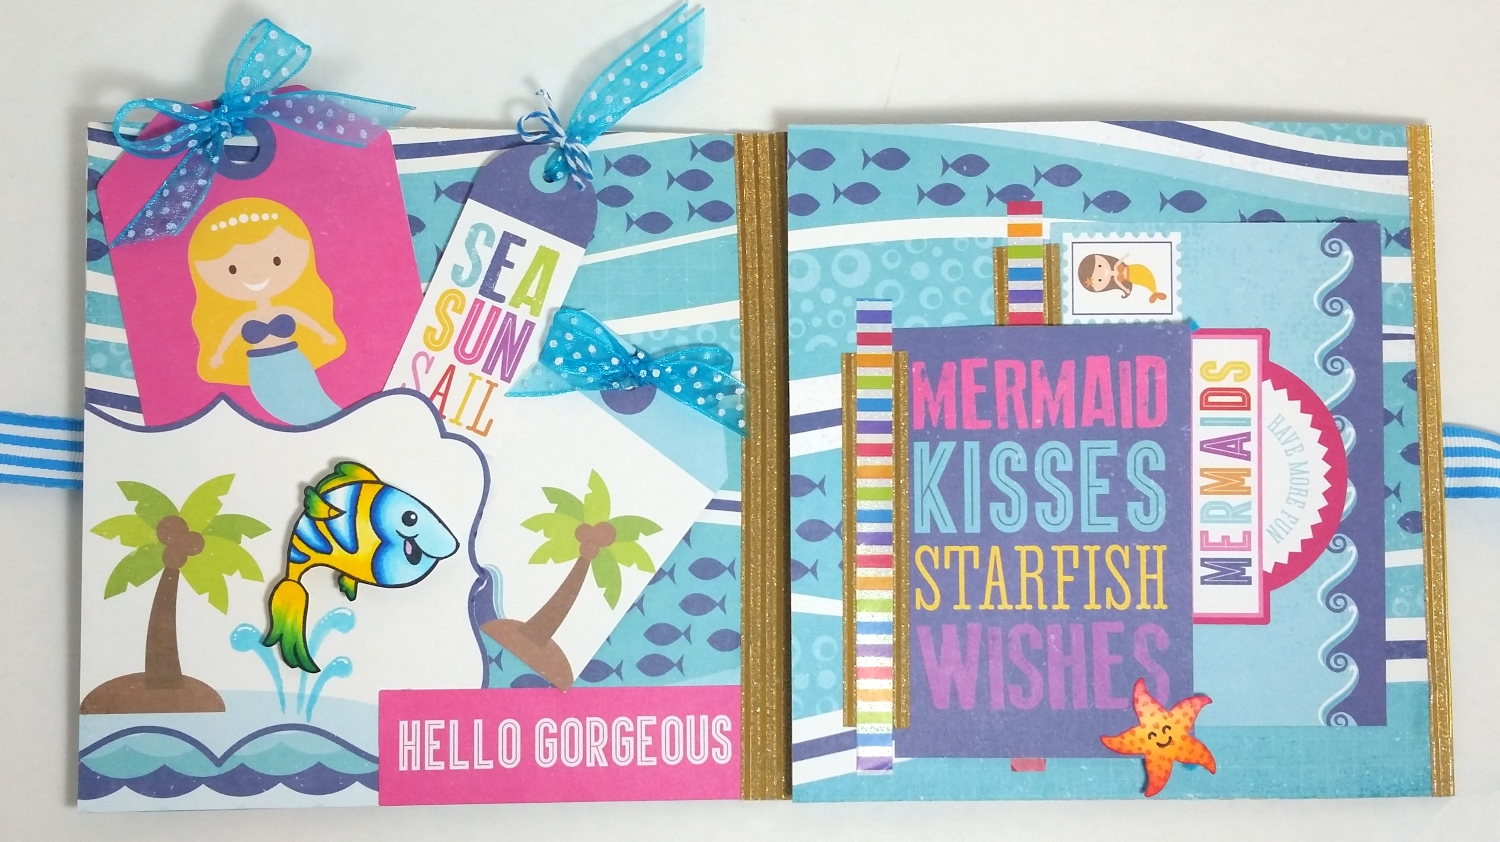
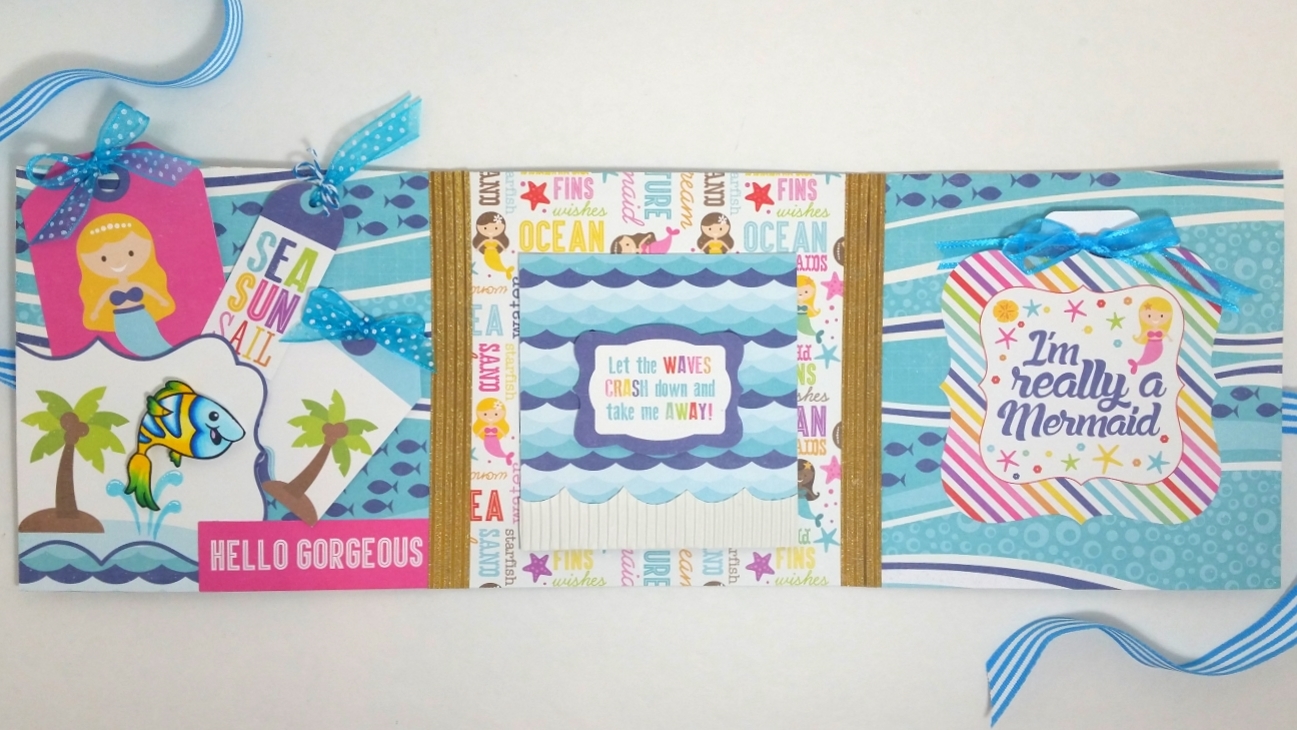
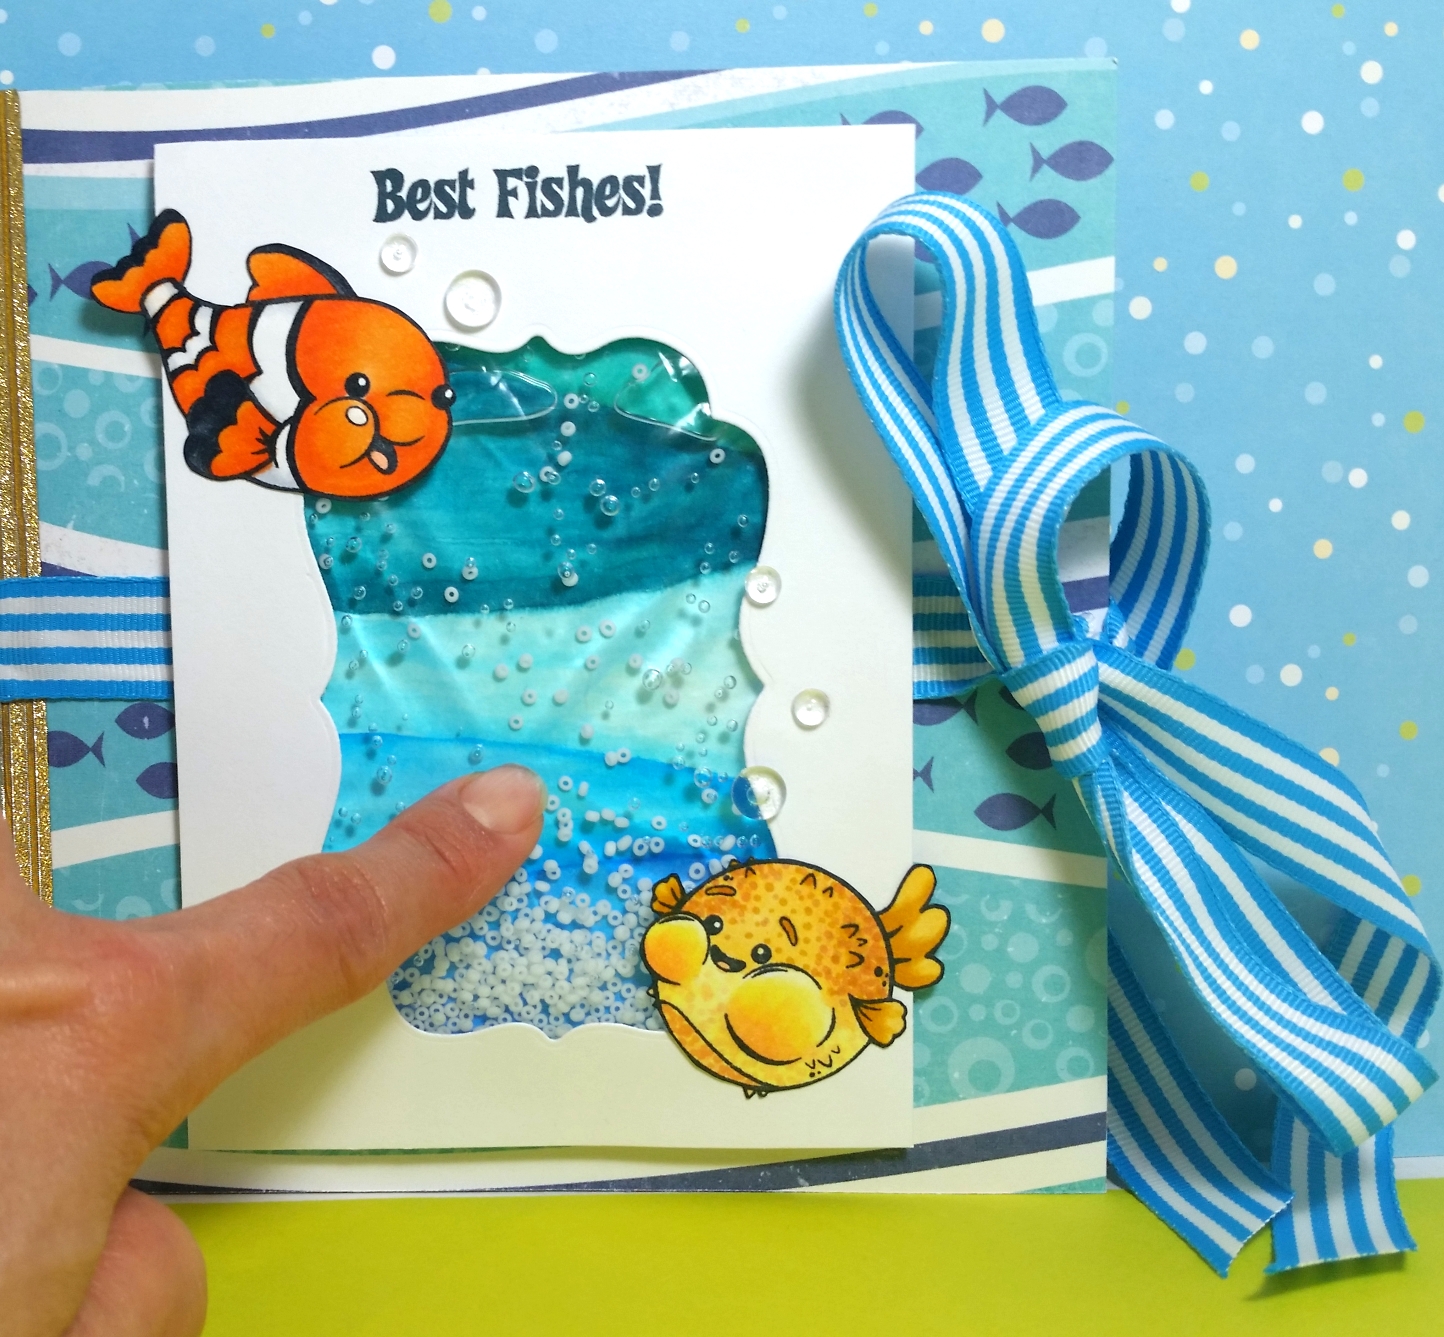 I made the little ATC (artist trading card 2.5″ x 3.5″) using a watercolor background that I made with various blues and aquas from the 60 piece set of Zig Clean Color Real Brush Markers, fussy cutting out a bunch of tiny mermaids from the paper collection, and a bit of polka dot vellum that I die cut into waves with the smallest of the MFT Die-Namics Stitched Scallop Edges dies. The title is text from one of the patterned papers too.
The flip book includes a watery gel-filled shaker (tutorial HERE) as well as a spinner card with a magnet closure that I created using the mirrored stamping technique and one of the fish from the “Cute Fish” cling stamps from an old Inkadinkado stamp set that I had picked up at Tuesday Morning about 6 months ago.
I used the following Copic colors to color up all four fish from the stamp set:
Clown fish (on front): C1, 6, 10 and 0; YR00, 12, 04 and 07
Blow fish (on front): Y00, Y11, YR31, YR21, E93, E95, E97
Rainbow colored fish (on tuck spot for tags): Y08, Y13, YG07, G19, B000, B01, B05, B18
Angel flame colored fish (mirrored for spinner): Y15, R32, R35, R37, B01, B24, B29
There are so many details to this flip book that I’d be writing a 3 page post to cover it all so instead, please enjoy the following video share:
This flip book is being entered into the following challenges:
MFT 10th Birthday Bonus Challenge – 10 ephemera pieces used in this flip book
Simon Says Stamp Monday Red White and/or Blue Challenge
Simon Says Stamp Wednesday Photo Inspiration Challenge
Word Art Wednesday Anything Goes Challenge
Lil Patch of Crafty Friends Anything Goes Challenge
Through the Craft Room Door Anything Goes Challenge
Penny Black and More Anything Goes With a Stamp Challenge
Craft Galore Encore Create Your Own Sunshine Smiles with Anything Goes Challenge
613 Avenue Create Anything Goes with an Optional Rose Twist Challenge
Craft Your Passion Anything Goes Challenge
]]>
Thanks for stopping by and have a great day! WOOF
]]>
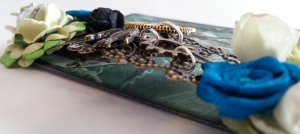
Side View Showing Filigree Arch
I started with the traditional 3.5″ x 2.5″ chipboard (upcycled embellishment packaging) base and covered both sides with a wonderful scrap of paper that I had in my scrap box from the Graphic 45 “Steampunk Debutante” collection. In moody green and black tones and a sophisticated French lady perched on a Chippendale chair, I thought this paper was perfect. I inked the edges with Tim Holtz Distress Ink in black soot, and then I was ready to build up the ATC!
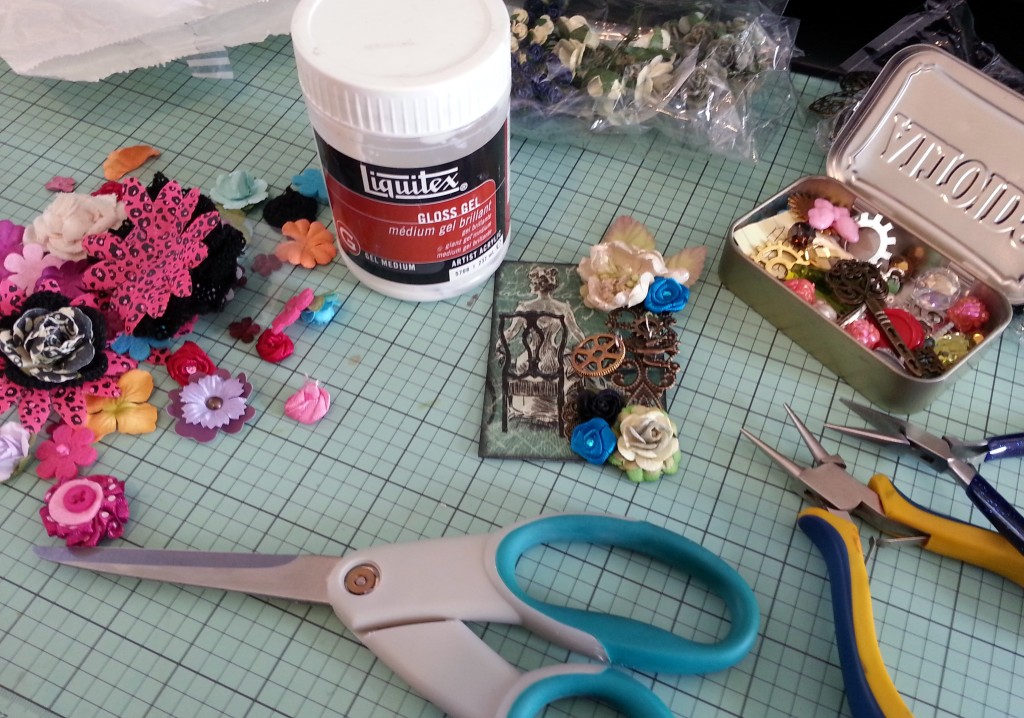
Craft Desk While Creating
I got out a bag of metal embellishments, a couple of doodad bags of different flowers that had been gifted to me from crafty friends, and an Altoid tin of mixed metal charms. I took a long metal filigree embellishment and bent the two ends to create a kind of arch. From that arch I decided I’d hang some metal charms. I used jump rings to attach a couple of gears, a bird and an Eiffel Tower (remember I had decided the elegant lady was French? LOL). With a little E6000 and some hot glue, I attached the arch to the ATC base and then covered the tops and bottoms with some layered crochet pieces, paper flowers, and paper flower petals that I thought complemented the Graphic 45 paper. While pretty in that monochromatic way, in the end I decided to add two turquoise rolled roses with rhinestone centers to the flower clusters to add a little pop of color and shift the green base paper toward blue a bit (isn’t it funny how putting different colors adjacent to one another can shift the perceived color of something?).
The following is a video share of this ATC:
https://www.youtube.com/watch?v=jDhlIM-xDLQ
This ATC is being entered into the SanDee & amelie’s Steampunk Destinations Challenge
The photo of my craft desk is being entered into the Moxie Fab World Throwdown Challenge
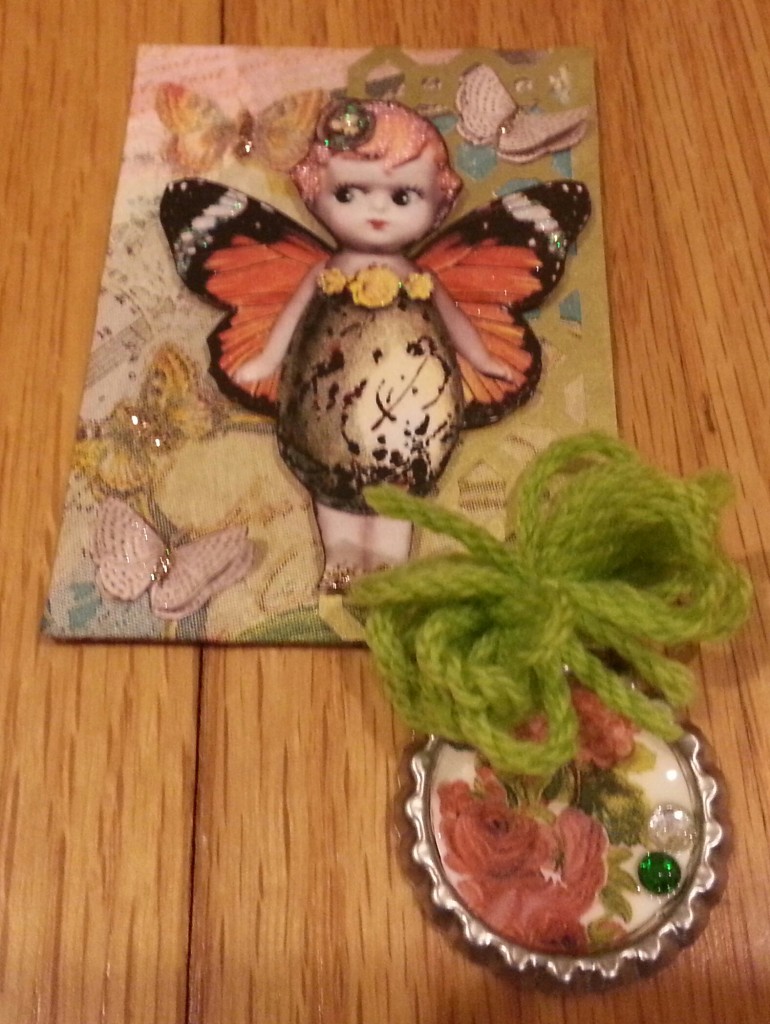 I started with a light weight chipboard that I covered with the top layer of a very pretty napkin in soft fall colors (after removing the white under layers) using Liquitex gel medium. I also included a gold lattice punched border that I made with my Martha Stewart border punch along one side to add some extra shimmer. I colored the edge of the Kewpie die cut with a black Sharpie so that you wouldn’t see the white edge of the paper. I then popped her up on foam adhesive so she would be raised up off the ATC base.
I fussy cut 4 small butterflies from a little scrap of patterned paper I had and glued them on the base doubled up (i.e., they formed 2 butterflies), raising the wings of the top butterfly so they would look like they were fluttering up.
Then to add a little movement to the ATC, I dangled a sweet bottle cap charm, which I topped with a multi-looped bow made from lime green yarn. To me, that lime green color (esp. in yarn) has a retro vibe that adds to the kitschy feeling I was going for.
Then, because I also associate lots of sparkle with kitsch, I went to town with my Wink of Stella, gold Stickles, cotton candy pink Stickles, irridescent Studio G glitter glue, and Glossy Accents. A girl can never have too much bling, right?! LOL
The following is a video share of the ATC:
This ATC is being entered into the Simon Says Stamp Monday Fall Challenge and
The Inspired By Stamping Gold Challenge and
The Addicted to Stamps Anything Goes Challenge
Thanks for stopping by! Please subscribe if you wish, and have a great kitschy day! WOOF
]]> thought fit the mood I was trying to create so I added that at a jaunty angle (Yes, I said, jaunty; I’m trying to add different adjectives to my daily vocabulary–tired of me just saying cute, beautiful, etc.). To add a little rough hewn texture, I also added a faux metal gear that I made a while back (video tutorial available here).
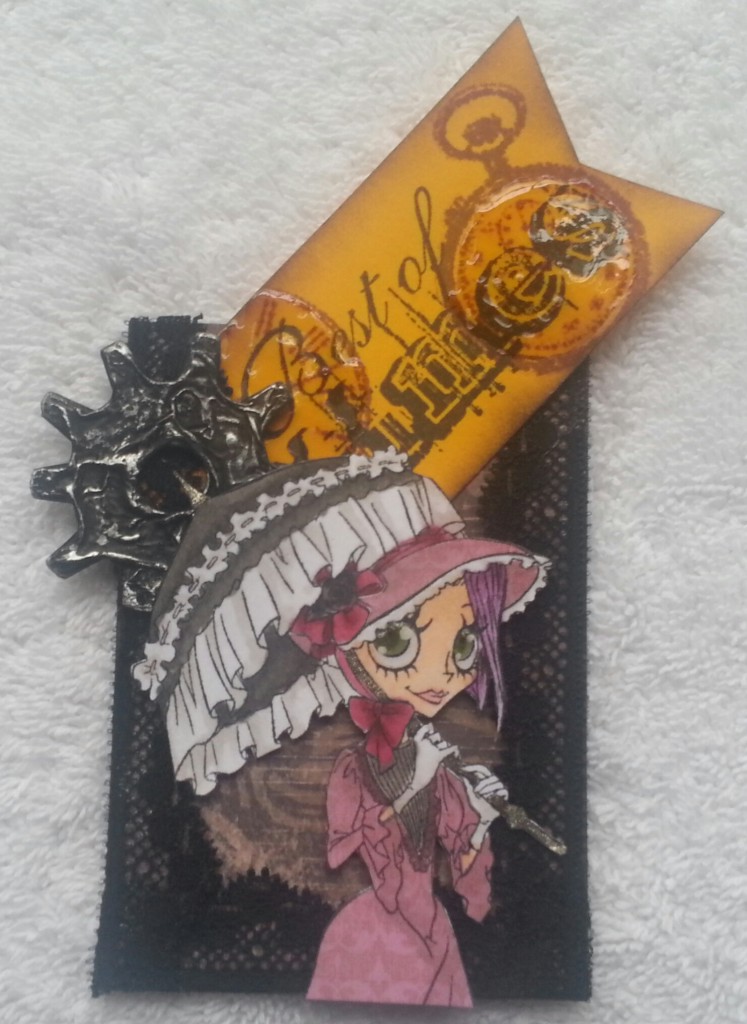 The centerpiece, of course, is the C.C. Designs Steampunk Lylah that I paper pieced (for her dress and bonnet) and colored with the following Copic colors: Hair: V06 and 12; Skin: E50, 51, and 53; Parasol: W7 and 9; Parasol tip and handle: W9; Frills on parasol and bonnet and gloves: W1; Bows and sashes on bonnet: R85 and 89; Eyes: G94 and 95; dress front: W5 and 7; and lips: R20.
You’ll also notice that there is some shimmer on this image. I used a light tough with my clear Wink of Stella on the frills on her parasol and the ruffles on her bonnet and dress. I tried my clear star Gelly Roll pen on the hard parts of her parasol, which worked out great because the glitter was stronger with this and gave the W9 colored areas a kind of metallic look. Finally, I added Glossy Accents on the clock faces of the tag and the big doe eyes of Lylah.
Oh and the secret? That would be that Lylah has dyed her hair violet (teeheehee). In a Steampunk world, that might be expected, but in a Victorian world that would be scandalous. I made this ATC in kind of a combo Steampunk and Victorian style and she embodies them both.
The following is a video share of this ATC:
This ATC is also being entered into the Simon Says Stamp Work it Wednesday Stamp Challenge
Thanks for stopping by! Please subscribe if you wish, and have a great day! WOOF
]]>
I used some silver Liquid Pearls for the lids. Then, what I think makes this ATC, I added some Glossy Accents on the little labels that I stamped from a Recollections mason jar clear stamp set (picked up from Michaels using a 40% off coupon). These stamped labels added a little whimsy to the ATC, which I’ve decided to name, “Sweet and Sour.” To accent those labels, I added some black and white twine and tiny enamel brads to “tie” on the labels. To add a little extra interest and texture, I also added a bit of rough twine ribbon and 3 shiny mint colored enamel dots.
The following is a video share of this ATC:
This ATC is also being entered into the Simon Says Stamp Monday Boldly Go Challenge
Thanks for stopping by and have a great day! WOOF
]]>