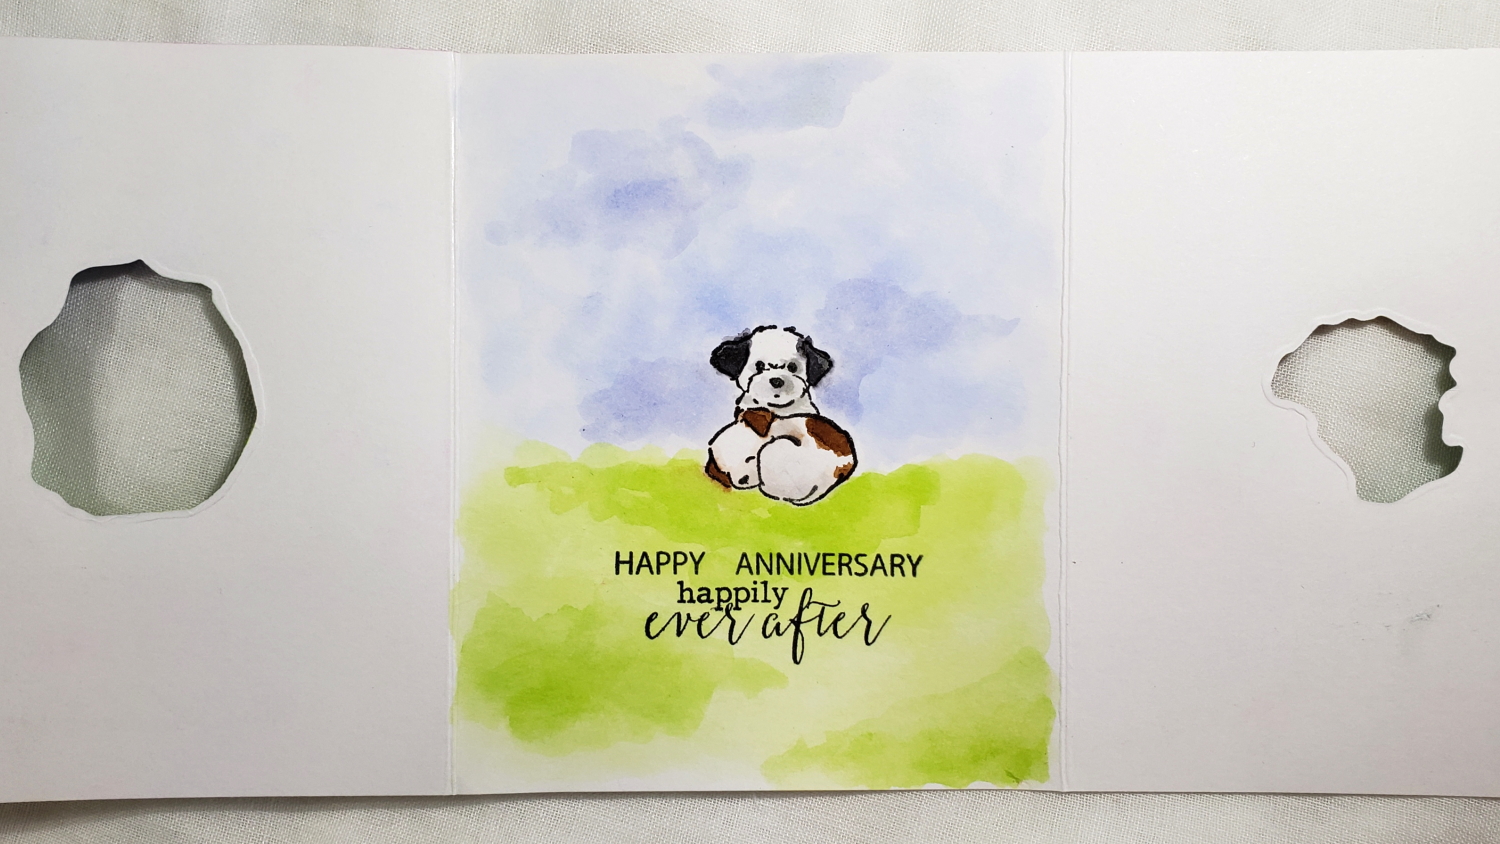
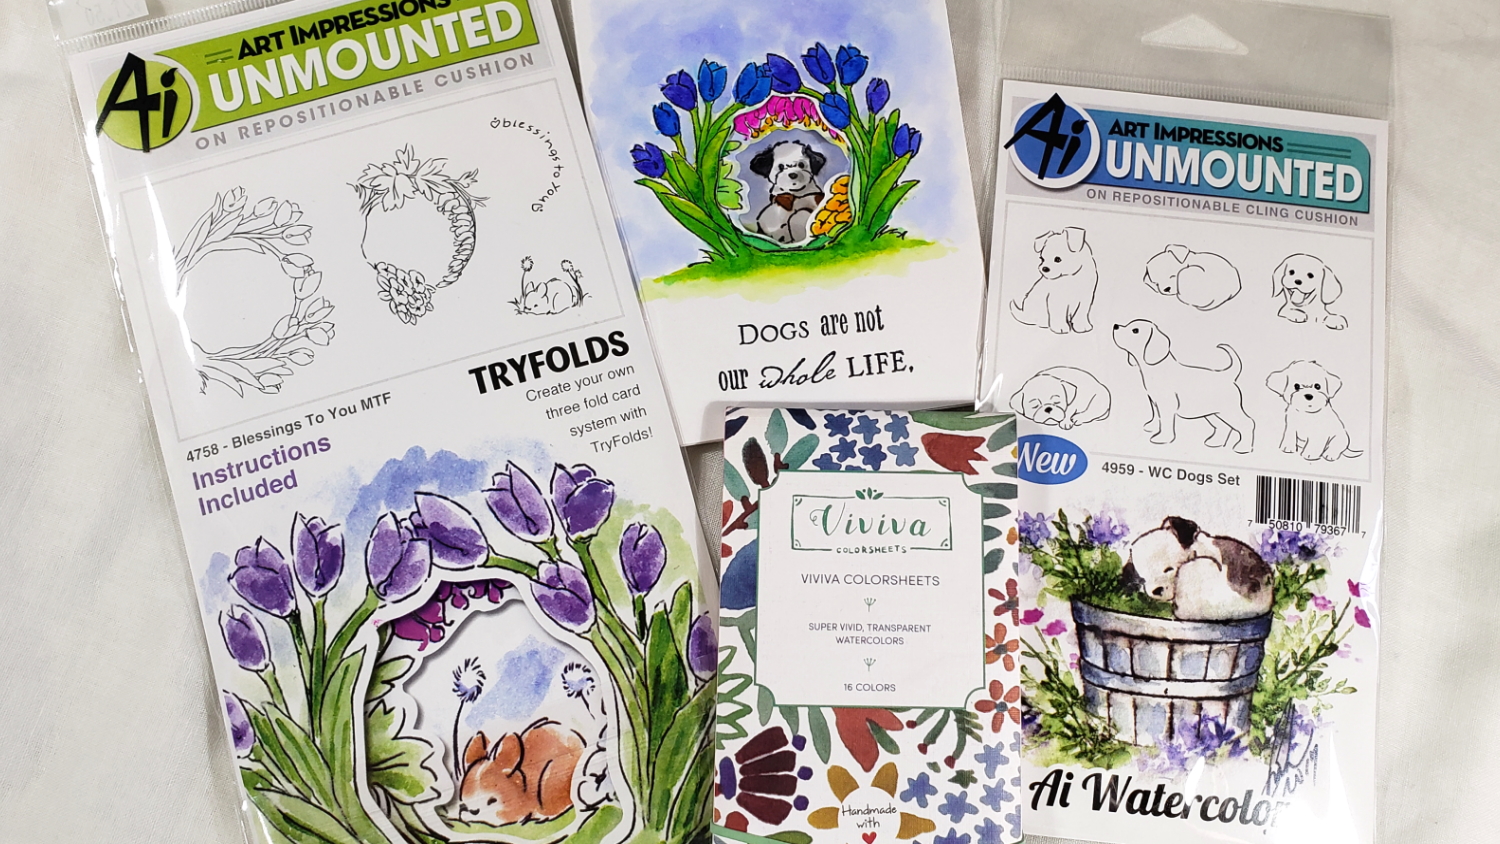
I used the Art Impressions “Blessings To You MFT” (mini tri-fold) stamp and die set, but I replaced the sleeping bunny with 2 pups from the Art Impressions “WC (water color) Dogs Set” and stamped and die cut out a card base using Strathmore Bristol Paper cut down to 4.5″ x 11″ and folded in thirds (at 3 5/8″).
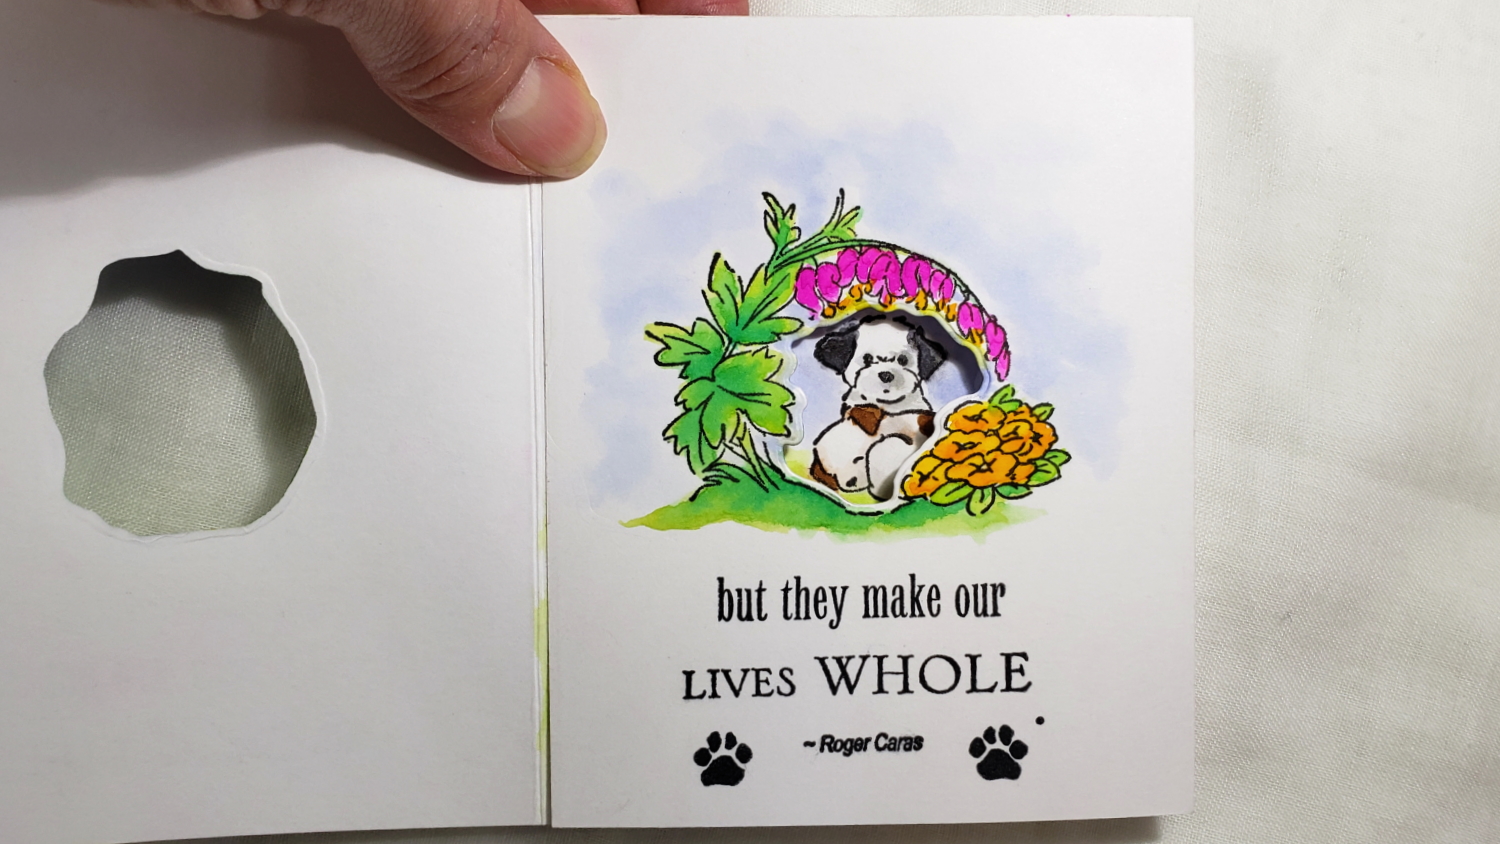
Using Black Onyx VersaFine Ink (best for watercoloring without bleeding) I stamped the largest stamp on panel 1 of the card (left third), then die cut out the center. Next I lightly outlined the opening of panel 1 onto the face of panel 2 (right third) with a pencil so that I could center the second stamp onto that outline. Then I die cut out the center of that stamp with the coordinating die. I outlined the opening of panel 2 onto the center panel so that I could center the images of the puppies, which I masked and layered. After all the stamping and die cutting, I erased all the pencil marks (checking that the ink was fully dried beforehand, of course).
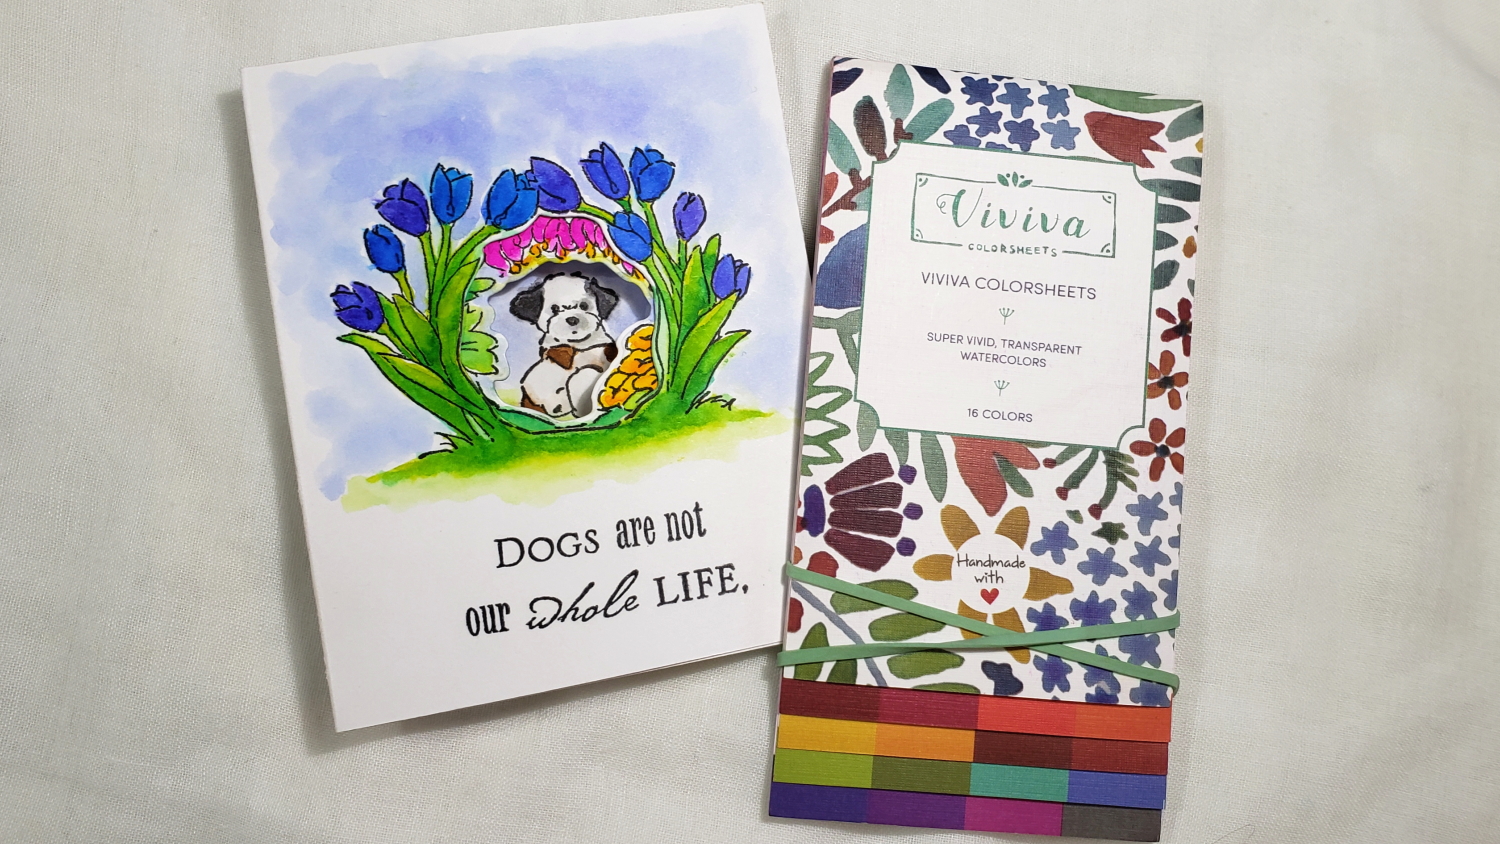
I had so much fun using the Viviva Watercolor Sheet colors (after making swatches — a must do since the colors on the sheets are so saturated that looking at them will NOT give you a sense of how they’ll look when you watercolor with them):
* The sleeping pup (Bandito) was colored with a blended Burnt Umber and Persian Blue, and the sitting pup (Babaloo) was colored with watered down Slate Black.
* I used the Persian Blue and Violet for the tulips.
* The drooping pink flowers with yellow centers were colored with Magenta and Chrome Yellow.
* The yellow flowers were colored with Chrome Yellow and Vermillion.
* Light Green, Sap Green and Viridian were used for the leaves and grass, and the sky was done with watered down Persian Blue.
Watercoloring is such a forgiving medium. Just blend, dab off excess, and apply second, third or even fourth coats to get beautiful results! I used a single Pentel Water Brush and just cleared the watercolors onto a tissue every time I switched colors. It was so easy!
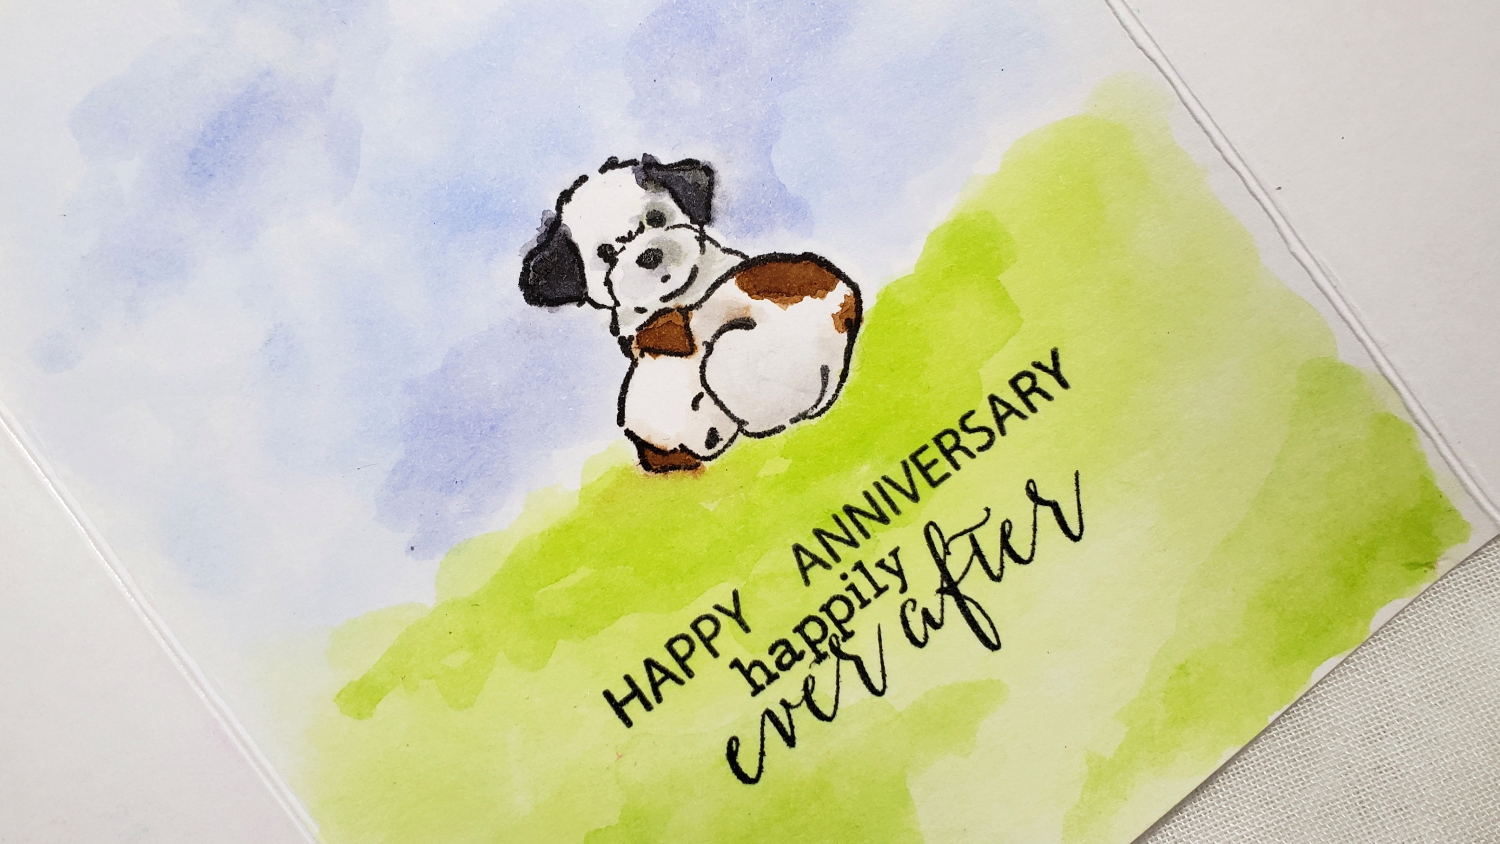
Lastly I looked for sentiments that I thought would work well for Mr. CraftyPaws and me for our anniversary. I had an old Cloud 9 Designs “Simple Thoughts – Dog” stamp set that had the perfect sentiment that I could stamp in two parts for the first and second panels: “Dogs are not our whole life, but they make our lives whole.” — Roger Caras {with 2 paw prints — perfect for our two dogs). Then for the last (center) panel, I used “happy” and “anniversary” from the Neat & Tangled “A Long Time Ago” stamp set and the “happily ever after” from the Clearly Besotted “Mr & Mrs Hoot” stamp set.
CLICK on the following picture to watch the process video:
Disclosure: The Viviva watercolor sheets were sent to me at no charge for my honest review. I really enjoyed them, thought the colors were very vibrant, and found them super easy to carry and use. Many of the supplies I’ve used for today’s project are linked. Some may be affiliate links, which means if you make a purchase I receive a small commission at no extra cost to you. I truly appreciate your support toward the costs of running this blog!
This card is being entered into the following challenges:
Art Impressions To Die For Challenge
Simon Says Stamp Wednesday Stamp it Challenge
Creatalicious Anything Goes with Optional Pearls or Lace Challenge
Word Art Wednesday Anything Goes Challenge
Through the Craft Room Door Anything Goes Challenge
]]>
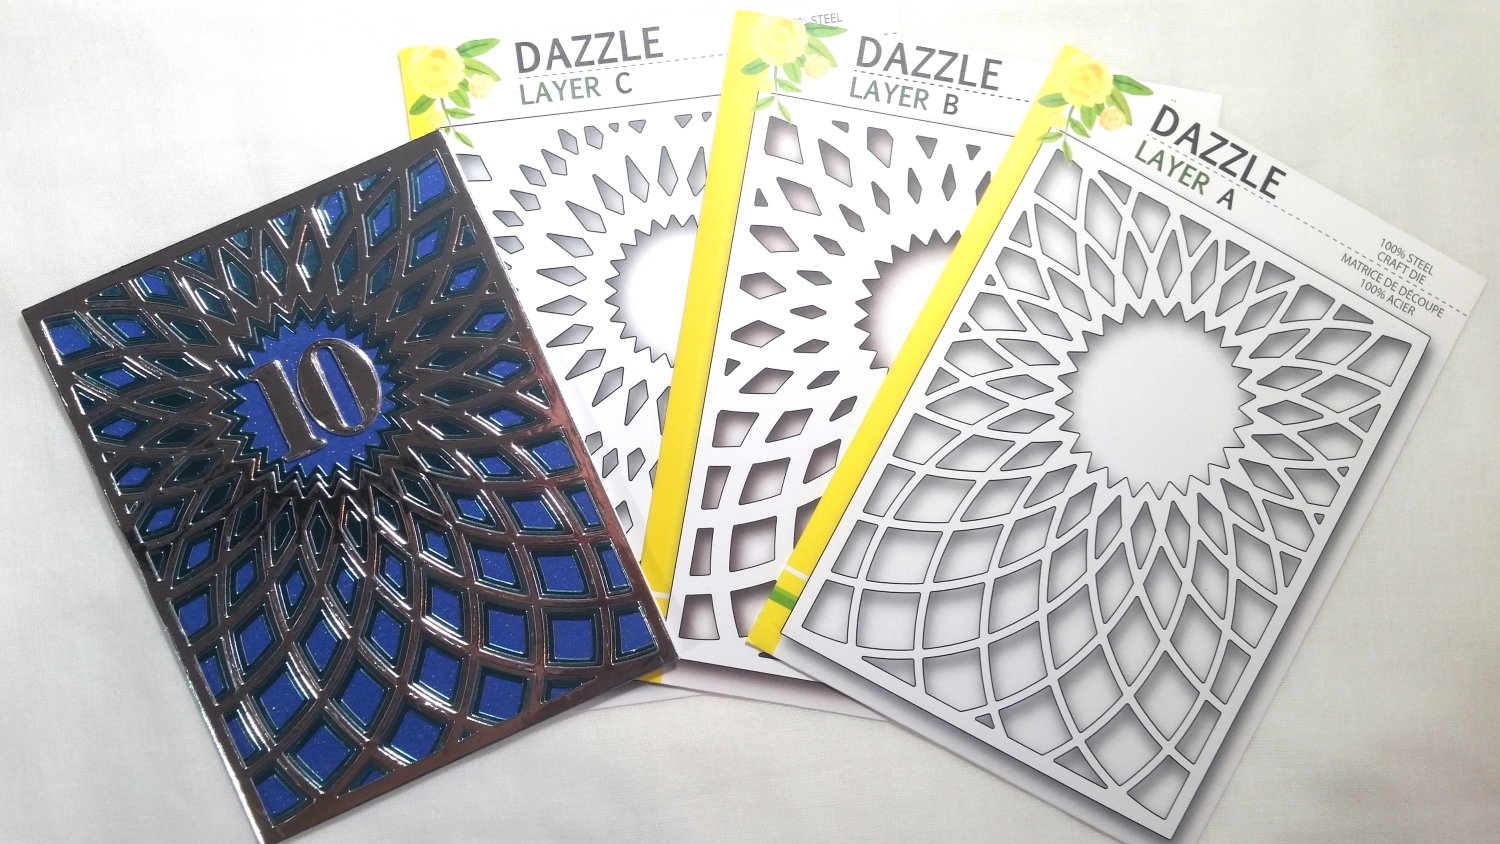
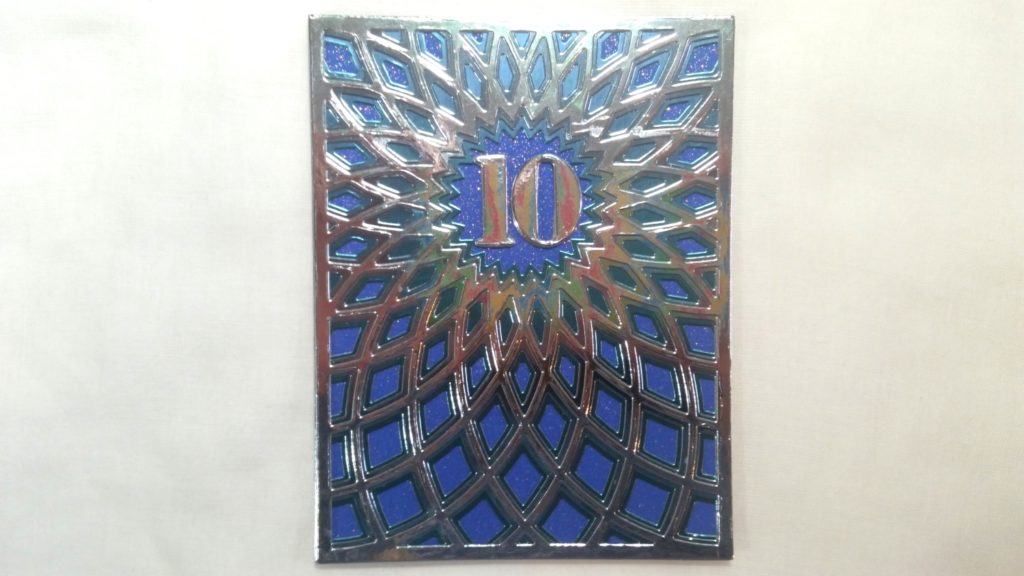
As my hubby and I both love the color blue, I thought it would be fun to use shiny, sparkly card stock in silvers and blues. The base is a sparkly blue from DCWV The Glitter Cardstock Stack Classics (sorry the pictures don’t do this justice). The next layer up (Layer C) was cut from a blue-green silver, the middle layer (Layer B) was cut from a light blue silver, and the top layer (Layer A) was cut from a pure silver cardstock. These foiled cardstocks were from the 6 x 6 DCWV Foiled Cardstock Stack and the 6 x 6 Recollections Christmas Foils Paper Pad. Then for the center pinked circle opening, I die cut “10” from an old numbers die set (sorry I don’t know the brand) using more of the pure silver foil cardstock; I actually stacked 5 of them to better stand out from the Dazzle layers. HINT: Gluing all these layers together, especially the top most intricate layer was made easy by using my favorite wet glue: Art Glitter Glue with a Fine Nozzle Tip.
That was it! I think this may have been one of the fastest cards I’ve ever made, but I love how clean and dynamic it is! Click the following picture to watch the process video of making this anniversary card:
This card is being entered into the following challenges:
613 Avenue Create Anything Goes with Optional Clean and Simple Challenge
Crafty Gals Corner Anything Goes Challenge
Crafter’s Castle Anything Goes with Optional Fall/Halloween
Cute Card Thursday Anything Goes Challenge
Word Art Wednesday Anything Goes Challenge
Creatalicious Anything Goes with Optional Pastels Challenge
Lil Patch of Crafty Friends Anything Goes Challenge
Through the Craft Room Door Anything Goes Challenge
Crafts Galore Encore Anything Goes Challenge – WINNER
]]>
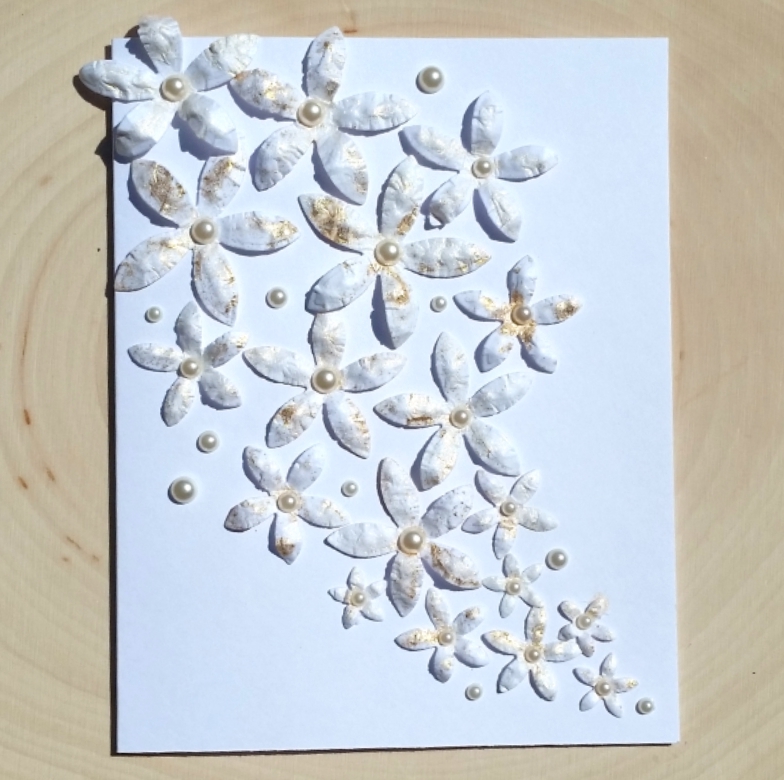 I first gathered all the left over flowers and lightly sprayed them with Heidi Swapp Color Shine in Sheer and Gold. Then I placed a paper towel over my mouse pad (so as not to get spray pigment on my mousepad) and used my Spellbinders Tool ‘n One with the medium sized stylus to hand emboss the flower petals into rounded curves from the back side of the flowers. Then I flipped over the flowers and pushed their centers with the stylus to get a simple shaped flower.
I then played with the placement of the various flower sizes, and decided that a small to large cluster of flowers forming a kind of swoop would look lush and luxe. Lastly I used self-adhesive flat back pearls to dot each flower center, using varying sizes to match the sizes of the flowers. To fill in a few gaps between the flowers I added a few extra flat back pearls to the card front. Easy peasy, clean and simple, super dimensional floral card that can be used for weddings, anniversaries, engagements or any time!
Diemond Dies SALES: My readers can get 15% off and free worldwide shipping at Diemond Dies through June 19, 2017 by using the coupon code spring15 (no minimum purchase required). Additionally, if you are interested in buying the whole May 2017 Bundled New Release, there is a special bundled sale price of just $59 (which is lowered to $50 if you also use the spring15 code — that’s 44% off the individual die prices!), good through June 25, 2017. After June 19, 2017, you can use my coupon code thankskristina for 10% off and free worldwide shipping on all orders of $35 or more.
The following is a Diemond Dies YouTube Hop Video sharing the process of making this card as well as the two cards from the previous post (watch and comment on YouTube for a chance to win a $20 gift certificate!):
These cards are being entered into the following challenges:
Lil Patch of Crafty Friends Anything Goes Challenge
Simon Says Stamp Wednesday Emboss It Challenge
Simon Says Stamp Monday Touchy Feeling Challenge: shaker card
Creatalicious Anything Goes Challenge with Optional Die Cuts or Punches
Word Art Wednesday Anything Goes Challenge
Cards Galore Encore Anything Goes Challenge
Not Just Cards Anything Goes Challenge
613 Avenue Create Anything Goes Challenge
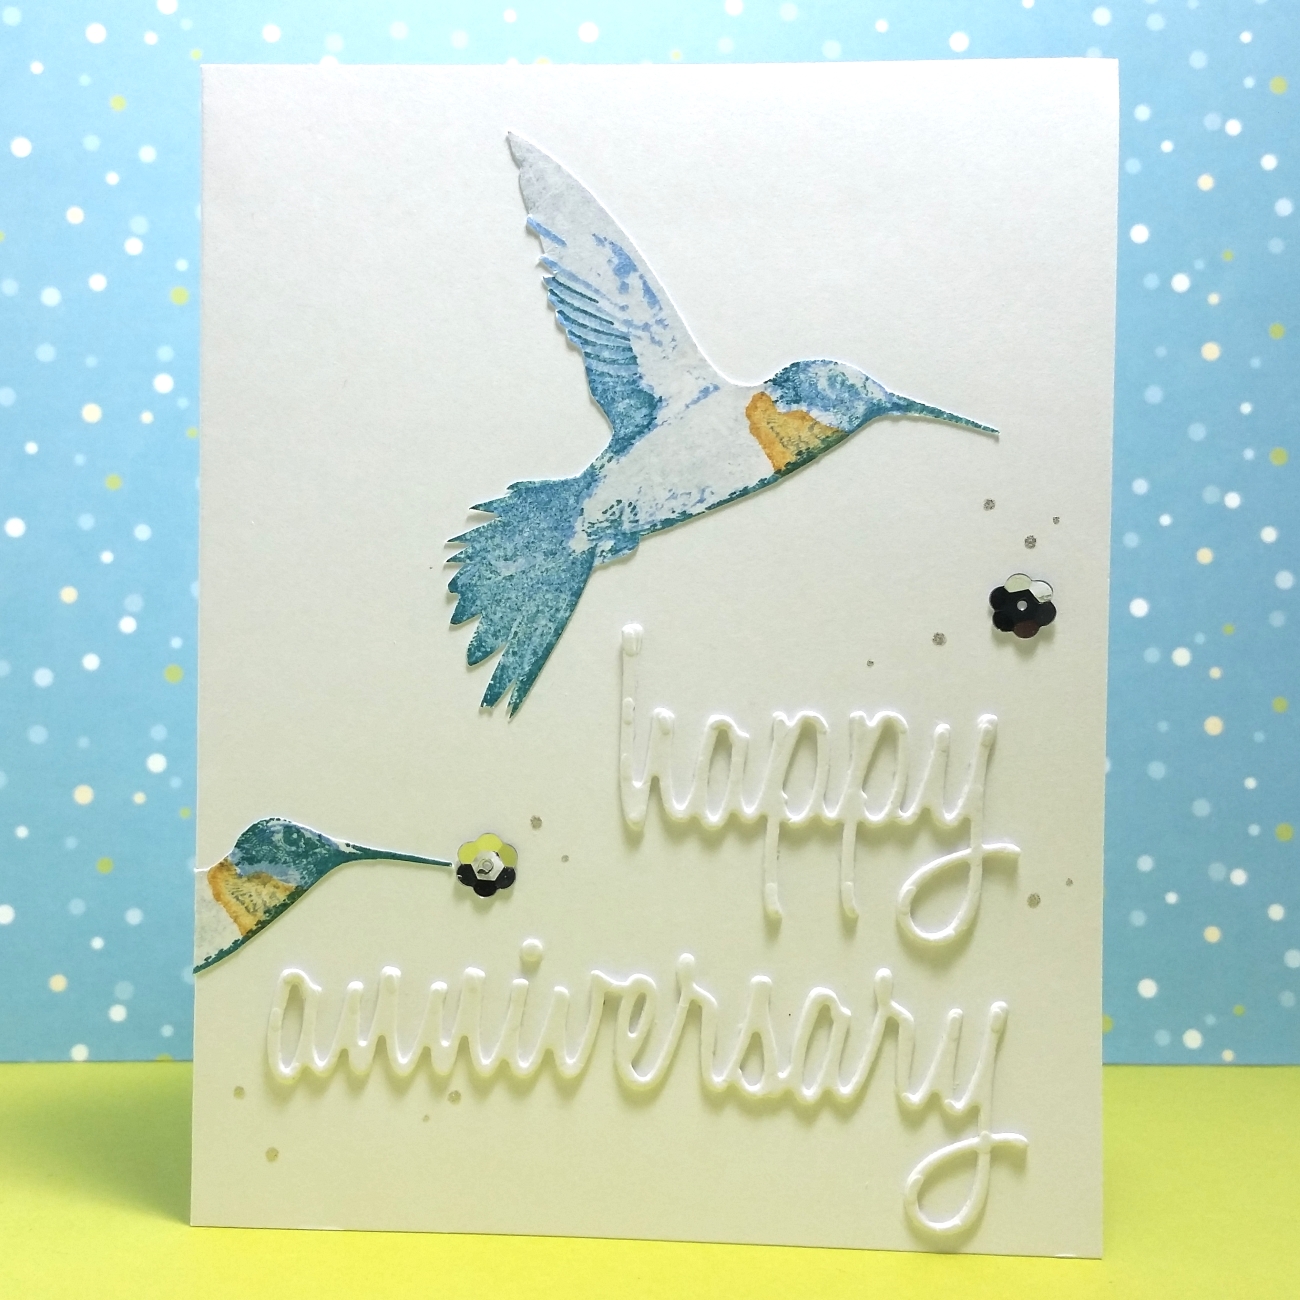 I don’t know why I thought I could just do this with no instruction, but I figured with my MISTI tool, I would be all set. Well…after a lot of fiddling, and eyeballing to try to get the various layers lined up, the hummingbirds turned out okay. Yep, no resounding success, but I had fun and now I am looking forward to my layered stamping class that I’ll be taking at the Scrapbook Exp tomorrow even more!
I used the following Ranger Adirondack pigment ink colors (I had picked these up ages ago at Tuesday Morning for about $2 each and really hadn’t used them much since I do more Copic and water coloring than colored stamping): Cloudy Blue, Sailboat Blue, Butterscotch and Stream.
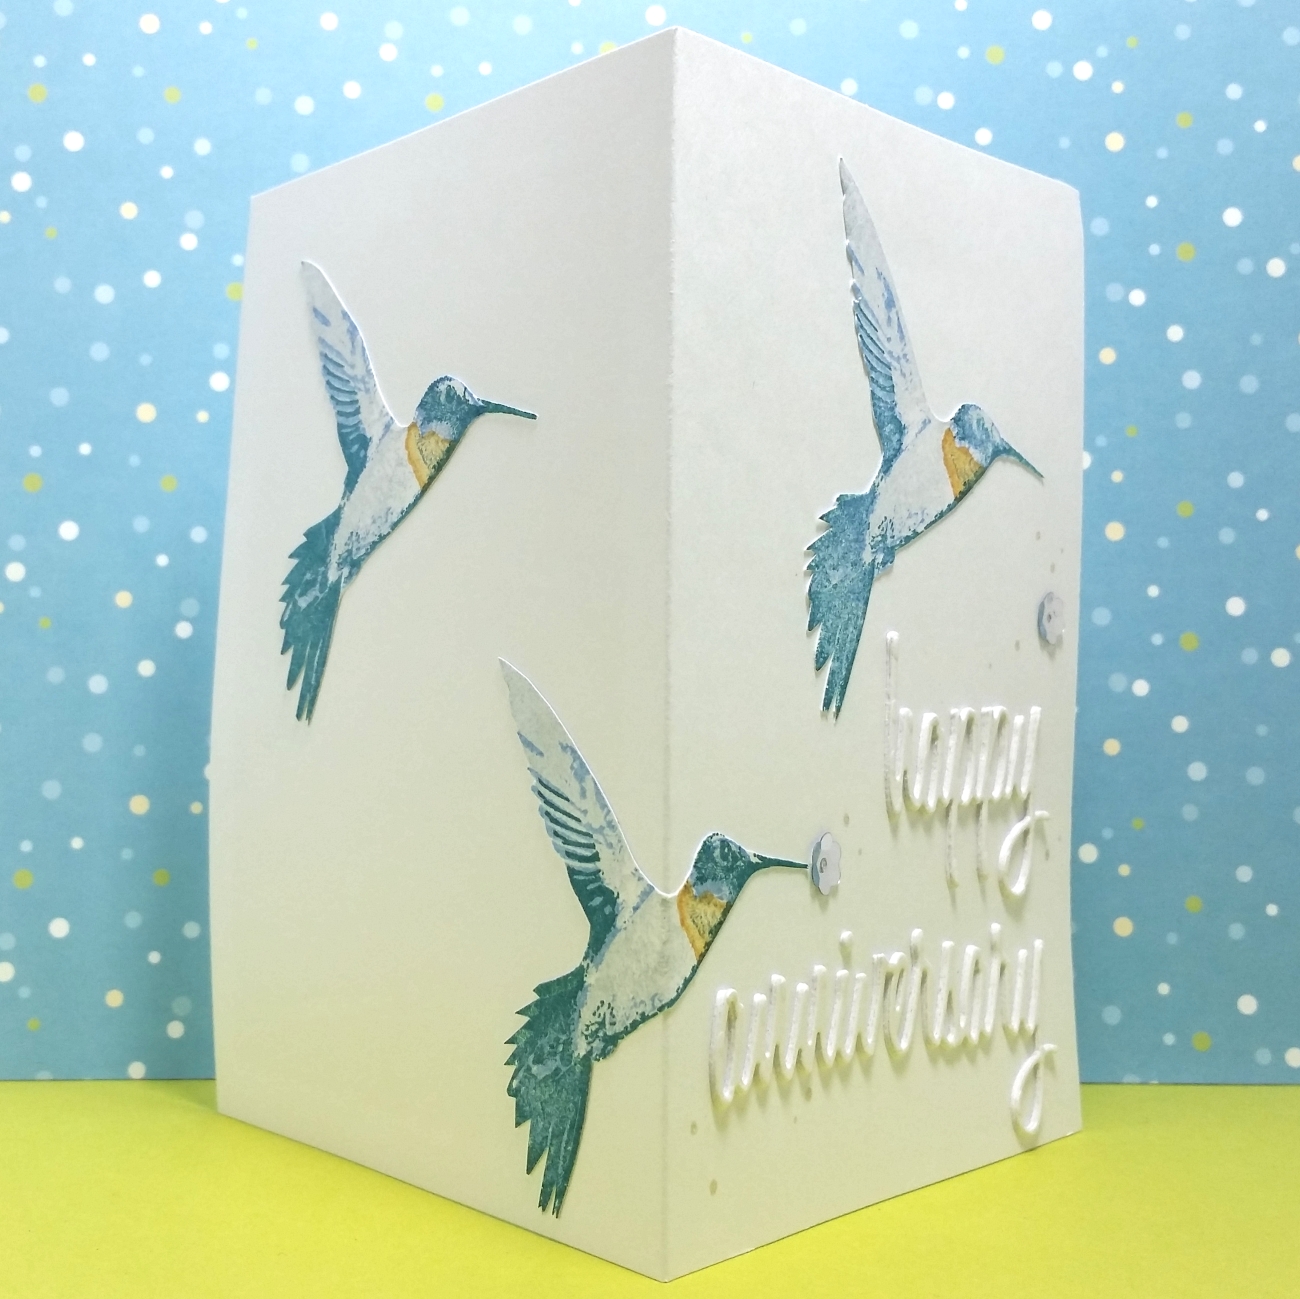 The misalignment of my layered stamping looked a little like how 3D movies look without 3D glasses, and I just couldn’t live with that so I fussy cut each one of the hummingbirds out (yes, even the super thin beaks) and glued them onto a white card base, wrapping them around the front and back of the card. I love the CAS look but I think taking it around the back adds a little something extra. 🙂
Then I used the “happy” and “anniversary” word dies from the Tim Holtz Sizzix Celebrate Thinlits die set. I cut the words out three times (making sure to secure the little dot for the “i”) and glued them together to make them dimensional like Thickers. I glued that onto the lower right of the card base and I would have finished it there, except that while I was gluing down one of the hummingbirds I smeared some of the ink onto the card base so I had to cover that up with some flower sequins. I actually like it even better with those couple of flowers and then the dozen or so doodled dots I added with a Sakura Clear Stardust Gelly Roll pen.
The inside is just lined with some pale handmade paper and a sentiment from the stamp set that says: ” Our hearts decide who is family,” which I thought was perfect for an anniversary card.
This card is being entered into the following challenges:
Simon Says Stamp Monday Flora and Fauna Challenge
Fab ‘n’ Funky Add A Sentiment Challenge
Simon Says Stamp Work It Wednesday Wafer Thin Dies Challenge
Through the Craft Room Door Anything Goes Challenge
613 Avenue Create Anything Goes with Optional Use Birds or Feathers Challenge
Word Art Wednesday Anything Goes Challenge
Craft Your Passion Anything Goes Challenge
Addicted to Stamps and More Make Your Mark Challenge
]]>
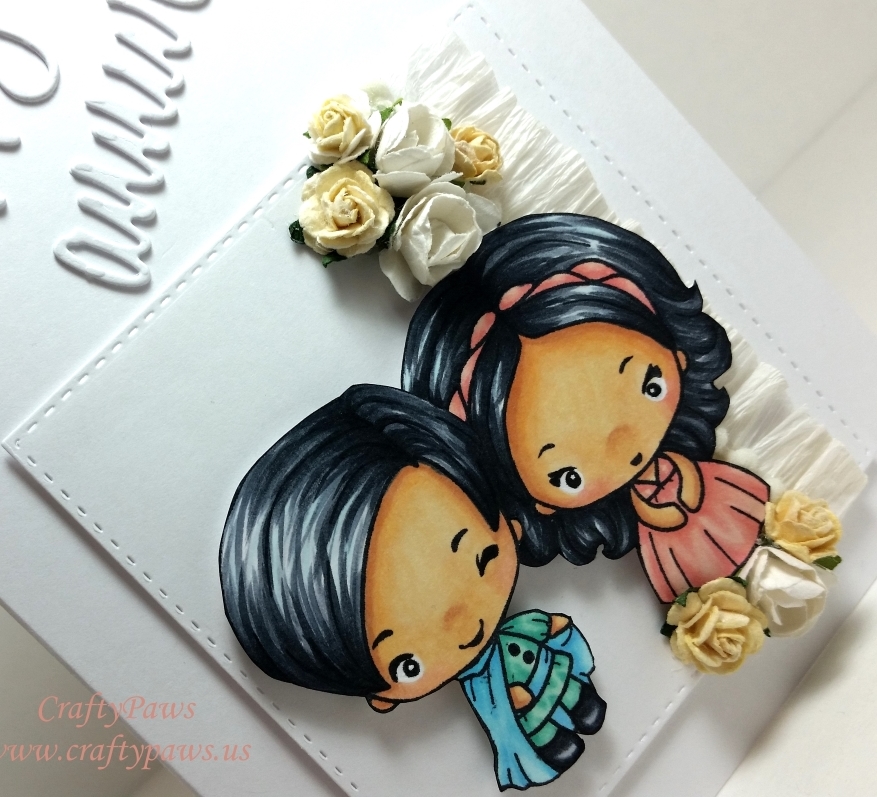 I stamped out a prince and princess from The Greeting Farm Ever After collection using My Favorite Things black licorice ink, picking the flirty Leonard to represent my dad and the short wavy-haired Sheena to represent my mom. I used the following Copic colors to put them in aqua, teal, and pink outfits:
Leonard: Skin: E50, 51, 11 and R30; Cape and belt: B000, 01 and 02; Shirt and pants: G000, BG10 and BG13; Hair and shoes: C2, C6, C8 and B000
Sheena: Skin: E50, 51, 11 and R20; Dress and headband: R30, 20, 32
I fussy cut them out and then worked on creating an interesting and dimensional base for them to pop up from. I used a Simon Says Stamp stitched rectangle square die to cut a white base, then designed a “stripe” made from white crepe paper streamers that I box pleated, a little pom pom trim and a few mulberry paper flowers. I made sure to position the little boy and girl before adding the flowers, using double layers of foam adhesive to get them level with all the trimmings.
 I wanted to keep the card base all white so that the attention would go to the little prince and princess so I triple die cut the “happy anniversary” sentiment from the Sizzix Celebrate Thinlit dies in white card stock and glued them one on top of the other to achieve a good thickness. I adhered them at an angle because the words seemed to fit that way better.
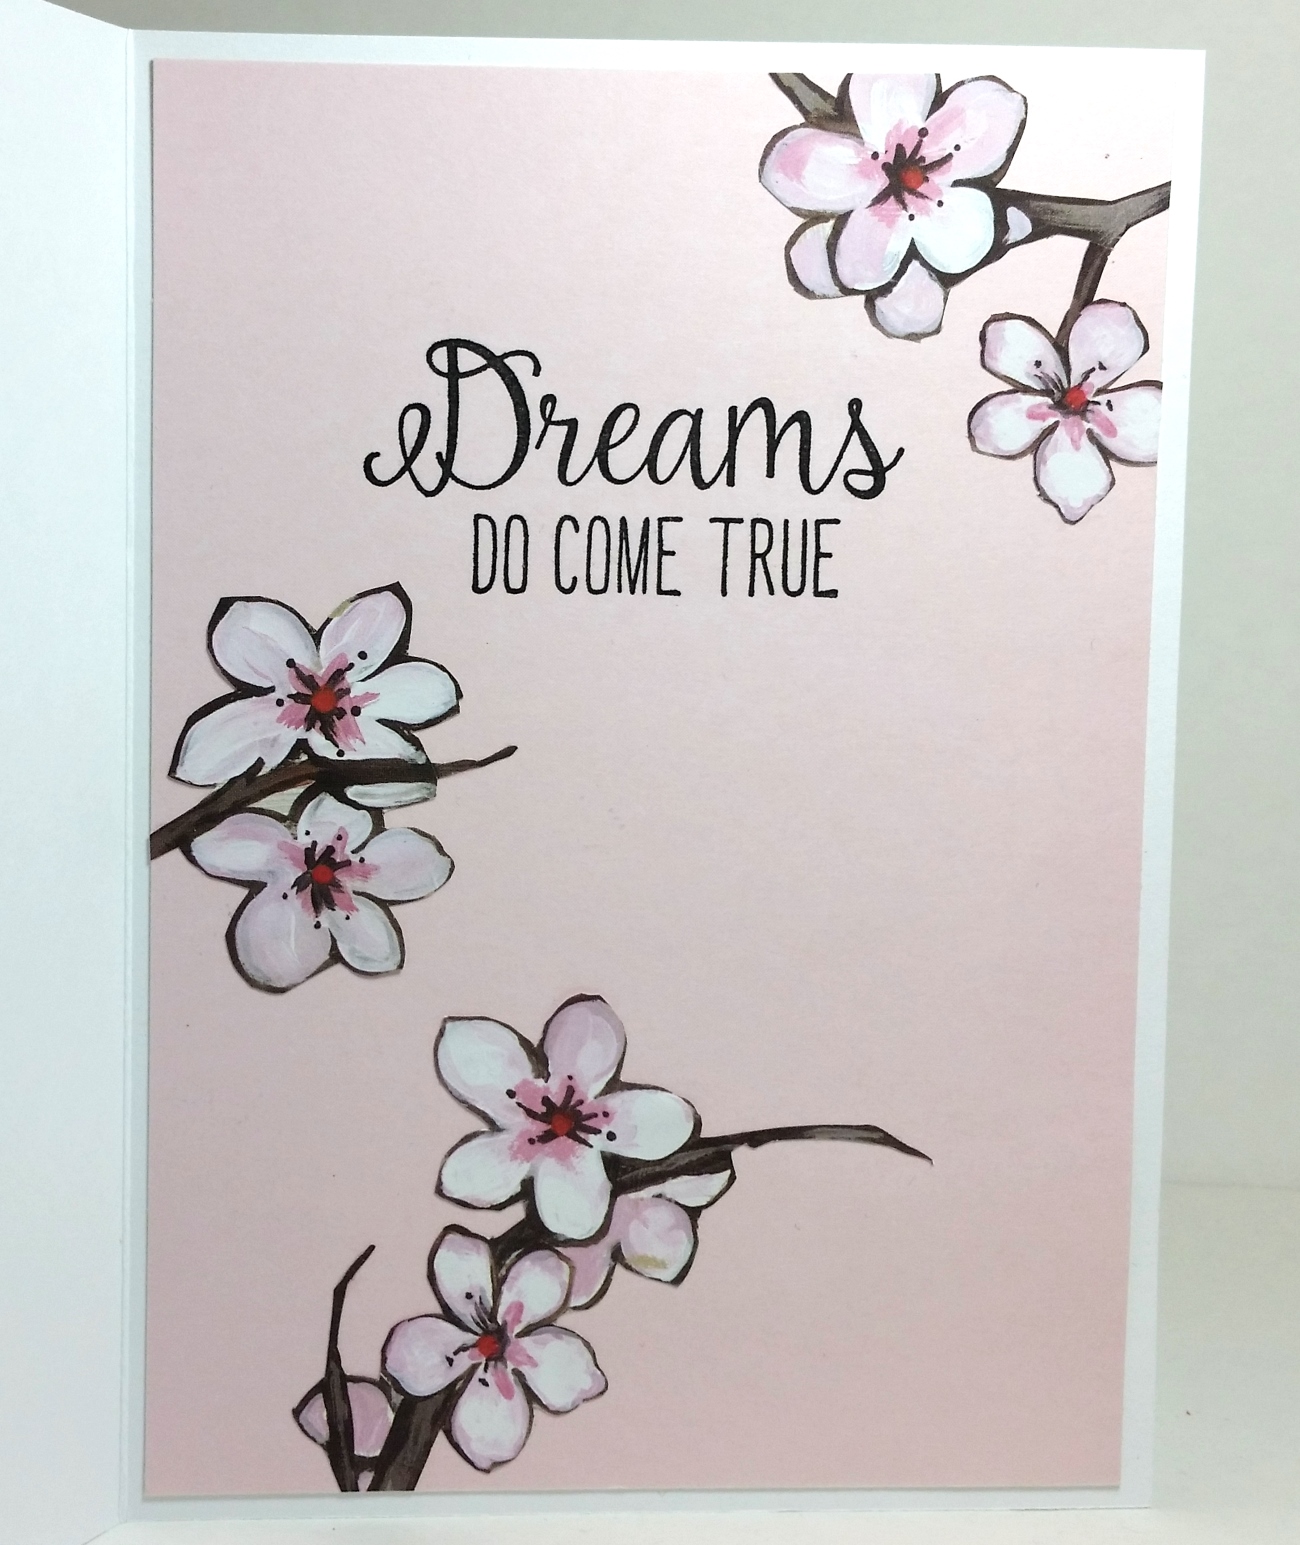
For the inside of the card, I used pale pink card stock for the liner sheet and the “Dreams Do Come True” sentiment from the stamp set. Then because I didn’t wait for the ink to fully dry, I got some smudges that I had to cover up. Luckily, I had a scrap of beautiful cherry blossom (my mom’s favorite flower) pattered paper to I was able to fussy cut out a few branches and flowers to add wonderful interest and cover up the smears. I liked the card much more with these flowers, so in a way I’m glad the smudges got me to dig into my scrap box for these last minute additions!
The following is a process video with some skin and hair Copic coloring details:
This card is being entered into the following challenges:
MarkerPOP Spring Challenge
Simon Says Stamp Wednesday Anything Goes Challenge
Simon Says Stamp Work It Wednesday Pastel Challenge
Word Art Wednesday Anything Goes Challenge
Farm Fresh Challenge – Bloom Where You Are Planted!
Card Mania Spring Challenge
Whimsy Stamps Spring Colors Challenge
Craft Your Passion Anything Goes Challenge
Crafty Girls Creations Anything Goes Challenge
MFT Card Sketch #274 Challenge
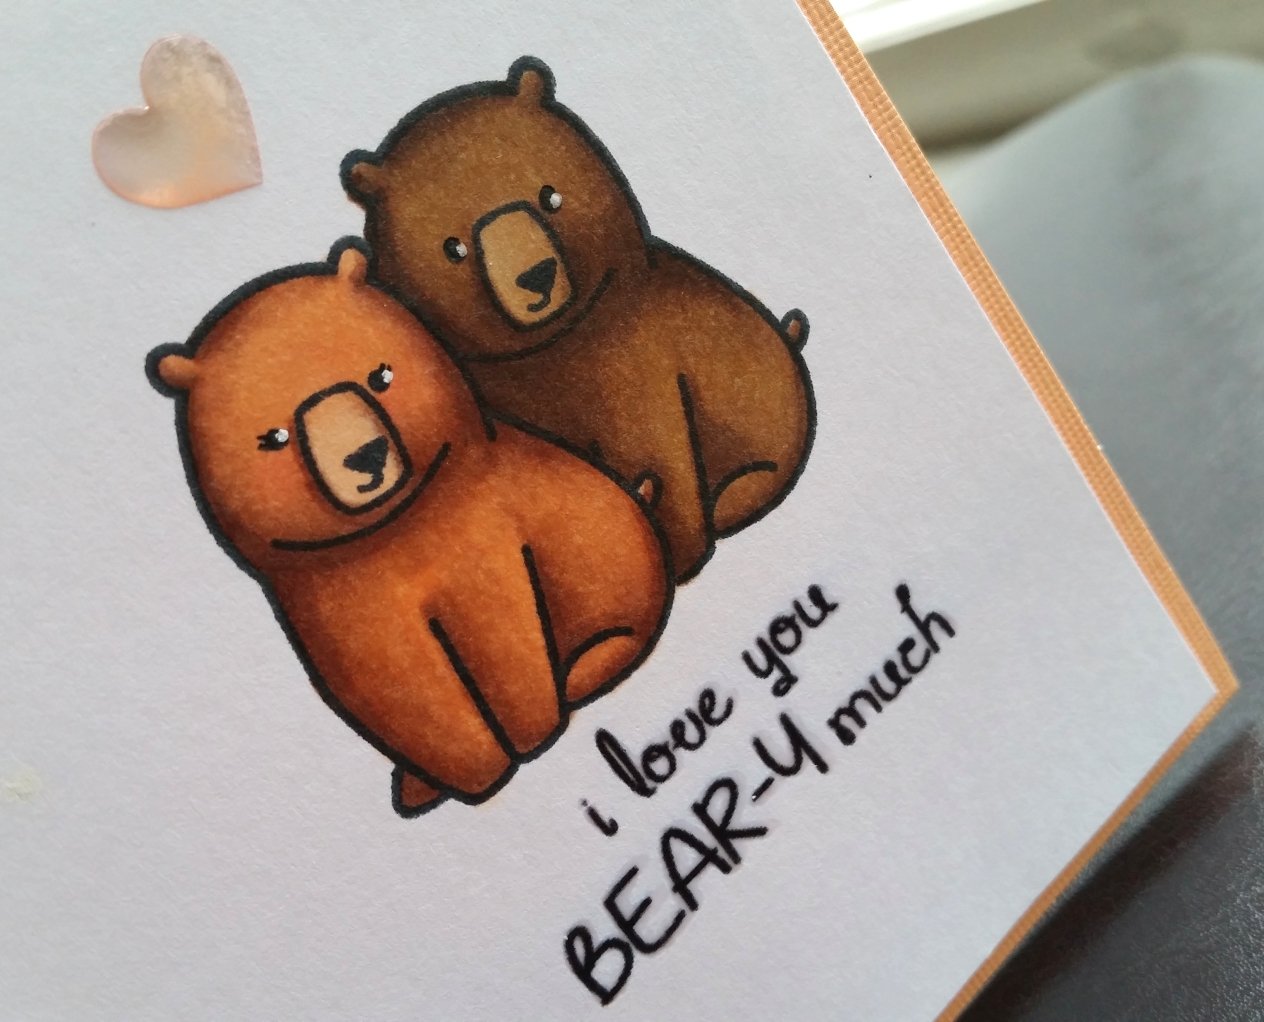 The first card I made in the traditional way, stamping the forward bear on the left with Tsukineko Momento Tuxedo Black Ink
, masking it off with another stamped and fussy cut bear on a post-it note, and then stamping the second bear. The second card I made using Tsukineko Momento Desert Sand
and just stamping the bear twice.
 I used the following 3 Copic colors to color up each bear (they are the same on both cards):
Lighter bear on left: E21, 23 and 25
Darker bear on right: E55, 57 and 59
The “i love you BEAR-Y much” pun was not included in the stamp set. I used free fonts that I found online (“Anjelika Rose” and “You Make Me Smile“) that I thought looked very similar to the fonts used in the stamp set sentiments and had such a sweet hand written quality (well, sweeter than my handwriting, but you know what I mean). I simply positioned the sentiment in the lower right of the card when I printed it so that the bears could kind of sit above the words. I used a VersaMarker to trace the words and used clear Recollections embossing powder to add a little shine and subtle texture to the sentiment.
Since I wanted to keep the cards monochromatic in earth tones, I used a peachy card stock for the card base onto which I layered the card front with double sided foam adhesive. I also added some more shine and texture with peachy colored enamel heart stickers from Cloud 9 Designs (I have had these in my stash for over a year so I was so happy I could finally use them!). 🙂
The following is a process video of making both cards:
These cards are being entered into the following challenges:
Simon Says Stamp Monday Trio Of Colors Challenge
AAA Cards Spectacular Embossing Challenge
Time Out Challenge Make Your Mark with a Twist of Monochromatic Color Challenge
613 Avenue Create Anything Goes Challenge
CASology Write Challenge
Thanks for stopping by, and have a wonderful day! WOOF
]]>But to create the card that I envisioned that would play off the red and blue gnomes of the movie, “Gnomeo and Juliet,” I needed a girl gnome. What to do…. Well, of course. I could draw a little girl digi gnome to share with all of you (available for free download HERE)!
 These are the Copic colors I used to color up the happy couple:
Skin: E50, 51, 53; girl blush: R20; and boy blush: R30
White areas of boy’s beard, girl’s apron, and mushroom spots and base: C1
Girl’s hair: B000, C5, 7, 9, 10
Girl’s outfit: R22, 24, and 29
Boy’s outfit: B41, 34, 24 and 18
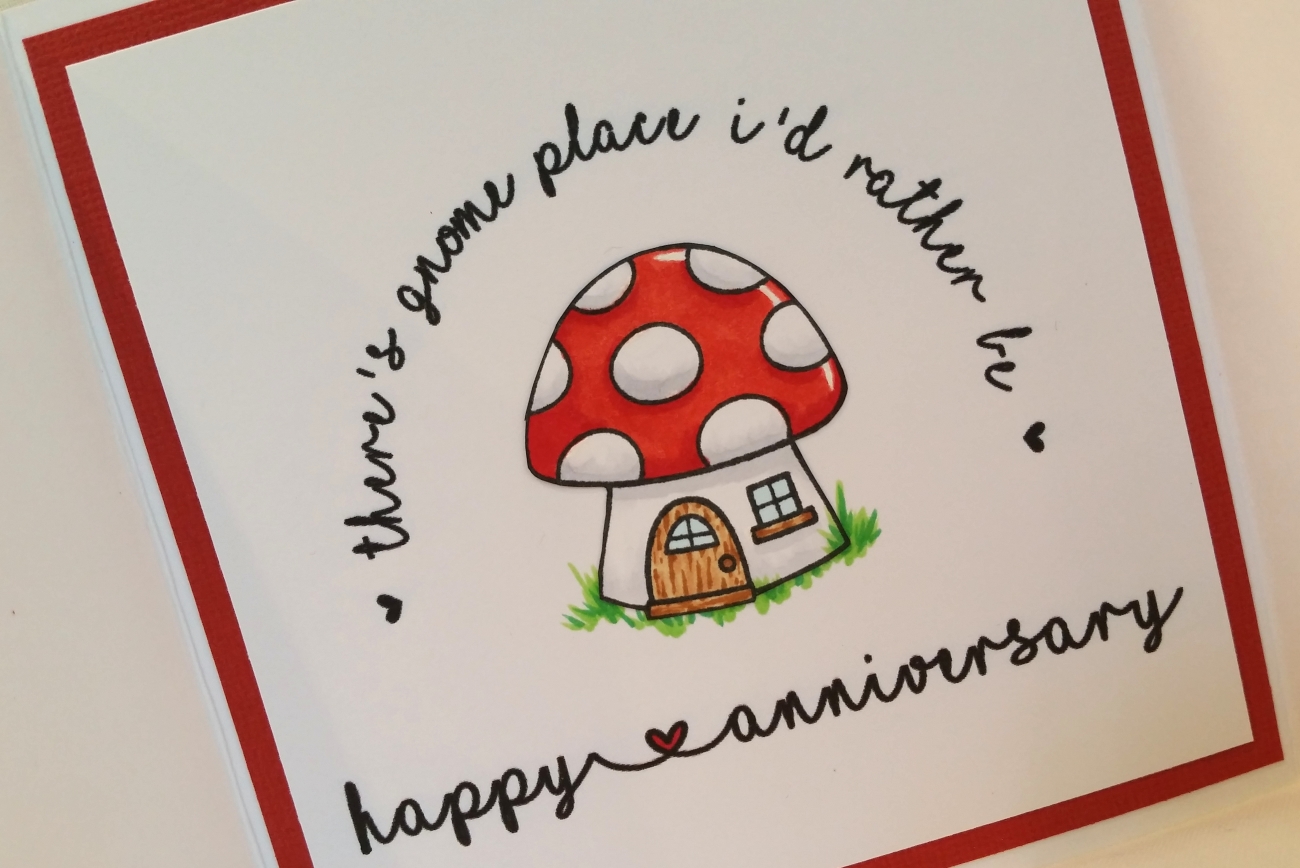
Mushroom roof: R24 and 29
Mushroom door and window ledge: E31, 33, and 37
Mushroom windows: B000
Grass around mushroom house: YG07 and G09
For the inside of the card, I knew I wanted to use the pun, “there’s gnome place I’d rather be” and use the mushroom house from the Lawn Fawn stamp set. But I wanted to kind of surround the little mushroom house with the words in a circle so I had to do a little research on how to do this in paint.net (the free digital editing software I use to make my digis). I found a great free plugin that had a circle text effect (and a lot of other cool effects) (HERE), and I also downloaded this adorable free script font, called “mf I love glitter” (HERE).
The following is a video share of this card:
This card is being entered into the following challenges:
MFT Summer School: Symmetry/Asymmetry
Simon Says Stamp Monday Homegrown Summer
Card Mania Anniversary Challenge
613 Avenue Create Anything Goes Challenge
Lil Patch of Crafty Friends Anything Goes Challenge
Thanks for stopping by, and I hope you’re having a wonderful crafty day! WOOF
]]>
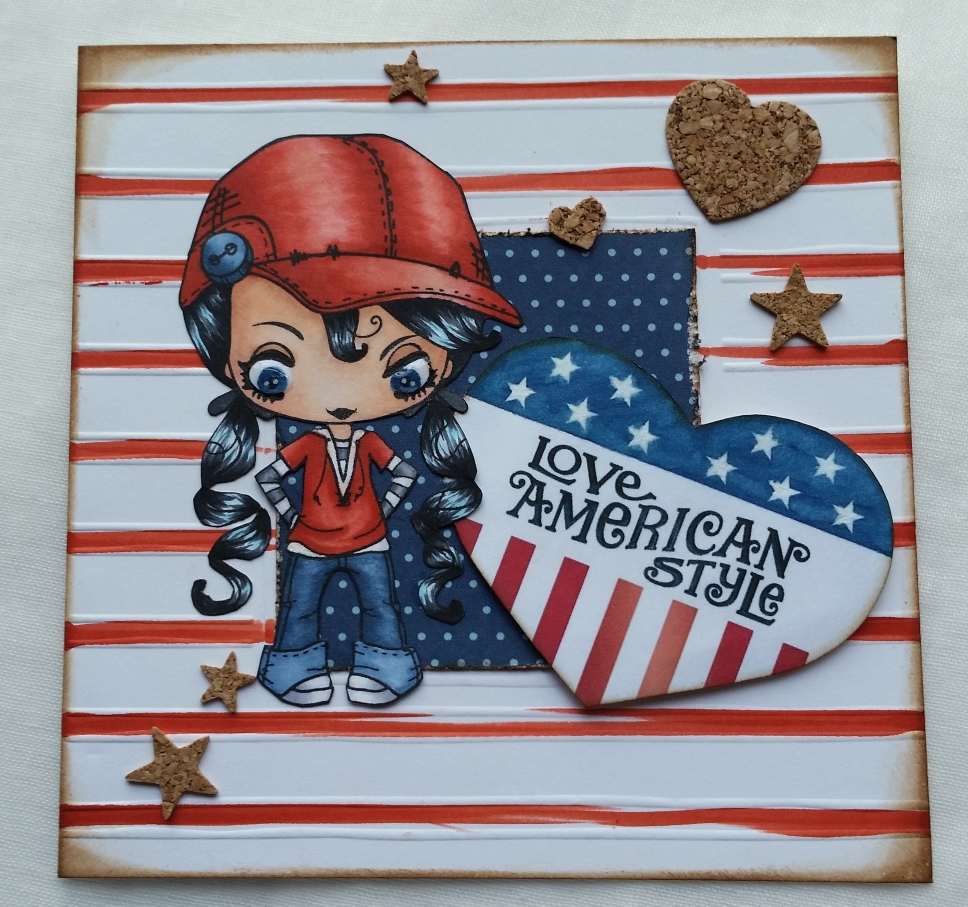 I colored her up in the following Copic colors and made this Americana style card (in honor of our planned vacation out West):
Skin: E000, 00, and 11 with R30 blush
Hair: B01, C5 and C9
Hat and shirt: R30, 22 and 08
White accents on shirts, sneakers, and striped long shirt: C1, 3, 5 and 0
Jeans, hat button and eyes: B93, 95 and 99
I also used my white Gelly Roll pen to add highlights to her eyes and covered the eyes with Glossy Accents for high shine.
I then took a simple embossed card base from my stash and used a ruler and R08 to loosely color in the embossed striped areas. Then for the center square area, I used a little blue polka dot scrap from the My Mind’s Eye “Moments” collection, roughed up the edges with my scissors, and inked it with Tim Holtz Distress Ink in Vintage Photo. I also used the same ink to distress the edges of the card base.
I wanted to add a woodsy touch to the card as well, so I added some American Crafts “do it yourself” cork star stickers and die cut some small hearts with a scrap of adhesive-backed cork paper. These little embellies also helped me cover up some accidental stray R08 marks that somehow appeared on my card base (it’s like when I eat spaghetti wearing a white shirt–it can’t be avoided. LOL)
Lastly, I hunted for a clean logo image of the old cheesy television show “Love American Style” that I used to watch with rapt attention as a kid (ever wonder how our tastes develop and change as we get older?). I found a great one, printed it out, fussy cut it, and inked the edges with Vintage Photo. I popped up one side of it with double sided foam adhesive and glued down the other side under one of Leslie’s pony tails.
This is a video share of this card:
This card is being entered into the following challenges:
July Farm Fresh Greeting Farm Red White and Blue Challenge
MarkerPOP Anything Goes Challenge
Challenge Up Your Life Wood/Cork Challenge
Simon Says Stamp Anything Goes Wednesday Challenge
Simon Says Stamp No Ordinary Paper Monday Challenge
Thanks for stopping by and have a wonderful crafty day! WOOF
]]>