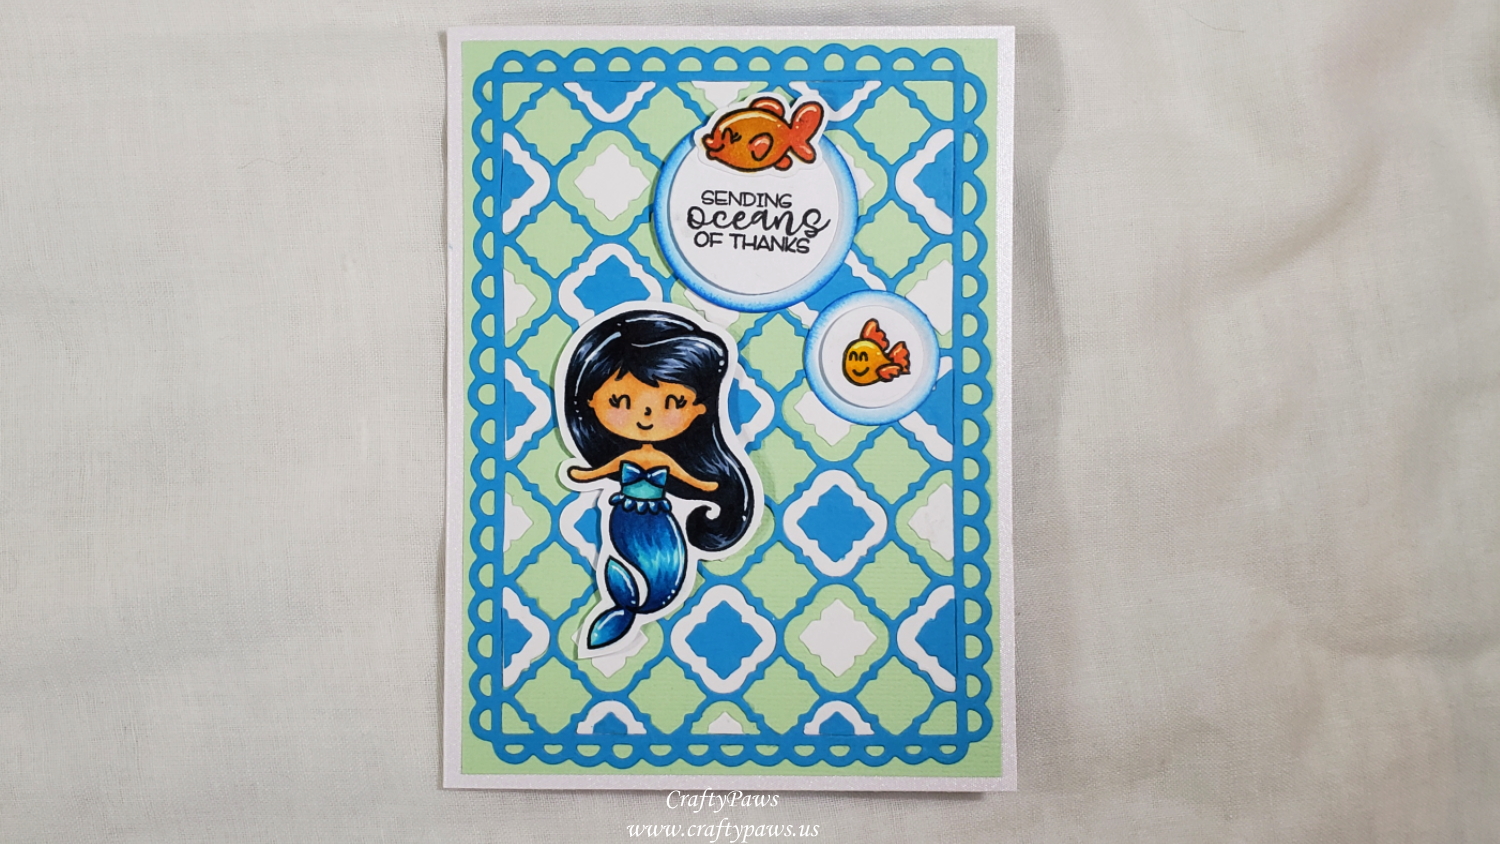
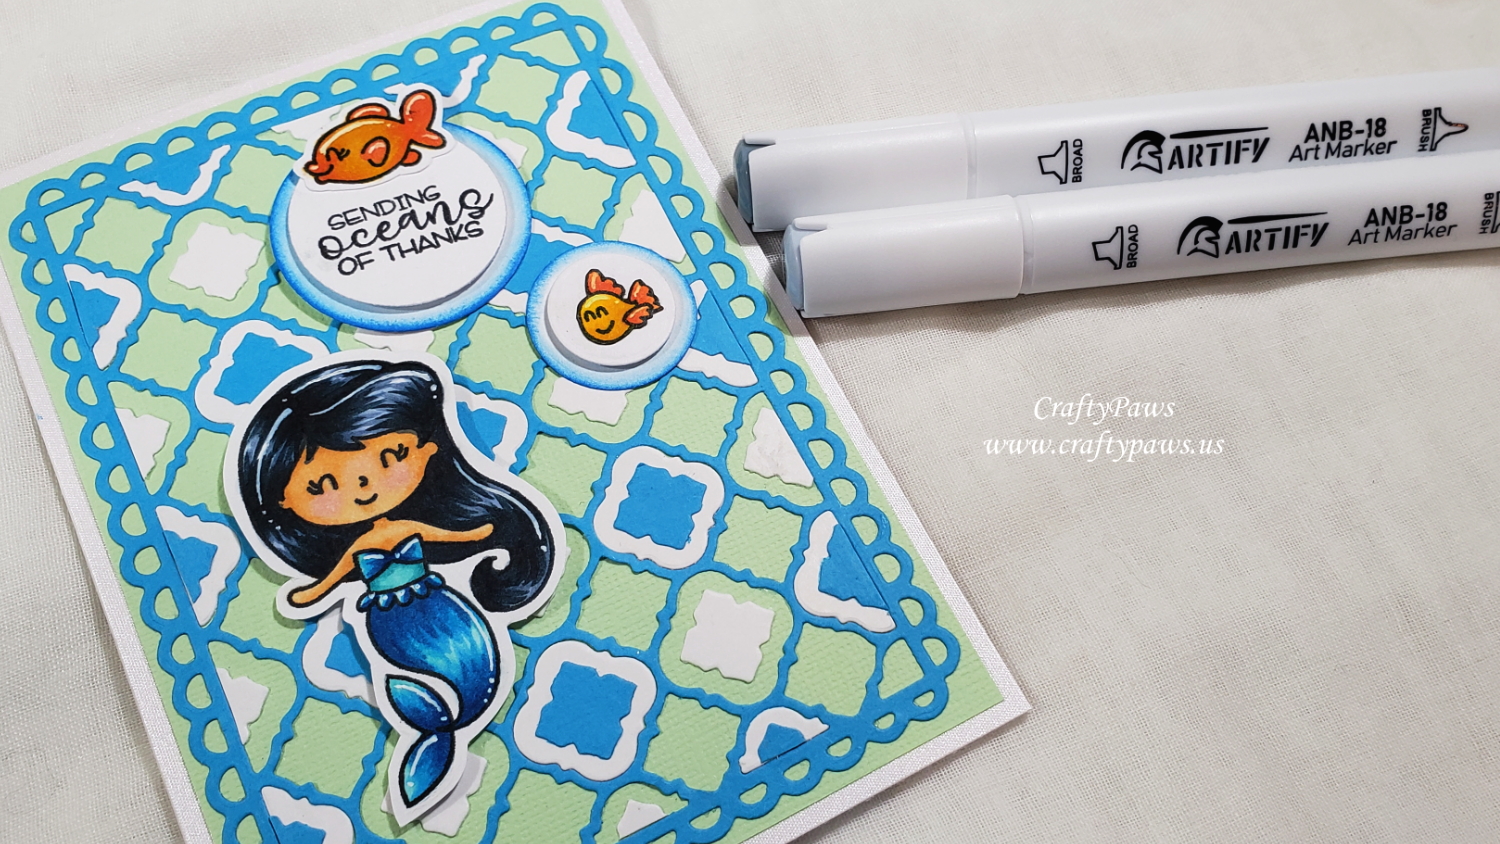
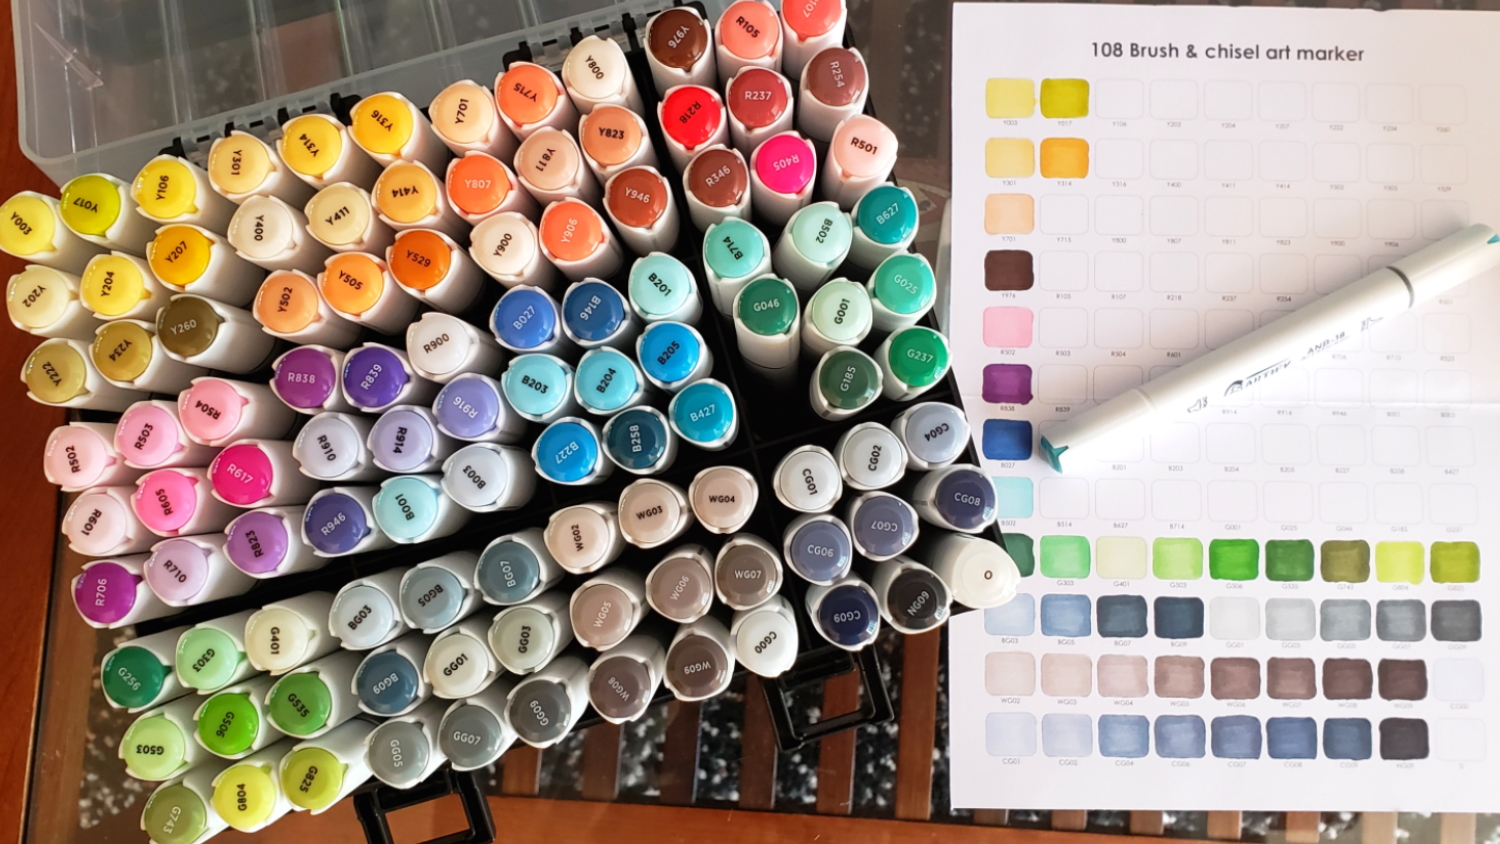
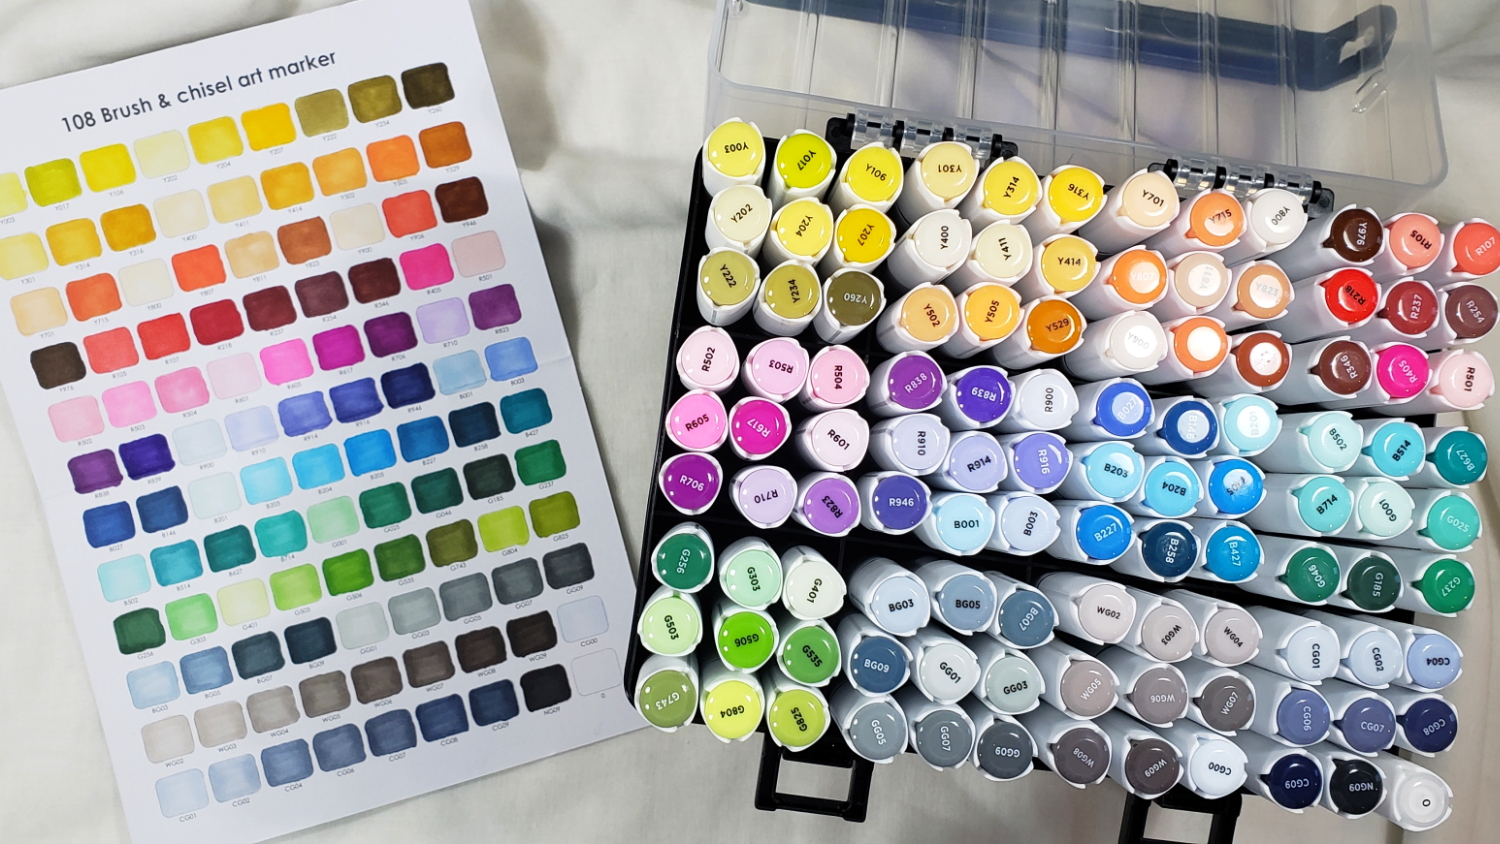
Then I got to coloring up the mermaid and the little fishes from the Avery Elle “Sea Babies” mini stamp set (retired). To coordinate with the cardstock colors I used in the background, I used these Artify marker colors:
Mermaid Body suit/tail: B502, B514, B204, B227
Mermaid Hair: CG01, BG05, BG09
Mermaid Skin: Y900, Y701, Y811, R501
Fishes: Y414, Y505, Y715, Y204, Y207, WG09
The colors blended well, but I was not used to the quantity of the ink that came out (I guess my Copic markers are dry — LOL). These markers are really juicy so I had to try to keep a lighter touch. I was really impressed with the coverage and brightness of these markers and I would recommend them as a budget-friendly alternative to Copic markers. I also added highlights with my trusty Uniball Signo White Gel Pen.
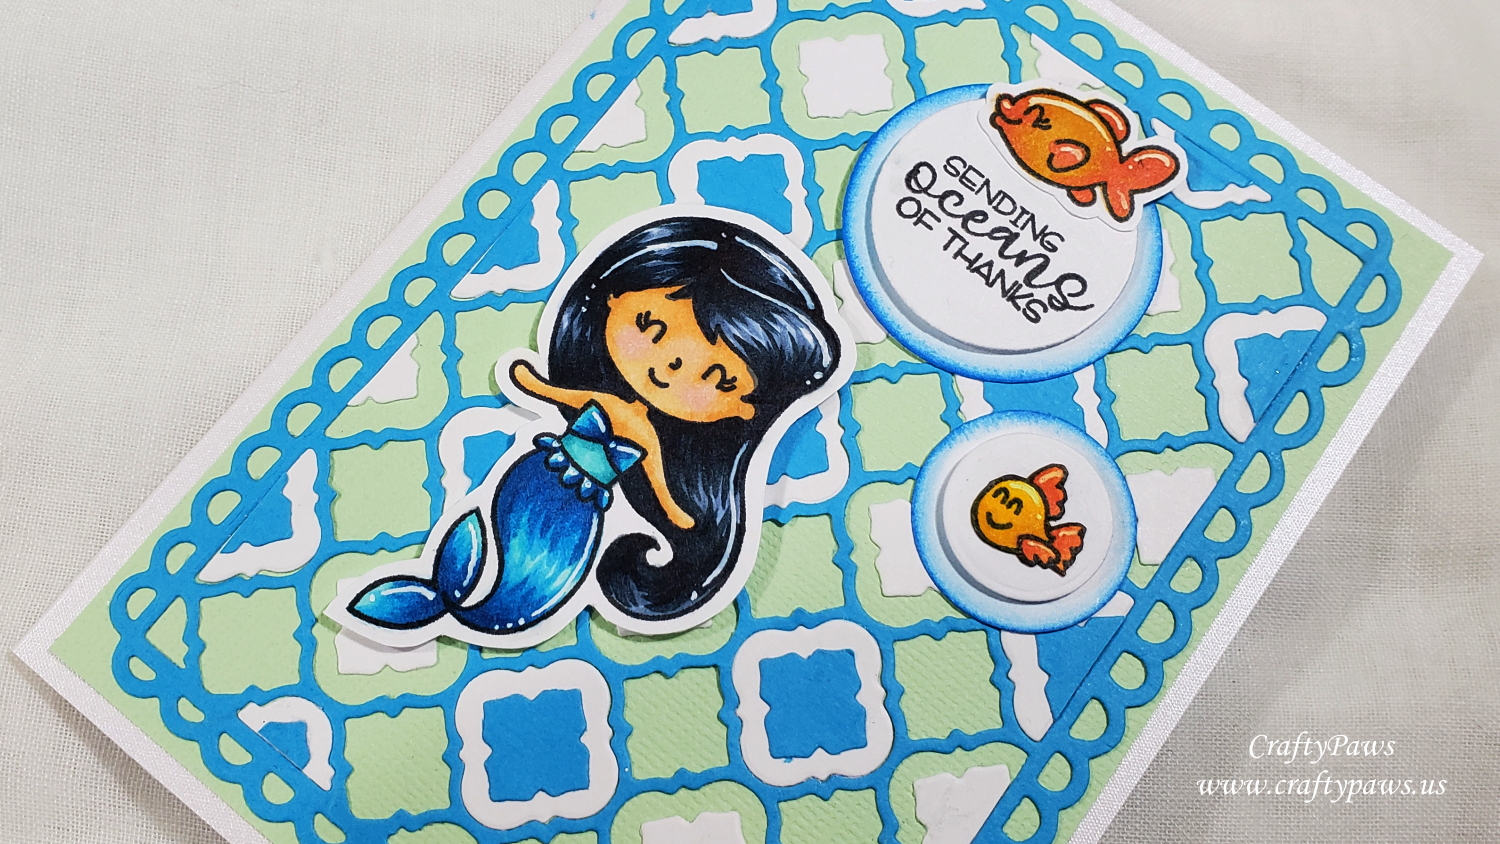
I fussy cut out the mermaid and the fishes with my Fiskars Spring Loaded Reverse Scissors, leaving a bit of a white margin all around so that she would pop a bit from the busy background. For the fishes, I decided that even with the white margin, they were too small and might be fighting with the busy background so I decided to put them on “bubbles” that I die cut using the four smallest circles from the Diemond Dies Die-Normous Stack-Ems Circle Nesting Die Set. I stacked two circle die cuts, added some depth with double sided foam adhesive between them, and blended some Salty Ocean Distress Ink on the lower circle. For the larger circle and fish, I also stamped in the combined sentiment from the stamp set: “Sending Oceans of Thanks”. So that the mermaid would not be overshadowed by the bubbles, I popped her up on double sided foam adhesive too.
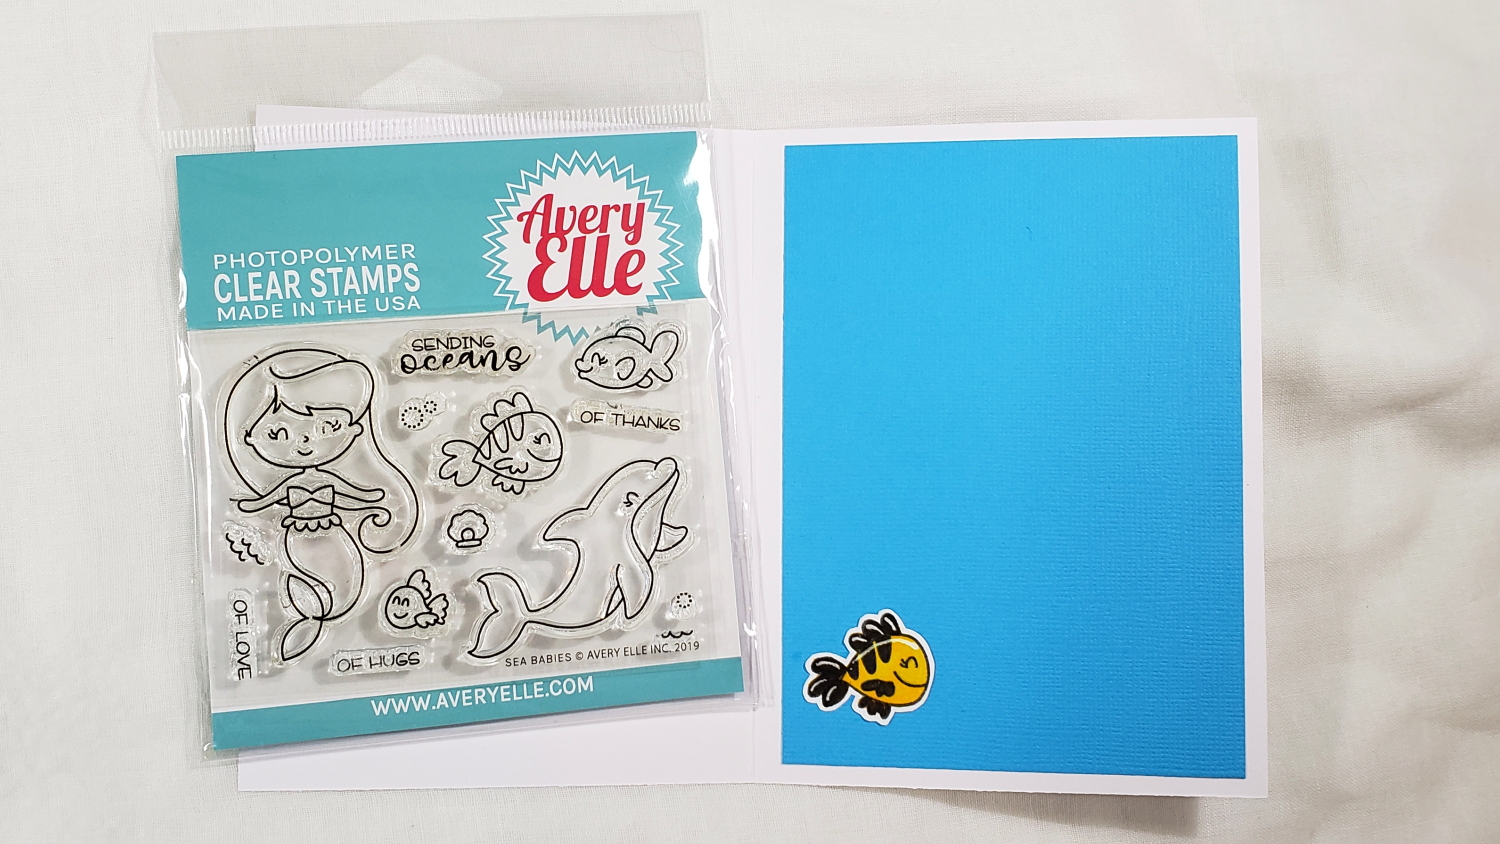
For the inside card liner, I simply used a scrap of aquamarine cardstock to match one of the background cardstock colors. And for a finishing touch, I added a third Artify-colored fish from the stamp set that I fussy cut and glued to the lower left.
CLICK on the following picture to watch the card making process video:
This card is being entered into the following challenges:
Crafts Galore Encore Anything Goes Challenge
Creatalicious Anything Goes with Optional Slim Line Card Challenge
Word Art Wednesday Anything Goes Challenge
Through the Craft Room Door Anything Goes Challenge
Stamping Sensations Fantasy and Magical Challenge
]]>
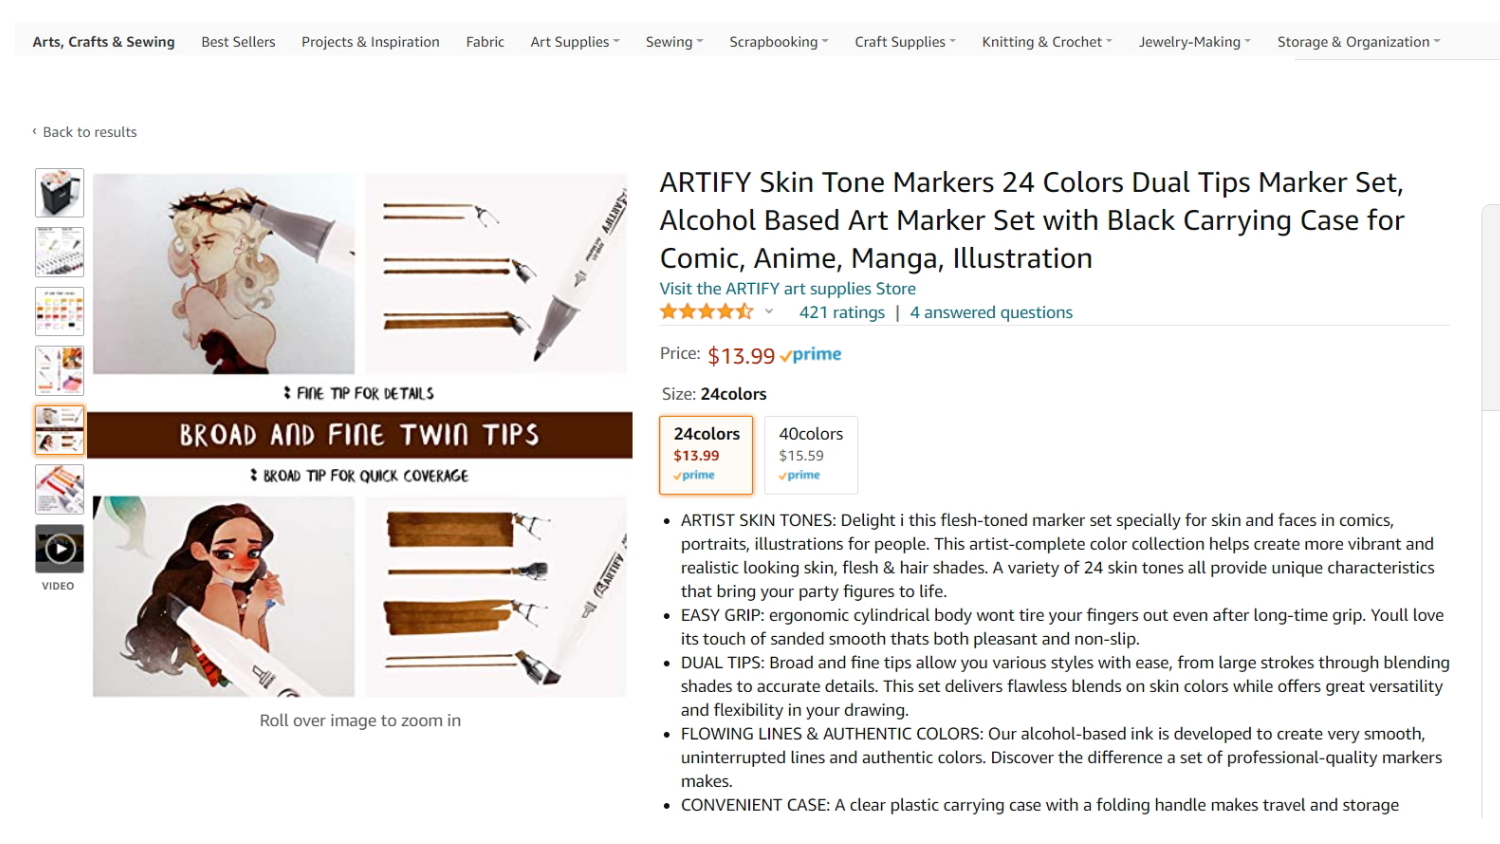
Pros:
1. Incredibly well priced
2. Markers themselves seem strong and well made – triangular barrel shaped body prevents rolling/dropping
3. The caps are secure and click into place (little chance of dried out markers due to loose caps)
4. Colors are plentiful, saturated, and blend well
5. There is not a strong odor (unlike Sharpies)
6. Comes with great, well organized swatch sheet
7. Comes packaged in fantastic organizing carrying case (another budget saver!)
Cons:
1. Markers are not labeled on the barrels (only on the caps) so caps can get misplaced from matching markers if both are removed in use (not an issue for me since I never take both caps off in use)
2. Chisel tip end may not be perfectly positioned for easy use given the triangular barrel shape of markers (not an issue for me since I don’t use the chisel nibs)
3. Swatch sheet paper may be different from the type you use so colors may appear different (easy to fix – copy onto your preferred paper to swatch)
4. Possibly lesser quality of nibs (time will tell with more usage)
This is an amazing budget-friendly set of alcohol markers, and I am really impressed. These would be great for kids, adults starting out on coloring, during travels, and so much more! Honestly, if I had not started out my coloring journey with Copic Markers (which range from approximately $5.85 to $8 per marker depending on sales, sets, and country of purchase), I would seriously consider getting these Artify markers.
CLICK on the picture below to watch my full review:
]]>
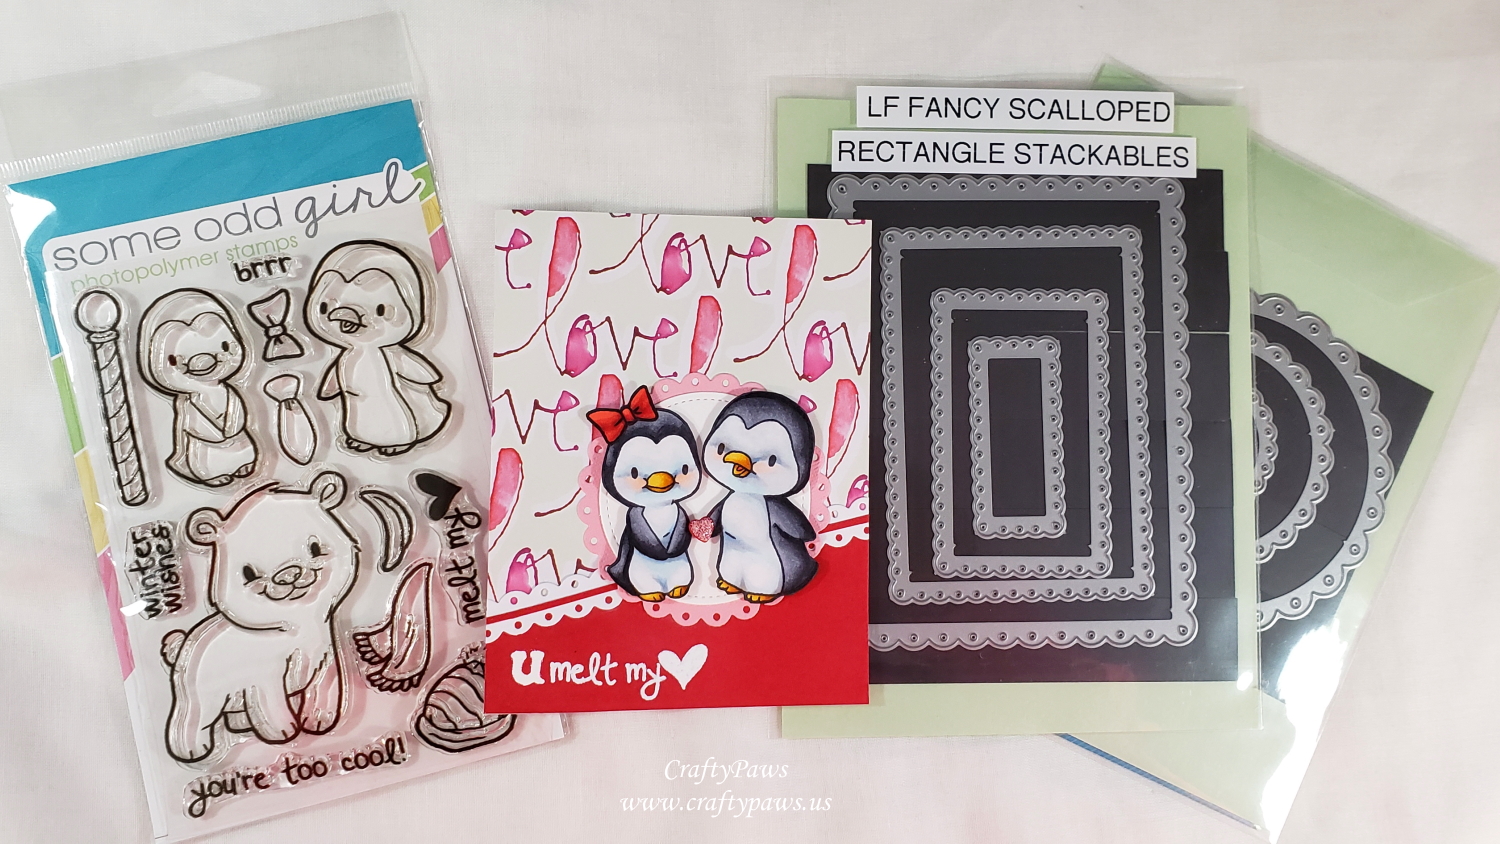
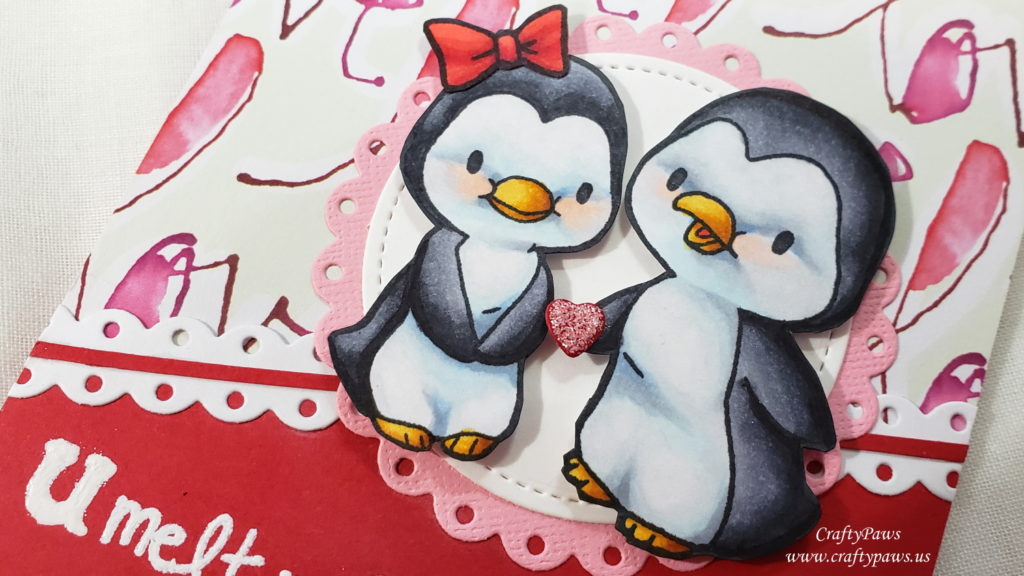
To color the images, I kept the black areas of the penguins light enough to not lose detail and effect the look of chubbiness, and I added pale blues and light greys to the white parts for dimension and interest. These might not be the typical colors one uses to color “white” and “black”, but these are the Copic colors I used:
Black parts of penguins: C3, C4, C6 and C8
White parts of penguins: 0, B000, B32, C0, C1, C2 and R00
Beaks and feet: Y21, YR24 and YR27
Bow: R22, R24, R29 and R39
I fussy cut out the images with my favorite Fiskars Spring Loaded Scissors and inked the edges of the images to hide the white cut edges with a Memento Tuxedo Black Marker. I then glued the bow onto the girl penguin using my favorite Art Glitter Glue with Fine Tip Nozzle to make her extra feminine. 🙂
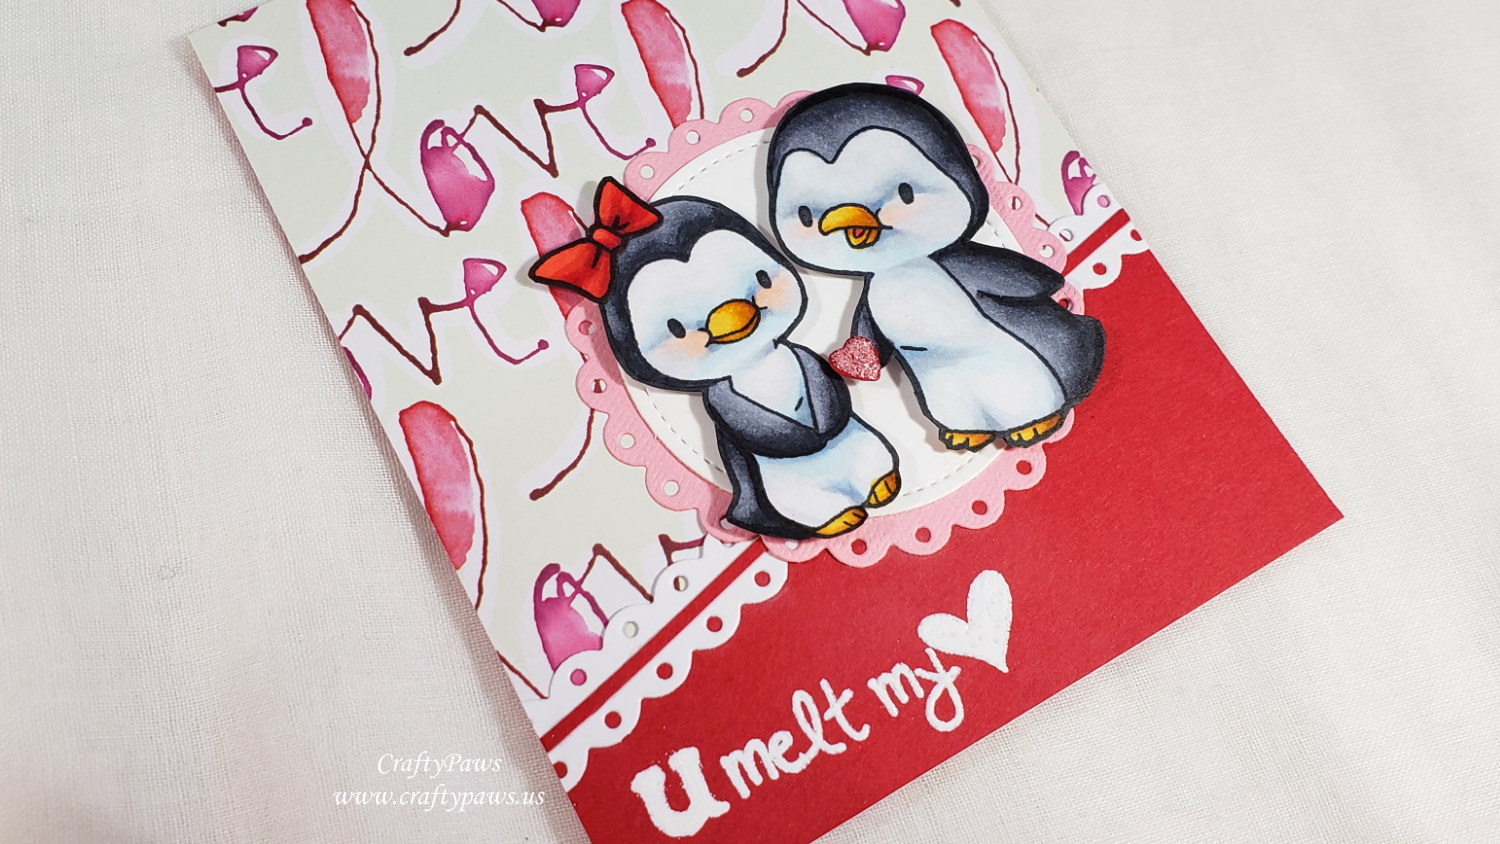
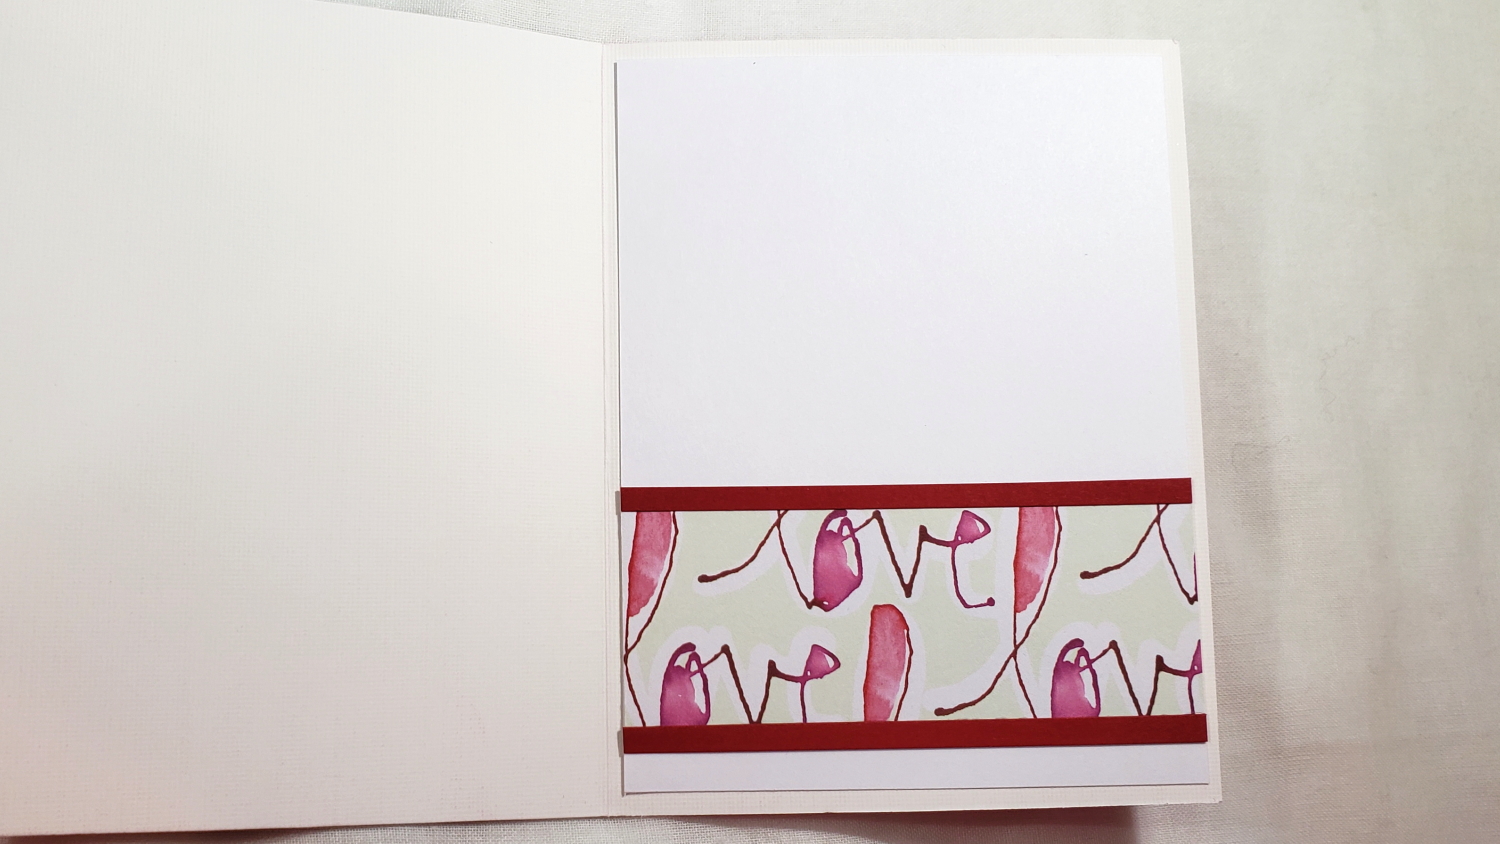
For the card front I used an old patterned paper that has been languishing in my scrap box for years (yes, years!) that had “love” repeated over and over in reds and pinks on a white and pale green background. I also used scrap red cardstock to add a “ground” and visually weight the bottom 1/3 of the card. Where the background papers meet, I used a Lawn Fawn Fancy Scalloped Rectangle die and flipped it to create a fancy scalloped border. And a small strip of red cardstock through the middle of the border added a nice crispness.
To set off the penguin couple, I used a Lawn Fawn Fancy Scalloped Circle Die and the Gina K Designs Stitched Circle Die with pink and white cardstock. Then to really bring out the penguins, I popped them up on foam dots. As a finishing touch, I die cut a tiny heart using the Lawn Fawn Happy Hello coordinating die set and placed it in the male penguin’s fin so that it would look like he was giving his mate a heart. A thick coating of Hibiscus Pink Stickles over the red heart both softened the color and added sparkle.
CLICK on the following picture to watch the process video of crafting this card:
Disclosure: Many of the supplies I’ve used for today’s project are linked. Some may be affiliate links, which means if you make a purchase I receive a small commission at no extra cost to you. I truly appreciate your support toward the costs of running this blog!
This card is being entered into the following challenges:
Crafty Gals Corner Winter Fun Challenge
Word Art Wednesday Anything Goes Challenge
Fab ‘n’ Funky In the Pink Challenge
Stamping Sensations Feminine Challenge
Through the Craft Room Door Anything Goes Challenge
Penny Black and More Animals, Birds and Butterfly Challenge
Simon Says Stamp Wednesday with Love Challenge
Creatalicious Anything Goes with Optional Hearts Challenge
MFT Wednesday Sketch Challenge #475
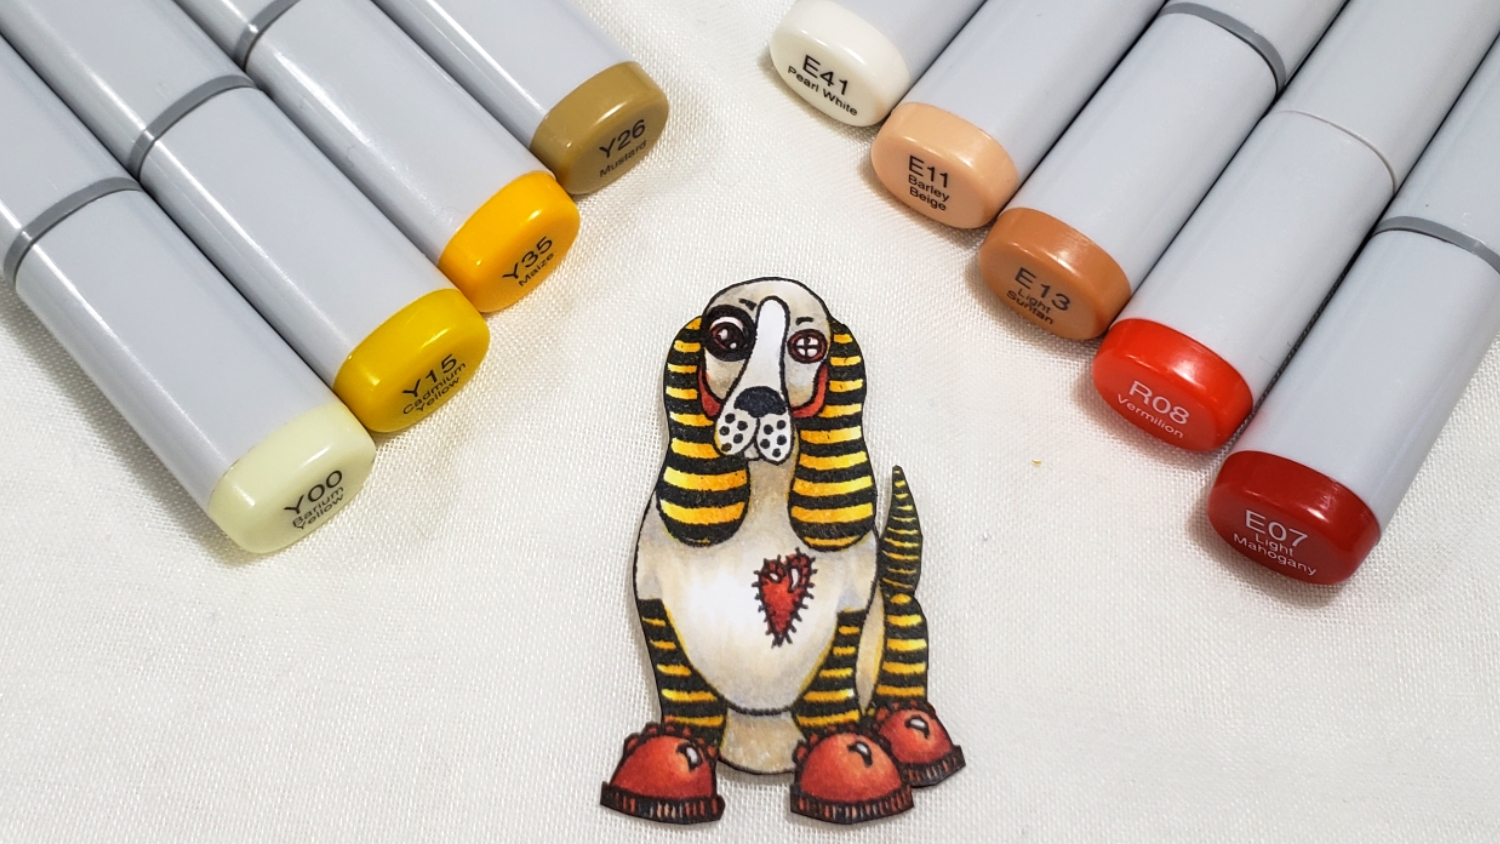
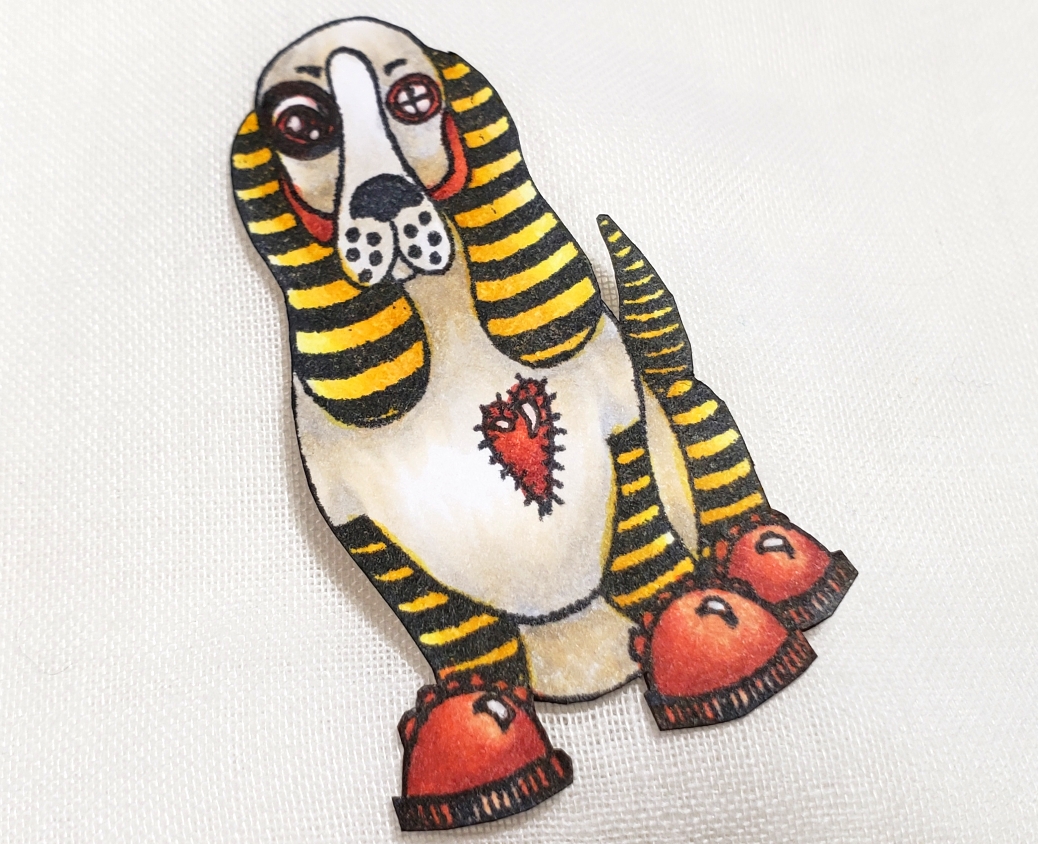
I love how this hound dog came out after Copic coloring it with what I consider a more neutral Steampunk color combination:
Ears, legs and tail: Y00, Y15, Y35 and Y26
Body, N0, N1, N2, E40 and E41
Boots, heart and jowls: E11, E13, E07 and R08
CLICK on the following picture to watch the Copic coloring process video:
Disclosure: Many of the supplies I’ve used for today’s project are linked. Some may be affiliate links, which means if you make a purchase I receive a small commission at no extra cost to you. I truly appreciate your support toward the costs of running this blog!
Thanks again for stopping by. As soon as I figure out what to do with all these funky puppies, I’ll be back to share that with y’all. Till then, I hope you’re having a wonderful crafty day!
]]>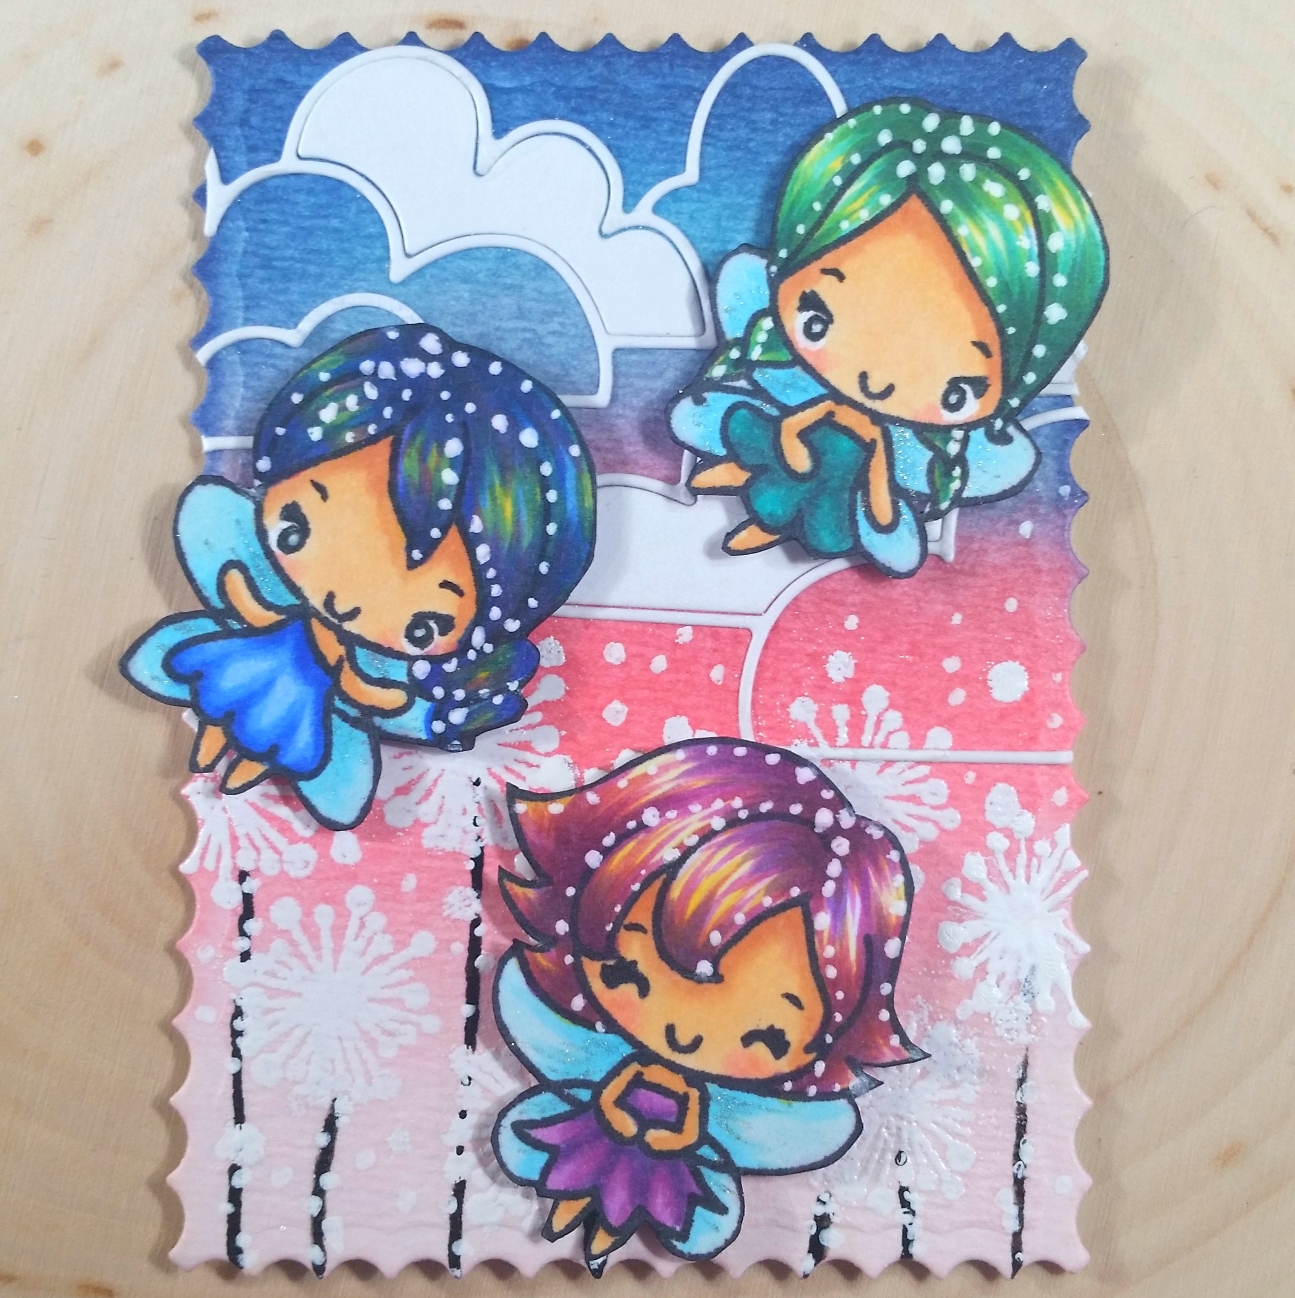 Then I set the scene for the sky with a Simon Says Stamp Cloud Bank Die, leaving a few of the cloud insets in place and otherwise using the outline of the clouds. Then I stamped out the dandelion heads from the Little Fairies stamp set with VersaMark ink and heat embossed some Recollections Snow embossing powder to get a little bit of texture and shine. For the Dandelion stems, I used a Black Sakura Glaze Pen, which gave a similar texture and shine to the embossed areas. For an area that I had inadvertently smeared with VersaMark ink and could no longer get a clear dandelion head impression, I hand painted in a dandelion head with Copic Opaque White (this too had a similar raised, shiny look). I also used a VersaMarker to dot the background a bit more and heat embossed some fairy dust (or dandelion fluff). For even more fine dots, I used a Uni-ball Signo white Gel Pen. Amazingly, all of these mediums (Glaze Pen, Gel Pen, Copic Opaque White, and VersaMark Ink or VersaMarker with embossing powder) had similar shine and slightly raised texture like heat embossing!
Finally, for the little fairies, I used the following Copics: For all the fairies, the skin was colored with: E50, E51, E21, E11, and R20; the wings with: B000 and B01 (topped with Clear Wink of Stella); and hair highlights with: Y11 and Y15
Purple-haired Fairy: Hair and dress: V12, V06, V17
Blue/Purple-haired Fairy: Hair and dress: B21, B24, B18, V06, V17
Green-haired Fairy: Hair and dress: BG15, BG18, BG78
To add to the magical look of the fairies, I added a lot of dots with a Uni-ball Signo White Gel Pen in their hair. After fussy cutting them out, I inked the edges with a Tuxedo Black Momento Marker to cover up the white edge of the paper, and I popped them all up from the background with double sided foam adhesive for a little dimension.
The following is a video share of this ATC:
This ATC is being entered into the following challenges:
Creatalicious Anything Goes with Optional Mythical Creatures Challenge
Simon Says Stamp Wednesday Anything Goes Challenge
Simon Says Stamp Work It Wednesday Favorite Stamps Stamptember Challenge
Word Art Wednesday Anything Goes Challenge
Through the Craft Room Door Anything Goes Challenge
Crafts Galore Encore Anything Goes Challenge – WINNER
Not Just Cards Anything Goes Challenge
Crafty Gals Corner Anything Goes Challenge
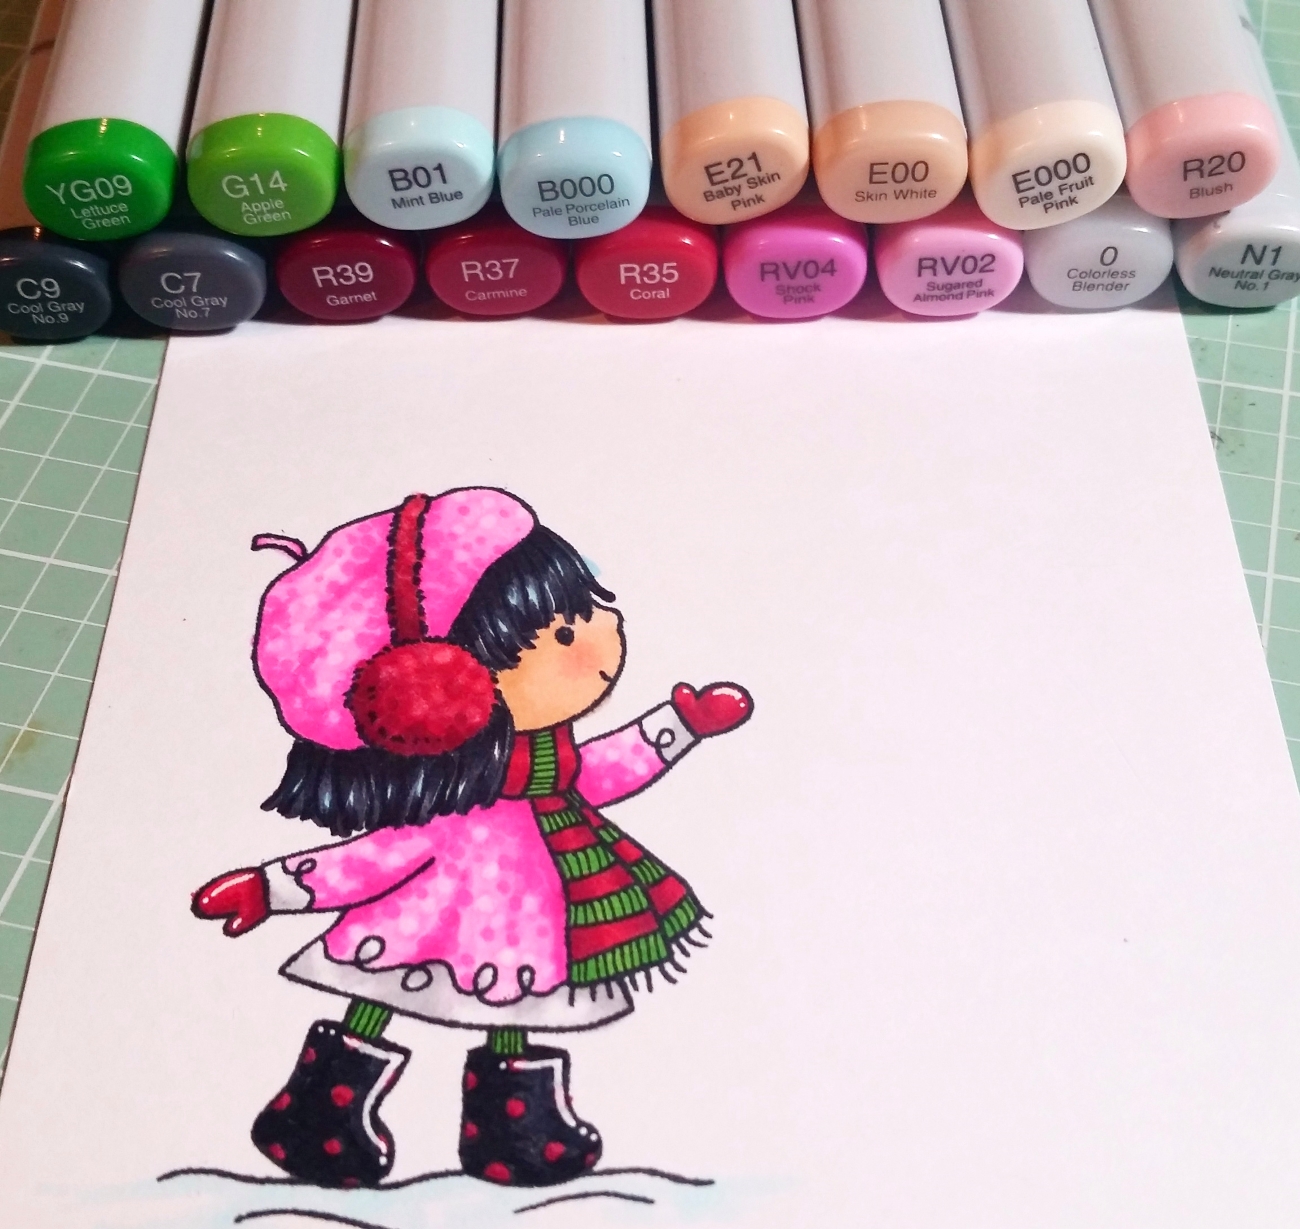 I stamped out the girl and tree pot with MFT Black Licorice Hybrid Ink and colored them with the following Copic colors:
Hair: C7, C9, B01
Skin: E000, E00, E21 and R20
Green scarf and tights: G14 and YG09 with stripes added with 0.05 pt Copic multiliner pen
Red scarf, ear muffs, polka dots on boots, mittens and bow on tree pot: R35, R37 and R39 with O for boucle effect on ear muffs
Black boots: C7 and C9
Pink coat, beret and tree pot: RV02, RV04 with 0 for boucle effect on coat and beret
White trim on coat: N0 and N1
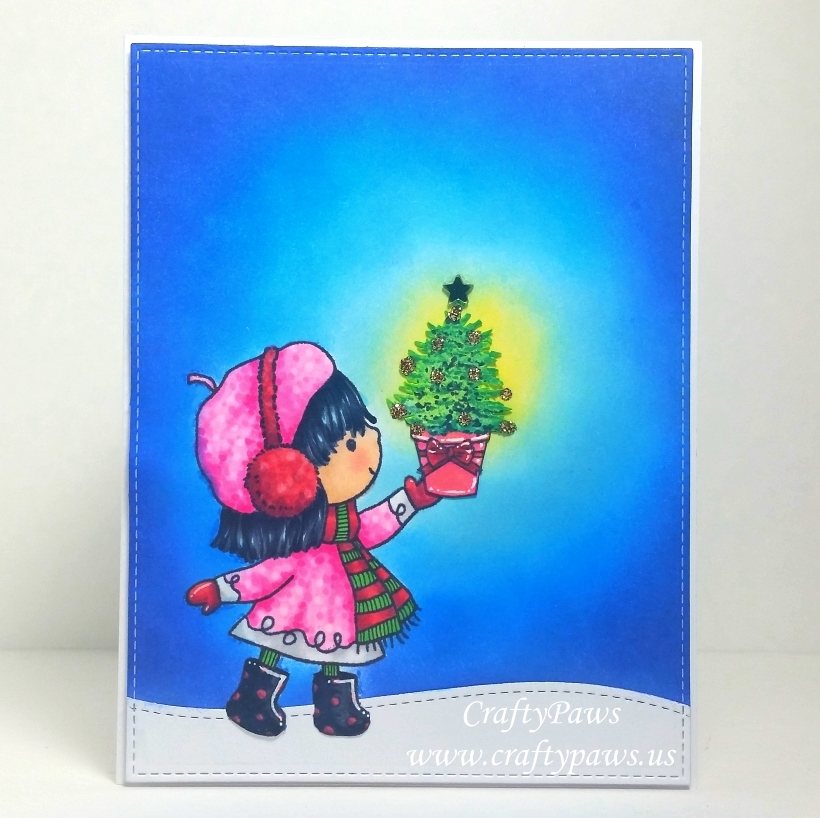 Then I applied Winsor & Newton Art Masking Fluid with an old paint brush over top of the colored image. WOW that was scary. I kept thinking I was ruining all my coloring work. Then it was a waiting game of letting the masking fluid fully dry (you can’t use a heat tool to quicken this because then you can make the masking fluid stick to the colored image). It was very humid so I let it sit for about an hour and a half. Then I did some Distress Ink blending with finger daubers to blend on the background sky with Squeezed Lemonade, Tumbled Glass, Salty Ocean and Blueprint Sketch. Afterwards, I just rubbed off the rubbery masking fluid and to my relief found that the image was completely unharmed. YAY!
While I was waiting for the masking fluid to dry, I stamped out the Christmas tree (both the tree and pot are from a Katy Sue Designs The Door stamp set) with an old American Crafts aqua pigment ink from my stash. Then I re-stamped the tree after dabbing on some Tim Holtz Distress Marker in Pine Needles to some of the branches to add depth of color. Lastly, I added some deeper shadows by dotting on some Copic C9. Whew! That’s a lot of different inks on a little tree, but I think it all looked good together in the end, especially once I fussy cut it out. 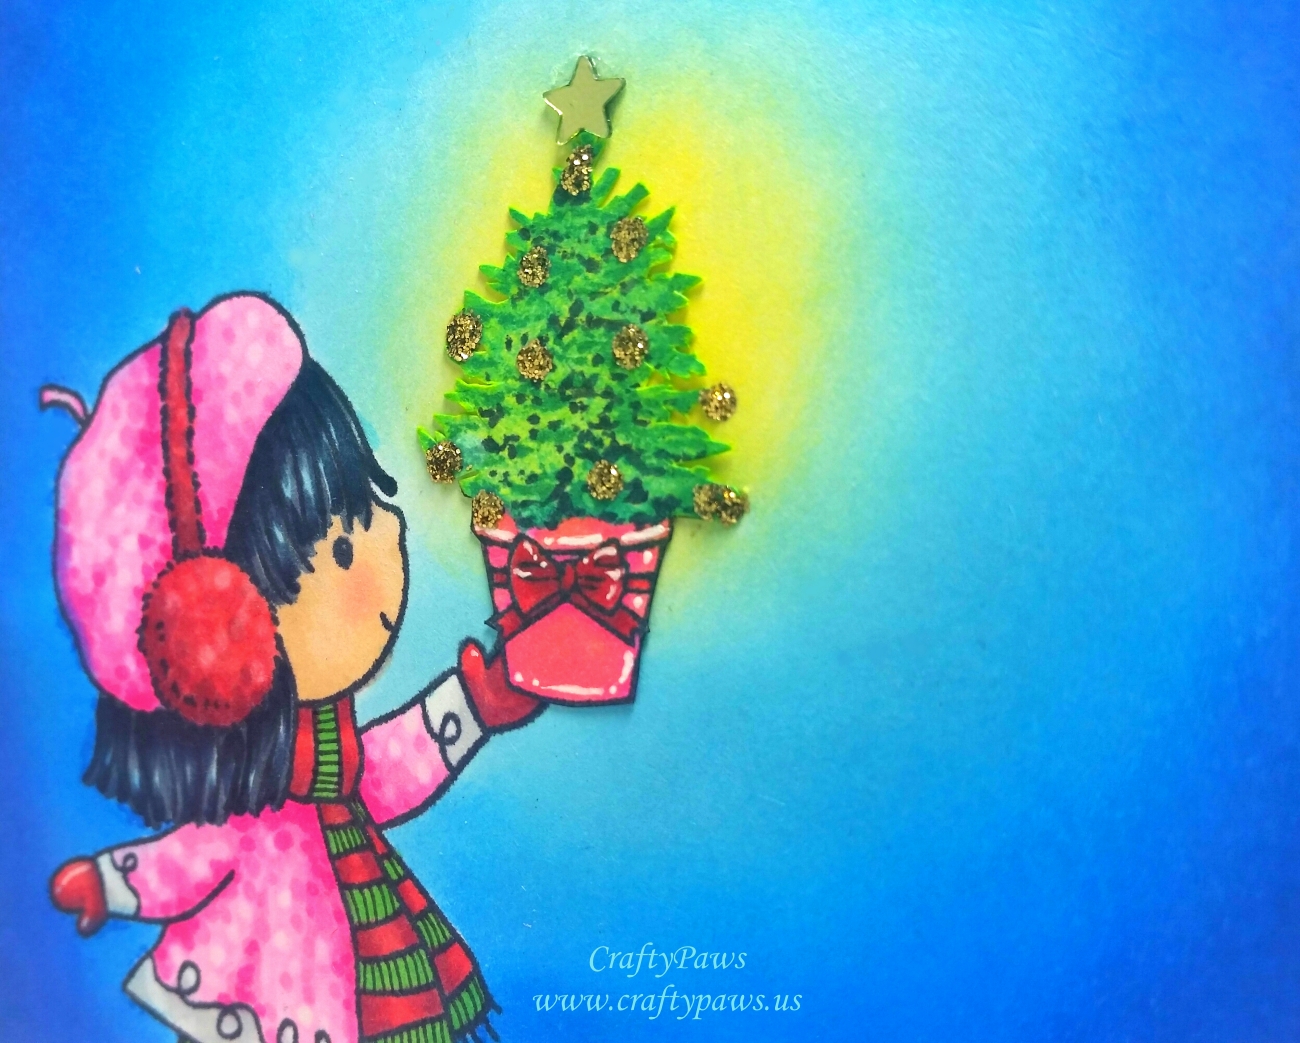 Now that fussy cutting was painstaking, but well worth the final look with the yellow blended background peeking through the tree branches. To decorate the little Christmas tree, I used Champagne Gold Stickles to add the look of sparkly baubles and a double layer of silver star confetti pieces for the star at the top.
For the snowy ground, I used a Lawn Fawn Stitched Hillside Borders Die (available HERE in the UK) on some white card stock, and I used an X-Acto blade to cut around the little girl’s boots so that it would look like she was walking on a snow bank. I used one of my all-time favorite card making dies–the large stitched rectangle die from the My Favorite Things Die-namics Blueprints 15 die set (available HERE in the UK) to cut out the whole scene. I popped up the scene on double sided foam adhesive and adhered it to a plain white card base. For the inside liner of the card, I printed out on my computer a simple sentiment, “O’ Christmas Tree, O’ Christmas Tree….” as if the little girl was singing the Christmas carol. 🙂
This card is being entered into the following challenges:
Craft Your Passion Anything Goes Challenge
Fab ‘n’ Funky Christmas Challenge
Crafty Purple Frog Magic of Christmas Challenge
Addicted to Stamps and More Make Your Mark Challenge
Crafty Gals Corner Anything Goes Challenge
Simon Says Stamp Monday O’ Christmas Tree Challenge
Simon Says Stamp Wednesday Anything Goes Challenge
Word Art Wednesday Anything Goes Challenge
Seven Hills Crafts Inspired by a Christmas Movie, Song or Carol Challenge
]]>