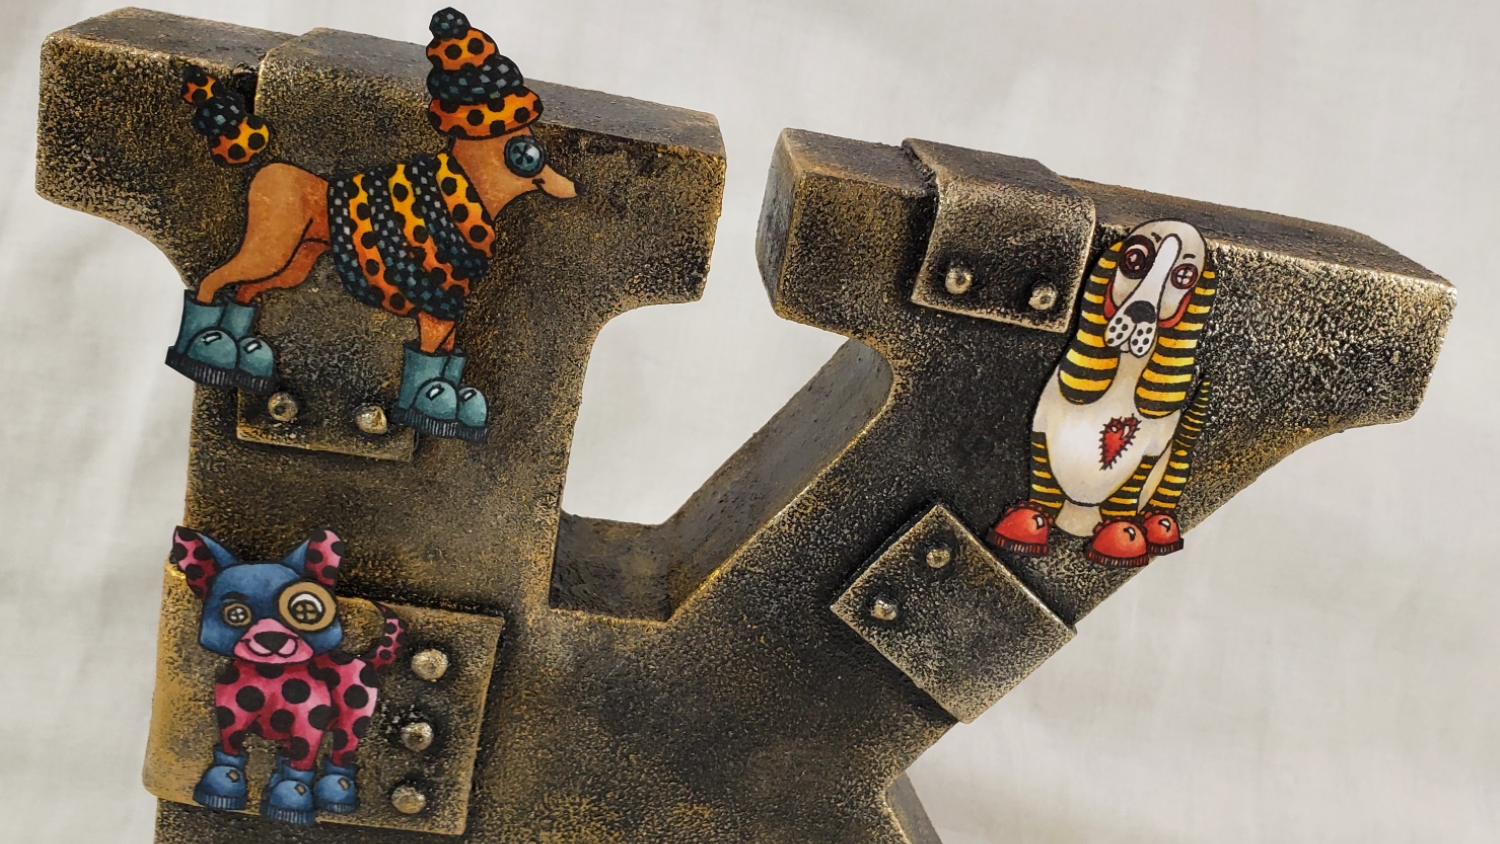
I had purchased a white wooden K in the clearance section of TJ Maxx about 4 years ago for $2. It was pretty beaten up, but I felt confident that I could revitalize it and make it my own. Then as other projects rose up on my crafting to-do/try list, the K got buried in my craft closet. So with small bursts of energy that seemed to work perfectly with needed drying times, I tackled this project — finally!
1. I cut strips of fun foam and hot glued them using my new Bojecher Glue Gun onto the K to form what I hoped would look like metal welded sheets.
2. I next used the hot glue gun to form little dots on the ends of the strips to form what I hoped would end up looking like rivets — to do both sides of the K I had to wait for the first side to dry to a full hardened cure.
3. I used a stiff stencil brush and DecoArt Media Modeling Paste in Black to not only seal the foam and wood, but also add some rough texture — again there was dry time of a couple of hours, especially where I had added thicker texture.
4. Because modeling paste did not fully cover the white of the wood, I next painted the whole thing with Artist’s Loft Metallic Black Acrylic Paint — more drying time, but pretty quick.
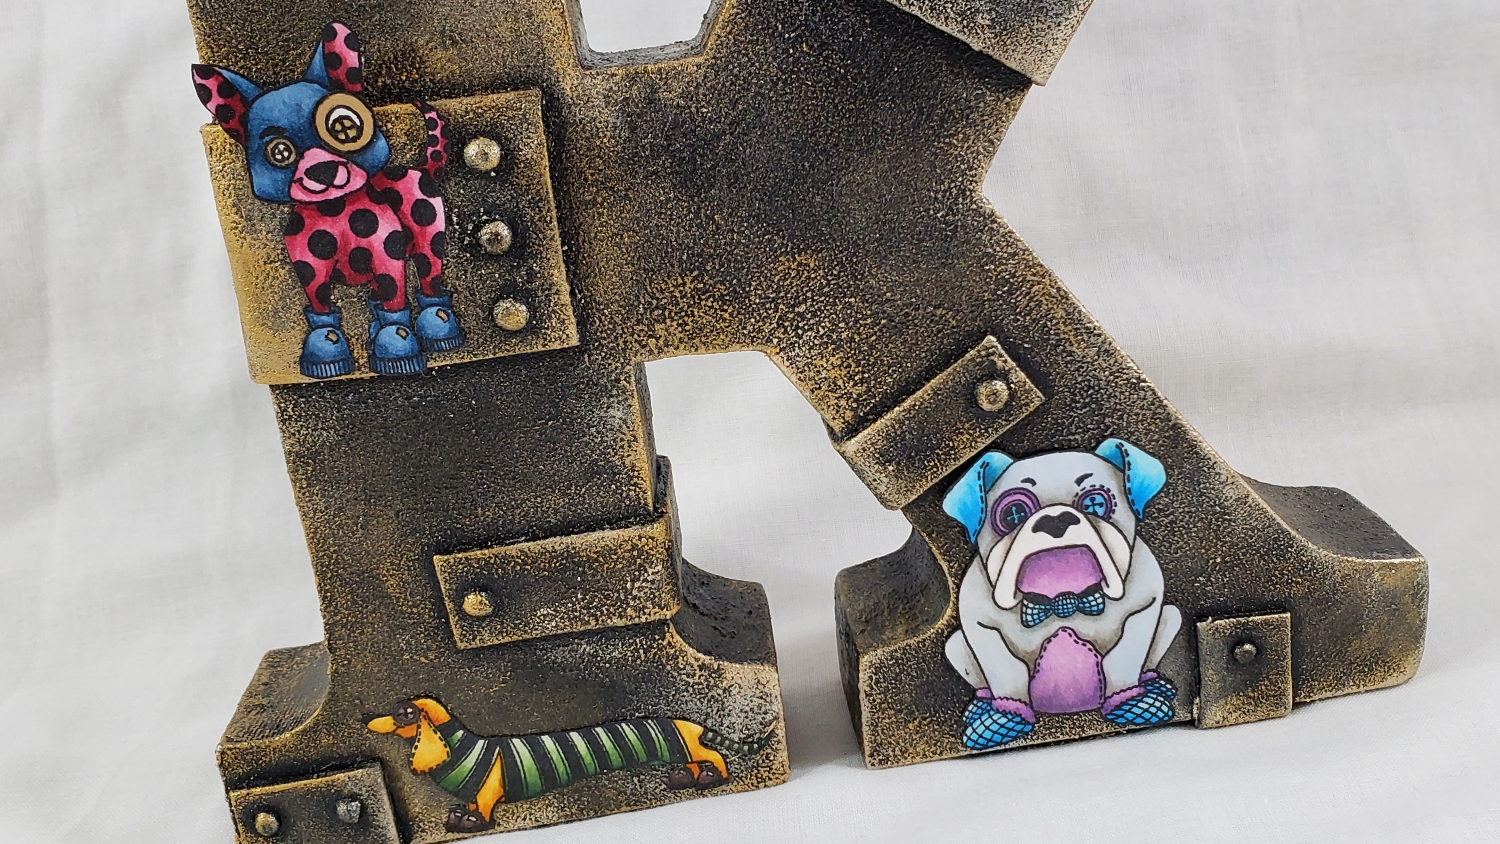
5. Lastly I had fun getting my fingers dirty with DecoArt Metallic Lustre in the colors Gold Rush and Champagne Ice. I first applied the Gold Rush to all the edges of the K, the rivets, and the strips, and it was like magic the way that shimmer made these odd materials look like metal. Then I did a light coating of the silvery Champagne Ice, over top of the gold and over more of the flat surfaces of the K, and this aged the K beautifully.
I could have stopped here, but I like Cutsie mixed with my Steampunk, so I pulled out those adorable TINY Dylusions Puppy Dog Tails images that I had Copic colored last month. I first coated them with a coat of Liquitex Matte Medium to protect the images and strengthen the paper. Then I futzed with them on the K until I found what I thought were the perfect placement of each pup. I really like this new addition to my craft room decor and I am sooooo happy to have that K finally transformed from trash to treasure!
The following is a video of the various steps to create this Cutsie Steampunk project:
Disclosure: Many of the supplies I’ve used for today’s project are linked. Some may be affiliate links, which means if you make a purchase I receive a small commission at no extra cost to you. I truly appreciate your support toward the costs of running this blog!
This altered letter is being entered into the following challenges:
SanDee and Amelia’s Anything Goes Steampunk/Industrial Challenge
Lil Patch of Crafty Friends Anything Goes Challenge
Through the Craft Room Door Anything Goes Challenge
Crafts Galore Encore Anything Goes Challenge
Word Art Wednesday Anything Goes Challenge
Simon Says Stamp Monday Tiny Things Challenge
Simon Says Stamp Wednesday Cute Challenge
Crafter’s Castle Anything Goes with Optional Add Glitter Challenge
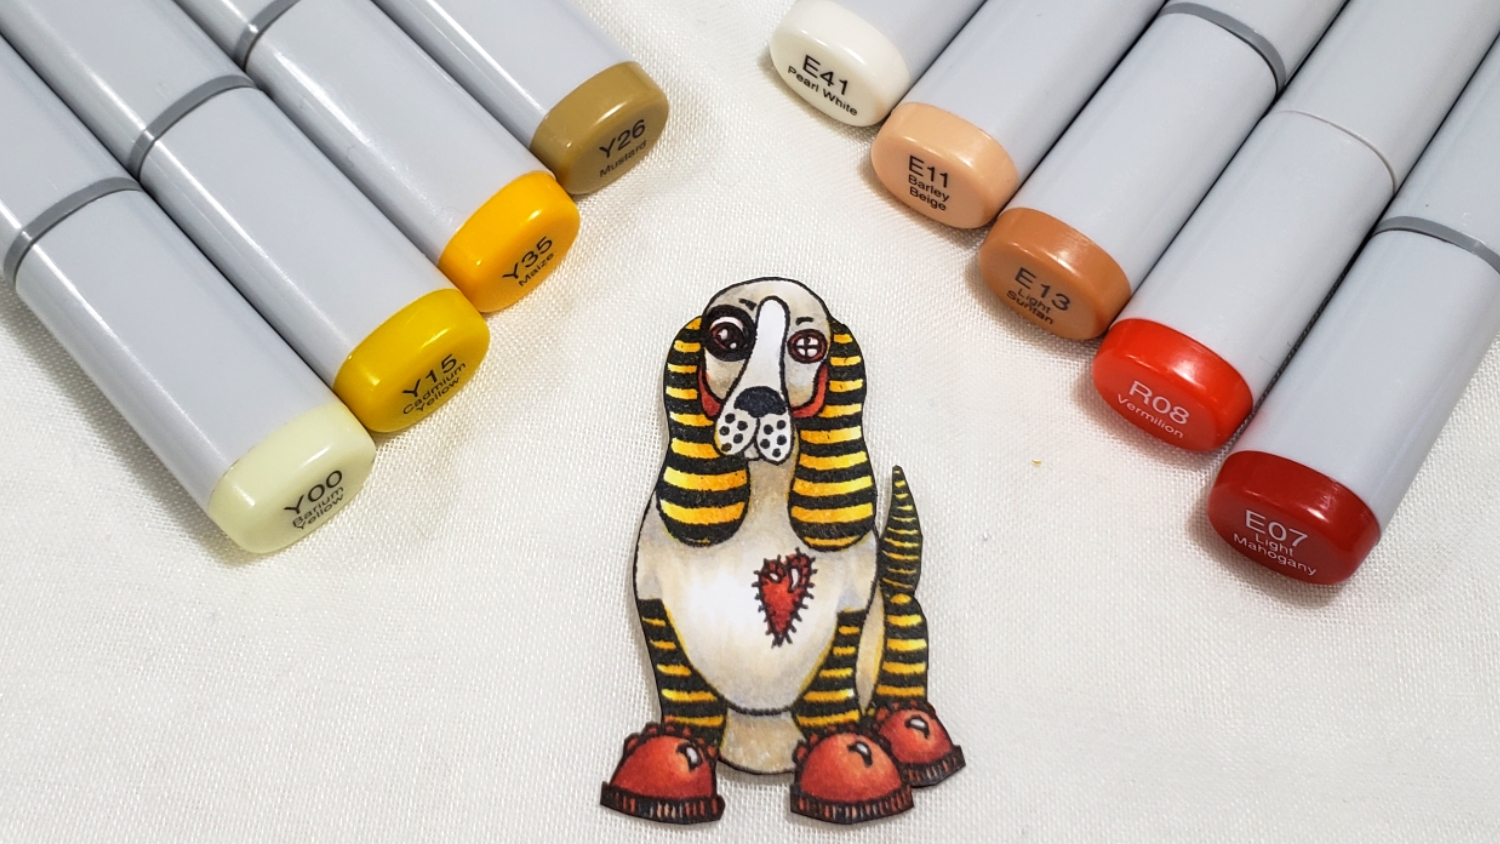
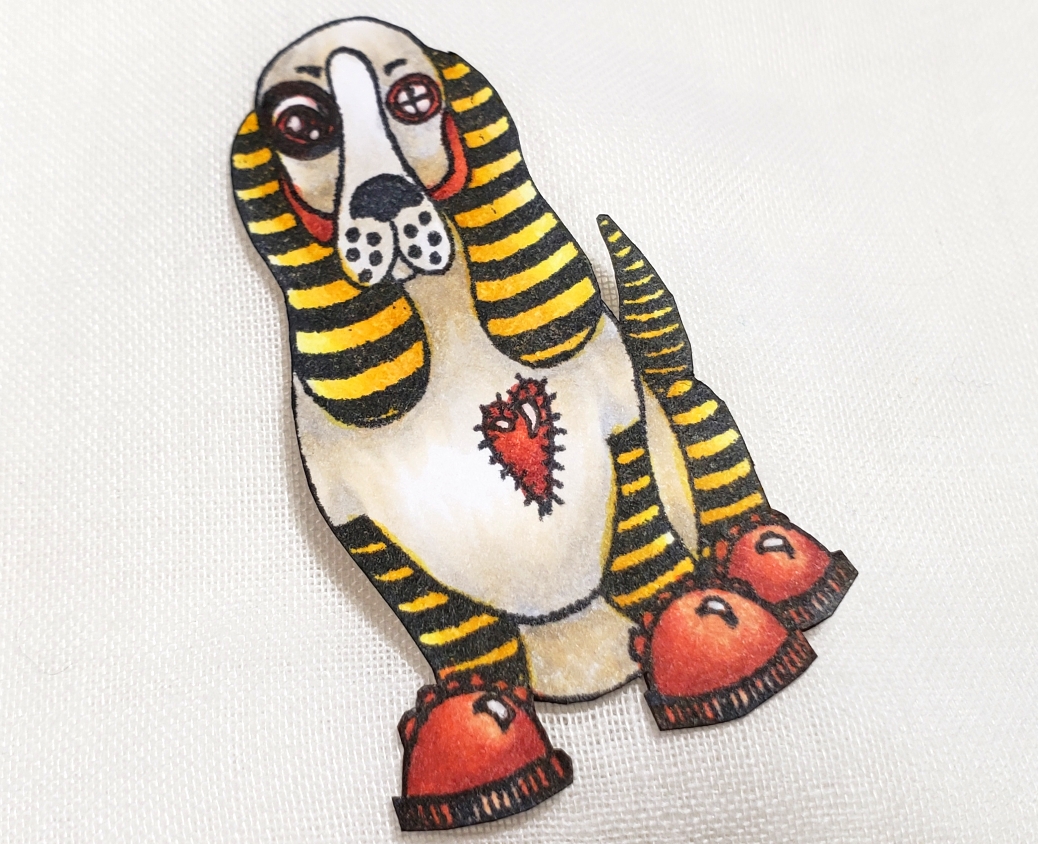
I love how this hound dog came out after Copic coloring it with what I consider a more neutral Steampunk color combination:
Ears, legs and tail: Y00, Y15, Y35 and Y26
Body, N0, N1, N2, E40 and E41
Boots, heart and jowls: E11, E13, E07 and R08
CLICK on the following picture to watch the Copic coloring process video:
Disclosure: Many of the supplies I’ve used for today’s project are linked. Some may be affiliate links, which means if you make a purchase I receive a small commission at no extra cost to you. I truly appreciate your support toward the costs of running this blog!
Thanks again for stopping by. As soon as I figure out what to do with all these funky puppies, I’ll be back to share that with y’all. Till then, I hope you’re having a wonderful crafty day!
]]>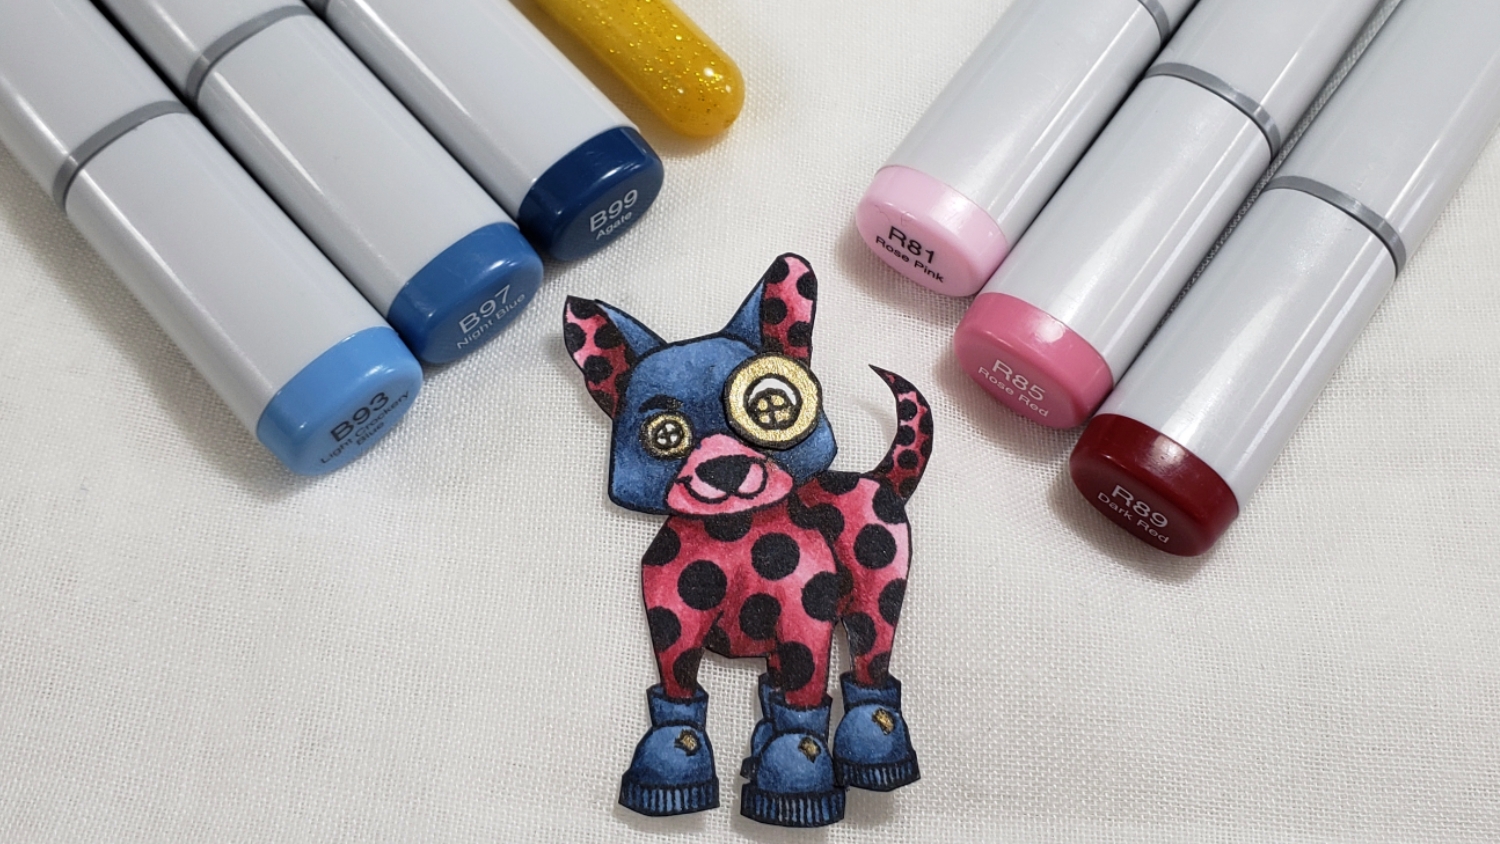
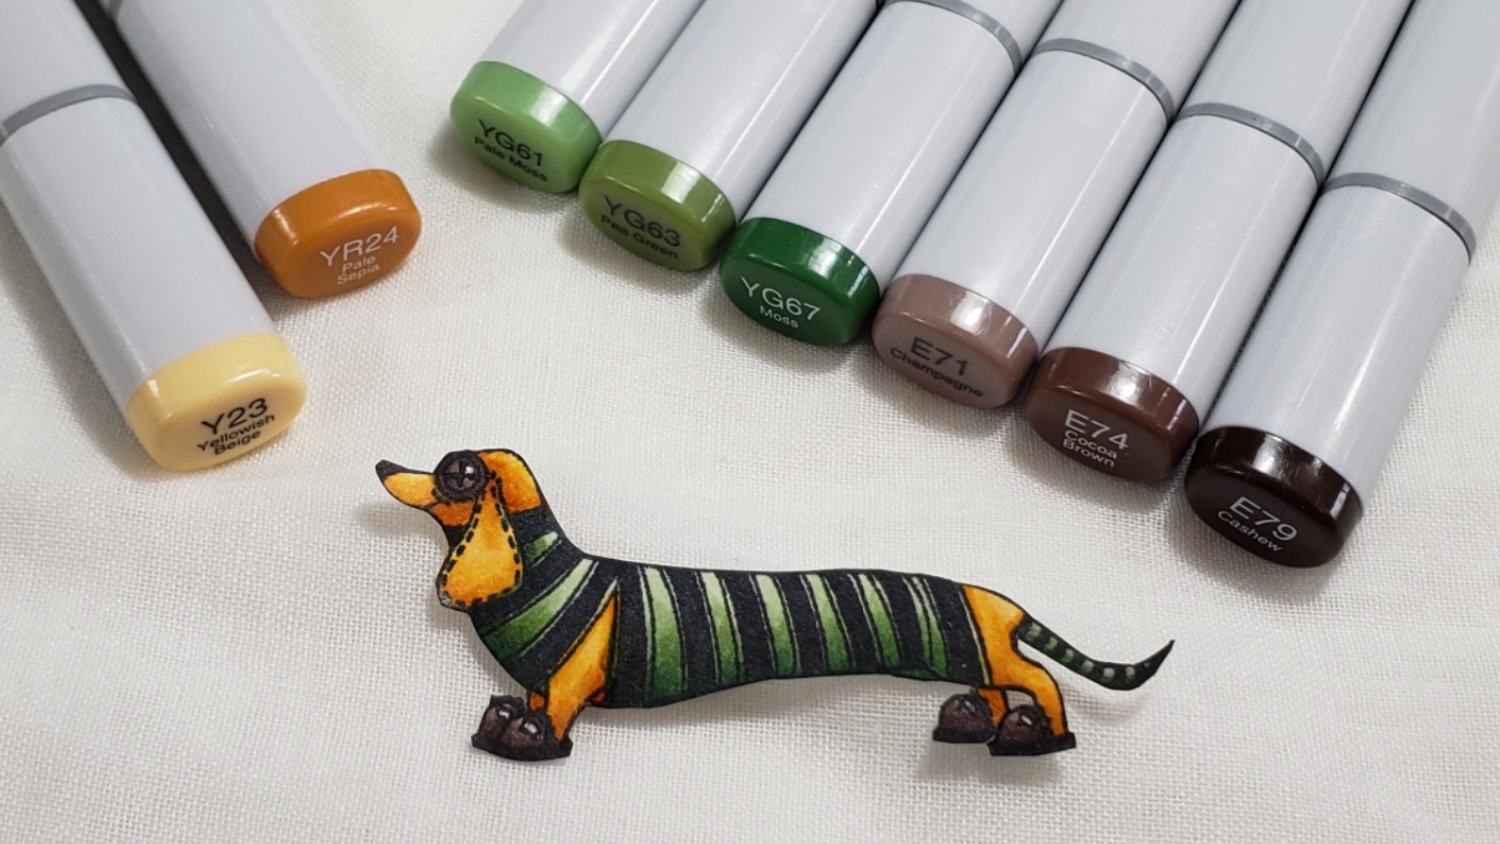
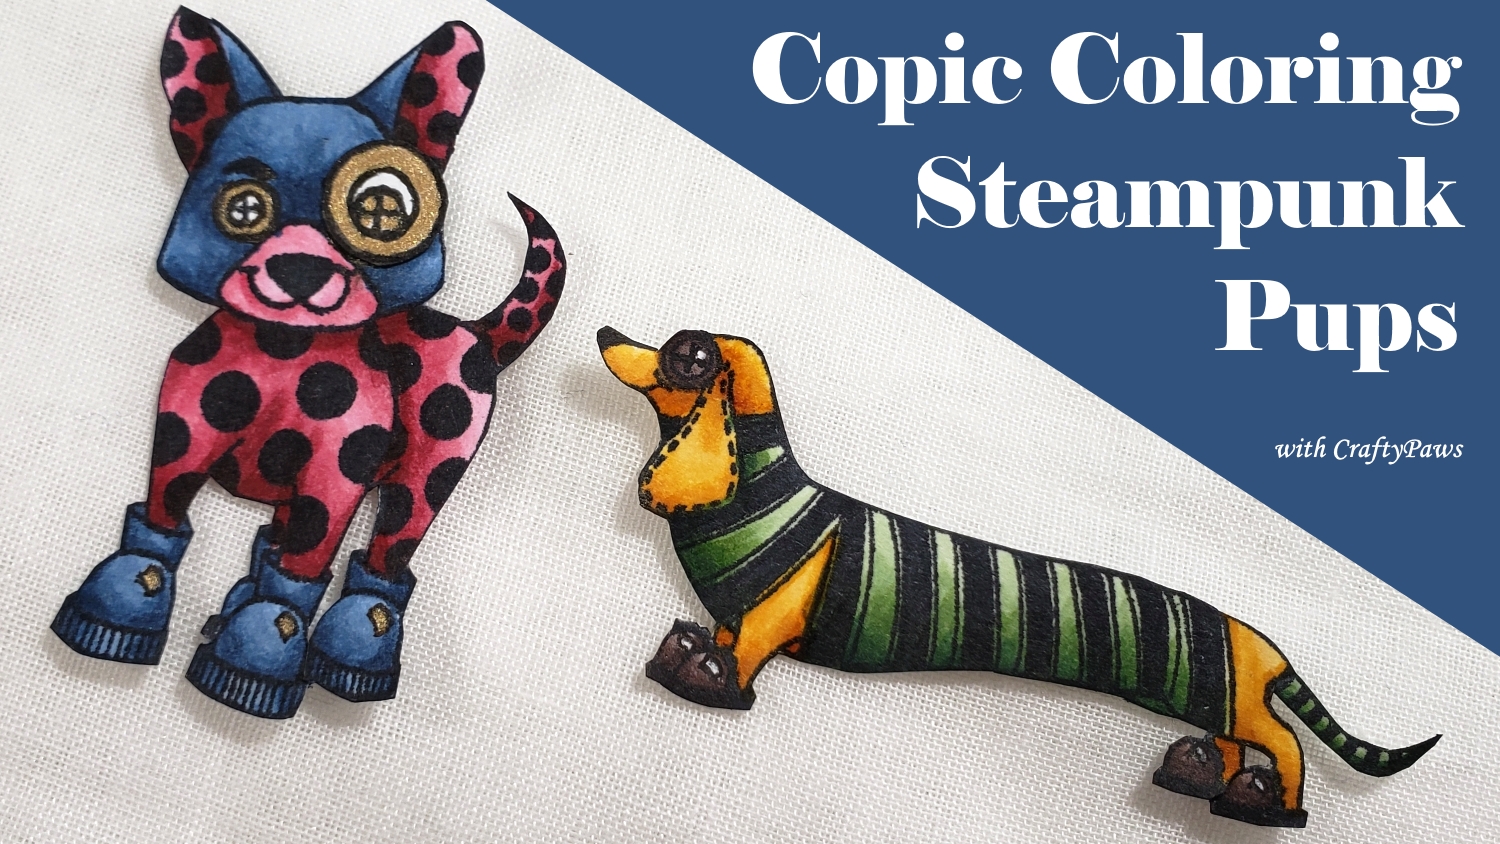
The next two Steampunk pups I colored up are the Terrier and Dachshund, and these are the Copics I used:
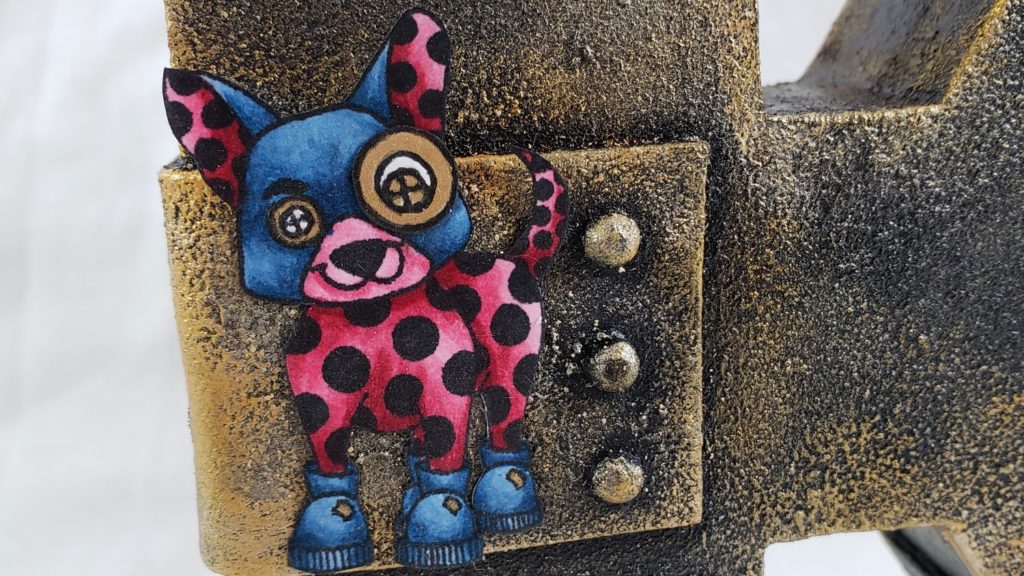
Terrier: R81, R85, R89, B93, B95 and B99 with Gold Gelly Roll Pen
Dachshund: YG61, YG63, YG67, G29, Y23, YR24, E71, E74, and E79
CLICK on the following picture to watch a Copic coloring process video:
Disclosure: Many of the supplies I’ve used for today’s project are linked. Some may be affiliate links, which means if you make a purchase I receive a small commission at no extra cost to you. I truly appreciate your support toward the costs of running this blog!
Thanks for stopping by, and please join me when I share what I create with all these Steampunk puppies!
]]>
I’m a bit rusty with crafting, let alone Copic coloring, because I’ve been away from my craft room for almost a month while I have been helping my dad through 2 heart surgeries, fully changing his diet, and just general recovery (if you want to know more, please watch THIS VIDEO and THIS FOLLOW UP VIDEO). Anyway, I’m feeling really thankful and blessed to still have my dad with me and am happy to be back to crafting (if only a little bit at a time for now).
When I figure out what I’m going to do with these colored and fussy cut pups, I’l go into more detail, but in the meantime, here are the Copic colors I used:
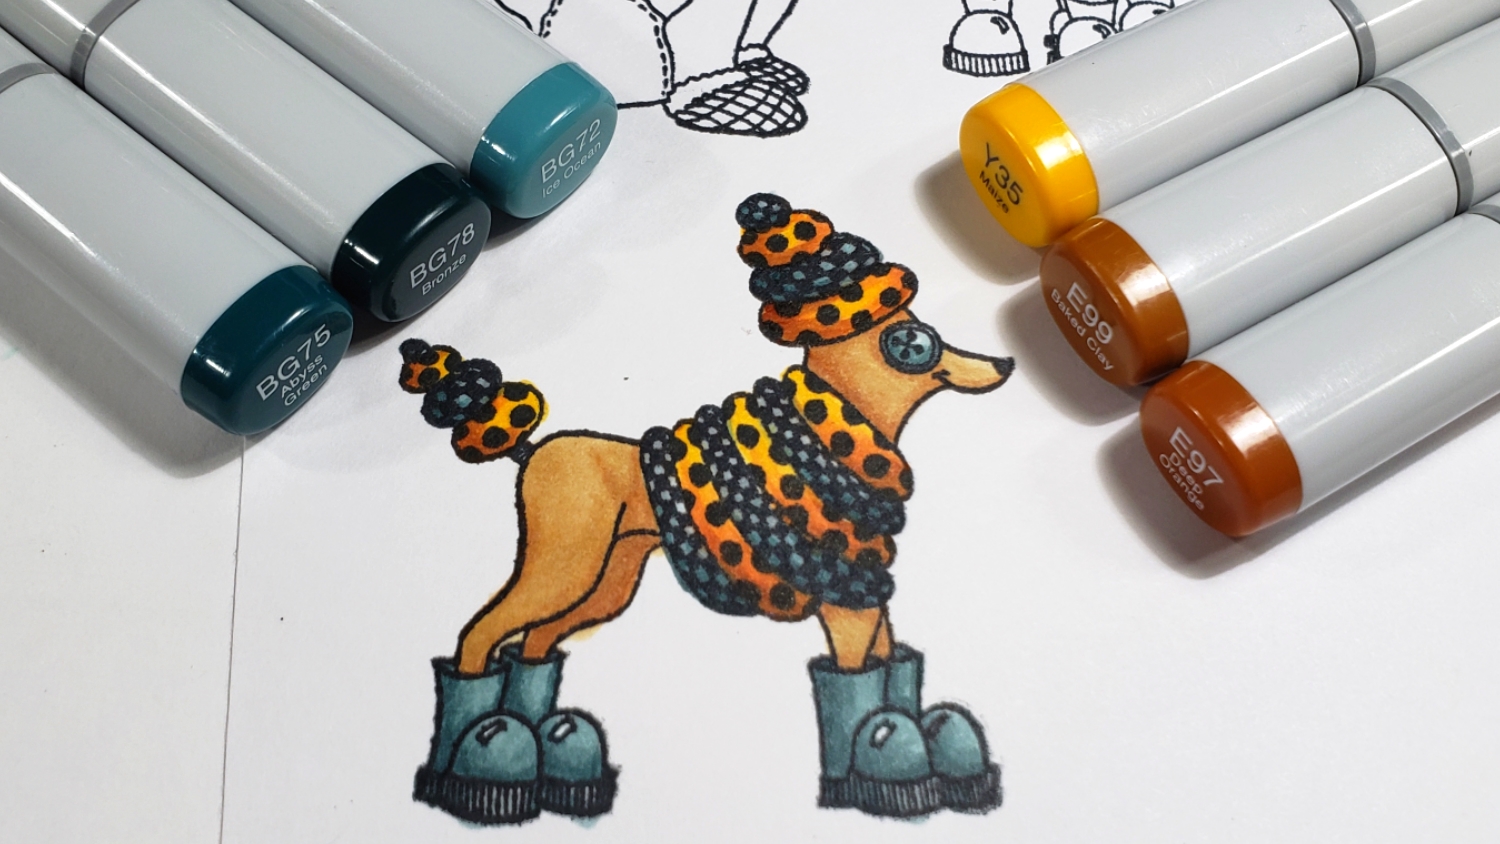
Poodle: Clothes: Y35, E97, E99, BG72, BG75, and BG78; Poodle body: E31 and E33
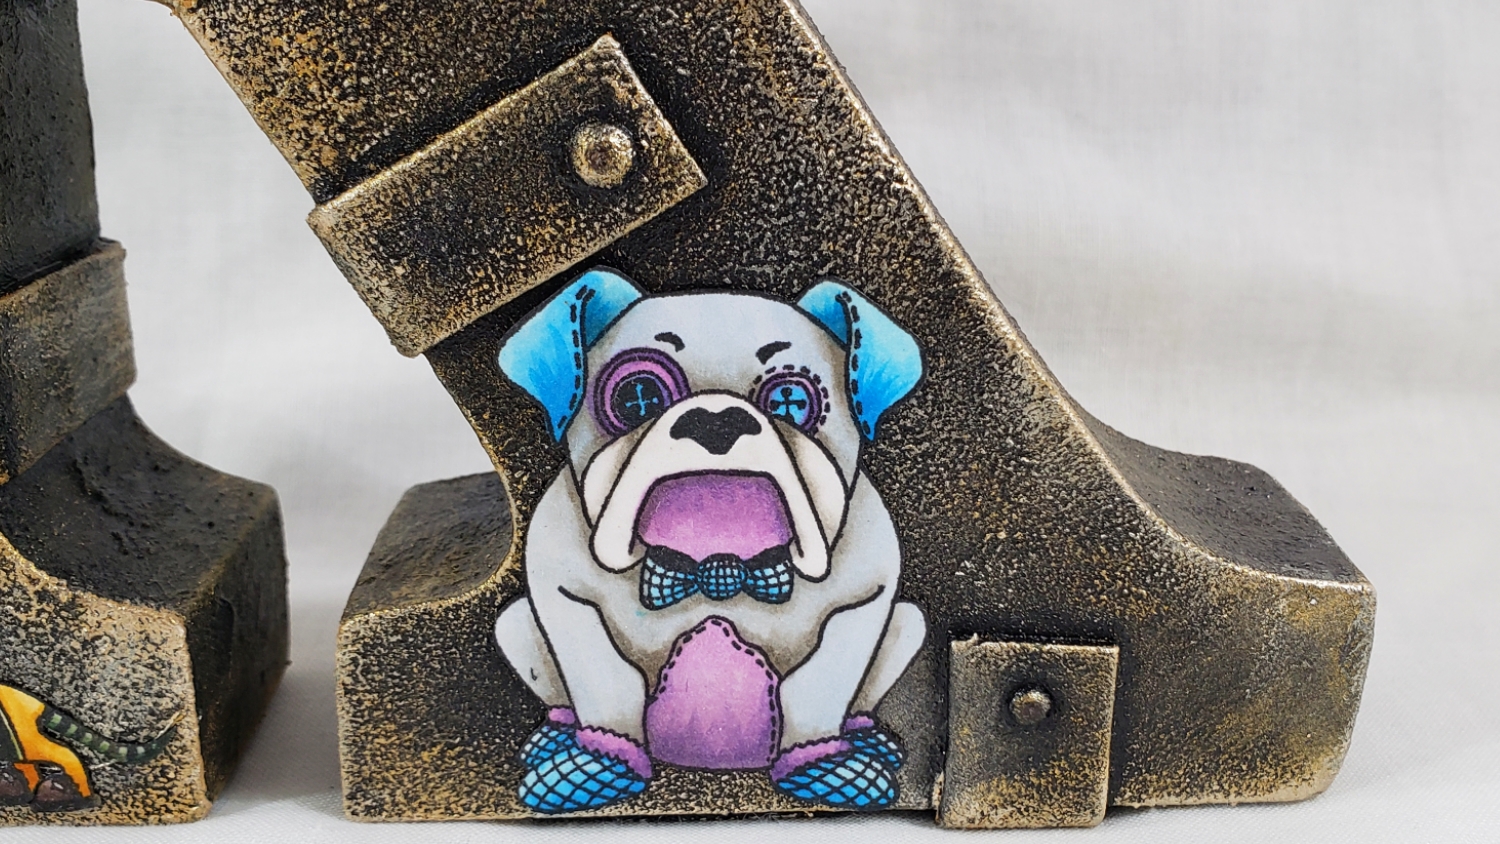
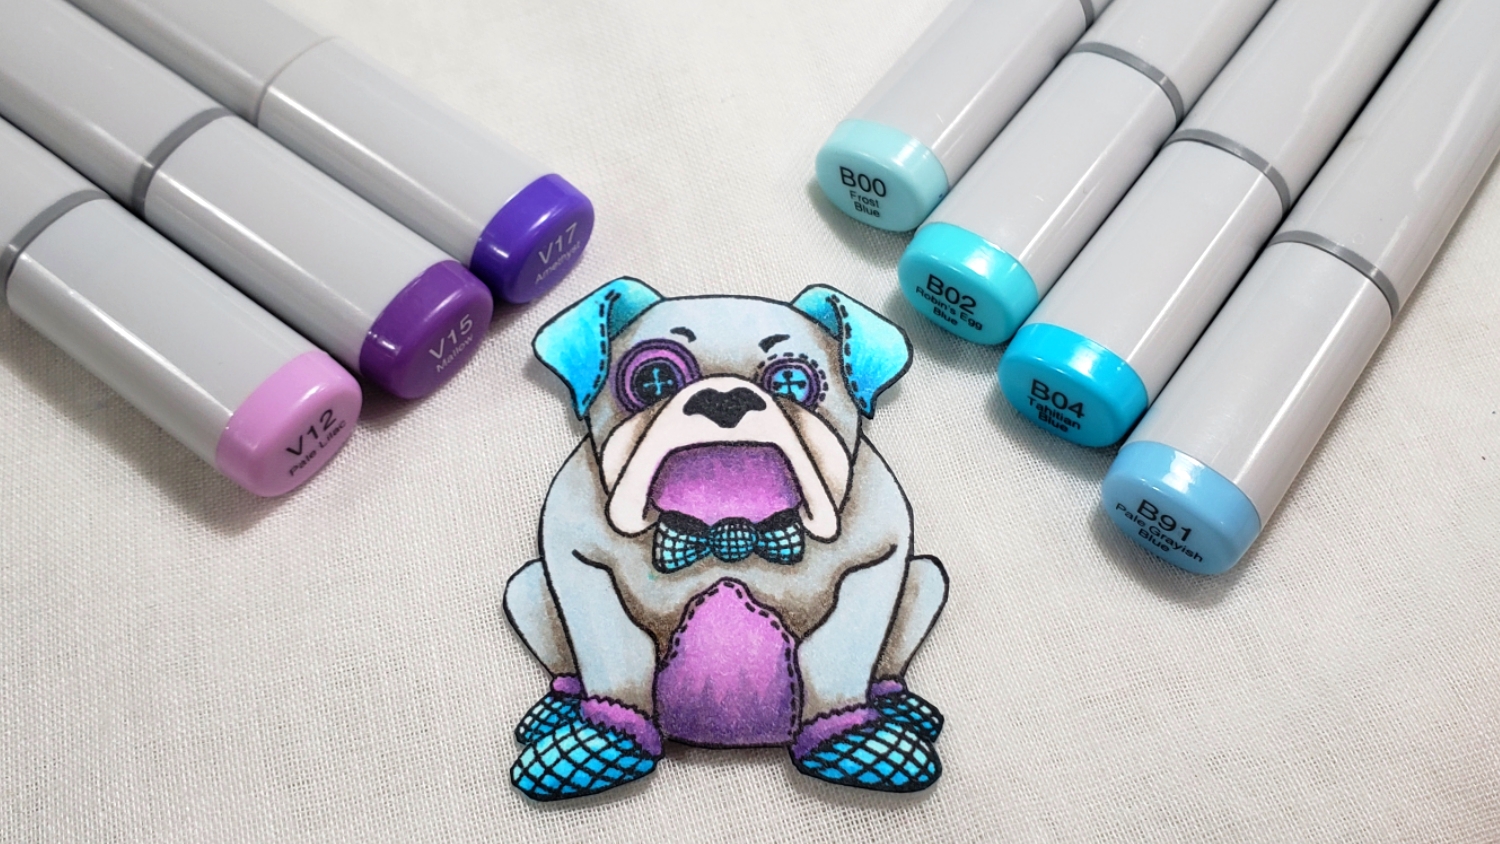
Bulldog: Clothes, ears, and purple patches: W0, W1, W3, V12, V15, V17, B00, B02, B04; Bulldog blue-gray body: W0, W1, W3, and B91
CLICK on the following picture to watch a Copic coloring process video:
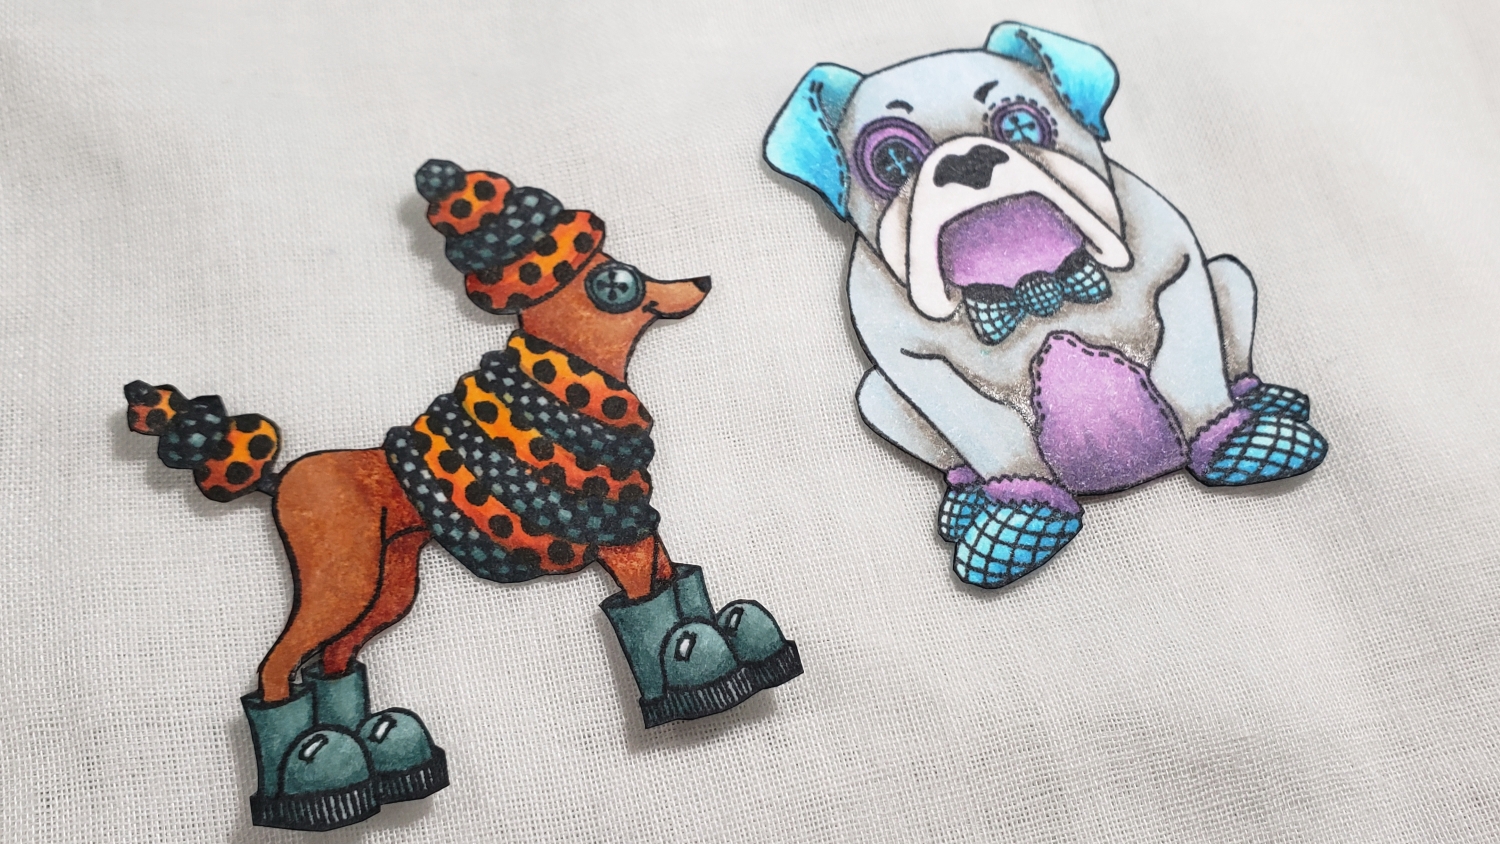
Thanks for stopping by and for all your patience as I took a “family leave” break and as I ease back into crafting when I can!
]]> To set the scene, I created a galaxy background. I started with Strathmore Bristol Paper and sprinkled and spritzed Ken Oliver Color Bursts in Indigo and Ultramarine Blue with water. To spread the pigment particles, I sprayed water strategically over the pigment crystals. Then I fully dried the paper with my heat tool; this step is critical before moving onto the heat embossed stamping.
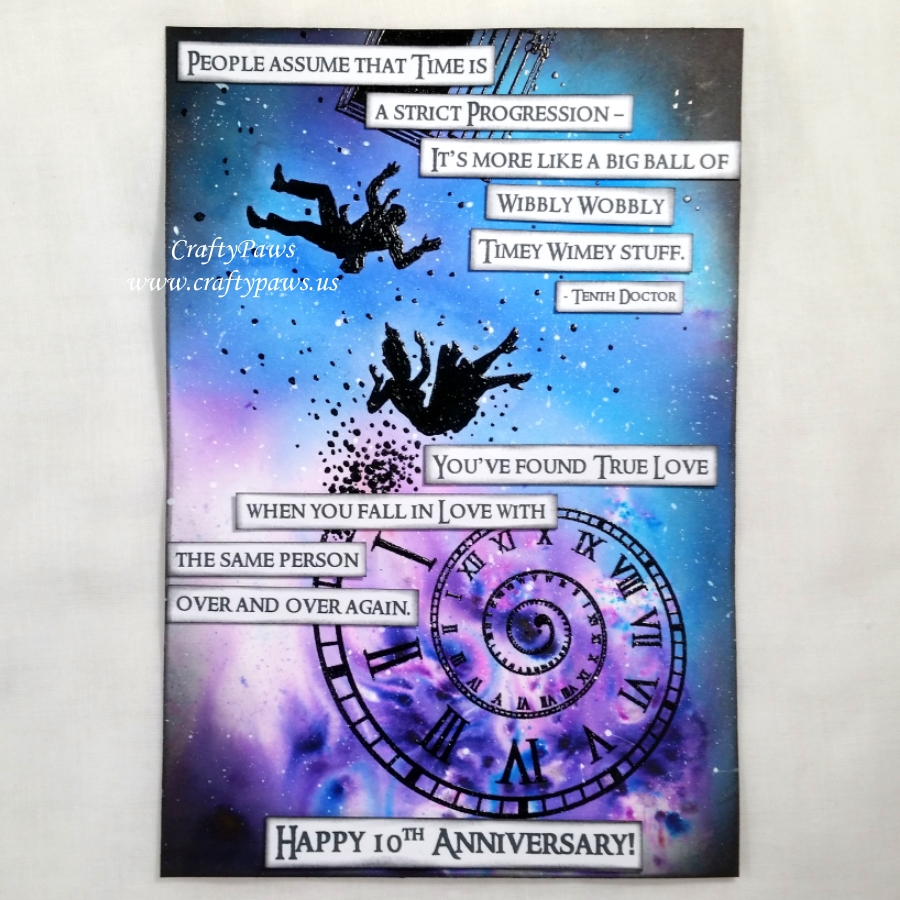
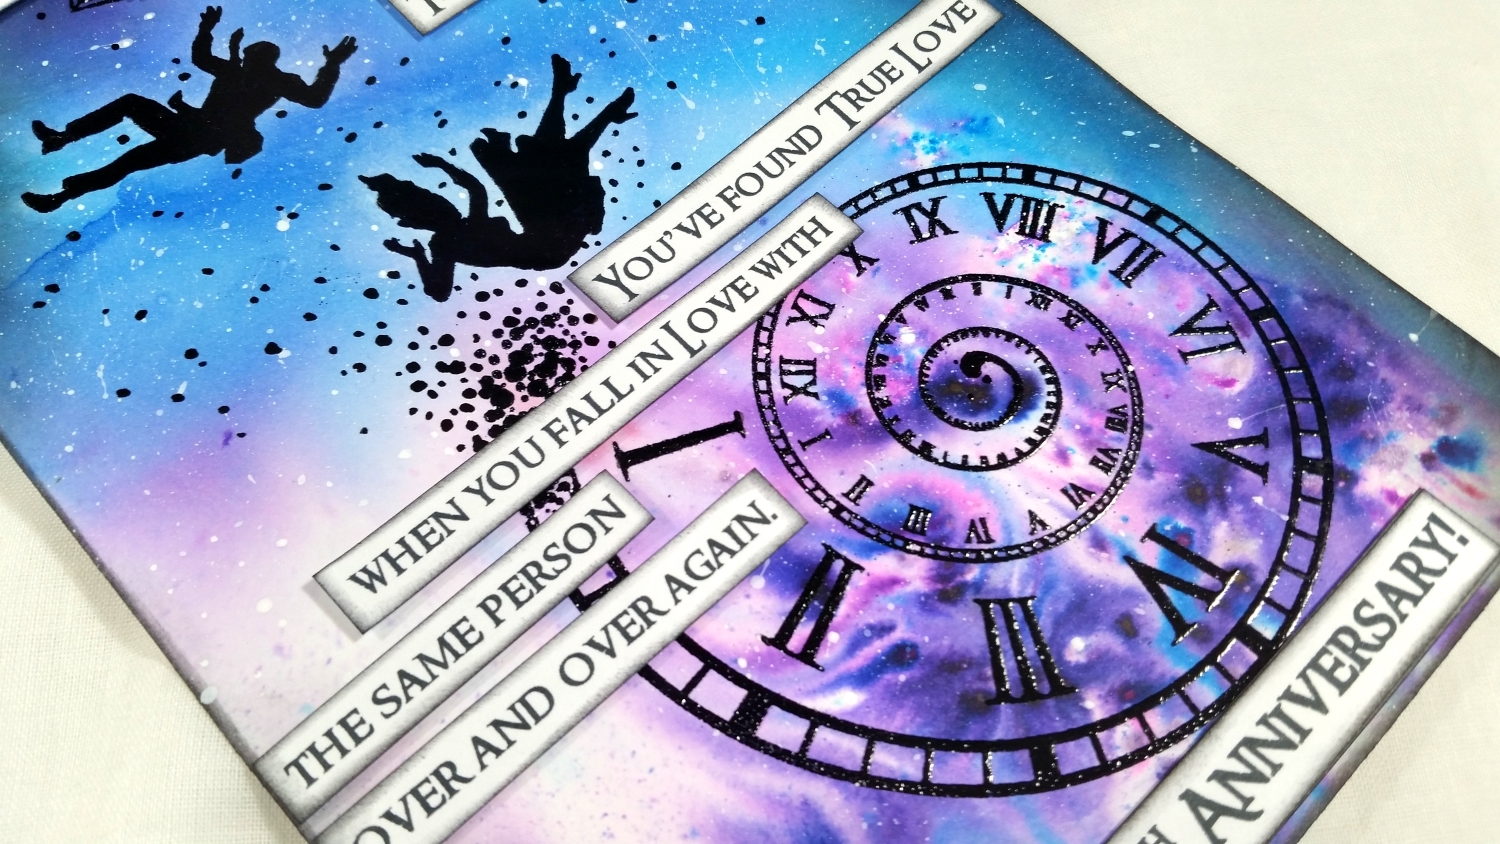
I wanted the stamped images to stand out from the background so I used VersaMark Ink and Ranger Black Embossing Powder to heat emboss them. I first prepped the background with my EK Success Powder Tool and then stamped the spiraling clock, the falling woman (me) and man (Mr. CraftyPaws), and the open door (representing the Tardis). I positioned the images so that it would look like the man and woman were falling out of the open door into a spiraling time warp. To connect the spiraling time warp clock a bit more with the falling couple, I also added more black splatter dots that start at the top of the time warp stamp with a Sakura Black Glaze Pen.
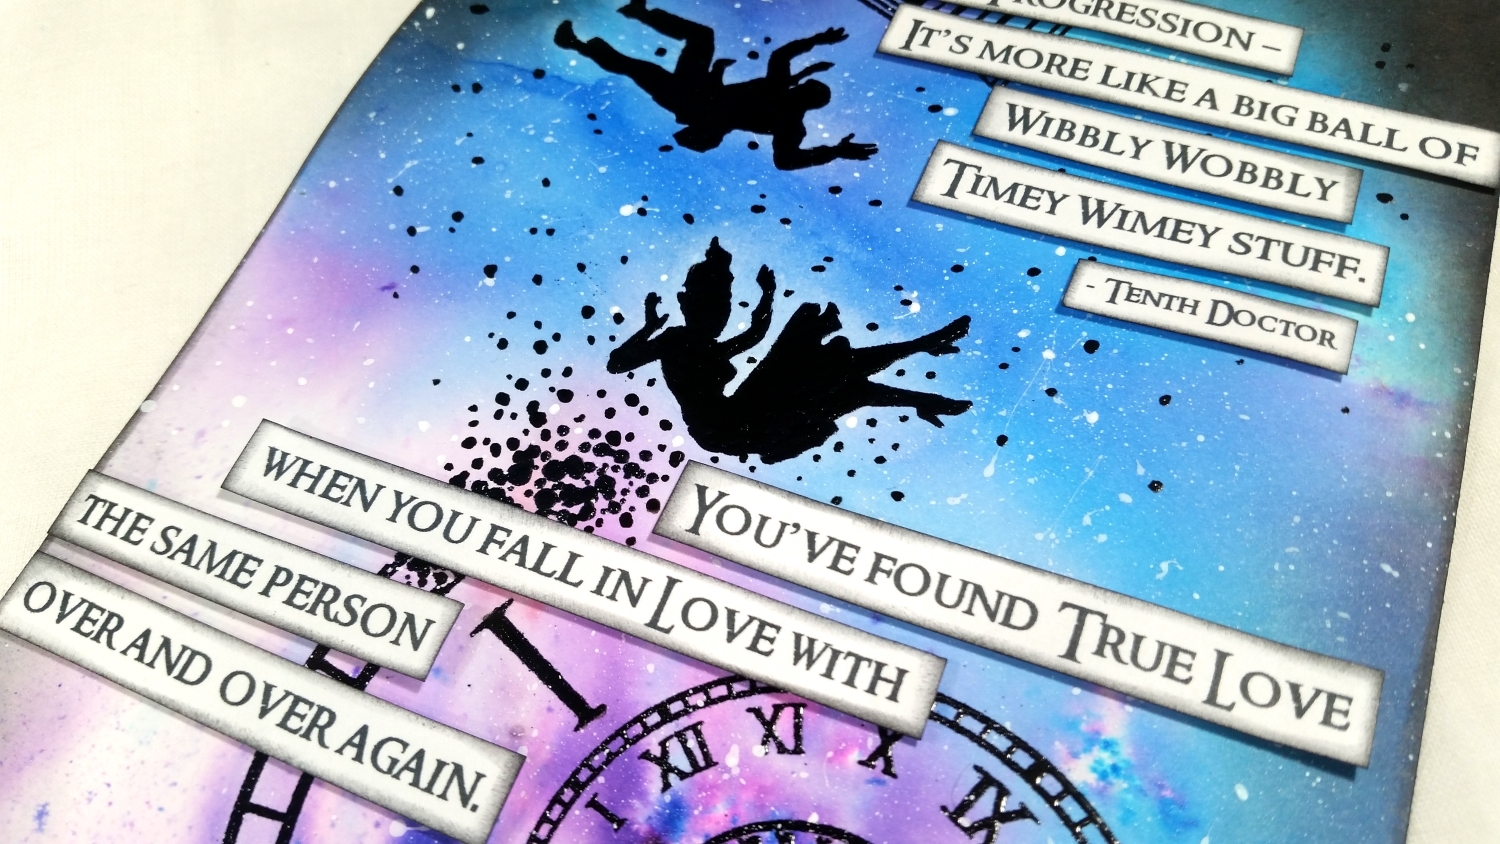
To create a more dramatic galaxy look, I blended Black Soot Tim Holtz Distress Ink around the edges of the entire background. And although it would have been easier to splatter watered down titanium white acrylic paint to create stars all over the galaxy background before doing the stamping, I didn’t think of this until afterwards. I went ahead anyway, and because the stamped images were all heat embossed, I was able to wipe off the white splatters from most of the images with a damp paper towel before they dried (whew!). I was also able to re-emphasize the shiny black silhouettes of the man and woman with a Sakura Black Glaze Pen.
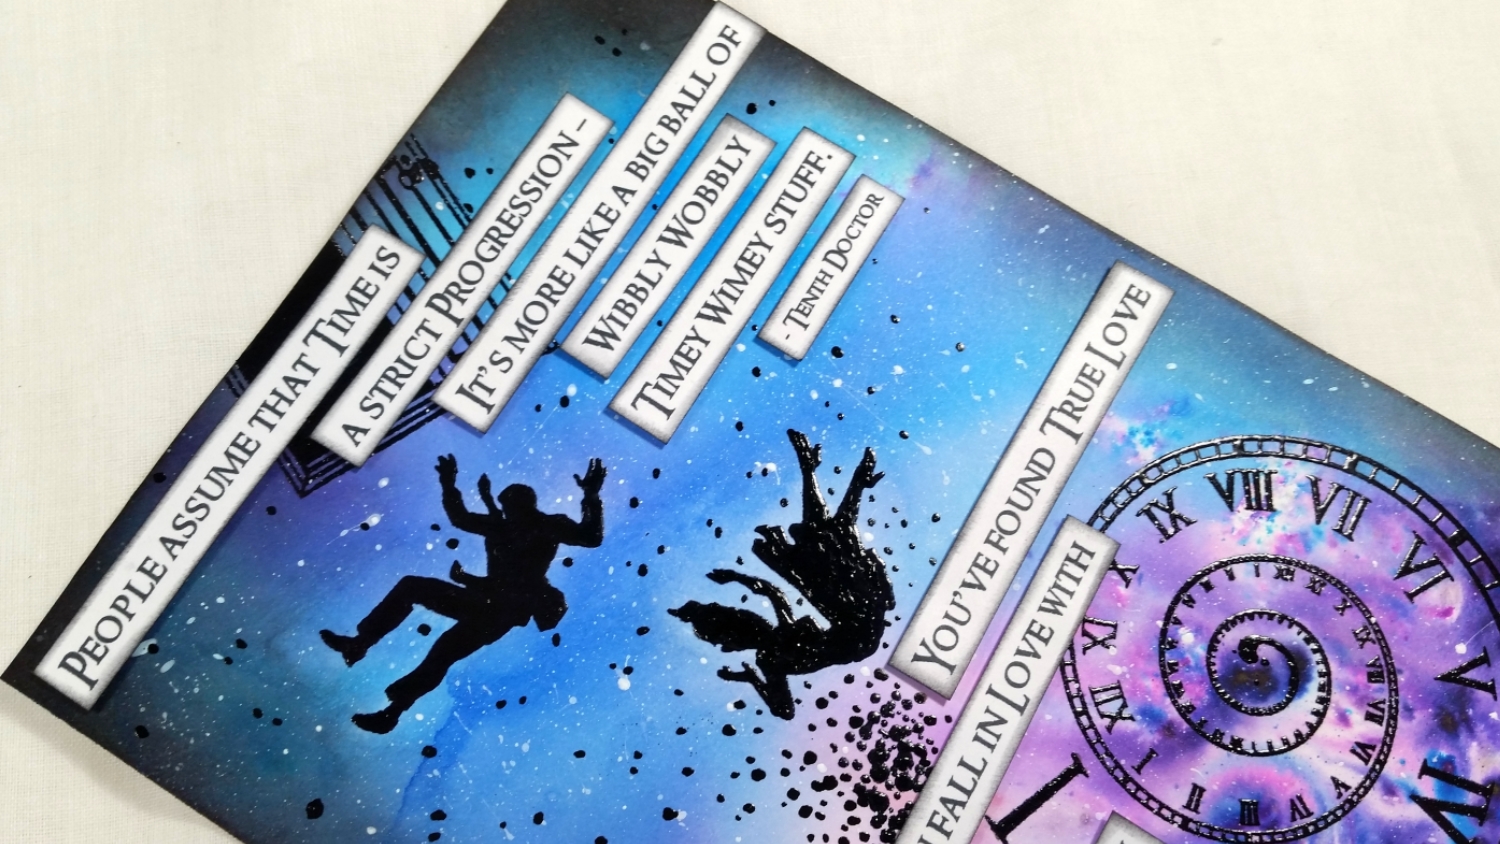
At this point, you may be thinking that this scene card doesn’t really scream “anniversary”. But wait. In one of our favorite “Doctor Who” episodes, “Don’t Blink,” the Tenth Doctor (played by David Tennant) says, “People assume that time is a strict progression — It’s more like a big ball of wibbly wobbly timey wimey stuff.” I thought that this sentiment went well with another saying: “You’ve found true love when you fall in love with the same person over and over again.” I printed out these quotes on my computer and cut each line apart so that I might position each line around the scene I created. I inked all the edges with Tim Holtz Distress Ink in Black Soot and popped up each line with double sided foam adhesive for a bit of dimension.
I really hope Mr. CraftyPaws likes this anniversary card as much as I enjoyed crafting it for him.
Disclosure: Many of the supplies I’ve used for today’s project are linked. Some may be affiliate links, which means if you make a purchase I receive a small commission at no extra cost to you. I truly appreciate your support toward the costs of running this blog!
The following is a process video of creating this special anniversary card: [to come]
This Doctor Who themed anniversary card is being entered into the following challenges:
Stamping Sensations Anything Goes Challenge
Simon Says Stamp Monday Transport It Challenge – WINNER
Word Art Wednesday Anything Goes Challenge
Creatalicious Anything Goes with Optional Flowers Challenge
Lil Patch of Crafty Friends Anything Goes Challenge
Through the Craft Room Door Anything Goes Challenge
Crafty Gals Corner Anything Goes Challenge
The Corrosive Anything Goes Challenge
613 Avenue Create Anything Goes Challenge – WINNER
]]>
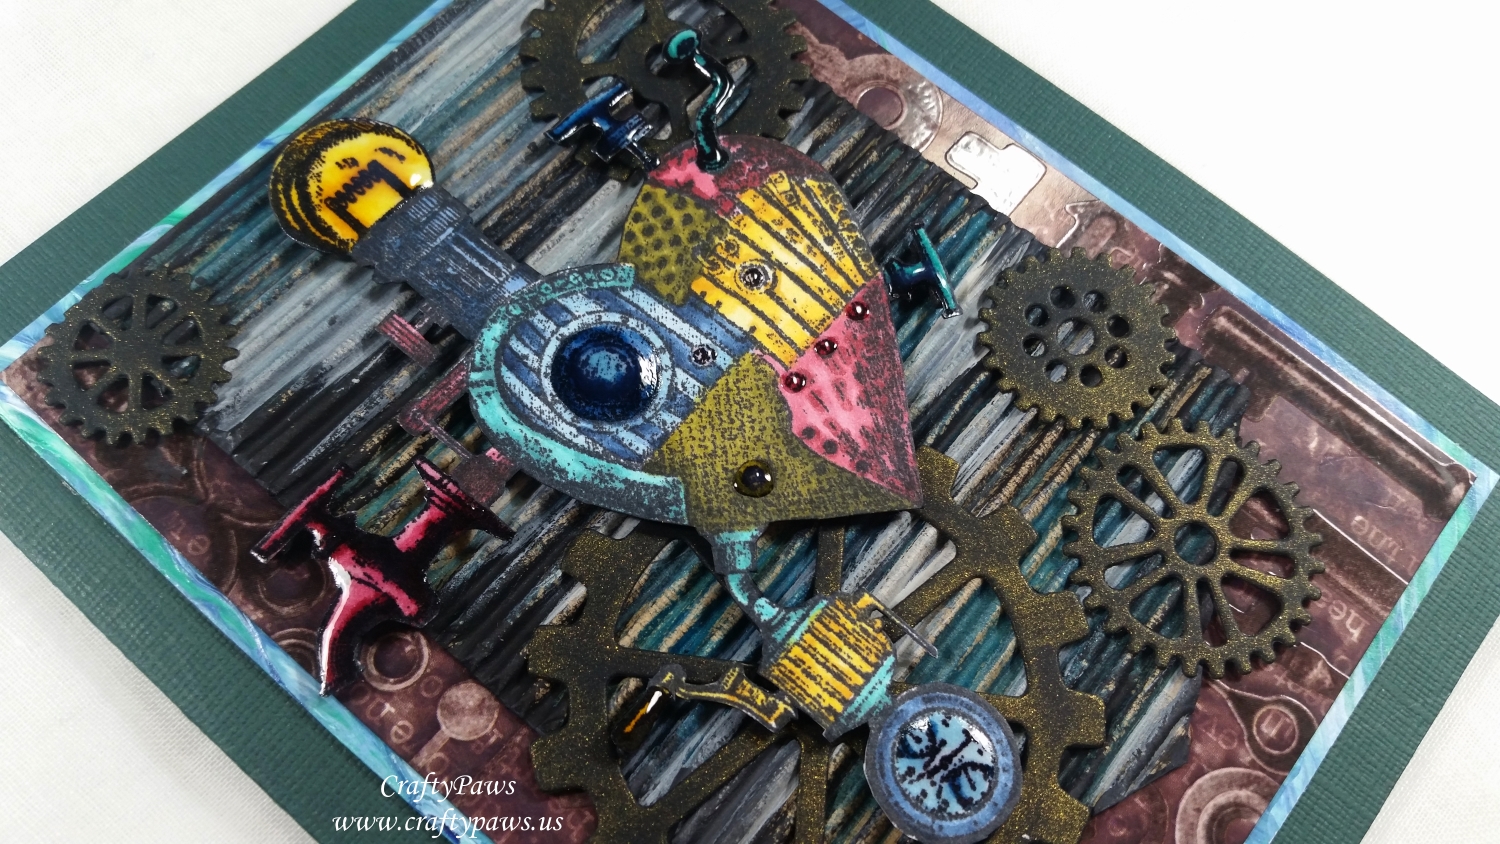
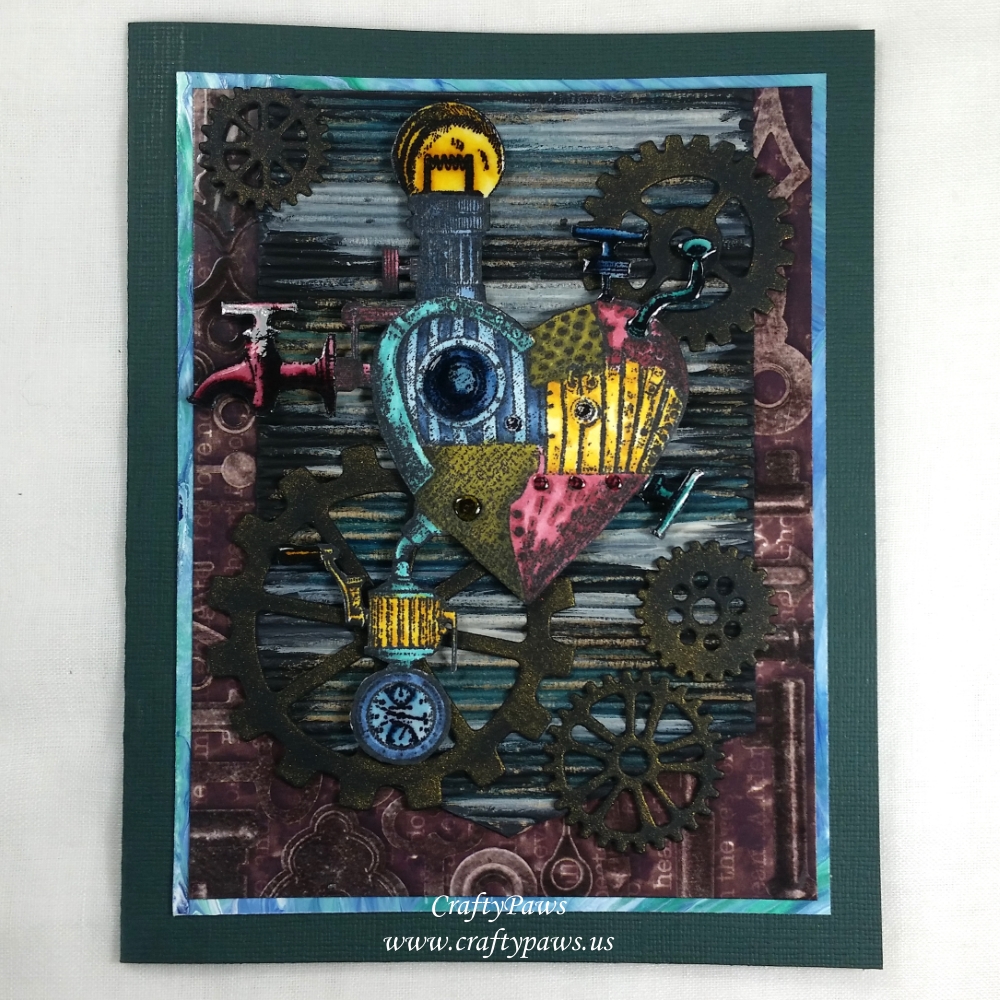 I created this Industrial Steampunk style card inspired by the striking Carabelle-Studio “The heart has its reasons” stamp set. I Copic colored it in the following rich secondary tones: Khaki: YG95, YT97, YG99; Golden Yellow: Y00, Y15, YR24; Teal: BG13, BG15, BG18; Burgundy: R83, R85, R89; Blues: B52, B93, B95, B97 and B99. Next I painstakingly fussy cut it out and carefully backed each part of the detailed image up on fun foam for added dimension. I also coated some parts of the image with Ranger Glossy Accents to give it some shine and interest.
For the card front, I really wanted to create a layered and textured grungy background. I rummaged through my paper scrap box and found some thick watercolor paper that I had long-ago painted with DecoArt fluid acrylics in Titanium White, Phthalo Blue, Cobalt Teal Blue, and Cerulean Blue. Just a bit of that peeks around the next layer up, which is a glossy and slightly textured patterned paper of keys and clock work hands that has been in my scrap box for years! I also found a bit of corrugated kraft card stock that I cut into a banner shape and then loosely painted with streaks using a DecoArt Media turquoise shimmer mister, dry brushed black acrylic paint and added light swaths of Martha Stewart Multi-Surface Satin Putty acrylic paint. I love the way the liquid mediums highlight the texture of the corrugated card stock and give this banner layer the look of something that has gotten painted numerous times over many years.

For some Steampunk accents, I die cut 5 gears from 100 lb black card stock using some Diemond Dies Steampunk Gears Dies. To give them a metallic shimmer, I blended on some Delicata Golden Glitz Pigment Ink to the die cut gears. I positioned them around and behind the top focal point image layer, which was the beautiful Steampunk heart image. The whole assembly was mounted on a dark forest green cardstock card base. My readers can get 10% off and free worldwide shipping on all orders of $35 or more at Diemond Dies by using the coupon code: thankskristina
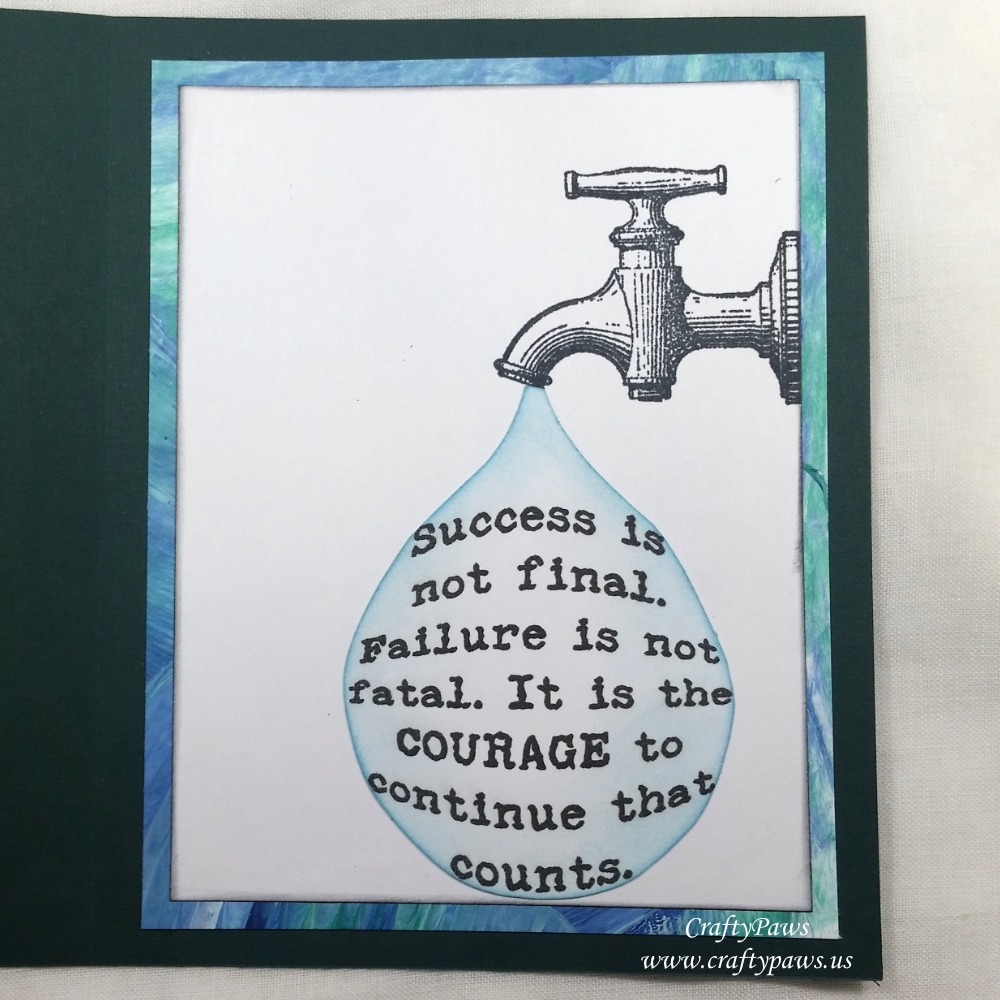 For the inside card liner, I simply stamped out the faucet from the Carabelle Studio “The heart has its reasons” stamp set on the upper right side. I matted it on more of the watercolor paper with the blue and green fluid acrylic paint to echo the matting on the card front.
Then I used Microsoft Word to shape the quote into a droplet shape. I inserted a circle shape that I made white with a white outline. Then I right clicked to insert text. I used a free distressed typewriter font to type in the quote in black. Then I used the “format” tab and clicked the “text effects” choice button which opened a drop down menu that had the “transform” choice as the last option. I clicked on the various options to shape the text into a rounded circle shape that I hoped I could cut into the form of a big drop of water. I printed out the quote and hand fussy cut it out into the droplet shape. Lastly, to add a bit of color and set the shaped sentiment apart from the white liner sheet, I blended on some Tim Holtz Distress Ink in Tumbled Glass.
Disclosure: Many of the supplies I’ve used for today’s project are linked. Some may be affiliate links, which means if you make a purchase I receive a small commission at no extra cost to you. I truly appreciate your support toward the costs of running this blog!
The following is a video share along with a Copic coloring process video:
This Steampunk Industrial card is being entered into the following challenges:
CropStop April Linky Party Challenge #38
Simon Says Stamp Wednesday Anything Goes Challenge
Word Art Wednesday Anything Goes Challenge
Creatalicious Anything Goes with Optional Dies or Punches Challenge
Lil Patch of Crafty Friends Anything Goes Challenge
Crafty Gals Corner Anything Goes Challenge
613 Avenue Create Anything Goes Challenge with Optional Use Vellum
Through the Craft Room Door Anything Goes Challenge
SanDee & Amelia’s Anything Goes Steampunk Industrial Challenge
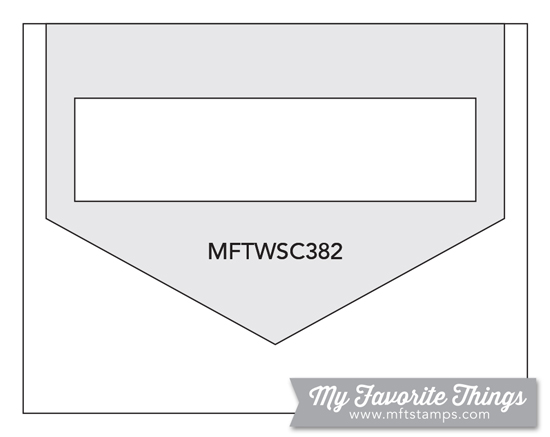
MFT Sketch Challenge #382
]]>
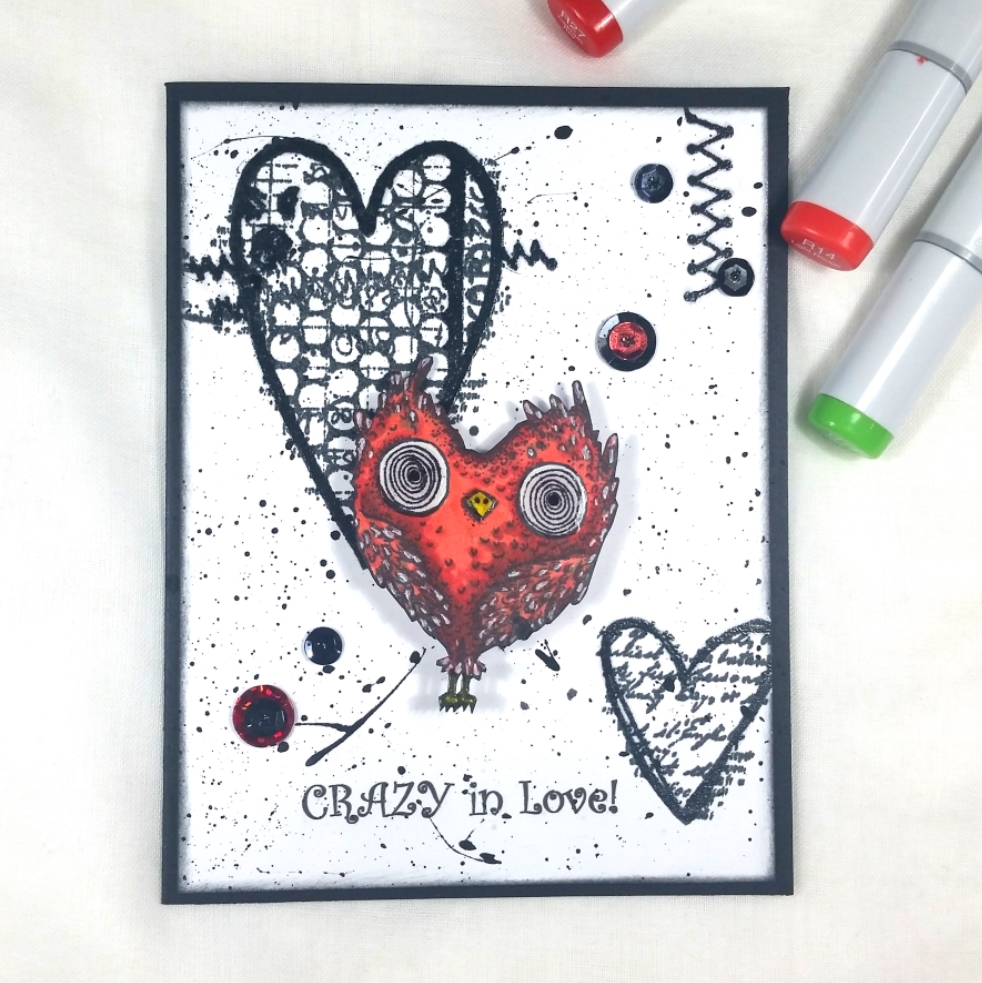 I Copic colored the bird with the following colors:
Beak and legs: Y19
Body: R14, G14 (that’s right a green!), and R27
I also flicked on some highlights to a lot of the darkly stamped feathers with a Uniball Signo White Gel Pen and coated the beak, claws and eyes with Glossy Accents for shine. I fussy cut out this bird with a Fiskars Spring Loaded Scissors and inked the edges with a Momento Tuxedo Black Marker for a finished look.
I wanted a Valentines themed background, but I didn’t want to distract from the crazy love-sick bird, so I used three of the stamps from the new-to-me Carabelle-Studio Follow Your Heart stamp set but did not add any color to them. Instead, I added some dimension and shine to parts of these background images using a Tsukineko VersaMarker and clear embossing powder for some heat embossing. I inked the edges of the card front with Tim Holtz Distress Ink in Black Soot, and to add a bit of grunge while keeping it pretty CAS, I also watered down some black acrylic paint and splattered it on with a wet paint brush.
To emphasize that mad, unstable feeling of new love, I thought adding the bird to the card front with a DIY action wobble would be fun. For a finishing touch and to add a little sparkle, I also added red and black sequins in varying sizes to the background.
The following process video shows the start-to-finish creation of this card, including how to make a DIY action wobble mechanism HERE
Disclosure: Many of the supplies I’ve used for today’s project are linked. Some may be affiliate links, which means if you make a purchase I receive a small commission at no extra cost to you. I truly appreciate your support toward the costs of running this blog!
This card is being added to the following challenges:
Creatalicious Anything Goes with Optional Wishes Challenge
Word Art Wednesday Anything Goes Challenge
Crafty Gals Corner Anything Goes Challenge
Through the Craft Room Door Anything Goes Challenge
613 Avenue Create Anything Goes with Optional Twist Something New Challenge
Card Mania Monochromatic Challenge
Lil Patch of Crafty Friends Anything Goes Challenge
Penny Black and More Something New Challenge
Addicted to CAS Music Challenge
]]>
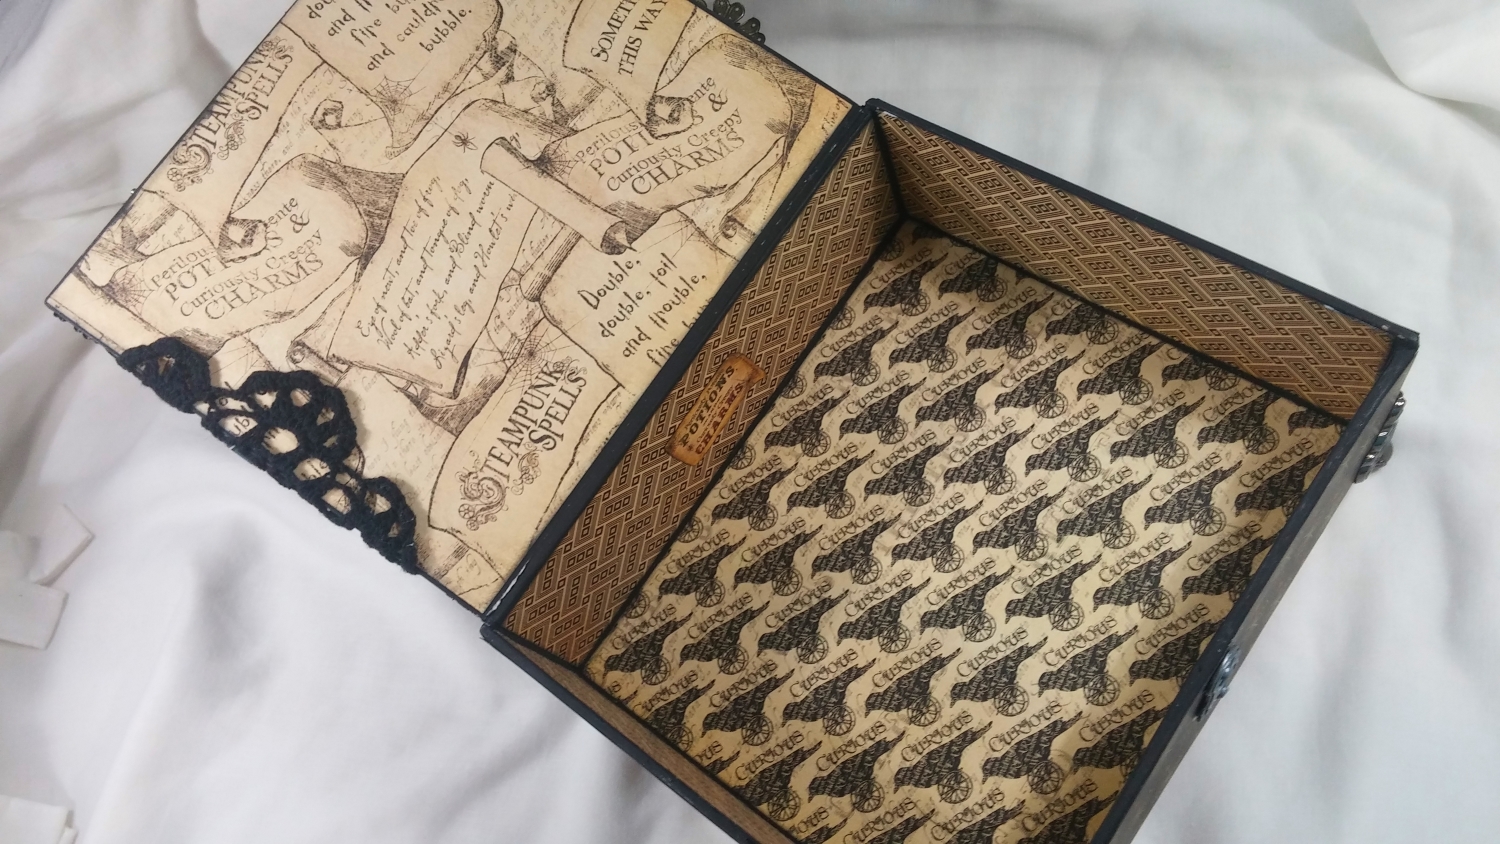
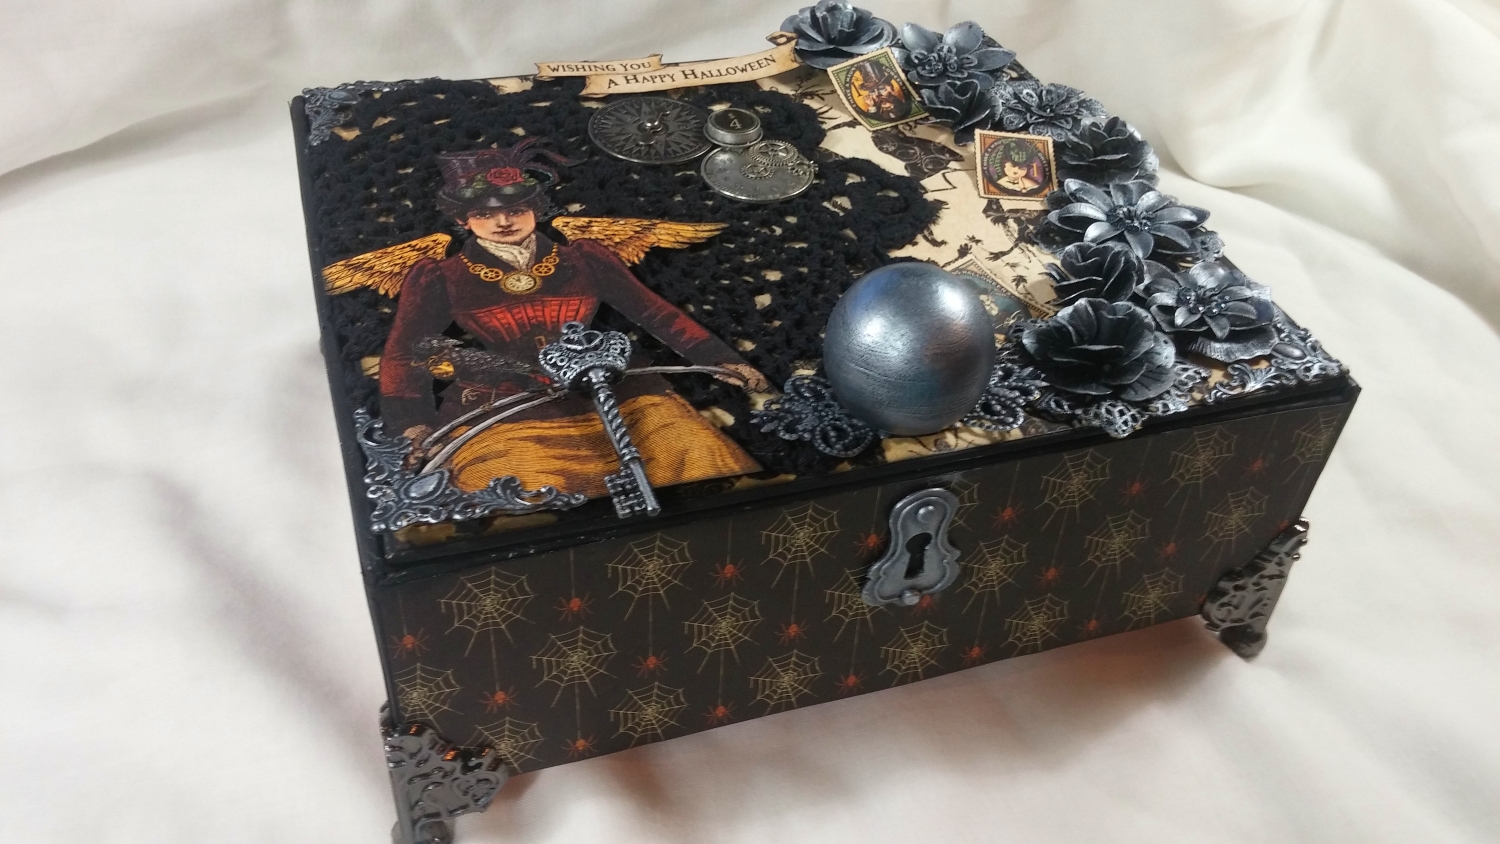
I started with an old cigar box that I painted the corners of with DecoArt Black Gesso. This would allow me to be less exact in cutting the patterned papers that would line each side, top, bottom and interior section of the box. I used beautiful papers from Graphic 45’s “An Eerie Tale” and “Steampunk Spells.” Each patterned paper was cut to size and all the edges were inked with Tim Holtz Distress Ink in Black Soot for a nice finished look. Then I used Beacon 3-in-1 Advanced Craft Glue to adhere some Tim Holtz Foundations Metal Feet to the bottom of the box to literally and figuratively elevate the box into something extra special.

With the box construction done, I decided to fussy cut one of my all-time favorite Steampunk images: the Steampunk lady with wings and a top hat, riding a bicycle. I inked the cut edges with a Momento Tuxedo Black Marker and popped her up on fun foam for a bit of added dimension. For the rest of the box lid, I decided to use a wooden knob to create a handle; a big black crocheted doily to add some softness; a metal key to add dimension to the Steampunk Spells focal image; a Tim Holtz Spinner and Compass Coin to add a whimsical interactive element; a Tim Holtz metal Keyhole for a box front accent; and a bunch of metal filigrees, odds and ends, and flower pieces to add a lush feeling. There was a lot of futzing but you can see the streamlined edited process in the video below.
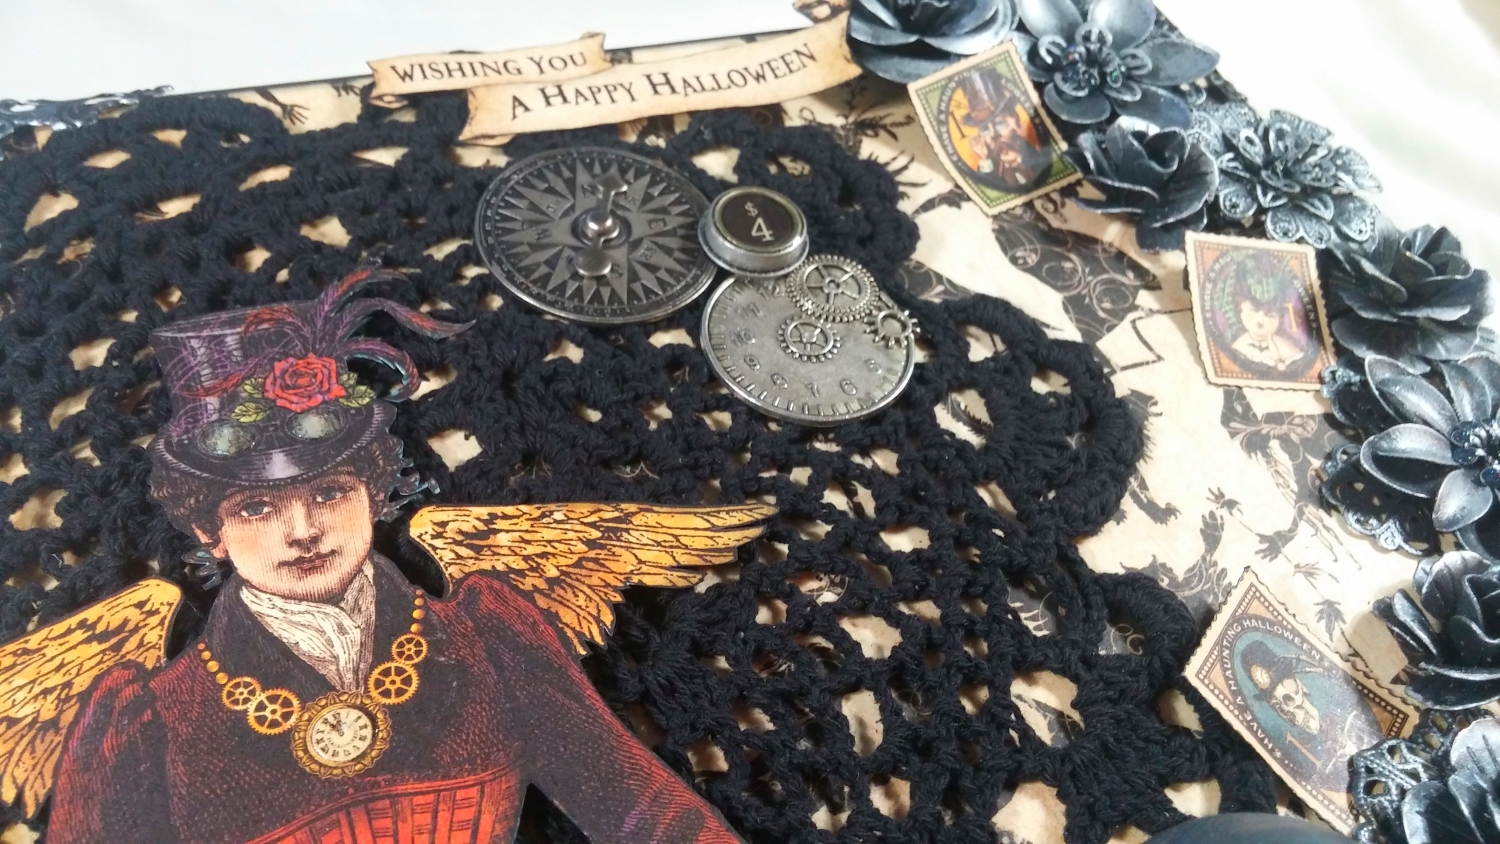
The wooden knob and all of metal pieces were of varying metallic colors, and I wanted a more unified look, so I took all of them and put them through the following process: First I painted them all with more DecoArt Black Gesso. Once dry, I used my finger or a stiff stencil brush to coat each piece with DecoArt Metallic Lustre in Black Shimmer. That dries almost immediately so I next hit all the high points with a dab of DecoArt Metallic Lustre in Silver Spark. The dull and mix matched metal pieces all got a cohesive luxe gunmetal silver grey makeover!
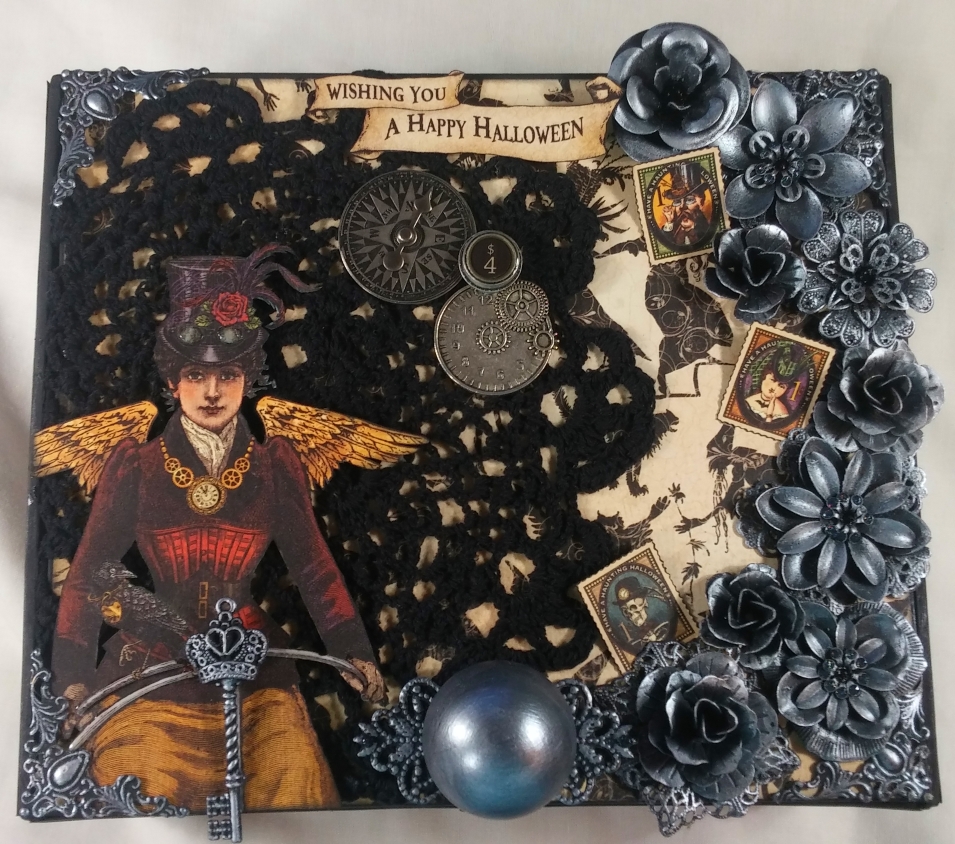
For some finishing touches and a little sparkle and shine, I added Ranger Glossy Accents to some of the features of the Steampunk lady (bicycle handles, clock necklace pendant and goggles on hat); some Recollections ebony glitter glue to the centers of some of the metal flowers; and some Tonic Studios Nuvo Glitter Drops in Midnight Sky on the stamen of some of the metal flowers. These subtle little extras add some nice details without distracting from the overall focal points of the box lid.
As I mentioned at the start, this project is part of the So Boo-tiful Halloween YouTube Hop. Nine of us are making 3D or altered item projects. Many of us are also doing giveaways as part of the hop. If you’d like to leave comments for chances to win, check out the video below. All the hop stop links are in the description box of the video. The following is a process video of creating this upcycled box:
Disclosure: Some of the links to products above are affiliate links, which means that if you click them and purchase something I may receive a small commission (at no cost to you), which helps me run my YT channel and blog. If you do use a link, I thank you for your support!
This Halloween Steampunk box is being entered into the following challenges:
SanDee and Amelia Steampunk/Industrial Anything Goes Challenge
Simon Says Stamp Monday A Walk on the Dark Side Challenge
Creatalicious Anything Goes with Optional Make Your Own Background Challenge
Through the Craft Room Door Anything Goes Challenge
Lil Patch of Crafty Friends Anything Goes Challenge
Crafts Galore Encore Anything Goes Challenge
613 Avenue Create Anything Goes with Optional Masculine Card Challenge
Just Keep On Creating Anything Goes Challenge
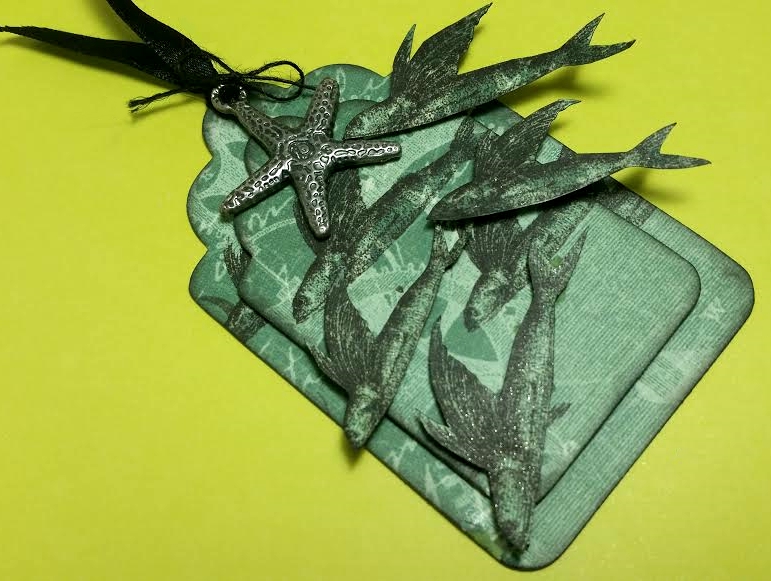
To make this little tag, I used the Diemond Dies Nesting Tag Die Set and cut into my one remaining sheet of this Steampunk Debutante Collection paper with the flying fish in the background (it has the flying man held up by a giant 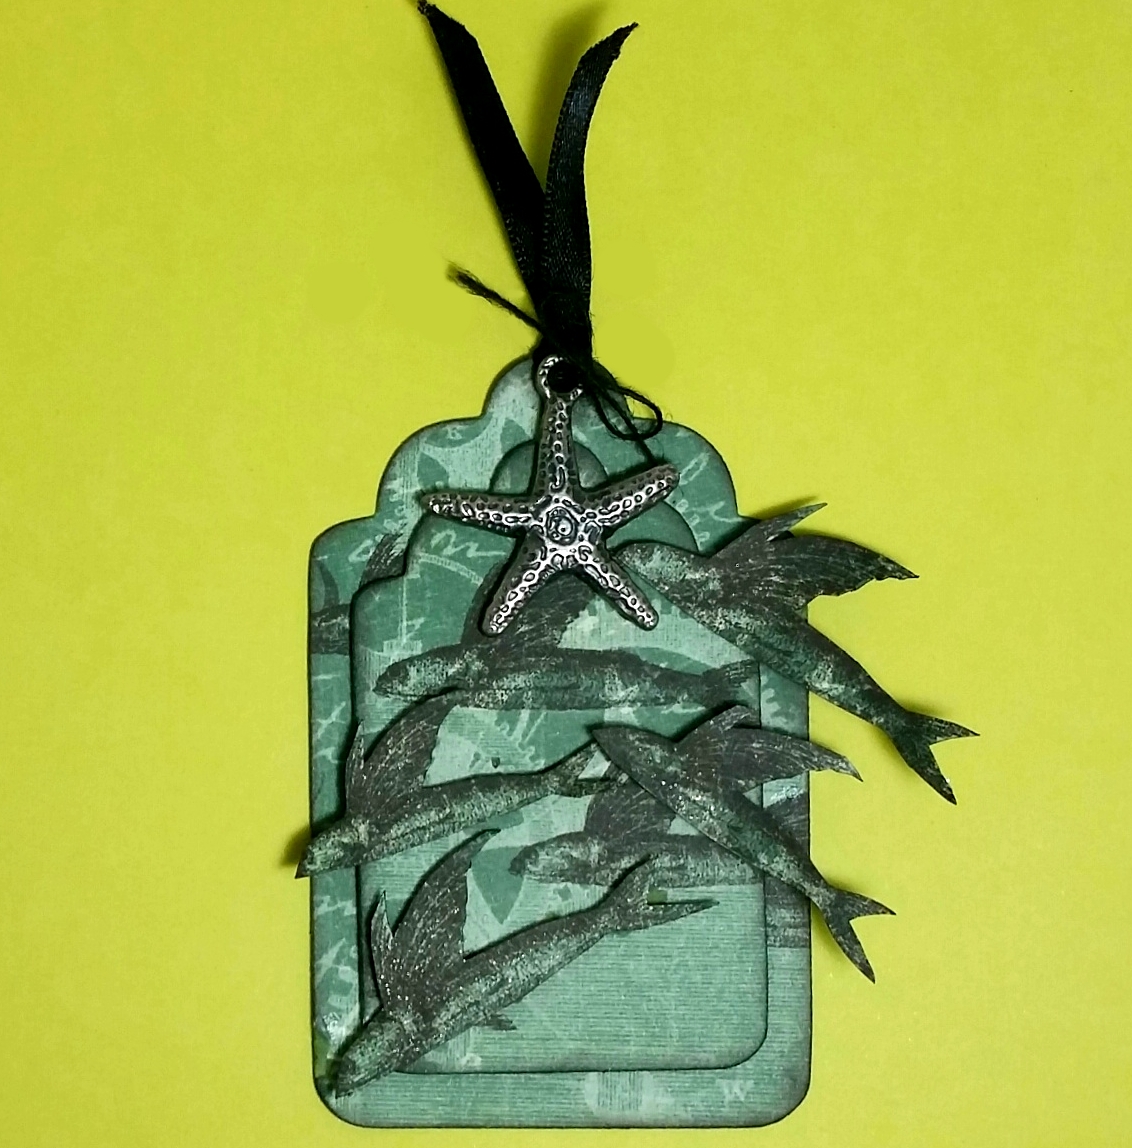 hand by a propeller). I layered two of the nesting tags with double sided foam adhesive, inking all the edges with Tim Holtz Distress Ink in Black Soot.
Then it was a matter of fussy cutting all the flying fish and inking the edges with a black marker. I then popped them up on one, two, or even three layers of more double sided foam adhesive, positioning them in directions to make them look like they were swimming in harmony in a big school. I think adding all the extra double sided foam adhesive gave some of them the look of jumping/flying in the air! I don’t know if you can see it in the photos, but I also added coats of Clear Wink of Stella to the flying fish so they have a great sparkle in the light.
To finish off the tag, I used a bit of black silk ribbon and looped it through a hole I had punched at the top. Lastly, I remembered I had an old metal starfish charm in my stash so I tied a bit of black twine into a bow and added the whole thing as a little topper.
This tag is being entered into the following challenges:
Simon Says Stamp Monday Nautical/By the Sea Challenge
Simon Says Stamp Wednesday Things With Wings Challenge
613 Avenue Create Anything Goes Challenge
SanDee & Ameile’s Anything Goes Steampunk/Industrial Challenge
Creatalicious Anything Goes Challenge
]]>
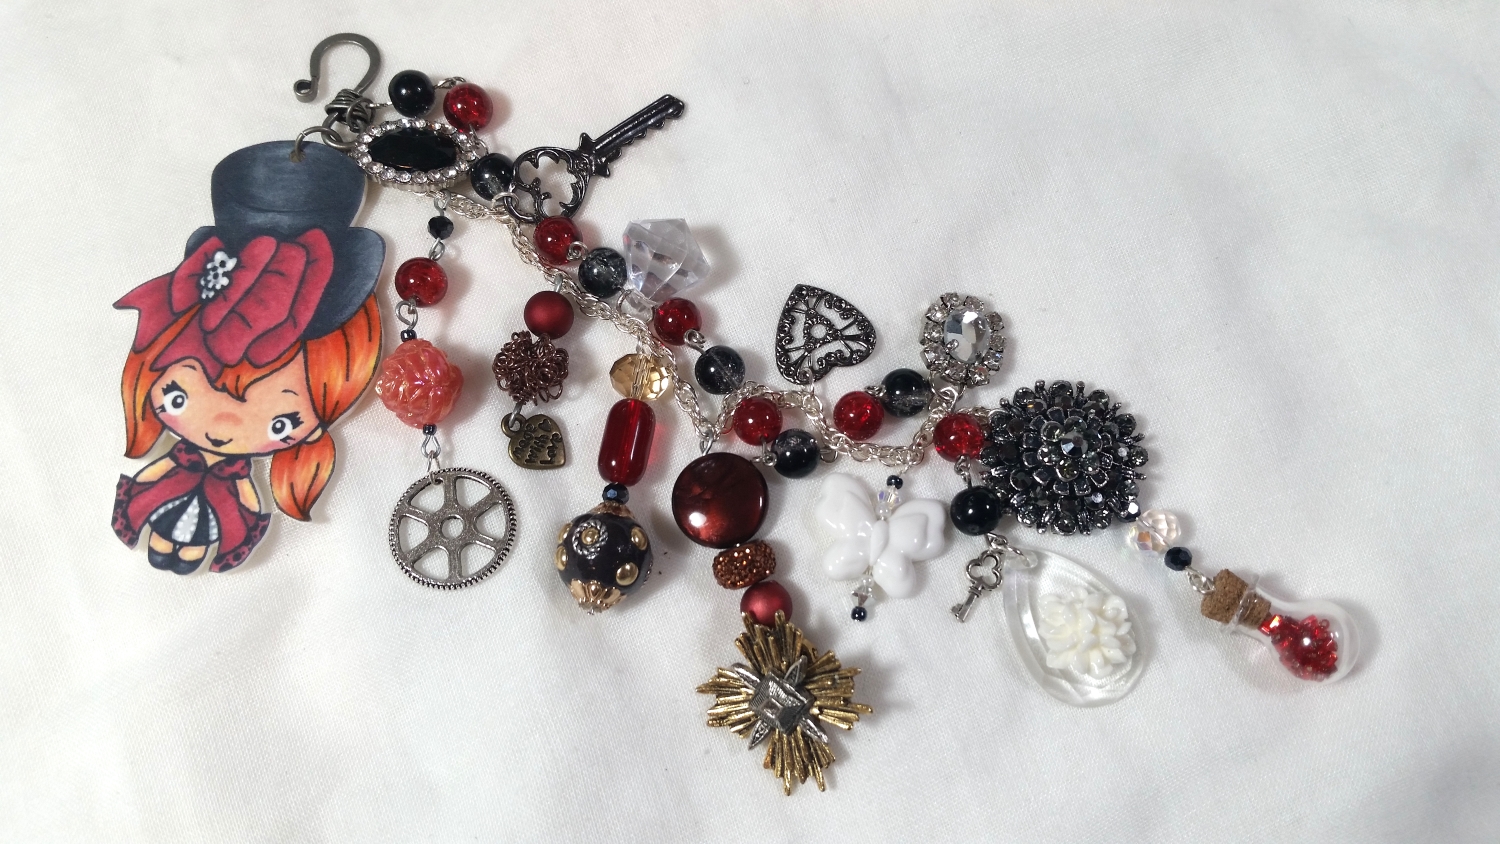
As I mentioned in yesterday’s post, I recently found a charm or necklace holder that had six hanging arms that matched my craft room decor perfectly and seemed to be made for the chunky charms I’ve been making with The Greeting Farms Hatters stamp set and Shrinky Dink papers. So I took that as a sign that I was supposed to finally ink up the last of the Hatters girls and get to coloring her up. I doodled on an extra layer of ruffles to her dress and a polka dot pattern to parts of her outfit to give her a little extra flair. Then I colored her up with the following Copic colors: Skin: E000, E00, E21, and R20; Blacks and greys in outfit: C1, 4, 6, 8, and 9; Reds in outfit: R22, 35, 37, and 39; Funky bright red hair: Y00, Y21, YR02, YR15, E13, YR04, and E15. Whew! That’s a lot of colors to achieve that bright red hair, but I really wanted it to harken to the bright colors of Tim Burton’s Alice in Wonderland and still contrast sufficiently from the red in her outfit (did I mention that I’ve named this cute Hatter, Queeny?). Ultimately I did a little cheat that I’ll share with you a bit later… 🙂
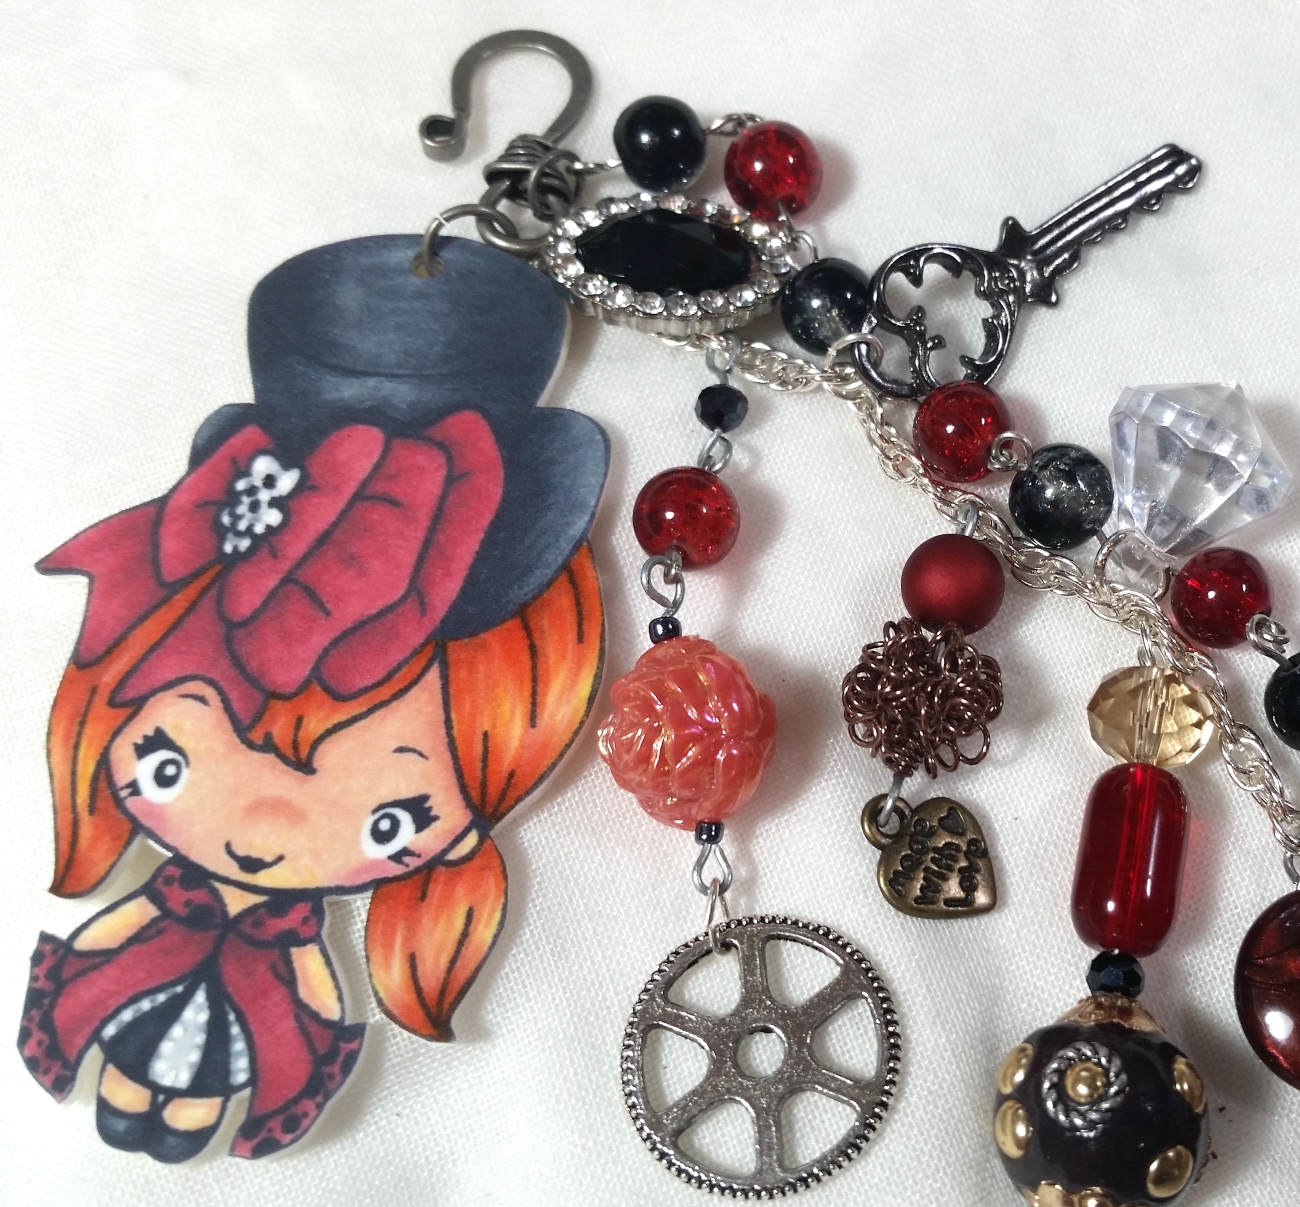 I scanned her into my computer, lightened the image by 60% and increased the contrast about 10%. Remember Shrinky Dink papers intensify the colors so this lightening step is critical. I printed her out to a 5″ x 7″ size on Shrinky Dink paper and then punched a standard 1/4″ hole at the top. Then I shrank her down using my heat tool to make her into a durable charm. When she was all shrunk down, I noticed that her hair seemed a bit faded. I decided to try a little experiment and added a top coat of Copic YR02 and Y00 over the dark and light areas (respectively) of Queeny’s hair, and I loved the vibrant result!
Then, like for all the prior chunky charms I poured through my stash of beads, charms, junk jewelry, and metal pieces and gathered everything that I thought would fit with Queeny’s color scheme and “queen of hearts” theme. Unlike for all the others, however, I realized I would have to do little shopping for some red beads (I had one measly bottle of red seed beads). Luckily Joann’s was having a 50% off sale plus an extra 20% off entire purchase (including sale items) coupon! I picked up a strand of Jesse James beads and a strand of Blue Moon beads and combined them with some junk jewelry pieces, acrylic pieces, a tiny corked glass bottle, and steel, black and gunmetal charms in my stash to make my last and most favorite chunky charm in this collection.
The following is a video share of this chunky charm and the one I shared in yesterday’s post HERE:
This chunky charm is being entered into the following challenges:
SanDee & Amelia’s Anything Goes Steampunk/Industrial Challenge
Simon Says Stamp Wednesday Anything Goes Challenge
Through The Craft Room Door Anything Goes Challenge
Crafts Galore Encore Anything Goes Challenge
613 Avenue Create Anything Goes Challenge
Craft Your Passion Anything Goes Challenge
Word Art Wednesday Anything Goes Challenge
Crafty Gals Creations Anything Goes Challenge
Creatalicious Anything Goes Challenge
]]>