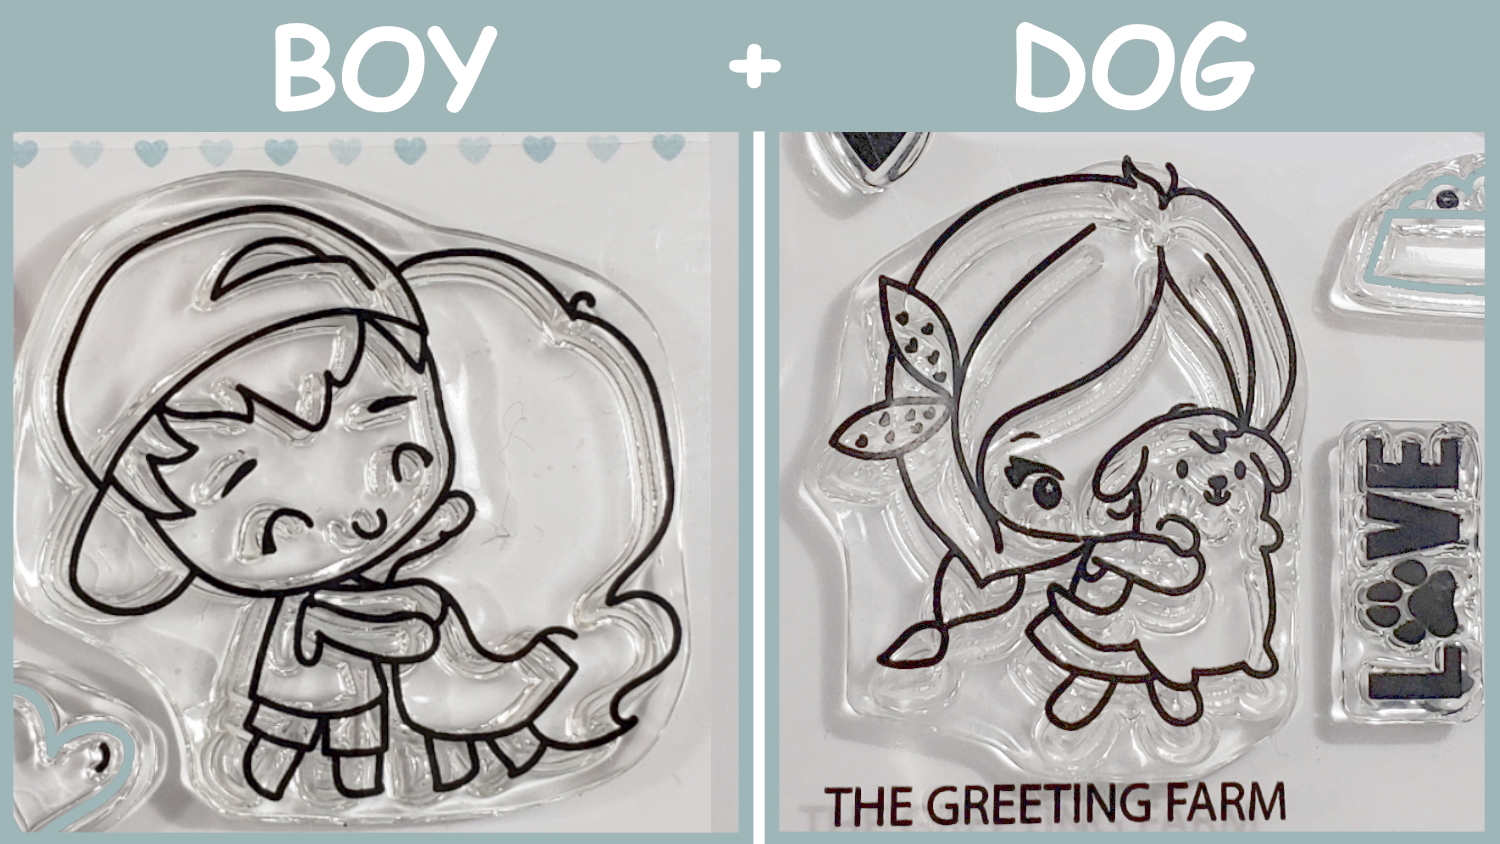
I used the boy and girl hugging image from “So This is Love” and just used the little boy facing toward the left to represent Mr. CraftyPaws. I altered him a bit more by doodling on short sleeves with a 0.05 pt Copic Multi-liner Pen since Mr. CraftyPaws would never wear a sleeveless shirt (lol). Then I stamped out just the little pup being held up by the girl with a braid from “The Snuggle Is Real” set to represent our little Havanese, Bandito, and tucked him in Mr. CraftyPaws’ arms.

For the girl representing me, I thought the girl with the glasses from The Snuggle Is Real would be the closest match. However, our Lhasapoo, Babaloo, does not look anything like the bulldog in that stamp. So I masked off the bulldog and doodled on the rest of the skirt of the little girl, adding details like the collar and long cuffed sleeves, with a 0.05 pt Copic Multi-liner Pen. For the dog representing Babaloo, I used the little dog with the bow from the same stamp set, but masked off the bow and doodled on a top-knot and shortened the ears and tail.
![]()
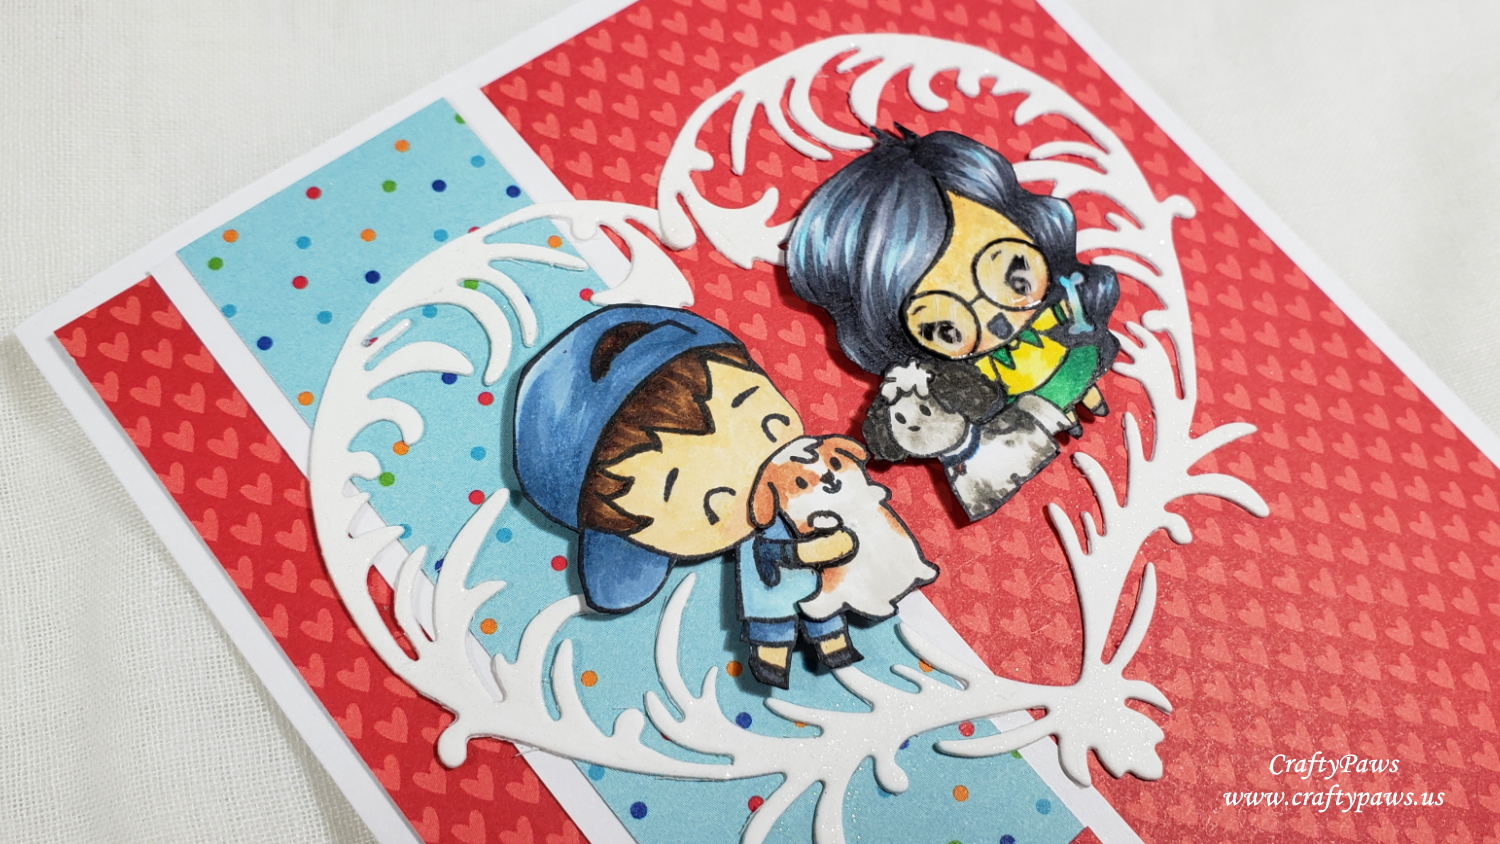
Then it was a matter of coloring up all the images to make them look like a family portrait!
Boy (Mr. CraftyPaws): Hair: E55, E57 and E59; Hat, Shirt and Shorts: B52, B93, B97; Skin: E50, E51, R30; Vest: B000 and B52
Brown and White Dog (Bandito): W0, E11 and E13
Black and White Dog (Babaloo): W0, W3, W5, W7 with B97 collar
Girl (Me): Hair: B01, C3, C5 and C7; Skin: E50, E51, E53. R30; Collar and Skirt: G05 and G09; Sweater: Y02 and Y08; Bone W0 and B01
To add a little shine, I added some glass streak marks on the glasses with a Signo Uniball White Gel Pen and topped the glasses with Ranger Glossy Accents. I fussy cut all the images with my favorite Fiskars Spring Loaded Scissors, inked all the edges for a finished look with a Memento Tuxedo Black Marker, and layered them together.

For the card front design, I decided to pull out one of my heart dies, the Diemond Dies Je T’Adore Heart, to “frame” the family portrait. I coated the frame with a coating of Clear Wink of Stella for some added shimmer. For the background papers, I used my much hoarded (and one of my FAVORITE) Doodlebug Designs “Puppy Love” 6 x 6 Paper Pad and picked out a heart patterned paper and used the reverse pale blue polka dot paper for a little strip of added interest. I backed that strip with white cardstock to match the width of the white border of the card front, and place that strip, toward the left side, following the design rule of thirds.

Lastly, for the sentiments I used the phrases from the cut apart pages of the Puppy Love paper pad that I thought would suit a Valentine’s Day card for Mr. CraftyPaws: “Great News…”, “I {heart} You” (with dabs of Glossy Accents on the hear), and “We Belong Together” are staggered along the left bottom third of the card front. On the inside card liner, I used, “Good Times!”, “Pawsitively Perfect!” and “You’re a Treat!” It was so fun designing and crafting this totally personal card for Mr. CraftyPaws. He’ll never know the extra steps I took to make this customized family portrait card, but I know he’ll love it all the same.
CLICK on the following picture to watch the process video and enter the GIVEAWAY from the YouTube video for a chance to win a set of The Greeting Farm “The Snuggle Is Real” stamp set!
Disclosure: Many of the supplies I’ve used for today’s project are linked. Some may be affiliate links, which means if you make a purchase I receive a small commission at no extra cost to you. I truly appreciate your support toward the costs of running this blog! All giveaway rules are listed in the description box of the YouTube video. The giveaway is not sponsored by or in any way affiliated with YouTube, Instagram, or The Greeting Farm.
This card is being entered into the following challenges:
Simon Says Stamp Wednesday Anything Goes Challenge
Creatalicious Anything Goes Challenge with optional use of craft
Word Art Wednesday Anything Goes Challenge
Lil Patch of Crafty Friends Anything Goes Challenge
Through the Craft Room Door Anything Goes Challenge
Crafts Galore Encore Anything Goes Challenge
Stamping Sensations Favorite Stamps Challenge
]]>

I also wanted to show some love to some long-neglected Martha Stewart punches that have been languishing in a craft drawer. I pulled out the above-pictured punches (listed clockwise from upper left): Deep Edge Lattice Hearts Border Punch, Hugs and Kisses Edge Punch, Heart Button Punch, Lace Eyelet Doily Border Punch, Heart Seal Punch and Lace Scallop Heart Punch (they all seem to be retired so I don’t have links, but they are all available on eBay).
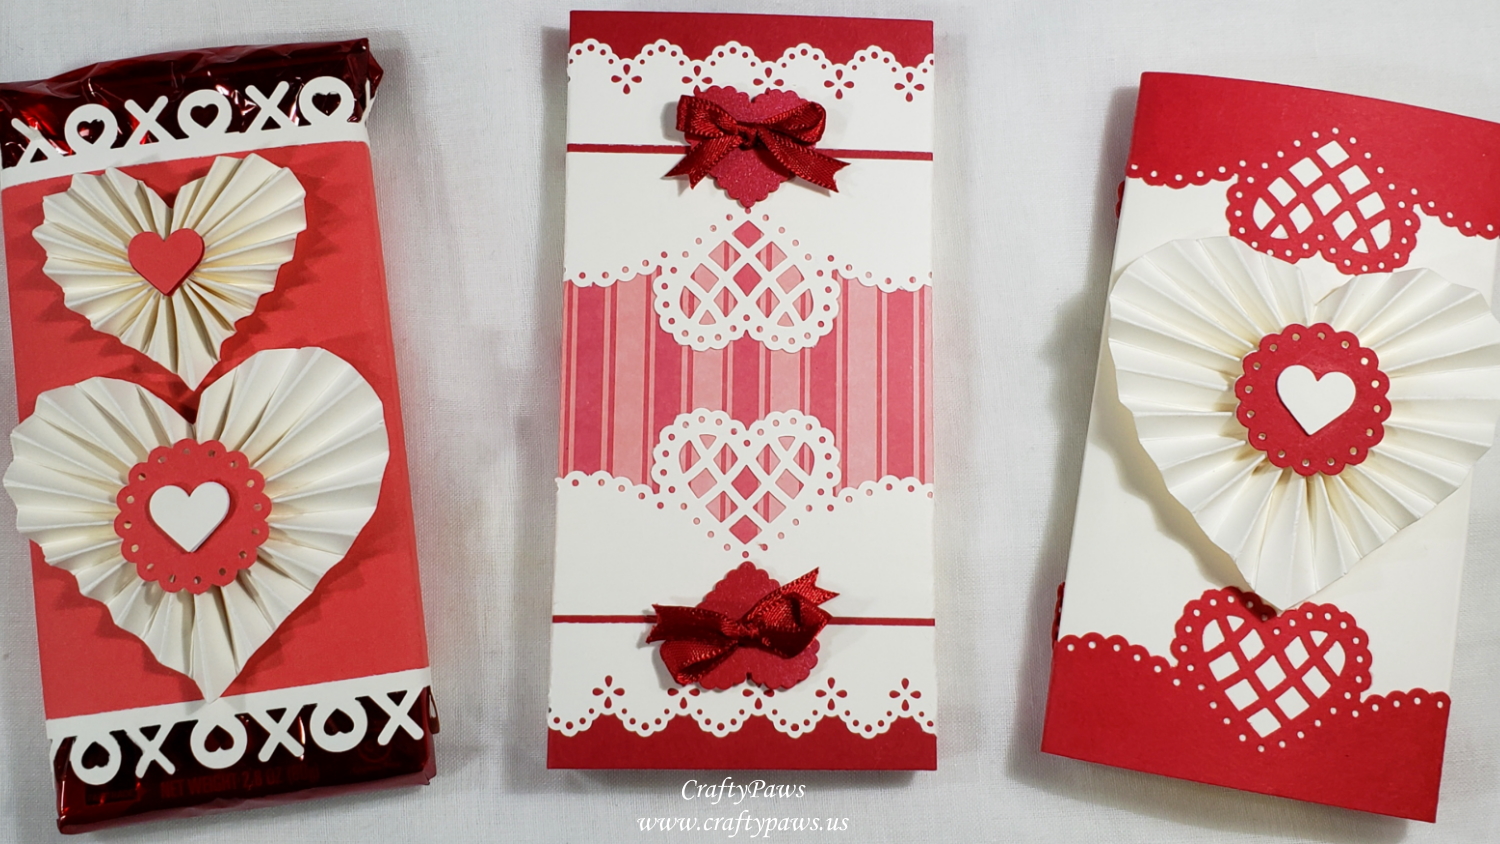
Then it was a simple matter of pulling out some cream, red, and red striped cardstock scraps and assembling various patterns together to wrap each chocolate bar. I also decided to add some 3D heart rosettes in various sizes to add dimension and interest.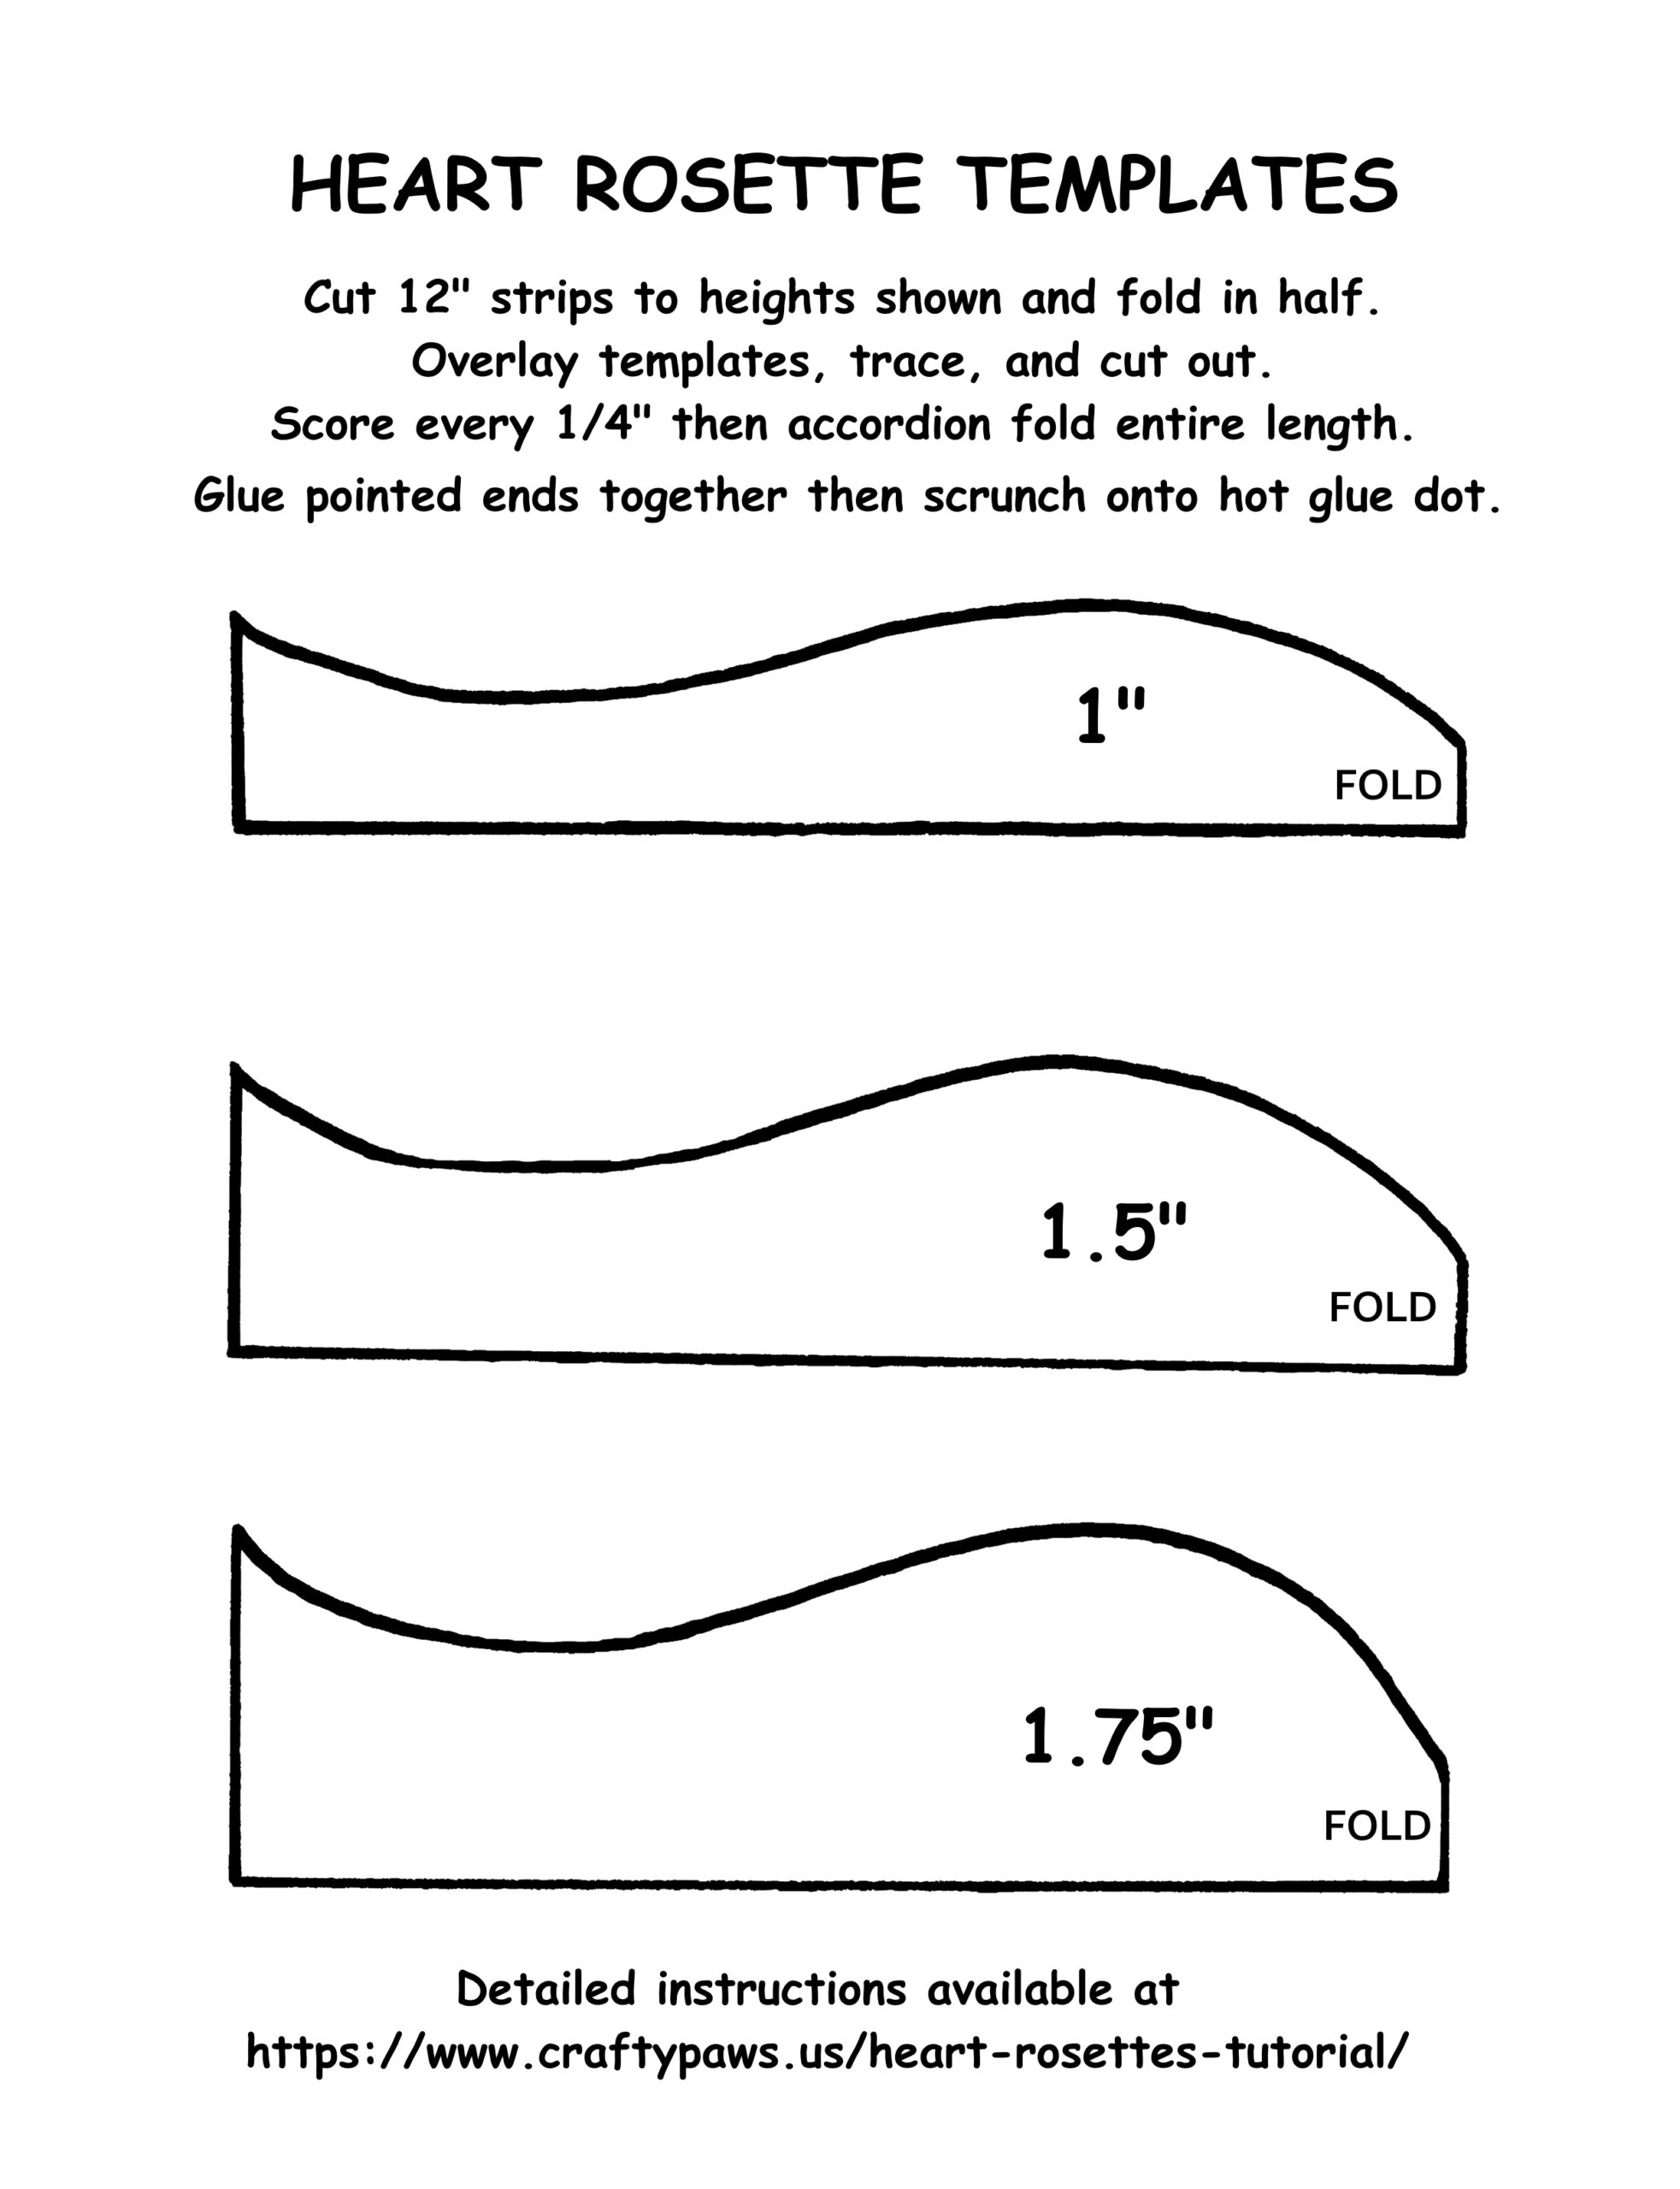
To craft the rosettes, I made templates for 12″ x 1″, 12″ x 1.5″ and 12″ x 1.75″ heart rosettes (I used the 1″ and 1.5″ ones for my wrappers). Please feel free to download the template and print it full size on cardstock to make your own heart rosettes! They make great decorations for gift wrapping, cards and embellishments.
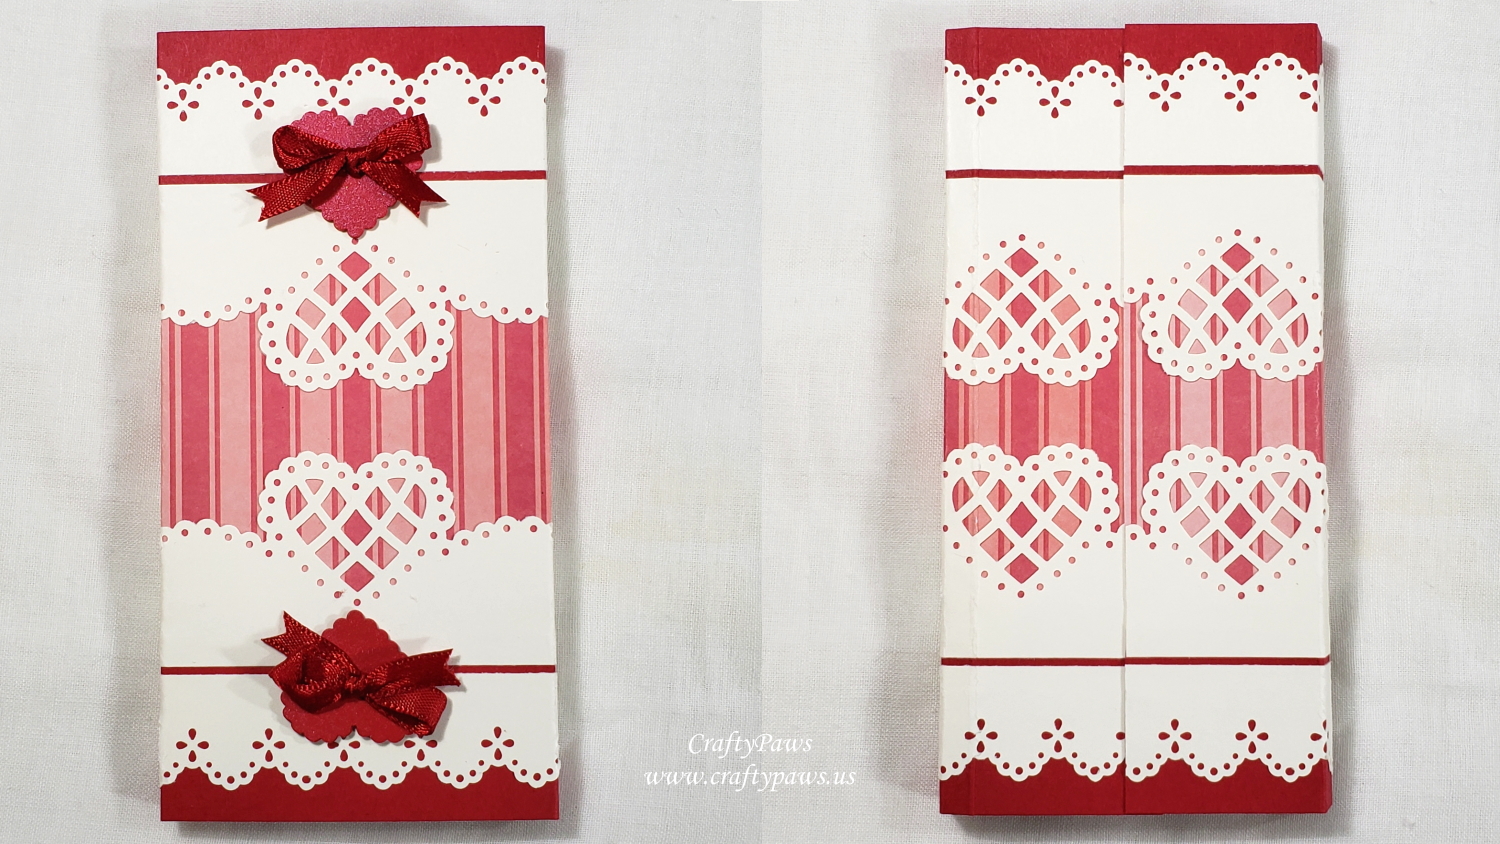
Chocolate Packaging with Heart Buttons
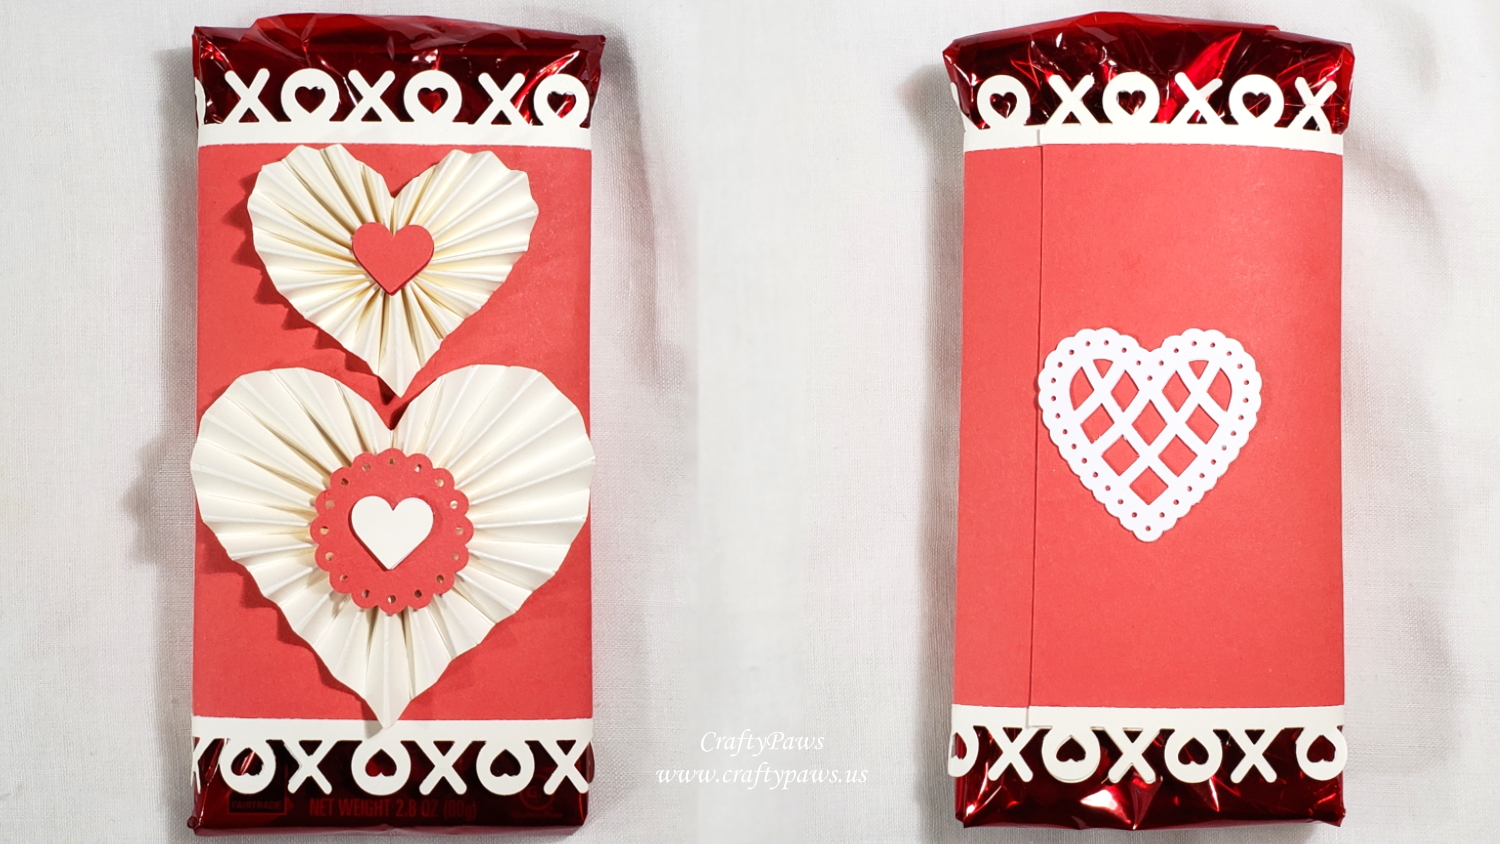
Chocolate Packaging with 2 Heart Rosettes
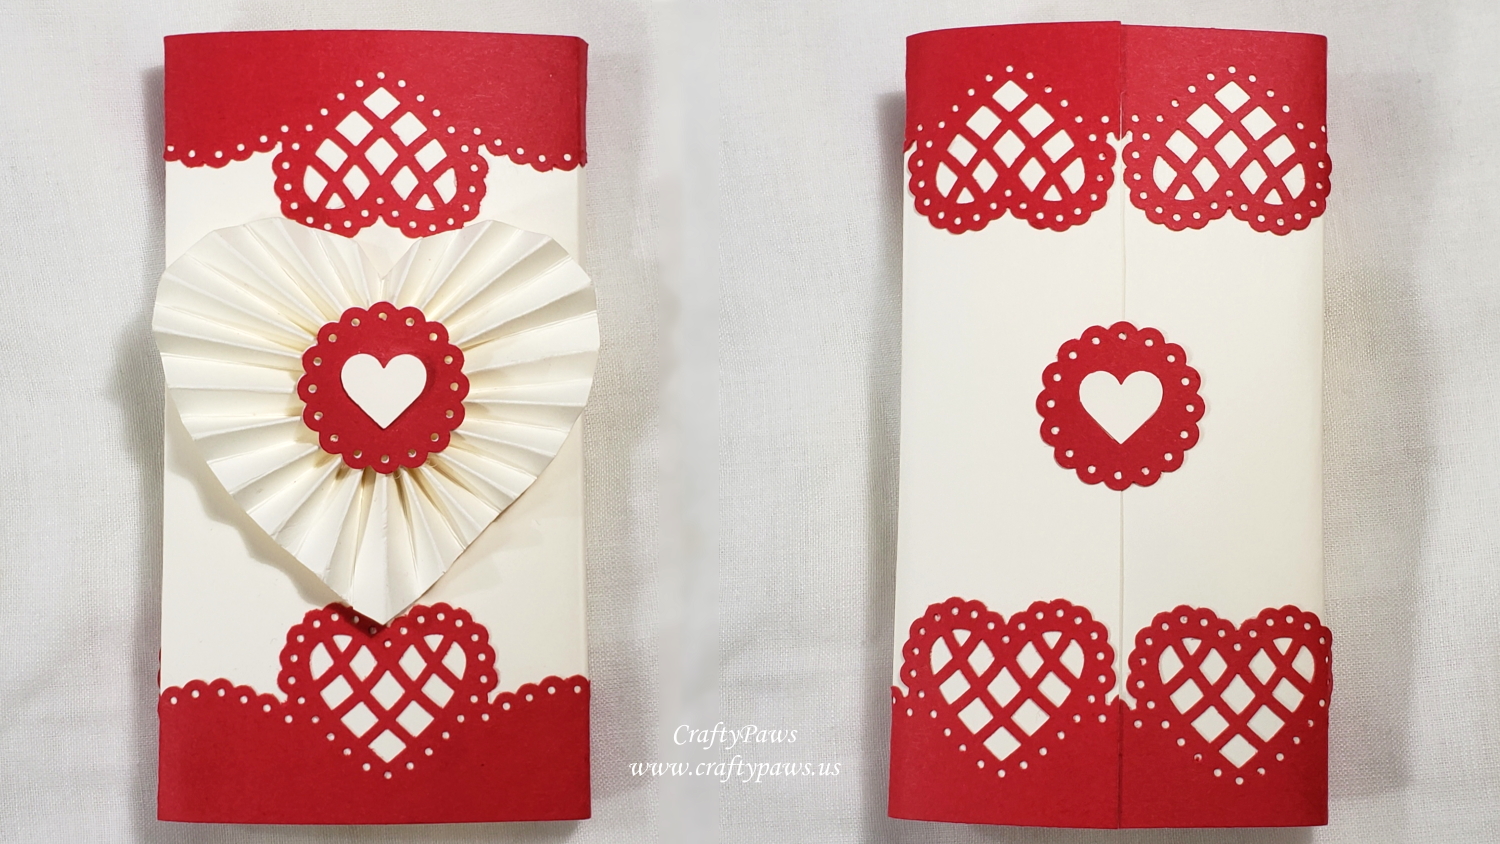
Chocolate Packing with Large Heart Rosette
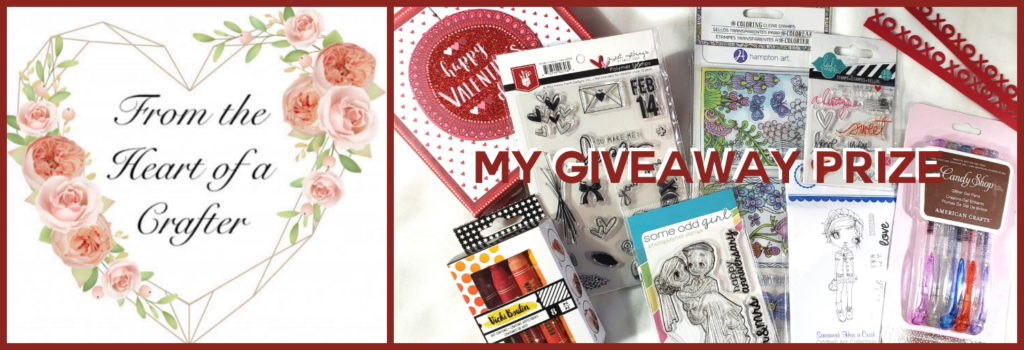
This project was made to share as part of a Love-themed YouTube Hop. If you’d like to hop along, please watch the videos linked in the description box of my video by CLICKING THE PICTURE BELOW. There are LOTS of GIVEAWAY prizes being given away by many of the folks participating in the hop (including me)!
Disclosure: Many of the supplies I’ve used for today’s project are linked. Some may be affiliate links, which means if you make a purchase I receive a small commission at no extra cost to you. I truly appreciate your support toward the costs of running this blog!
These chocolate wrappers are being entered into the following challenges:
Word Art Wednesday Anything Goes Challenge
Fab ‘n’ Funky Love Love Love Challenge
Crafty Gals Add a Heart Challenge
The Male Room Heart You Challenge
]]>
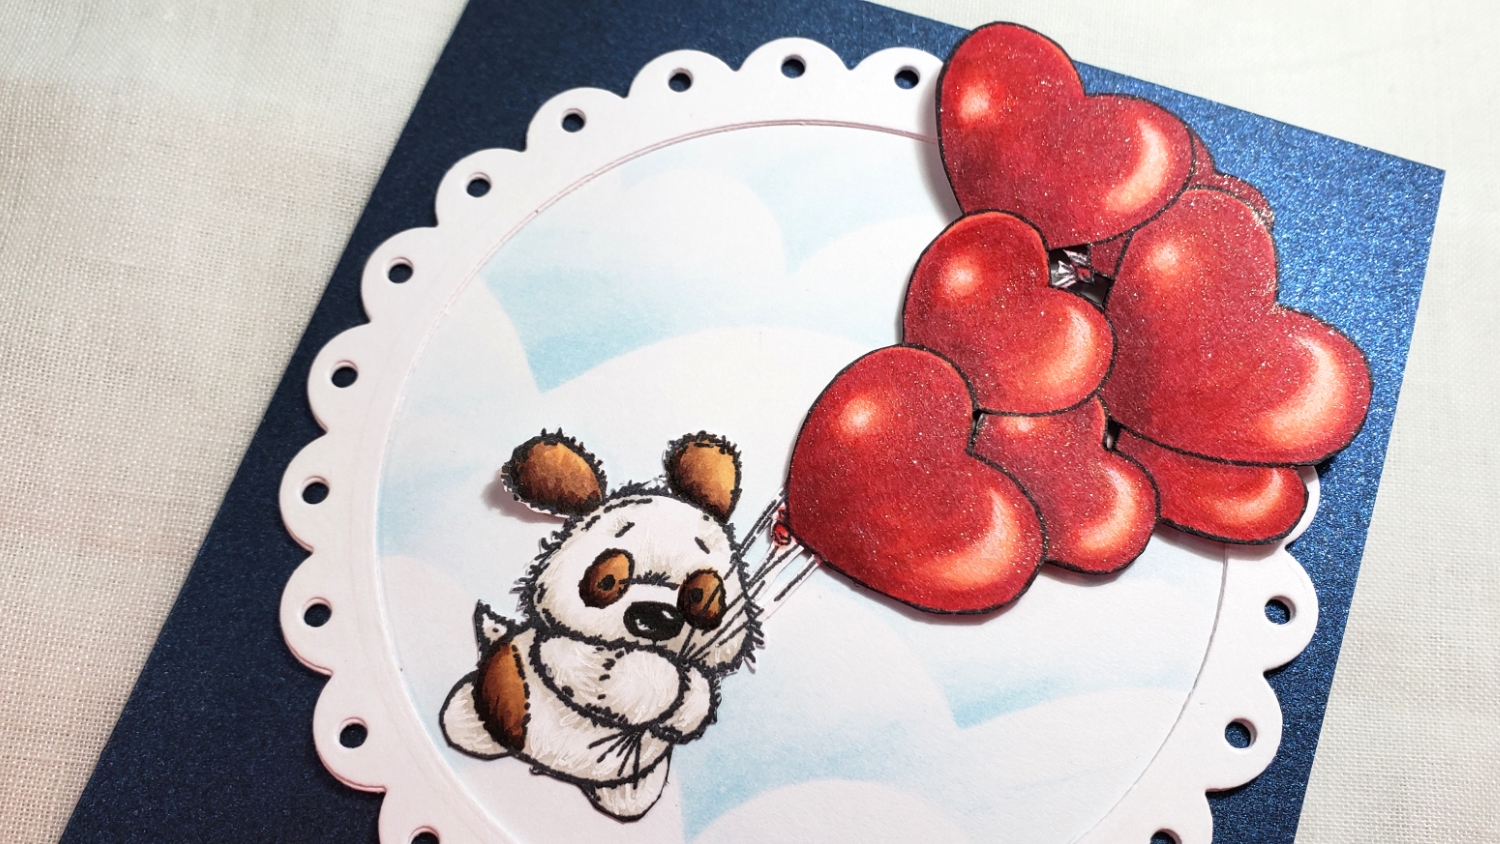
I first used a Copic Multiliner 0.03 pt black pen to doodle on an extra spot around an eye of the puppy from the Penny Black’s “So Much Love” stamp set (this extra spot makes him look very much like our sweet little Bandito) and then I Copic colored up the image:
Spots: E21, E23, E25, E29
White fur: W0, W1 and Sakura White Gelly Roll Pen for added fur texture
Balloons: R20, R21, R22, R24, R27, R29, R39 with Clear Wink of Stella Pen for added shimmer and Cream and White Prismacolor Colored Pencils to emphasize the highlights.
I next fussy cut this image out with my favorite Fiskars spring loaded scissors and an X-Acto blade (for the inside between balloon and strings areas).
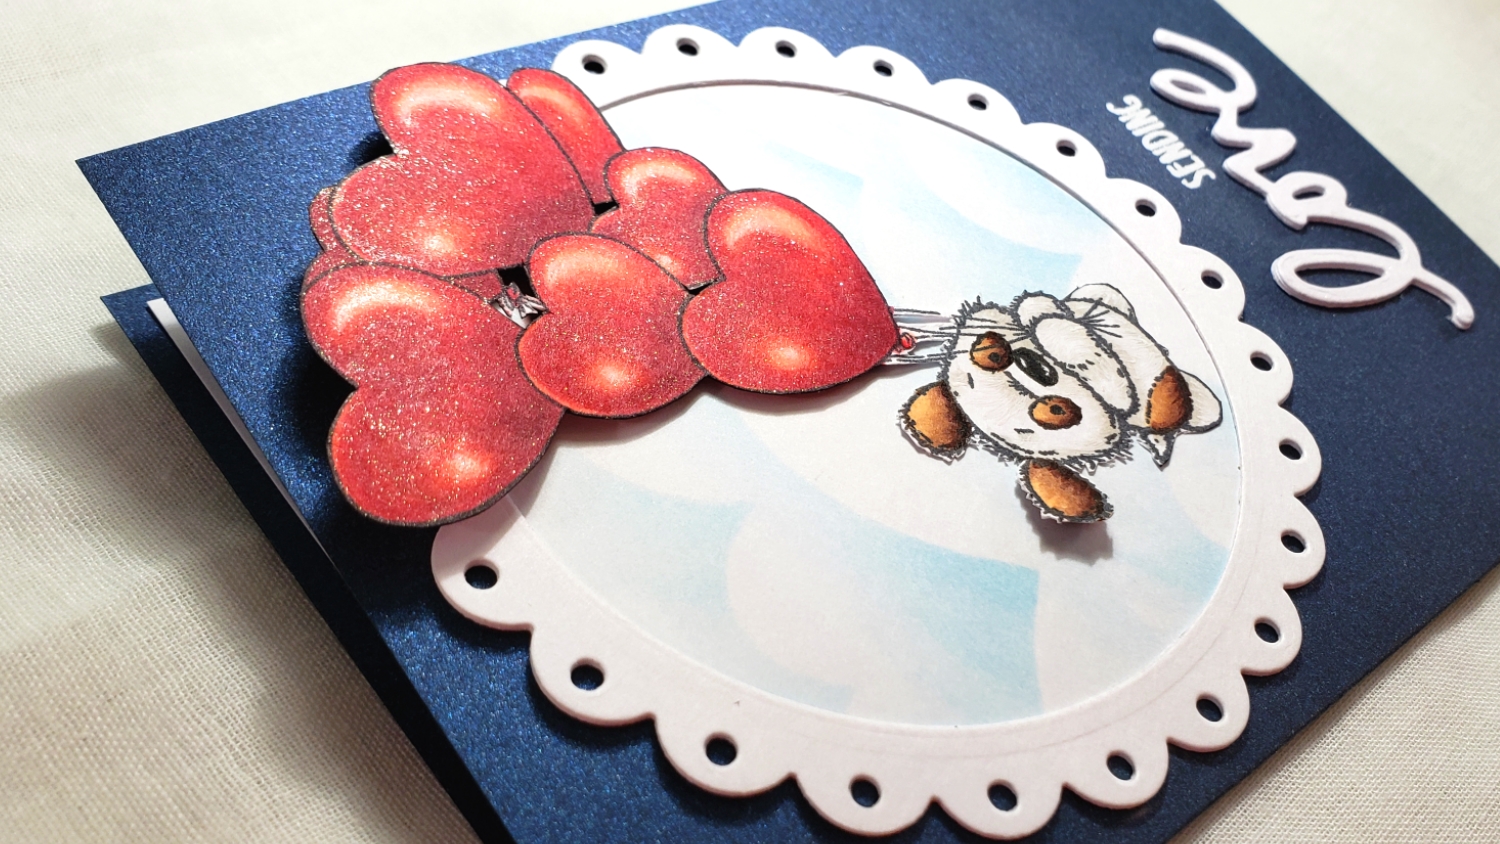
For the background, I die cut some white cardstock with the largest die from the Lawn Fawn Fancy Scalloped Circle Stackables Die, and I cut out two frames (that I stacked for added stability and to create a frame) with the same die and the 11th largest circle die from the Diemond Dies Die-Normous Stack-Ems Circle Nesting Die Set. But before I added the frames, I used a handmade arches stencil to blend on some clouds onto the background with Tim Holtz Distress Ink in Tumbled Glass. Then I glued down and popped up the balloons and the puppy’s left year on double sided foam dots to add dimension.
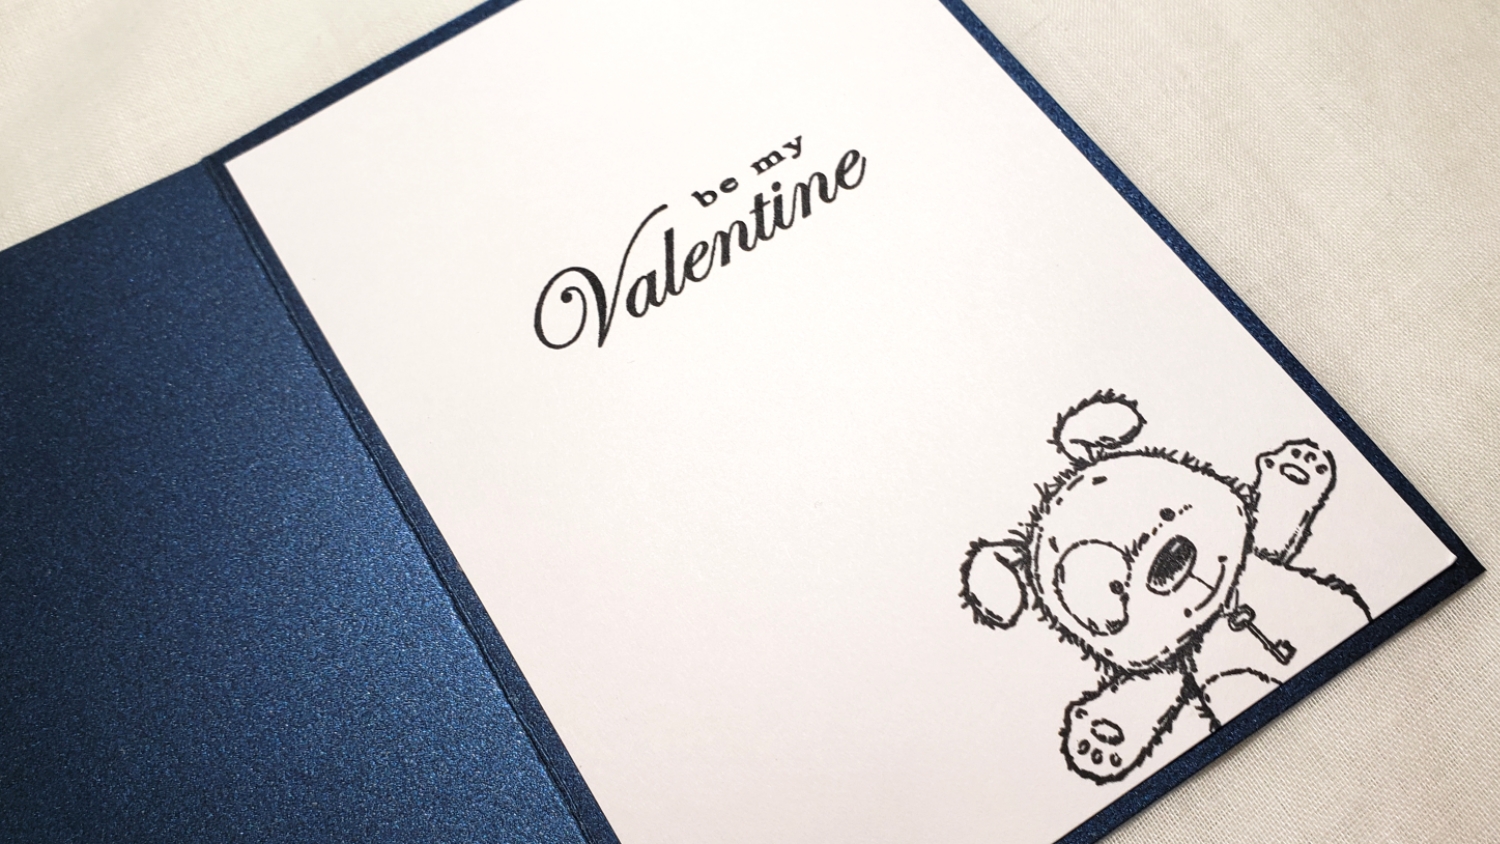
For the sentiment on the card front, I heat embossed “sending” from the Neat & Tangled “Better Together” stamp set with Ranger White Embossing Powder, and then I die cut the “Love” word die from an old retired Little Yellow Bicycle word die set (it had “love”, “laugh” and “smile”). I actually die cut the word 3 times and stacked them to match the depth of the framed image. The inside liner for the card was simply stamped with a “Be My Valentine” sentiment from the Penny Black “Key to My Heart” stamp set and the sweet dog image with outstretched paws.
CLICK on the image below to watch the process video of crafting this card:
Disclosure: Many of the supplies I’ve used for today’s project are linked. Some may be affiliate links, which means if you make a purchase I receive a small commission at no extra cost to you. I truly appreciate your support toward the costs of running this blog!
This card is being entered into the following challenges:
The Male Room Love Your Men Challenge
Simon Says Stamp Monday Typography Challenge
Word Art Wednesday Anything Goes Challenge
Creatalicious Anything Goes with Optional Love/Hearts Challenge
Penny Black and More Anything Goes with Optional Tags Challenge
Crafter’s Castle Anything Goes with Optional Valentine’s Day Challenge
Stamping Sensations All Things Bright and Beautiful Challenge — little puppy critters
Crafty Gals Corner Love is In the Air/Add A Heart Challenge
Through the Craft Room Door Anything Goes Challenge
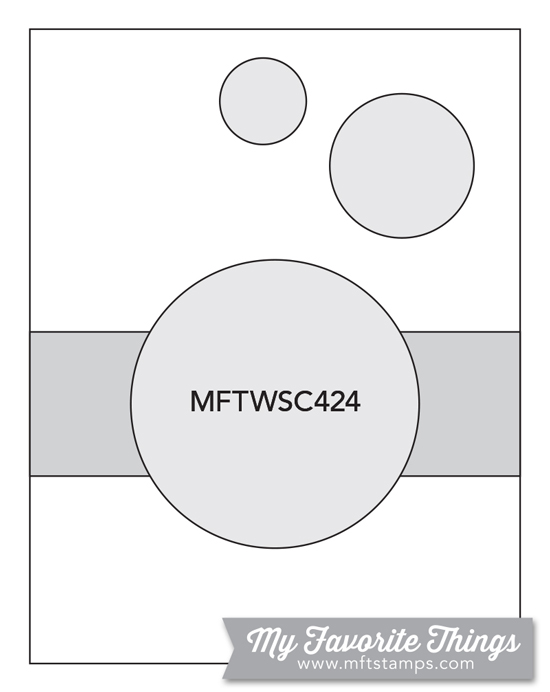
MFT Sketch Challenge 424
 For the card front background I also dug into my stash and used a pretty pattern paper with hearts, flowers and birds from the “Pastels & Whites” paper stack by Craft Sensations (I took my Copic color cues from this paper). Rather than have the little girl just floating on the sea of pattern, I decided to use a Pretty Pink Posh Scallop Frame die with white card stock to create a frame. I wanted to ground the little girl so I found a scrap of patterned note paper in a shabby chic green with cream colored script that I cut with a Lawn Fawn Stitched Hillside die. I was going to just inset that hill into the frame, but I thought it might be nice to soften all of these patterns behind the little girl so she could remain the focal point without a lot of distracting pattern behind her. So I layered a piece of vellum paper behind the frame and over top of the hill and center of the background paper, and this softened the patterns nicely while still keeping them visible.
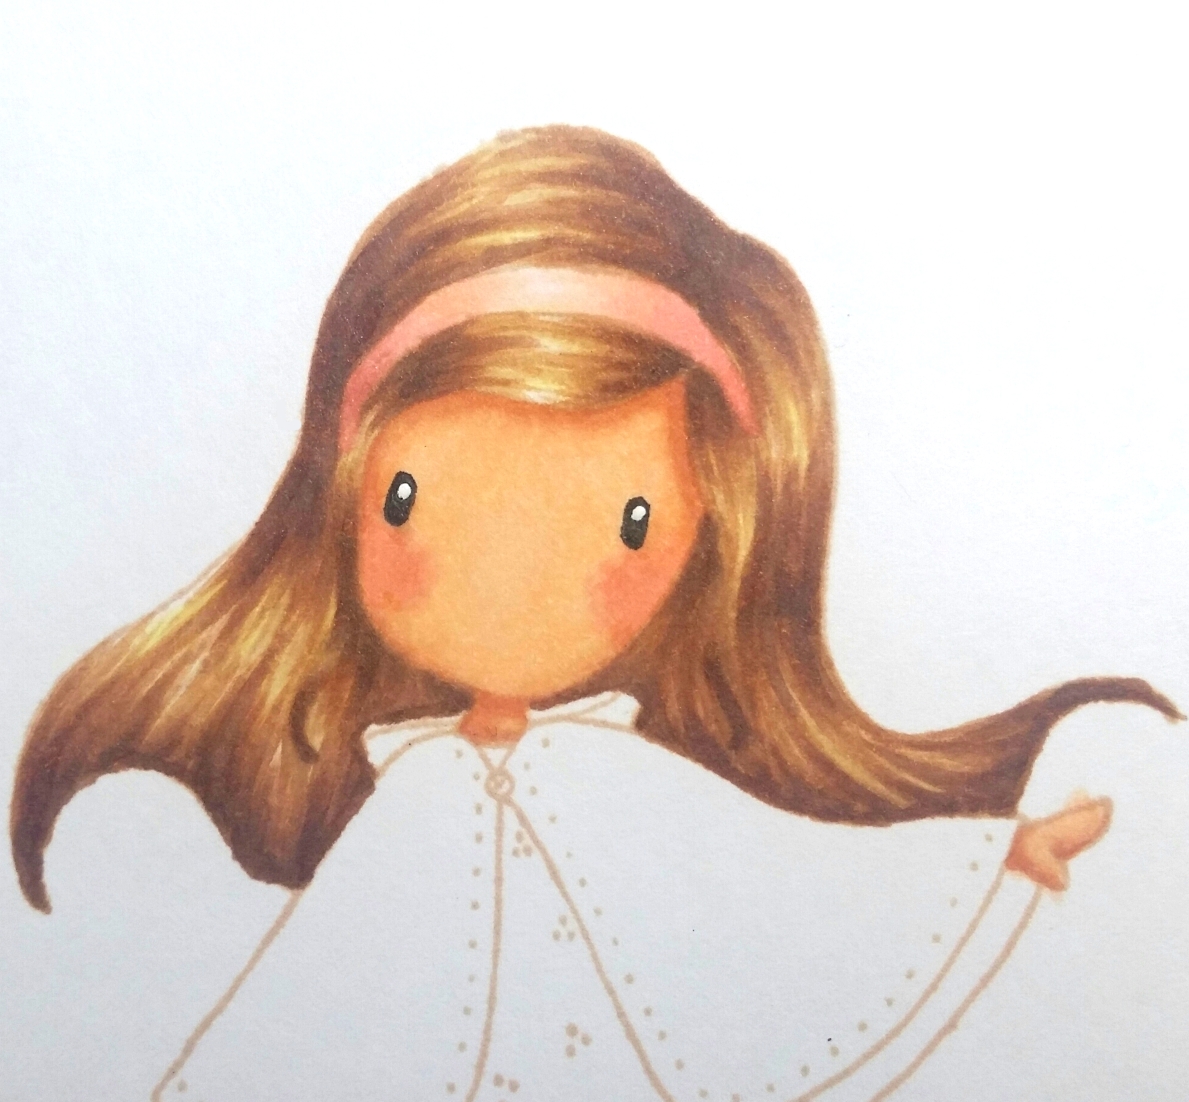
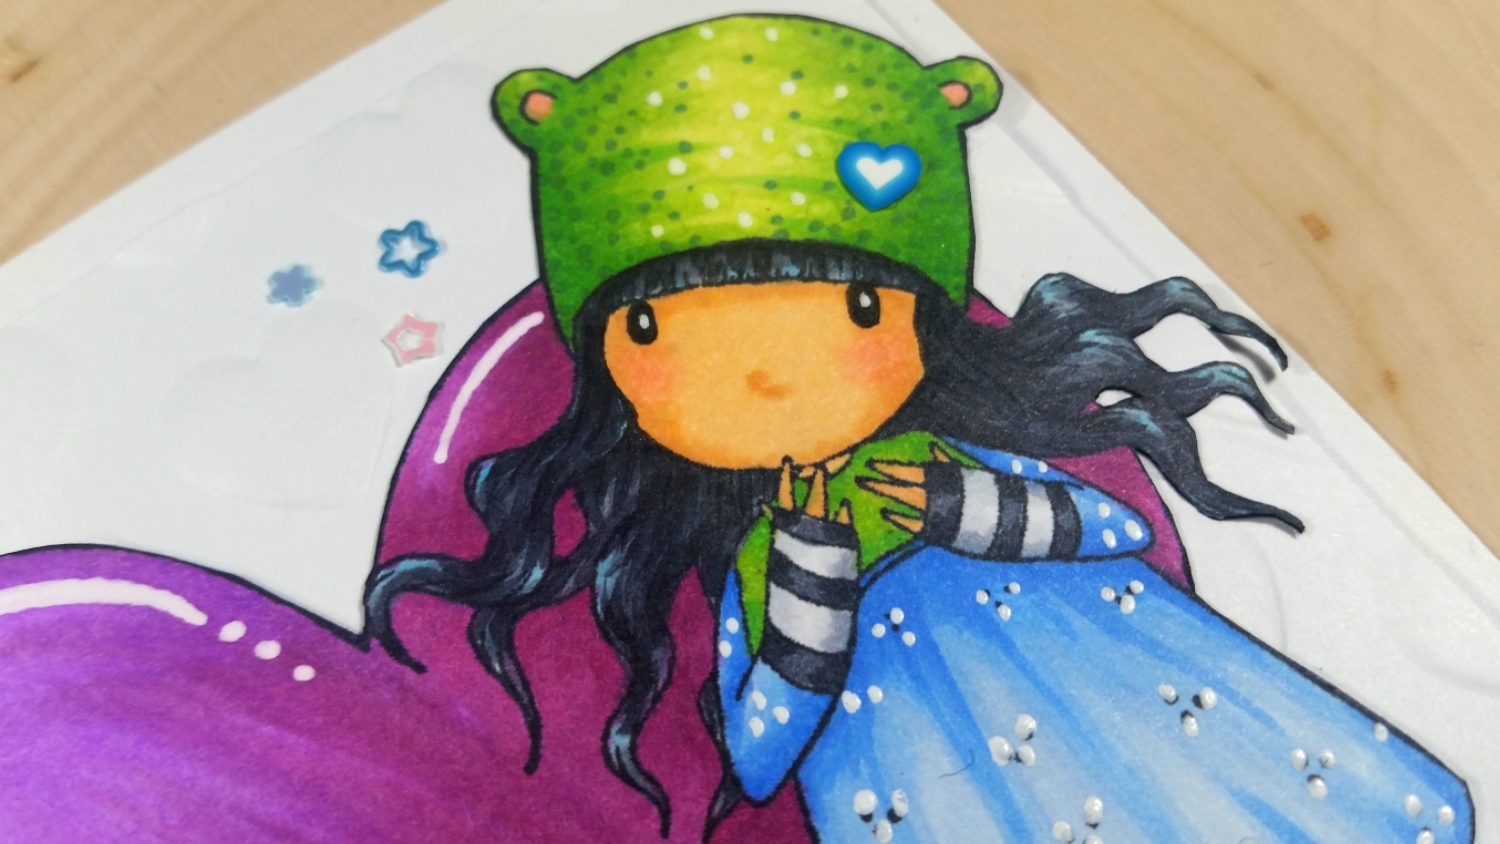
I stamped the main focal point Gorjuss Girl image with Momento Desert Sand Ink (my favorite ink for no line Copic coloring). Then I colored her up with the following Copic colors:
Skin: E000, E00, E01, E21, E11 and R20
Hair: Y11, E31, E33, E23, E25 and 0.3 pt Copic Multiliner Pen in Warm Gray for fine details (I think this was key to the final look)
Pink of headband, dress and tights: R30 and R32
Cape: YG01, YG13, YG03 and YG25
 Underskirt and gray of tights: W0, W1, W3 and White Prismacolor Colored Pencil
I also emphasized the black of her eyes with a 0.03 pt Copic Multiliner Pen in Black and added highlights to her eyes and dot details to her dress with a Uniball Signo White Gel Pen.
Lastly, I decided the little girl could be traipsing through a meadow to deliver a box of Valentines chocolates so I dug up this cute conversation heart stamp from an old Recollections Valentines set that also had never seen ink. I inked it up with Tim Holtz Distress Oxide Ink in Worn Lipstick for a soft pinky peachy look that I thought matched the colors in the background paper and the colors I’d used to color up the girl’s dress. I tucked the heart into her left hand (notice how her thumb overlaps the front while the rest of her hand is behind) before popping up the entire fussy cut girl on double sided foam adhesive for a little added interest and dimension.
Disclosure: Many of the supplies I’ve used for today’s project are linked. Some may be affiliate links, which means if you make a purchase I receive a small commission at no extra cost to you. I truly appreciate your support toward the costs of running this blog!
The following is a quick card share video:
This card is being entered into the following challenges:
Art Impressions Sweet Treats Challenge – box of chocolates she’s delivering. 🙂
Penny Black and More Love, Hearts and Flowers Challenge
Simon Says Stamp Monday Take Note Challenge
Simon Says Stamp Wednesday It Must Be Love Challenge
Word Art Wednesday Anything Goes Challenge
Creatalicious Anything Goes With Optional Love/Anniversary/Thinking of You Challenge
Through the Craft Room Door Anything Goes Challenge
Lil Patch of Crafty Friends Anything Goes Challenge
613 Avenue Create Anything Goes with Optional Love Challenge
]]>
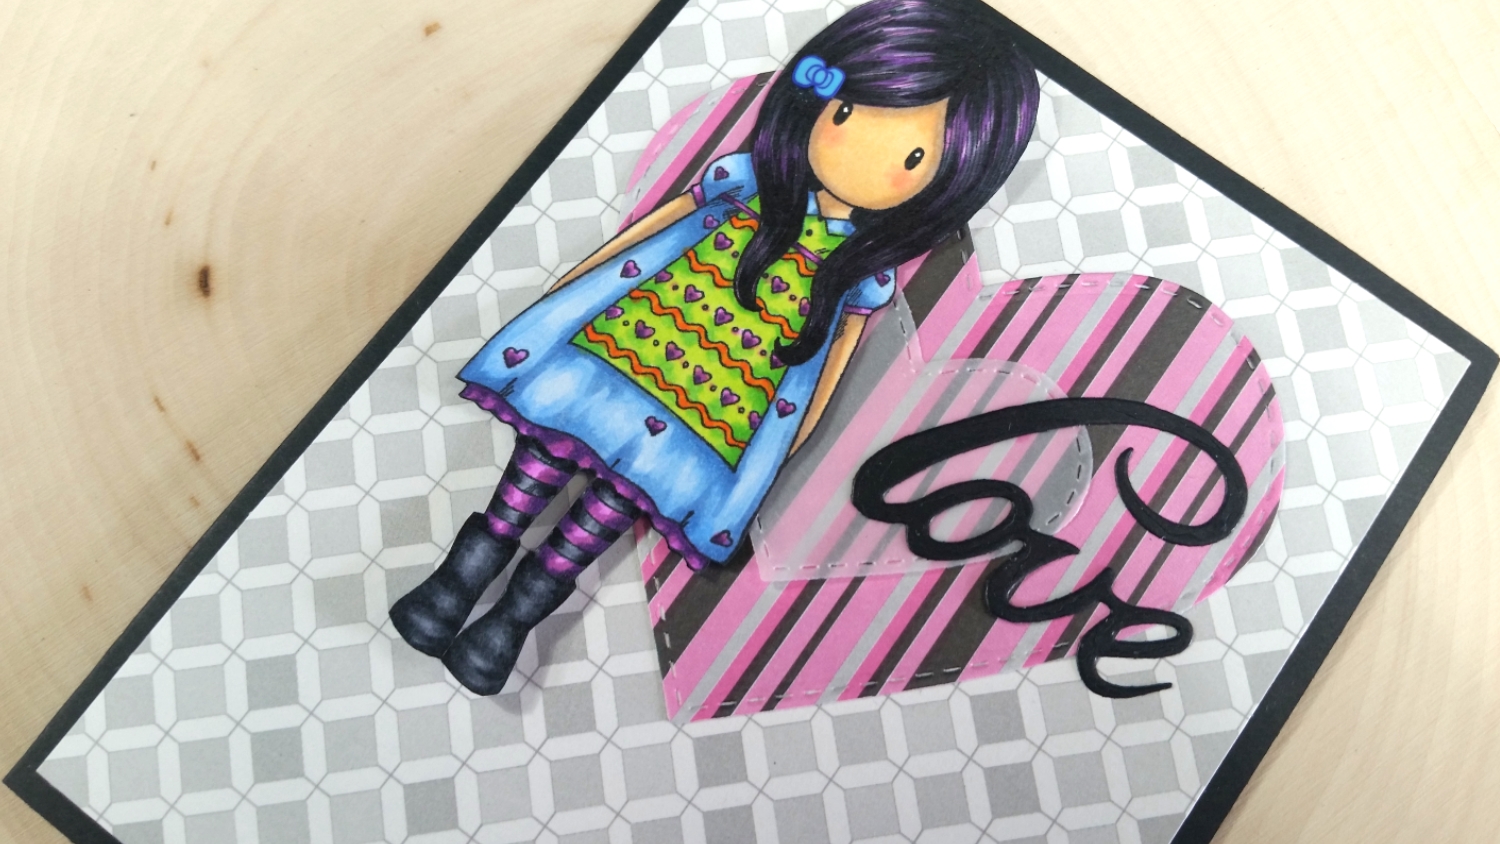
I colored up the Gorjuss Girl with the following Copic colors:
Blue dress: B41, B32 and B45
Green bib: YG01 and YG07
Orange squiggles: YR04 and YR07
Raspberry/purple in tights, underskirt and hair: V04, V06 and V09
Black in hair and tights: C3, C5, C7 and 100
Skin: E50, BV01, E51, E21 and R20

For the card front, I decided to keep it simple and just use up some funky patterned papers from my scrap box. I used a very neutral diamond patterned paper in various greys for the base. I also found a great striped paper that seemed to coordinate with the colors I used on the girl’s tights and hair so I used the medium size heart from the Diemond Dies Inside & Out Stitched Hearts Die Set to “frame” the Gorjuss Girl. For a little added layering and interest, I also used the smallest heart die from the set to cut out a scrap of vellum. For the sentiment, I used just the script “love” from the Diemond Dies Sending Love Die Set and positioned it to the right of the Gorjuss Girl overlapping the heart layers.
Disclosure: Many of the supplies I’ve used for today’s project are linked. Some may be affiliate links, which means if you make a purchase I receive a small commission at no extra cost to you. I truly appreciate your support toward the costs of running this blog!
This card is being entered into the following challenges:
Lil Patch of Crafty Friends Anything Goes Challenge
Through the Craft Room Door Anything Goes Challenge
CAS-ual Friday Hearts, Hearts and More Hearts Challenge
Simon Says Stamp Work It Wednesday Love Challenge
Crafty Gals Corner Anything Goes Challenge
Simon Says Stamp Wednesday Anything Goes Challenge
Word Art Wednesday Anything Goes Challenge
Creatalicious Anything Goes with Optional Love/Anniversary/Thinking of You Challenge
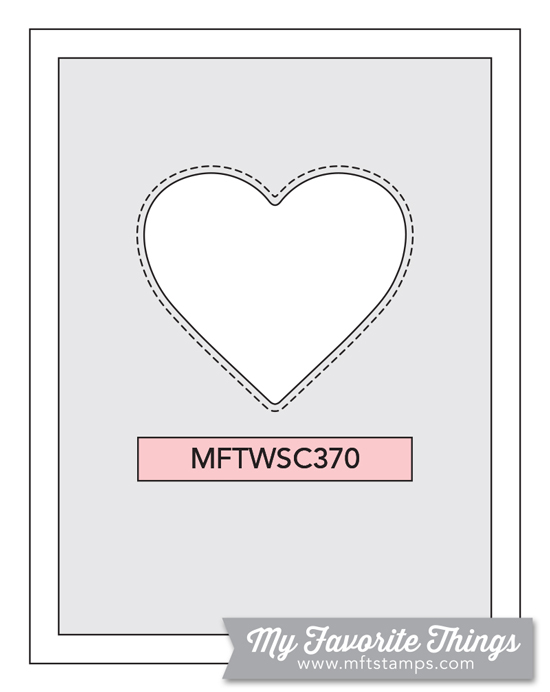
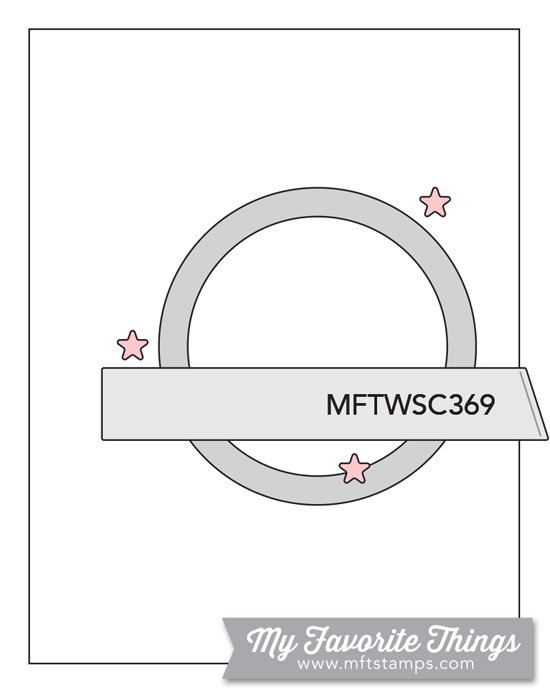
MFT Card Sketch Challenge #370
]]>
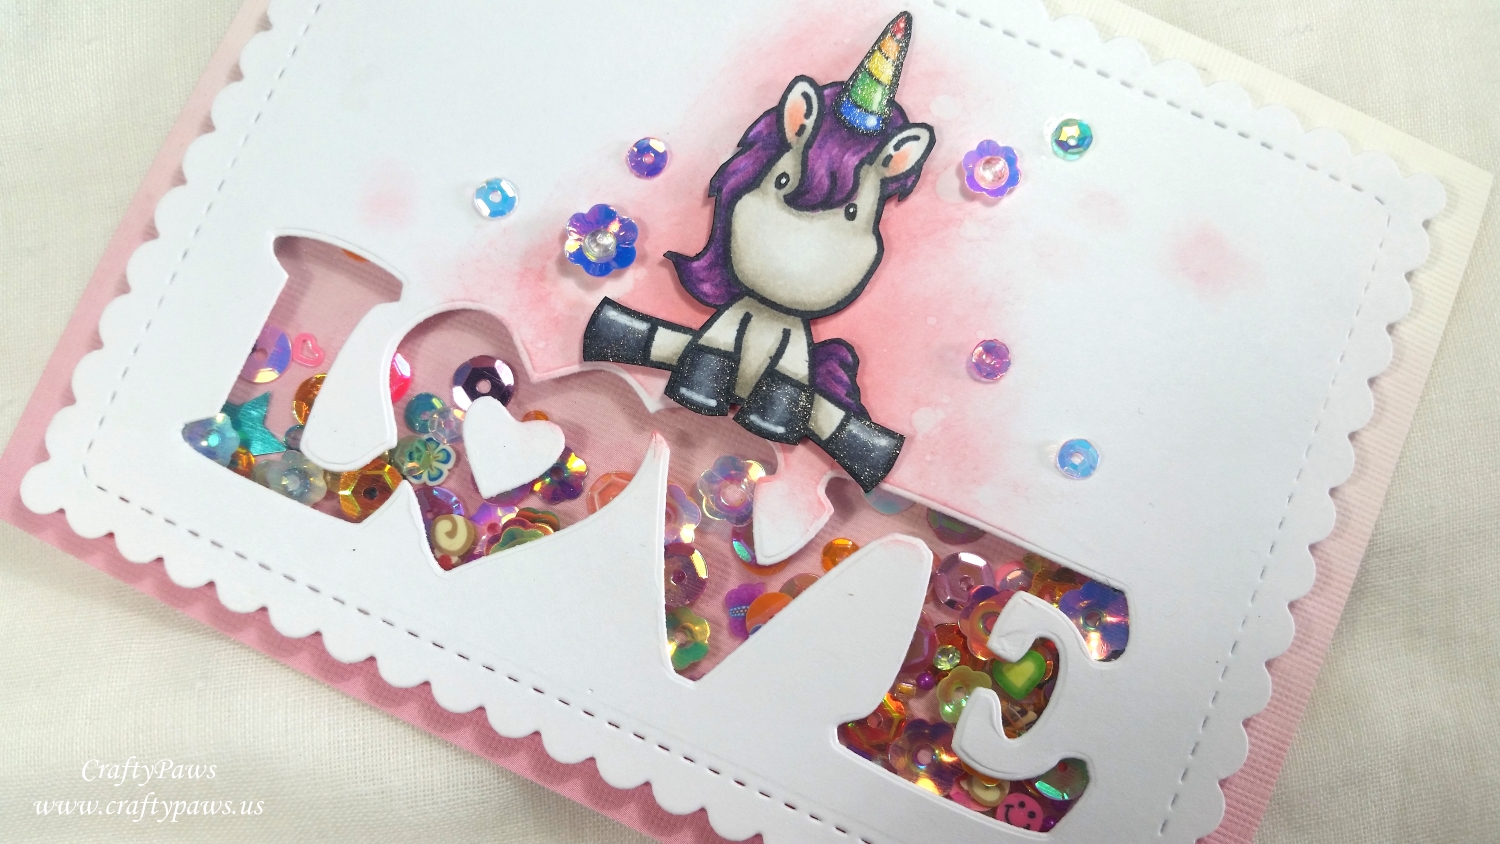
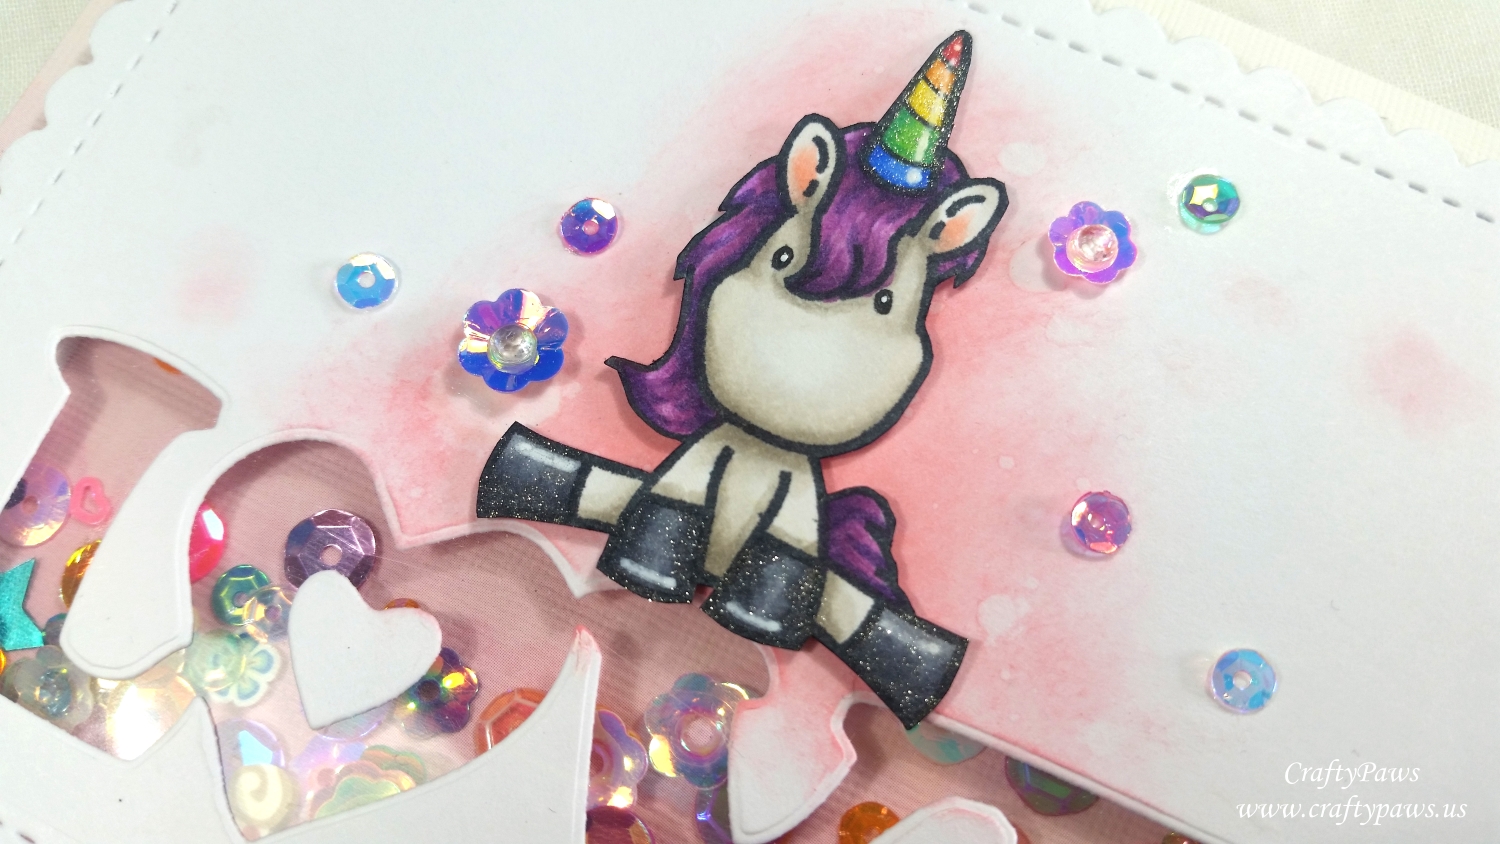
So I was excited to try out this idea with this unicorn love card. I first Copic colored up the cute unicorn from the C.C. Designs “Unicorn Dreams” stamp set:
Unicorn body and ears: W0, W1, W3 and R20
Unicorn hooves: C3, C5 and C7 with Uniball Signo White Gel Pen highlights
Main and tail: V01, V04, V06 and V09
Rainbow horn: B24 and B28; YG07 and G09; Y13 and Y08; YR00 and YR04; and R14 and R37 with Uniball Signo White Gel Pen highlights
I fussy cut that out with my favorite Fiskars Spring Loaded Scissors and inked the cut edges with a Momento Tuxedo Black Marker to give a nice finished look.
I die cut the card front with the scalloped stitched rectangle die from the WPlus9 “Sunshine Layers” die set. Then I die cut the love shaker window with the Diemond Dies Bold Love Word Die. With a scrap of plastic from some sticker packaging, I then framed in the shaker window using Beacon 3-in-1 Adhesive (which works great on non-porous substances like plastic). Then I created a double thickness double sided foam adhesive well all around the love word window. I also added double sided foam dots around the rest of the card front so that the card front would be level and fully supported. I next used my EK Tools Powder Tool to remove the stickiness around the edges of the double sided foam adhesive in the love word window area so that the Doodles Paper Playground Unicorn Sparkle Blend shaker pieces wouldn’t stick to the edges when I poured them in the well. I next removed all the release paper from the foam dots and foam adhesive strips and carefully aligned the ready-made pink ombre card base over top.
For the card front, I decided to blend on some Tim Holtz Distress Oxide Worn Lipstick behind where I was going to position the unicorn as well as a couple of smaller dots on the upper right and lower left hoof area of the unicorn. I sprinkled a bit of water on the ink and used a paper towel to get a nice splotchy look. Then after adding some thin double sided foam adhesive behind the unicorn, I placed him into place as if he was doing the splits on the love shaker window. For finishing touches I added seven additional shaker pieces around the unicorn for some sparkle and coated the unicorn’s horn and hooves with a coating of Clear Wink of Stella for some shine.
The following is a process video of creating this fun shaker card:
Disclosure: Many of the supplies I’ve used for today’s project are linked. Some may be affiliate links, which means if you make a purchase I receive a small commission at no extra cost to you. I truly appreciate your support toward the costs of running this blog!
This card is being entered into the following challenges:
Through the Craft Room Door Anything Goes Challenge
613 Avenue Create Something New Challenge
Crafty Gals Anything Goes Challenge
Simon Says Stamp Wednesday Anything Goes Challenge
Creatalicious Anything Goes With Optional Love/Anniversary/Thinking of You Challenge
Simon Says Stamp Work It Wednesday Love Challenge
Lil Patch of Crafty Friends Anything Goes Challenge
Art Impressions Feel the Love Challenge
MFT Sketch Challenge #370
]]>
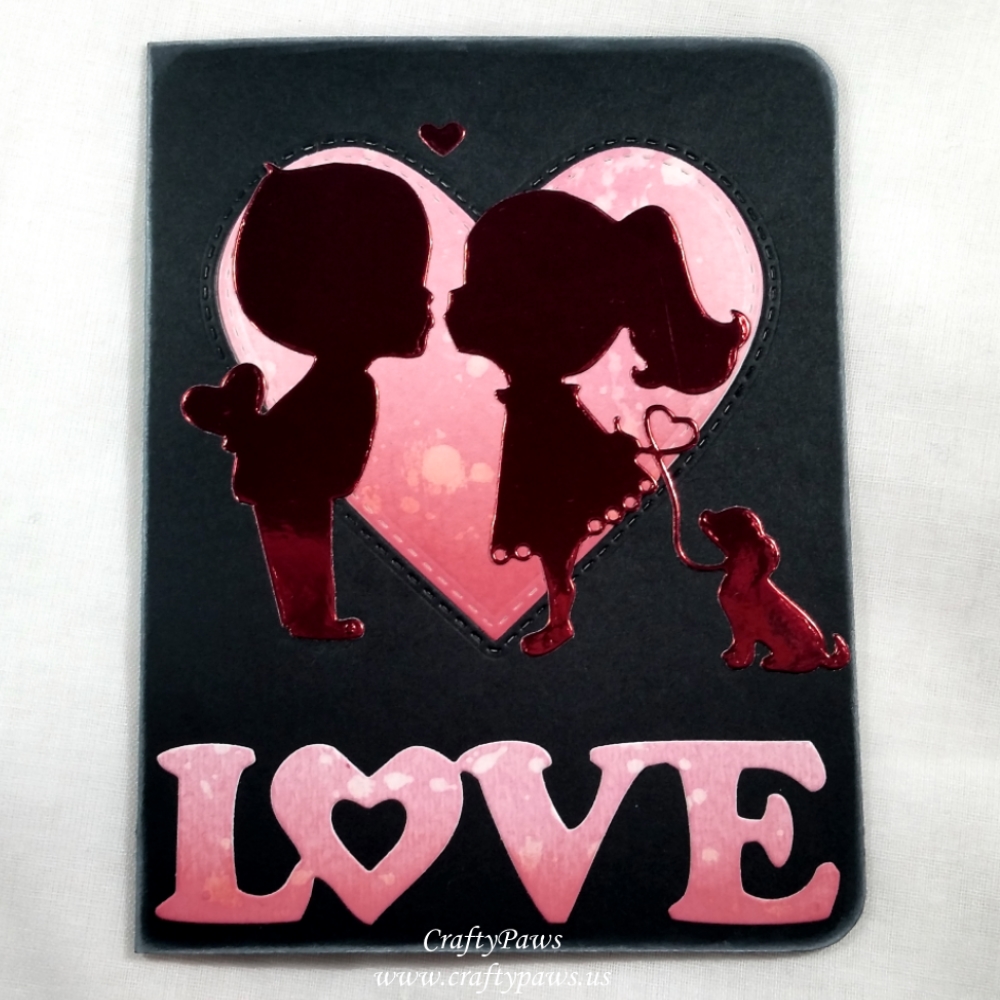 For this Valentines card, I used three of the four new die sets. First I used the middle sized heart from the Inside and Out Stitched Hearts Die Set to inlay a heart from the black card base. I love that with these hearts die set, the stitching is both on the inside and outside of the heart dies so if you just want to use the frame or area outside of the heart, you still get stitched details but you can get stitched hearts if you want to use the heart cut outs only.
In this sample, I first blended some Tim Holtz Distress Oxide Inks in Worn Lipstick and Candied Apple onto some watercolor paper to create an ombre look. Then sprinkled some water on the paper and lifted up some of the ink with a paper towel for a mottled look. I die cut the heart from the inked paper for the heart inset. Lastly, I die cut the same heart from the black card base and inset the ink-blended/splattered heart.
I repeated the same treatment to a bit more water color paper and used the Bold Love Word Die to kind of add a defining sentiment to the base of the card. Lastly I die cut the cute boy and girl (and dog) from the Sweet Kiss Die Set using red metallic card stock and positioned them in front of the heart. The metallic red adds festive shine and pops nicely from the black card base. The extra heart from the inside of the heart shaped leash I used as a finishing accent hovering above the boy and girl. To add a bit of softness, I also rounded to two right corners of the card with a We R Memory Keepers Crop-A-Dile Corner Chomper and inked the edges of the card with more Tim Holtz Distress Oxide Inks in Worn Lipstick.
The video below shows all the dies in this new release and also shares how I made this card:
My readers can get 10% off and FREE wordwide shipping at Diemond Dies by using the coupon code: thankskristina
Disclosure: Many of the supplies I’ve used for today’s project are linked. Some (not the Diemond Dies links) may be affiliate links, which means if you make a purchase I receive a small commission at no extra cost to you. I truly appreciate your support toward the costs of running this blog!
This card is being entered into the following challenges:
Simon Says Stamp Wednesday Layer it Up Challenge
Word Art Wednesday Anything Goes Challenge
Creatalicious Anything Goes with Optional Cute Challenge
Addicted to CAS Ombre Challenge
Card Mania Monochromatic Challenge
Lil Patch of Crafty Friends Anything Goes Challenge
Through the Craft Room Door Anything Goes Challenge
Crafty Gals Corner Anything Goes Challenge
]]>
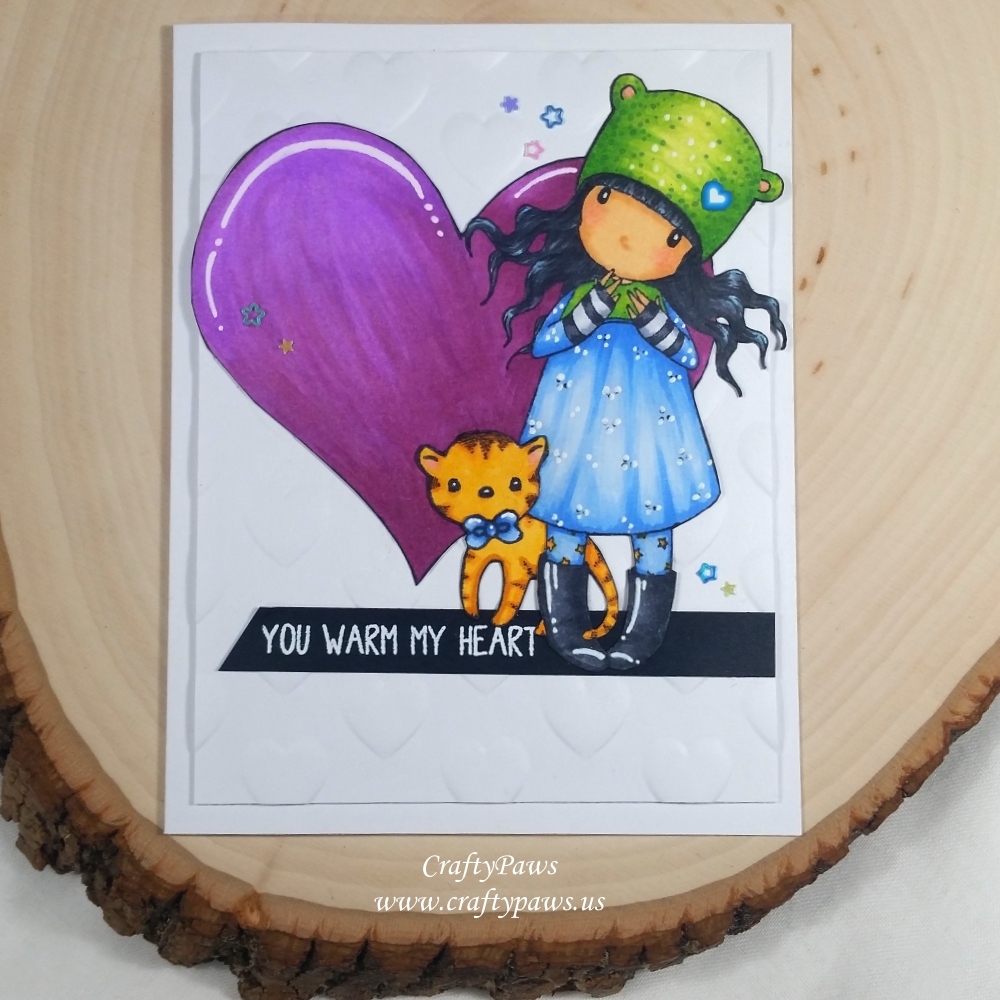 I Copic colored up this cutie and her kitty from the Santoro Gorjuss Girl “Purrrrrfect Love” stamp set with the following colors:
Heart: V04, V06 and RV66
Skin: E50, E51, E21 and R20
Hair: B01, C4, C6, C8
Boots and wrist warmers: C00, C2, C4, C6 and C8
Green parts of dress and hat: YG01, YG25, G14
Blue parts of tights and dress: B21, B32, B41, B24
Stars on tights and kitty: Y17, YR15, YR24 and R20
I also added white highlights and detail dotting on the dress, boots, hat, bow tie, and heart with a Uniball Signo White Gel Pen.
You’ll notice that I switched out the kitty’s head for a rounder, more chubby kitty from the Pretty Pink Posh “Holiday Pals” stamp set to make it look more like my one of my friend’s cat. I also added a bow tie from that set since my friend dresses her cats (lol), and I colored it to match the little girl’s dress. I fussy cut out the whole image, including using an X-Acto blade to get in the nooks and crannies by the cat’s tail and the girl’s hair, and I inked all the edges of the cut image with a Momento Tuxedo Black Marker for a finished look.
I layered her on top of a plain white card stock card front that I dry embossed with hearts using the We R Memory Keepers Next Level Dotted embossing folder. I chose a sentiment from the Avery Elle Polar Pals stamp set that I thought combined the wintery feel of Christmas with the heart reference for Valentines. I used black card stock, VersaMark Ink and Ranger Super Fine White Embossing Powder for a crisp and clear sentiment strip on which the little girl and her kitten could stand.
For finishing touches I painstakingly selected 7 tiny star confetti from the Unicorn Sparkle Blends by Doodles Paper Playground. I arranged them in 3 clusters and think they add a nice little accents. I also spotted a super cute heart in the Unicorn Sparkle Blends so I added that on the Gorjuss Girl’s hat.
Disclosure: Many of the supplies I’ve used for today’s project are linked. Some may be affiliate links, which means if you make a purchase I receive a small commission at no extra cost to you. I truly appreciate your support toward the costs of running this blog!
This card is being entered into the following challenges:
CASology Late Challenge
Lil Patch of Crafty Friends Anything Goes Challenge
Crafty Gals Corner Anything Goes Challenge
Through the Craft Room Door Anything Goes Challenge
Simon Says Stamp Wednesday Layer It Up Challenge
Creatalicious Anything Goes with Optional Cute Challenge
Word Art Wednesday Anything Goes Challenge
MFT Sketch Challenge #369
]]>
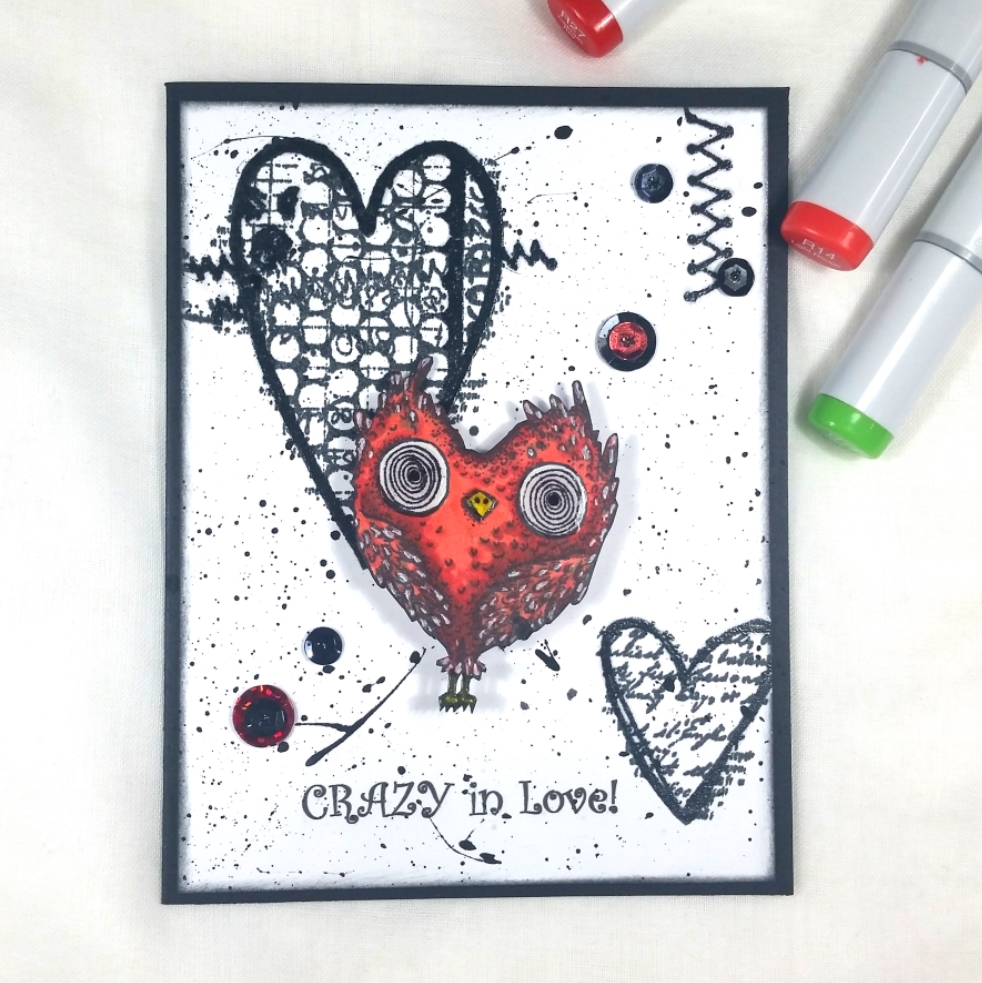 I Copic colored the bird with the following colors:
Beak and legs: Y19
Body: R14, G14 (that’s right a green!), and R27
I also flicked on some highlights to a lot of the darkly stamped feathers with a Uniball Signo White Gel Pen and coated the beak, claws and eyes with Glossy Accents for shine. I fussy cut out this bird with a Fiskars Spring Loaded Scissors and inked the edges with a Momento Tuxedo Black Marker for a finished look.
I wanted a Valentines themed background, but I didn’t want to distract from the crazy love-sick bird, so I used three of the stamps from the new-to-me Carabelle-Studio Follow Your Heart stamp set but did not add any color to them. Instead, I added some dimension and shine to parts of these background images using a Tsukineko VersaMarker and clear embossing powder for some heat embossing. I inked the edges of the card front with Tim Holtz Distress Ink in Black Soot, and to add a bit of grunge while keeping it pretty CAS, I also watered down some black acrylic paint and splattered it on with a wet paint brush.
To emphasize that mad, unstable feeling of new love, I thought adding the bird to the card front with a DIY action wobble would be fun. For a finishing touch and to add a little sparkle, I also added red and black sequins in varying sizes to the background.
The following process video shows the start-to-finish creation of this card, including how to make a DIY action wobble mechanism HERE
Disclosure: Many of the supplies I’ve used for today’s project are linked. Some may be affiliate links, which means if you make a purchase I receive a small commission at no extra cost to you. I truly appreciate your support toward the costs of running this blog!
This card is being added to the following challenges:
Creatalicious Anything Goes with Optional Wishes Challenge
Word Art Wednesday Anything Goes Challenge
Crafty Gals Corner Anything Goes Challenge
Through the Craft Room Door Anything Goes Challenge
613 Avenue Create Anything Goes with Optional Twist Something New Challenge
Card Mania Monochromatic Challenge
Lil Patch of Crafty Friends Anything Goes Challenge
Penny Black and More Something New Challenge
Addicted to CAS Music Challenge
]]>
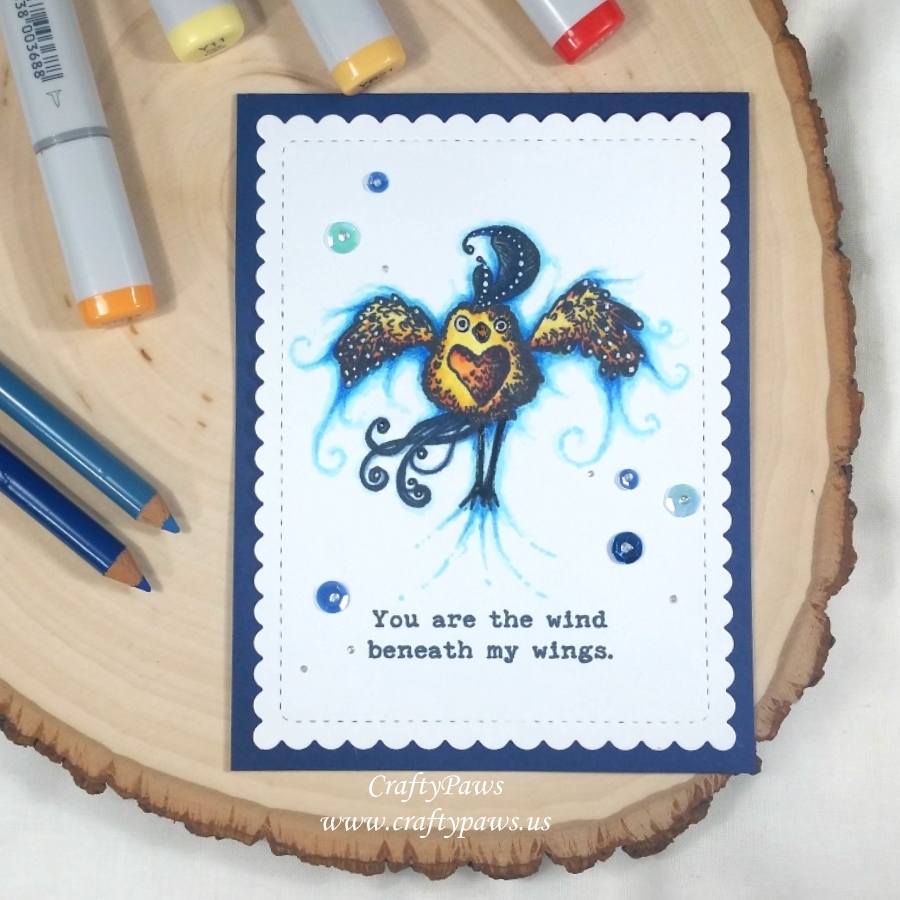 I printed out the sentiment: “You are the wind beneath my wings.” from my computer and then stamped out the whimsical flying bird with a heart shaped breast with Momento Tuxedo Black Ink. Then I Copic colored the bird and the surrounding swirly air/wind with the following Copic colors:
Bird: Y11, YR21, YR14, R14, B34, B37 and B39
Air: B000, B00, B01
To add a little deeper detailed coloring in the “nooks and crannies” of the air around the bird, I also used a couple of Prismacolor color pencils in Blue Mediterranee (PC1022) and Bleu Denim (PC1101). For a little magical shimmer on the bird, I added a coat of Clear Wink of Stella. To help the darker areas of the bird pop, I added some dotting details with a Uniball Signo White Gel Pen. Lastly I also added Ranger Glossy Accents to the bird’s eyes, beak and legs for some dimension and shine.
For a finishing touch on the CAS card, which I die cut using a WPlus9 Sunshine Layers die, I glued on a smattering of sequins topped with tiny dots of Platinum Liquid Pearls to cover the holes in the sequin centers. For added texture, shine and balance, I also added a handful of teeny tiny Platinum Liquid Pearl dots close to the sequin clusters.
The following is a process video of the coloring of this card:
Disclosure: Many of the supplies I’ve used for today’s project are linked. Some may be affiliate links, which means if you make a purchase I receive a small commission at no extra cost to you. I truly appreciate your support toward the costs of running this blog!
This card is being entered into the following challenges:
Simon Says Stamp Work It Wednesday New Challenge
Simon Says Stamp Monday Something New Challenge
Simon Says Stamp Wednesday Something New Challenge
CASology Encourage Challenge
Creatalicious Anything Goes Challenge
Word Art Wednesday Anything Goes Challenge
Crafty Gals Corner Anything Goes Challenge
Lil Patch of Crafty Friends Anything Goes Challenge
Cards Galore Encore Anything Goes Challenge
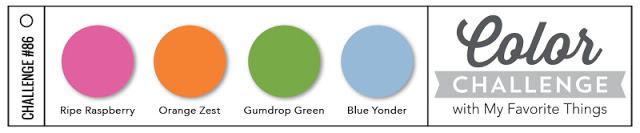
MFT Color Challenge #84
]]>