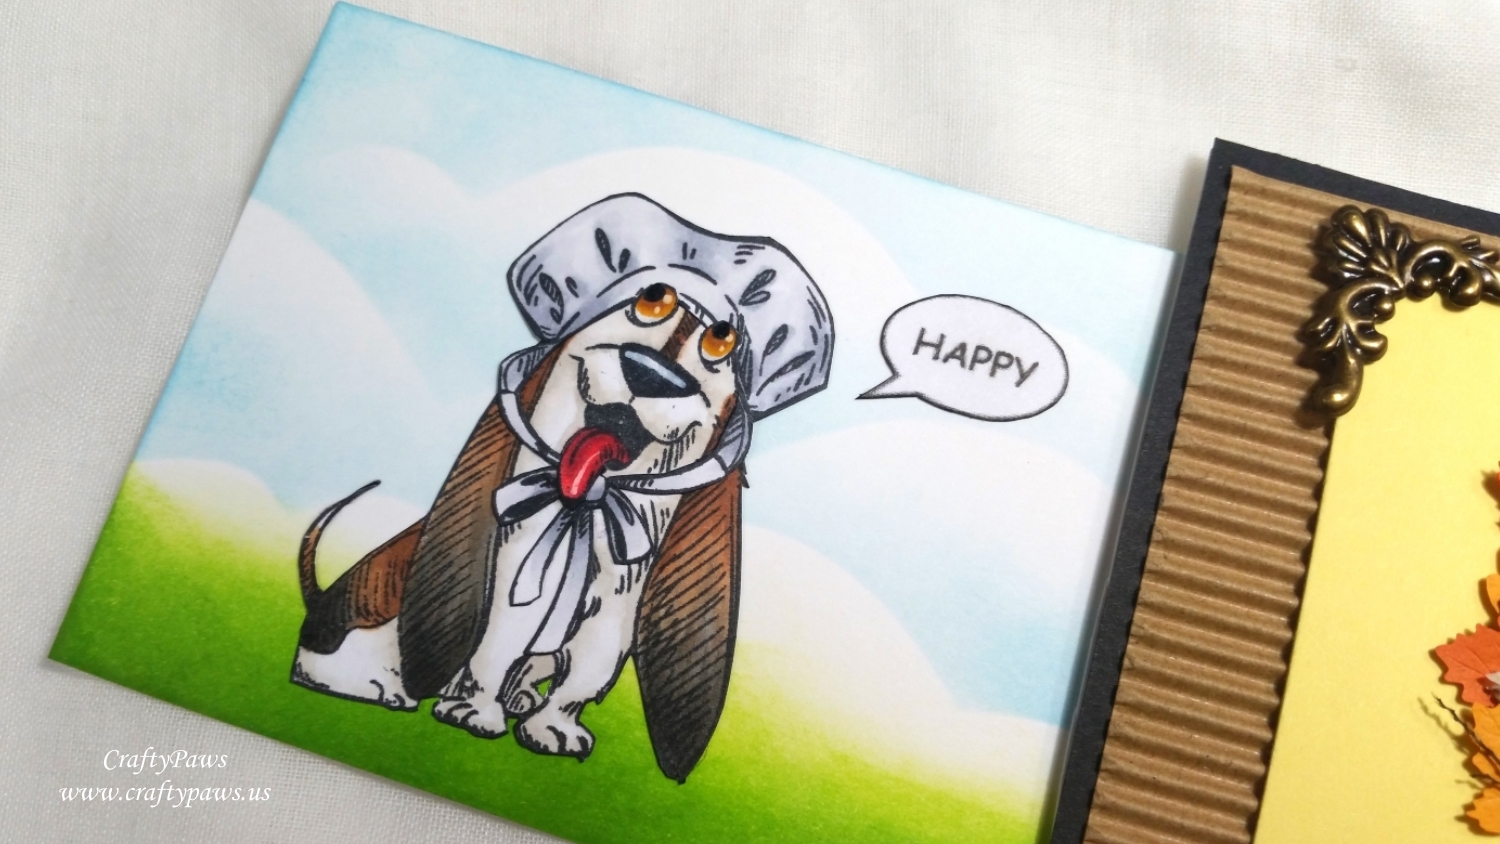
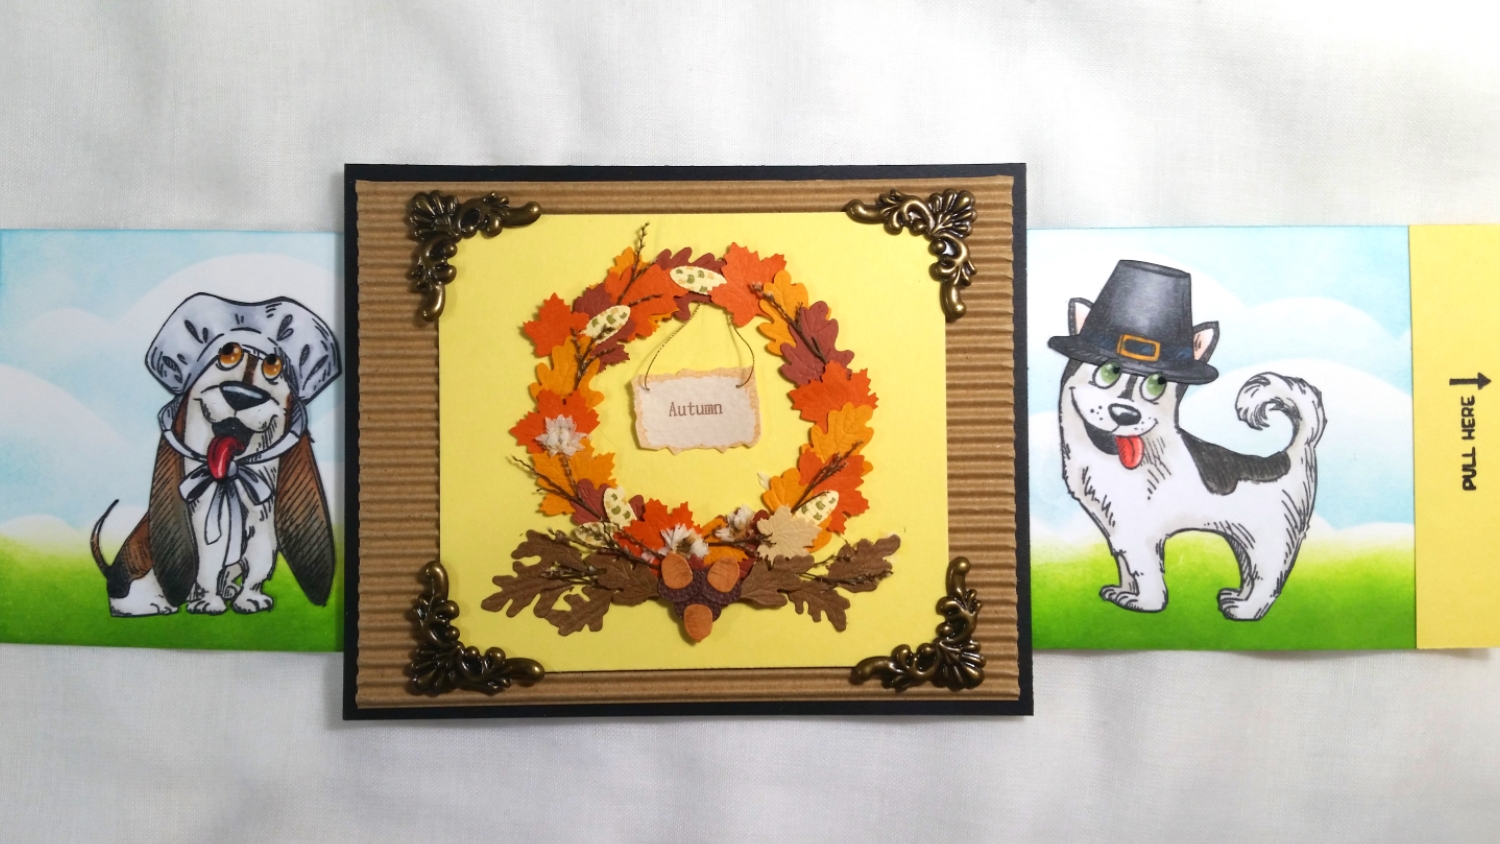
I first Copic colored the Husky and the Basset Hound as well as the Pilgrim bonnet and top hat with the following Copic colors:
Basset Hound: Tongue: R35 and R39; White: W0 and W1; Dark areas: W5 and W7; Brown areas: E23 and E25; Eyes YR24 and E23; Nose: C8
Husky: White: W0 and W1; Black: W5 and W7; Tongue: R22 and R24; Inner Ear: R30; Eyes: G24, G94 and G46 with Signo Uniball White Gel Pen and Sakura Black Glaze Pen
Pilgrim Bonnet: C00, C0, C1, C2 and C3
Pilgrim Top Hat: N3, N4, N5, N7, Y38, and B99
Then I fussy cut them and inked the edges with a Momento Tuxedo Black Marker.
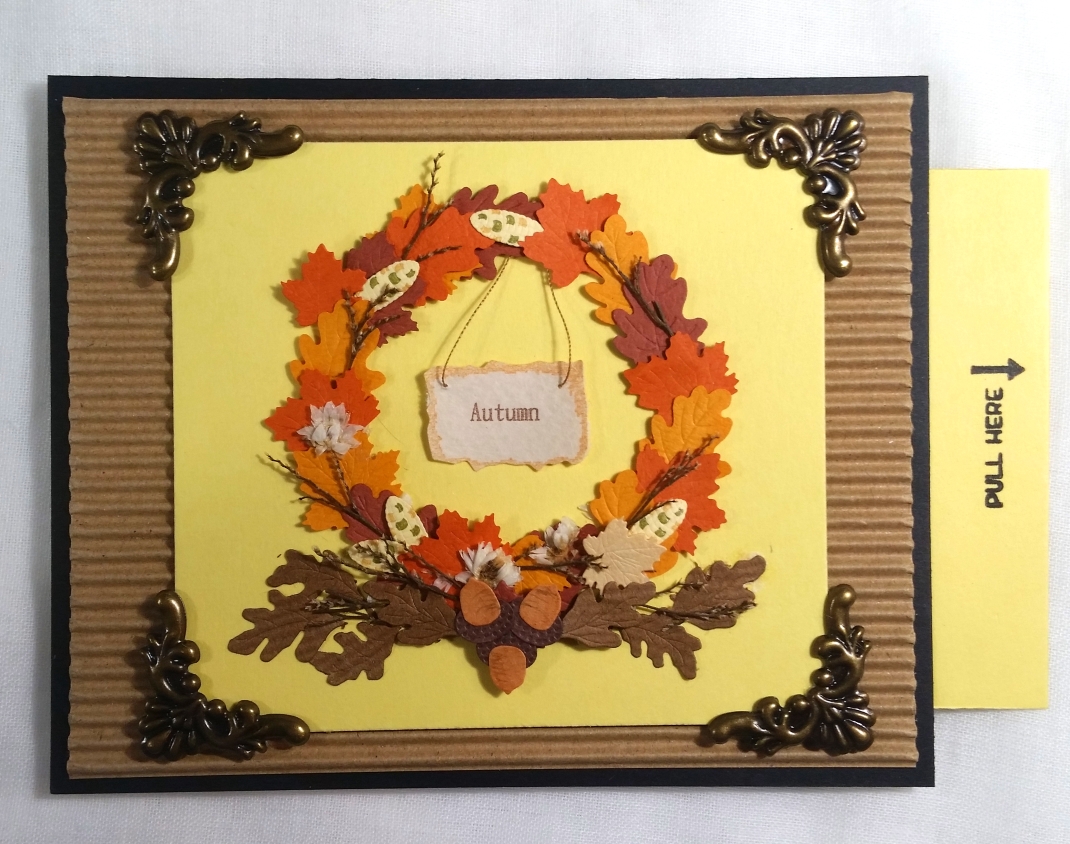
Then I prepped the various panels to create the double slider card structure as follows:
- Front Panel, Slider Mechanism Panel and Back Panel: 4.25″ x 5.25″
- Slider Mechanism Panel (positioned horizontally) is then prepped using an X-Acto blade to cut vertical slits 0.25″ away from either side, and 0.75″ away from the top and bottom
- Left Slider Panel is cut 3.25″ x 4 5/8″
- Right Slider Panel is cut 3.25″ x 5 1/8″
- Then a strip of heavy duty plastic is cut to 2.5″ x 11″, this is looped through the slits of the Slider Mechanism Panel and secured with strong double sided tape like Scor-Tape


Word Art Wednesday Anything Goes Challenge
Creatalicious Anything Goes with Optional Circles Challenge
Simon Says Stamp Work it Wednesday Celebration or Birthday Challenge
Lil Patch of Crafty Friends Anything Goes Challenge
Through the Craft Room Door Anything Goes Challenge
Crafts Galore Encore Anything Goes Challenge
613 Avenue Create Anything Goes with Optional Clean and Simple Challenge
Crafty Gals Corner 3+ Layers Challenge
Stamping Sensations I Spy with My Little Eye Something Beginning with B Challenge – Basset Hound, Pilgrim Bonnet, speech Bubbles, Blue skys
Simon Says Stamp Wednesday Pop it Up Challenge
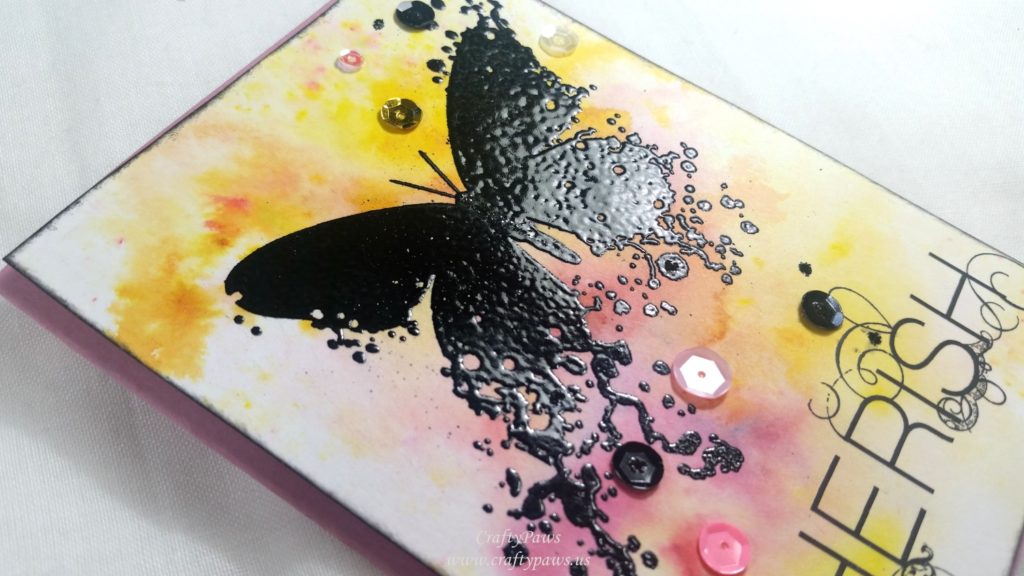
 I started with a card front base of Strathmore Bristol Paper, which I wet down with water and then sprinkled on some Ken Oliver Color Bursts in Merlot and Lemon Yellow. I wanted a bit more soft pink so I also added some Tim Holtz Distress Ink in Spun Sugar. Once I achieved the splotchy look I was hoping for, I made sure the whole card front was fully dry with my heat tool.
Next I used a MISTI to repeatedly stamp the butterfly until I got a fairly dark, saturated image. But it wasn’t quite what I had imagined so I used a Momento Tuxedo Black Marker to fill in some areas that weren’t stamping well due to the now slightly irregular card front texture (some of the Color Burst pigment grains had not fully liquified). Even still, I wasn’t totally satisfied with the dull black butterfly so I decided to try heat embossing. I used VersaMark Ink and some Ranger Black Embossing Powder to fully emboss the messy/sketchy butterfly, and ohhh! All of a sudden it seemed to come to life!
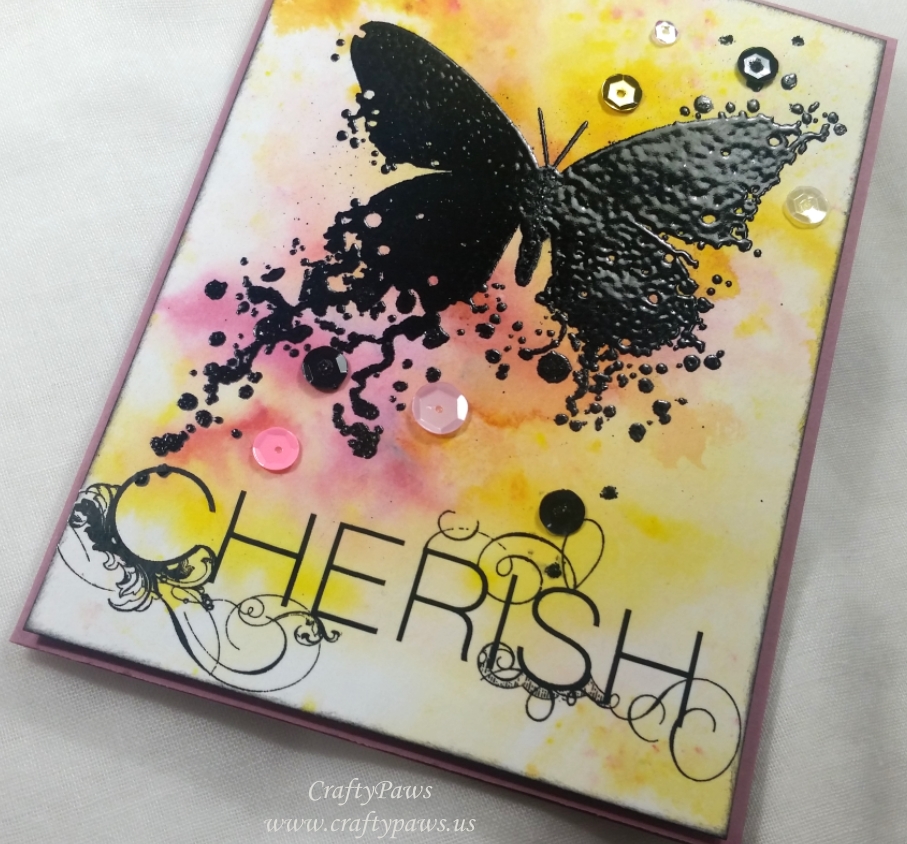 For the sentiment, I rummaged through my stash of sentiment stamps and rub on sentiments and found the word “CHERISH” in a beautiful swirly font rub on that I thought would complement and not distract from the focal point butterfly. I carefully rubbed it onto the whole lower part of the card front.
Next I inked the edges of the card front with some Versafine Black Onyx Ink before popping the whole card front onto a soft pink card base, backing it fun foam scraps for a bit of dimension.
For finishing touches and a bit of sparkle, I added sequins in black, pale pink, true pink, yellow gold and lemon yellow. I placed the appropriately colored sequins on the background areas to match the watercolored background. I also used a bit of ebony black glitter glue to add a bit of extra shine and texture on top of the black sequins, along the body of the butterfly, and strategically on some of the splattery-bubbly parts of the butterfly.
The following is a process video of crafting this card:
Disclosure: Many of the supplies I’ve used for today’s project are linked. Some may be affiliate links, which means if you make a purchase I receive a small commission at no extra cost to you. I truly appreciate your support toward the costs of running this blog!
This card is being entered into the following challenges:
CropStop Link Party Challenge #38
Addicted to CAS Bubbles Challenge
Simon Says Stamp Wednesday Sparkle and Shine Challenge
Word Art Wednesday Anything Goes Challenge
Creatalicious Anything Goes with Optional Dies and Punches Challenge
Card Mania Spring Challenge
Lil Patch of Crafty Friends Anything Goes Challenge
613 Avenue Create Anything Goes with Optional Use Vellum Challenge
Oddball Art Messy and Sketchy Challenge
]]>
*****************************
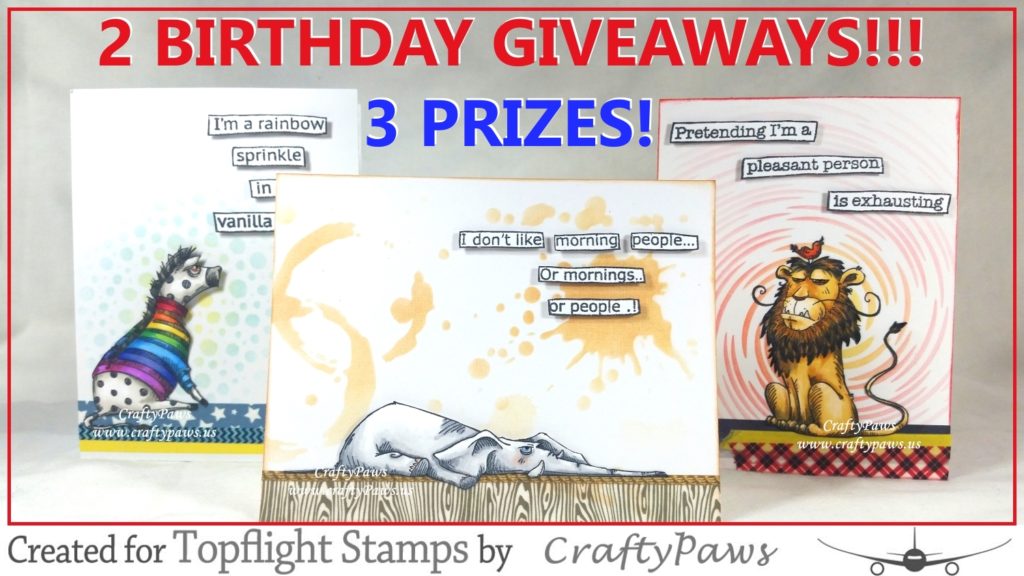
I’m so excited to be part of the Topflight Stamps 1st Birthday Blog Hop! The designers had free reign to use any of the products from the shop, and I am in LOVE with these whimsical Katzelkraft Jungle Animals Stamps so I knew I wanted to create a set of fun, anytime cards with them.
These are the Copic colors I used for each animal:
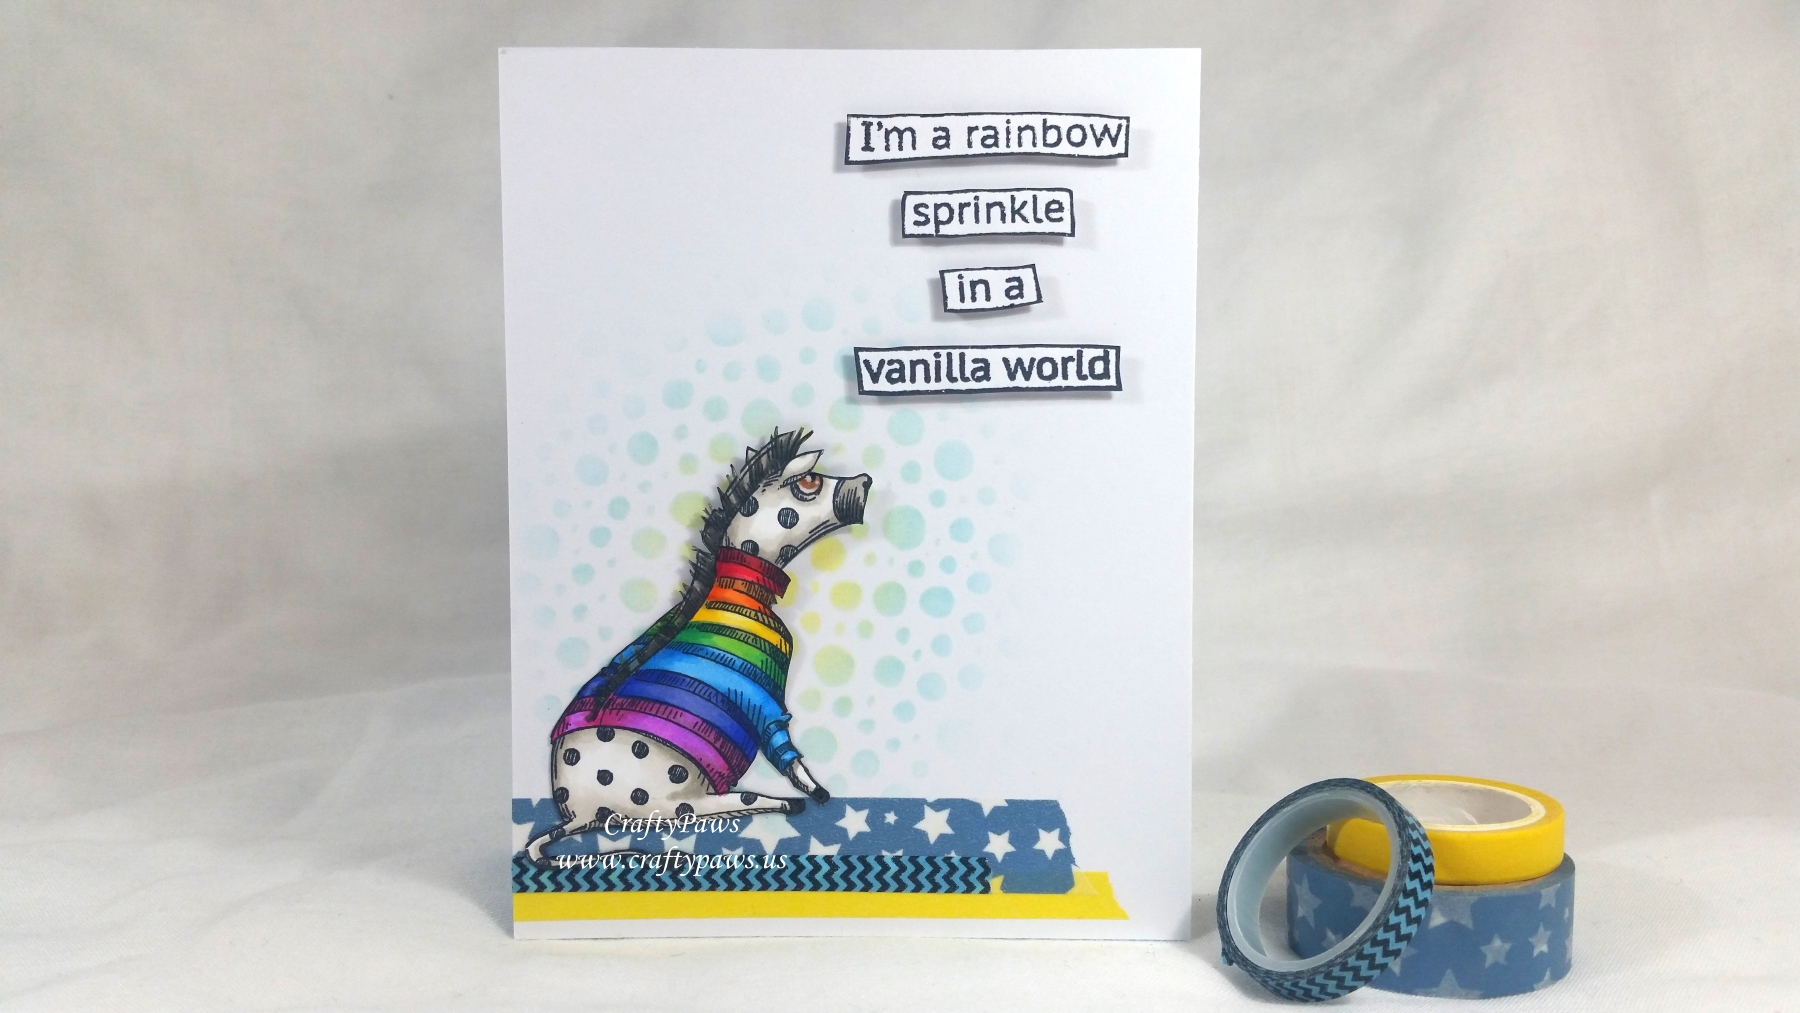
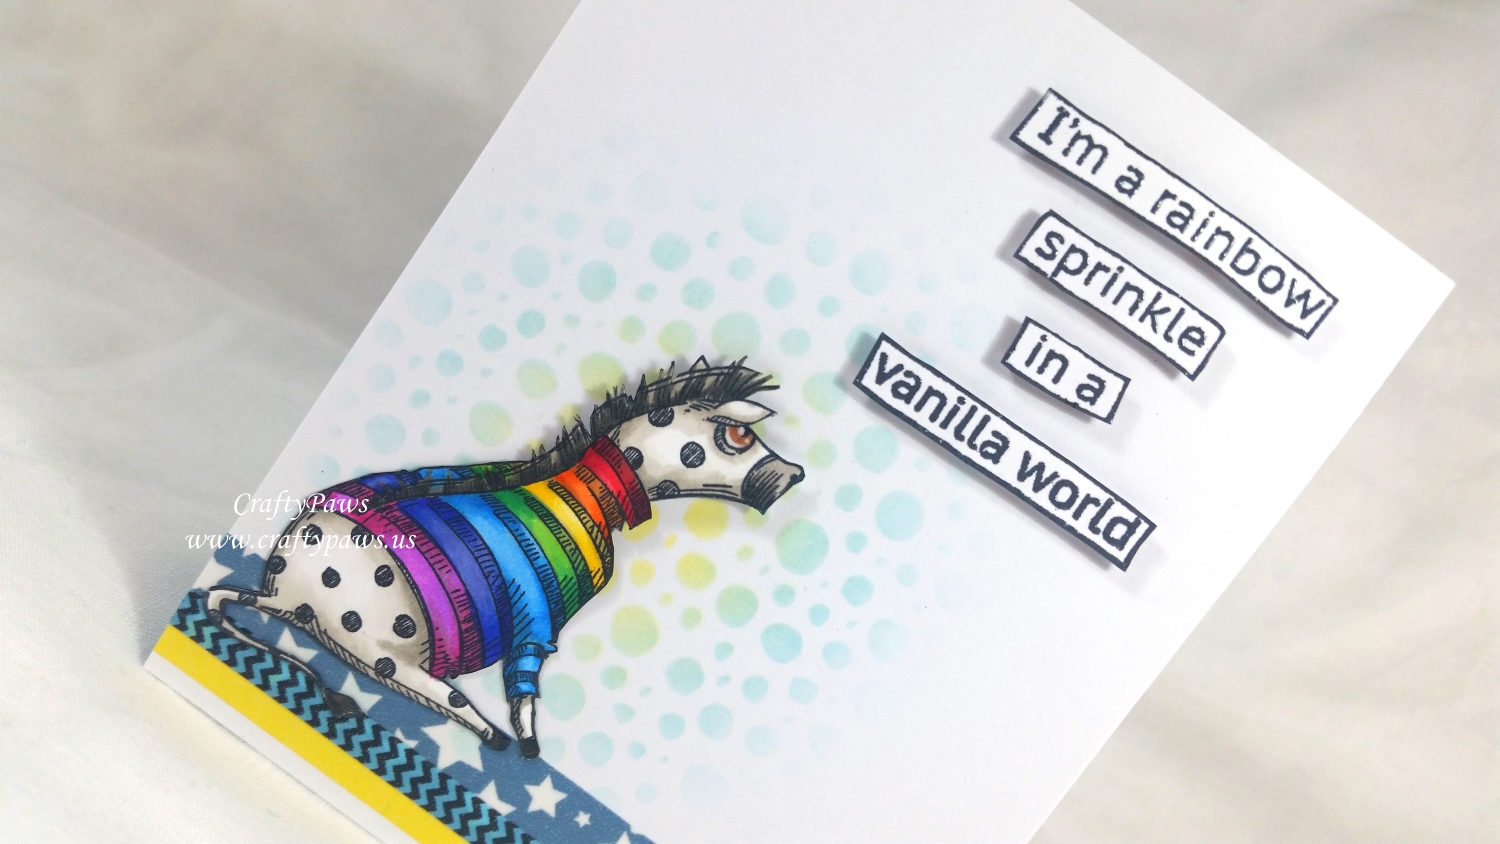
Polka Dot Horse: Body and Main: 0, W0, W1, W3 and W7; Rainbow Sweater: R35, R37, YR02, YR07, Y11, Y15, YG07, G09, B12, B16, B69, BV13, V04 and RV09; Eye: E25 with Uniball Signo white gel pen highlights
Exhausted Elephant: Body: N0, N2, N4, C0, R30; Eyes: B34 with Uniball Signo white gel pen highlights
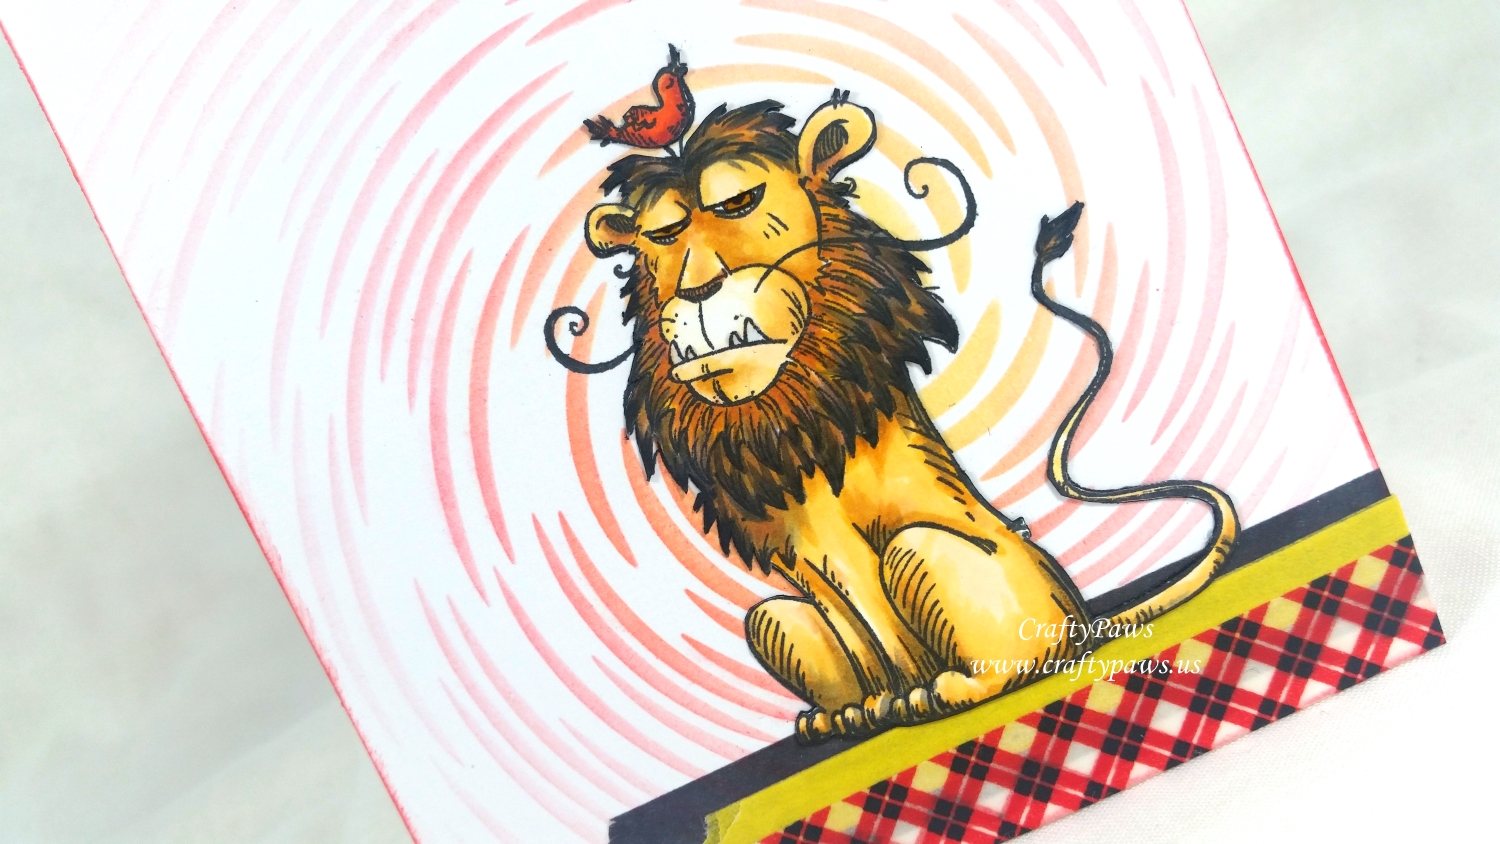
Lion with Bird: Bird: YR07, E97 and E07; Lion Body: E50, Y212, E53, YR24 and W3; Lion Main: W3, W5, W7, YR24 and E15; Teeth: C0; Eyes: YR24
After coloring them, I fussy cut out each of the animals and inked all the edges with a Momento Tuxedo Black Marker for a finished look. I also coated all the teeth, tusks, and eyes with Ranger Glossy Accents for shine. I’ll admit that after struggling to fussy cut out those super fine detailed curly whiskers of the lion and the legs of the bird, I ended up cutting them off; they just looked too scraggly. Instead, I re-stamped the image onto the card front and glued the colored and fussy cut lion and the bird over top to regain those delicate details in a much cleaner looking form for the finished card.
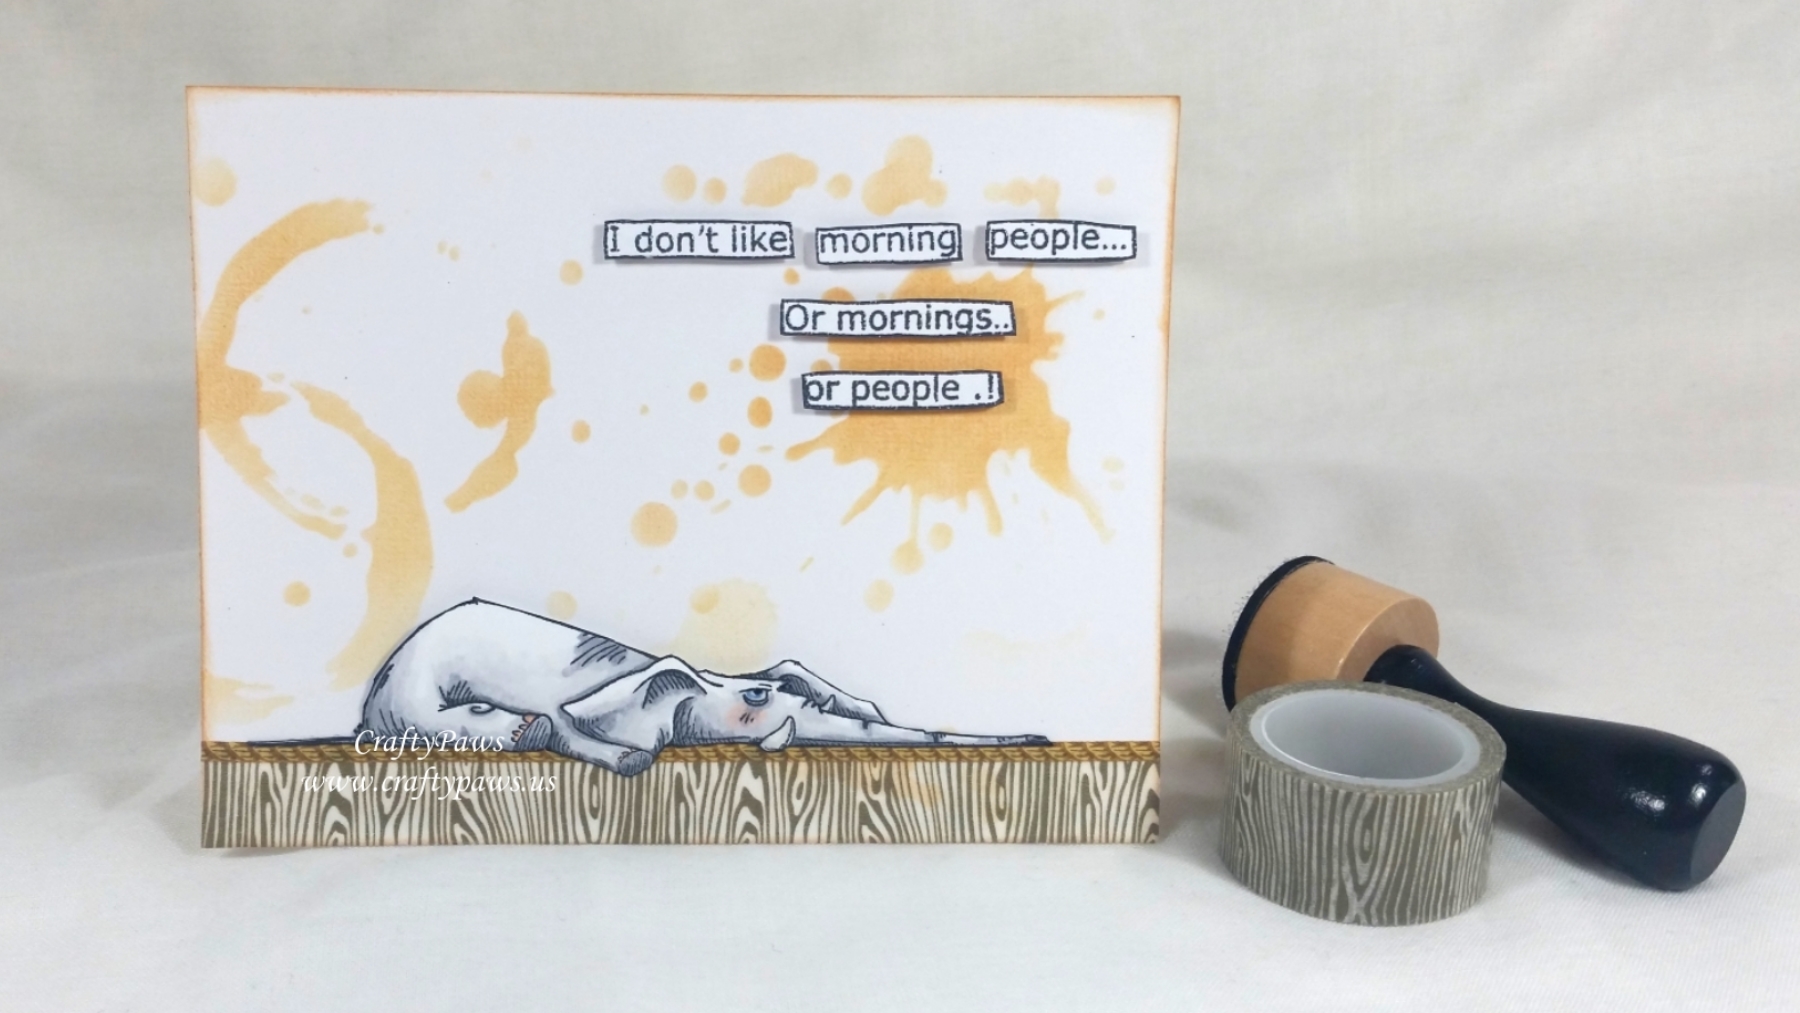
Because I also wanted to play with the AWESOME Clarity Stencil Brushes (also available at Topflight Stamps), I decided to stencil backgrounds for each animal. For the polka dot horse, I used a Dylusions Bubbles Stencil and blended on Tim Holtz Distress Ink in Squeezed Lemonade and Tumbled Glass. Where the two colors blended together, it created a beautiful citrus green. For the elephant, I used the Tim Holtz Splatters Stencil to create a coffee or tea stained look with Tim Holtz Distress Ink in Scattered Straw and Tea Dye. Lastly, for the grumpy lion, I wanted the focus to be on his wonderful facial expression so I used a DecoArt Andy Skinner Tornado Stencil with the center of the spiral being where I positioned the lion’s head. To add some energetic color, I used Tim Holtz Distress Ink in Squeezed Lemonade and Festive Berries, and where the two colors blended together a glorious tangerine orange color appeared.
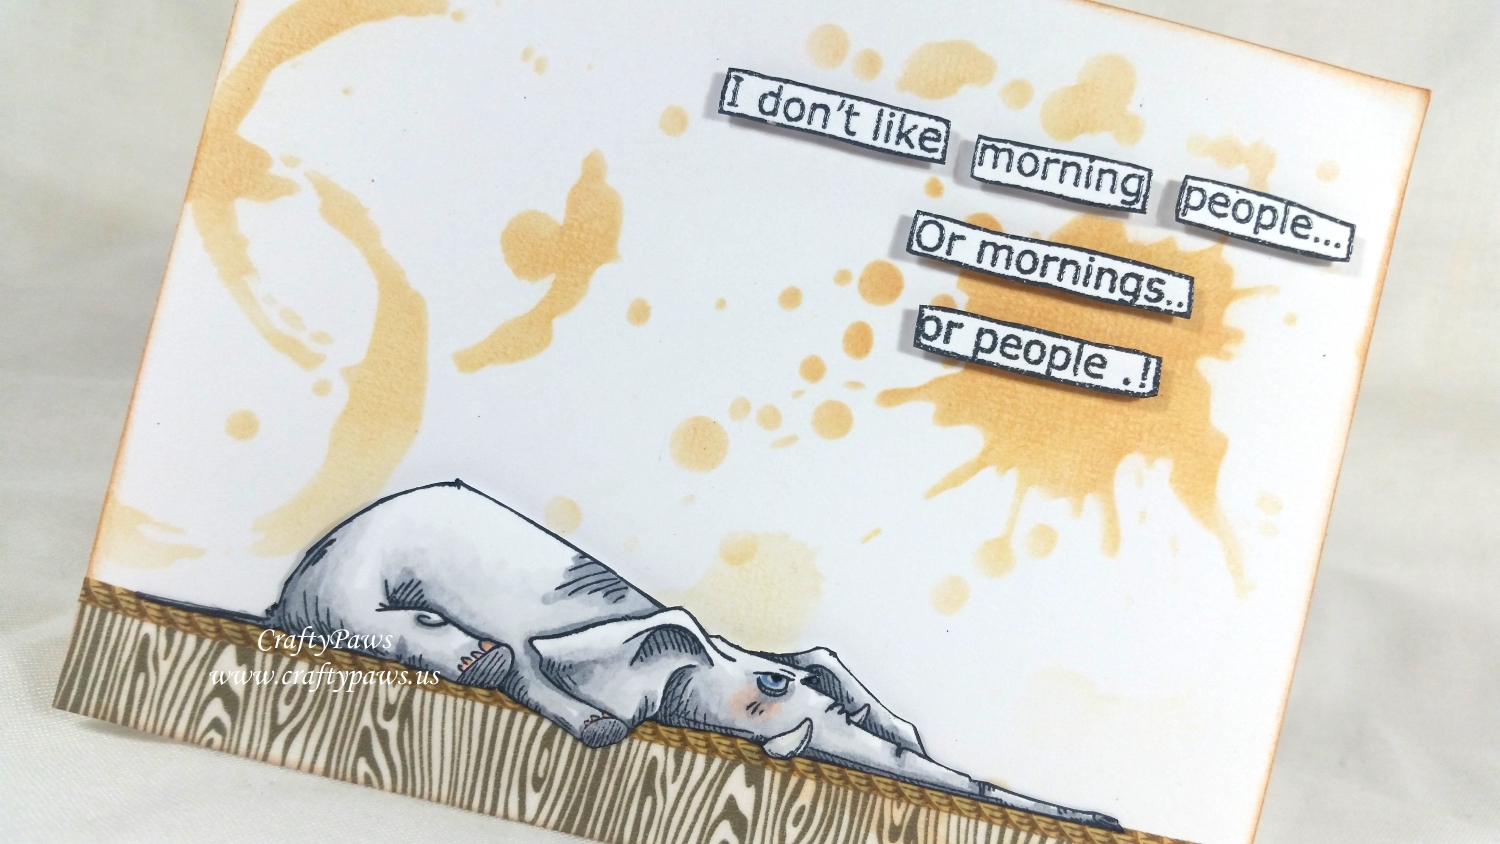
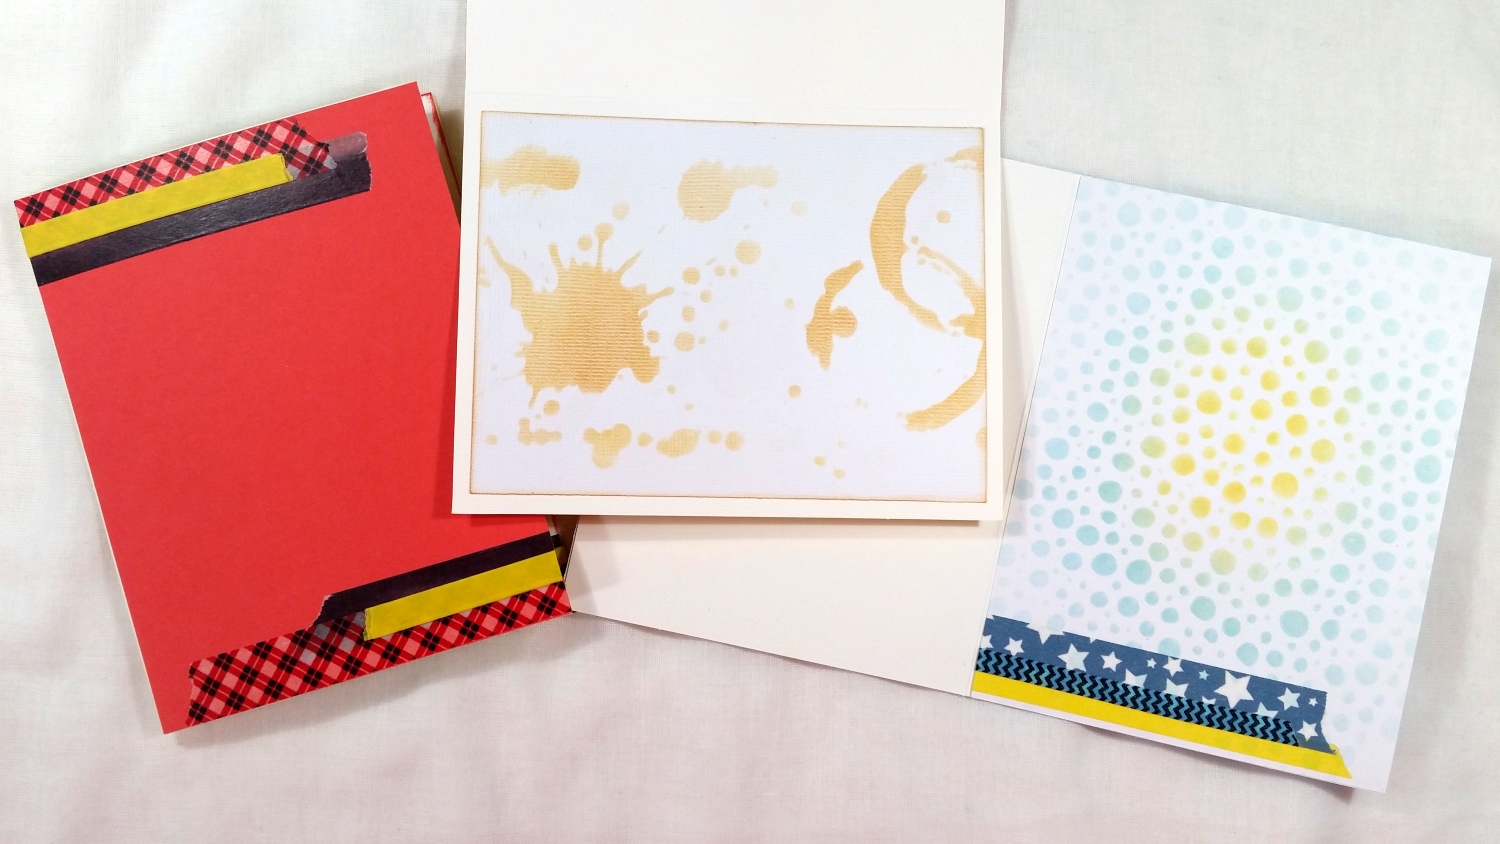
Next, I wanted all of the animals to look like they were sitting or laying on a floor of some sort, so I dug through my collection of washi tapes and picked out some fun patterns and colors that I thought would coordinate with the animals and their backgrounds. The polka dot horse got a plain yellow, a white and cornflower blue stars, and a thin teal and black chevron. The elephant was grounded with wide wood grain and super thin rope patterned washi tapes. The lion got his footing on an ombre black, thin yellow and a bold red, white and black plaid.
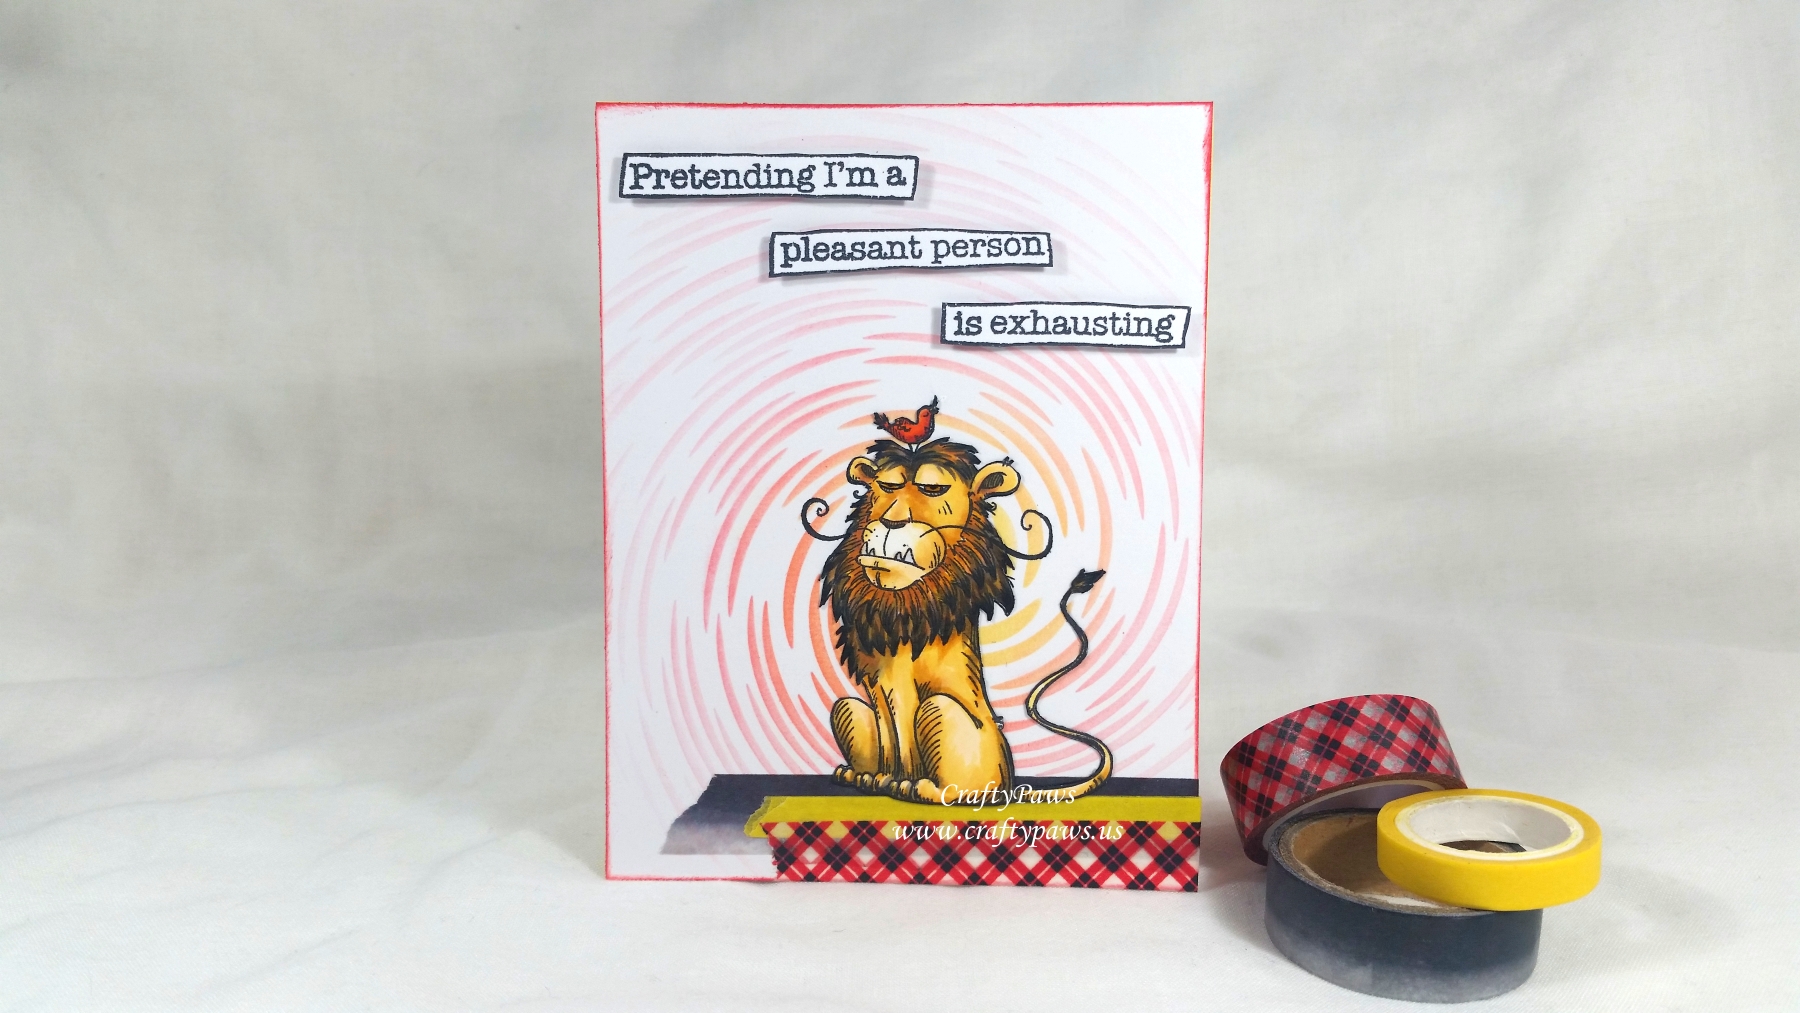
I was struggling a bit, thinking about what sentiments would work with and highlight these animals that were so full-of-personality, when I remembered some funny Dylusions sentiment stamp sets that I had fallen in love with and had to have in my stash but had never used. The sentiments for the horse and the lion are from the “Quote Bubbles” Stamp Set (this link is a different set, but has these quotes). The horse with the rainbow colored sweater says, “I’m a rainbow sprinkle in a vanilla world,” and the exasperated lion with a bird on his head says, “Pretending I’m a pleasant person is exhausting.” The quote for the elephant comes from the Dylusions “Quote Medley” Stamp Set (this link is for a different set, but has this quote) and says, “I don’t like morning people…Or mornings.. or people.!” I mean really, these quotes seemed made for these animal stamps! To give these sentiments a bit of visual weight, I heat embossed them with charcoal colored American Crafts Zing! embossing powder, fussy cut each segment out, inked all the edges with a Momento Tuxedo Black Marker, and popped them up on thin double sided foam dots.
To create coordinating card liners, I matched the washi tapes used on the card fronts with the card liners and/or I used the same stencils and Distress Inks to stencil matching backgrounds for the insides of the cards. I like how the cards are finished both inside and out.
GIVEAWAY ON MY YOUTUBE CHANNEL: To celebrate my birthday, I’m giving away a $25 gift card to the craft store of the winner’s choice. You must subscribe to my YouTube channel and leave a comment on the video (not on this blog post) by April 7, 2018 (12 pm ET).
GIVEAWAYS FOR TOPFLIGHT STAMPS 1ST BIRTHDAY BLOG HOP: Be sure to comment on this blog (please include your email so I can contact you if you win). Each of the designers on this blog hop are giving away a $10 gift certificate to Topflight Stamps. PLUS all the blogs on the hop to be eligible for the GRAND PRIZE $50 Topflight Stamps store credit!!! You have until March 31, 2018 (12 pm ET) to comment. I will announce my $10 GC winner here on my blog on Monday, April 2. The $50 Grand Prize winner will be announced on the Topflight Stamps Blog the same day. Be sure to check out all these blogs and comment for your chance to win the grand prize!
- Topflight Stamps
- Donna Bowman
- Lindsay Weirich
- Clare Messenger
- Julia Stainton
- Jenny Colacicco
- Veronica Zalis
- Tenia Nelson
- Lisa Hoel
- Teri Anderson
- Jenny Marples
- Nathalie Fournier
- Karen Bearse
- Kristina Song – YOU ARE HERE
SALE: Topflight Stamps is having a Special Birthday Discount from March 27 – March 31, 2018. Get 20% off your entire purchase by using the code: BDAY20

Disclosure: Many of the supplies I’ve used for today’s project are linked. Some may be affiliate links, which means if you make a purchase I receive a small commission at no extra cost to you. I truly appreciate your support toward the costs of running this blog!
]]>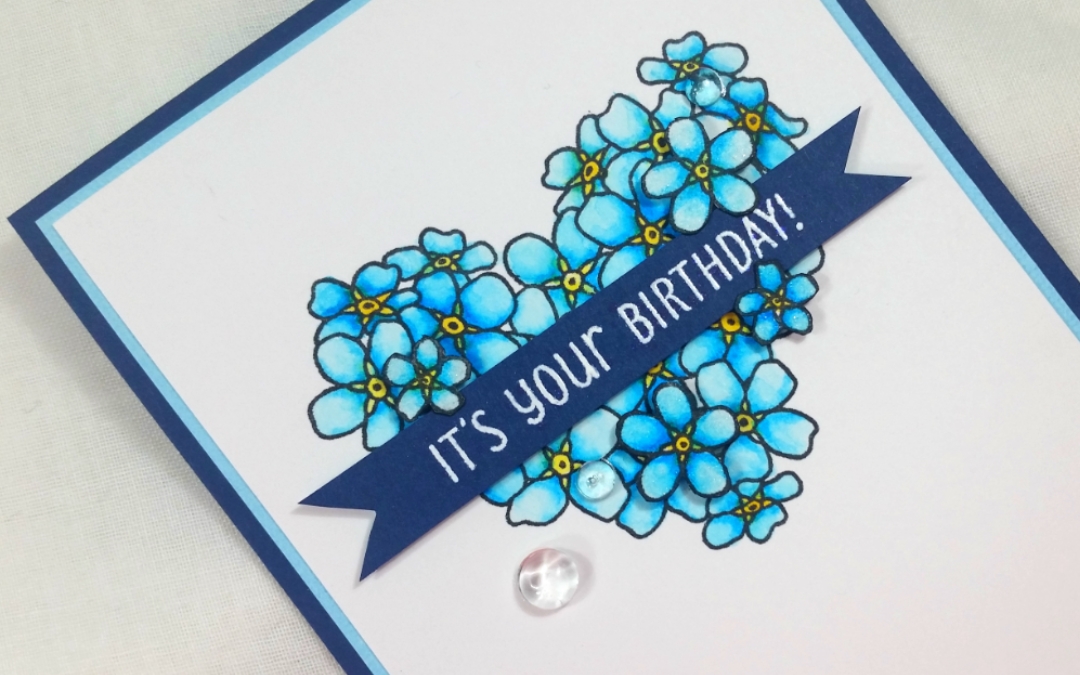
I stamped the bouquet on Strathmore Bristol Paper and used a Arteza Real Brush Pens in Acid Yellow (151), Bumblebee Yellow (128), Arctic Blue (117), and Cyanine Blue (159) with a water brush to watercolor the flowers. I also stamped four medium and small individual flowers and used the same colors to watercolor these but used a Clear Wink of Stella Brush Pen for added shimmer and shine. I fussy cut these extra flowers out and inked the edges with a Momento Tuxedo Black Marker for a nice finished edge because I wanted to add some dimension and detail to the card by popping up these flowers.
 For the card front sentiment, I heat embossed the sentiment that says “It’s Your Birthday!” using Ranger Super Fine White Embossing Powder on dark blue card stock and hand cut banner tails on each side. I popped up this sentiment on double sided foam adhesive to give a bit of dimension. Then I added the four fussy cut flowers on foam dots and positioned some of them to overlap the banner here and there. As a finishing touch, I also added three 6mm and 4mm Pretty Pink Posh Clear Droplets in to add sparkle, dimension, and the look of dew drops. I added a skinny mat for the card front with a pale blue card stock and then adhered everything to a dark blue card base.
I also created a simple card liner by stamping a branch of flowers from the For the Love of Stamps “Forget-Me-Nots” stamp set off the edge of the pale blue liner in the lower left corner. I thought this completed the card nicely, coordinating, but not being matchy-matchy with the card front image. To finish, I stamped an “Enjoy Your Big Day” sentiment in the upper center of the card liner; both sentiments are from the Power Poppy “Party Time” stamp set.
Disclosure: Some of the supplies I’ve used for today’s project are linked. Some may be affiliate links, which means if you make a purchase I receive a small commission at no extra cost to you. I truly appreciate your support toward the costs of running this blog!
COUPON: If you want to purchase any products at the Arteza Shop, you can get 10% off by using the COUPON CODE: BOE-TOZ-460
The following is a process video of creating this card:
This card is being entered into the following challenges:
Card Mania Embossing Challenge
Lil Patch of Crafty Friends Anything Goes Challenge
613 Avenue Create Anything Goes with optional ReUse/Upcycle Challenge
Through the Craft Room Door Anything Goes Challenge
Word Art Wednesday Anything Goes Challenge
Creatalicious Anything Goes with optional Birthday Challenge
Simon Says Stamp Wednesday Floral Frenzy Challenge
]]>
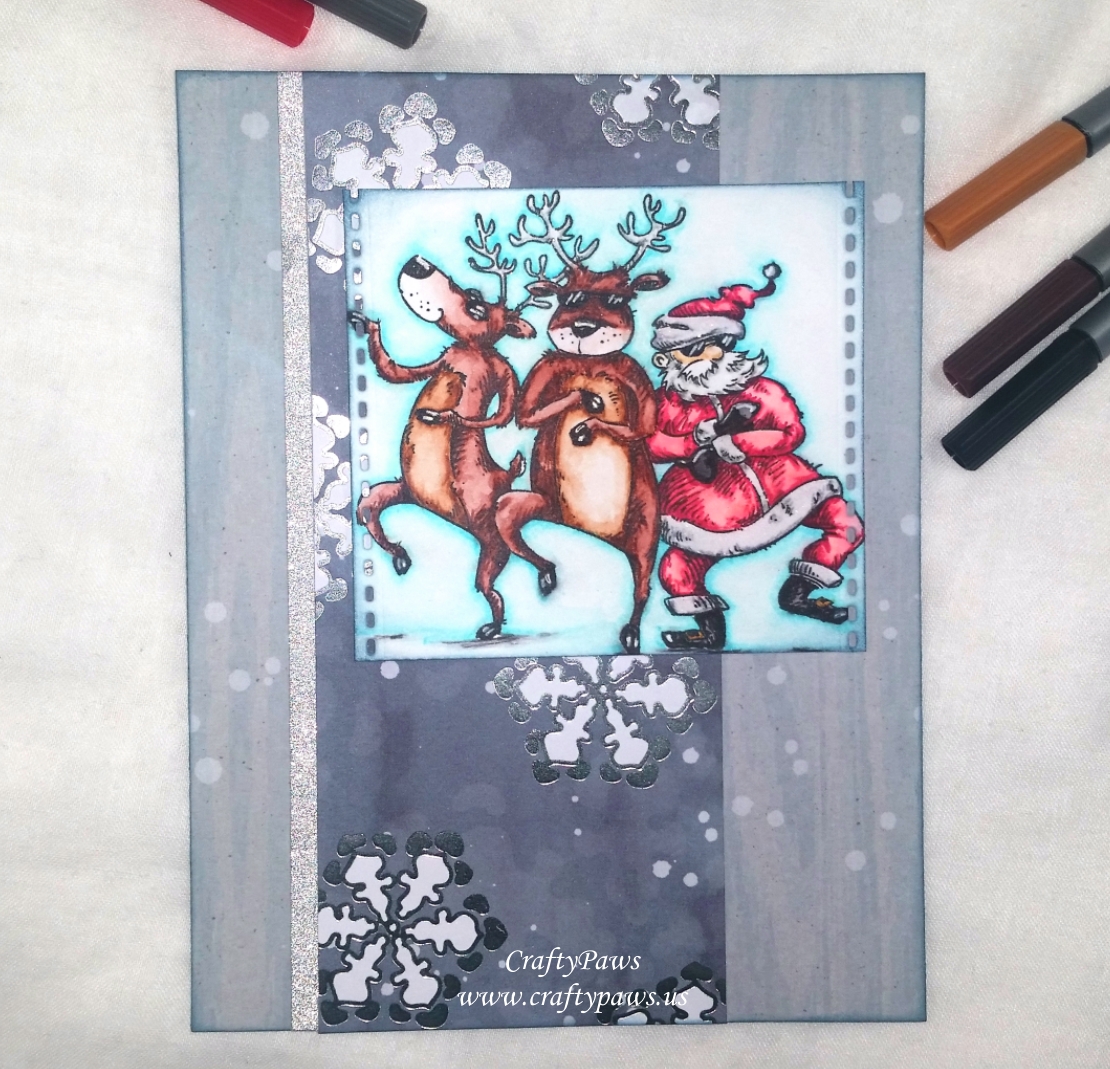 I also got a chance to re-evaluate some more Arteza products (I’ll be sharing a full separate video review of these in a following post). In short, I LOVE the Arteza Fineliner Pens. To color up this image, I used 8 of them: brown, tan, yellow, red, black and three greys and a fine point Arteza water brush to blend out the inks for a watercolored look. Getting into tiny nooks and crannies of the image was so easy with these fineliner pens!
I also used the Arteza Arctic Blue (117) Real Brush Pen and a water brush to create a soft blue haloing background. For some highlighting details, I used a Uniball Signo White Gel Pen on the sun glasses, noses, hooves, boots and gloves; and I added some magical shimmer to the antlers and Santa’s white fur trim with a Clear Wink of Stella Pen.
For the card front, I used scraps from my scrap box from a 2012 Recollections Christmas paper pad called “Memories Never Melt” and inked the edges with some Tim Holtz Distress Ink in Faded Jeans. For a little sparkle, I added a thin strip of silver glitter washi tape on one side. To add the look of a film strip cell (like this was a pic from a music video – hahaha), I used one of the Neat & Tangled Tiny Cuts border dies on the two sides of the image, again inking the edges with more Tim Holtz Distress Ink in Faded Jeans to maintain a cohesive look.
 Inside the card, I used the remaining scraps of the Recollections patterned paper from my scrap box. To make it a little more festive, I doodled some bursting stars with the Arteza Black Fineliner Pen. Then to drive home the fun Gangnam Style theme, I used Ranger Super Fine Embossing Powder on a scrap of dark blue card stock to heat emboss the sentiment from the stamp set. I cut it into a simple banner shape and added that as the final touch on the card liner.
Disclosure: Many of the supplies I’ve used for today’s project are linked. Some may be affiliate links, which means if you make a purchase I receive a small commission at no extra cost to you. I truly appreciate your support toward the costs of running this blog!
Arteza Coupon: If by chance you want to purchase any Arteza products, you can use the COUPON CODE (BOE-TOZ-460) for 10% off.
The following is a video sharing the coloring of this image:
This card is being entered into the following challenges:
Word Art Wednesday Anything Goes Challenge
Creatalicious Anything Goes Challenge with Optional Birthday
Through the Craft Room Door Anything Goes Challenge
613 Avenue Create Anything Goes with Optional Reuse/Upcycle Challenge
Art Impressions Water Color Wonders Challenge
Lil Patch of Crafty Friends Anything Goes Challenge
Card Mania Embossing Challenge
Penny Black and More Feature a Creature Challenge
Stamp Sensations Forest Friends Challenge
MFT Sketch 376 Card Challenge
]]>
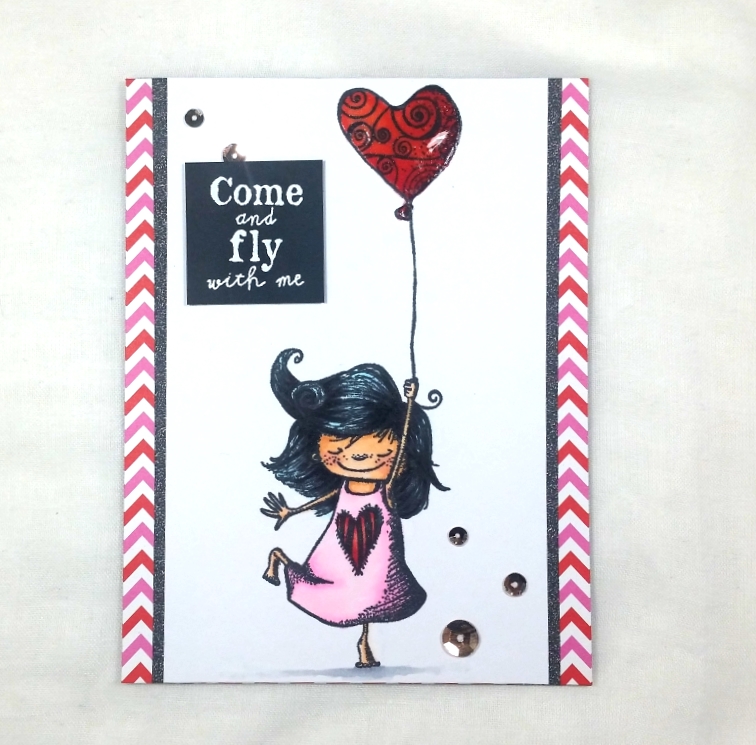 I used the following Copic colors to color up this cutie and her balloon:
Skin: E000, E00, E01, E21 and R20
Blue black hair: B000, B00, C7, C8 and C9
Dress: RV00, RV02, R22, R24 and R29
Balloon: R22, R24 and R29
Shadow on ground: C1 and C2
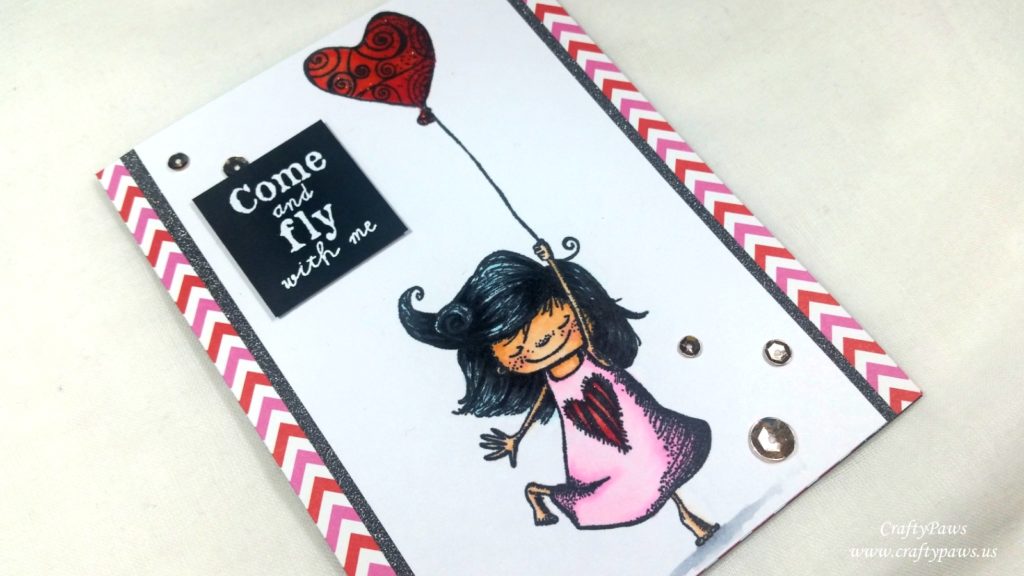
I used Clear Wink of Stella to add shimmer to both the balloon and the heart on the little girl’s dress, and added a coating of Ranger Glossy Accents on the Balloon for high shine.
I first stamped out the sentiment in the upper left, but ended up getting stray ink marks so I had to figure out how to hide that. I ended up stamping out the sentiment with VersaMark Ink on a scrap of black card stock and used Super Fine White Ranger Embossing Powder to heat emboss it. I popped this sentiment piece on double sided foam adhesive to add a little dimension, and I think it looks much better this way than how I had originally stamped out the sentiment just directly on the card front.
 For a little extra visual texture, I added gun metal glitter washi tape to both sides of the card front and also backed the whole piece with some fun pink and red chevron patterned paper from the Doodlebug Design “Lovebirds” 6 x 6 paper pad (retired). For a sparkly finishing touch I added a handful of sequins in various sizes to the lower right and upper left of the card front.
It’s one of my goals this year to focus a bit more on the insides of my cards, so for this one I trimmed the sides of the card liner with scraps of the same Doodlebug chevron patterned paper. I also decided to stamp out from the stamp set, the large quilt heart and the heart balloon again.
Unfortunately, I smeared the heart balloon a little bit, but I ended up camouflaging that with little eyelash lines that I doodled all around the hearts with a 0.03 pt. Copic Multi-liner Pen. Again, having to address a little mistake I think made the card better! 🙂
Disclosure: Many of the supplies I’ve used for today’s project are linked. Some may be affiliate links, which means if you make a purchase I receive a small commission at no extra cost to you. I truly appreciate your support toward the costs of running this blog!
The following is a start to finish process video of crafting this card:
This card is being entered into the following challenges:
Simon Says Stamp Wednesday Anything Goes Challenge
Word Art Wednesday Anything Goes Challenge
Creatalicious Anything Goes with Optional Girly Challenge
Card Mania Embossing Challenge – WINNER
Lil Patch of Crafty Friends Anything Goes Challenge
Through the Craft Room Door Anything Goes Challenge
613 Avenue Create Anything Goes with Optional Love Challenge
Crafty Gals Corner Anything Goes Challenge
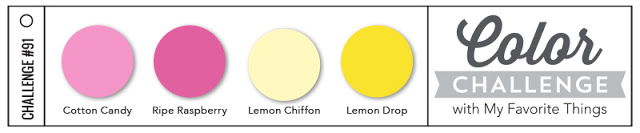
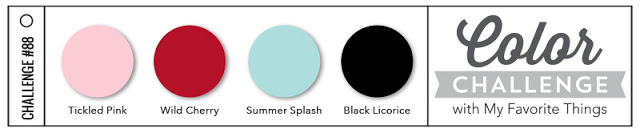
MFT Color Challenge #88
]]>
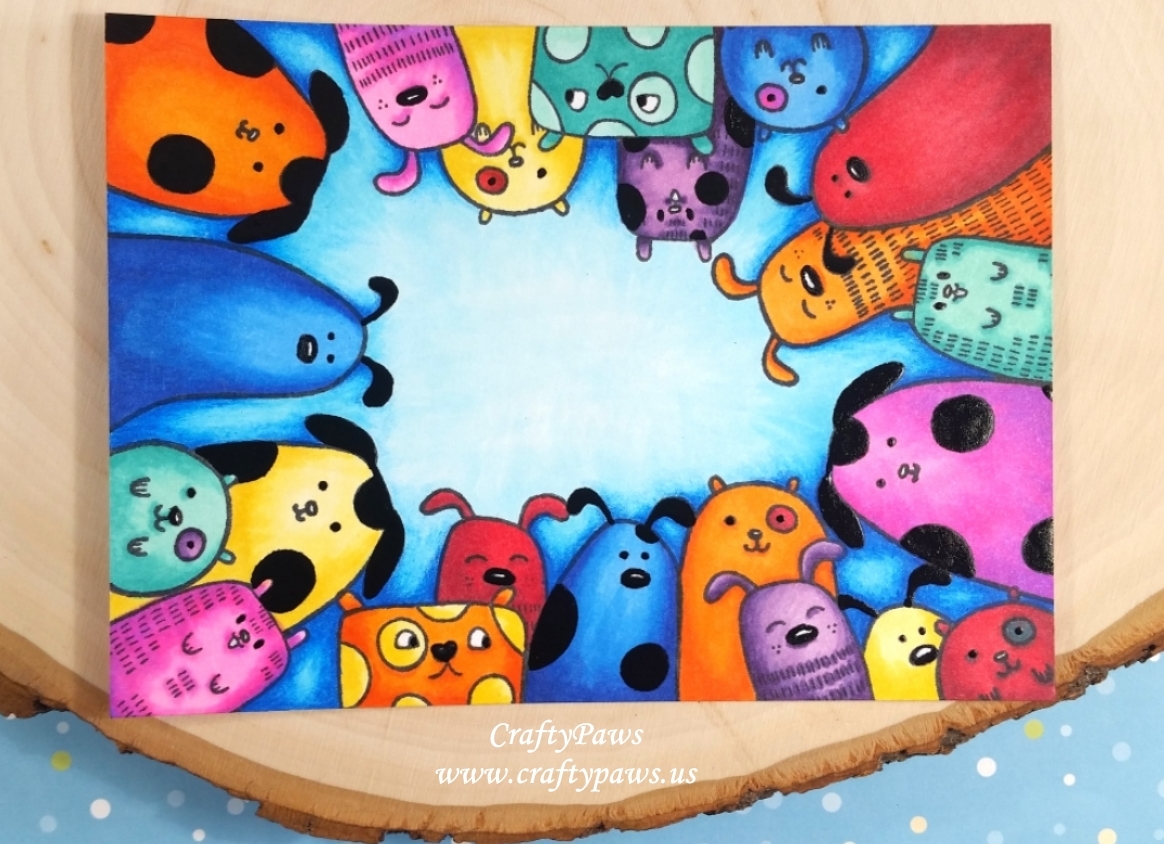
I stamped out each dog image 2-5 times, masking dogs in the front before stamping the dogs behind them all the way around my card front, which I cut down to 5 1/2″ x 3 7/8″. Because I didn’t want any dog to be next to any other dog that looked exactly the same, I ended up doodling to add extra fur, extend the lengths of the bodies, or adding spots to some of the dogs to keep the dogs looking different. I probably didn’t have to worry so much about maintaining the linear differences since I was Copic coloring them in a bunch of crazy colors, but it was fun to add the extra variety anyway.
 I used the following Copic colors to make the rainbow dog pack:
Blue dogs: B12, B16 and B18
Purple dogs: V12, V15, V17 and V09
Yellow dogs: Y11 and Y15
Orange dogs: YR15, YR04 and YR07
Red dogs: R35, R37 and R39
Blue green dogs: BG11, BG13 and BG15
Violet dogs: RV02, RV04 and V04
I colored the background with pale blues: B000, B00, and B01. Then to add a little depth and make the dogs pop a bit more from the background, I used Prismacolor colored pencils in Electric Blue (PC1040) and Copenhagen Blue (PC906) to add some deeper blues to the nooks and crannies of the background. I also colored some of the dogs’ spots and ears with a Sakura Black Glaze Pen for some shine and subtle texture.
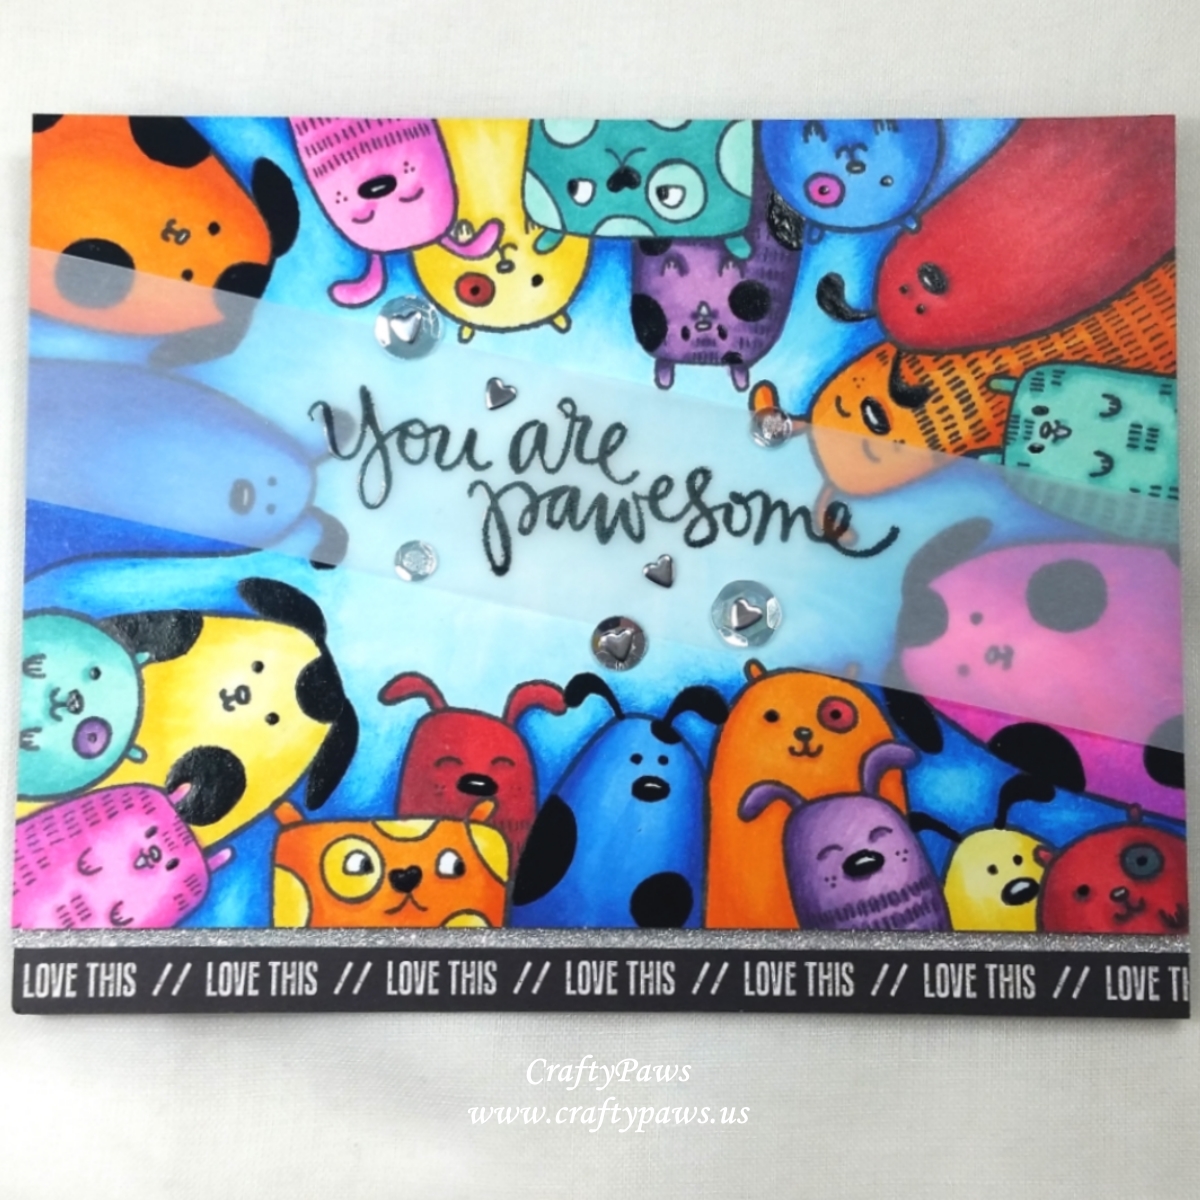
This left a perfect open space for a sentiment in the middle of the card front. But rather than make a single layer card, I thought it might be more interesting heat emboss a sentiment onto a vellum strip that I could wrap around the whole card front. Fortuitously, the “You are Pawesome” scripty sentiment from the Simon Says Stamp You Are Pawesome stamp set fit perfectly! I first prepped the vellum with the EK Success Powder Tool then I inked up the sentiment with VersaFine Black Onyx Ink. Then I used Recollections clear embossing powder to heat emboss and fix the sentiment in place on the vellum (ink tends to smear unless fixed like this).
I secured the vellum in place by securing it on the back of the card front with tape and then popped it up on a sheet of fun foam for some added dimension. I found a strip of patterned paper in my scrap box that had “LOVE THIS” printed over and over and decided this would be a great way to accent the bottom of the card. To add a little shimmer, I also added a thin strip of silver glitter washi tape above this before adding the card front over top. For finishing touches and to hide where I tacked down the vellum a bit more, I added lots of sparkly silver sequins and tiny metal hearts.
The following is a process video of putting together the card (this does not include the stamping and coloring):
This card is being entered into the following challenges:
Card Mania Red and Hearts Challenge
Lil Patch of Crafty Friends Anything Goes Challenge
Fab ‘n’ Funky Babies, Children or Men Challenge
Through the Craft Room Door Anything Goes Challenge
613 Avenue Create Love Challenge – WINNER
Penny Black and More Love, Hearts and/or Flowers Challenge
Crafty Gals Corner Add a Heart Challenge
Word Art Wednesday Anything Goes Challenge
Creatalicious Anything Goes with Optional for a Boy or Man Challenge