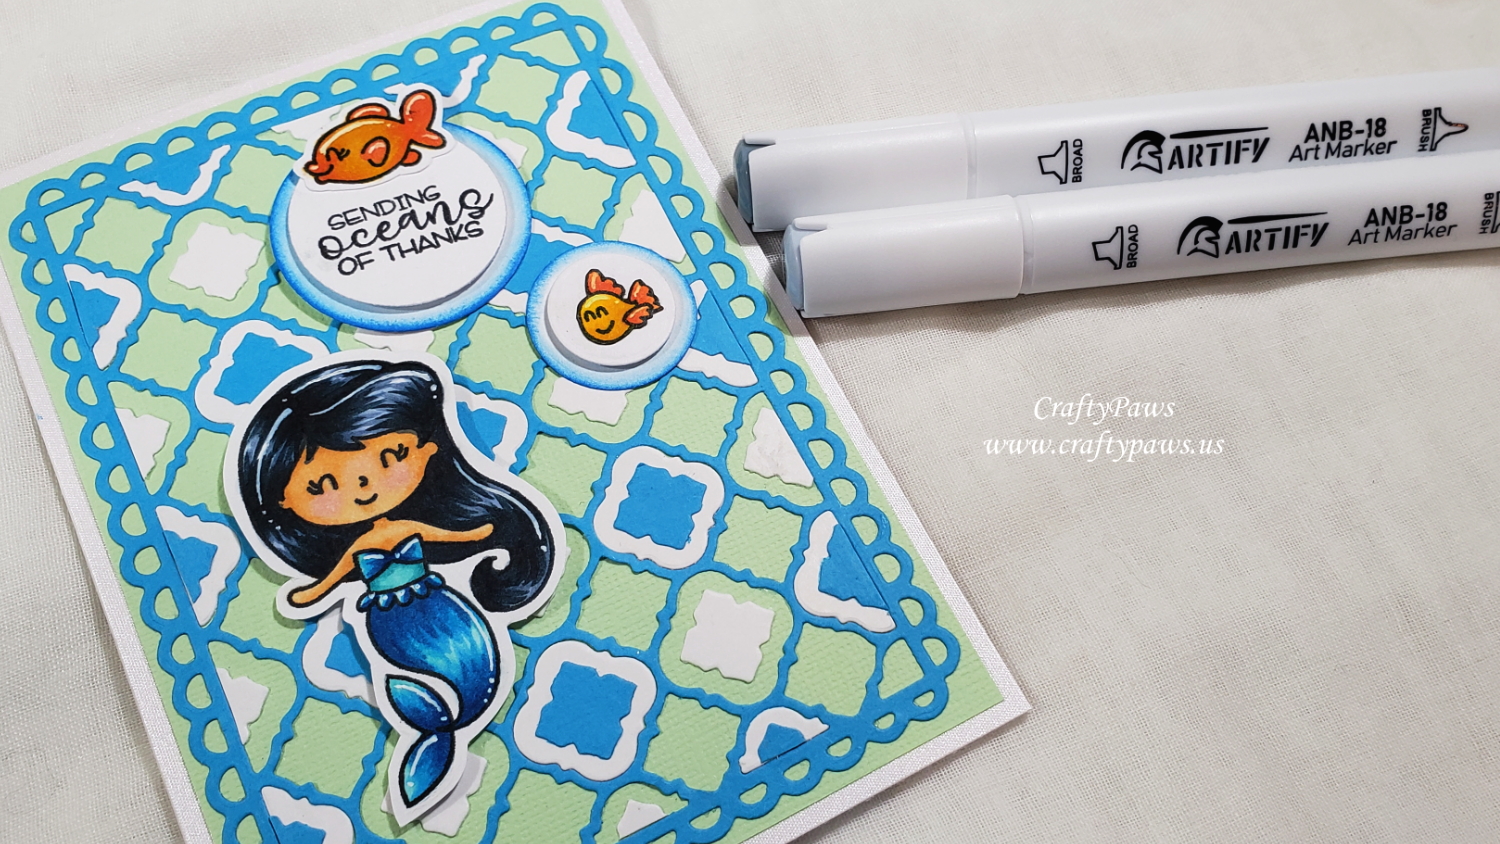
Then I got to coloring up the mermaid and the little fishes from the Avery Elle “Sea Babies” mini stamp set (retired). To coordinate with the cardstock colors I used in the background, I used these Artify marker colors:
Mermaid Body suit/tail: B502, B514, B204, B227
Mermaid Hair: CG01, BG05, BG09
Mermaid Skin: Y900, Y701, Y811, R501
Fishes: Y414, Y505, Y715, Y204, Y207, WG09
The colors blended well, but I was not used to the quantity of the ink that came out (I guess my Copic markers are dry — LOL). These markers are really juicy so I had to try to keep a lighter touch. I was really impressed with the coverage and brightness of these markers and I would recommend them as a budget-friendly alternative to Copic markers. I also added highlights with my trusty Uniball Signo White Gel Pen.
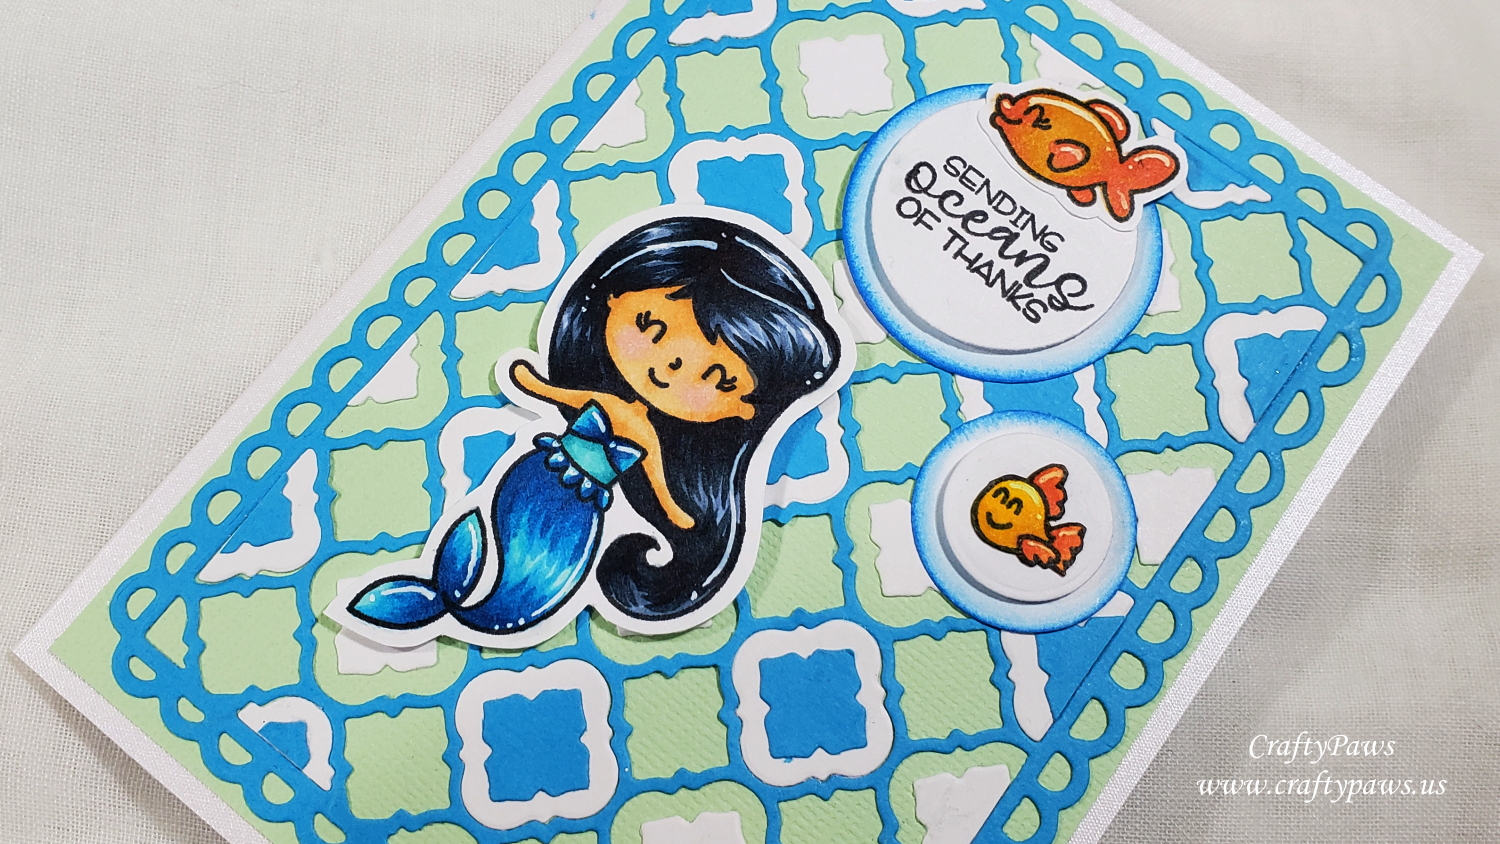
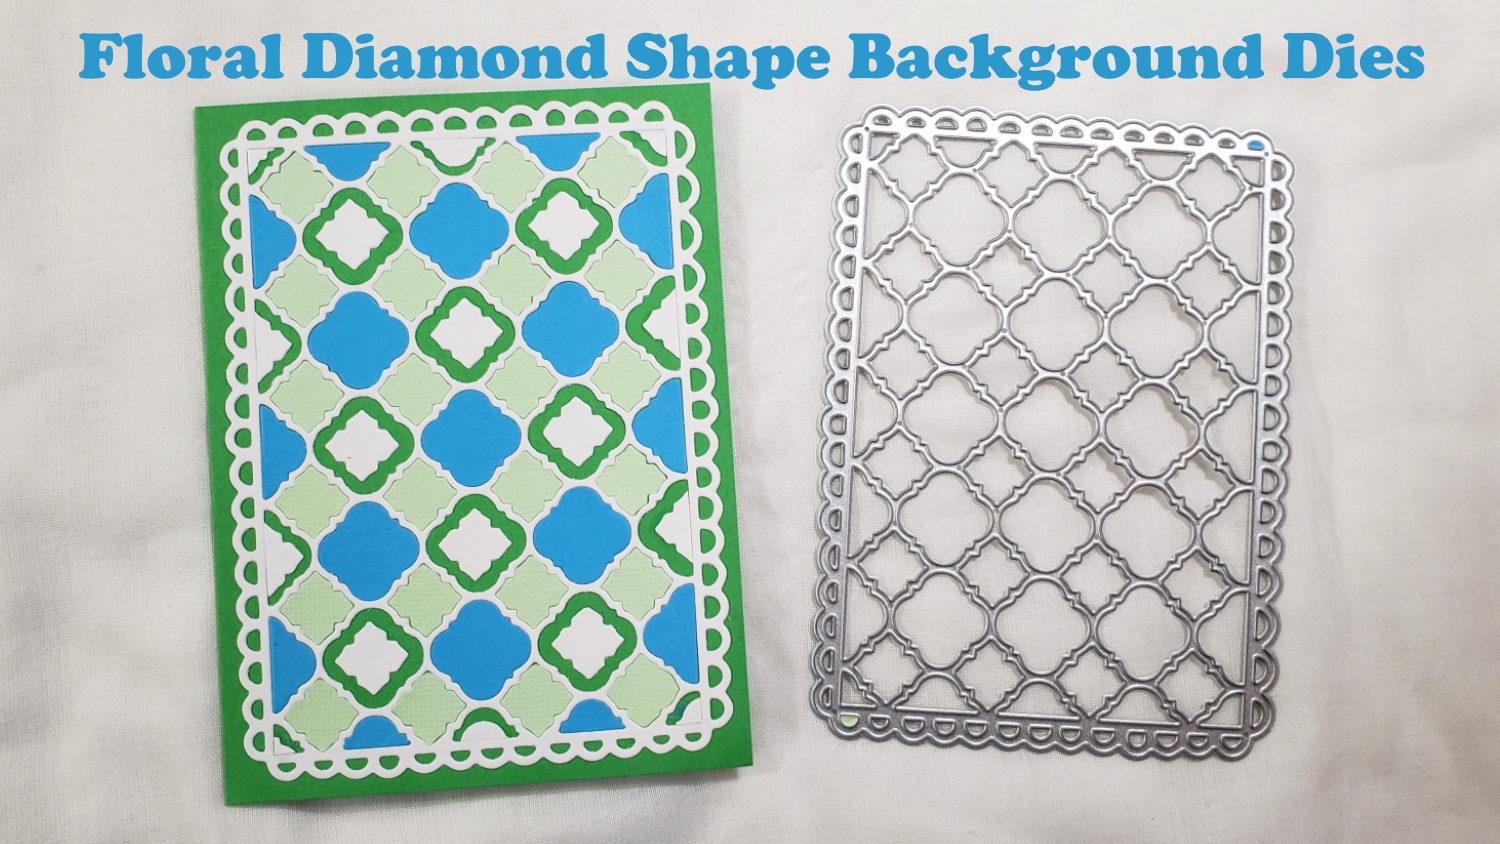
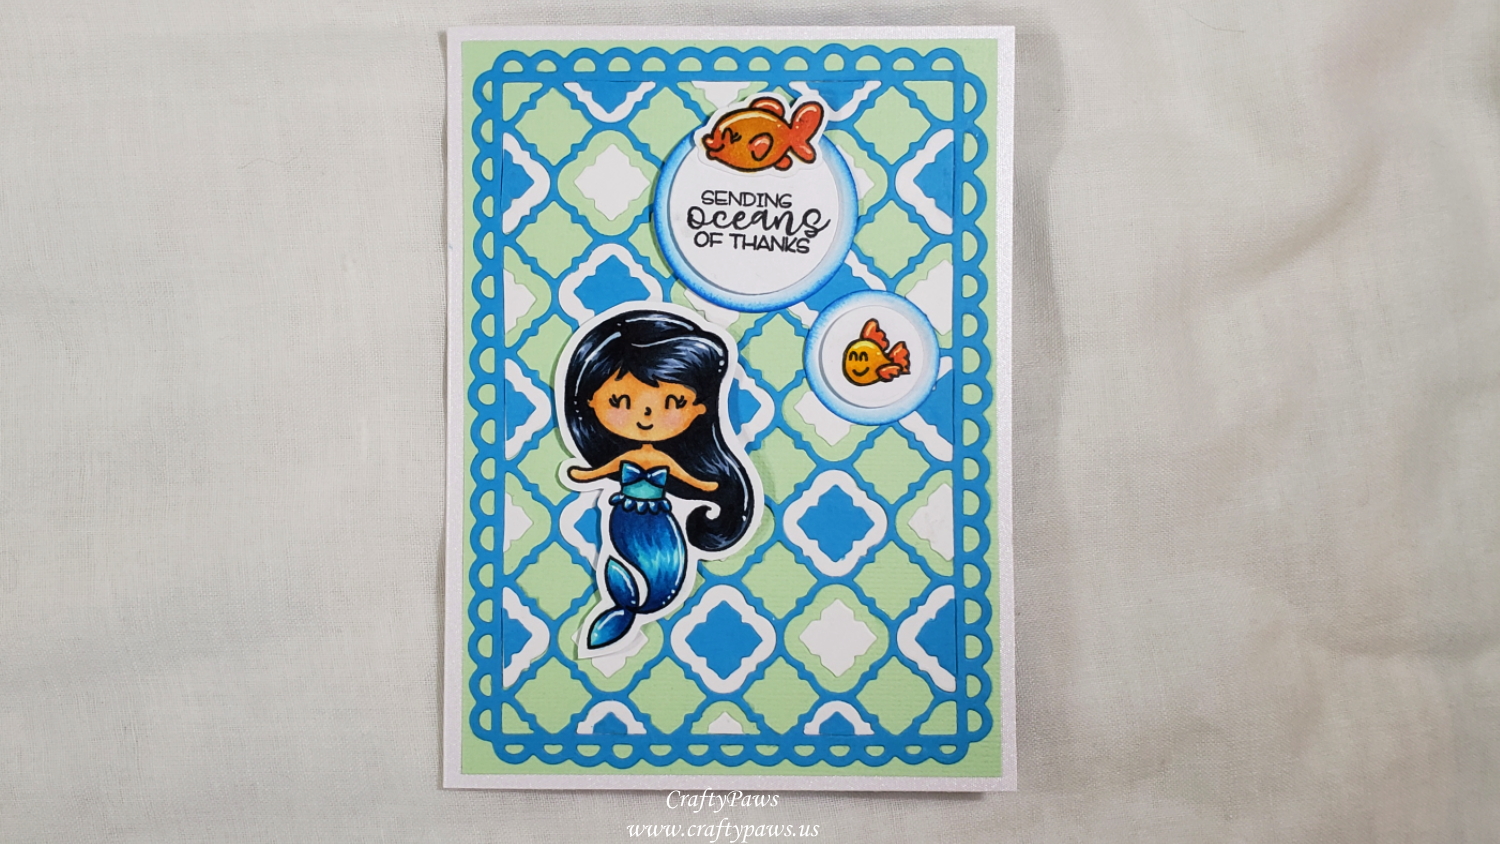
I fussy cut out the mermaid and the fishes with my Fiskars Spring Loaded Reverse Scissors, leaving a bit of a white margin all around so that she would pop a bit from the busy background. For the fishes, I decided that even with the white margin, they were too small and might be fighting with the busy background so I decided to put them on “bubbles” that I die cut using the four smallest circles from the Diemond Dies Die-Normous Stack-Ems Circle Nesting Die Set. I stacked two circle die cuts, added some depth with double sided foam adhesive between them, and blended some Salty Ocean Distress Ink on the lower circle. For the larger circle and fish, I also stamped in the combined sentiment from the stamp set: “Sending Oceans of Thanks”. So that the mermaid would not be overshadowed by the bubbles, I popped her up on double sided foam adhesive too.
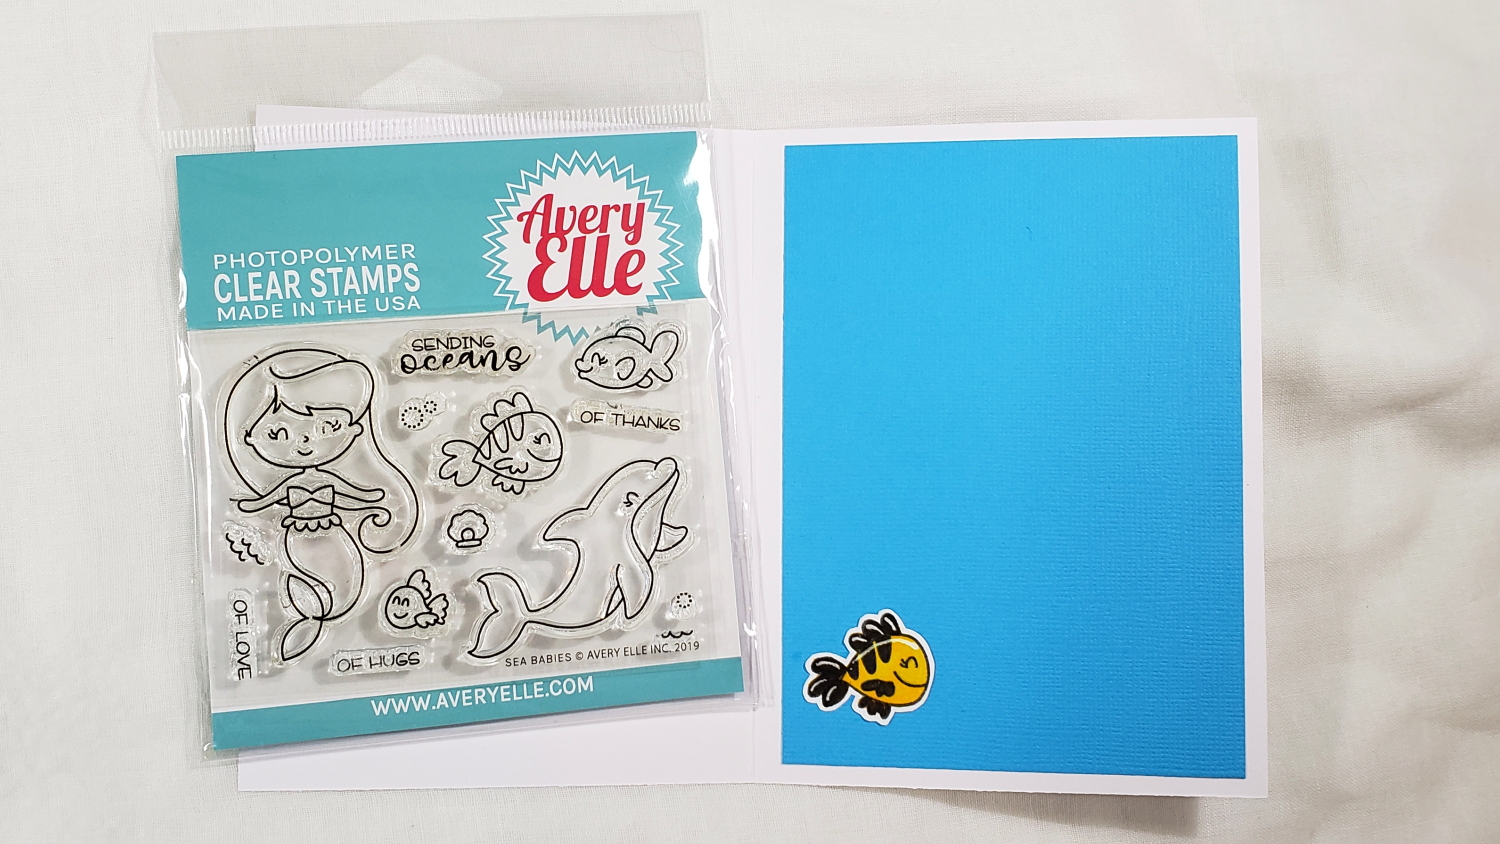
For the inside card liner, I simply used a scrap of aquamarine cardstock to match one of the background cardstock colors. And for a finishing touch, I added a third Artify-colored fish from the stamp set that I fussy cut and glued to the lower left.
CLICK on the following picture to watch the card making process video:
This card is being entered into the following challenges:
Crafts Galore Encore Anything Goes Challenge
Creatalicious Anything Goes with Optional Slim Line Card Challenge
Word Art Wednesday Anything Goes Challenge
Through the Craft Room Door Anything Goes Challenge
Stamping Sensations Fantasy and Magical Challenge
]]>
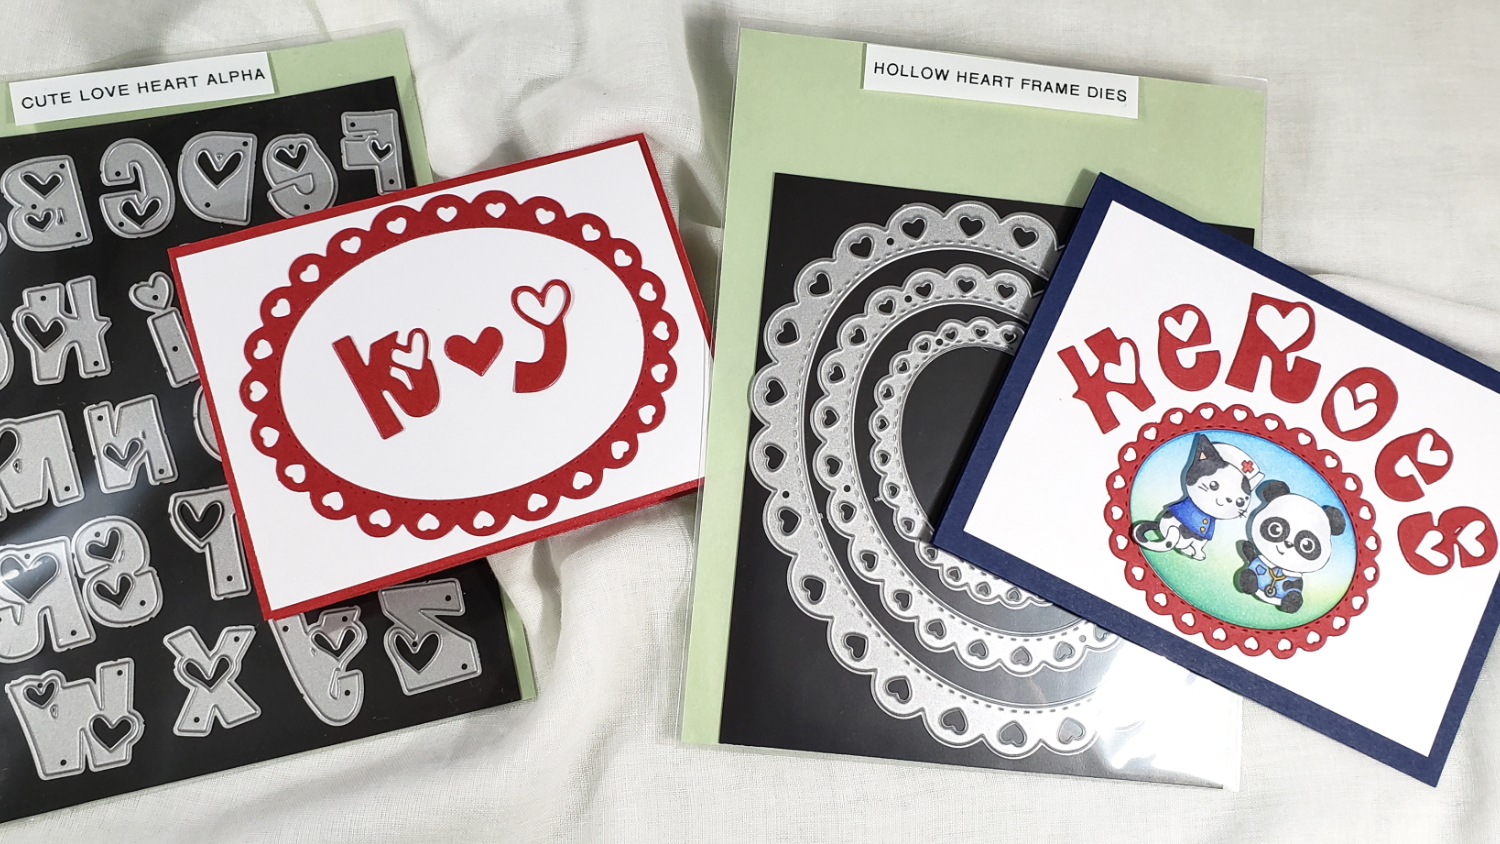
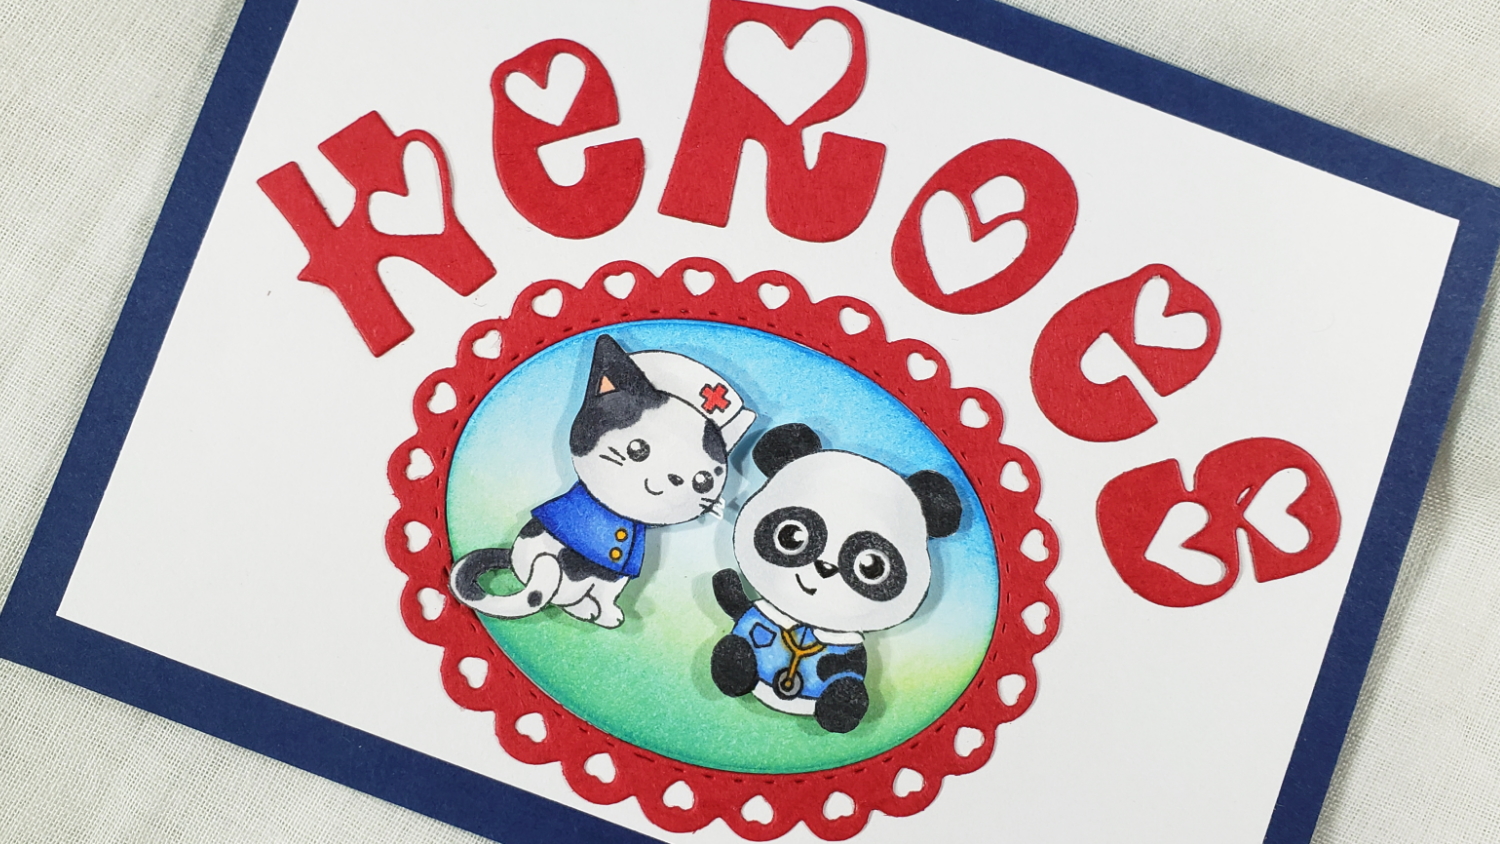
I die cut the H E R O E and S from the absolutely adorable heart alphas using rich red card stock and matched the scalloped heart oval frame with the same red card stock (although there is nothing about the critters that connotes a gender, these heart-filled red pieces I think give the card a feminine look). For the inset oval background, I used a scrap of white card stock and blended on Tim Holtz Distress Ink in Squeezed Lemonade and Salty Ocean. With just the two colors, I was able to create a third so that the critters looked like they were sitting on some grassy ground with a yellow horizon and a blue sky.
To color up the nurse kitty and the doctor panda bear, I used the following Copic colors:
Kitty: C00, C0, C1, C7 and R20 for inside the ear
Nurse cap: N0 and R27
Nurse top: B21, B24, B28 and Y38 for the buttons
Panda: C00, C0, C1, and C7
Doctor coat: B21 and B24
Stethoscope: Y38
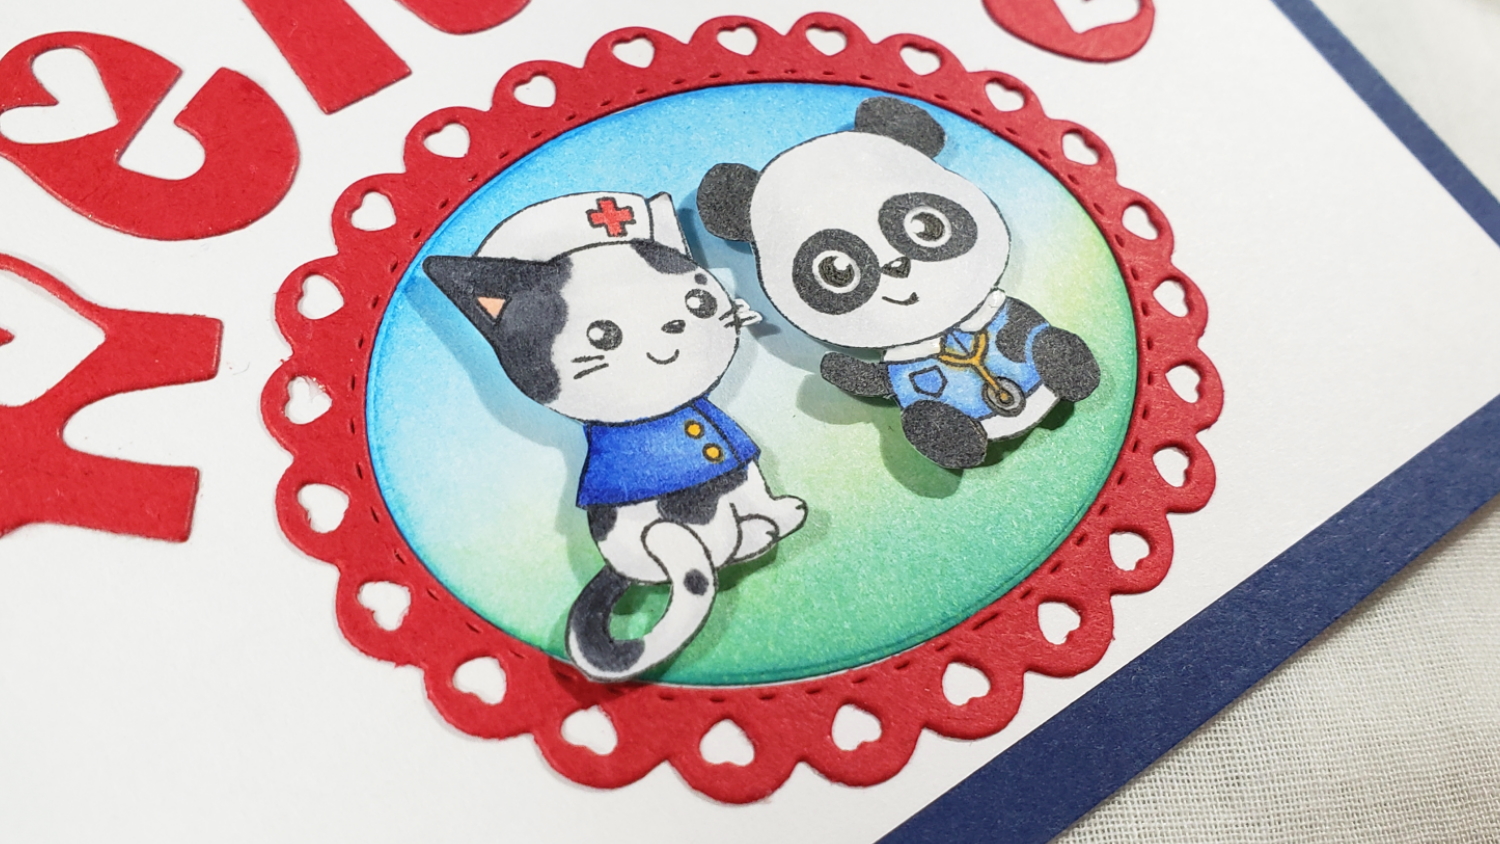
I also used a Copic Multiliner on 0.05 pt to outline and emphasize the eyes and a Uniball Signo White Gel Pen to add the highlights. I fussy cut out the critters (including the little empty space left by the kitty’s tail looping around with an X-Acto blade), and popped them up on foam dots for a bit of dimension. I cut the card front down to fit on a navy blue card stock card base with a quarter inch border all around to nicely frame the card and repeat the blues of the critter’s uniforms.
This card, and others I crafted with this InLoveArtShop design team package is shared in the following video:

Disclosure: The dies used in this post were gifted to me free of charge as part of my design team package. Many of the supplies I’ve used for today’s project are linked. Some may be affiliate links, which means if you make a purchase I receive a small commission at no extra cost to you. I truly appreciate your support toward the costs of running this blog!
Note: My readers can use coupon code: FSCraftyPaws at Inloveartshop.com for 15% off of your entire order!
This card is being entered into the following challenges:
Word Art Wednesday Anything Goes Challenge
Simon Says Stamp Monday Make Your Own Background Challenge
Creatalicious Anything Goes with Optional Birthday Challenge
Through the Craft Room Door Anything Goes Challenge
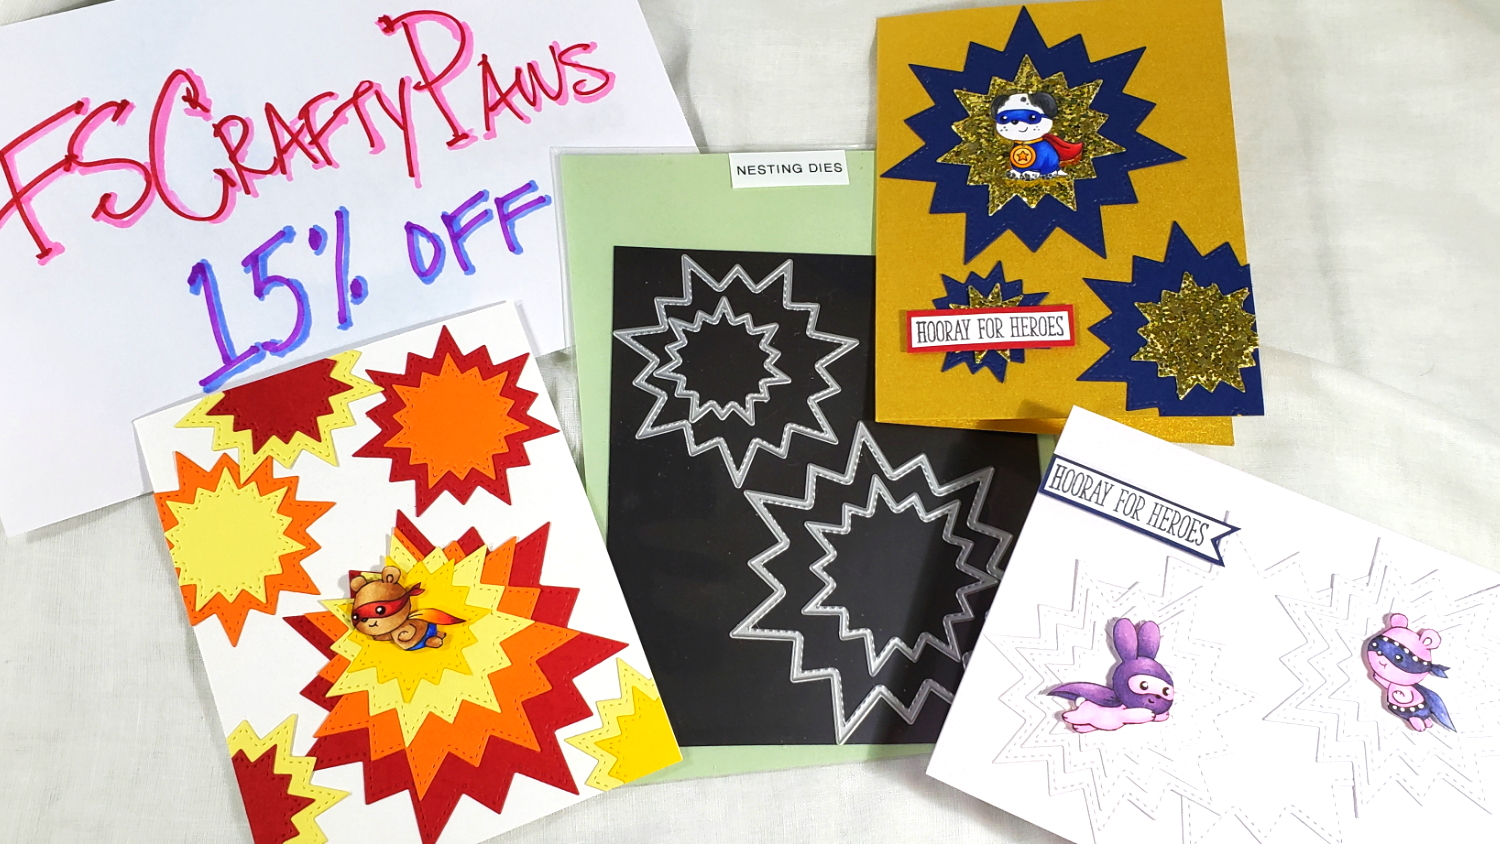
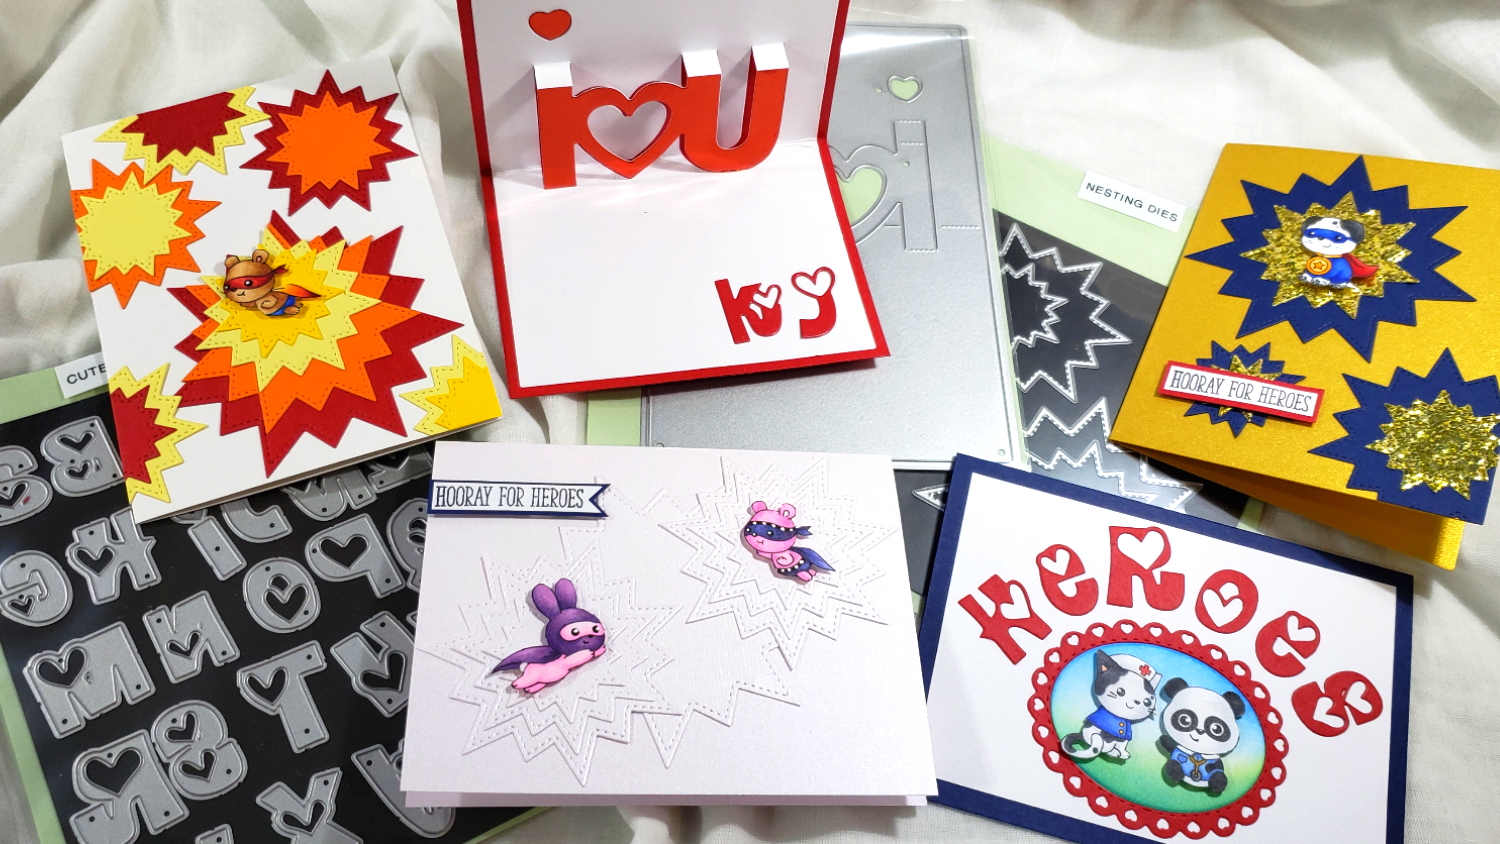
When Inloveartshop.com reached out to me to resume my design team work, I took it as a motivation and sign that to remember self-care (which for me is crafting). I picked out a handful of dies, and when they arrived (about a month after I placed my order) I was immediately inspired to return to crafting. NOTE: My readers can get 15% off their entire order from InLoveArtShop.com by using the code FSCraftyPaws at check out.
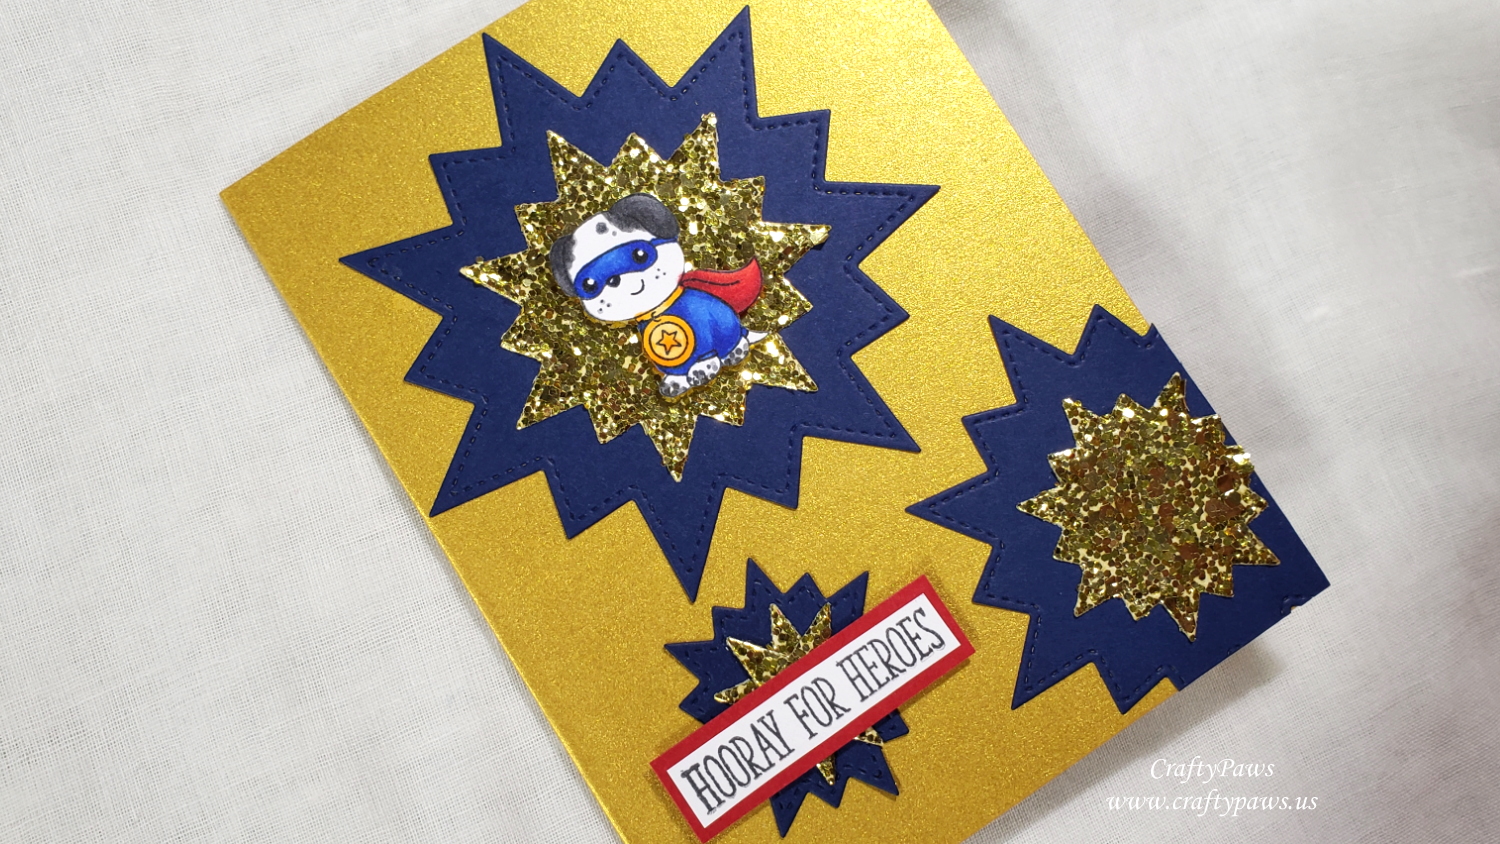
I absolutely fell in love with the Nesting Dies Set and had so many superhero card ideas running through my mind. This first card is made with just some scrap glittered card stock, navy card stock, shimmery gold card stock (for the card base), and a cute puppy super hero from the Clearly Besotted Caped Cuties Stamp Set (retired, but a recent re-issue is available HERE).
For the explosions, I used every other size of the Nesting Dies to cut out the bursts in the glittered card stock and the navy card stock, leaving a bit of space between (if I had used every size, the burst would have been much closer together). I also used a star die and stacked them to make athe center of the smallest burst. Since the star obviously didn’t look like the other bursts, I covered that last burst with the sentiment from the Clearly Besotted Hooray For Heroes Stamp Set (retired).
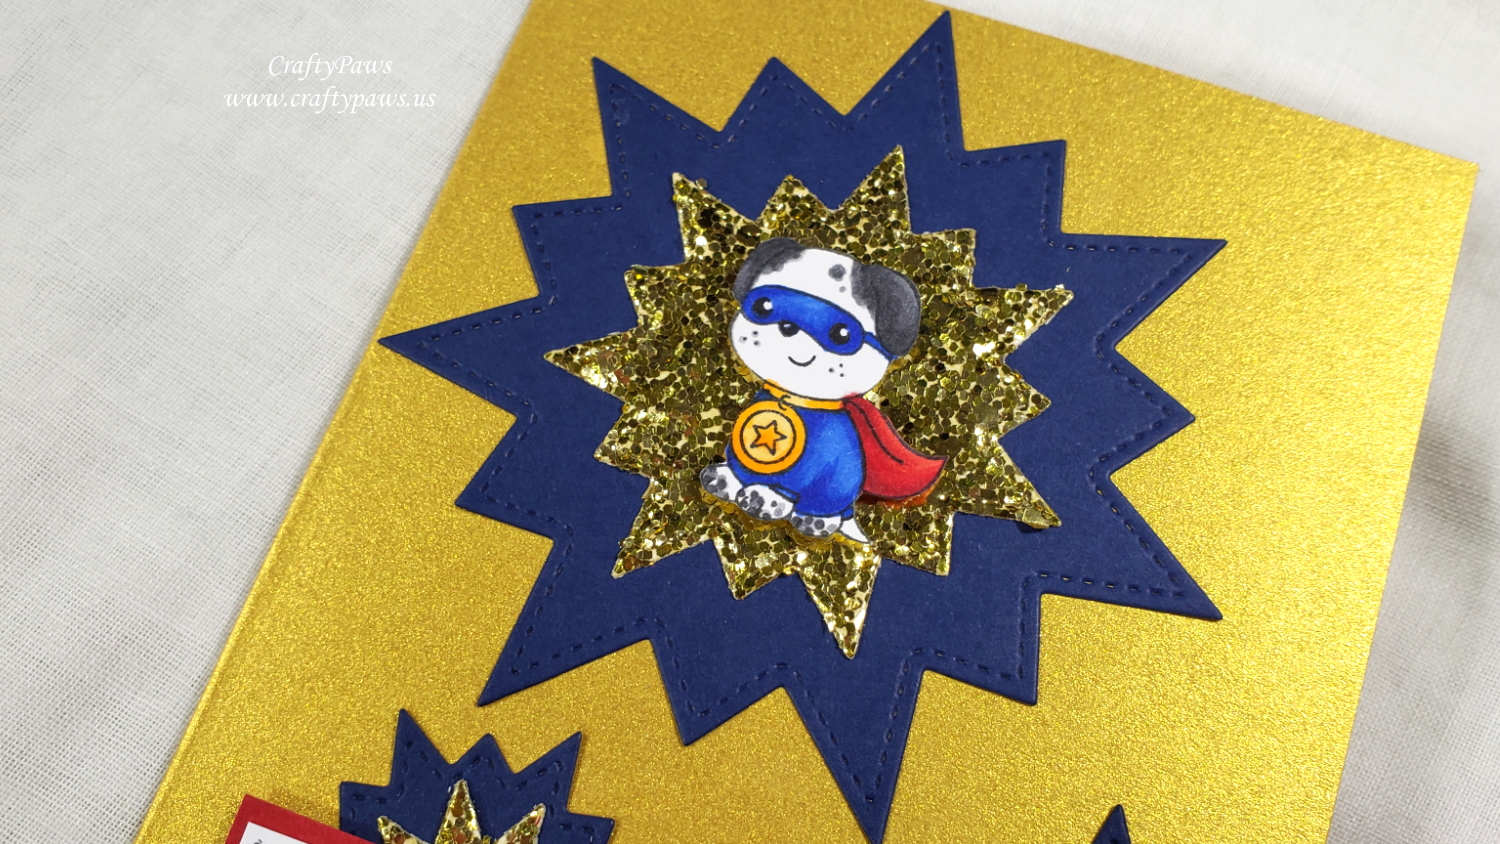
I used the following Copic colors to make the puppy super hero look like our Babaloo:
Black spots: N3, N5, N7
Gold medallion: Y32, Y38, YR16
Blue suit: B24, B28
Red cape: R24, R29, R39
Then I fussy cut him out and popped him up on foam dots to add a little dimension.
This card, and others I crafted with this InLoveArtShop design team package is shared in the following video:
Disclosure: The dies used in this post were gifted to me free of charge as part of my design team package. Many of the supplies I’ve used for today’s project are linked. Some may be affiliate links, which means if you make a purchase I receive a small commission at no extra cost to you. I truly appreciate your support toward the costs of running this blog!
This card is being entered into the following challenges:
Lil Patch of Crafty Friends Anything Goes Challenge
Through the Craft Room Door Anything Goes Challenge
Penny Black and More Men and Boys Challenge
Crafts Galore Encore Anything Goes Challenge
Simon Says Stamp Monday Make Your Own Background Challenge
Simon Says Stamp Wednesday Anything Goes Challenge
Creatalicious Anything Goes with Optional Birthday Challenge
]]>
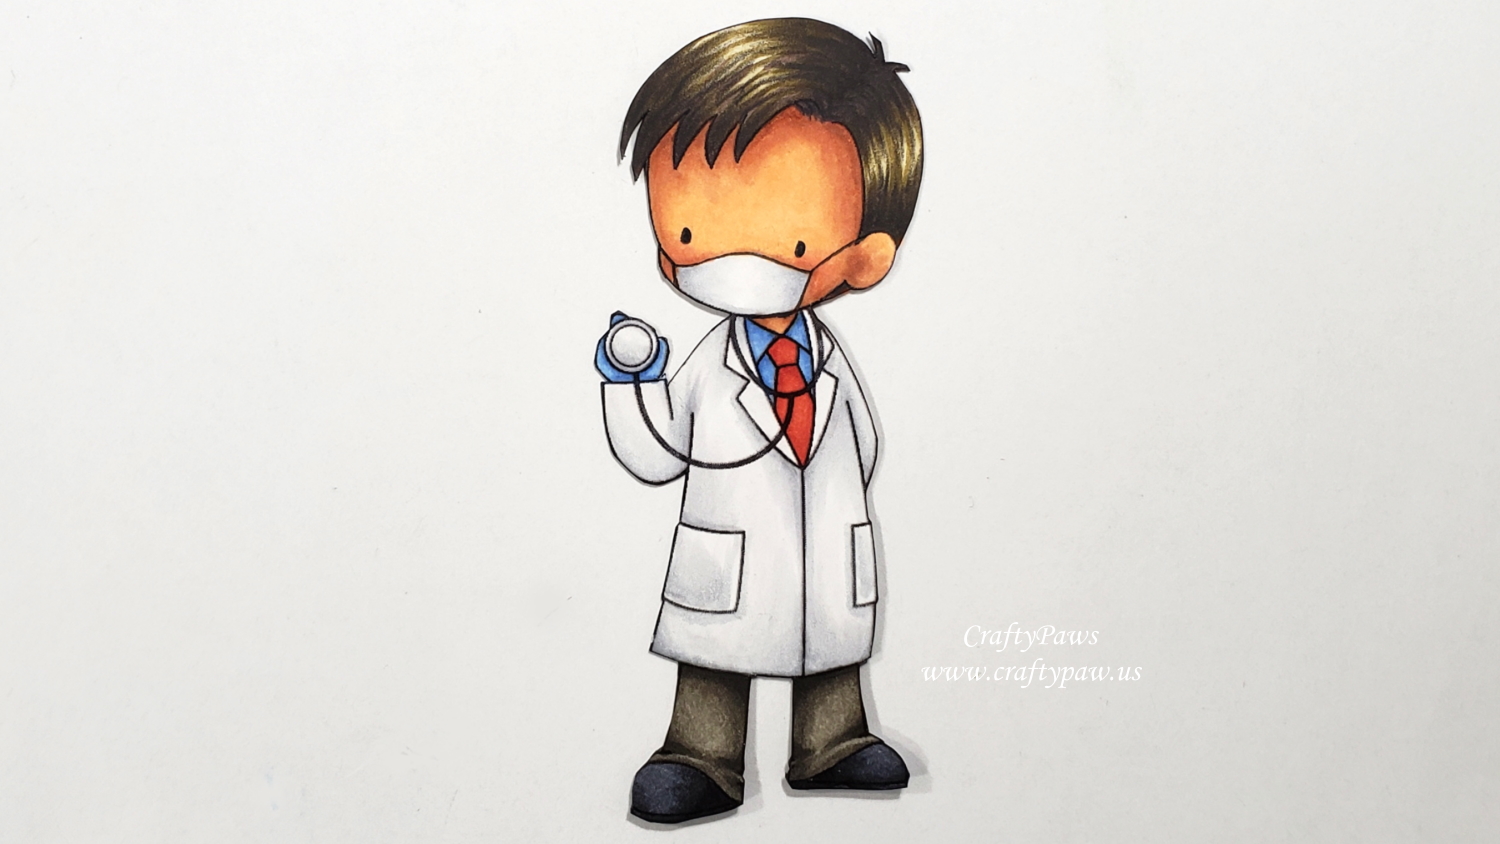
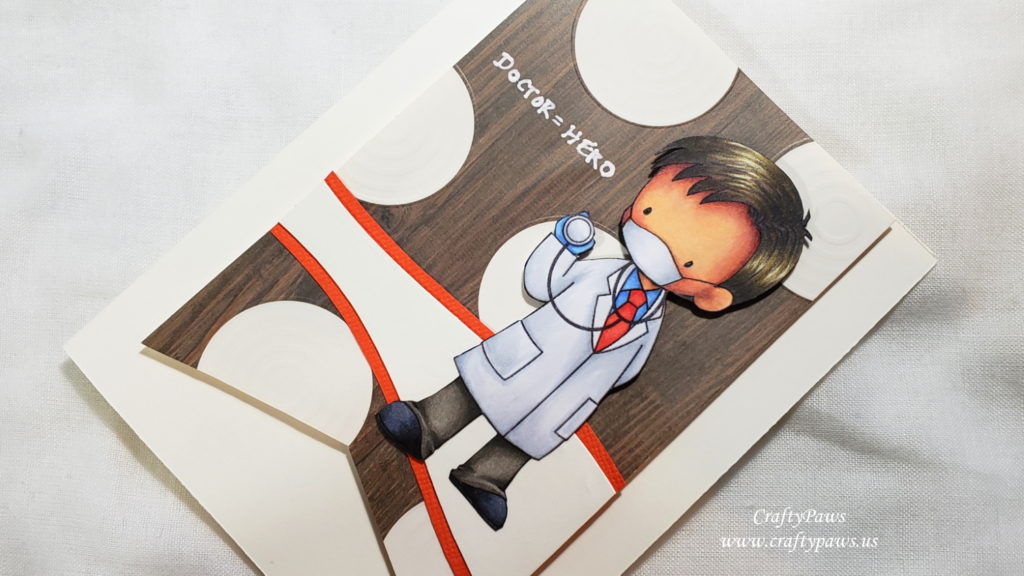
I wanted to give this doctor a Mediterranean look so I chose the following Copics and Prismacolor Premium Colored Pencils:
Skin: E00, E11, E13 and R20 (blush) with Prismacolor Beige (997) and Black Cherry (1078)
Hair: E81, E84, E87, E79 and 90% Warm Grey (1058)
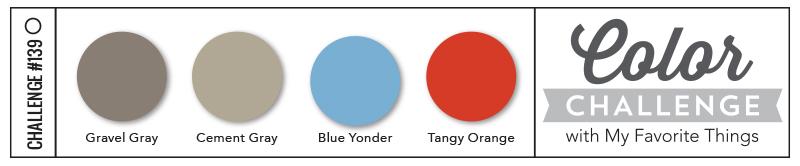
Everything else I picked using the MFT Color Challenge in mind:
Lab coat and mask (doodled on with a 0.05 pt black Copic Multiliner Pen): C00, C01 and C2 with White Prismacolor Colored Pencil (938)
Blue shirt and glove: B21 and B23
Red tie: R14 and R27
Grey pants: W3, W5 and W7
Shoes: C3, C5, C6 and C9
I fussy cut out the image with my very Fiskars Reverse Spring Loaded Scissors and inked the edges (especially the nooks and crannies from the back) with a Memento Tuxedo Black Marker.
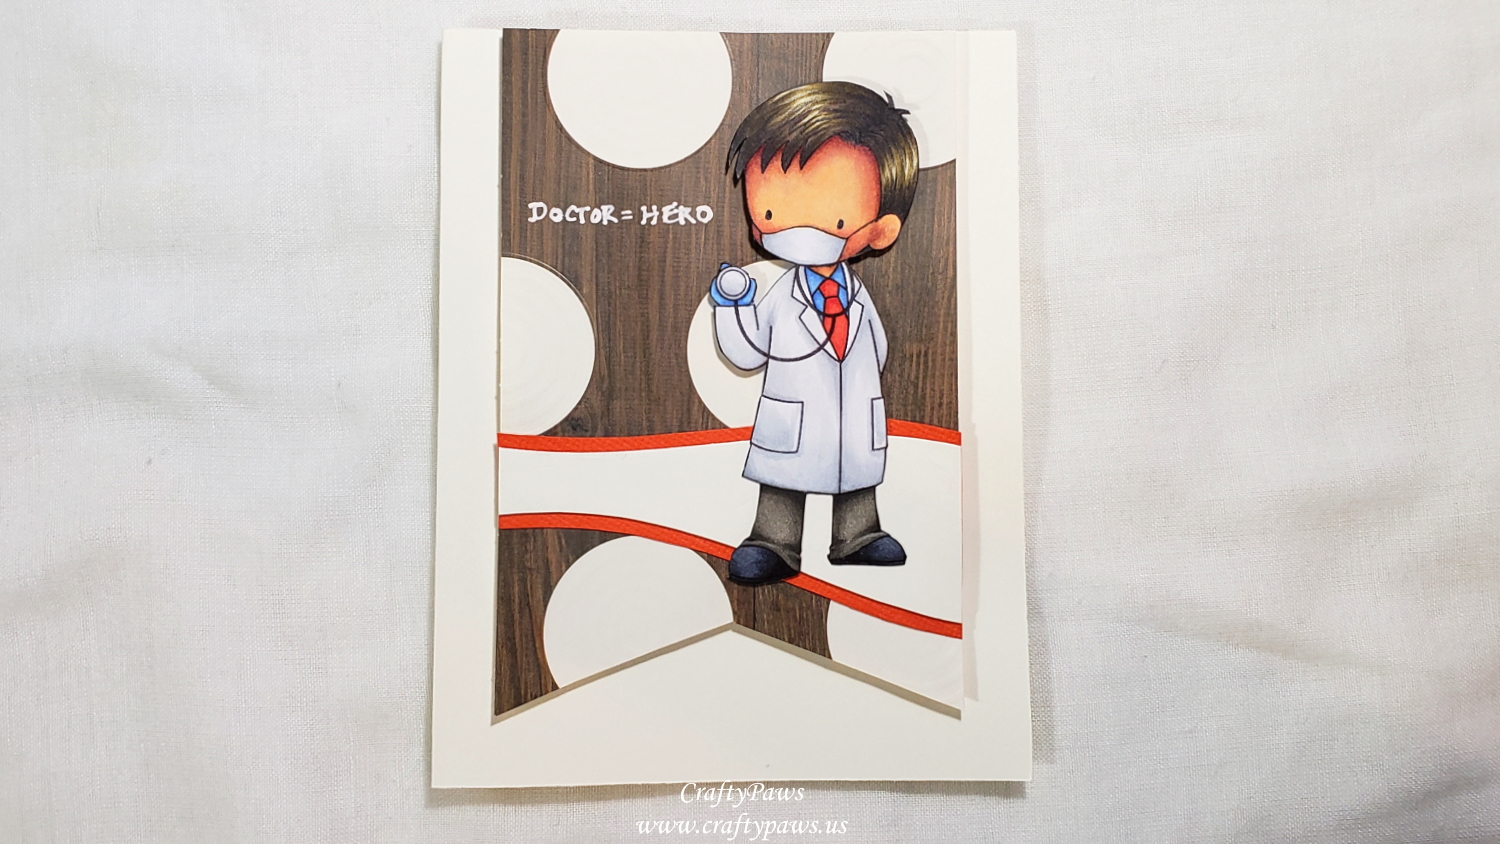
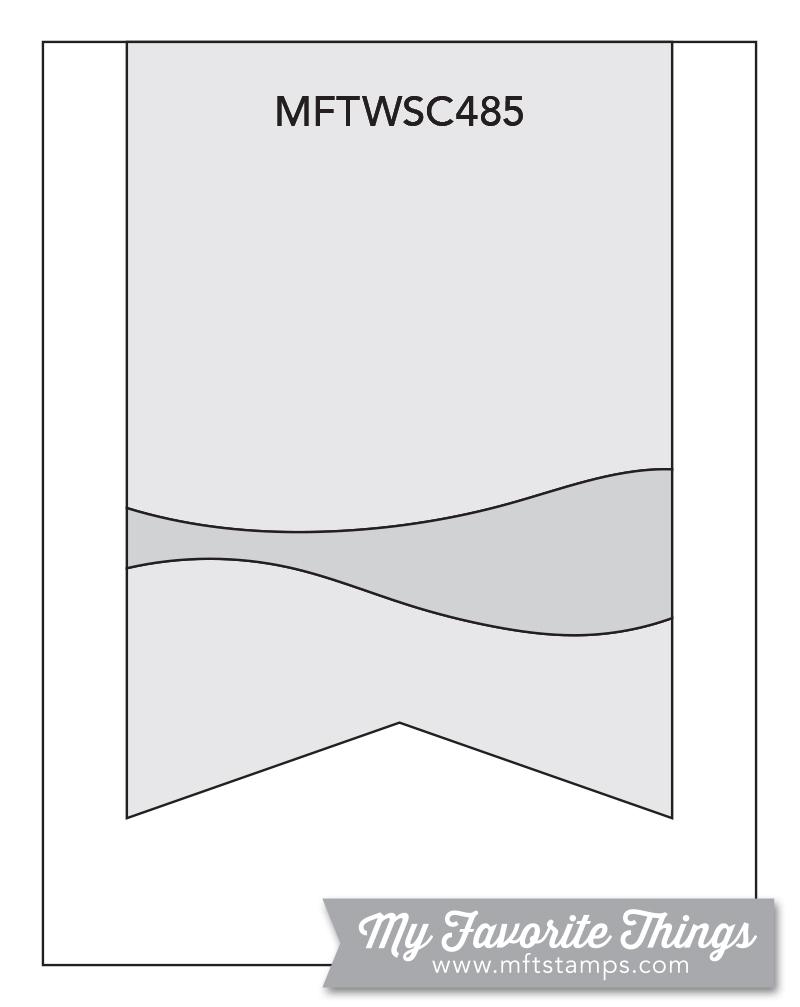
For the background, I followed the MFT Sketch Challenge and used up some great wood grained paper that had a fun large cream spots pattern. I hand cut the banner and even the swoosh design that I thought gave the doctor a great “grounding” with more scraps from my scrap box.
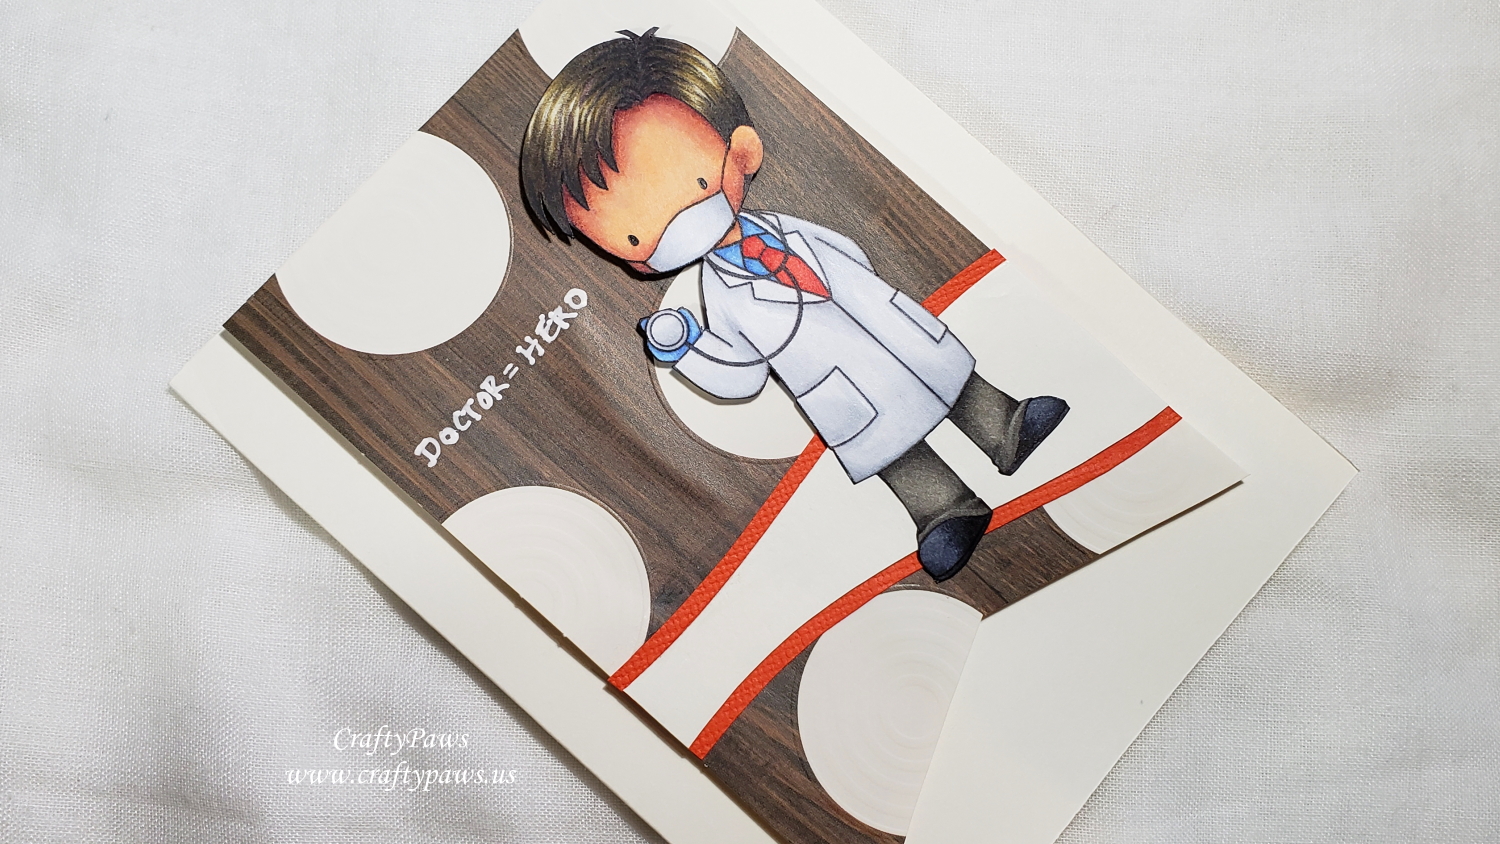
I popped up the doc on double sided foam adhesive for his head and torso and glued him down behind his legs and feet onto the swoosh floor that I had layered up to add a little interest. I also popped up the whole banner with fun foam that I glued down to add extra dimension.
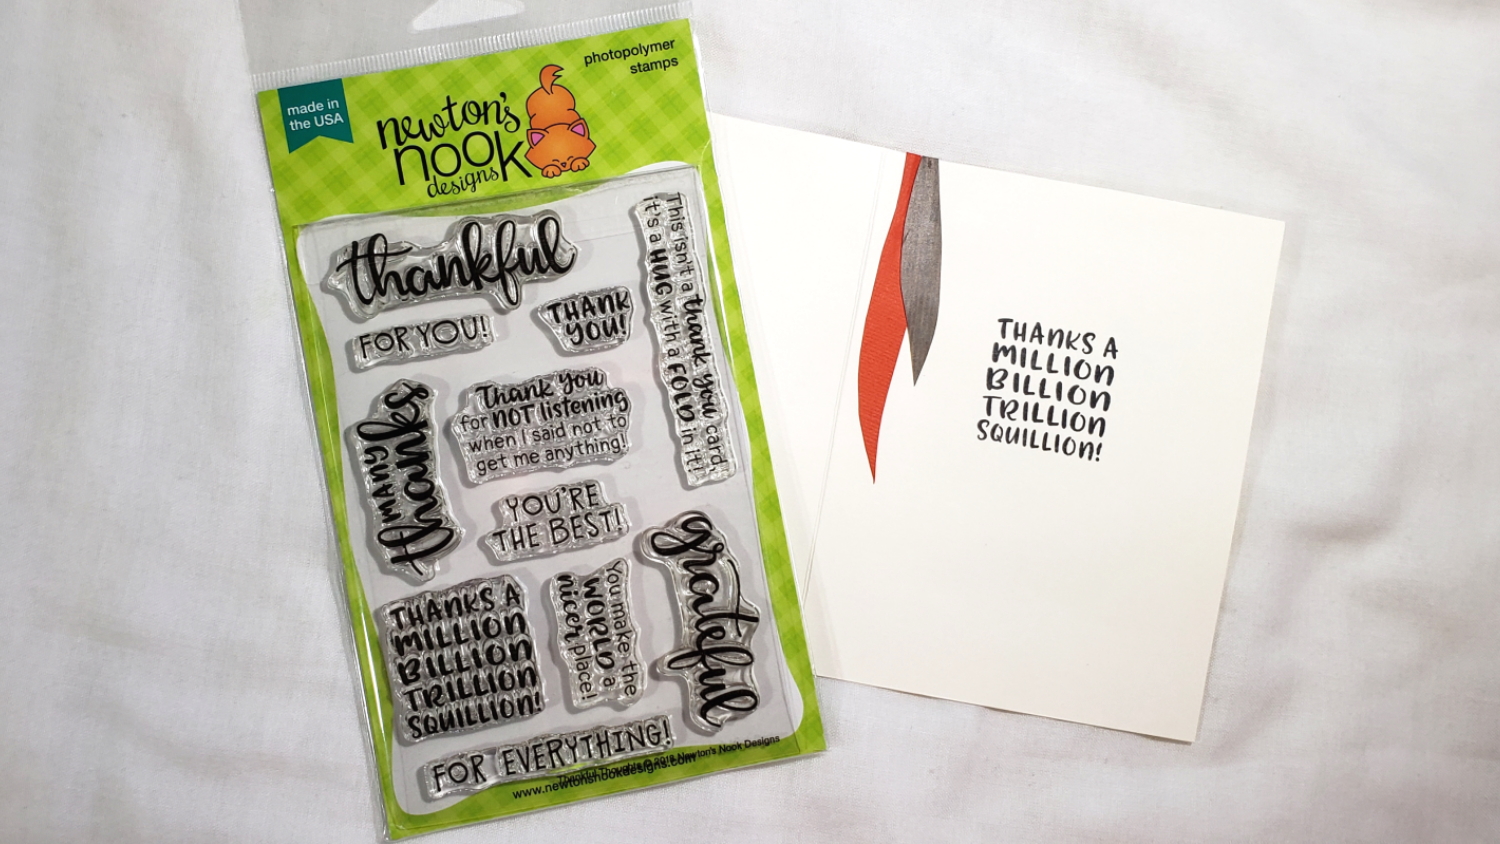
There was a perfect “blank” spot just to the left of the doc on the patterned wood grain polka dot paper so I hand wrote in with a Uniball Signo White Gel Pen, “DOCTOR = HERO”. For the inside liner I stamped out a sentiment from the Newton’s Nook Designs “Thankful Thoughts” stamp set, “THANKS A MILLION BILLION TRILLION SQUILLION!” I also added some hand cut “squills” (is that a word?) from left over scraps of the wood grained paper and the tangy orange card stock I had used on the doctor’s tie and the borders around the swoosh floor.
CLICK on the picture below to watch the process video of crafting this card:
Disclosure: Many of the supplies I’ve used for today’s project are linked. Some may be affiliate links, which means if you make a purchase I receive a small commission at no extra cost to you. I truly appreciate your support toward the costs of running this blog!
This card is being entered into the following challenges:
Simon Says Stamp Monday E is for? Challenge – Everyday Hero
Simon Says Stamp Wednesday Knock on Wood Challenge
Creatalicious Anything Goes Challenge with Optional Marble Background
Word Art Wednesday Anything Goes Challenge
Fab ‘n’ Funky Spots or Dots Challenge
Through the Craft Room Door Anything Goes Challenge
MFT Color Challenge #139
MFT Wednesday Sketch Challenge #485
]]>
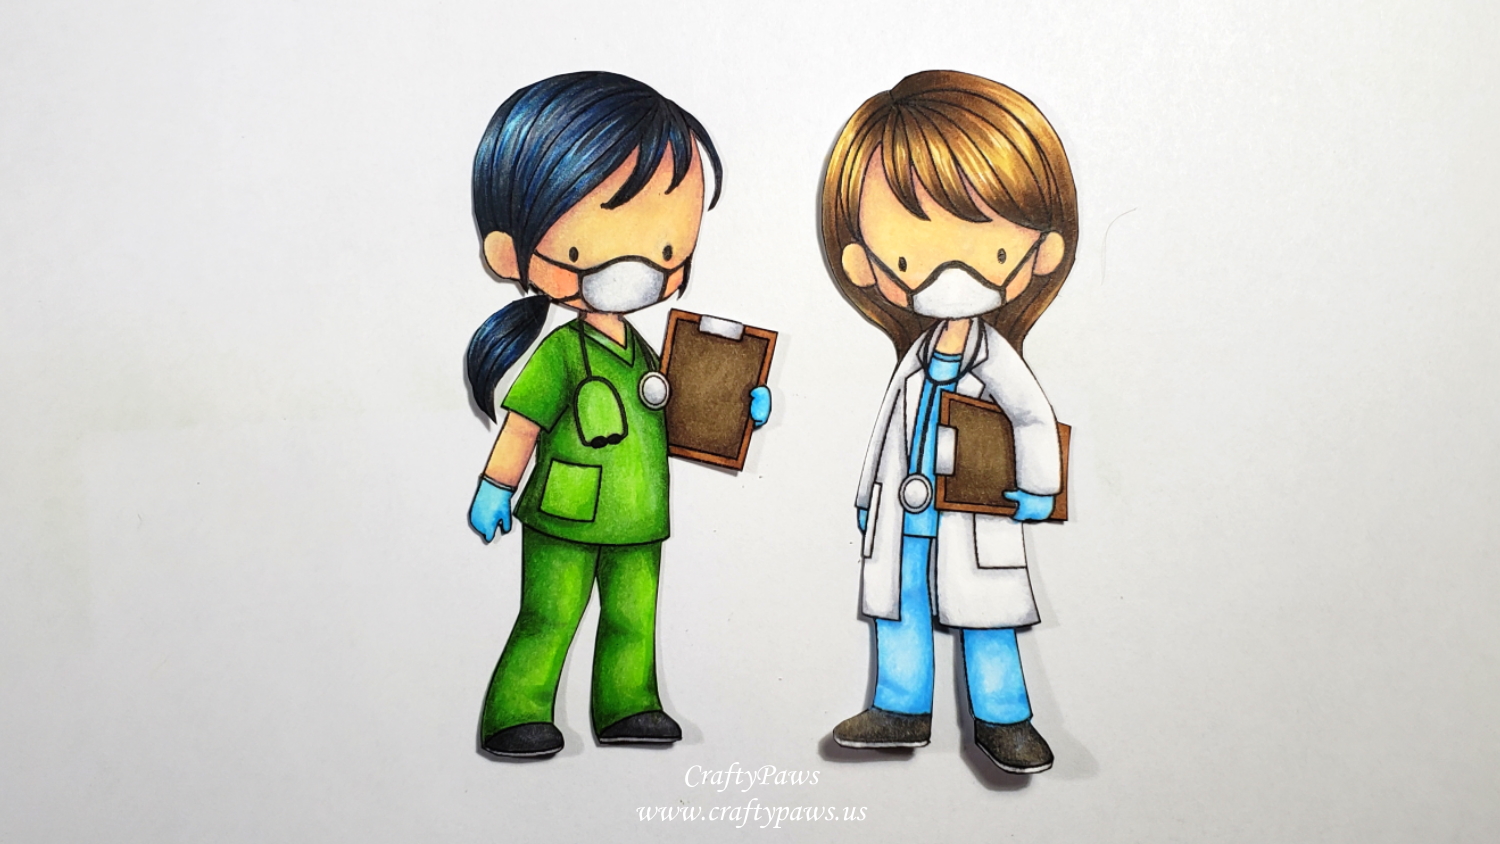
To highlight the Personal Protection Equipment (PPE) that our EVERYDAY ESSENTIAL HEROES sorely need, I downloaded the digis and then converted them to jpg using a screen grab. I erased the noses and mouths using paint.net. Then I was able to doodle on face masks and gloves using a 0.05 pt black Copic Multiliner Pen.

I colored the female nurse with my Copics, and then I had some fun add more vibrancy and detail with Prismacolor Premium Colored Pencils:
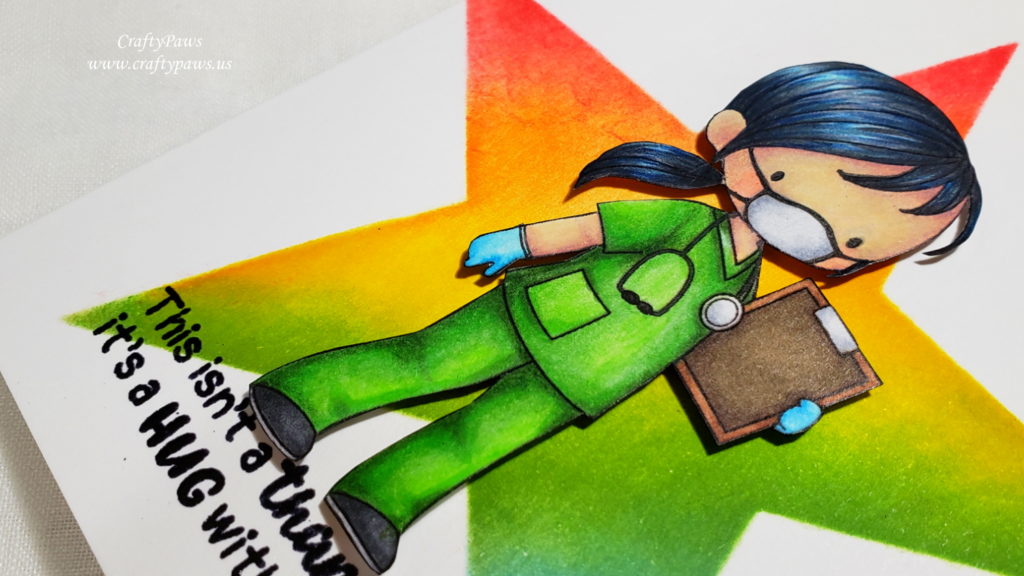
Wood Clipboard and Stethoscope: C00, C0 and C3 (for metal parts) and E23, E57 and E44 (for HIPPA compliant (no patient information visible on wooden clipboards)
Skin: E50, E51, E01, R20 (blush) with Prismacolor Beige (997); Light Peach (927); Shell Pink (1093); Ruby Beige (1019)l and Clay Rose (1017)
Shoes: N5 and N7 with C3 for soles
Blue Gloves: B0000, B01, B02, and B04 with Prismacolor Sky Blue Light (1086) and Non-Photo Blue (919)
Black Hair: B01, C4, C6 and C8 with Prismacolor Indigo Blue (901) and 99% Cool Grey (1067)
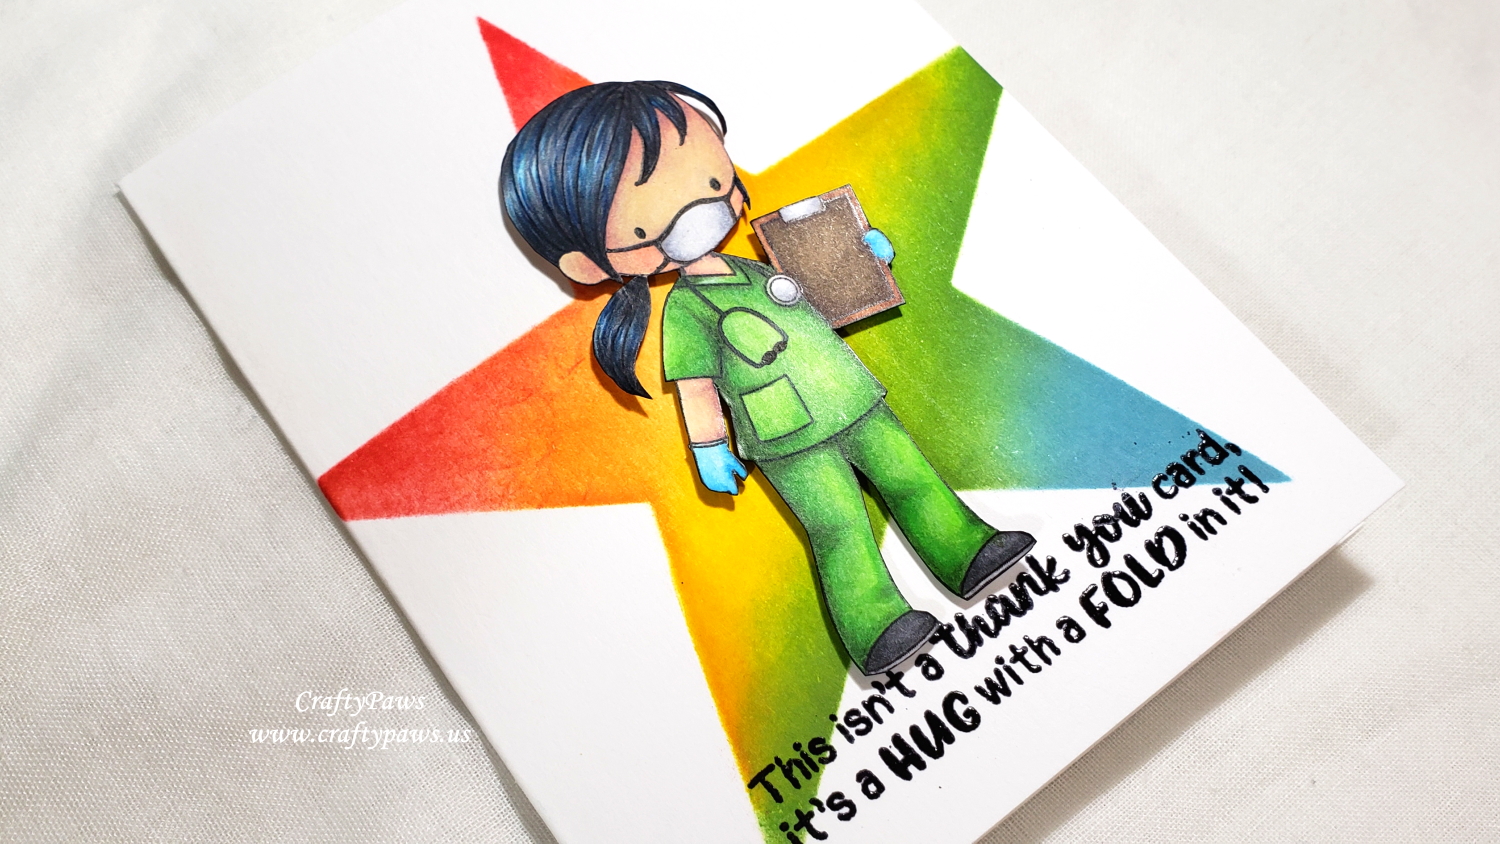
Green Scrubs: B12, G14 and G46 with Prismacolor Spring Green (913), Apple Green (912 and Kelp Green (1090)
I then fussy cut the nurse with my Fiskars Reverse Spring Loaded Scissors and inked the edges with a Memento Tuxedo Black Marker for a clean finished look. To add some dimension, I also popped her up on double sided foam adhesive.
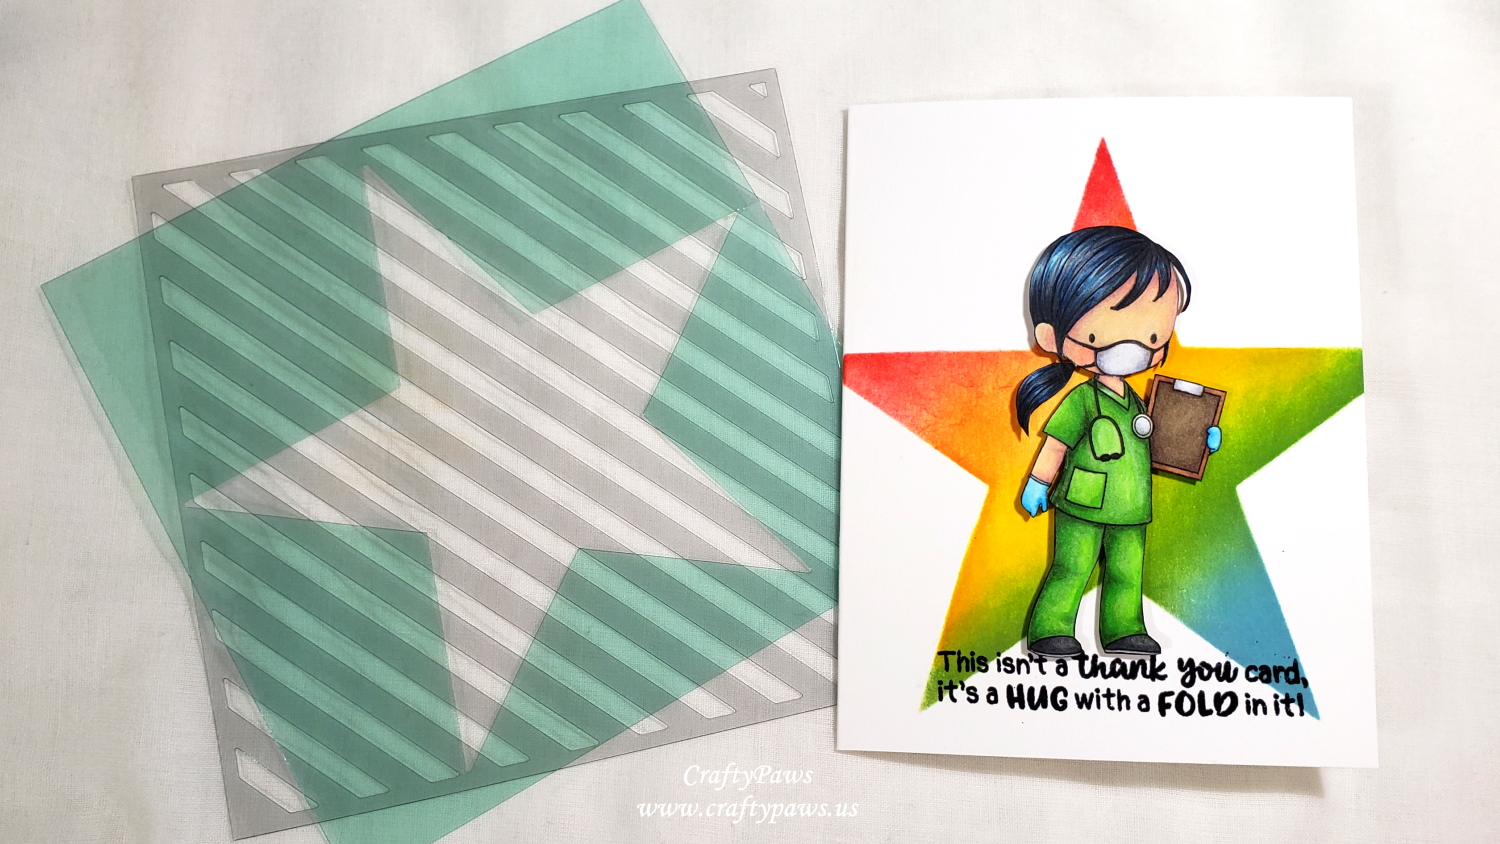
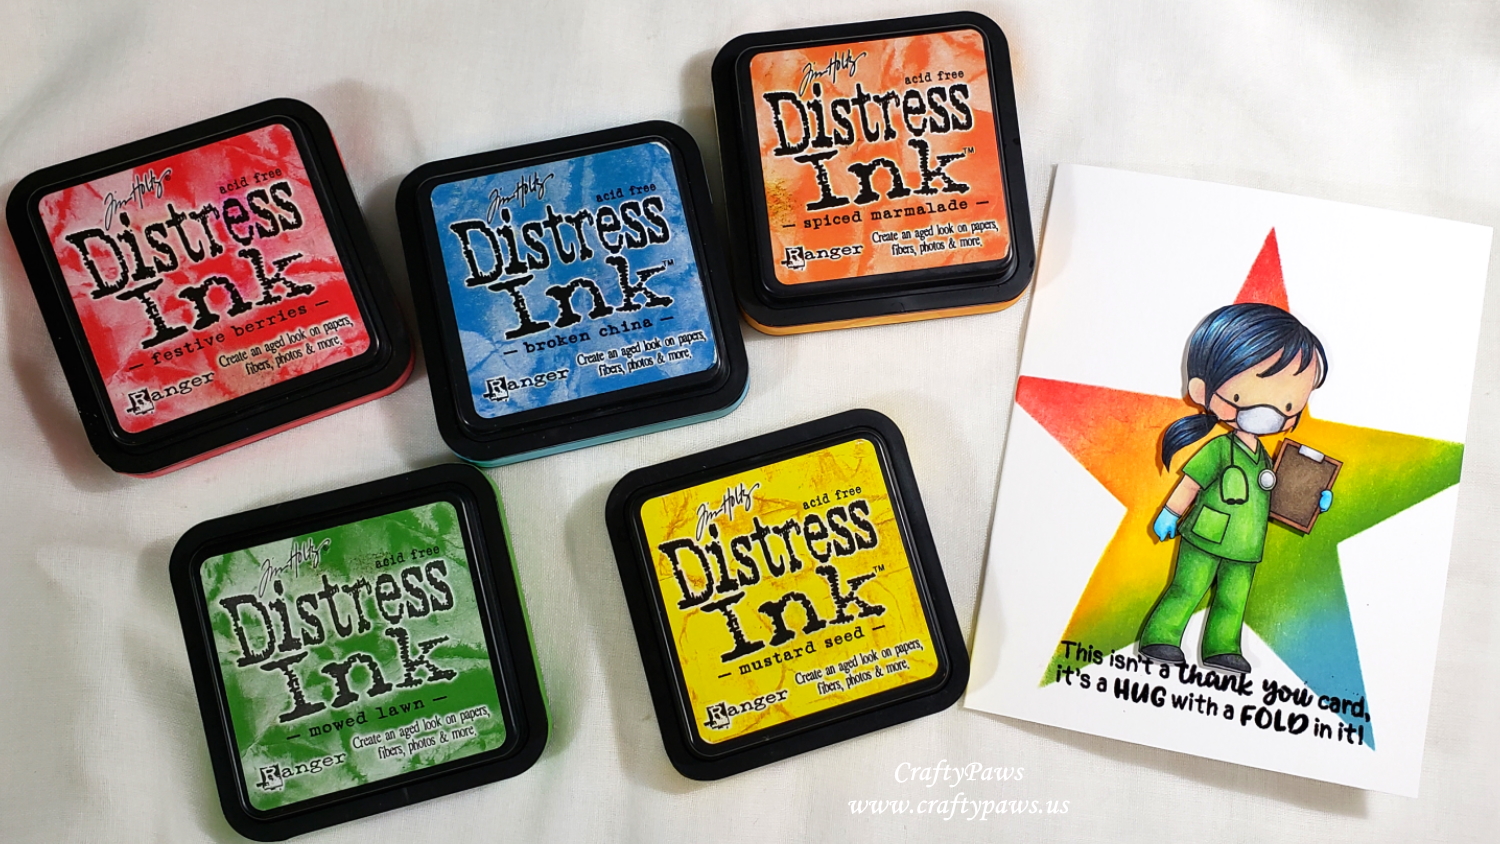
For a sharp CAS background, I used an old Heidi Swapp Star Stencil (retired) and blended on a rainbow of spring Tim Holtz Distress Inks in Festive Berries, Spiced Marmalade, Mustard Seed, Mowed Lawn (which seems to match the green scrubs perfectly) and Broken China. I thought the star could reference how I believe all these medical personnel are super stars for continuing their courageous work to help all of us right now.
To keep the nurse looking like she is just floating, I also decided to give her a sentiment to “stand on”. I used the “This isn’t a thank you card, it’s a HUG with a FOLD in it!” sentiment from the Newton’s Nook Designs “Thankful Thoughts” stamp set. To add a bit of shine and subtle dimension, I stamped the sentiment out with VersaMark Ink and heat embossed it with Black Ranger Embossing Powder.
I love how it all came out! I hope the nurse who receives the card can feel the love and appreciation with which it was made. CLICK on the following picture to watch the process video:
Disclosure: Many of the supplies I’ve used for today’s project are linked. Some may be affiliate links, which means if you make a purchase I receive a small commission at no extra cost to you. I truly appreciate your support toward the costs of running this blog!
This thank you card for an everyday heroine doctor is being entered into the following challenges:
Simon Says Stamp Monday E Challenge – Everyday Essential hero and embossing
Penny Black and More Anything Goes Challenge
Lil Patch of Crafty Friends Anything Goes Challenge
Creatalicious Anything Goes with Optional Marble Background Challenge
Word Art Wednesday Anything Goes Challenge
Through the Craft Room Door Anything Goes Challenge – WINNER
Crafts Galore Encore Anything Goes Challenge
Stamping Sensations Somewhere Over the Rainbow Challenge
Simon Says Stamp Wednesday Knock on Wood Challenge – HIPPA compliant wood clipboard 😁
]]>
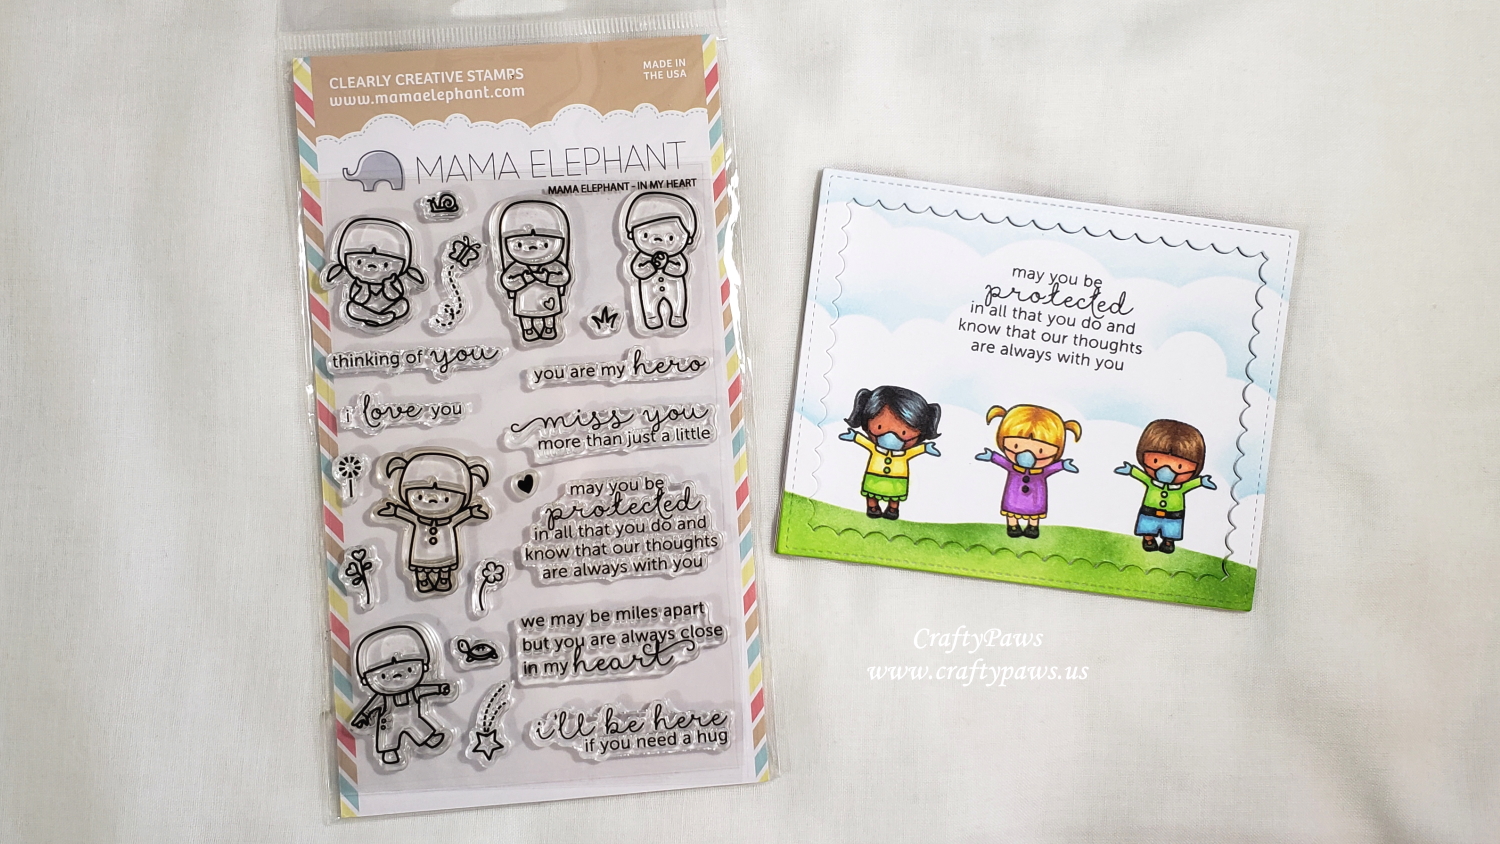
When I pulled the stamp set out, I realized there were amazingly appropriate sentiments in the set too. For my card, I used, “may you be protected in all that you do and know that our thoughts are always with you” (I mean how perfect is that for the times right now?). For the inside liner, I also used: “you are my hero”.
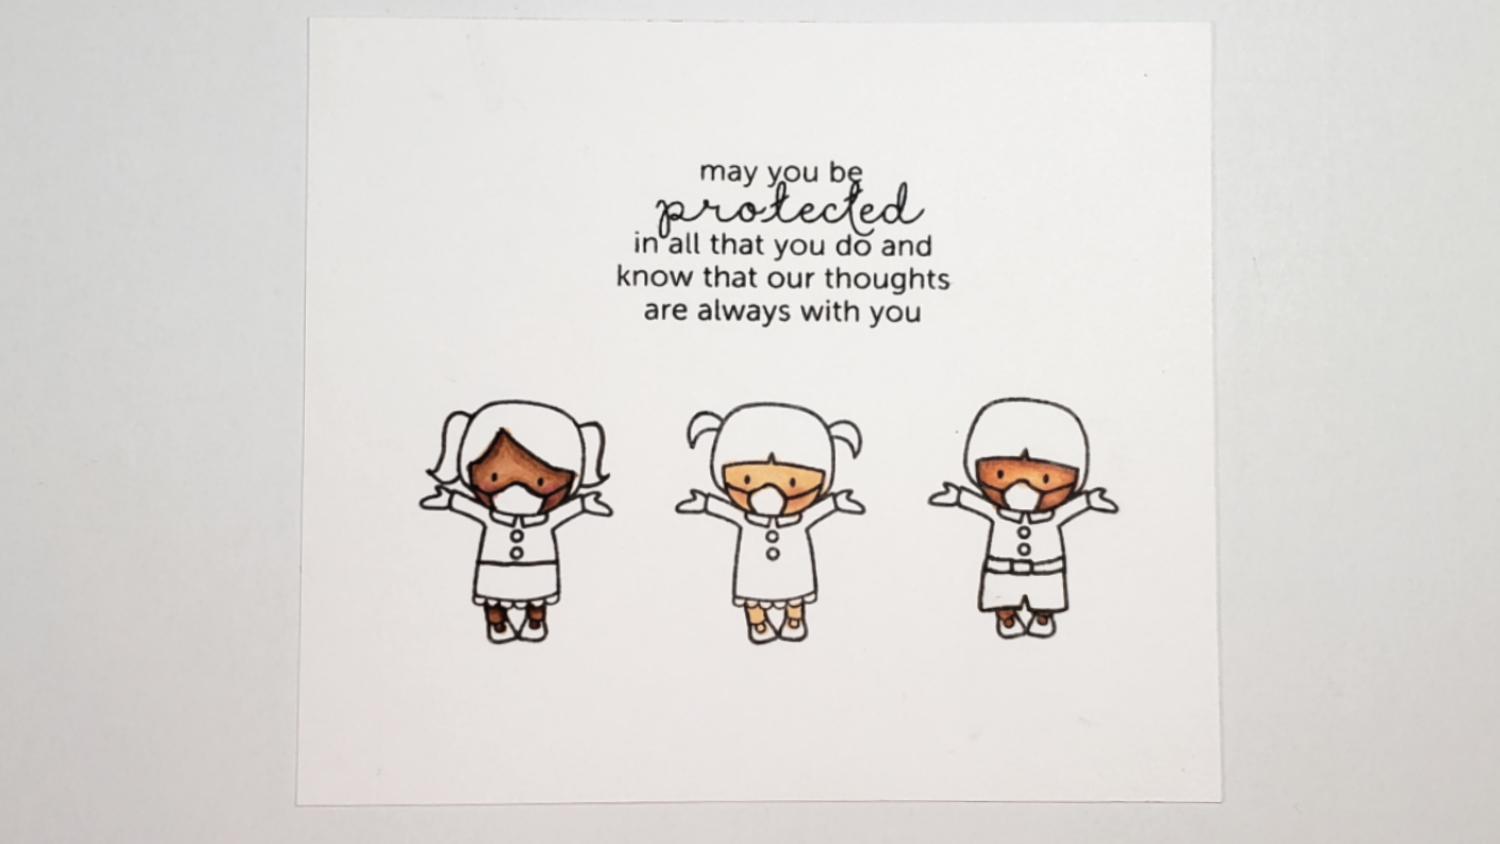
I masked off certain parts of the little girl stamp with bits of washi tape, inked up the stamp, removed the washi bits, and stamped out 3 kiddos! Then I used a 0.1 pt Copic Multiliner Pen to doodle on some changes to the kids’ hair, clothes and added masks! I also colored up and fussy cut out another girl from the stamp set (the one grasping her chest) to decorate the inside liner.

Then I used the following Copic colors to bring the kiddos to life. Note that I used different color combinations for the skin tones because I wanted to represent the human rainbow of our front line heroes and bright spring colors for the clothes to suggest hope and life for the future:
Girl in Skirt: Skin: E11, E13, E25 and RV34 (blush); Top: Y11, Y15, N1 (collar) and YG05 (buttons); Skirt: YG01, YG03 and YG05; Hair: B01, N6 and N9
Girl in Dress: Skin: E00, E01 and R20 (blush); Dress: Y15, V04 and V06; Hair: Y11, Y15 and YR24
Boy in Pants: Skin: E01, E02, E11, E13 and R20 (blush); Top: YG01, YG03, YG05 and N1 (collar); Pants: B00, B52 and B45; Belt: YR16, N6 and N9; Hair: E55, E57 and E59
Masks and Gloves: N1, B00 and B52
All Shoes: N6 and N9

Girl with Long Hair (on inside liner): Skin: E01, E02 and R20 (blush); Hair: B02, C4, C6 and C8; Dress: RV02, RV04, RV06 and V06 (heart); Tights: V06 and V17; Mask and Gloves: B02 and B04
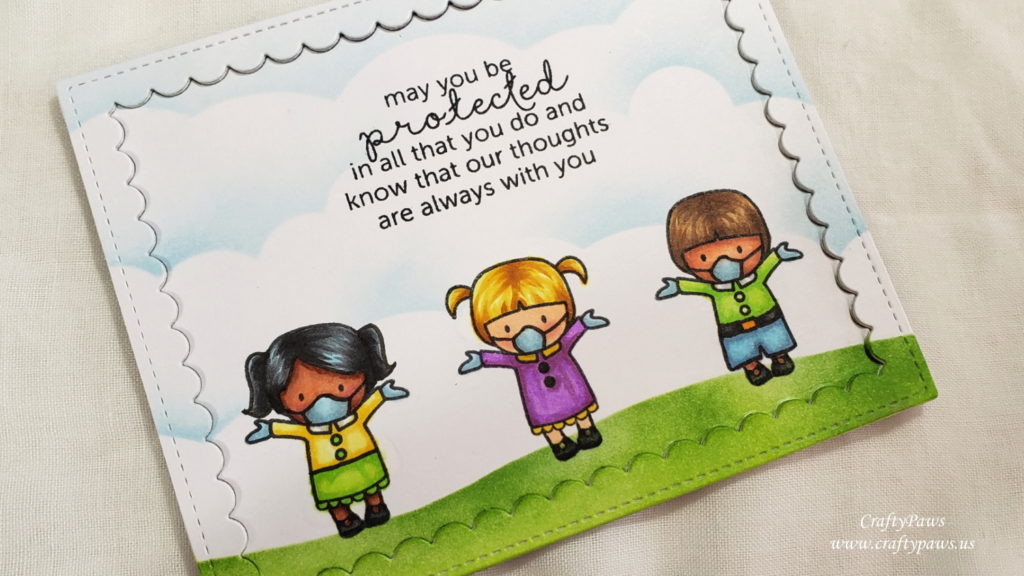
The backgound sky was made with a My Favorites Things Cloud Stencil and some Tim Holtz Distress Ink in Tumbled Glass blended on. The grass/ground was made against a simple homemade stencil and Tim Holtz Distress Ink In Twisted Citron and Mowed Lawn. I was just careful to lighten the blending around the sentiment and the kids’ feet since I was too lazy to make masks. 😀
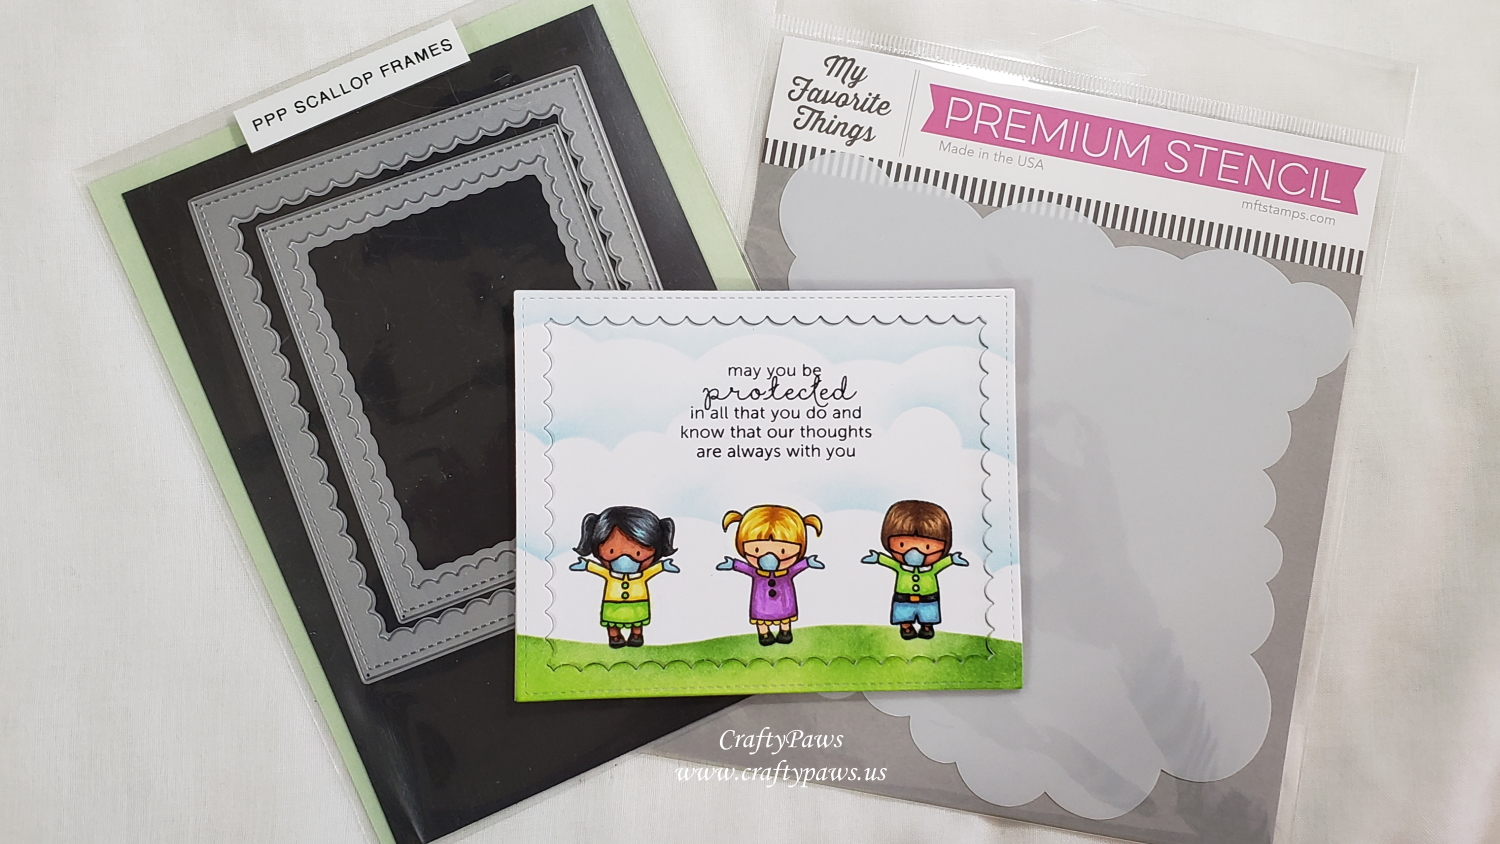
To add a little dimension to this otherwise single layer card, but keep it looking crisp and simple in the style of the stamps, I used the large Pretty Pink Posh Scallop Frames die. I cut the scallop frame 4 additional times from card stock scraps and stacked them under the finished card front frame. I love how that came out looking more “finished” while not distracting or cluttering the general CAS style.
CLICK on the photo below to watch my process video:
Disclosure: Many of the supplies I’ve used for today’s project are linked. Some may be affiliate links, which means if you make a purchase I receive a small commission at no extra cost to you. I truly appreciate your support toward the costs of running this blog!
This card is being entered into the following challenges:
Crafts Galore Encore Anything Goes Challenge
Crafty Gals Corner Easter/Spring Challenge
Creatalicious Anything Goes with Optional Wedding Challenge
Word Art Wednesday Anything Goes Challenge
Penny Black and More Anything Goes Challenge
Simon Says Stamp Wednesday Mood Board Challenge

]]>
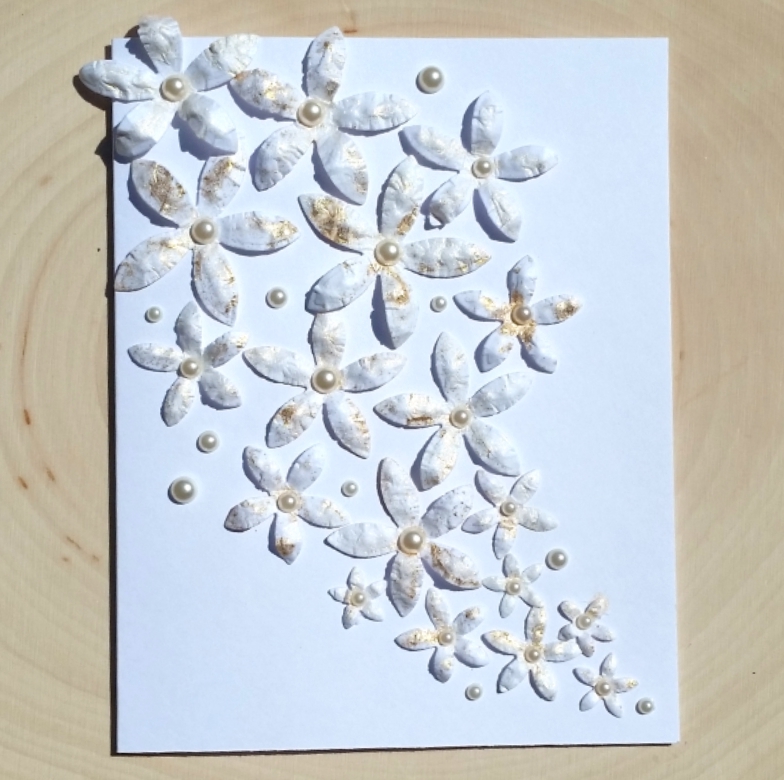 I first gathered all the left over flowers and lightly sprayed them with Heidi Swapp Color Shine in Sheer and Gold. Then I placed a paper towel over my mouse pad (so as not to get spray pigment on my mousepad) and used my Spellbinders Tool ‘n One with the medium sized stylus to hand emboss the flower petals into rounded curves from the back side of the flowers. Then I flipped over the flowers and pushed their centers with the stylus to get a simple shaped flower.
I then played with the placement of the various flower sizes, and decided that a small to large cluster of flowers forming a kind of swoop would look lush and luxe. Lastly I used self-adhesive flat back pearls to dot each flower center, using varying sizes to match the sizes of the flowers. To fill in a few gaps between the flowers I added a few extra flat back pearls to the card front. Easy peasy, clean and simple, super dimensional floral card that can be used for weddings, anniversaries, engagements or any time!
Diemond Dies SALES: My readers can get 15% off and free worldwide shipping at Diemond Dies through June 19, 2017 by using the coupon code spring15 (no minimum purchase required). Additionally, if you are interested in buying the whole May 2017 Bundled New Release, there is a special bundled sale price of just $59 (which is lowered to $50 if you also use the spring15 code — that’s 44% off the individual die prices!), good through June 25, 2017. After June 19, 2017, you can use my coupon code thankskristina for 10% off and free worldwide shipping on all orders of $35 or more.
The following is a Diemond Dies YouTube Hop Video sharing the process of making this card as well as the two cards from the previous post (watch and comment on YouTube for a chance to win a $20 gift certificate!):
These cards are being entered into the following challenges:
Lil Patch of Crafty Friends Anything Goes Challenge
Simon Says Stamp Wednesday Emboss It Challenge
Simon Says Stamp Monday Touchy Feeling Challenge: shaker card
Creatalicious Anything Goes Challenge with Optional Die Cuts or Punches
Word Art Wednesday Anything Goes Challenge
Cards Galore Encore Anything Goes Challenge
Not Just Cards Anything Goes Challenge
613 Avenue Create Anything Goes Challenge
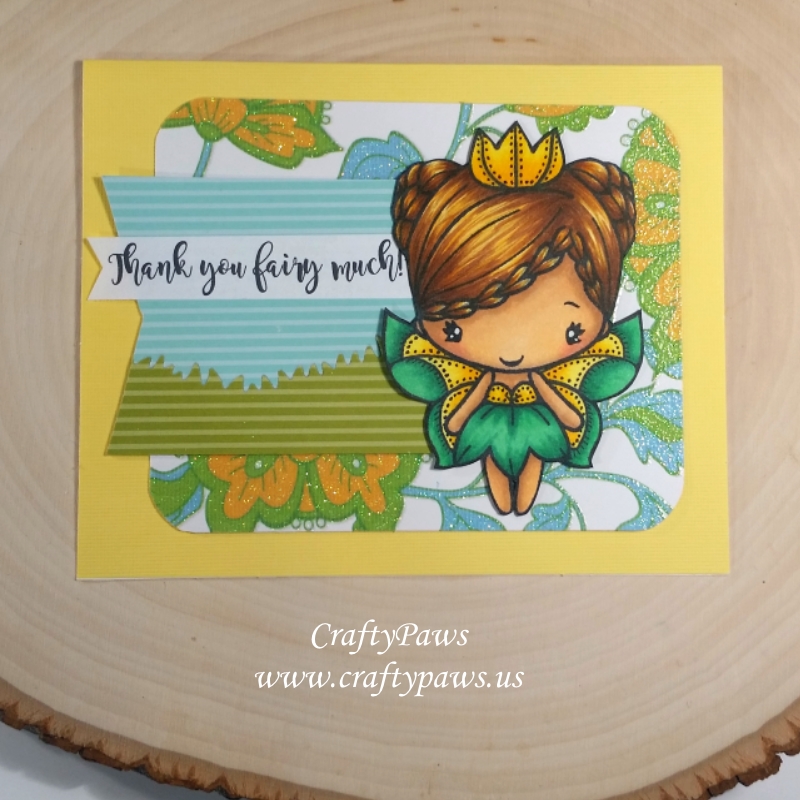 I want to surprise her with a little happy mail so I made up this card with one of The Greeting Farm images that I colored up recently as part of my Copic coloring series (you can see how the hair on this cute is colored up HERE). The Greeting Farm image is called Fairy Queen Anya, and I used the following Copic colors, concentrating on how to shade braided hair: E51, E53, E21, BV00, R20, G02, G16, Y13 and Y19. Her hair is colored with Y21, YR24, E37 with fine details added in with a Warm Gray Copic Multi-liner Pen in 0.3 pt. I also added dot details and little line lash details with a black Copic Multi-liner Pen in 0.1pt. Lastly, I fussy cut her out and then inked the edges with a Momento Tuxedo Black Marker.
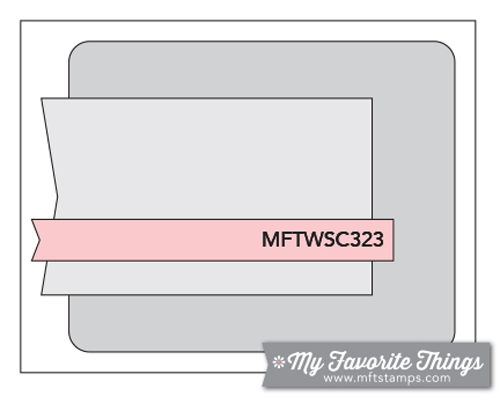
For the card base I used a bright yellow card stock and then I used some fun floral glittered paper scraps in my stash and followed a great sketch from the MFT Sketch Challenge #232 HERE. The banner was hand cut after I pieced together a “sky” and “grass” with stripey scrap blue and green papers that I cut with an MFT Die-namics Grassy Hills Die (one of my all time favorite go-to dies). For the punny sentiment, I printed out, “Thank you fairy much!” on my computer using a free scripty font, Magnolia Sky.
This card is being entered into the following challenges:
Simon Says Stamp Work It Wednesday Green Challenge
Simon Says Stamp Wednesday For a Special Lady Challenge
Crafty Purple Frog Lovely Ladies Challenge – WINNER
Word Art Wednesday Anything Goes Challenge
Crafty Gals Corner Polka Dots or Stripes Challenge
Creatalicious Anything Goes Challenge with Optional Use Lots of Green
613 Avenue Create Anything Goes with Optional No Digis
Cards Galore Encore Anything Goes Challenge
Through the Craft Room Door Anything Goes Challenge
]]>
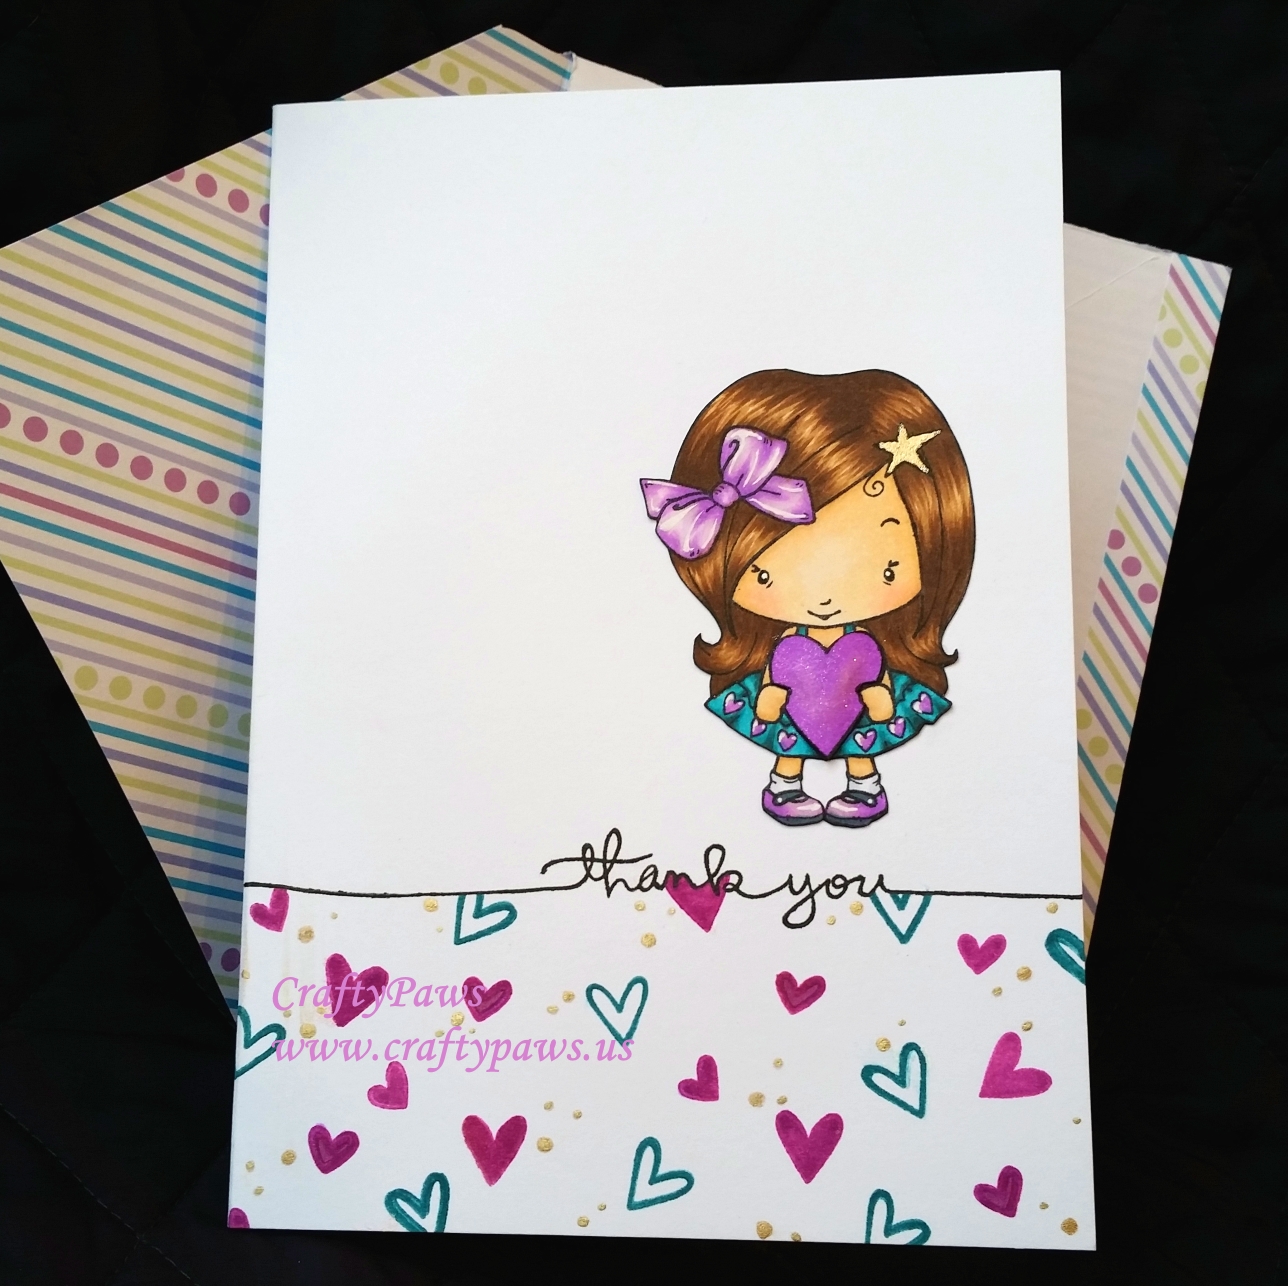 I used Amelia from The Greeting Farm’s Oliver and Amelia Valentines stamp set, the small hearts from the Lawn Fawn Science of Love stamp set, and the “thank you” from the Simon Says Stamp Handwritten Borders stamp set.
To color up the image, I used the following Copic colors:
Skin: E50, 51, 53 and R30
Hair: E55, 57, and 59
Dress: BG45, 49 and 78
White socks: C01
Hair bow, hearts and shoes: V000, 01, 04 and 06 with highlighting using a white Sakura Gelly Roll pen
To add a little extra interest to this cutsie CAS card, I stamped out Amelia twice and fussy cut out just the heart from the second stamping. I popped up the center of the heart with thin strips of double sided foam adhesive and firmly glued the edges of the heart down with art glitter glue. That way the heart looks plump and dimensional but looks more “realistically” like Amelia is holding it. LOL To add a little shimmer to the heart I also coated it with a clear Wink of Stella pen.
For the inked up hearts background on the lower third of the card, I used Ranger Adirondack Earthtones Wild Plum and Stream pigment inks. To make sure that the hearts looked like they were going right up to, but not beyond, the “thank you,” I created a mask using a post-it note and stamped the hearts right over top. I really like crisp details like that on CAS cards. 🙂
The star in Amelia’s hair and the hand drawn dots around the hearts were colored in with a metallic gold Sakura Gelly Roll pen. I love that opaque shimmer, and it also hides some smearing that I did of the hearts because I was too impatient to wait between stampings for the pigment ink to dry completely. ;P
The following is a process video of making this card and the coordinating envelope (ps: I added a little dimensional envelope closure using a Die-Versions “Thanks” word die by cutting it out 4 times and gluing the die cut words together to create a DIY Thicker — you can see it in the main top photo):
This card is being entered into the following challenges:
Simon Says Stamp Wednesday Anything Goes Challenge
Simon Says Stamp Monday Thanks Challenge
Farm Fresh Give Thanks Challenge
Addicted to CAS Dimension Challenge
Through The Craft Room Door Anything Goes Challenge
Crafts Galore Encore Use a Stamp or Digi Challenge
Lil Patch of Crafty Friends Anything Goes Challenge
Share Handmade Kindness: Strangers Challenge
Thanks for stopping by, and I hope you are having a wonderful crafty day! WOOF
]]>
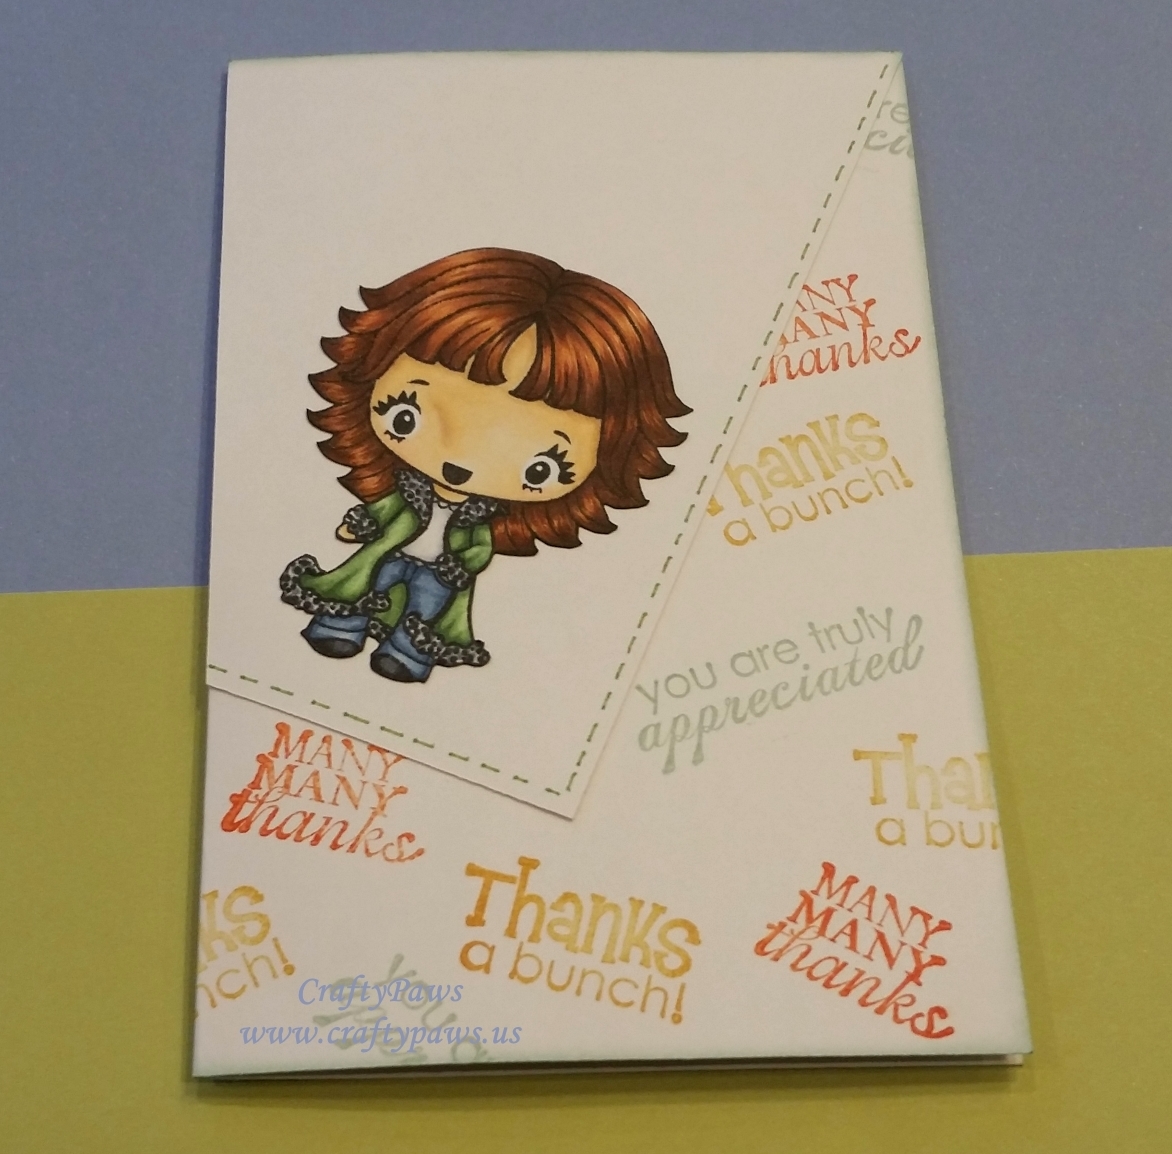 I pulled out Sassy Suzi from The Greeting Farm and Copic colored her with some beautiful fall colors:
Skin: E50, 51, 53 and R30
Hair: E11, 97, 99 and 29
Jeans: B93, 95 and 97
Shirt: C1 and 3
Shearling Coat: G40, 24 and 46
Shearling Fur (colored with a dotting technique): C3, 6 and 9
For the background, I used three different thank you stamps from the awesome C.C. Designs Thanks a Bunch stamp set that I got from Happy Creating. To stick with the fall colors I used three Adirondack pigment inks in Juniper to stamp “you are truly appreciated,” Terra Cotta for “many many thanks,” and Butterscotch for “thanks a bunch.”
Because I am not a neat Copic colorer, I had to fussy cut out Sassy Suzi and glue her down to a clean white card stock, but I think it came out very clean looking. To add a little interest to the white panel and to help define it’s edge from the background paper that still had a lot of white space between the thanks sentiments, I drew in some faux stitching with a Tim Holtz Distress Marker in mowed lawn. Then to finish off the edge of the card I inked the edge lightly with more of the Adirondack Juniper ink.
The following is a video of the Copic coloring of Sassy Suzi:
My readers can get 20% off their entire purchase at Happy Creating by using the code TURKEY through November 30, 2015
This card is being entered into the following challenges:
Simon Says Stamp Thinking of You Challenge
Farm Fresh Challenge Give Thanks Challenge
Raisin Boat Thankful Challenge
CASology Give Challenge
Fab ‘n’ Funky Clean & Simple Challenge
Lil Patch of Crafty Friends Anything Goes Challenge
Jennifer McGuire Share Handmade Kindness: Community Challenge
Thanks for stopping by and have a wonderful day! WOOF
]]>