 I colored up the faces and feet of the sheep with these Copic colors:
Ram: C0, 1, and 3
Ewe: E50, 51, 53 and R20 for blush
I colored up an accessory bow for the ewe with R20, 22, 24 and 29 (I paper pieced one with a scrap of rainbow polka dot paper, shading with C1 and 3)
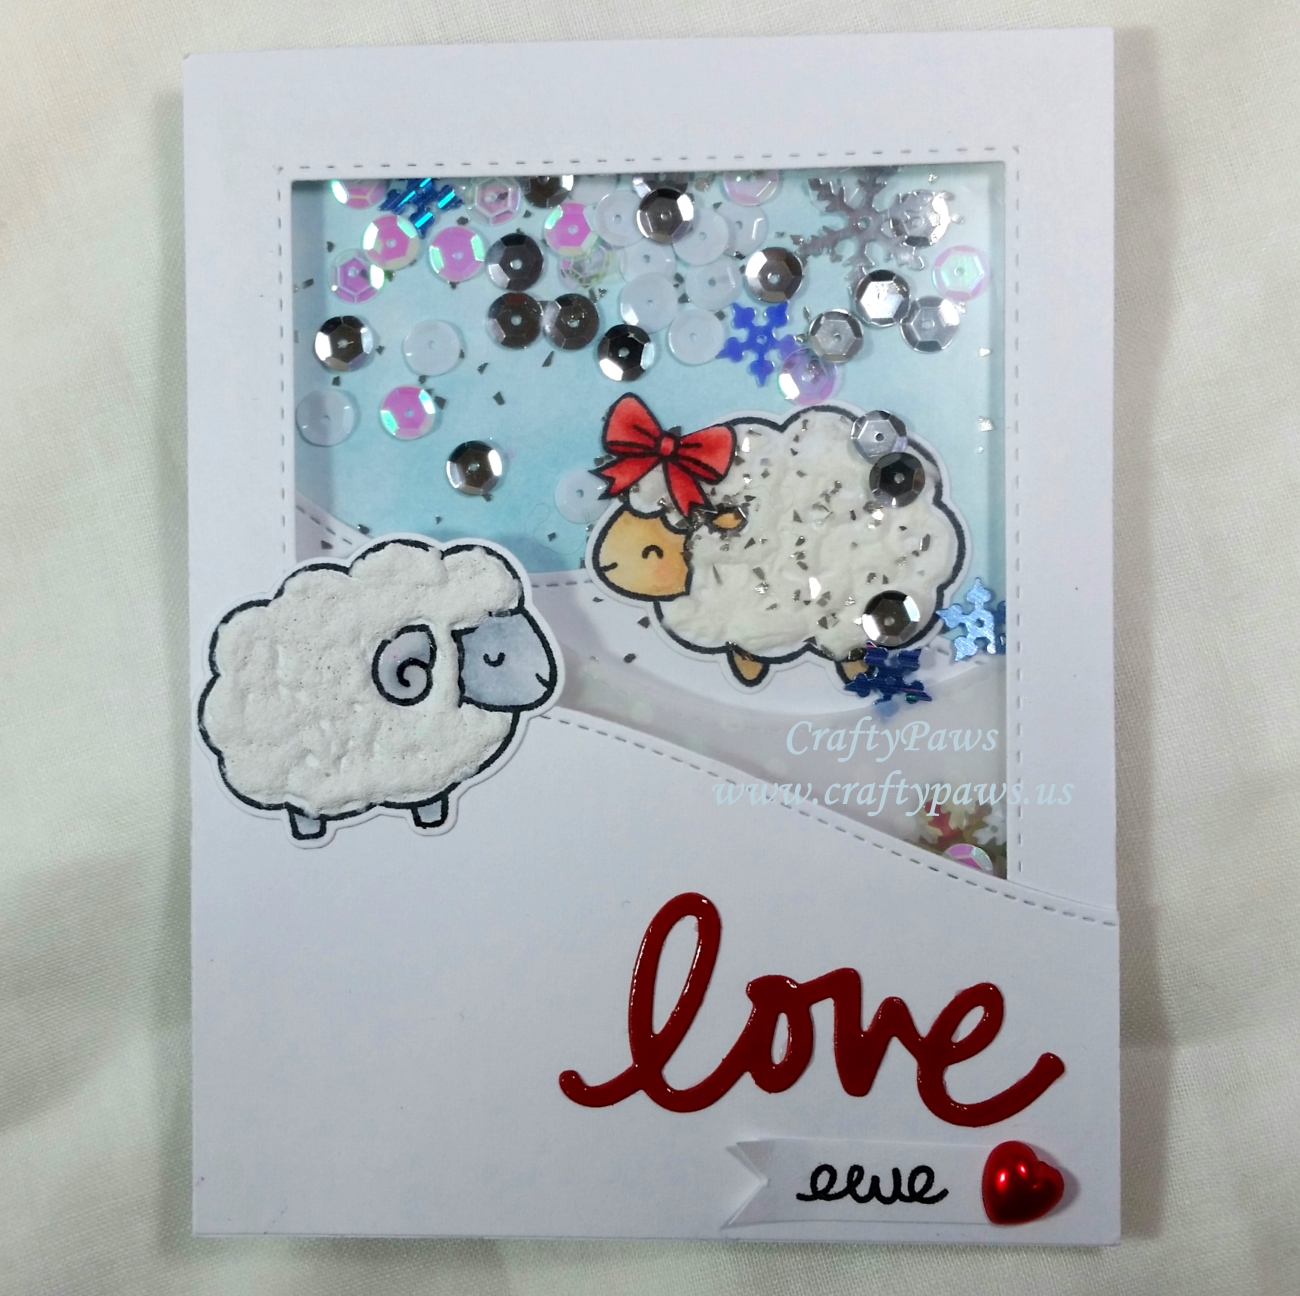
I used the matching die set to cut these out, but then hand fussy cut the bows so that the white edge would make the accessorizing more seamless. Lastly, I used Glossy Accents to add shine to the ram’s horn and DecoArt Snow Writer to add a wooly texture to the sheep (this has a fuzzy look but dries hard for resilience in mailing).
I used the Simon Says Stamp Stitched Square Die Set and the Lawn Fawn Stitched Hillside Die Set to construct a multi-layered winter wonderland shaker card, mostly with white card stock, but with a fun little twist by adding a snowy hillside made of white polka dot vellum. Attaching the various layers with double sided foam adhesive or wet Art Glitter Glue created three different levels around which the shaker pieces could move around. Speaking of shaker pieces, I added snow flake confetti; pearl, white and silver sequins, and Stampin’ Up! silver glass chunky glitter to have an assortment of fun shaker pieces.
For the base background sky, I just blended in some Tim Holtz Distress Ink in Tumbled Glass. Lastly I used the Little Yellow Bicycle “love” word die and the “ewe” from the sentiment “christmas is ewe” from the stamp set to create the sentiment “love ewe.” I love this silly pun playing off of the girl sheep as a homonym for “you.” Yay for girls! 😀
For the card that had the polka dot bow, I used the same paper for the love die cut, and did a second cut out of red card stock to offset the polka dot one like a shadow (this seemed to make the “love” pop and make it more readable). For the card with the red bow, I die cut the love from red card stock and topped it with Glossy Accents to add a little shine and dimension.
The following is a step by step video of creating the multi-layered shaker card:
These cards are being entered into the following challenges:
Lawnscaping Winter Wonderland Challenge
Simon Says Stamp Monday Something New Challenge
Simon Says Stamp Wednesday Something New Challenge
Penny Black One for the Girls Challenge
Art Impressions Winter Wonderland Challenge
Fab ‘n’ Funky Something New Challenge
Lil Patch of Crafty Friends Anything Goes Challenge
Word Art Wednesday Anything Goes Challenge
Card Mania Winter Fun Challenge
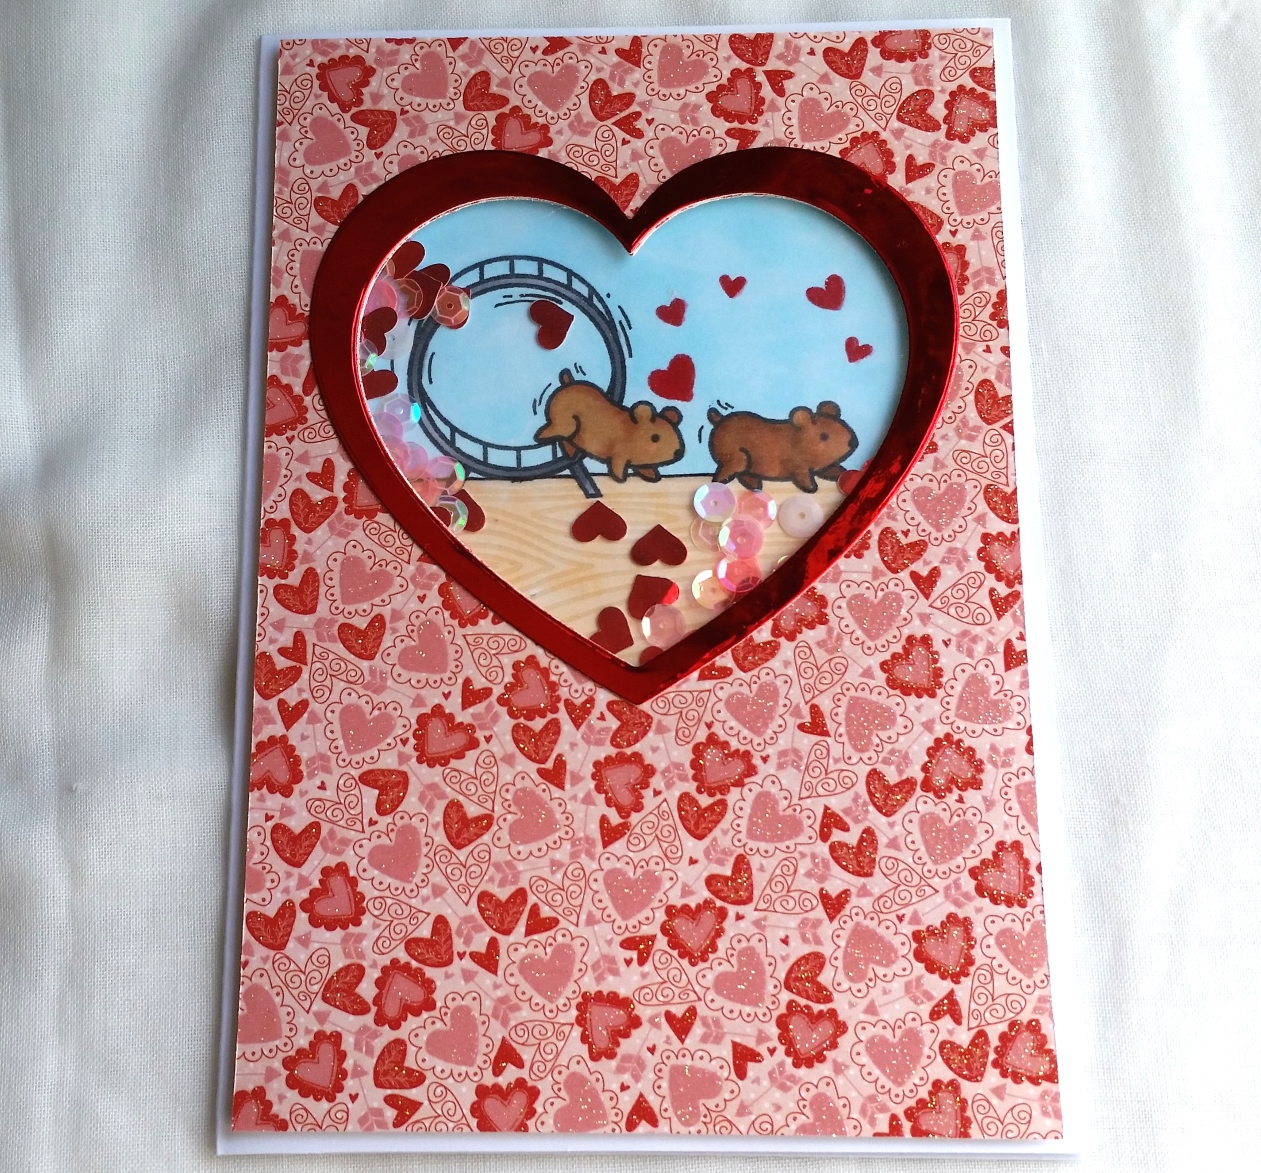 To create the little scene, I wanted to make everything 1 layer so that the shaker pieces wouldn’t get stuck on any layered images. I stamped out the hamster twice, used a post-it mask on the 2nd hamster and stamped out the hamster wheel to make it look like the 2nd hamster was just jumping off to follow the first hamster. Then I colored the whole scene with the following Copic markers:
1st hamster: E33, 35 and 37 with R20 blush
2nd hamster: E31, and 35 with R20 blush
Hamster wheel: C4 and 5
Back wall: B000
Wood desk: E51
Then to add a little texture, again without adding any layering that could impede the shaker pieces from moving around, I decided to add a wood grain to the desk top. I masked off the hamster wheel and the two hamsters before embossing so that they would remain clean and free of the wood grain embossing. I used the large wood grain stamp from the Lawn Fawn “Woodgrain Backdrops” set with VersaMark ink and clear embossing powder. There is a subtle darkening where the embossed grains are and the texture adds some interest.
 I also decided to add a little more embossing interest by stamping in some small red hearts from the Lawn Fawn “Wheelie Like You” and “Into the Woods” stamp sets with Momento Luxe “love letter” red ink. Unfortunately (GASP!) I smeared the stamping. Luckily, I was able to repair the damage with my RV29 Copic marker, a white Gelly Roll pen, and a VersaMarker pen (to re-moisten the hearts for embossing). I used more clear embossing powder on the floating hearts and finished the scene, swearing I was never going to risk that sort of extra stamping toward the end of a project again. LOL
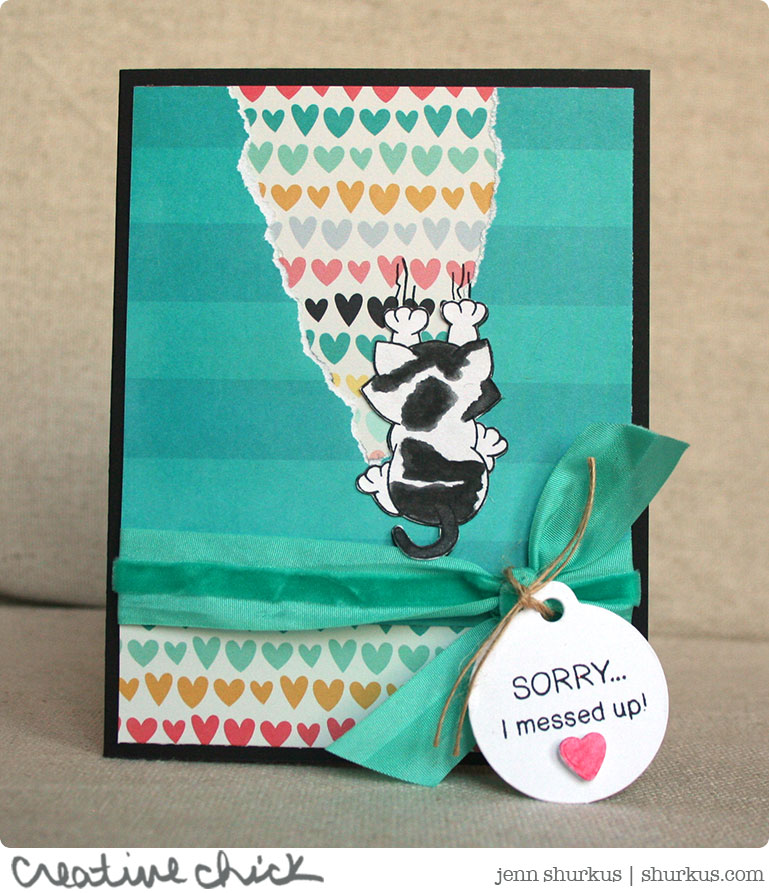
To make the shaker, I die cut a heart into a cute valentine patterned paper from the DCWV “Doodlin’ Around Stack.” I also used some red metallic paper to die cut out a heart frame to finish off the shaker window. To adhere the acetate panel, I used Zip Dry glue to the back of that heart opening. I used some pink iridescent sequins and red hearts I punched from the same red metallic paper for the shaker pieces. To pop up this front panel from the scene panel, I used double sided foam adhesive, taking care to minimize edge stickiness and static with my EK Tools powder tool.
The following is a tutorial video sharing the process of making this card:
This card is being entered into the following challenges:
Lawnscaping Embossing Challenge
MarkerPOP Anything Goes Challenge
AAA Cards Maskerade Challenge
Card Mania Anniversary Challenge
CAS-ual Friday Pretty Pattern Challenge
Thanks for stopping by and I hope you’re having a wonderful crafty day! WOOF
]]>
 I used the following dies from Diemond Dies for the construction:
The shaped base and all the layering base pieces: Bucket Mini Album Die
The dimensional bow at the top of the card: Bow Dies Set
The shovel shaker pieces and inside shovel accent: Sand Pail and Shover Die Set
The inside message area: Labels 2 Die
My readers can get an extra 10% off and free worldwide shipping at Diemond Dies on all orders of $35 or more by using the code: “thankskristina” at check out!
I used Whimsy Stamps’ “skippy and bobbin,” which was the first girl image stamp I ever bought (that was 2 years ago when I first started crafting on YouTube–WOW 2 years goes by fast when you’re having so much fun!). When I saw this stamp, I fell in love with this little girl and her best friend/golden retriever puppy (I can’t help but make up stories in my head about certain stamped images–LOL).
The following are the Copic colors I used to color up the image:
Skin: E50, 51, 53, 13 and R20 blush
Hair: E55, 57, 59 and 79
Pink parts of outfit: RV000, 02 and 04
Blue parts of outfit: B00, 01 and 04
White parts of outfit and puppy’s sailor’s cap: C1 and C3
Golden retriever puppy: E50, 53 and 55
I also added some sparkle on flowers of girl’s outfit and puppy’s dog tag with a Silver Metallic Sakura Gelly Roll Pen.
I wanted to make this card fun and feminine, as according to her mom, the recipient is definitely a “girly girl.” 🙂 However, I wanted it to be clean and simple too so that Skippy and Bobbin would be the center attraction. I kept it relatively clean by using only 3 metallic papers–a gorgeous damask in blue for the background sky, a shiny darker blue for the background ocean, and a soft shimmery cream for the bucket handle, dimensional bow, and beach sand.
The following is a process video sharing how I made this card:
This card is being entered into the following challenges:
Simon Says Stamp Work It Wednesday Die Cut Challenge
Simon Says Stamp Tie It Up Wednesday Challenge
Raisin Boat Summertime Challenge
Time Out Friendship is Golden Challenge
AAA Cards It’s So Hot! Challenge
Thanks for stopping by, and I hope you’re having a sun shiny day! WOOF
]]>
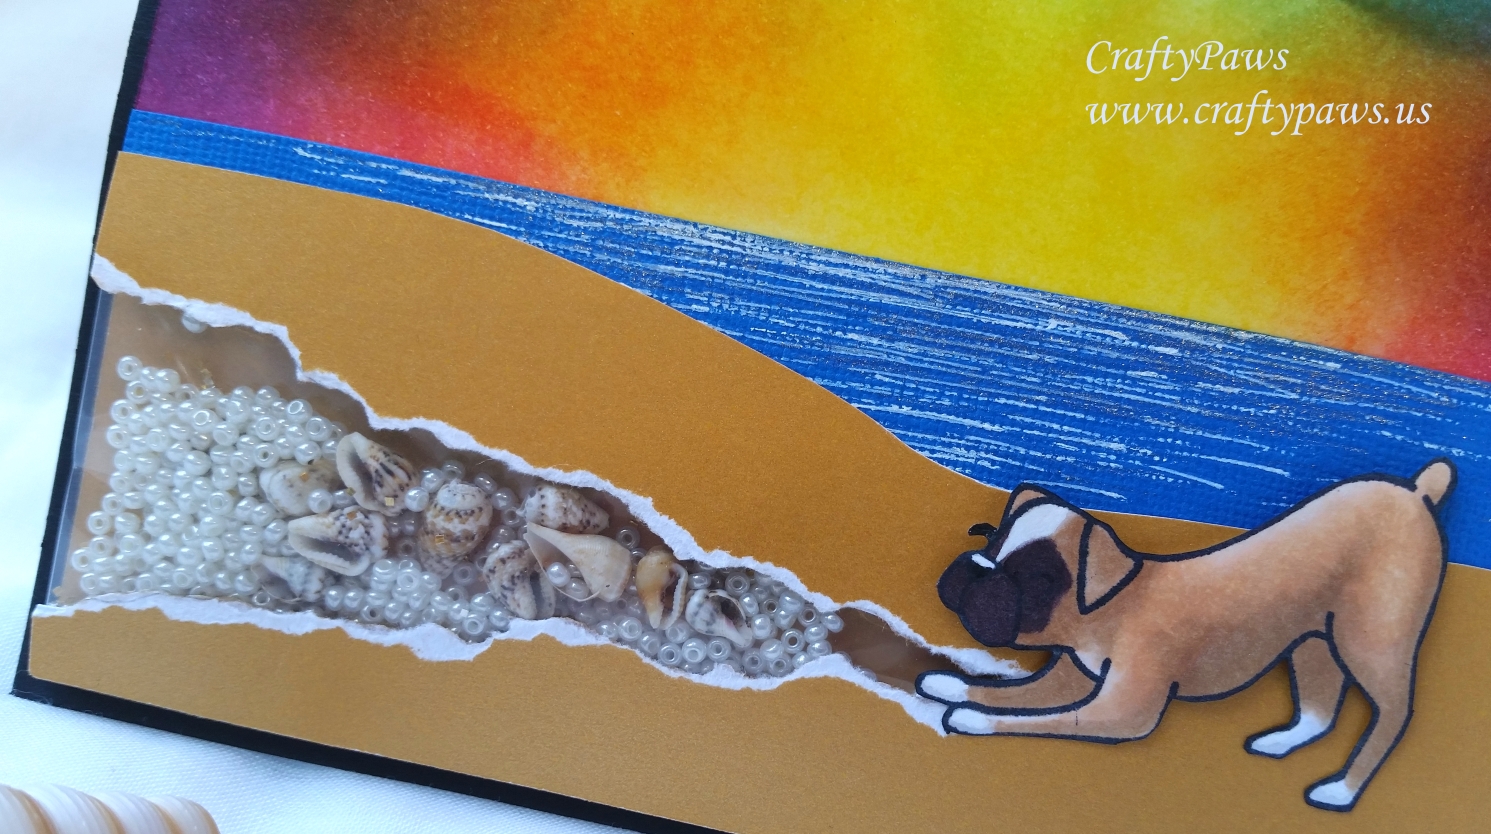 I used a gold paper from an DCWV Shimmer Stack for the sand because it had a wonderful subtle shimmer that was reminiscent of sparkly sand at the beach. I tore a little v-shaped area out to create a window (cased from a card made by Jenn Shurkus) where I could put a shaker pocket that I made with a bit of plastic from a sheet protector and my fuse tool. Inside the shaker pocket, I added pearlescent seed beads, chunky gold glitter, and tiny sea shells from an old broken necklace (I love upcycling things like this).
I wanted the scene to have a vibrant background, so I created a rainbow colored sunset using the following Tim Holtz Distress Inks with blending tools: Mustard Seed, Spiced Marmalade, Tumbled Glass, Broken China, Seedless Preserves, and Picked Raspberry. I love the deep, rich colors, and who doesn’t like a rainbow?For the ocean, I just used a scrap of dark blue card stock from my scrap box and used my White and Clear Star Sakura Gelly Roll Pens to create a shimmery sparkle, the way the ocean might look at sunset.
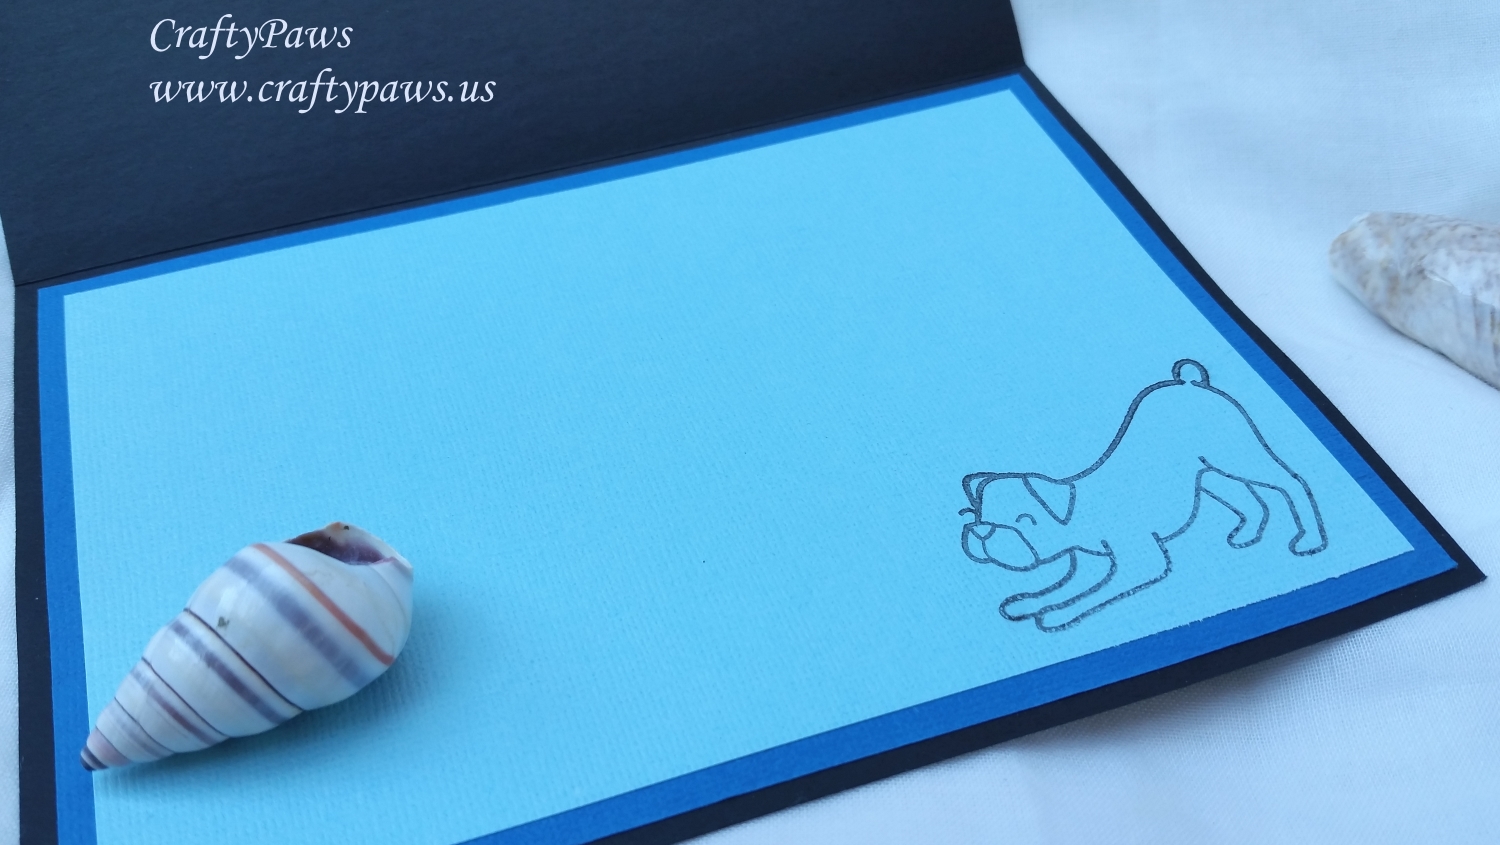
I colored in the boxer pup stamp with the following Copic colors: E50, E53, E55, E79, W1 and N10. I fussy cut him out and then used some strategically placed foam adhesive to pop his head and body off the card base. I used Aleene’s Original Tacky Glue to adhere his feet directly to the “sandy” beach. I think the two levels on the pup helps highlight his playful stance.
 For a bit of fun (and to fulfill the challenge that my crafty friend Ashley (YT: Sparkly CanadianCraftyGirl) and I had set for ourselves to use ribbon and enamel dots in this Lawn Fawn collaboration project), I pulled an airplane wood veneer piece from my stash, colored it with a black Sharpie, and prepped a snippet of an “I {heart} My Pet” ribbon to look like one of those banners that you might see an advertising airplane towing at the beach in the summertime. 🙂
Lastly to finish off the inside, I just lined a black card base (I think vibrant cards like this look great and pop off of black card bases) with some dark blue and pale blue card stock. Then I did a second generation stamping of the boxer pup in the corner with VersaFine ink to add some fun.
The following is a process video of creating this card:
Thanks so much for stopping by! I hope you are having a wonderful crafty day! WOOF
This card is being entered into the following challenges:
Simon Says Stamp No Ordinary Paper Monday Challenge
Simon Says Stamp Anything Goes Wednesday Challenge
Raisin Boat Summertime Challenge
MarkerPOP Anything Goes Challenge
Creative Chick 10th Blogiversary Challenge

]]>
This is a shaker card that I made using the Diemond Dies large mason jar as the base, a piece of plastic packaging material that I upcycled to make the cover, and some cute little dragonfly shakers (I added some blue and iridescent sequins for a little extra sparkle inside the shaker too) that I made with Shrinky Dinks and the new Diemond Dies dragonfly die. As I am extending my guest design team member stint for Diemond Dies, if making a purchase, please use the coupon code: thankskristina for 10% off your entire purchase and free worldwide shipping on orders over $35.
This shaker is one that I made for a Canadian friend (YT: Sheila McNabb) so I decided to use the beaver (the national animal of Canada) from the Furry Friendship Whimsy Stamp set to create a little scene inside the shaker. I inked around the edges of the mason jar with a blue green American Crafts ink and also inked the lower level of the scene to create a lake look on which the little beaver could be floating. I colored him, the branch he is holding and the log he is standing on using the following Copic colors: E21, 23, 25, 29 and 100. I added a little BG18 just for the leaves. Since the background paper color was a light tan, I also used a white Gelly Roll pen to brighten his front teeth. 🙂
The following is a tutorial video for this shaker:
This shaker card is also being entered into the Naughty or Nice Anything Goes Challenge and
the Simon Says Stamp Work It Wednesday Blue Challenge and
the Simon Says Stamp Monday Anything Goes Challenge
Please subscribe if you wish, and have a great day! WOOF
]]>
 It’s going to be my dad’s 80th birthday soon, and I knew I wanted to make a very special card to help celebrate this milestone birthday. This swing shaker card (my first shaker!) was just the ticket. I followed the swing card tutorial recently posted by Peggy (YT: jppeggy2) and tweaked it a bit to add my own twist and a little fun.
These are the materials and measurements I used, and in the following video, I share the assembly instructions.
Card base: 4 1/2″ x 7 1/2″
Score with long way going horizontally at 2 7/8″ and 3 7/8″
Patterned paper for font: 4 1/4″ x 2 5/8″
Patterned paper for back: 4 1/4″ x 3 3/8″
2 die cut rings of patterned paper for the font and back to finish off the edges of the shaker part
3-4 die cut rings of thin chipboard to create the depth so the beads, sequins or bling can shake around inside (I used 3 for the sequins and 4 for the bling).
1 large die cut piece of acetate for the front face of the shaker
1 large die cut of patterned paper for the back of the shaker (visible behind the beads, sequins or bling) and the back of which will be where the note or sentiment can be stamped or written.
This is the video: https://www.youtube.com/watch?v=kwvMvjRiECU
I hope you’ll consider giving this card a try. It is really fun, not difficult, and it can help you create a card with a clean and simple look but with a WOW factor.
This card is being entered into the Simon Says Stamp Monday Challenge and
the Ribbon Carousel Blog Challenge 94 and
the Naughty or Nice Challenge #5
Thanks for stopping by and please subscribe if you wish! WOOF
]]>