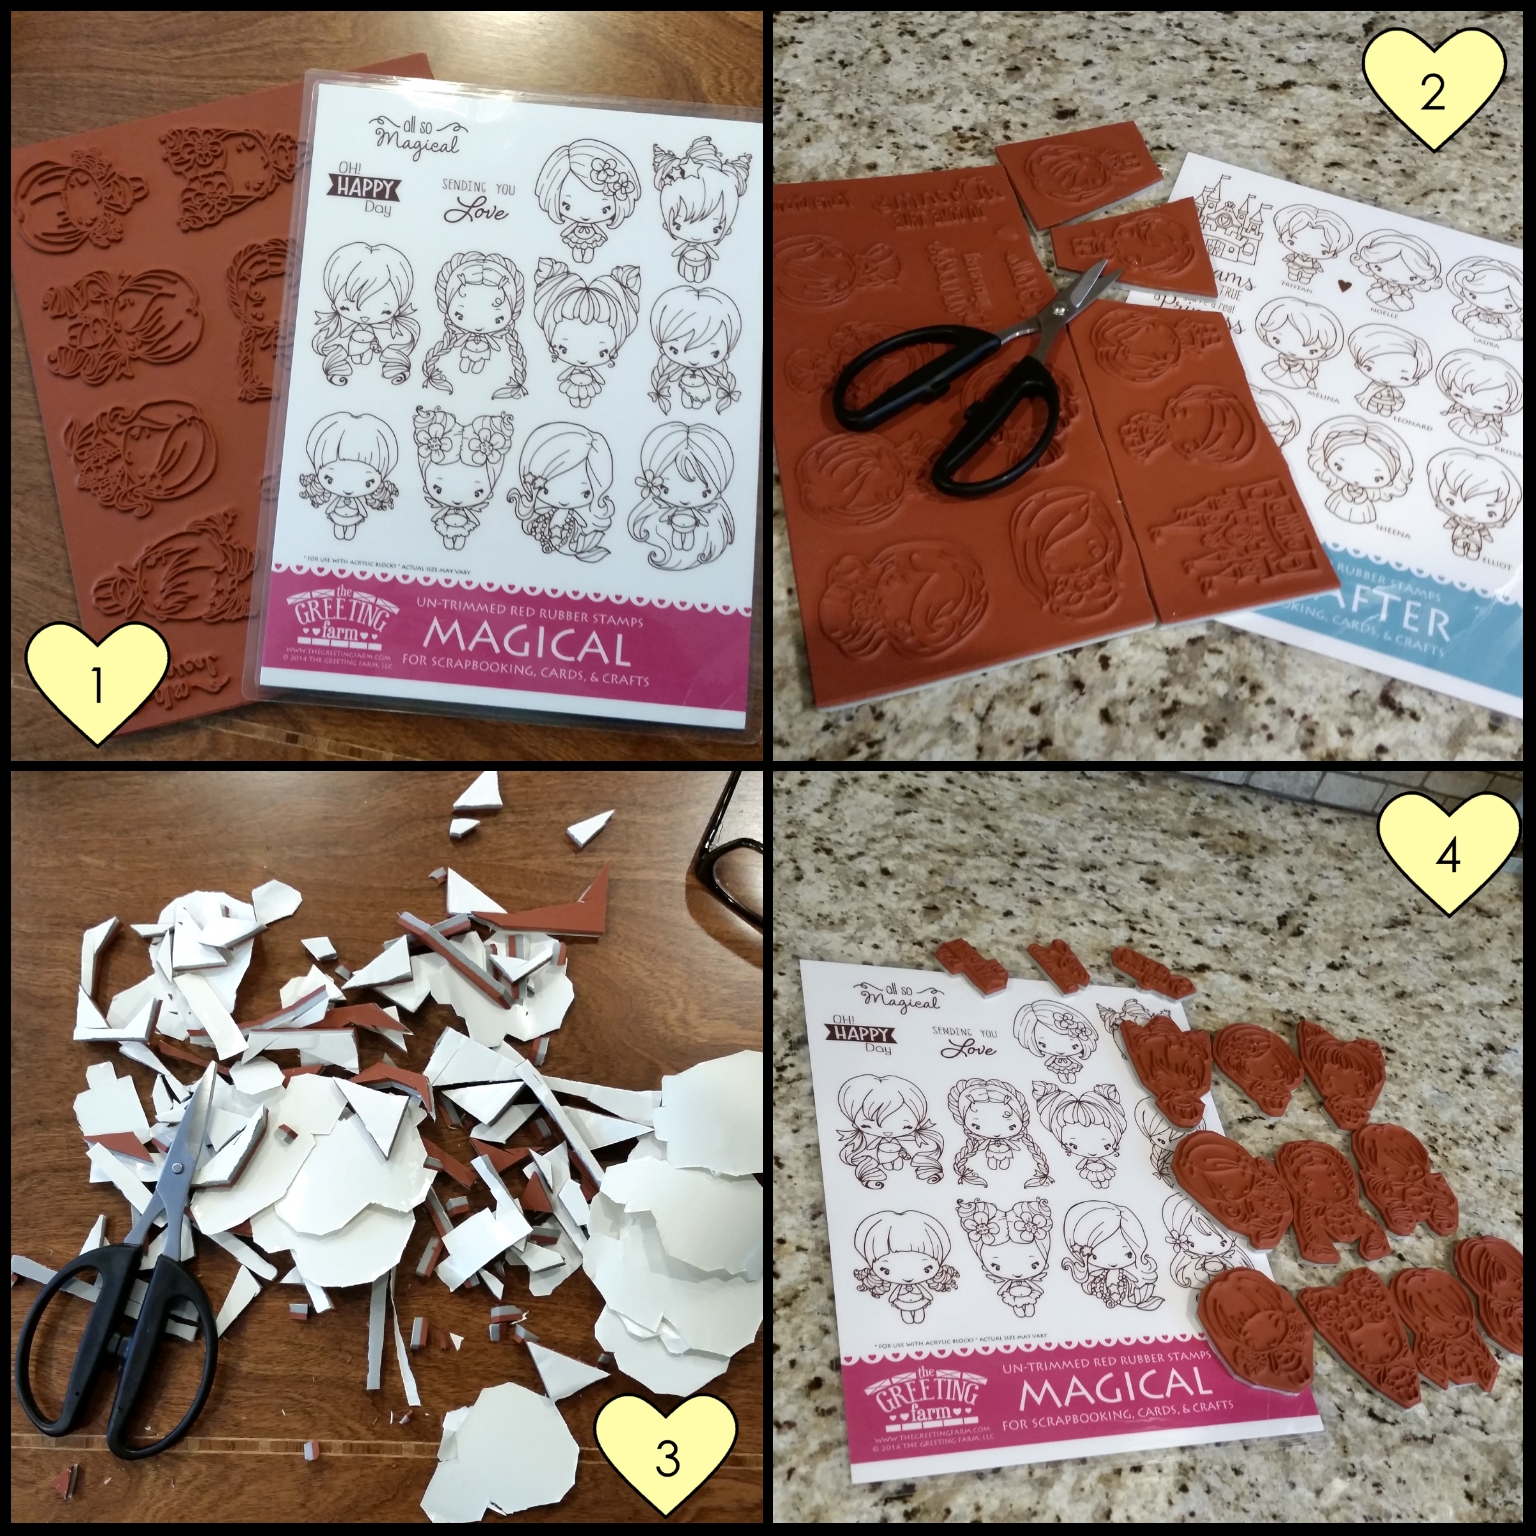
 I had recently purchased several red rubber stamp sets from The Greeting Farm, which come uncut. These adorable stamps are meant to be used with stamping blocks (I use this 4 Piece Fiskars Stamp Block Set, which may not be the best but is a great value and has served me well for all my years of stamping) or a stamp press (my favorite is this Easy Fiskars Stamp Press or this Compact Fiskars Stamp Press). To get a clean stamped impression, however, you need to trim off the excess rubber beyond the images.
Previously I had used heavy duty kitchen shears to cut untrimmed stamps, but after finally buying these Kai scissors, I wonder why I wasted so much time and effort to save $20. These scissors cut through the rubber and foam mounting like butter. Plus their sharp point makes cutting close to the image a breeze. The only slight down side to these scissors is that they are not padded so after a LOT of trimming, my middle finger became sore. TIP: If you are going to be trimming a bunch of stamps at one time, I would recommend putting a band aid on your middle finger to protect your finger from the pressure.
The following is a short process video of me using these scissors:
Thanks for stopping by and I hope this video is helpful to you.
]]> As most of you know I have two pups (well one is 15 years old and the other is 3 1/2) that are my loves. When we lived in NYC and didn’t have cars, I didn’t think much about it, but now that we live a driving lifestyle I was so glad to have found these pet leash/seat belts for them. Obviously, these are not as exciting for the dogs (they would have preferred edible expressions of my love), but I feel so much better knowing that they are safer when we drive around town.
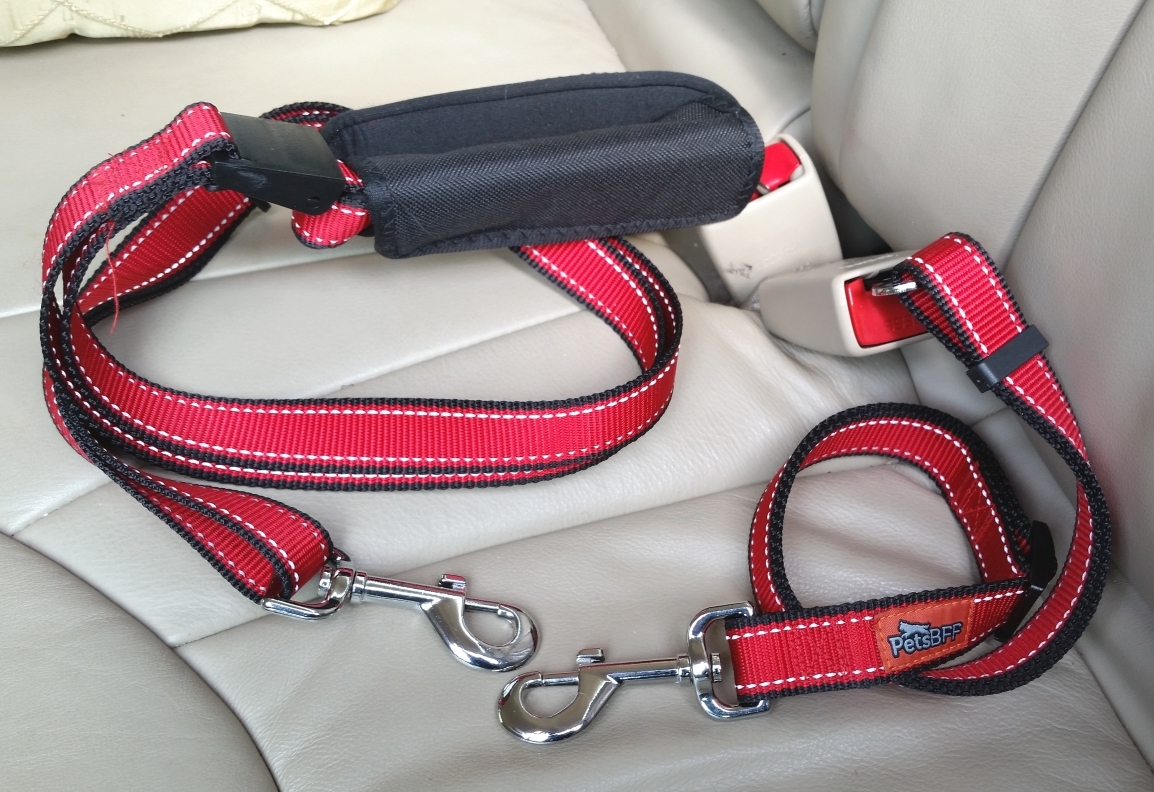
 These 1″ wide seat belts come 2 to a pack and are adjustable in length. One is 22″-37″ long and is perfect for my more sedentary, old girl, Biscuit. The other is 3.7 – 6 feet long (it converts into a leash with a padded handle that has a zippered compartment for keys, ID, etc.) and gives my younger, friskier Bandito enough lead to let him roam a bit in the back seat. It’s as if these seat belts were made for my fur babies!
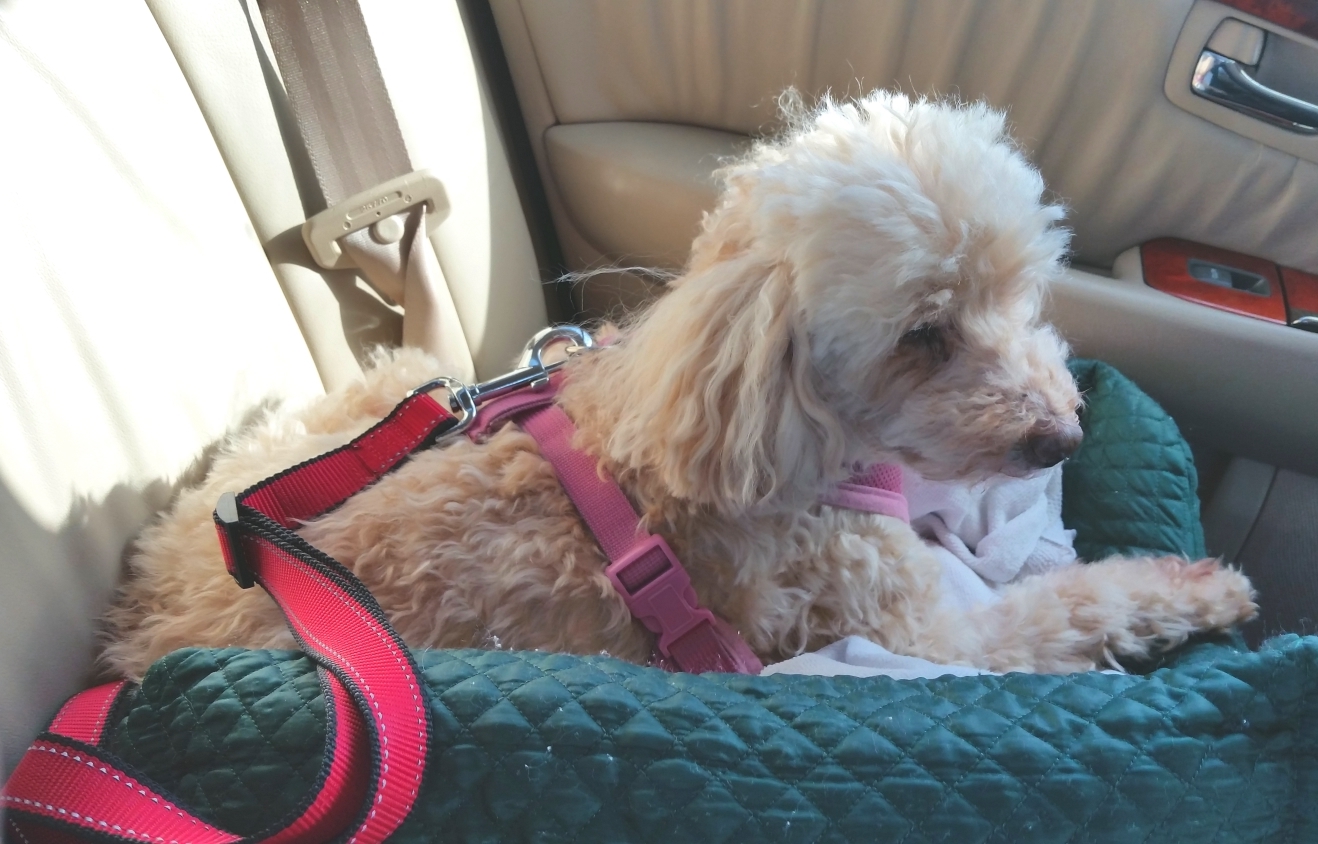
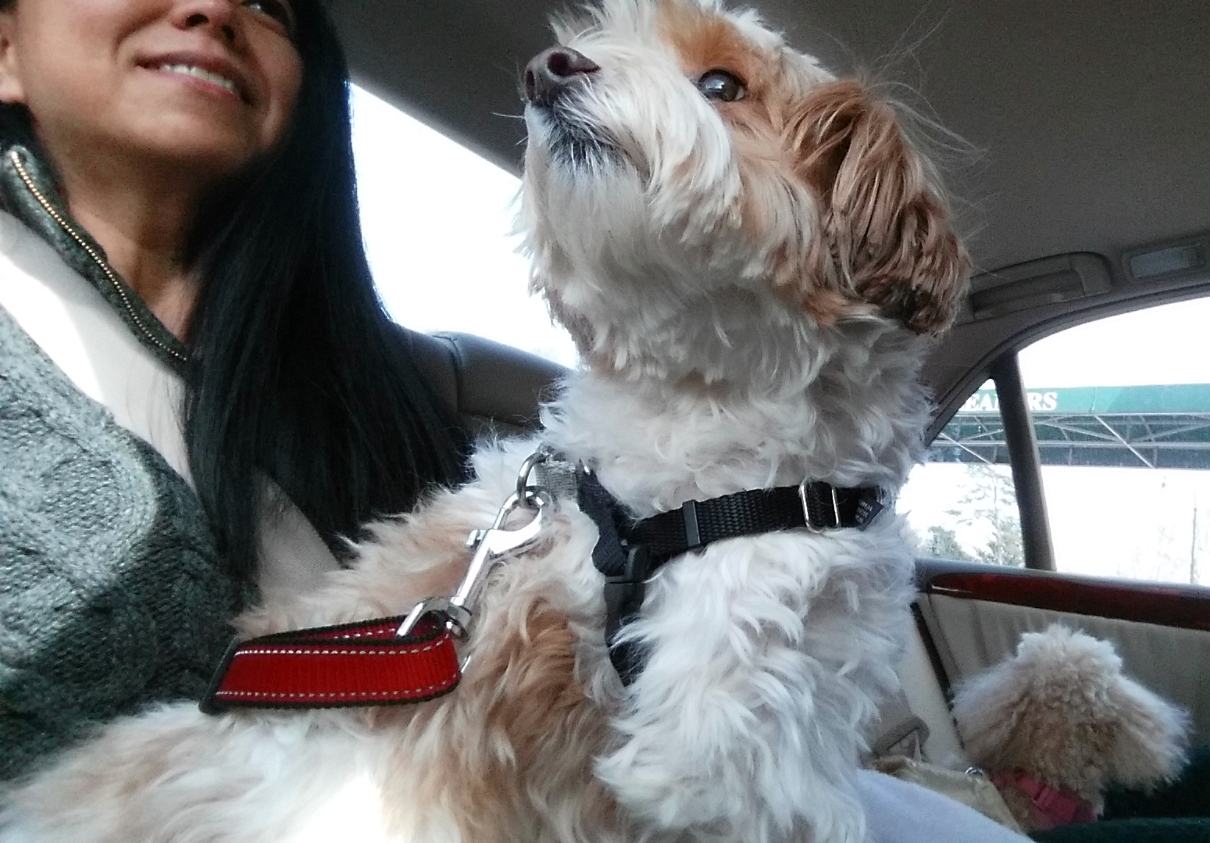 This all might seem a little extreme for non-dog people, but I think of and treat my dogs like my kids. We would never let kids ride around in cars without safety belts or car seats so why would I let me dogs ride around like that? This is the doggy equivalent of safety belts and car seats for kids, but even better. The dogs didn’t seem to even notice that they had their safety belts on (unlike a lot of kids who fight against getting put into car seats or using safety belts). They didn’t seem bothered by the tethering at all, and I had peace of mind that they were safer now.
I will say that I was a little disappointed by the packaging on this product. They had pictures of dogs in regular round collars tethered to these safety belts. I took one look at that and knew I would only use these with harness collars. I don’t want to imagine what could happen in a sudden stop or accident with these restraints used with simple collars….
The following is a video share of these dog safety belt/leashes:
If you are interested in picking up these safety belts, check them out on Amazon: Two – Dog Seat Belt Leashes – Pet Seat belt Harness for Car
Disclaimer: I received these leashes/safety belts at a discounted price in exchange for my honest review.
]]> First, my hubby is always looking for “cold spots” in bed. In fact, he has 4 pillows that he rotates around trying to keep his head cold as he sleeps. Refrigerated prior to use, this gel mat pillow was able to keep him comfortably cool so he fell asleep quickly and easily. However, he said in the night it did not stay cold enough so he reverted to his other pillows after it had gotten to room temperature.
Second, I am a chronic migraine sufferer, and unlucky for me but good for a fulsome review, I have had two migraines in the last few days. I normally use two ice packs to provide temporary relief when my migraines are the most acute, but this time I was able to use just this one gel mat pillow. The 12.5″ x 22″ size was large enough for me to double over and wrap around my forehead and neck, and because it is soft and malleable, it was much more comfortable to use as well. The down side, again, is that it only stayed cold for about an hour. I am considering getting a second gel mat so that I can alternate the use of two of these mats for my migraines.
Third, my 15 year old miniature poodle has arthritis and often gets overheated. She struggles to stay comfortable, moving back and forth from her dog beds to the cooler hardwood floors. I had previously tried getting a doggy water bed for her, but she did not like the movement and unsteady feeling and wouldn’t touch it without constantly being bribed with treats. With this cooling gel mat, I only had to have her try it out and she naturally went there for cooling relief. I think the soft resistance from the gel gave her some cushioning from the hardwood floors, but I am going to see how she likes it actually in one of her dog beds.
The following is a video share of my experiences:
My readers can get this product for 30% off by using the coupon code: 30TMSN15 You can order yours today HERE
Disclaimer: I got this product at a heavily discounted price in exchange for a review, but all opinions are my own.
Thanks for stopping by, and I hope you are having a cool day! WOOF
]]>
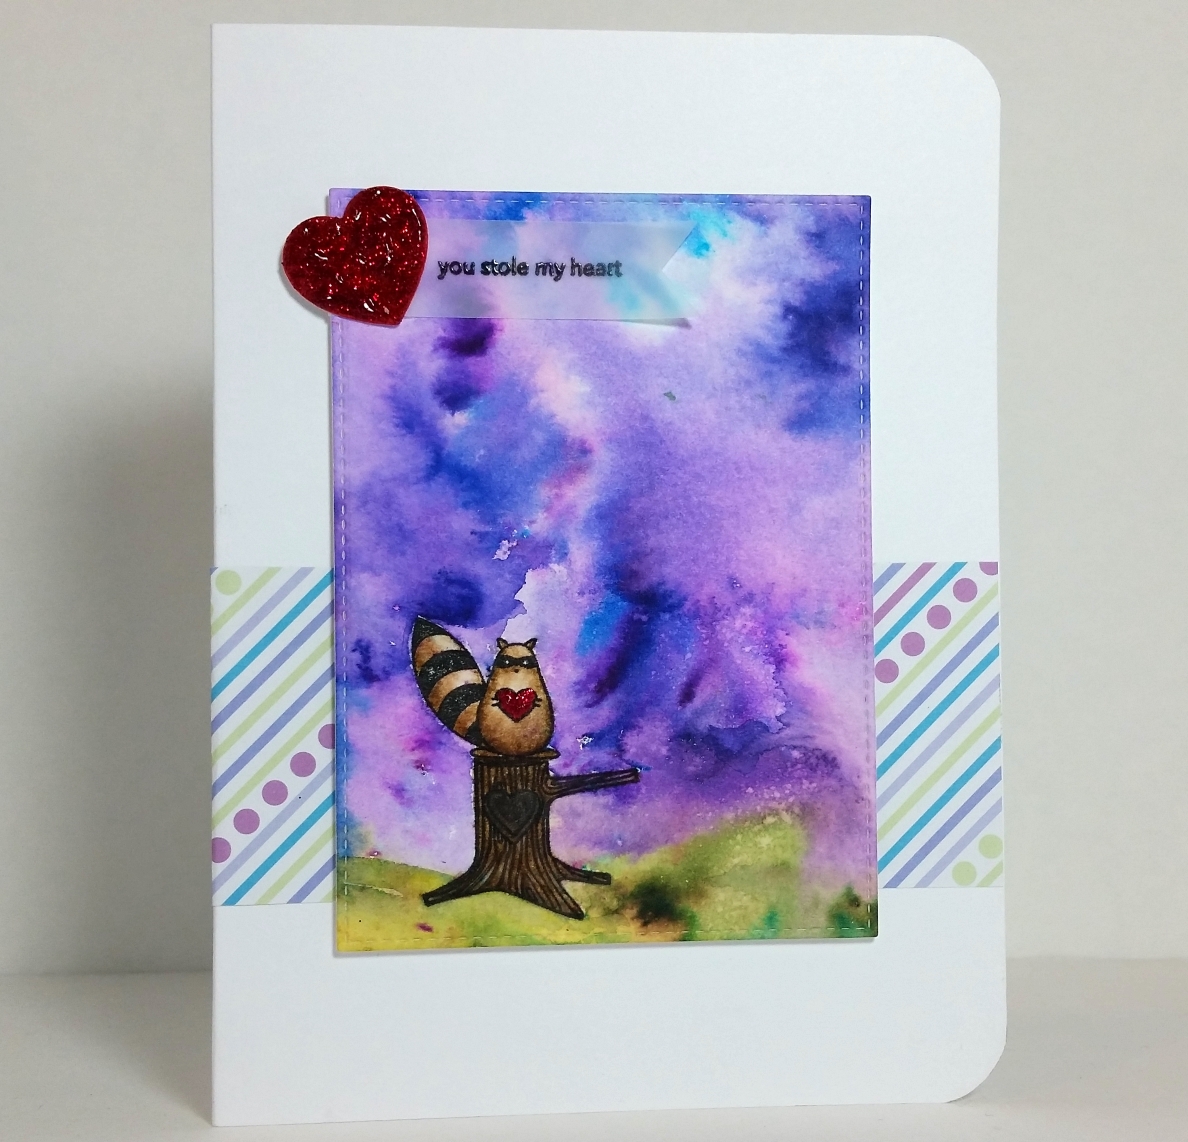 I used some simple Scotch Tape masking, post-it note masking, and Stamp-a-ma-jig stamping to arrange the little raccoon on top of the tree stump. I would never have attempted this type of masking, especially on rough watercolor paper before, but with the Stamp-a-ma-jig, this was actually quite doable. Then I did some water coloring with Tim Holtz Distress Markers in Antique Linen, Tea Dye, Vintage Photo, Gathered Twigs, and Black Soot to color them up. I colored the heart the raccoon is holding and a die cut heart that I use for an embellishment with Festive Berries before I add a thick coat of Cranberry Stickles over top for lots of sparkle.
Then after carefully drying everything I’d done so far, I applied water to the watercolor paper around the stamped image with a water brush and started playing with the Color Bursts in Yellow Ochre, Terre Verte, and Indigo and a spray bottle filled with water. Eeek, this was nerve wracking, fun and exciting! Because the powders are mixed combinations the results when activated with water are surprising. I love it!!! LOL
 Then I followed a fab sketch from the MFT Wednesday Sketch Challenge to assemble this card front onto a card. I used a strip of an old scrap of patterned paper to layer behind the card front that I die cut out using the largest of the rectangles from the MFT Die-Namics Stitched Rectangle STAX die set. I popped up the card front on foam adhesive for a little dimension, and put everything on a large white card base to create a CAS feel. I thought the intense colors on the card front needed some empty white space to balance it out.
Lastly, I stamped out the sentiment “you stole my heart” from the stamp set onto vellum and heat embossed that with Recollections clear embossing powder to set it. I hand cut that little piece of vellum into a banner and added that at the top left of the card front tucked behind that Stickled heart I mentioned earlier.
The following is a start to finish process video of making this card:
This card is being entered into the following challenges:
MFT Wednesday Sketch Challenge
MarkerPOP Valentines Day Challenge: WINNER
Simon Says Stamp Monday Something New Challenge
Through The Craft Room Door Anything Goes Challenge
Crafts Galore Encore Anything Goes Challenge
613 Avenue Create Anything Goes with an Option Twist of CAS Challenge
Lil Patch of Crafty Friends Anything Goes Challenge
Thanks for stopping by, and I hope you’re having a wonderful crafty day! WOOF
If you like this post, please share it with friends:
]]>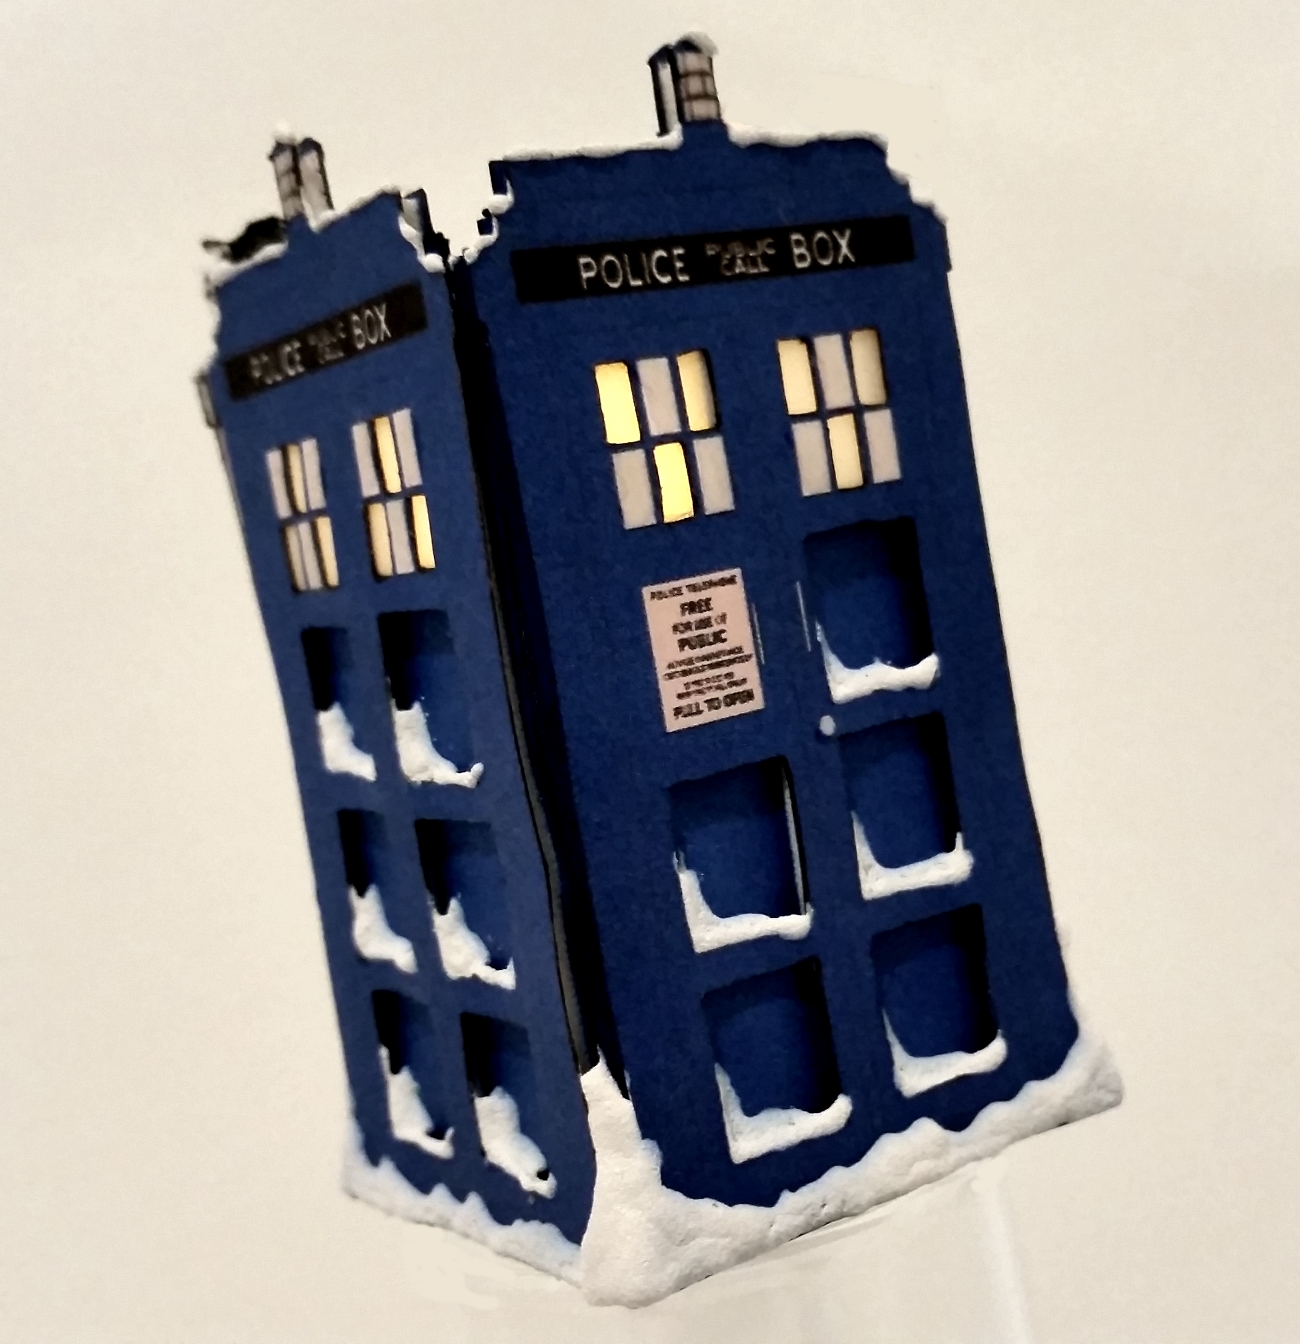 I found online a clean front door image of the Tardis (Doctor Who’s time traveling space ship), then I used paint.net to alter it to make it look like one of the side walls and replicated it 2 more times (3 sides total). I printed out 2 images of each side of the Tardis and fussy cut each of them out. Then I used an Xacto knife and cut out all the panels on the doors of half of the images. I also used an Xacto knife to cut out half of the windows at the top of each door (alternating every other window panel so as not to accidentally cut away or rip the window sills) and lined them with vellum. For the second set of Tardis sides (the ones I’ll put behind the ones with the panels cut out), I cut out the windows completely. Then I painstakingly inked all the cut edges (yes, even inside every window pane) with a black felt tip marker to hide the white of the paper and give a finished look. Finally, I layered all of sides using double sided foam adhesive, creating a dimensional paneled look for each wall.
With some black card stock, I constructed a little box about 1.5″ square at the base and 1″ high. I flipped this over so the bottom was on the top and then adhered each side of the Tardis to each side of the box. This created a great 3D look as well as a platform on which to inset a battery operated tea light. This tea light addition adds a great glow behind the cut out windows that I had lined with vellum and took this little 3D ornament to the next level (my hubby said he thought this was the best craft project I had ever made! hehehe).
To add a little extra interest, I also added DecoArt Snow Writer on the tops and bottoms of each side of the Tardis and along the left side and bottom of each inset panel. As it takes 2-3 hours for each side to dry enough to move on to the next wall, this was a great lesson in patience for me. :o) What is fantastic about this product, though, is that it dries completely hard and secure (no more deflated puffy texture like from Liquid Applique). As a finishing touch, I added just a pinch of Glossy Accents to add shine and a glassy look to the windows that were not cut out and lined with vellum. I used a remnant black satin ribbon to create a hanging loop, making sure to leave space so that I could turn on and off the tea light inside as needed.
This 3D Light Up Doctor Who Ornament is being entered into the following challenges:
Simon Says Stamp Monday Just A Pinch Challenge
613 Avenue Create Anything Goes Challenge
Through the Craft Room Door Anything Goes Challenge – WINNER
Craft Your Passion Challenges Anything Goes
Card Mania Christmas Challenge
Thanks for stopping by, and I hope you are having a wonderful crafty day! WOOF
]]>
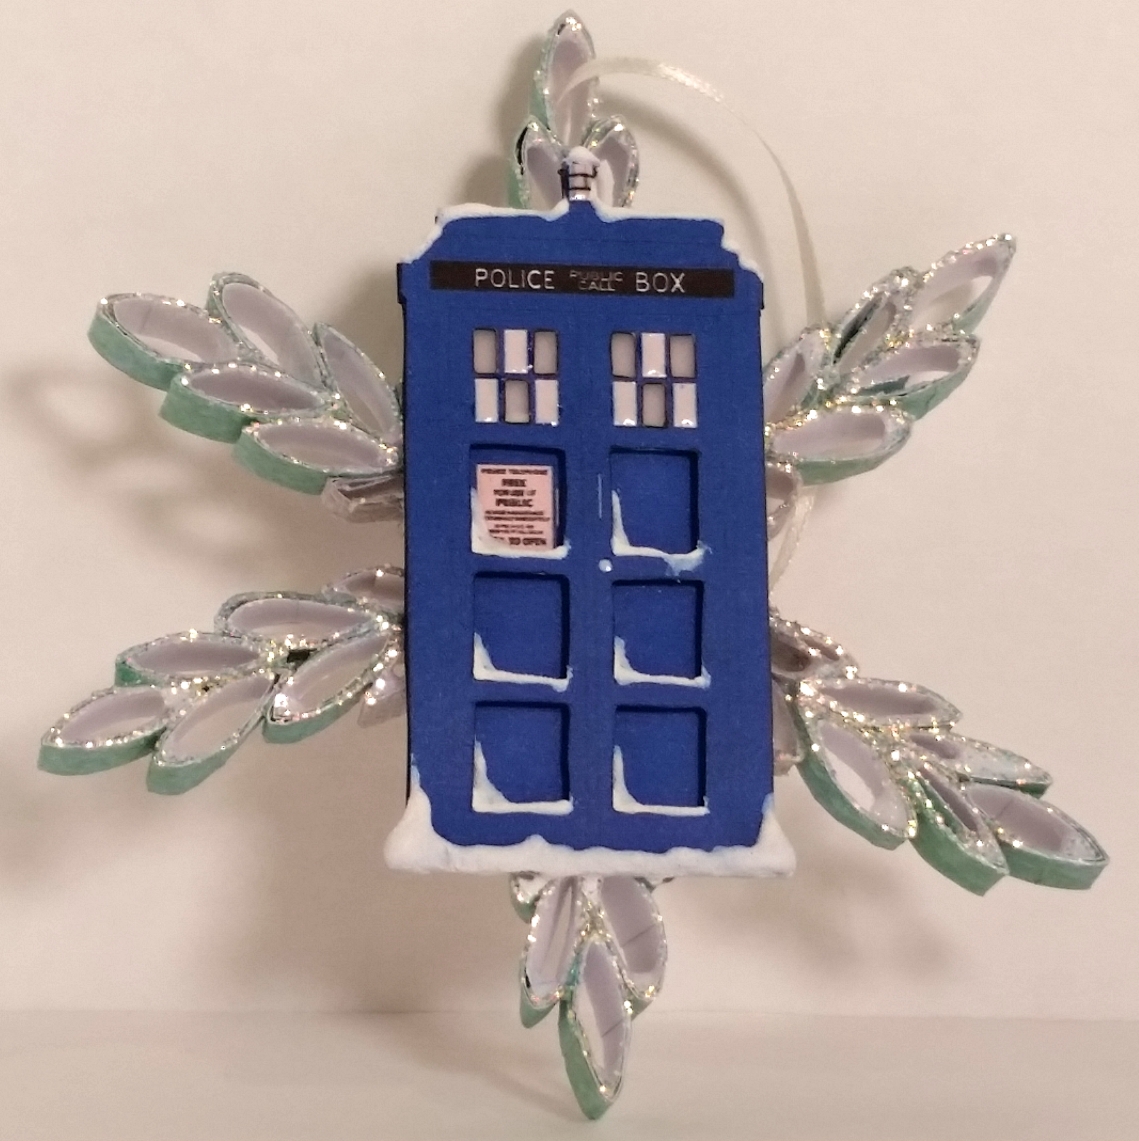 I know he loves Doctor Who so in addition to the card I made for him HERE, I also made this paper snowflake ornament (Hectanooga1’s tutorial HERE) and this Primitive style Scrabble tile ornament (sara’s creatopia’s tutorial HERE) for his Christmas tree.
There was a lot of fussy cutting, Xacto blade cutting, inking of all the cut paper edges, glittering (which I really don’t like, but thought it added so much to the paper snowflake base) and decorating with pinches of DecoArt Snow Writer for the Doctor Who Tardis snowflake ornament. I also added in vellum behind half of the windows and Glossy Accents over top of all the windows at the top of the Tardis so that any Christmas lights where this ornament is hung could twinkle and show through the windows. 😀 Thinking through and creating the whole thing took me a full day and a half. LOL The Primitive Scrabble tile ornament took me less than an hour and it only required a bit of ribbon, some backing card stock and some more DecoArt Snow Writer faux snow. Have I said how much I LOVE the DecoArt Snow Writer?! It dries hard and is perfect for altered item and home decor projects!
The following is a video share of these ornaments:
The Doctor Who Tardis snowflake ornament is being entered into the following challenges:
Simon Says Stamp Just A Pinch Challenge
Lil Patch of Crafty Friends Anything Goes Challenge
613 Avenue Create Anything Goes Challenge
Through the Craft Room Door Anything Goes Challenge
Virginia’s View All About Glitter Challenge
Thanks for stopping by, and have a wonderful crafty day! WOOF
]]>
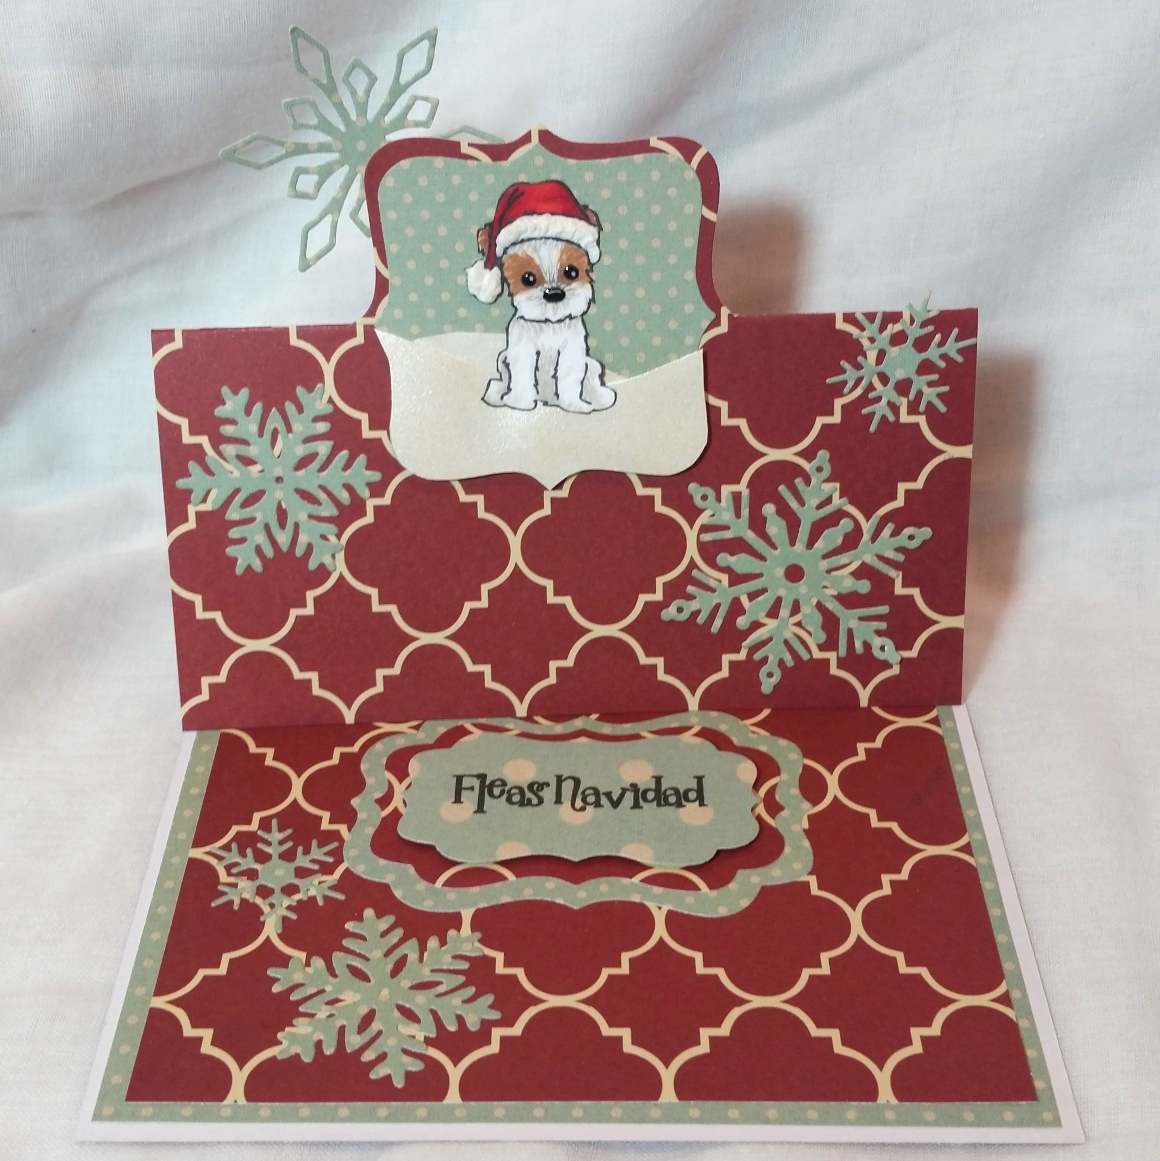 EZ Flip It Top Note Die Set
Bow Die Set to make the snow banks for the puppy to sit on
Labels 1 Nesting Die Set to make the stopper for the easel card
Winter Snowflake Die Set and Snowflake #1 Die to make the decorate snowflakes for the second card
My readers can get 10% off their entire order of $35 or more and free worldwide shipping at Diemond Dies by using the coupon code “thankskristina” at checkout.
Plus Diemond Dies is now making available a limited number of dies and die bundles on Amazon. There are some amazing discounted prices during this special introductory period, so if you have been wanting some Diemond Dies, now is a great chance to stock up! These would make fabulous holiday gifts for crafty friends (or yourself!). There are direct links to all those dies below:
 Nesting Stars Die Set
Nesting Tag Die Set
Nesting Scalloped Circle Die Set
Nesting Heart Die Set
Icicle and Holly Border Bundle
Christmas Lights Die Set
Christmas Tree Die
Dogwood Flower Die Set
Cherry Blossom and Branch Die Set
Skeleton Leaf and Mini Leaves Bundle
Fancy Flowers Die Set
Mini Envelope Die Set
Halloween Bundle
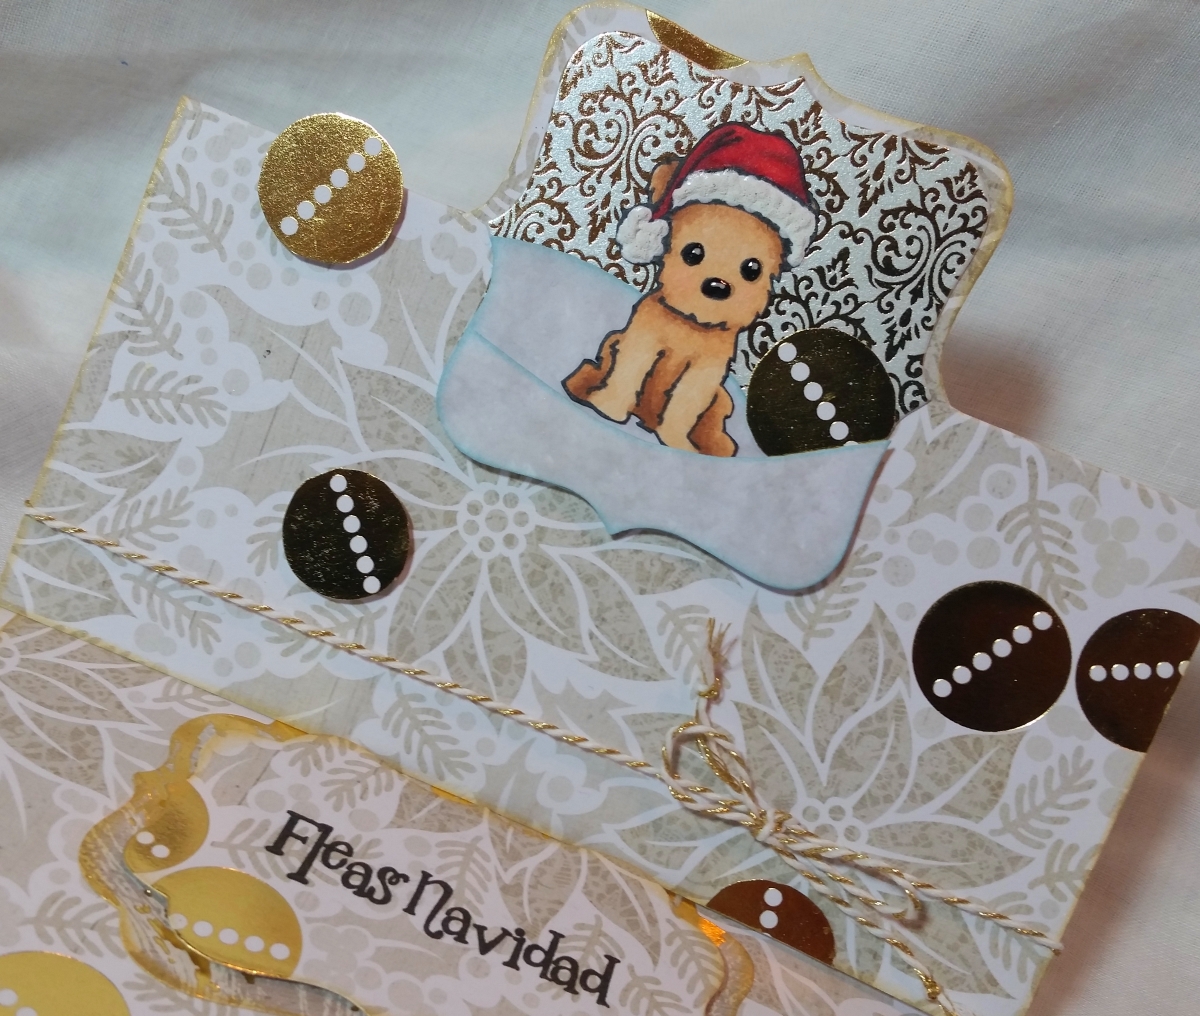
The following is a video of my Copic coloring of the cute little Christmas Doggy in different colors along with a review of Marvy Uchida’s Liquid Applique and DecoArt’s Snow Writer (UPDATE: after de-clogging my Snow Writer, it came out beautifully and I LOVE the way it dries/cures solidly. This is a much better long-term material for using on cards, layouts, and alter projects since it does not deflate or get crushed over time (or in the mail)):
I used the following Copic colors:
Black puppy: W3, 5, 7, 9; White puppy: W1 and 3; and Spotted puppy: W1, W3, E33, 23 and 25. The golden puppy, which I use in the card tutorial but was not included in this coloring video, was colored up with E21, E33, and R30 (for blush). The Santa hats were all colored with R24, 29 and 39. I added highlights to the eyes and noses with a white Sakura Gelly Roll pen and also used Glossy Accents to add shine to the eyes and noses.
The following is a tutorial video of constructing the EZ Flip It Card + a GIVEAWAY:
These Christmas Cards are being entered into the following challenges:
Simon Says Stamp Work It Wednesday Holiday Card Challenge
Simon Says Stamp Monday Holly Jolly Stamping Challenge
Through the Craft Room Door Anything Goes Challenge
Crafts Galore Encore Merry Christmas and Anything Goes Challenge
Card Mania Christmas Challenge
Lil Patch of Crafty Friends Anything Goes Challenge
The Red Christmas Card with the snowflake die cuts is being entered into the following challenges:
Simon Says stamp Wednesday Let It Snow Challenge
Sparkles Christmas Challenges Die Cuts for Christmas Challenge
Thanks so much for stopping by, and I hope you are having a wonderful crafty day! WOOF
]]>
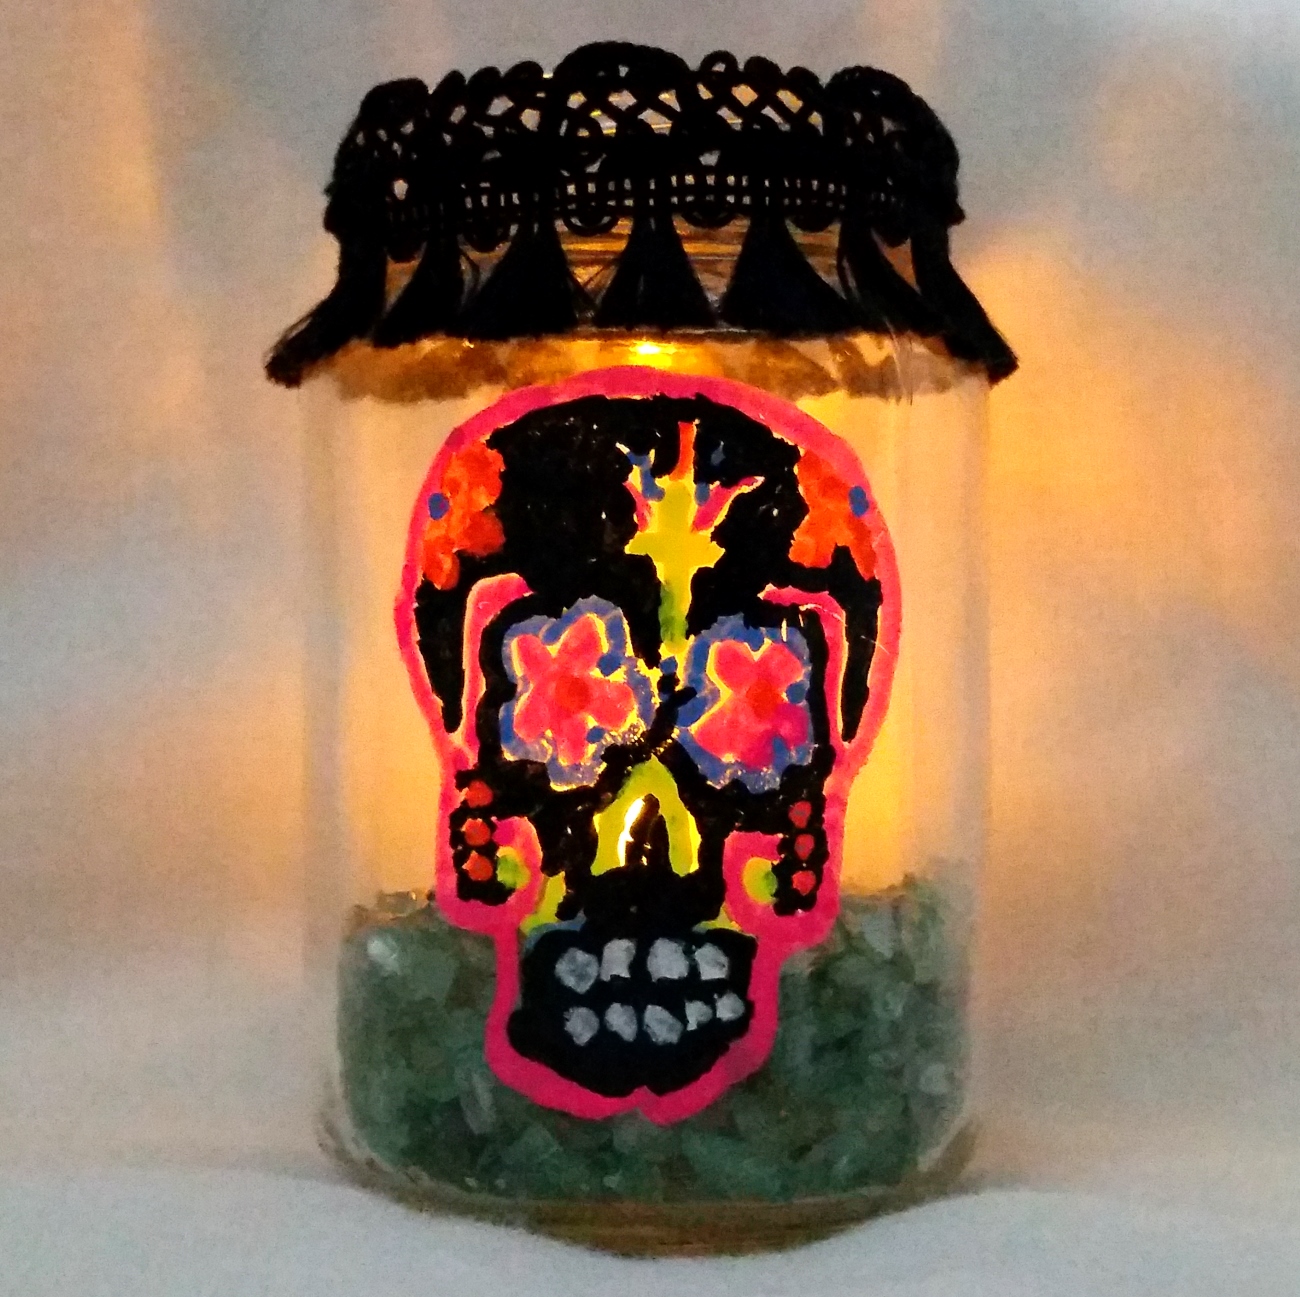 I tried them on ready made American Crafts chalk board stickers, home made chalk board stickers I made with American Crafts chalkboard paint on name tags, a mirror, a ceramic mug, and on an upcycled baby food jar that I made into a Dia De Los Muertos votive holder! How great would a whole row of these votive holders look at a Halloween dinner?! I had so much fun playing with these markers.
They work on hard, non-porous surfaces like glass, whiteboards, mirrors, plastics, chalkboards, and ceramics. Clean up is easy with water or Windex on a paper towel or a baby wipe. They are child safe, water-based, non-toxic, low odor, acid free, and does not stain clothing.
ChalkOla Markers are available here:
Amazon in the US: ChalkOla Markers
Amazon in the UK: ChalkOla Markers
The following video is a product review and my sharing some fun craft projects/play using ChalkOla Markers:
The Dia De Los Muertos votive holder is being entered into the following challenges:
The Daily Marker 30 Day Coloring Challenge
The Shabby Tea Room Swirls and Twirls Challenge
Simon Says Stamp Anything Goes Wednesday Challenge
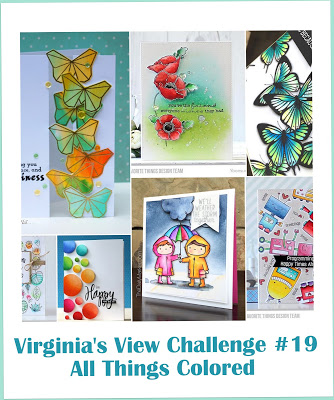
Virginia’s View All Things Colored Challenge
Thanks for stopping by and I hope you are having a wonderful crafty day! WOOF
]]>