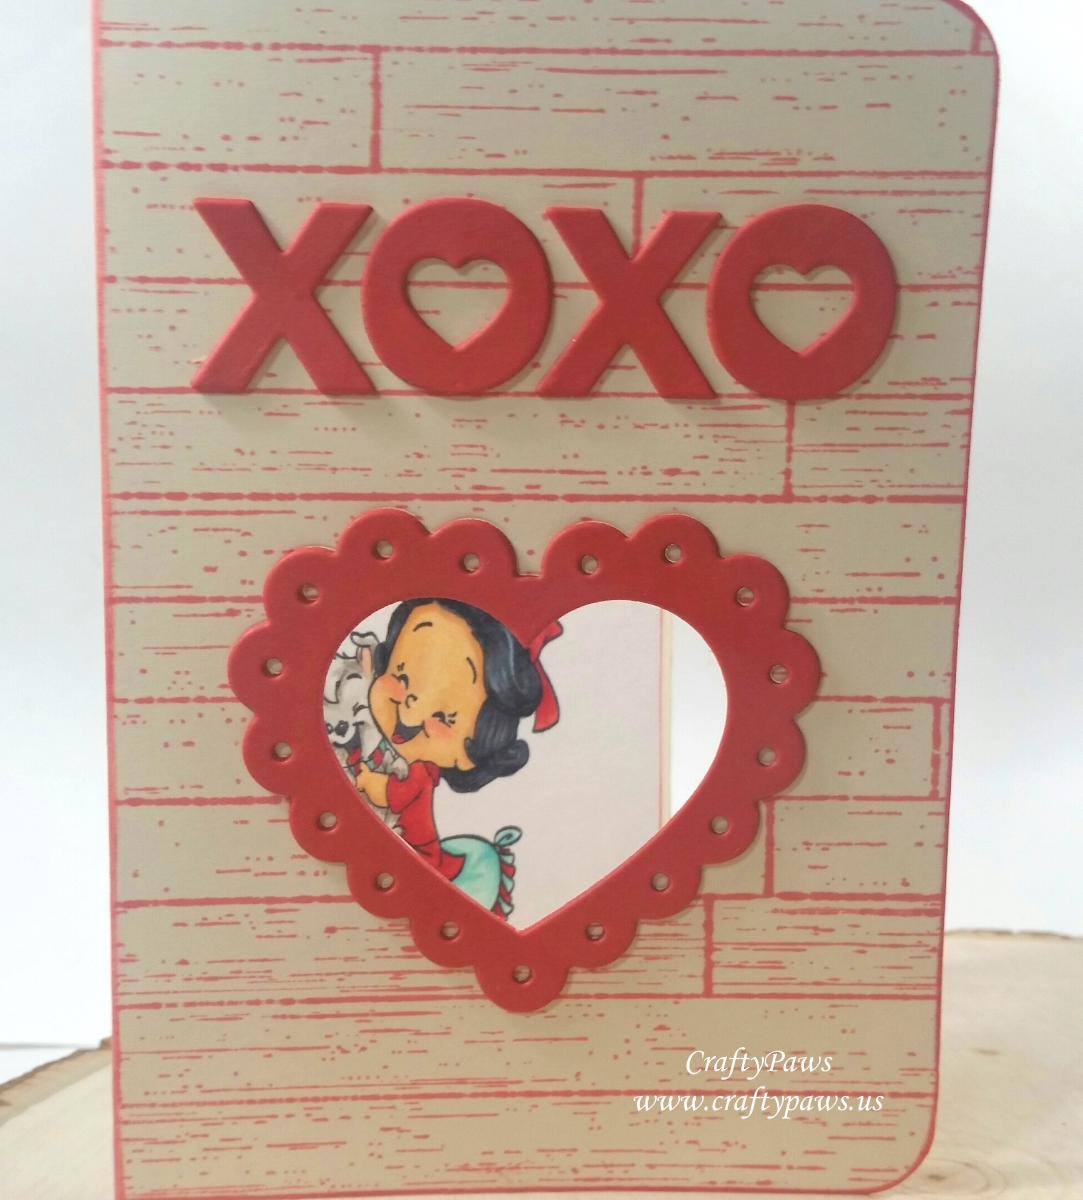
 I started with a cream colored card base and created my own background with the Docrafts Wooden Boards Background Stamp. I wanted to match the Stampin’ Up! rosy colored card stock from the Affectionately Yours collection so I used Simon Says Stamp Rose Apple Premium Ink.
I then cut the card base down so that it would be 6″ x 4.25″ (this is slightly taller than a standard A2 size but I wanted plenty of room for my image and sentiment inside the card).
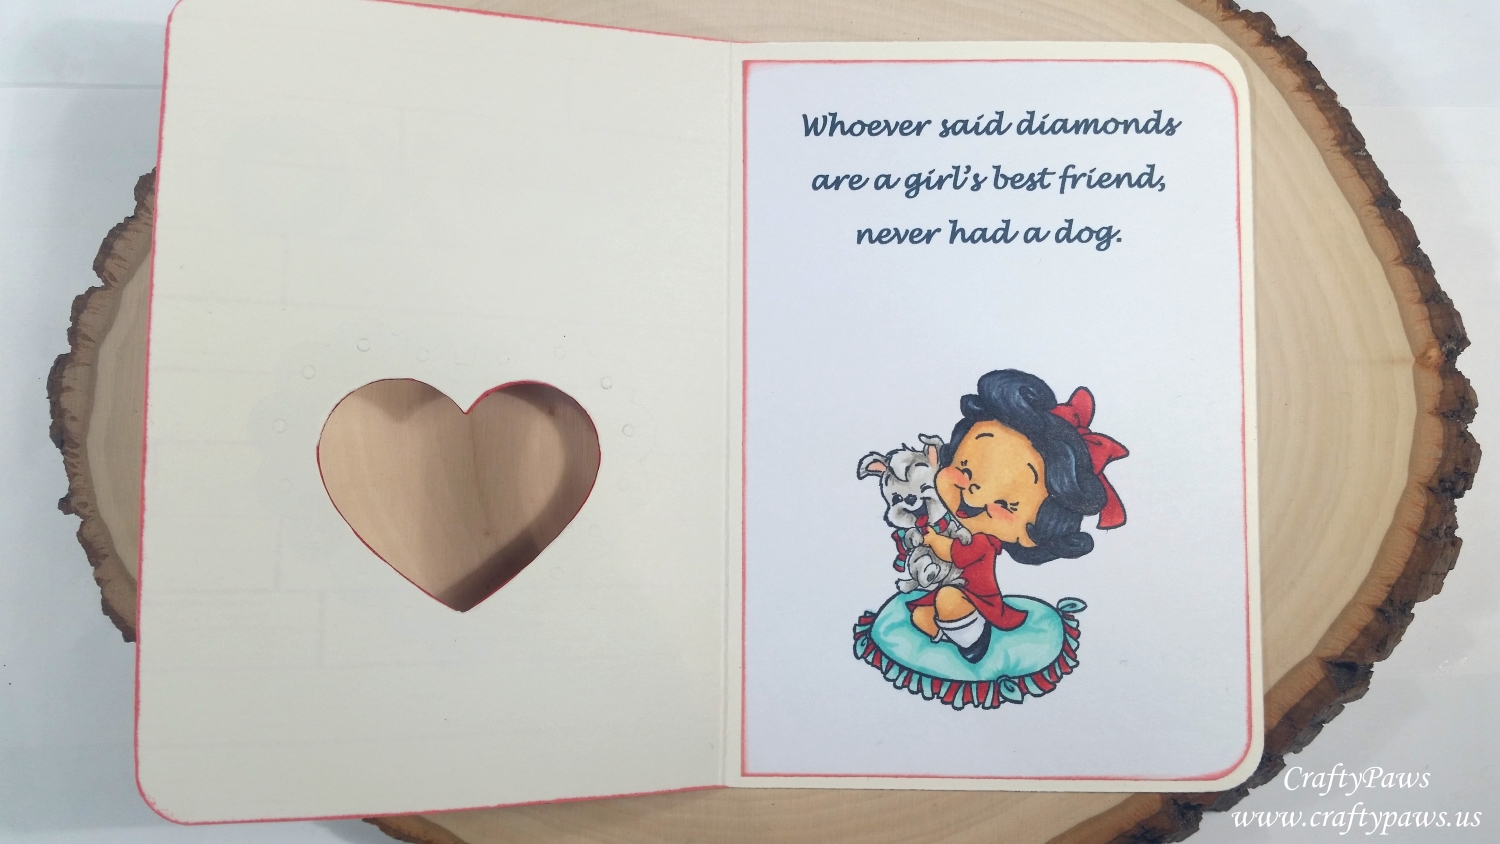
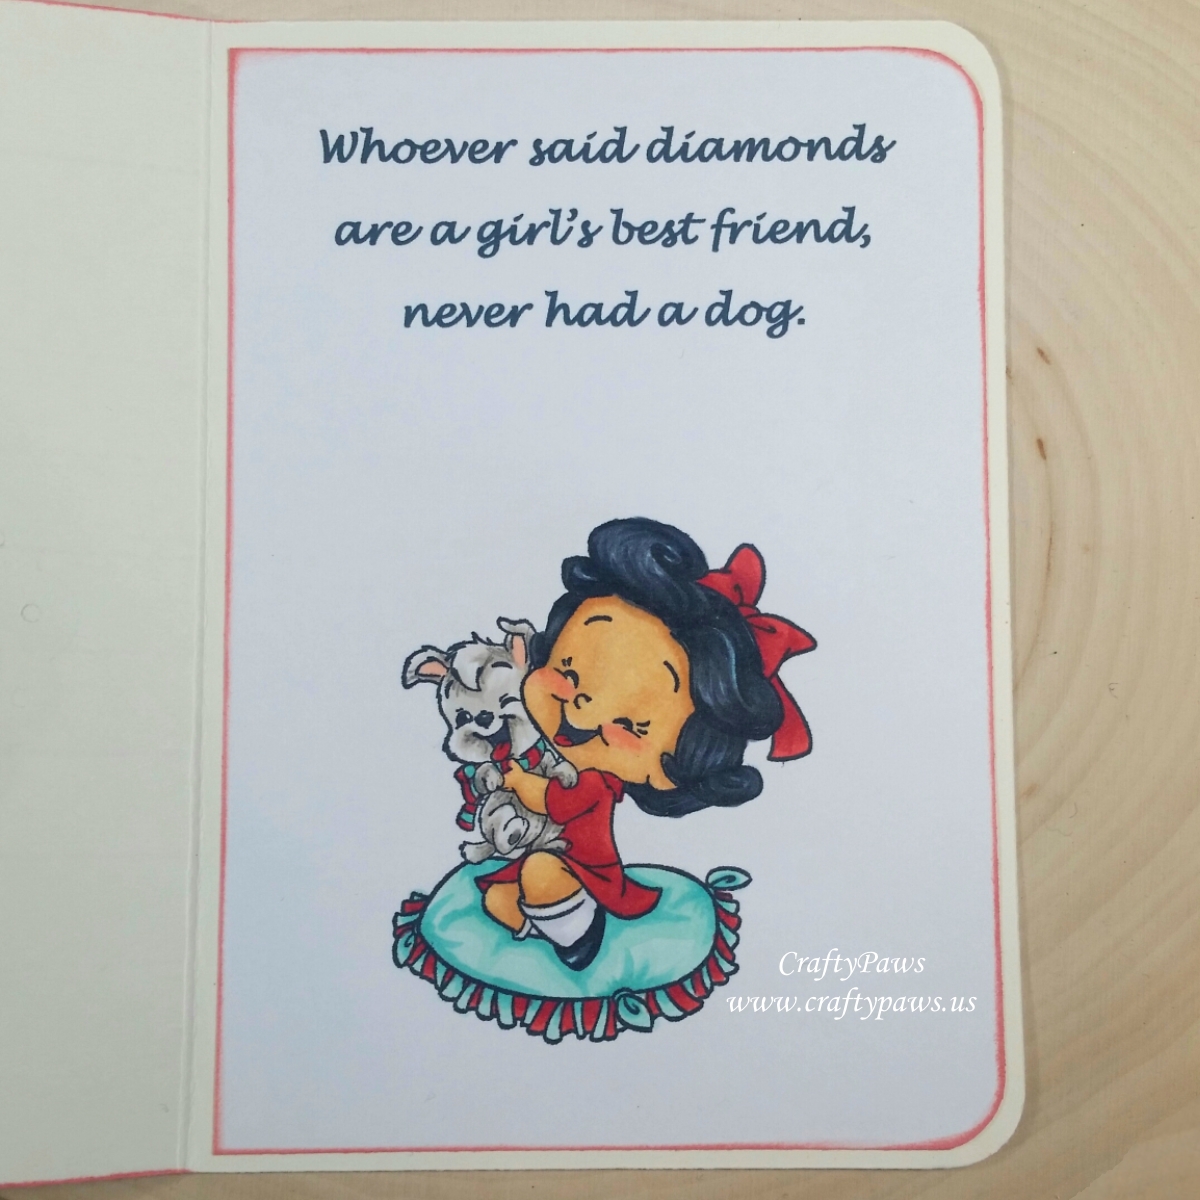
I next worked on the inside of the card. I printed from my computer the saying that inspired this card, “Whoever said diamonds are a girl’s best friend, never had a dog.”
Then I used the MISTI and stamped in the lower 2/3 an adorable C.C. Designs image of a girl cuddling her puppy; it’s called Birthday Puppy. I set this aside to Copic color later, but I needed it figure out the positioning of the heart window on the card front.
I used the Darice Love Theme Embossing Essentials and embossed the card front with the scalloped heart frame die and a Sizzix Silicone Embossing Mat, using the girl and the puppy stamp to approximate the positioning of the die on the card front.
I next used an X-Acto knife to cut out the center heart to create a window in the card front. To create a bit of dimension and add stability to the card front, I die cut the XOXO and the scalloped heart frame three times each and glued them stacked all together with Art Glitter Glue (the Fine Tip Nozzle makes this easy). I positioned the XOXO in the upper third of the card front and the stacked scalloped heart frames around the heart window I had cut out by hand.
 To soften the card a bit, I rounded the two right corners with the 3/8″ side of a We R Memory Keepers Crop-A-Dile Corner Chomper, and I did the same to the inside of the card liner piece too. I also inked the edges of the card front and the card liner with more Simon Says Stamp Rose Apple Ink to give a finished look.
Before attaching the card liner piece to the inside of the card, I colored the little girl and her pup with the following Copic colors:
Skin: E50, E51, E21, R20
Puppy: W0, W1, W3 and R30
Hair and shoes: B01, C5, C7, C9
Socks: C00 and C1
Pillow, puppy’s scarf, and girl’s dress: BG11, BG13, R24, R27 and R29
Disclosure: Many of the supplies I’ve used for today’s project are linked. Some may be affiliate links, which means if you make a purchase I receive a small commission at no extra cost to you. I truly appreciate your support toward the costs of running this blog!
The following is a start to finish process video of making this card:
This card is being entered into the following challenges:
Simon Says Stamp Monday Monochrome Challenge – mostly reds
Simon Says Stamp Wednesday Anything Goes Challenge
Through the Craft Room Door Anything Goes Challenge
Word Art Wednesday Anything Goes Challenge
Creatalicious Anything Goes with Optional Halloween Challenge
Not Just Cards Anything Goes Challenge
Just Keep On Creating Anything Goes Challenge
Lil Patch of Crafty Friends Anything Goes Challenge
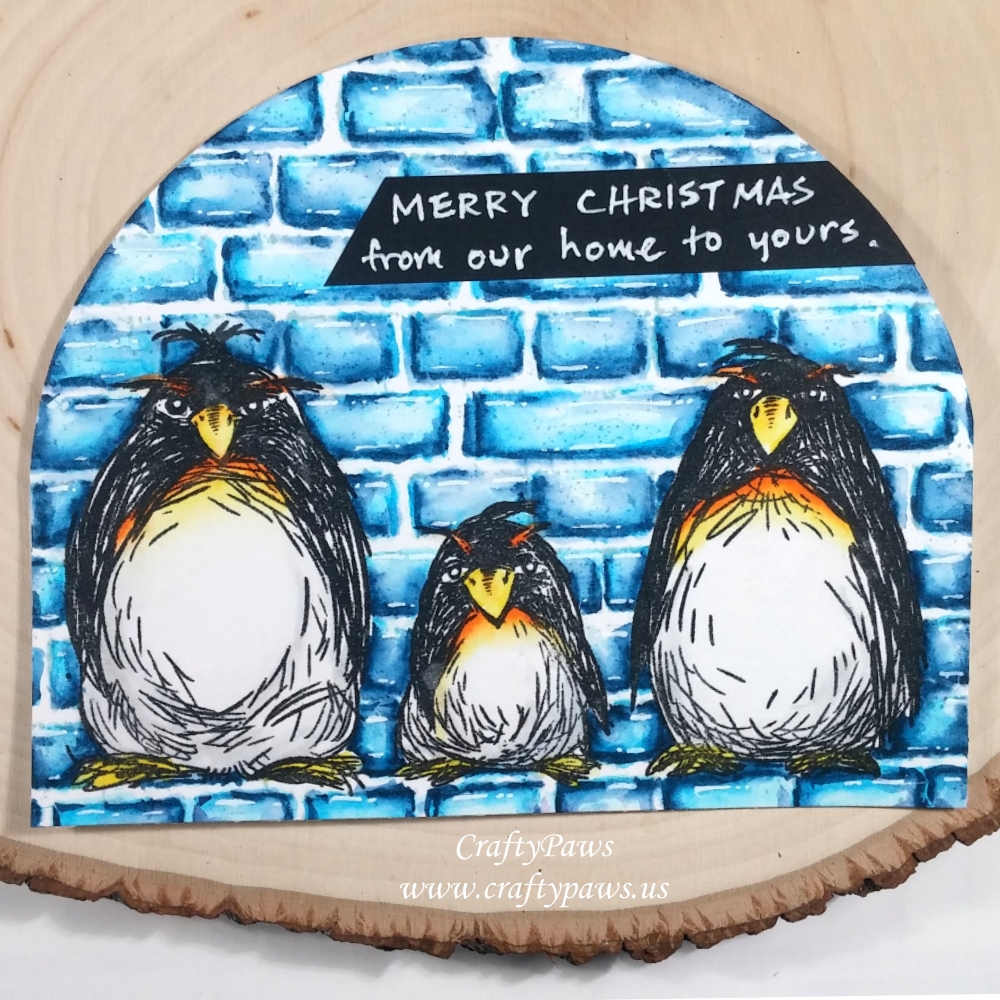 I started out with Strathmore Bristol Paper for the card front and stamped out the Grumpy Penguins using VersaFine Onyx Black Ink (which is water-safe). Then I used Winsor & Newton Art Masking Fluid and covered them up with an old synthetic paint brush that I had first coated with a little bar soap (this helps prevent the masking fluid from permanently sticking to the bristles and makes clean up easier). I waited until the masking fluid was dry to the touch (about 5 minutes) before moving on to the next step.
To stamp out the Brickwork Background, I decided to use Simon Says Stamp Winter Sky Premium Ink so that the bricks would look more like ice blocks and less like bricks. Then I used Zig Clean Color Real Brush Markers in Cobalt Blue (031) and Peacock Blue (038) to watercolor in the blocks. For an even more icy look, I used a Uni-ball Signo White Gel Pen to add highlights on all the blocks.
I then used the soft part of my finger to rub off the dried masking fluid. I was careful not to scrape with my fingernail or press too hard because I didn’t want the masking fluid to take off any of the paper, and luckily it came off really easily.
 Then it was a matter of just adding some colorful details to the penguins. I used Yellow (050) and Orange (070) to add some brightness to their eyebrows, beaks, feet and bellies. Then for the shadowed lower and sides of their bellies, I used a Light Gray (091), which I think added a more rounded, dimensional look to the penguins.
To made the background look even more like an igloo, I decided to make this into a shaped card. I used the largest circle die from Diemond Dies’ Die-Normous Stack-Ems Circle Nesting Die Set, and cut the top half of the circle from the card front top. Then I took a piece of white cardstock, folded one side about 1/4″ down and put that folded side just under the circle die and ran that through my die cutting machine half way down too; this forms the card base back. For both the card front and the card back, I trimmed the sides straight down from where the half circles left off. This created an arched, or igloo, shape. I glued the two sides together at the tab that was created by doing the 1/4″ fold. I know reading these instructions can be a little unclear, so if you want to see all of this, the video below walks you through the whole process in detail.
Lastly, for the sentiment, I simply used a Uni-ball Signo White Gel Pen to hand write a little sentiment that reads, “Merry Christmas from our home to yours.” I love the odd juxtaposition of the grumpy faces of the penguins with this super cheery sentiment. LOL
The following is a start to finish process video of creating this card:
Disclosure: Many of the supplies I’ve used for today’s project are linked. Some may be affiliate links, which means if you make a purchase I receive a small commission at no extra cost to you. I truly appreciate your support toward the costs of running this blog!
This card is being entered into the following challenges:
Topflight Stamps World Card Making Day Challenge
Simon Says Stamp Work It Wednesday Stamptember Challenge
Word Art Wednesday Anything Goes Challenge
Creatalicious Anything Goes Challenge with Optional Make Your Own Background
CASology ODD Challenge
Addicted to CAS Favorite Stamp Challenge
Simon Says Stamp Happy World Card Making Day Challenge
Fab ‘n’ Funky Word Art Challenge
Lil Patch of Crafty Friends Anything Goes Challenge
Just Keep On Creating Anything Goes Challenge
]]>
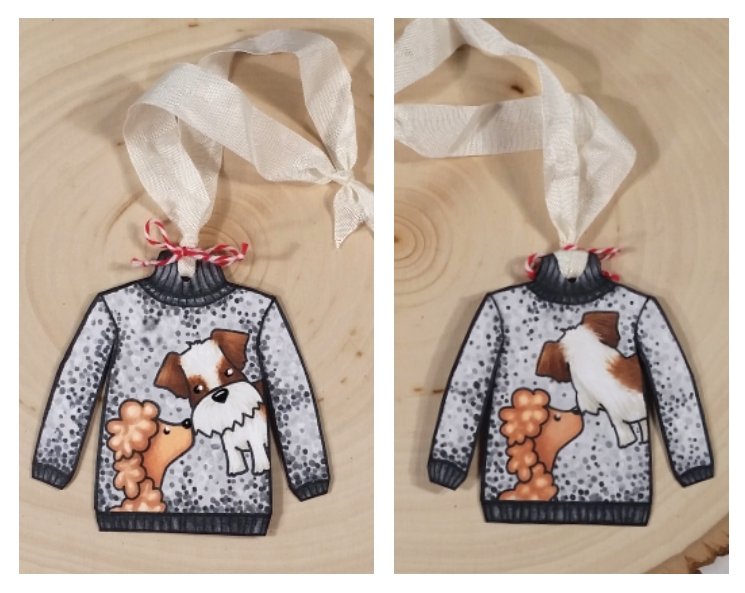 make this second sweater the back side of the sweater. However, because the left and right side of the sweater is not exactly the same, I had to do a lot of cutting apart and re-assembling together to make the front and back sweaters fit together without a lot of mismatched areas.
So for my second try, I decided to stamp out the sweater and then scan it into my computer and reverse the image (simple how-to with Microsoft Word is included in the video below). Now I knew I could sandwich the back sides of the 2 sweaters together and they would fit perfectly! I fussy cut out the reverse image sweaters and inked the edges for a clean look with a Tuxedo Black Momento Marker. For this second ugly sweater, I used one of the disgruntled kitties from Katzelkraft Cats and stamped the front of it on one sweater and just the outline of it on the second sweater (easy how-to alter stamp by wiping away details for backsides – this is in the video below too).
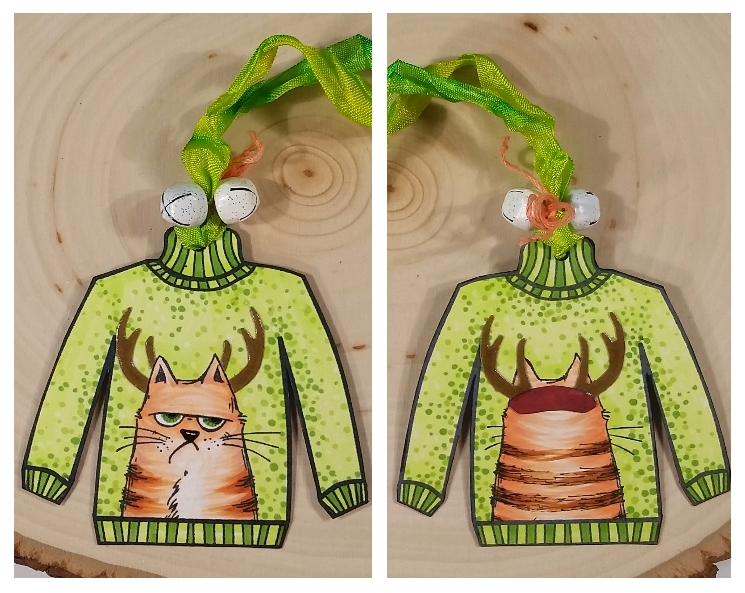 For this kitty sweater, I used the following Copic colors:
Kitty: E00, 02, 11, 97 and 99 with YG17 eyes and Distress Marker eye flecks in Mowed Lawn
Sweater: YG01, YG03, YG17, and 0 colorless blender
Then I used a bit of hand dyed seam binding to create a hanging loop through a 1/8″ hole punched through the top of the sweater neck and a bit of tangerine colored embroidery thread to tie on a couple of jingle bells on a bow. To give this kitty a reason to be disgruntled, I decided to add an antler headband to him. I punched out a set of antlers from an EK Success antler head and cut around the antler pieces to fit around the front of the kitty. I repeated the punch out to add the fuller antlers to the back side of the kitty, and hand fussy cut out a little red scrap of paper to give the look of a simple headband. To add a bit of shine and finish off this funny ornament, I topped all the antlers with Glossy Accents.
The following is a start-to-finish process video of how to create this grumpy kitty front and back ornament:
This kitty and doggy ornaments are being entered into the following challenges:
Penny Black and More Get Ready For Christmas Challenge
Simon Says Stamp Work It Wednesday Stamptember Challenge
Lil Patch of Crafty Friends Anything Goes Challenge
Word Art Wednesday Anything Goes Challenge
Creatalicious Anything Goes with Optional Leaves Challenge
Through the Craft Room Door Anything Goes Challenge
613 Avenue Create Anything Goes with Optional Distress It Challenge
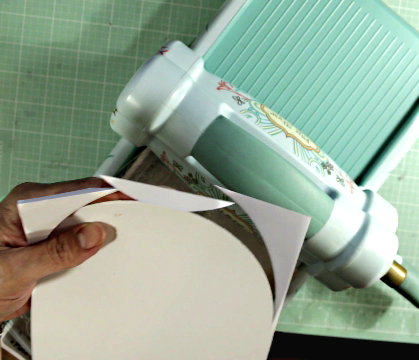
 These 3 techniques: heat embossing, brushing on Perfect Pearls, and heat embossing with shimmery watercoloring seemed to really take advantage of the cardstock by contrasting the fantastic shine from these mediums beautifully against the deep black paper. The weight of the paper also held up nicely to extreme heating as well as super wet watercoloring.
The first card I made using a Venetian Mask from So Suzy Stamp. I stamped it out with VersaMark Ink and used Ranger Queen’s Gold Royal Satin Embossing Powder. I also prepped the card base with the EK Success Powder Tool and masked off the edges of the card and inked on a thin 1/8″ border that was heat embossed to frame but not distract from the bold yet intricate mask image. This was super fast and easy but has such great impact.
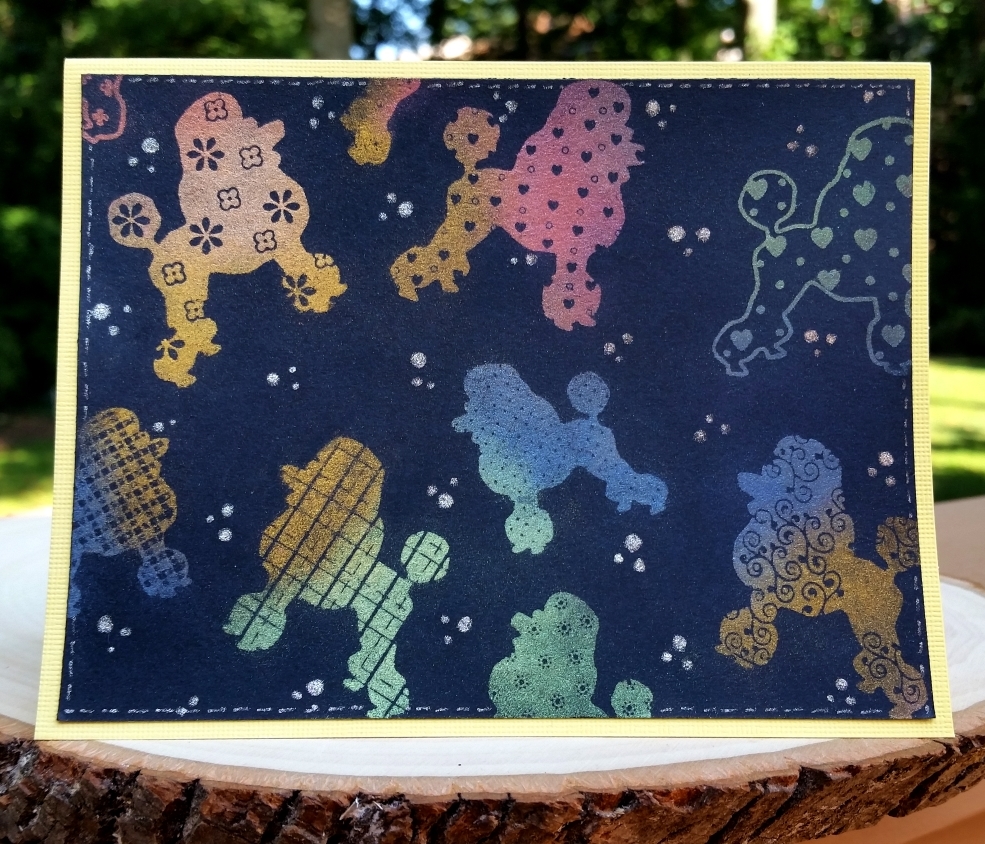
The second card was made using an old Inkadinkado Patterned Poodles stamp set. I chose this stamp set because each image had fun, full patterns that I thought would pick up a lot of the Ranger Perfect Pearls powder colors well. I again prepped the card front with the EK Success Powder Tool and used the MISTI Tool to make sure that I could re-stamp the images if the patterns were not crisp with a first stamping of VersaMark Ink. I then took my time brushing on the following Ranger Perfect Pearl colors with a thin dry paint brush: Blue Smoke, Kiwi, Perfect Gold, Perfect Bronze, Perfect Copper, and Rust. I wanted each poodle image to have multiple shimmery colors blended together for a fun look. To add a little more sparkle, I used a Sakura Gelly Roll Pen 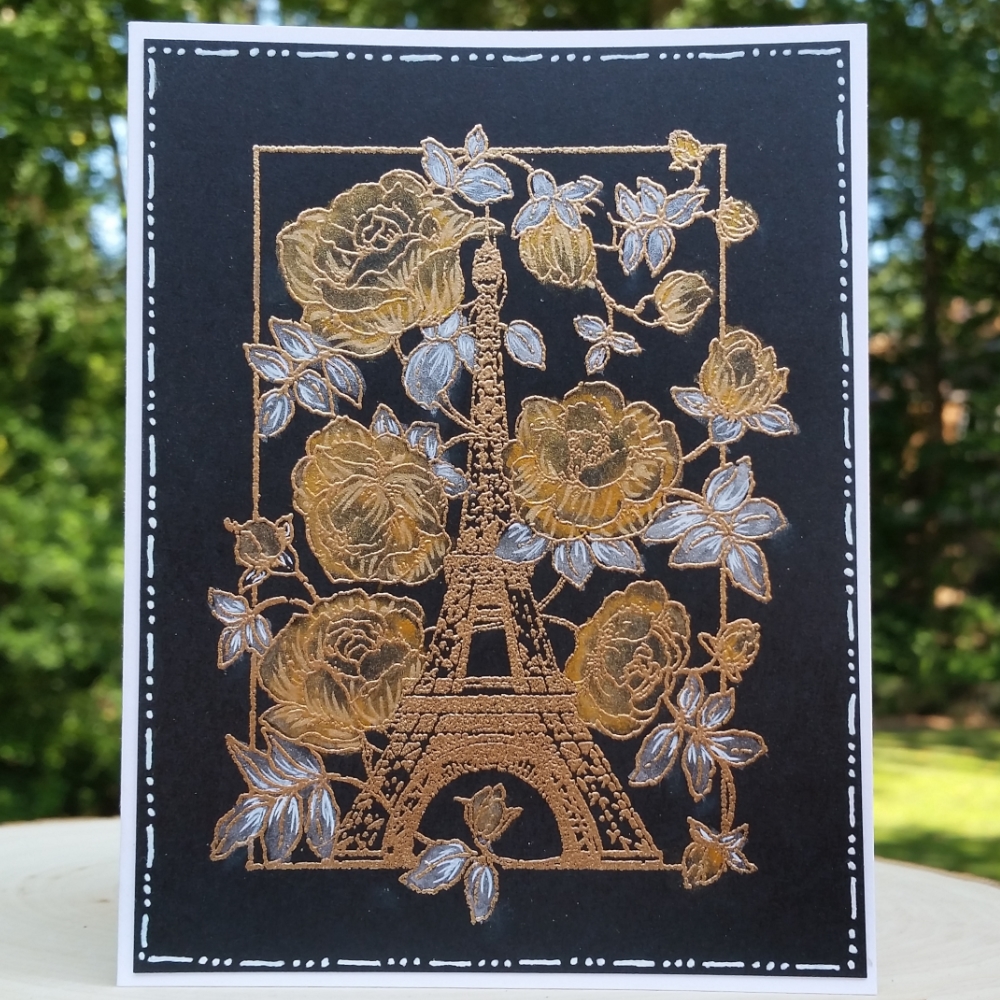 in Stardust (this is slightly more opaque than a Clear Wink of Stella Pen) to doodle on faux stitching around the edge of the card and varying sized dots in the open background spaces.
For the third card, I heat embossed the gorgeous Penny Black April in Paris stamp using more Ranger Queen’s Gold Royal Satin Embossing Powder. Again I prepped the card front with the EK Success Powder Tool and used the MISTI Tool to ensure clean crisp stamping without too much stray powder adhering. Then I put the heavy weight Neenah cardstock to the wetness test. I used lots of water to paint on and water down shimmery Gansai Tambi Starry Colors watercolors in Red Gold, Light Gold and White Gold to color in the roses and leaves of the image. It performed beautifully! It dried so fast and absorbed so much pigment that I was even able to immediately doodle on more details on the leaves and rose petals with Sakura Gelly Roll Pens in White and Metallic Gold. For a final little detail, I added some dots and dashes around the edge of the card front with more of the Sakura Gelly Roll Pen in White before popping it onto a white card base. BTW, I have found that the Mono Sand Eraser is an awesome tool to fix slight stamping smears and even light embossing errors! It hides a multitude of sins!
The following is a process video of all three techniques:
These cards are being entered into the following challenges:
Simon Says Stamp Wednesday Stamptember Stamp It Challenge
Simon Says Stamp Monday Stamptember Stamp It Challenge
Simon Says Stamp Work It Wednesday Stamp It Challenge
Creatalicious Anything Goes with Optional Mythical Creatures Challenge
Crafty Gals Corner Use Your Favorite Color(s) – Gold
Word Art Wednesday Anything Goes Challenge
Not Just Cards Anything Goes Challenge
613 Avenue Create Anything Goes with Optional Distress It Challenge
Crafts Galore Encore Anything Goes Challenge
Through the Craft Room Door Anything Goes Challenge
]]>
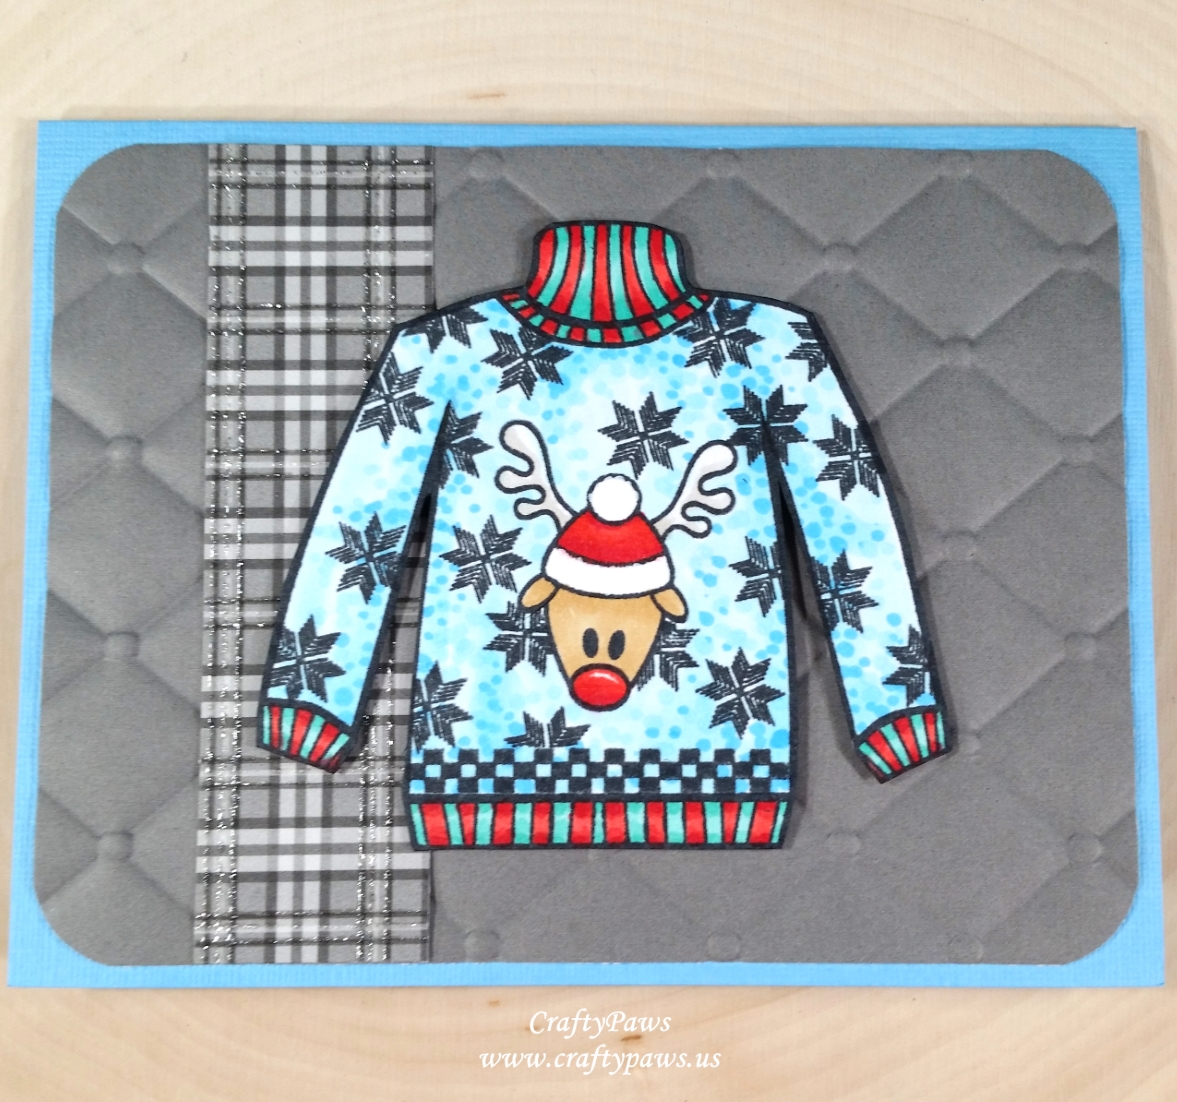 I stamped out the outline sweater stamp 3 times and was able to create 3 distinct sweater designs by combining this stamp with others. For the first sweater, I stamped out the deer head from the “Ugly Sweater Weather” stamp set and added even more “ugly” patterns from the stamp set to make the sweater super busy. I did take care to mask off the ribbed areas so that I didn’t over-stamp them with the snowflake and checkerboard patterns. Then I colored it up with the following Copic colors, adding a fun boucle texture to the background:
Red: R24, 27 and 29
Blue background: B000, 00, 02
Teal stripes: BG32 and 23
Deer head and antlers: E31 and W1
For the second sweater, I used the super cute penguin from the Joy Clair “Christmas Penguins” stamp set and stamped it onto the sweater as if it was peering into the body of the sweater from the lower right. I kept it simple and colored up all the holiday lights in the following rainbow of colors and the sweater in neutral grays:
R27, YR15, Y08, G08, B06, V17 and N1, 3, 5, 7 and 9

For the third sweater, I stamped out the itty bitty penguin from the Joy Clair “Christmas Penguins” stamp set over and over in a helter skelter random pattern. Again, I took care to do a little masking around the edges of the sweater and the cuffs and neck areas so that the penguins would not over-stamp the ribbing of the sweater or go off the edge of the sweater body and also simultaneously stamp over the arm areas. Again this Copic coloring was super simple; since the images were small, I could almost skip the shading on them and could focus on just coloring up the background for the nubby sweater texture: Hats: R27 and 29; Belt and belt buckle: N7 and YR16; Penguin beaks: YR15
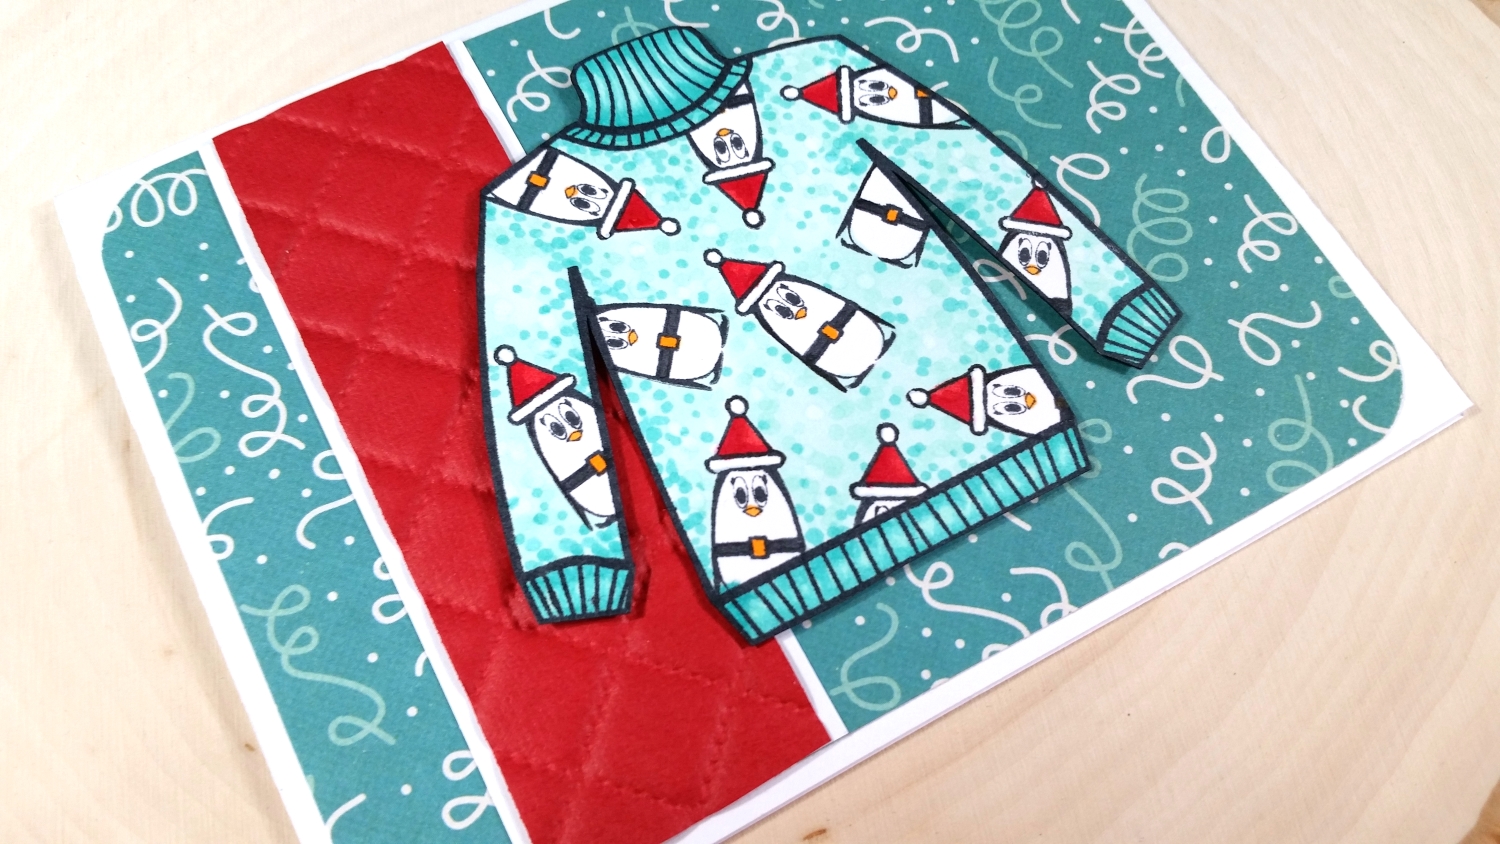
After prepping all the sweaters, I fussy cut them out and inked the white cut edges with a Tsukineko Tuxedo Black Marker. Then it was a matter of using up scrap papers from my scrap box and adding some interesting, but not too distracting horizontal, top-folding card bases. I 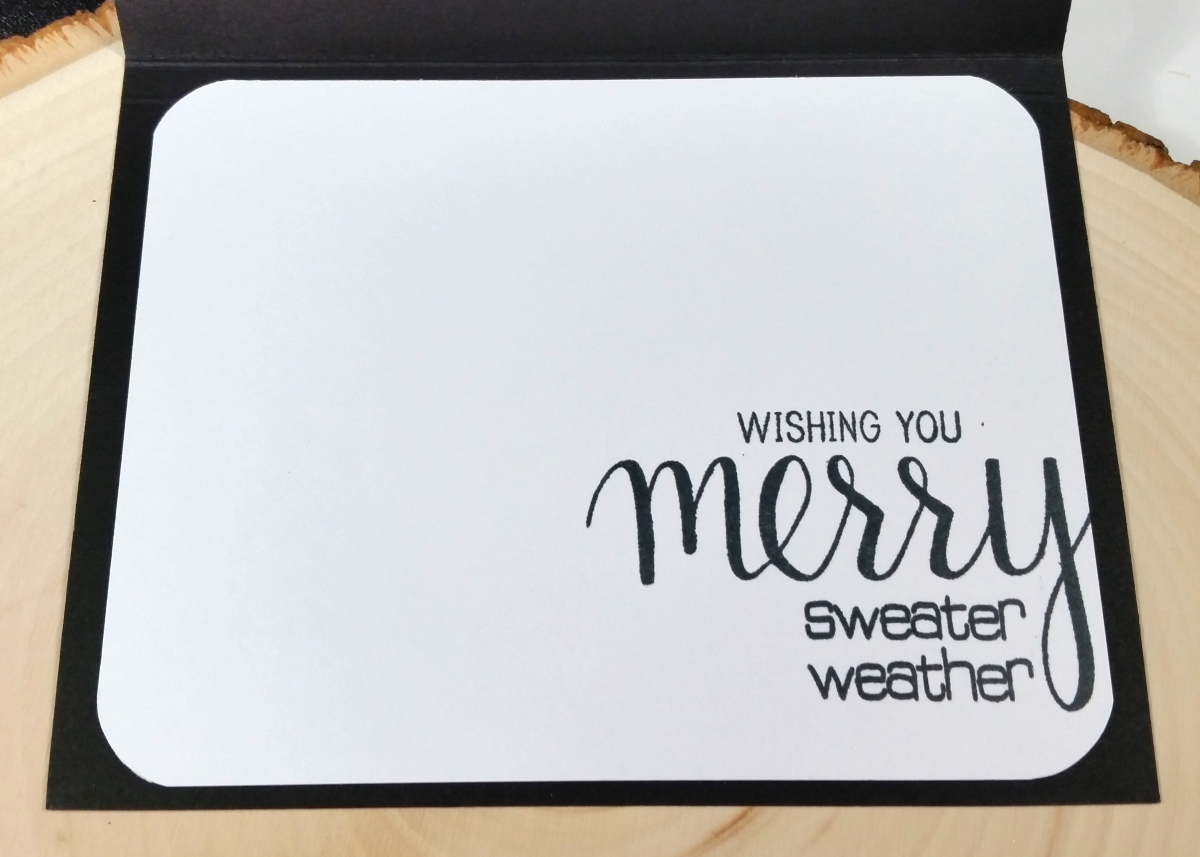 started with a background card front with rounded edges and added a strip of a different colored or patterned (and sometimes glittered) paper along the left side. To add some textural interest, I used the two embossing folders from the We R Memory Keepers Next Level Quilted Set (I thought the idea of quilting would go nicely with the sweater theme) for some of the plain papers as well.
For the inside sentiments, I used the “Don we now our ugly sweater” and the “Get Your Tacky On!” from the “Ugly Sweater Weather” stamp set for two of the cards. For the third card, I combined the “sweater weather” sentiment from the “Ugly Sweater Weather” stamp set with some of the text from a Hero Arts Merry Stamp & Cut set to make the inside sentiment say, “wishing you merry sweater weather”!
The following is a process video sharing how I made these sweater designs:
These cards are being entered into the following challenges:
Simon Says Stamp Wednesday Add a Sentiment Challenge
Word Art Wednesday Anything Goes Challenge
Lil Patch of Crafty Friends Anything Goes Challenge
Creatalicious Anything Goes with Optional Glitter/Bling Challenge
Penny Black and More All Creatures Great and Small Challenge – small and large penguins
Crafts Galore Encore Anything Goes Challenge
Through the Craft Room Door Anything Goes Challenge
Fab ‘n’ Funky Anything Goes Challenge
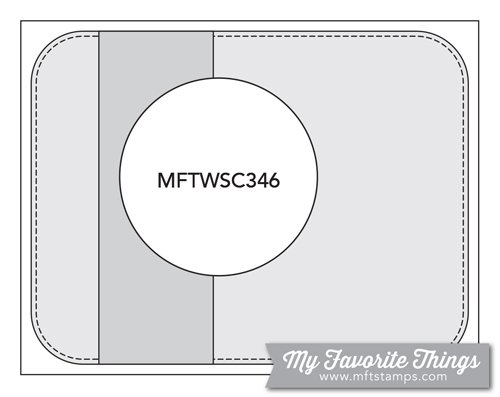
MFT Sketch Challenge #346
]]>
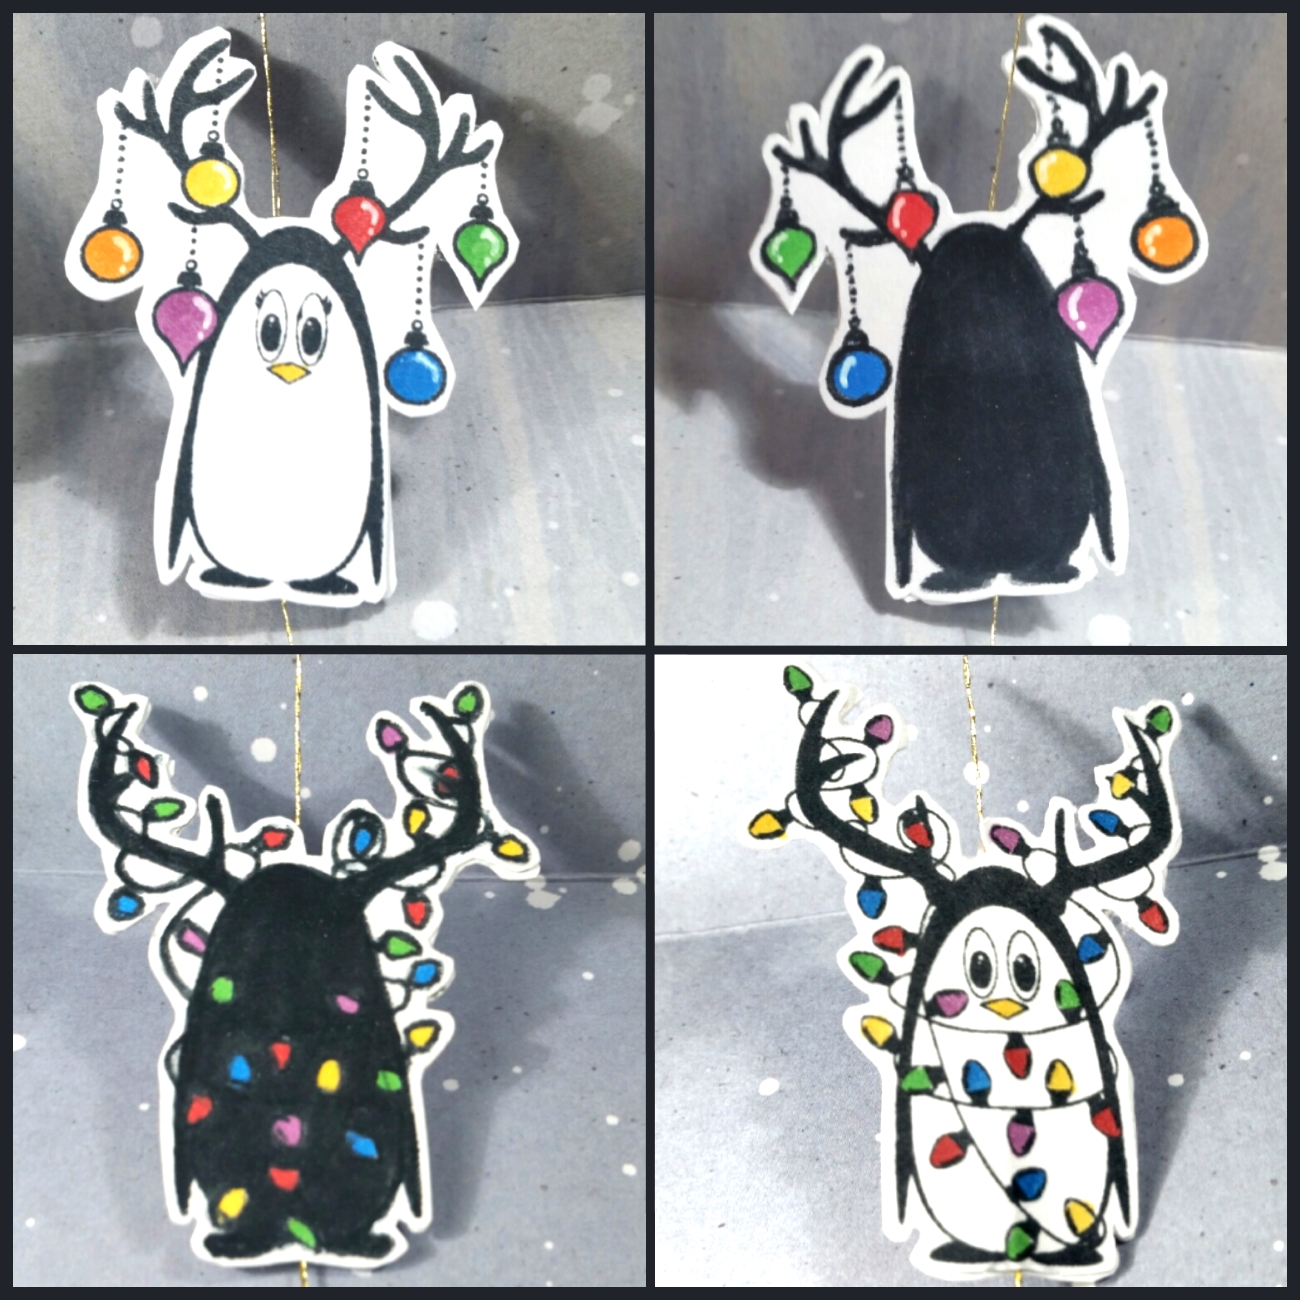 I used 4 of the penguins from the super cute Joy Clair Christmas Penguins stamp set, and made them into front and back images. For the penguins that were not symmetrical (like the ones with the ornaments or Christmas lights on the antlers), I first did some mirror stamping (there are mirroring stamp sets like the Paper Smooches Mirror Block Stamp Set, but I used the smooth side of the very full wood grain stamp from the Lawn Fawn “Woodgrain Backdrops” set) using Momento Tuxedo Black Ink (the start-to-finish video below shows the details of how to do this). Then I crisped up the lines/details and filled in the faces with a Momento Tuxedo Black Dual Marker to make the back sides of the penguins.
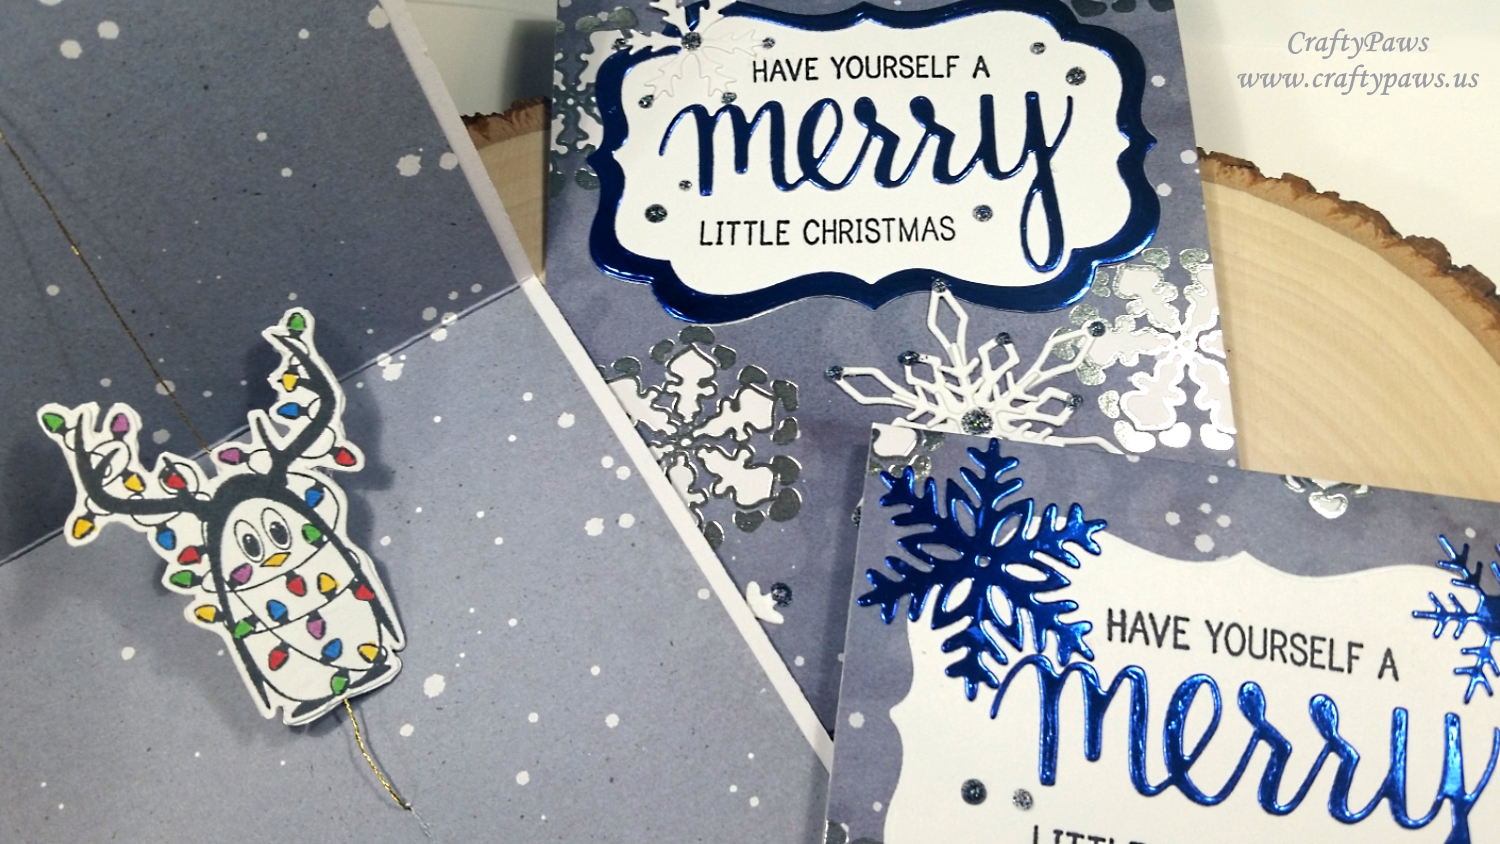
For the perfectly symmetrical penguins like the ones with the Christmas sweaters, I simply stamped them out twice and filled in the faces of one of each penguin with the Momento Tuxedo Black Dual Marker to make the back side images. A little simple Copic coloring (for a rainbow of ornaments and lights: R27, YR04, Y15, YG09, B06, V06 and pink and aqua sweaters: RV52, RV55, BG32) and fussy cutting and these front-and-back penguin images were ready to sandwich a little thread to become spinners!
For the card bases, I actually used two card bases for each card. The papers, which are all in dusty blue shades with white splatters that look like snowflakes, are from an old 2013 Recollections Christmas Watercolors paper stack. There is an outer card base that measures 4.25″ x 11″ and is scored at 5.5″. This card base card front is decorated with various Diemond Dies snowflake die cuts (Icy Snowflake Die Set, Snowflake #1, and Winter Snowflake Die Set) using blue metallic card stock and white card stock with Nuvo Glitter Drops in Midnight Sky for extra shine and textural interest.
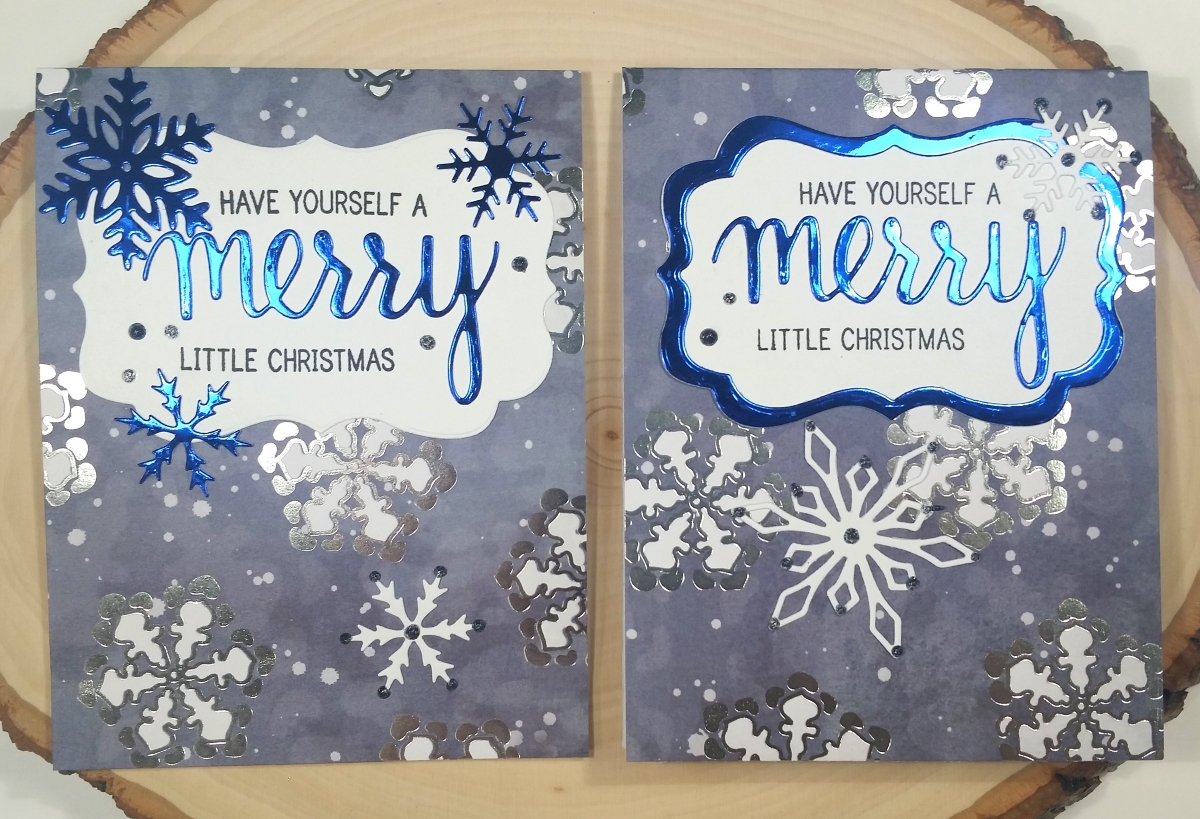
For the sentiment on the card front, I used the Hero Arts Merry Stamp & Cuts on top of a Diemond Dies Labels 1 die cut base. I had just enough blue metallic card stock to cut a couple of label frames and a handful of the snowflakes for bright shiny pops of color. All the delicate die cuts were glued on with my favorite wet glue: Art Glitter Glue with a fine metal tip nozzle. The sentiment, which I stamped using a MISTI around the die cut “MERRY,” reads, “HAVE YOURSELF A MERRY LITTLE CHRISTMAS.”
There is also an inside liner card base that measures 4″ x 10.75″ and is scored at 5 3/8″. These are simply decorated with a single large white die cut snowflake (Icy Snowflake Die Set, Snowflake #1, and Winter Snowflake Die Set) in the lower left or right corner of the top-folding card.
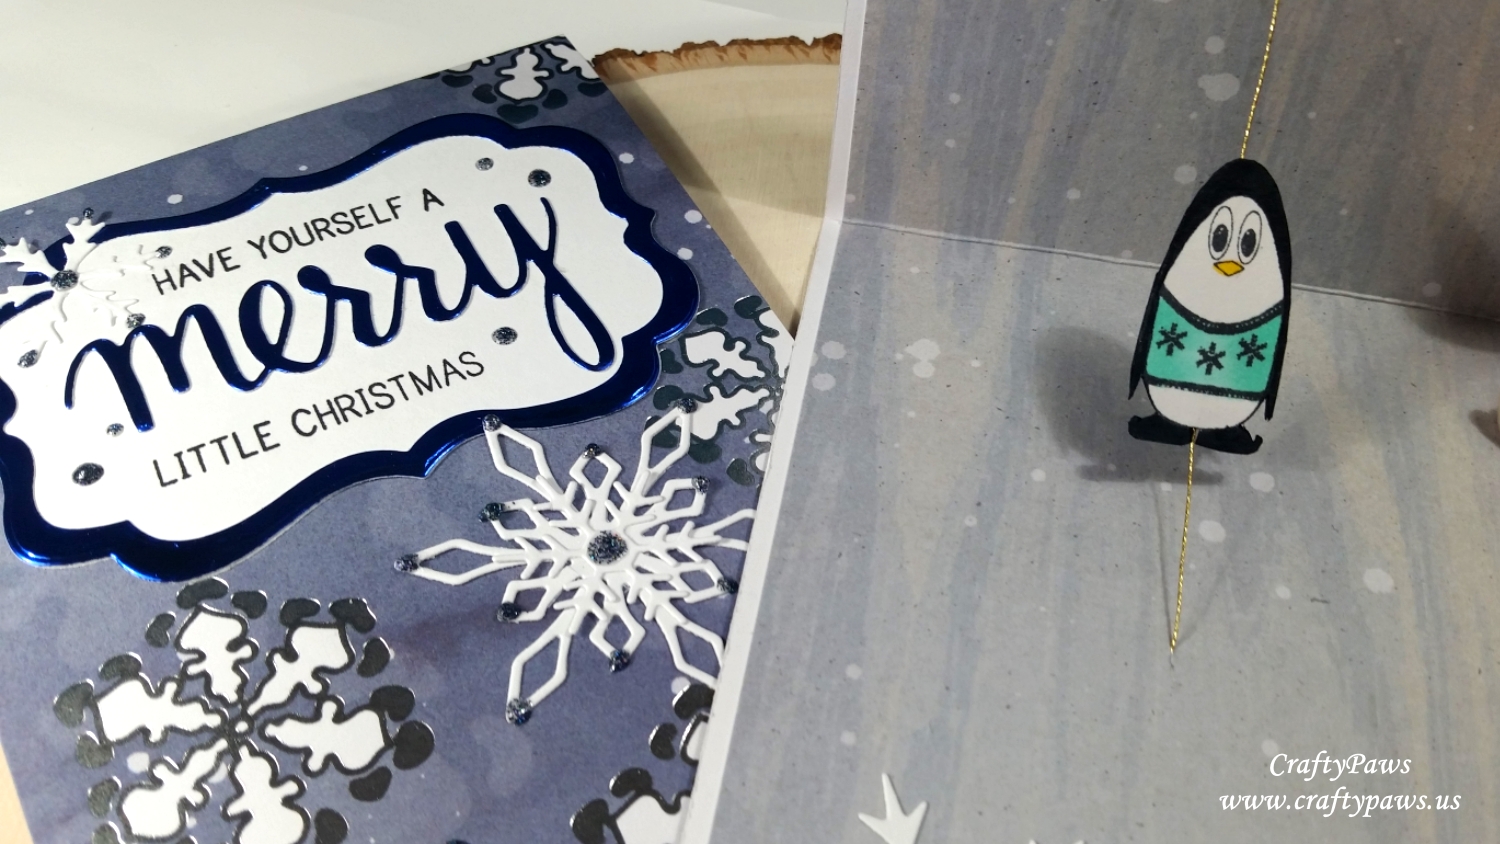
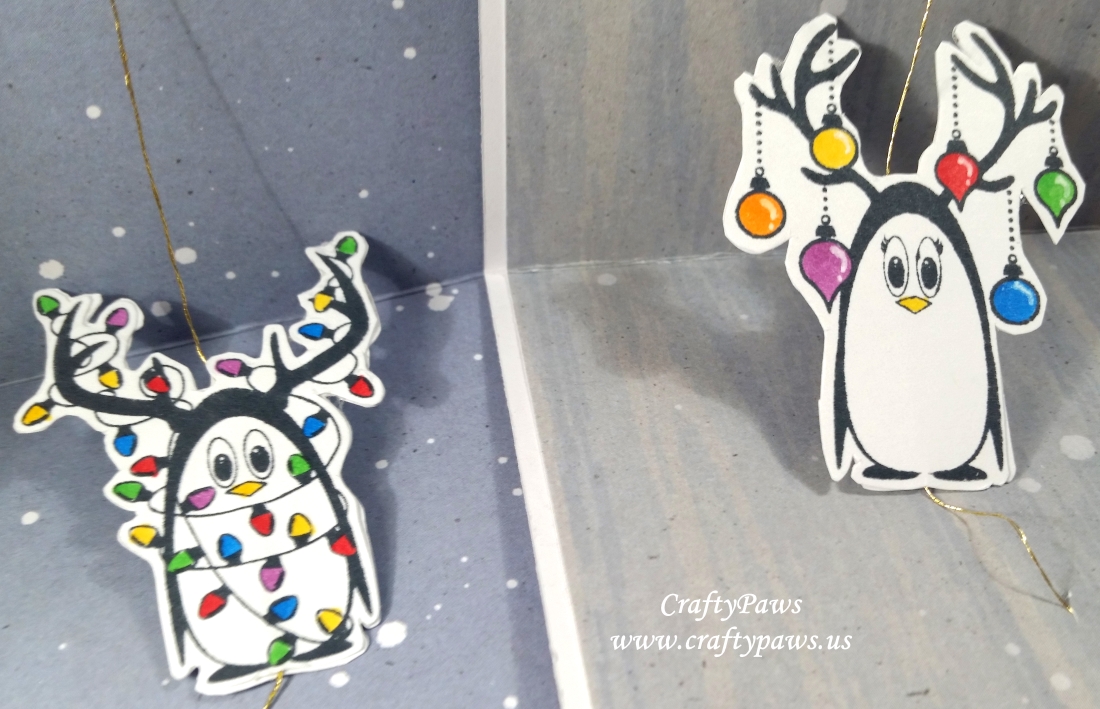
To attach the spinner mechanism to this inside liner, I cut a small slit in the middle of the card (through both layers) with an X-Acto knife and threaded through the slits a thin thread; mine was DMC gold metallic thread, but you could use a fishing line or clear line for a more invisible magic look. When the thread could span the card open to about 90 degrees, then I secured the thread on the back side of the card liner with 5mm adhesive sticky tape. I then sandwiched the front and back of a penguin around the middle of that thread to make the spinner.
The last step was to position the inside card base inside the outside card base and adhering everything securing into place with more 5mm adhesive sticky tape. The inside liner card base is about 1/8″ smaller on all sides from the outside card base so there is a nice matted look to the card interior.
This is the start-to-finish process video for creating these cards:
These spinner cards are being entered into the following challenges:
Joy Clair Anything Goes with Optional Layers Challenge – WINNER
Simon Says Stamp Work It Wednesday Add Sparkle Challenge
Simon Says Stamp Wednesday Splatter It Challenge
Card Mania Party Challenge
Lil Patch of Crafty Friends Anything Goes Challenge
Through the Craft Room Door Anything Goes Challenge
Not Just Cards Anything Goes Challenge
Word Art Wednesday Anything Goes Challenge
The following is a video sharing the crafty yumminess I picked for my guest designer package:
I hope you’ll join me in my crafty adventures!
]]>