
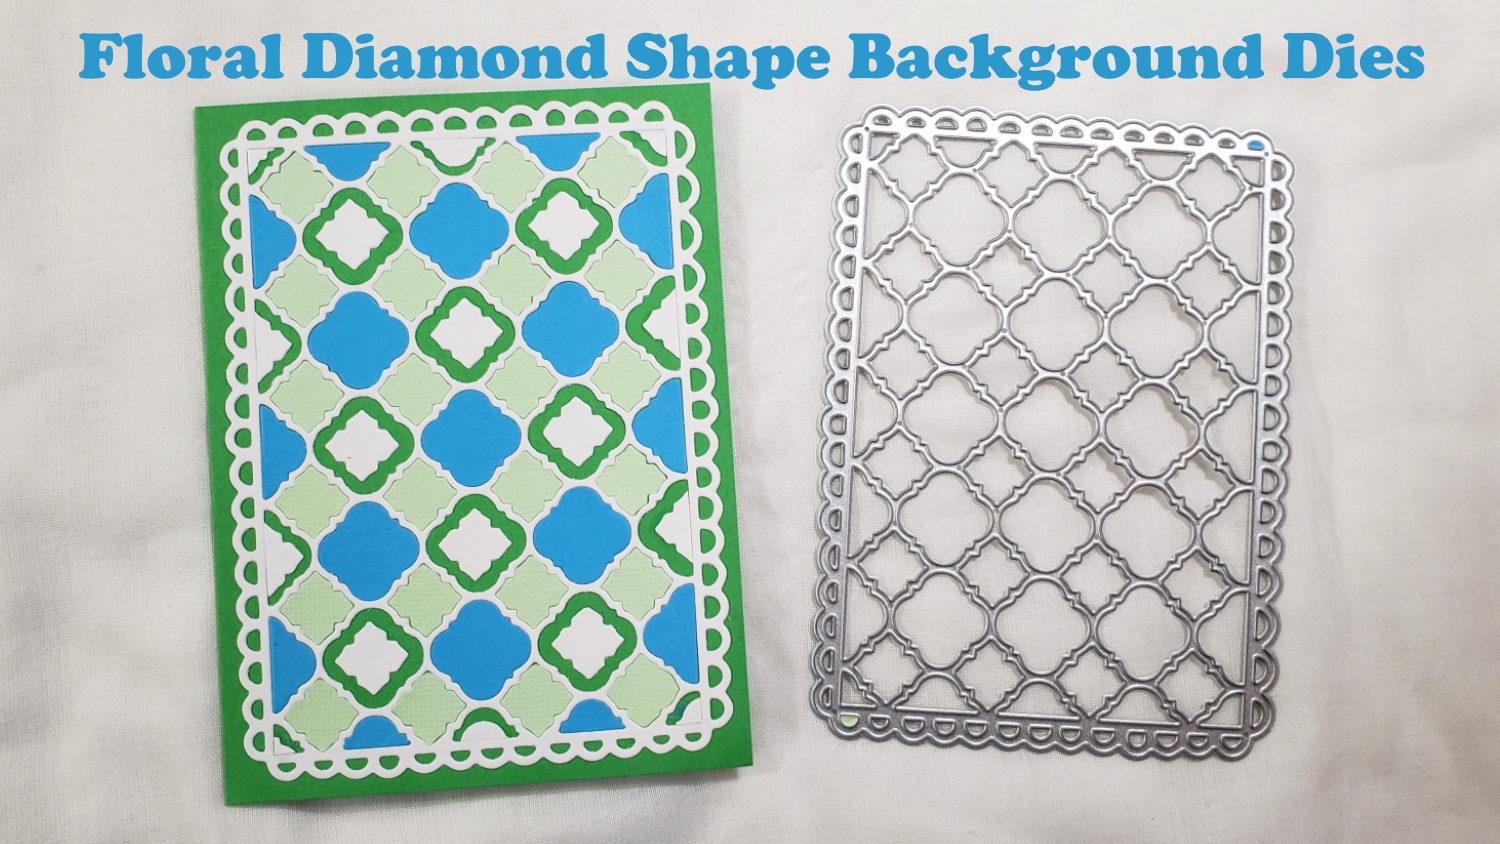
As I looked down the barrel of less than 1 week to Christmas, I started to panic, noting that I only had 1 pre-made handmade holiday card. So I decided to try to make some “mass-make” cards. I used the Altenew Bells and Bows stamp and die set, the JOY from the Diemond Dies Holiday Words Die Set, and a card base I made ages ago with the Floral Diamond Shape Background Dies. NOTE: I’m not sure if these codes still work, but at Diemond Dies you might try “thankskristina” at checkout for 10% off and free shipping on orders of $35 or more AND at inloveartshop.com you might try the code G-36967 for 20% off.
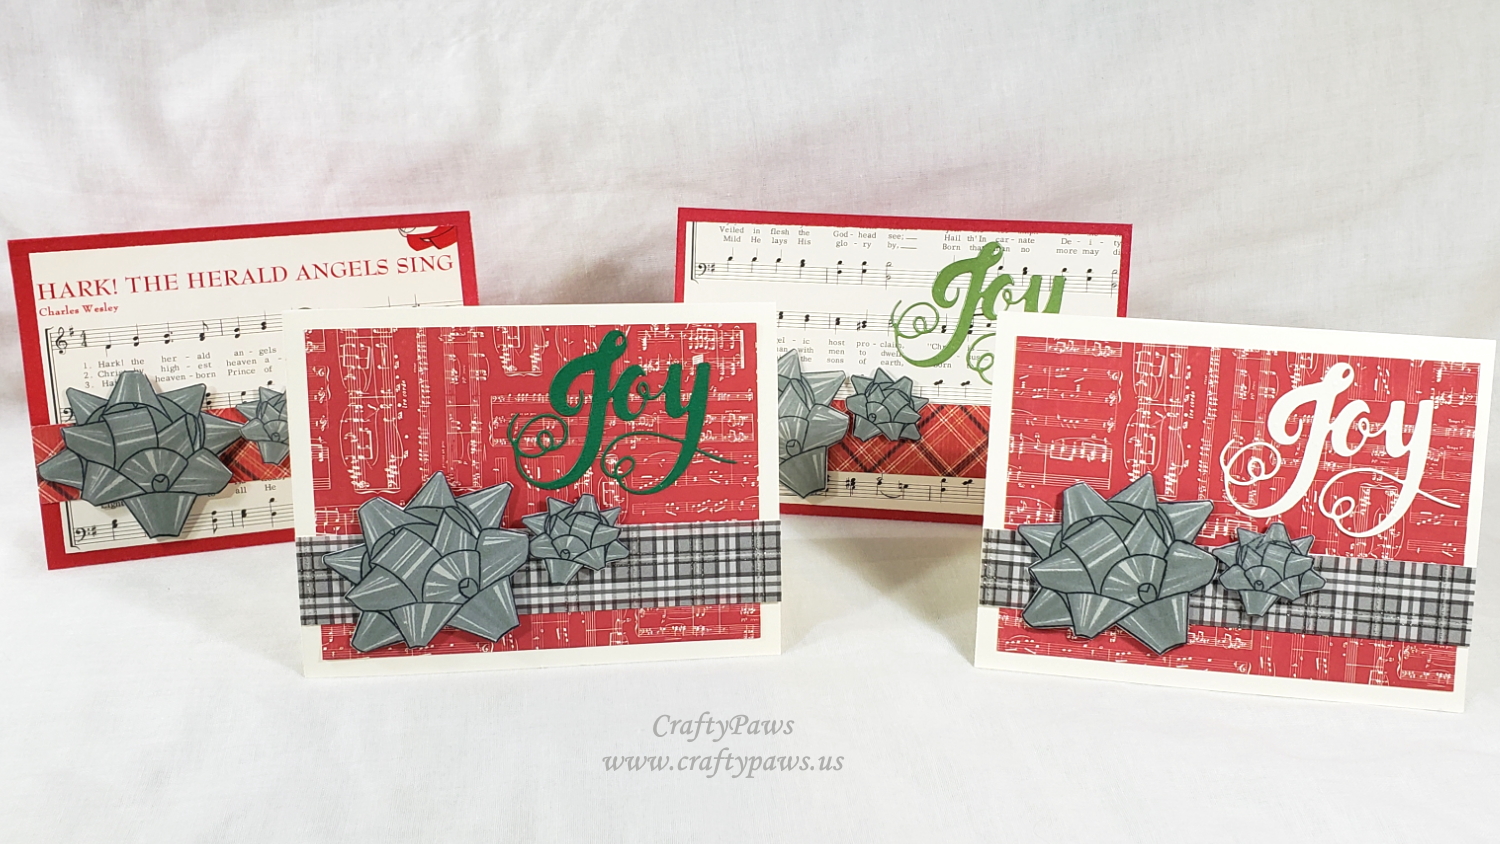
First I stamped out the big and small bows as well as the bell using 3 grey tone Lawn Fawn Fundamentals inks in Manatee, Hippo, Storm Cloud, and my Memento Tuxedo Black. (Watch my video below to get some tips on how to best align the layering stamps for perfect results!) Then I used the accompanying dies to cut them out. Lastly I created card bases with scraps from my patterned paper scrap bin using the rule of thirds to make 4 cards and added the stamped bows with double sided foam adhesive to add special handmade details and dimension:
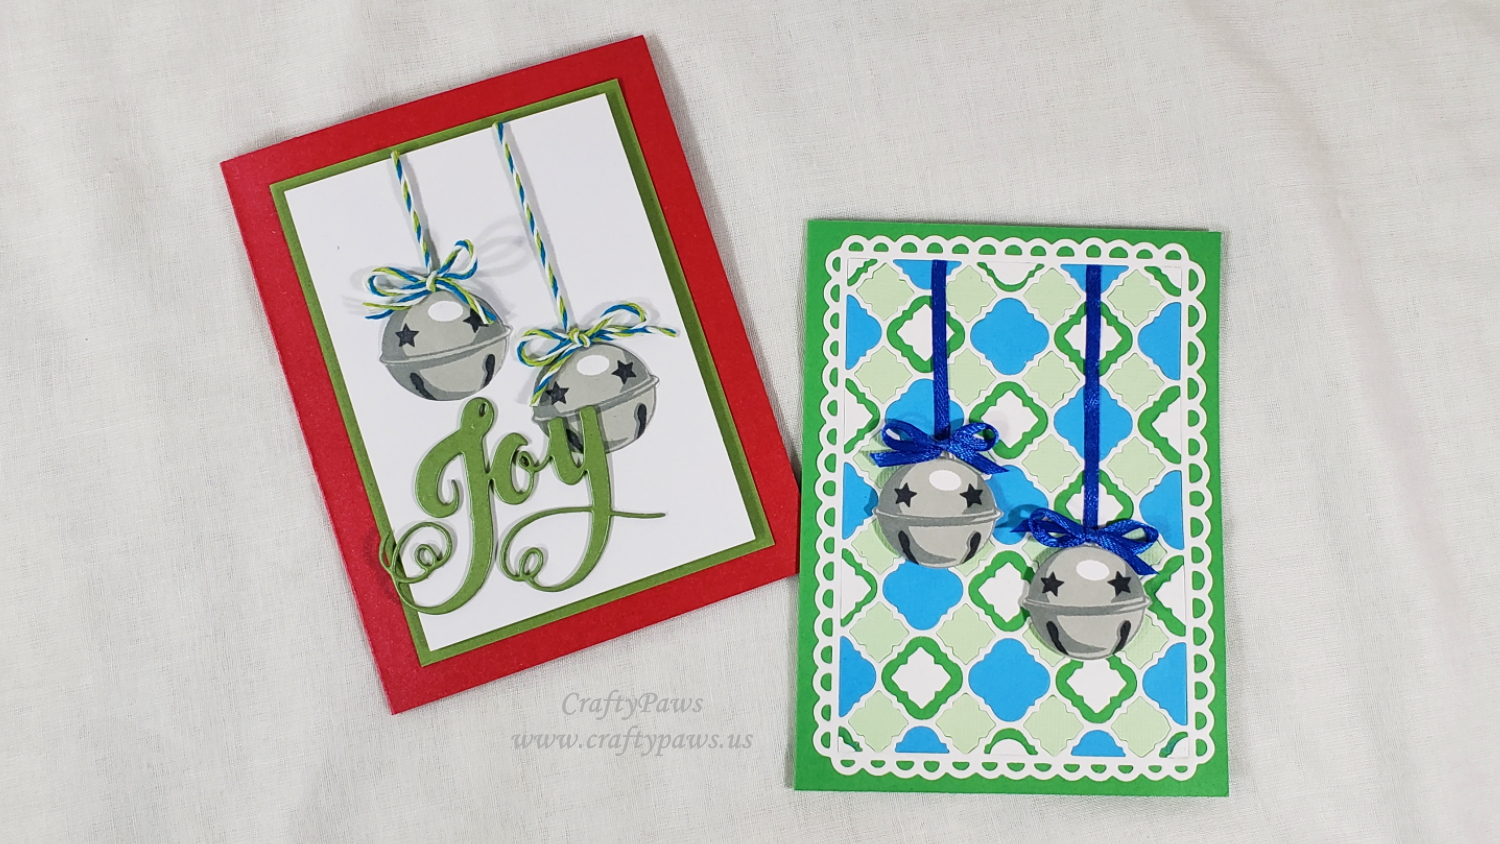
I decided to pair the remaining 4 stamped bells onto 2 cards that I made using an old card base made with the aforementioned inloveartshop floral diamond background die with thin blue satin ribbon and another layered card base using tri-colored bakers twine. I think the key to making quick cards but getting the payoff (and credit) for the unique special feeling of handmade is to add dimension with foam adhesive, interest with ribbons and twine, or bling it on with glittered papers or sequins.
CLICK on the picture below to watch my video tutorial:
Disclosure: Many of the supplies I’ve used for today’s project are linked. Some may be affiliate links, which means if you make a purchase I receive a small commission at no extra cost to you. I truly appreciate your support toward the costs of running this blog!
These cards are being entered into the following challenges:
Stamping Sensations Choose a Theme and Stamp It Challenge
Crafts Galore Encore Anything Goes Challenge
Simon Says Stamp Wednesday Bling It On Challenge – especially the glittered plaid Joy cards
Creatalicious Anything Goes with Optional Traditional Christmas Colors Challenge
Word Art Wednesday Anything Goes Challenge
]]>
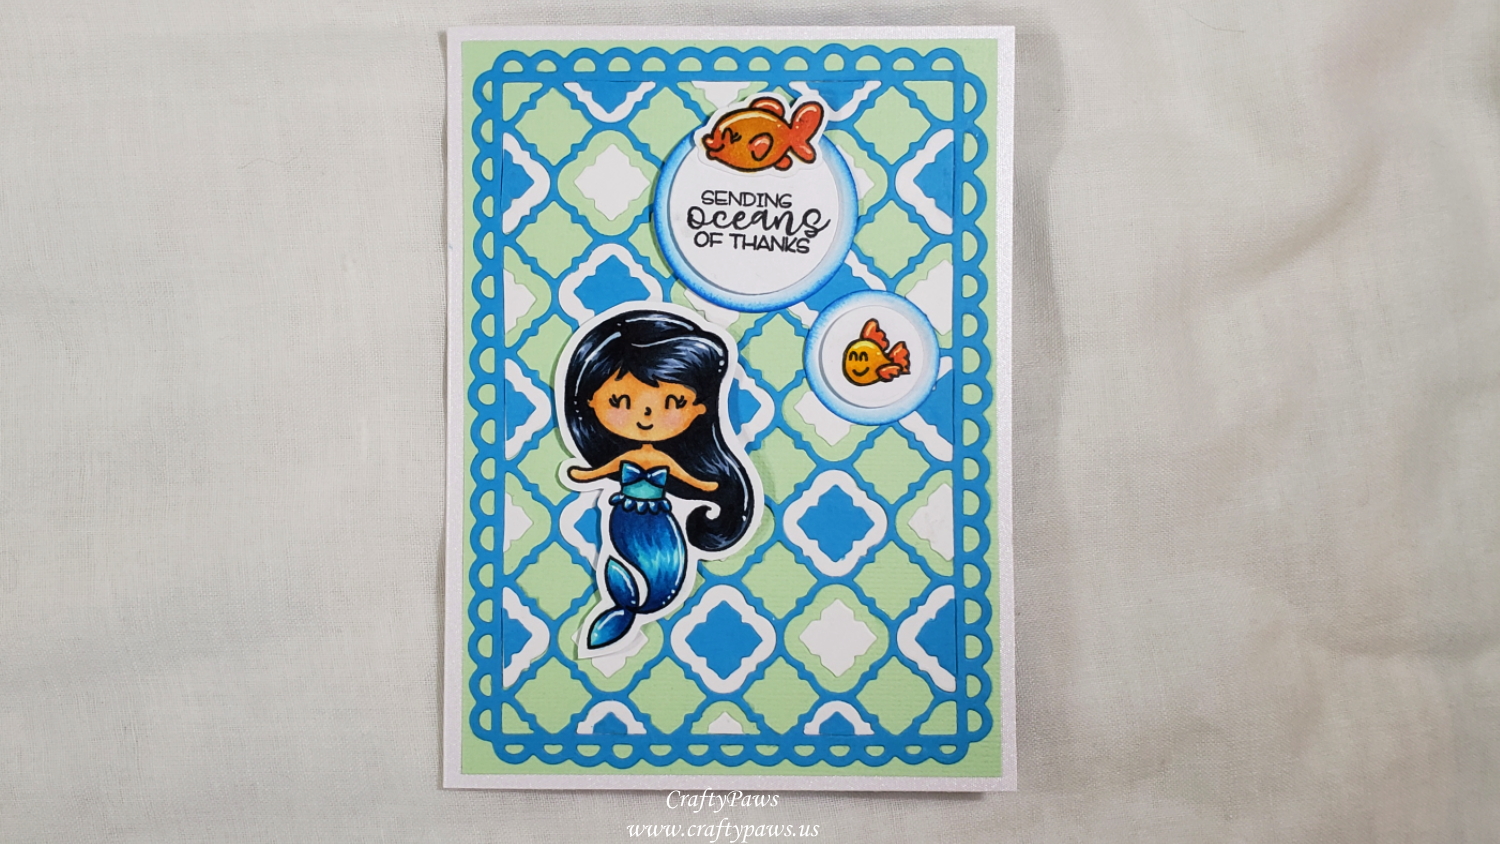
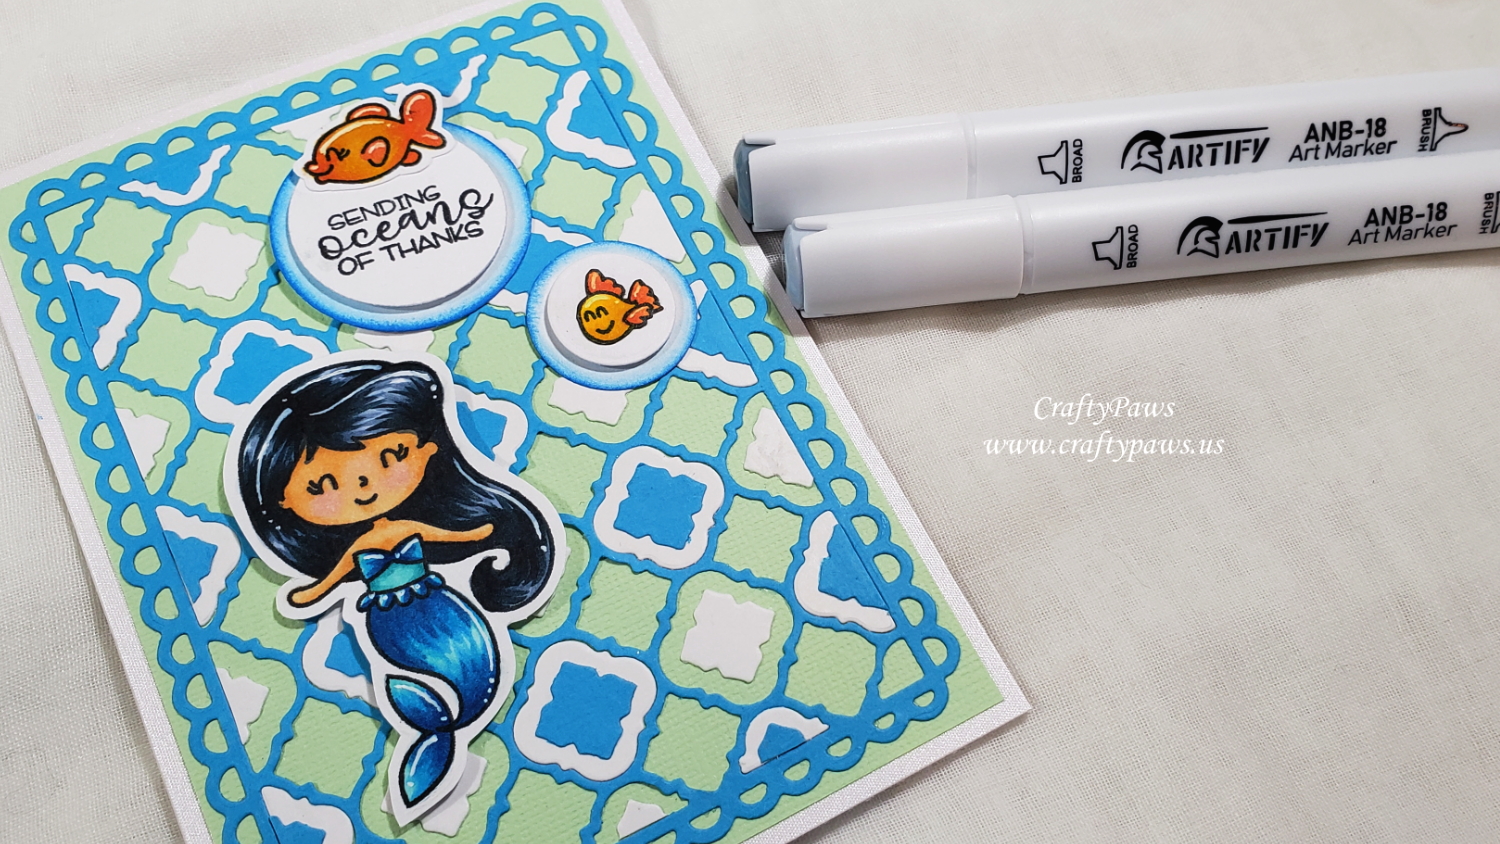
Then I got to coloring up the mermaid and the little fishes from the Avery Elle “Sea Babies” mini stamp set (retired). To coordinate with the cardstock colors I used in the background, I used these Artify marker colors:
Mermaid Body suit/tail: B502, B514, B204, B227
Mermaid Hair: CG01, BG05, BG09
Mermaid Skin: Y900, Y701, Y811, R501
Fishes: Y414, Y505, Y715, Y204, Y207, WG09
The colors blended well, but I was not used to the quantity of the ink that came out (I guess my Copic markers are dry — LOL). These markers are really juicy so I had to try to keep a lighter touch. I was really impressed with the coverage and brightness of these markers and I would recommend them as a budget-friendly alternative to Copic markers. I also added highlights with my trusty Uniball Signo White Gel Pen.
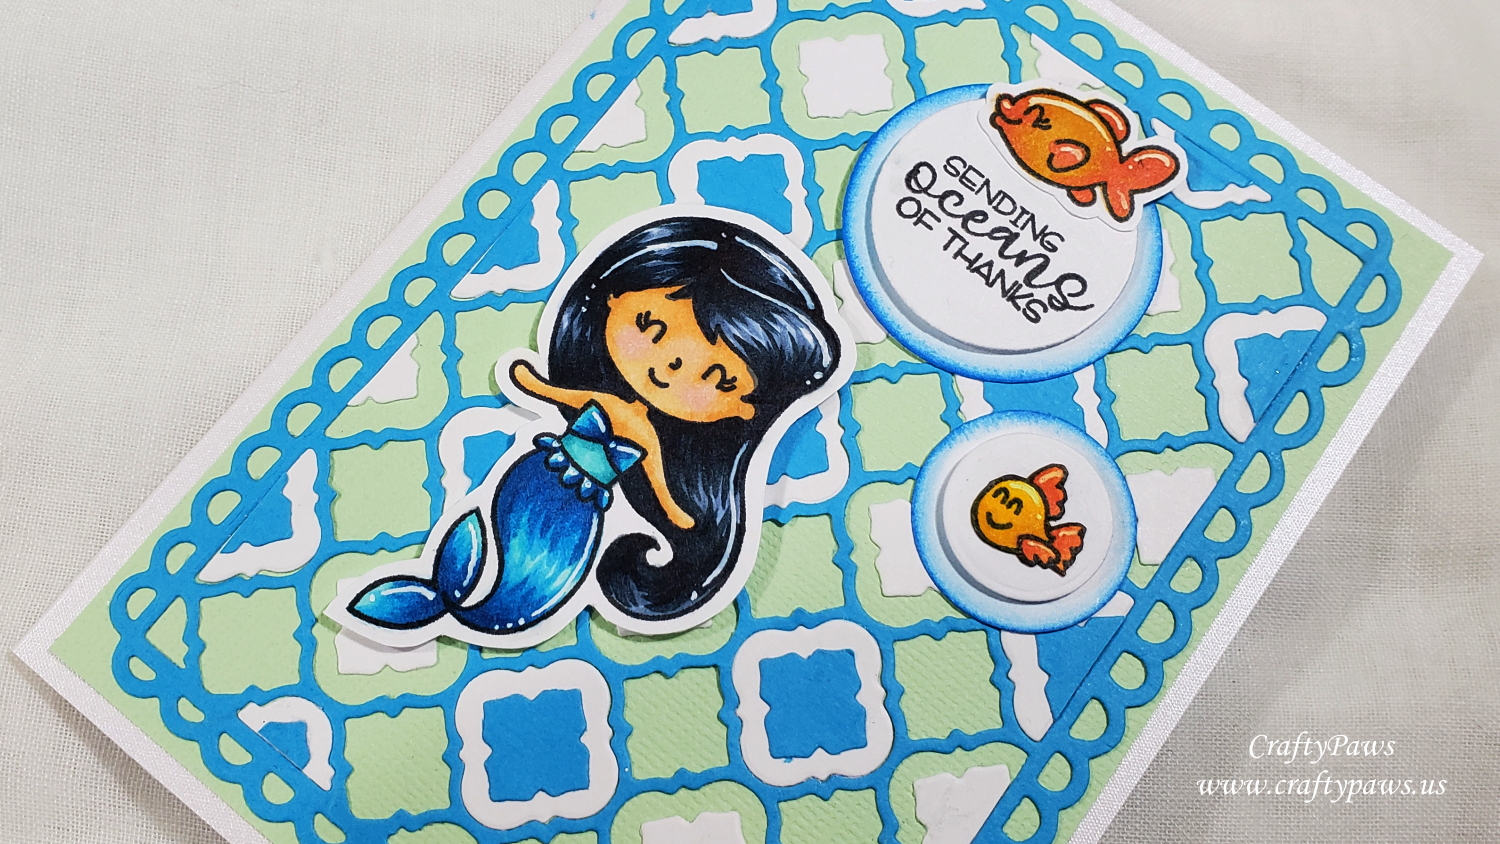
I fussy cut out the mermaid and the fishes with my Fiskars Spring Loaded Reverse Scissors, leaving a bit of a white margin all around so that she would pop a bit from the busy background. For the fishes, I decided that even with the white margin, they were too small and might be fighting with the busy background so I decided to put them on “bubbles” that I die cut using the four smallest circles from the Diemond Dies Die-Normous Stack-Ems Circle Nesting Die Set. I stacked two circle die cuts, added some depth with double sided foam adhesive between them, and blended some Salty Ocean Distress Ink on the lower circle. For the larger circle and fish, I also stamped in the combined sentiment from the stamp set: “Sending Oceans of Thanks”. So that the mermaid would not be overshadowed by the bubbles, I popped her up on double sided foam adhesive too.
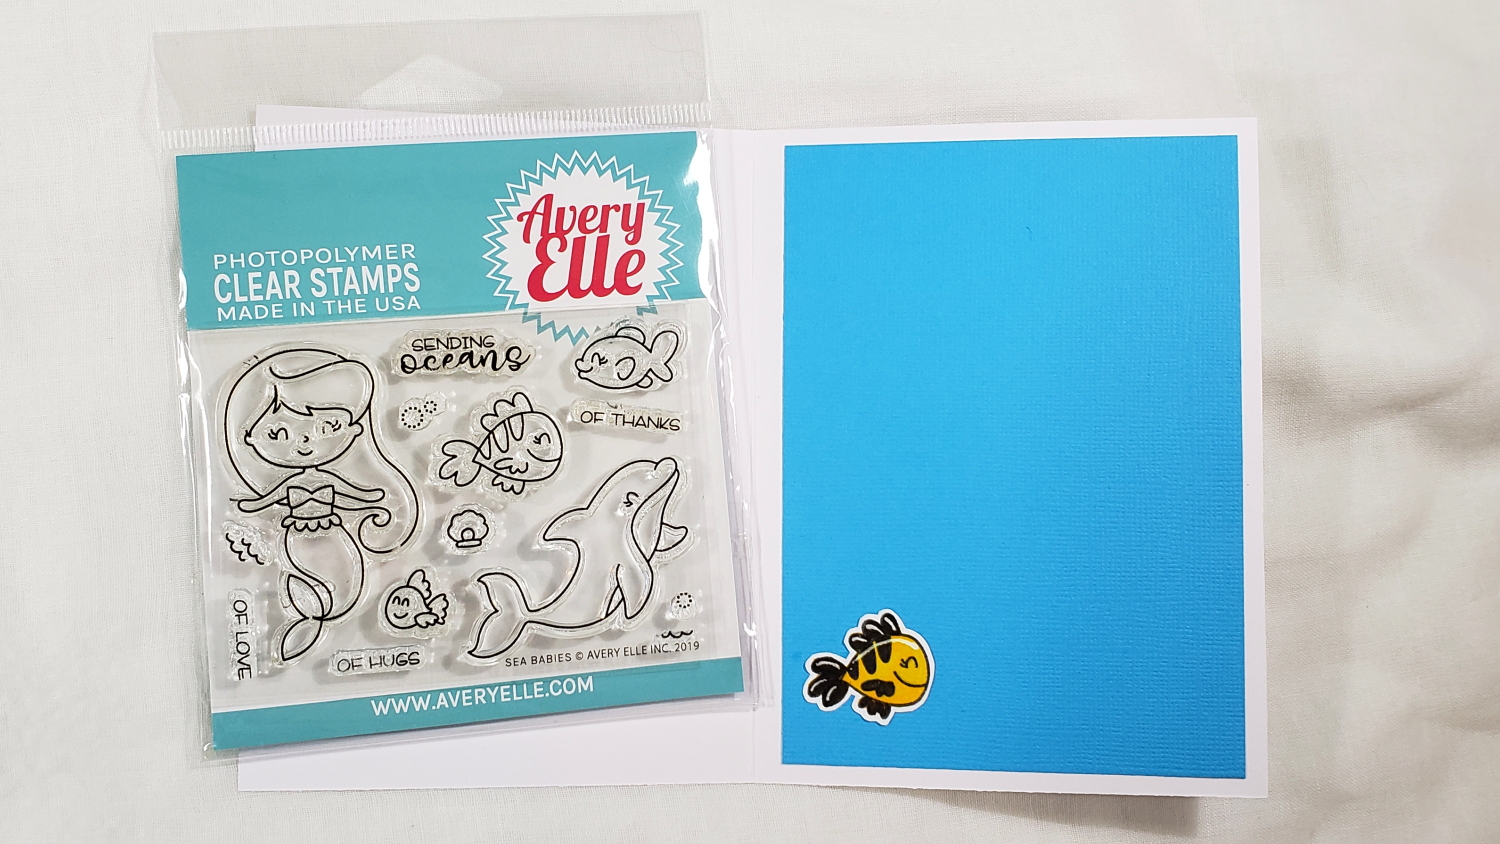
For the inside card liner, I simply used a scrap of aquamarine cardstock to match one of the background cardstock colors. And for a finishing touch, I added a third Artify-colored fish from the stamp set that I fussy cut and glued to the lower left.
CLICK on the following picture to watch the card making process video:
This card is being entered into the following challenges:
Crafts Galore Encore Anything Goes Challenge
Creatalicious Anything Goes with Optional Slim Line Card Challenge
Word Art Wednesday Anything Goes Challenge
Through the Craft Room Door Anything Goes Challenge
Stamping Sensations Fantasy and Magical Challenge
]]>

I was so happy to be able to easily create this over-sized card using the Inloveartshop Stackables Spiral Pattern Decor Dies to create a background that highlights two focal point images. I cut out 4 sizes of the stackable spiral circles in various shades of purple — lavender, periwinkle, and deep purple. I stacked them progressively smaller and then spaced them out on a white card front on a periwinkle card base. To keep a cohesive look, I connected the stacked spirals with a strip of lavender card stock through the middle of the card. I also used a simple circle die (from the versatile Diemond Dies Die-Normous Stack-Ems Circle Nesting Die Set) to create a light background from which the puppy images could pop. NOTE: My readers can get 20% off by using the DISCOUNT CODE: G-36967 at the Inloveartshop checkout.
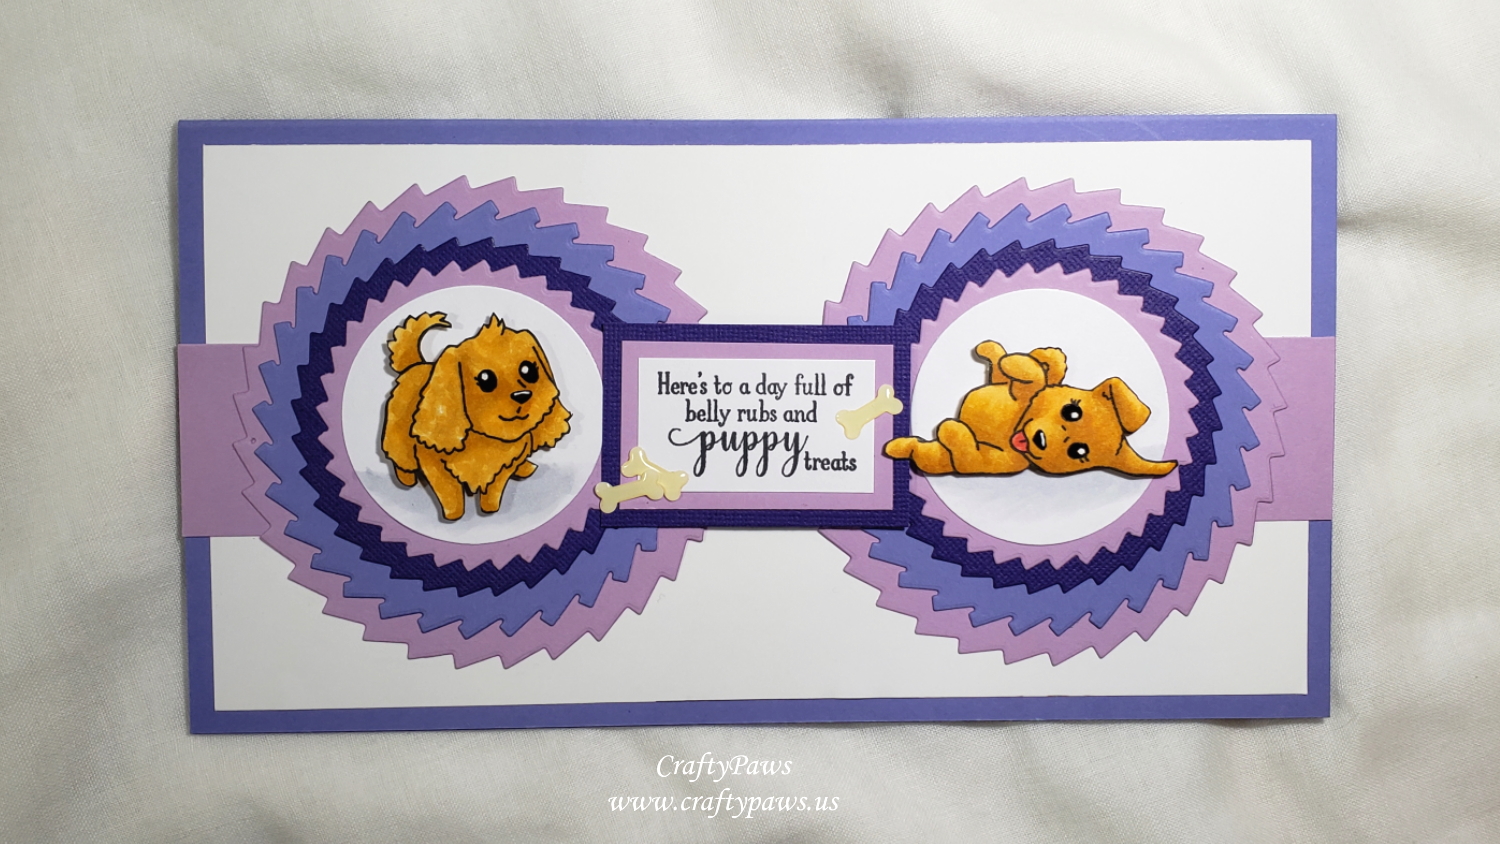
For the focal images, I finally got to color up the poodle and the paws-up puppy from the Gina K Designs “Playful Pups” stamp set (retired). As my niece’s new puppy is an apricot mini poodle (like my sweet Biscuit was), I colored up the dogs with the following Copic colors:
Fur: YR21, YR23, YR24
Nose: W7
Tongue: R22 and R24
Ground for background white circles: C1
After fussy cutting them with my Fiskars Spring Loaded Reverse Scissors, I inked the edges of the cut images with a Memento Tuxedo Black Marker for a clean finished look. I also popped up the puppies on double sided foam adhesive to add even more dimension.
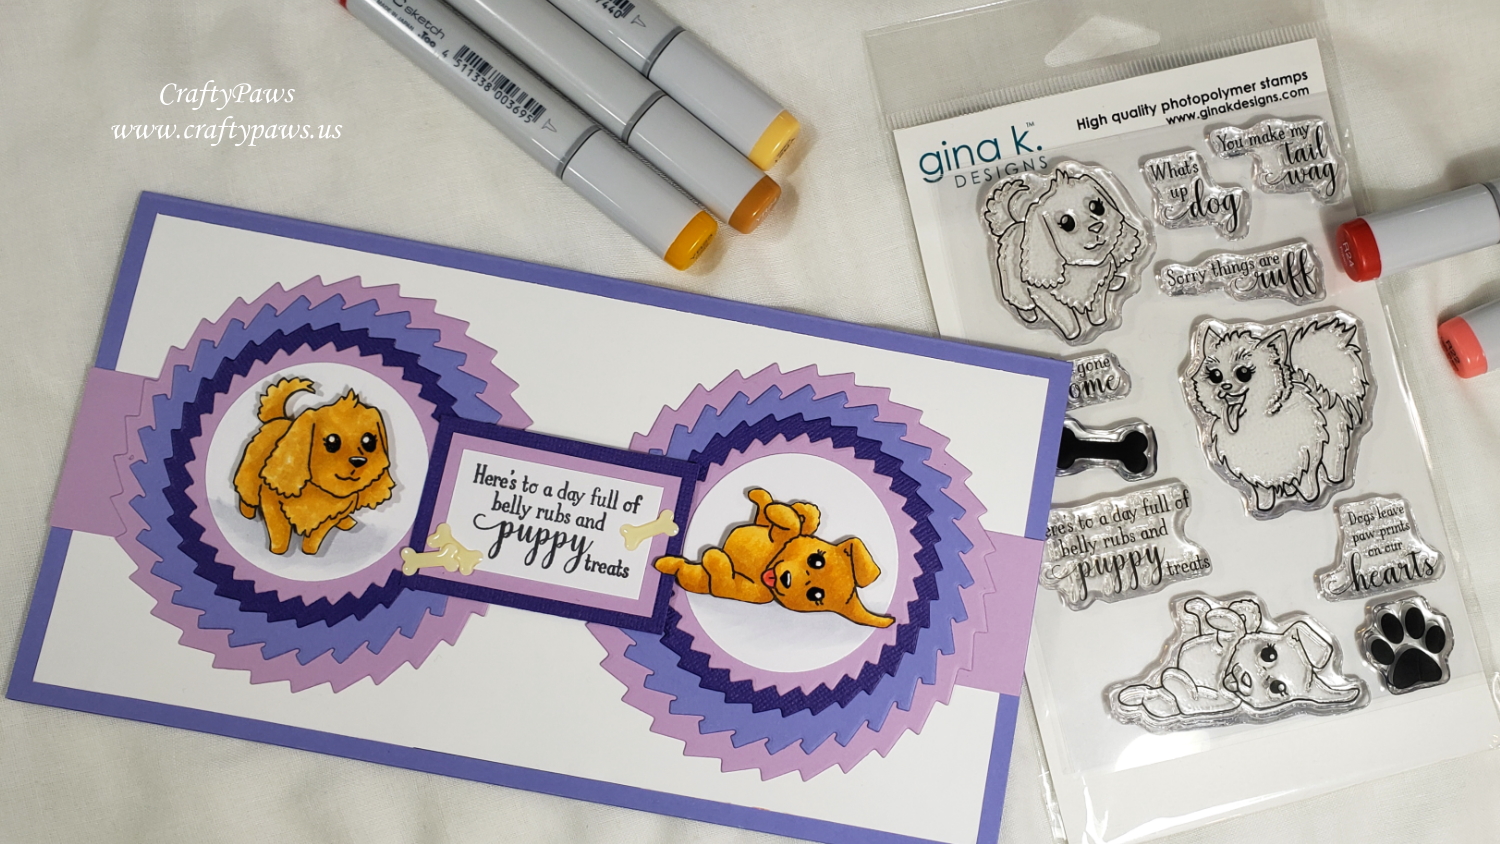
For the sentiment, I used the “Here’s to a day full of belly rubs and puppy treats” from the same stamp set. To help the sentiment stand out, I matted them with more scraps of the lavender and deep purple card stock that I had used for the background, and I also back the sentiment with more double sided foam adhesive. I had a few enamel bones from a Doodlebug Designs sticker set from the Puppy Play Collection (retired), so I added 3 to the sentiment for embellishments.
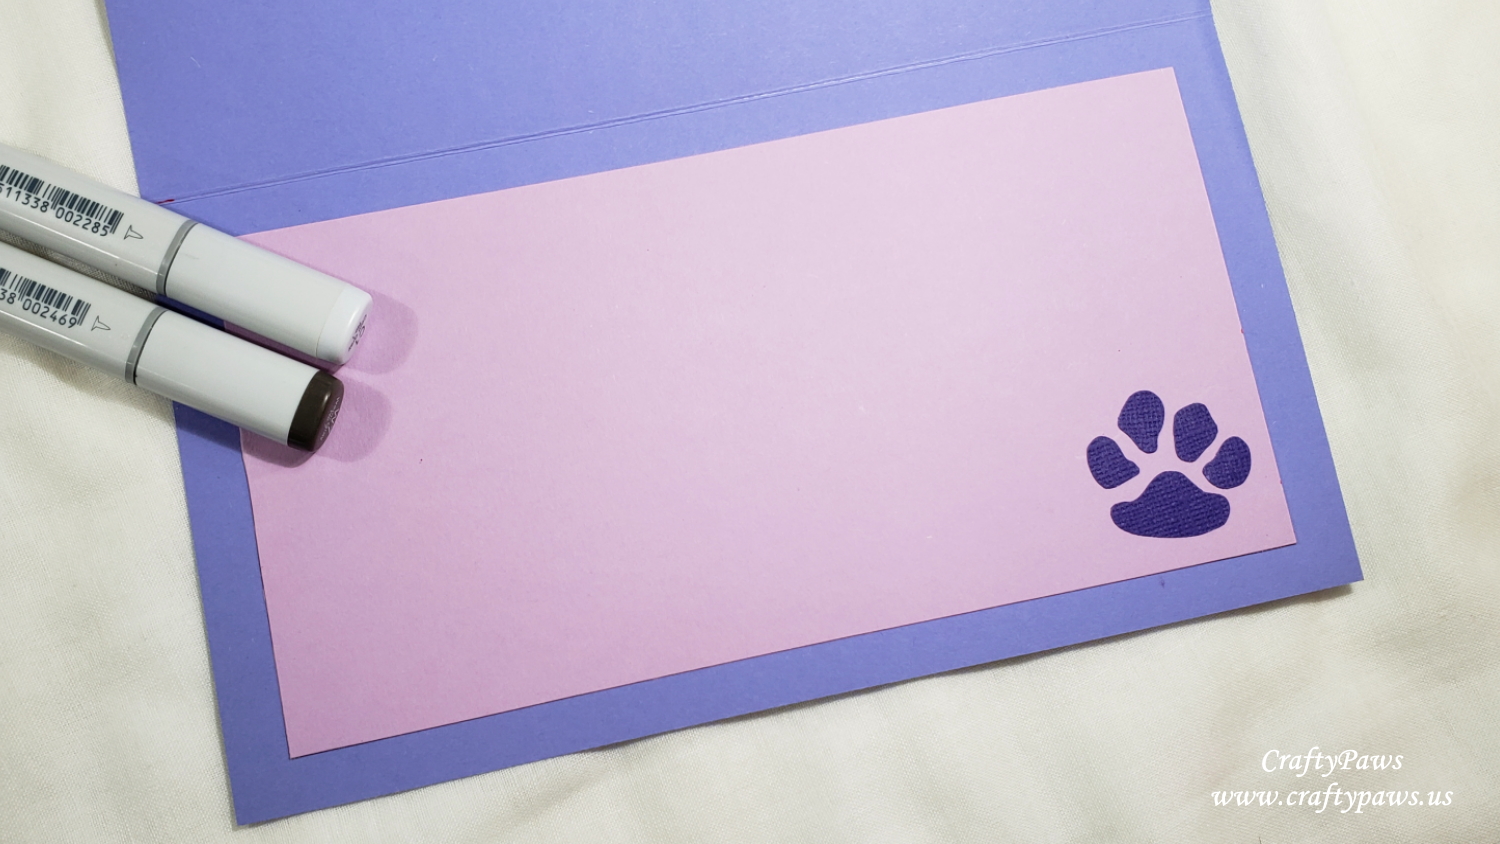 For the inside card liner, I used the remainder of the lavender card stock sheet. And for a little interest, I also used an old Fiskars Furry Friends Paw Squeeze Punch with a bit of the deep purple card stock for an accent paw print inside the card.
CLICK on the picture below to watch the card making video:

Disclosure: Many of the supplies I’ve used for today’s project are linked. Some may be affiliate links, which means if you make a purchase I receive a small commission at no extra cost to you. I truly appreciate your support toward the costs of running this blog!
This card is being entered into the following challenges:
Creatalicious Anything Goes with Optional Use Green Challenge
Word Art Wednesday Anything Goes Challenge
Through the Craft Room Door Anything Goes Challenge
Crafts Galore Encore Anything Goes Challenge
Stamping Sensations Monochromatic Challenge – purples
]]>
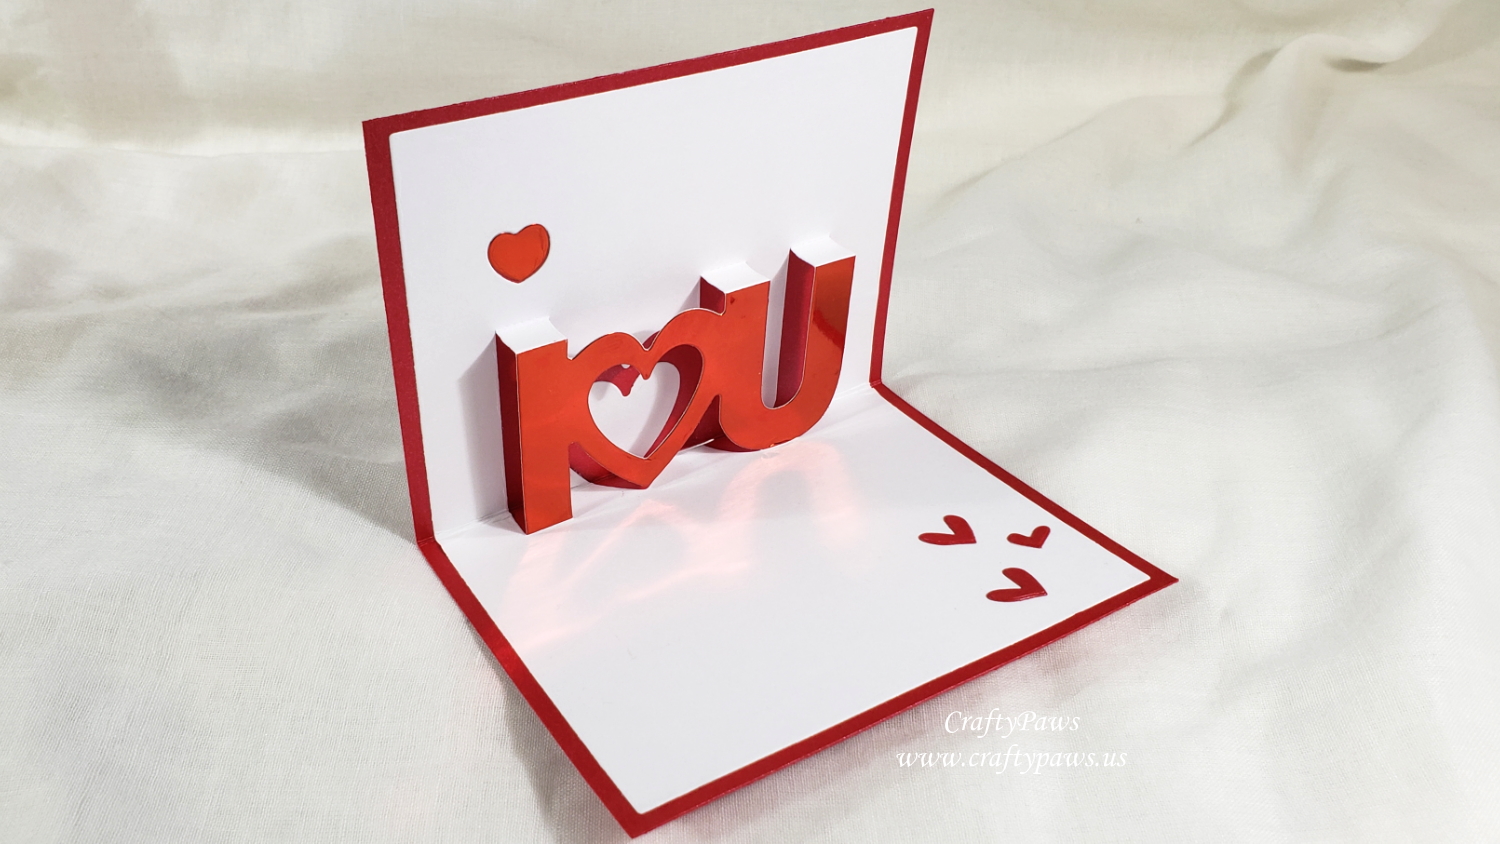
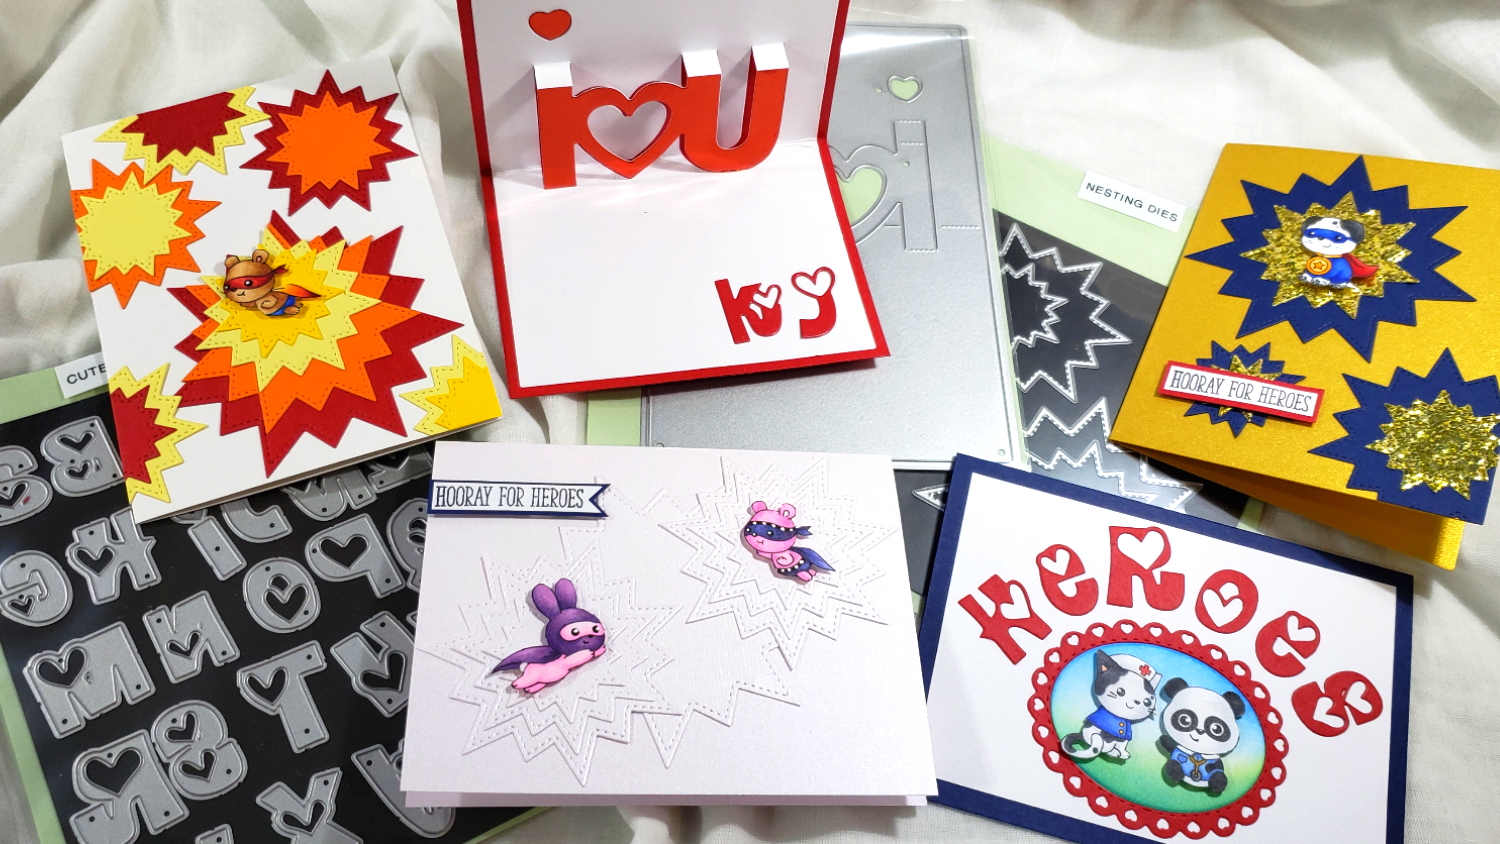
Anyway, as with all the holidays and birthdays this crazy year, Father’s Day kind of snuck up on me. So today, I whipped together this fast fun pop up card for my dad. I used 3 die sets from InloveArtShop: Cute Love Heart Alphabet Dies (SKU: DMZH813): https://bit.ly/2z3JaeK ; I Love U Pop Up Card Die (SKU: DMZH514): https://bit.ly/2ze11A1 ; and Hollow Heart Frame Dies (SKU: DMZH385): https://bit.ly/2xCpZZ6 PLEASE NOTE: My readers get 15% off their entire order at InLoveArtShop by using the coupon code: FSCraftyPaws at check out.

The inside of the card was super easy to craft using the I Love U Pop Up Card Die. I die cut a piece of white card stock with the I {heart} U die that results in a card liner about 7.25″ x 4.5″. Then I folded up (mountain) along the dotted lines by the tops of the letters and heart, and folded down (valley) along the dotted lines by the base of the letters and heart. I cut the card base from shimmery red card stock to measure 7.5″ x 4.75″ so that there would be a 1/8″ border all around. Lastly, I used wet glue along the back of the white card stock (except for the pop out tab areas) and lined up the center fold with the card base center fold. I also lined up the inside of the heart and glued that white die cut into place. Using a bone folder I burnished down the white card liner to make sure all the glued parts were secure. To add an extra sparkle, I die cut the I {heart} U again from red metallic card stock and fussy cut out the tops and bottoms so that I could glue this high shine layer over the heart dotting the I as well as the I {heart} U.
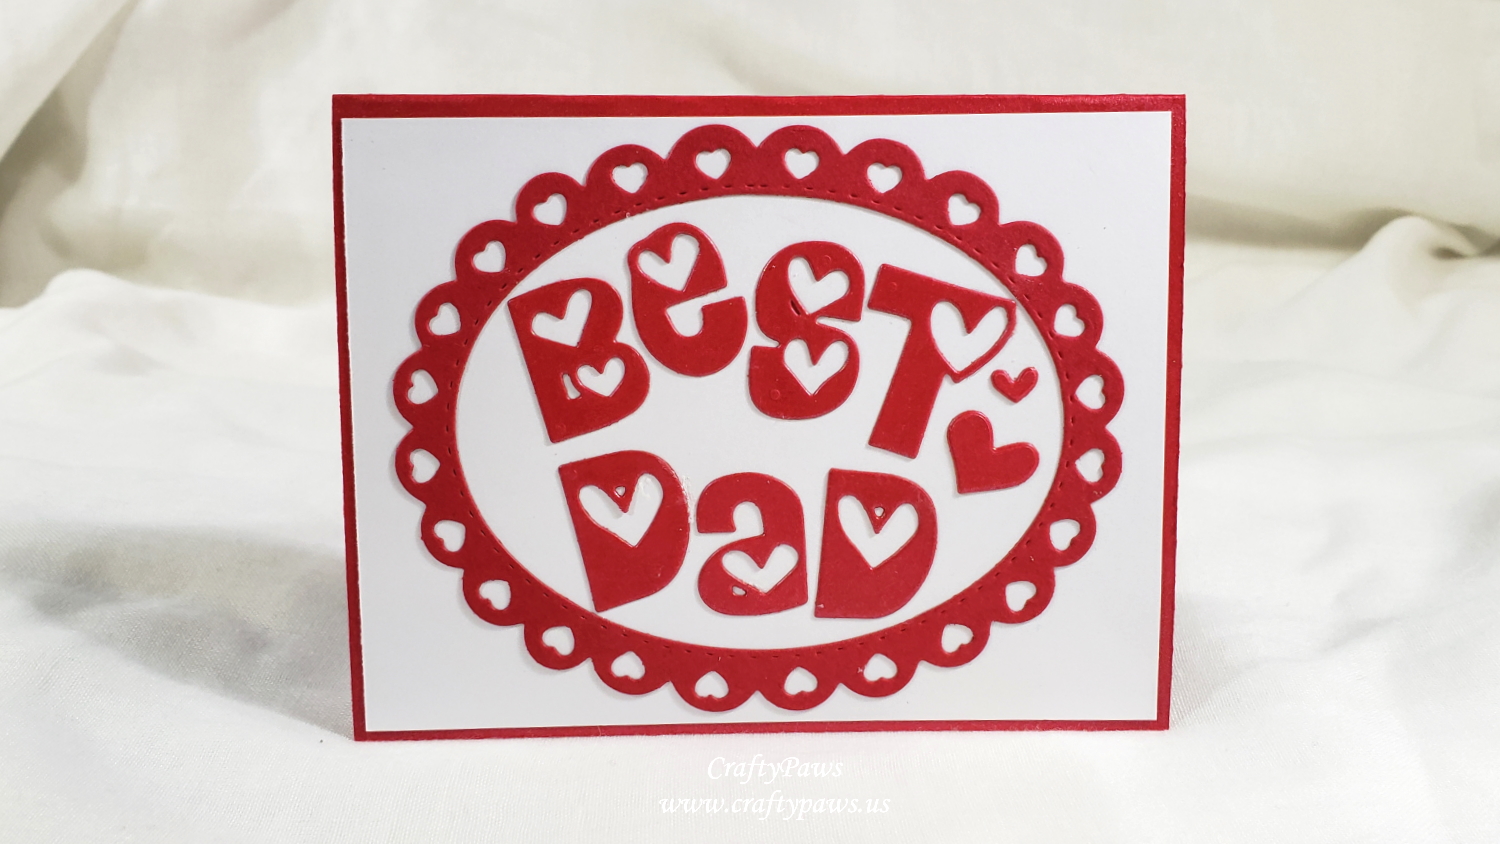
For the card front, I used plain white card stock just a bit smaller than the card base. Then I die cut the middle sized Hollow Heart Frame Die from the same shimmery red card stock. Lastly, I die cut the letters from the Cute Love Heart Alphabet Dies to spell out “BEST DAD”, using a couple of the spare hearts that were left over from the letters as decorations.
Although this was a fast-to-craft card, I think my dad will really like the fun pop up element. He loves interactive and unusual cards and will have no idea how easy this was to make. 🙂 CLICK on the picture below to watch the card in action:
This card is being entered into the following challenges:
Creatalicious Anything Goes with Optional No Designer Paper Challenge
Word Art Wednesday Anything Goes Challenge
Lil Patch of Crafty Friends Anything Goes Challenge
Through the Craft Room Door Anything Goes Challenge
Crafty Gals Corner You’re The Man Challenge
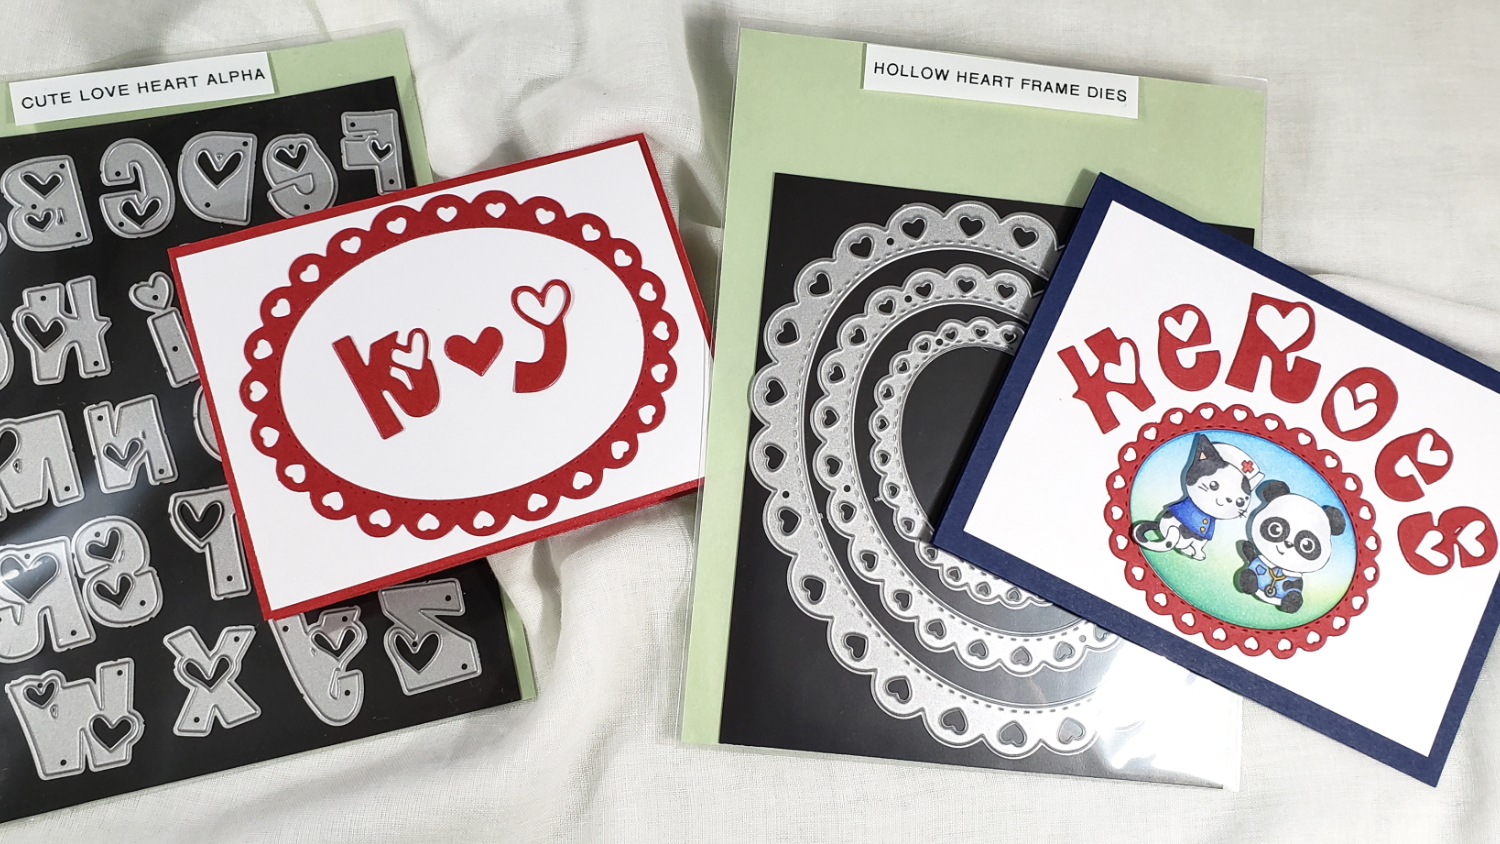
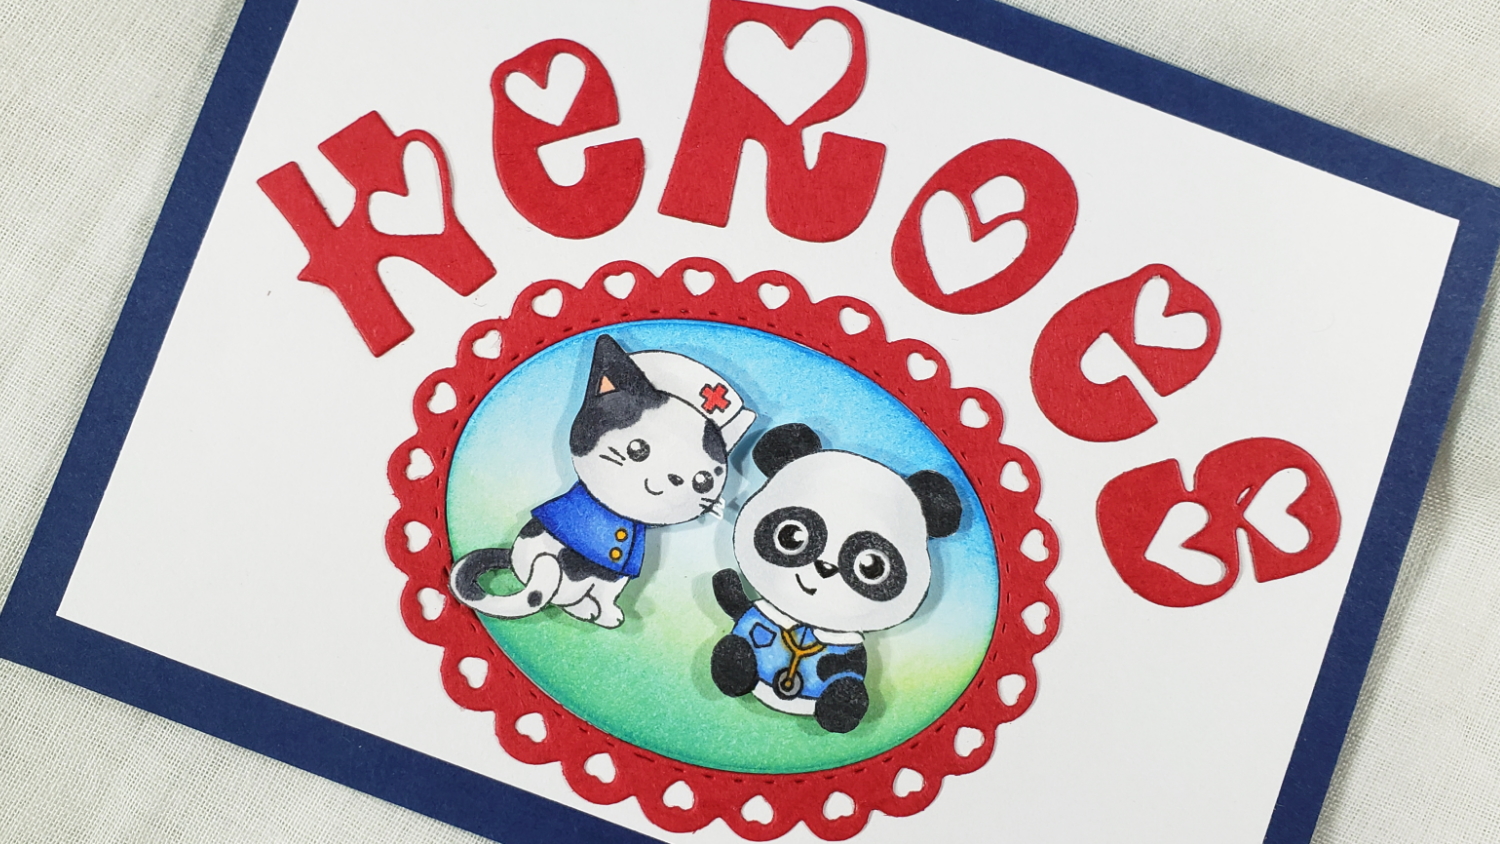
I die cut the H E R O E and S from the absolutely adorable heart alphas using rich red card stock and matched the scalloped heart oval frame with the same red card stock (although there is nothing about the critters that connotes a gender, these heart-filled red pieces I think give the card a feminine look). For the inset oval background, I used a scrap of white card stock and blended on Tim Holtz Distress Ink in Squeezed Lemonade and Salty Ocean. With just the two colors, I was able to create a third so that the critters looked like they were sitting on some grassy ground with a yellow horizon and a blue sky.
To color up the nurse kitty and the doctor panda bear, I used the following Copic colors:
Kitty: C00, C0, C1, C7 and R20 for inside the ear
Nurse cap: N0 and R27
Nurse top: B21, B24, B28 and Y38 for the buttons
Panda: C00, C0, C1, and C7
Doctor coat: B21 and B24
Stethoscope: Y38
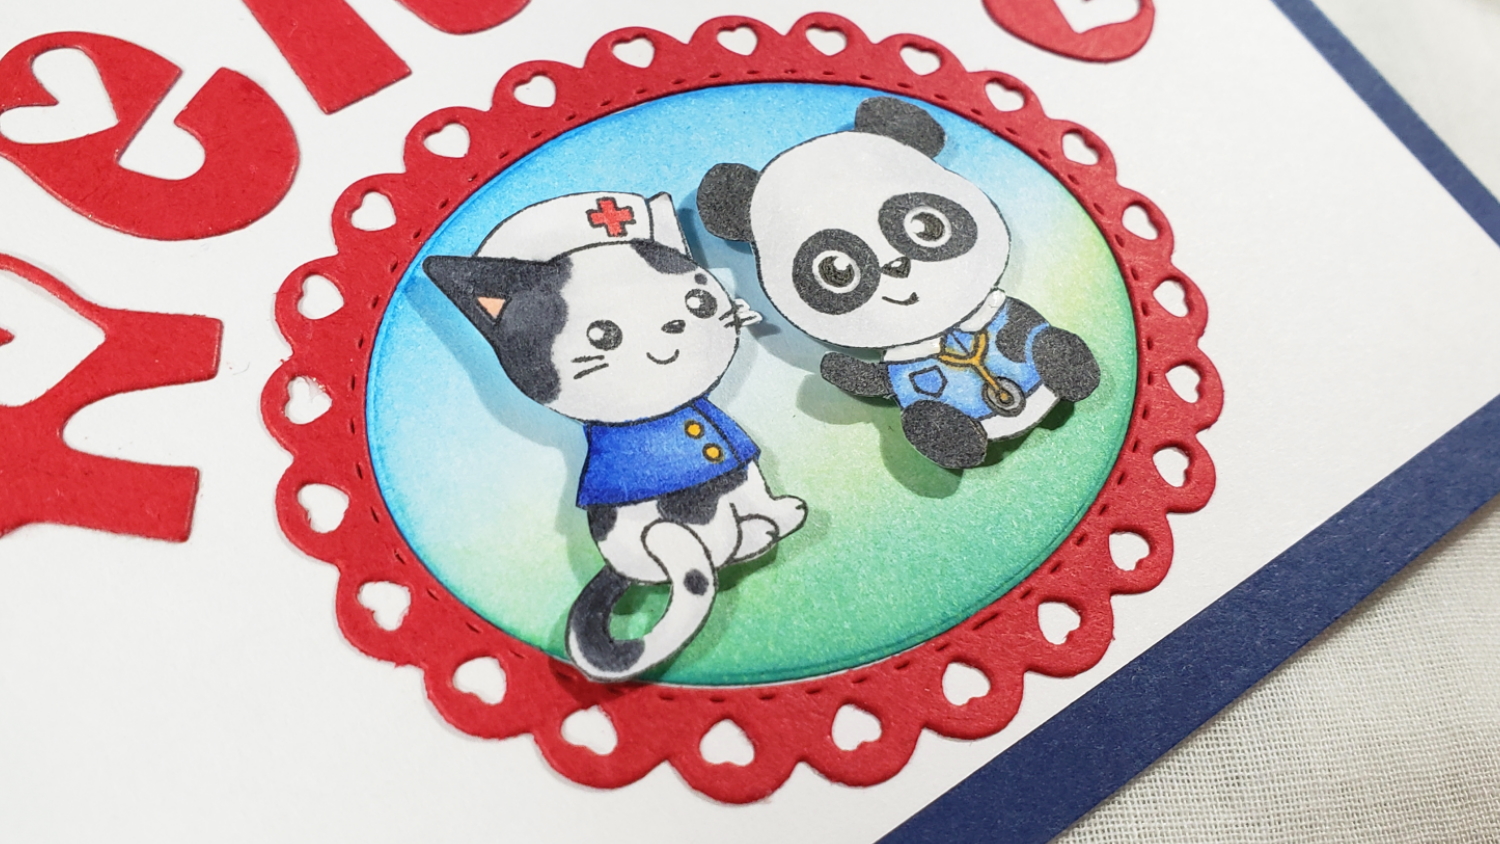
I also used a Copic Multiliner on 0.05 pt to outline and emphasize the eyes and a Uniball Signo White Gel Pen to add the highlights. I fussy cut out the critters (including the little empty space left by the kitty’s tail looping around with an X-Acto blade), and popped them up on foam dots for a bit of dimension. I cut the card front down to fit on a navy blue card stock card base with a quarter inch border all around to nicely frame the card and repeat the blues of the critter’s uniforms.
This card, and others I crafted with this InLoveArtShop design team package is shared in the following video:

Disclosure: The dies used in this post were gifted to me free of charge as part of my design team package. Many of the supplies I’ve used for today’s project are linked. Some may be affiliate links, which means if you make a purchase I receive a small commission at no extra cost to you. I truly appreciate your support toward the costs of running this blog!
Note: My readers can use coupon code: FSCraftyPaws at Inloveartshop.com for 15% off of your entire order!
This card is being entered into the following challenges:
Word Art Wednesday Anything Goes Challenge
Simon Says Stamp Monday Make Your Own Background Challenge
Creatalicious Anything Goes with Optional Birthday Challenge
Through the Craft Room Door Anything Goes Challenge
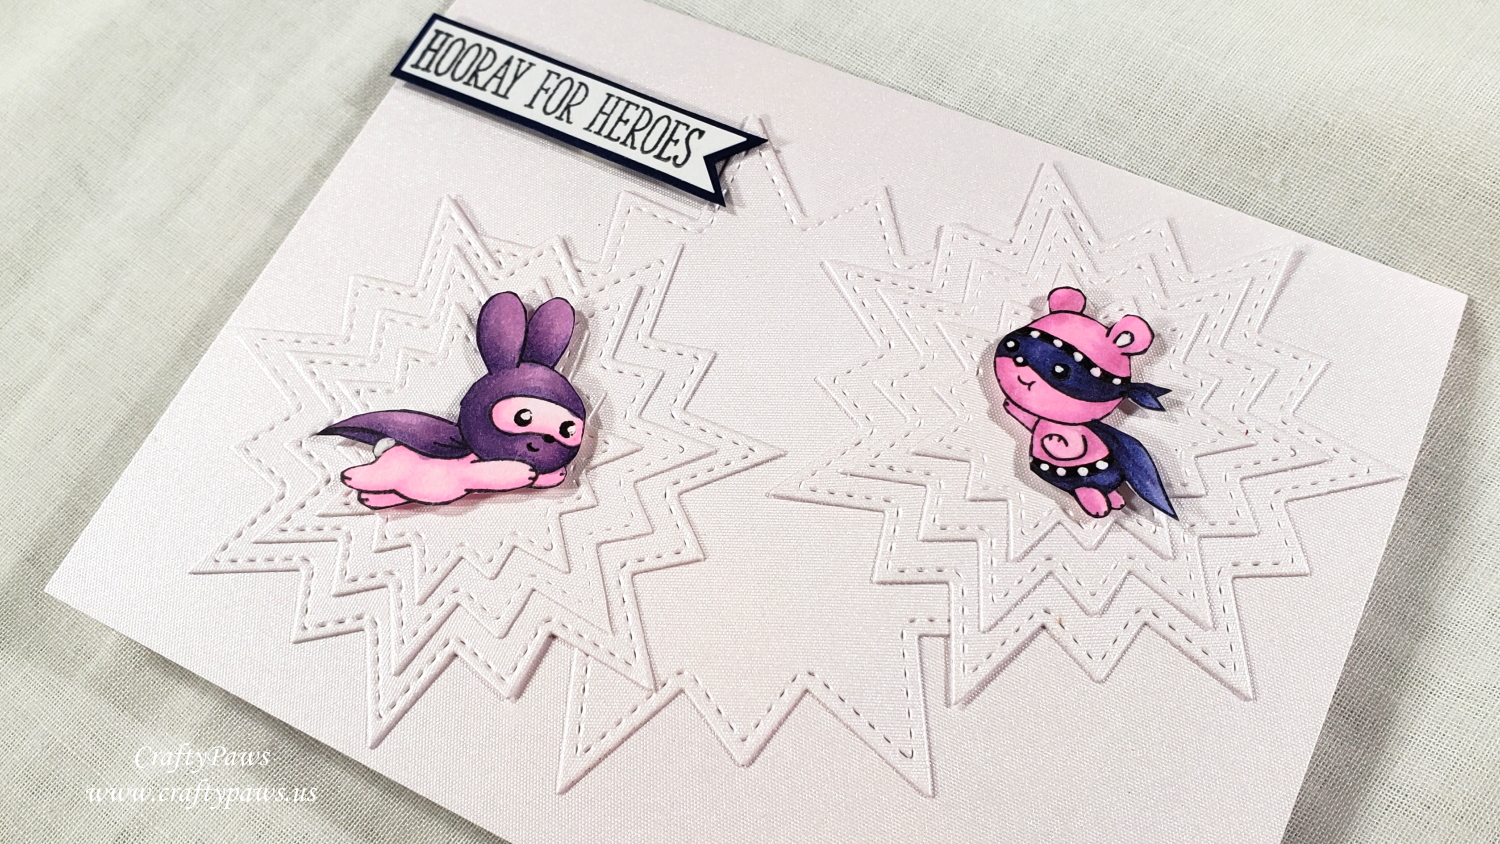
For this card, I decided to try to make the explosive background created with the Nesting Dies Set more like those cartoon reverberations. I used a white card stock card base and then used linen-textured white card stock for all the layered bursting nesting dies. The pops of color came into play as I decided to Copic color the caped cutie bunny and teddy bear as female superheros in pinks and purples:
Bunny body: RV000, RV00, and RV02
Teddy body: RV00, RV02, and RV55
Bunny costume: V12, V15, and V17
Teddy costume: BV02, BV04, and BV08
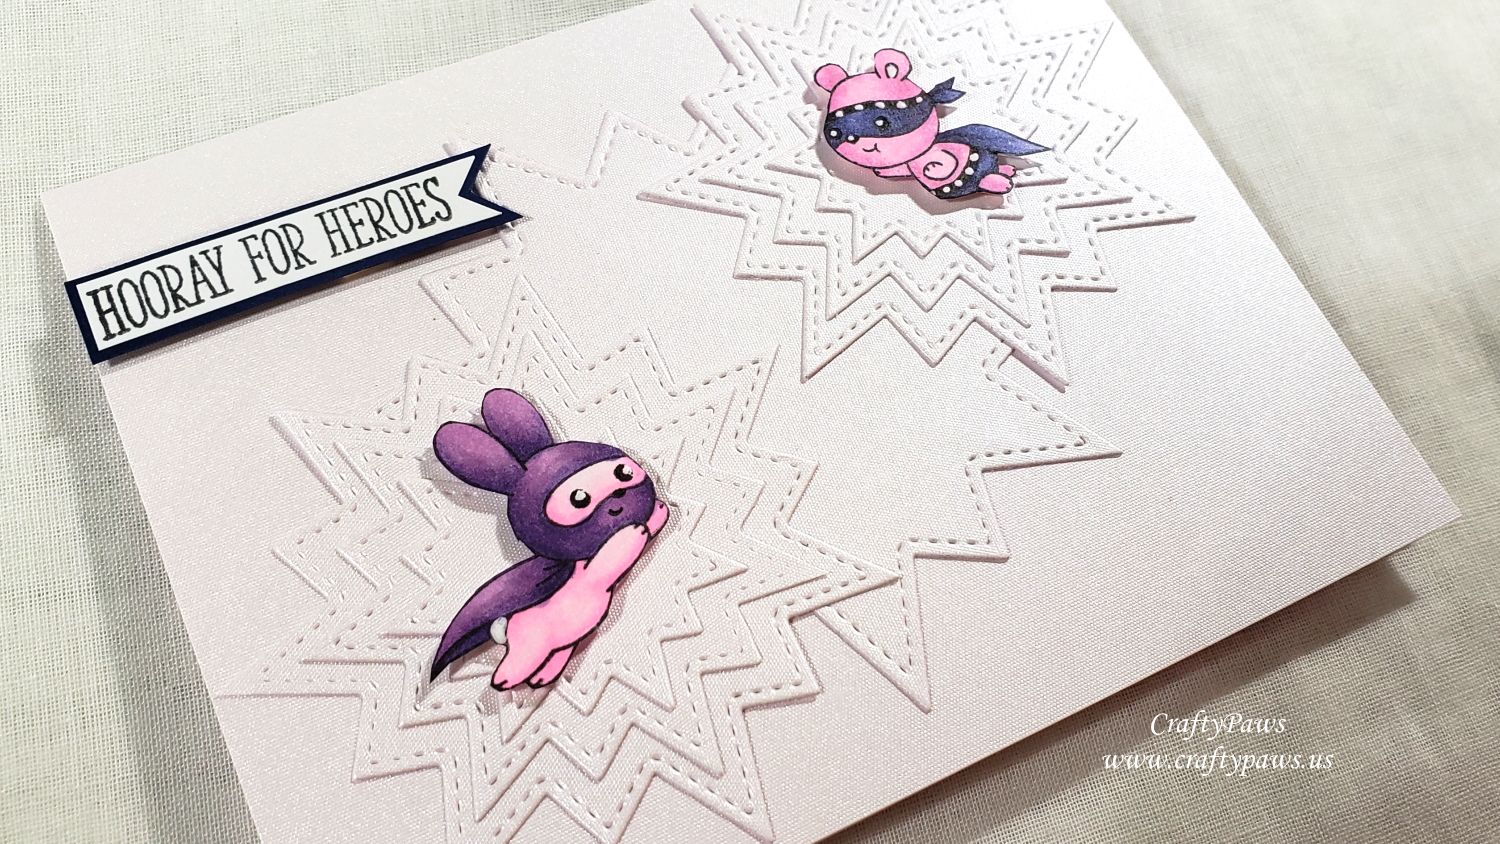
Because I accidentally bled my colors when coloring up the Teddy’s costume outside the lines I doodled on black and white striped accent bands with a 0.05 Copic Multiliner Pen and a Uniball Signo White Gel Pen. I also used the white gel pen to highlight the critters’ eyes, the bunny tail and inside the teddy’s ear. I used Fiskars Spring Loaded Reverse Scissors to fussy cut them out and popped them up on foam dots for added dimension.
This card, and others I crafted with this InLoveArtShop design team package is shared in the following video:
Disclosure: The dies used in this post were gifted to me free of charge as part of my design team package. Many of the supplies I’ve used for today’s project are linked. Some may be affiliate links, which means if you make a purchase I receive a small commission at no extra cost to you. I truly appreciate your support toward the costs of running this blog!
This card is being entered into the following challenges:
Word Art Wednesday Anything Goes Challenge
Crafty Gals Corner For the Ladies Challenge
Simon Says Stamp Monday Make Your Own Background Challenge
Creatalicious Anything Goes with Optional Birthday Challenge
Crafts Galore Encore Anything Goes Challenge
Lil Patch of Crafty Friends Anything Goes Challenge
Through the Craft Room Door Anything Goes Challenge
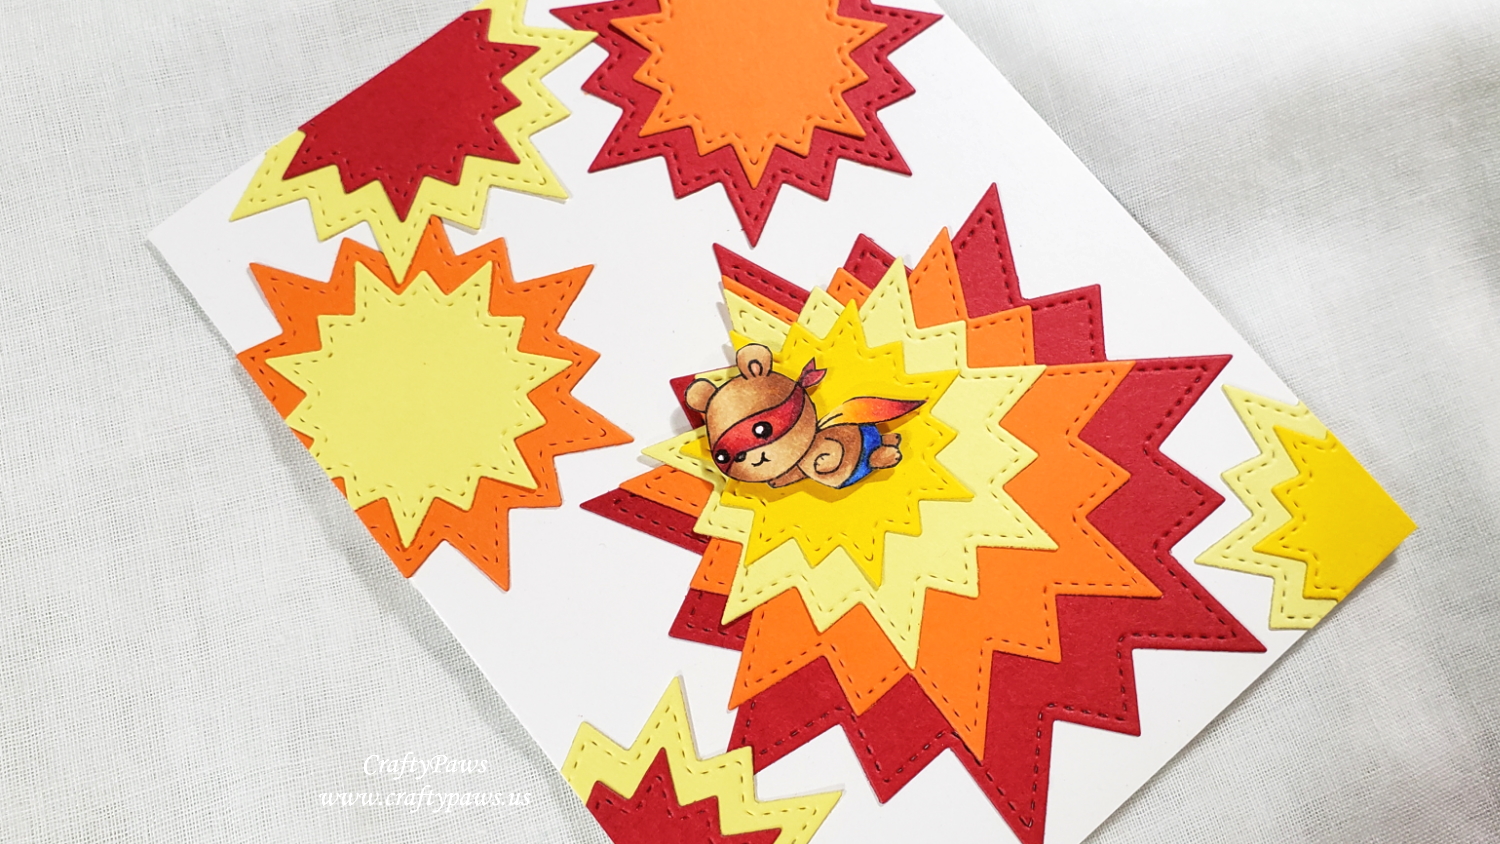
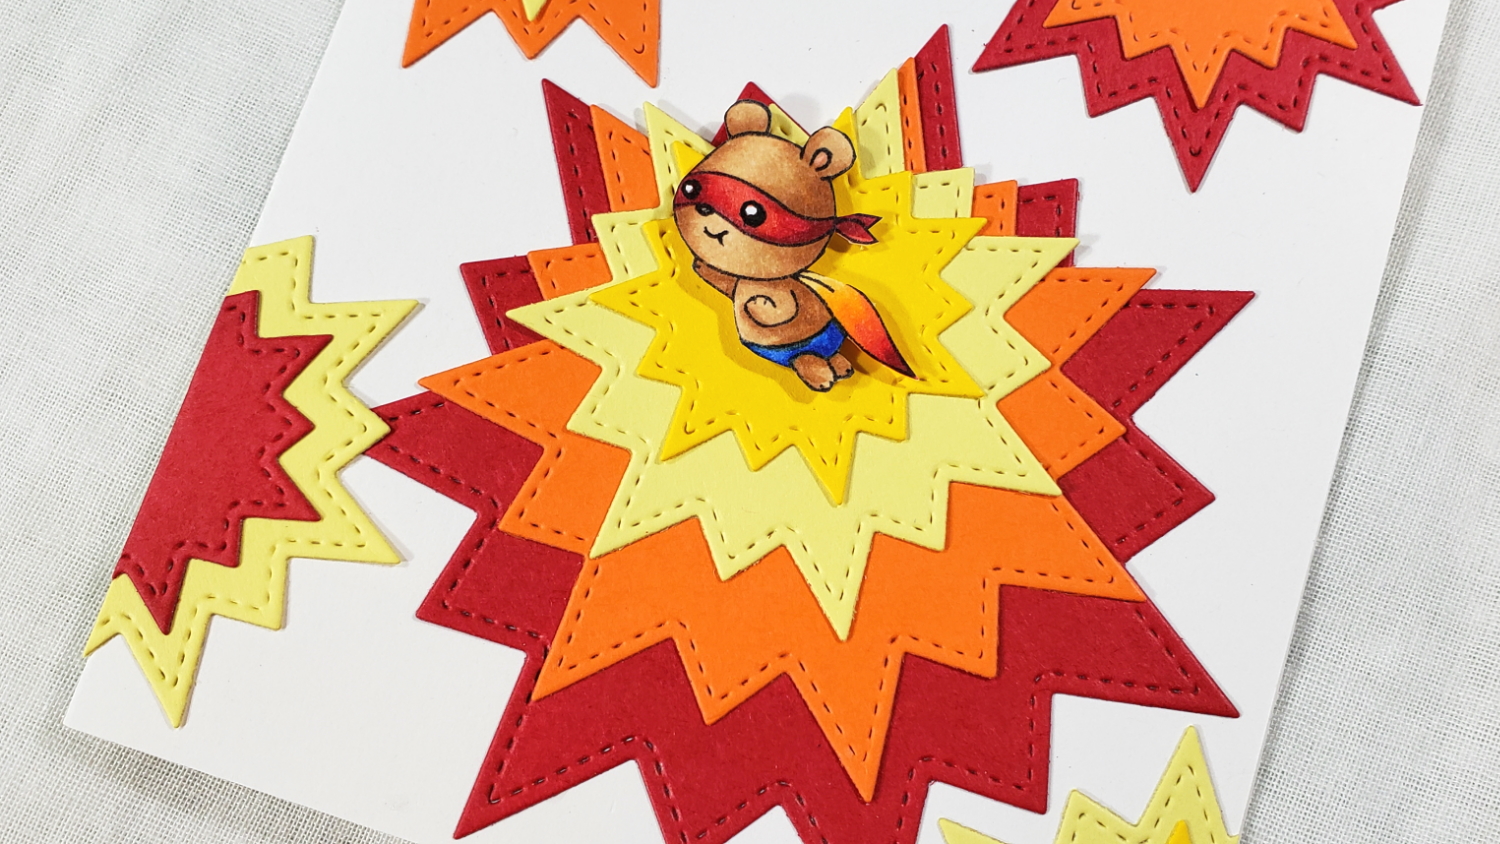
I have fallen in love with the Nesting Dies Set and have so many superhero card ideas (and I think we can all agree that we need real super heroes especially now). This card is made with just some scrap card stock in red, orange, and yellows (I love how you can really use up lots of scraps with dies). I created a background of what I thought looked like explosions (I have been watching some old Batman shows, and I think I had the “kapows” on my mind), and I created a focal burst by offsetting a series of the Nesting Dies so that it might look like a little super hero was soaring toward us (anyone remember the opening tune to “Mighty Mouse”? – That’s where the title of this blog post comes from). The teddy bear super hero is from the Clearly Besotted “Caped Cuties” Stamp Set, which is retired, but a recent re-issue is available HERE.
I used the following Copic colors to color up the cute super hero:
Teddy bear: E30, E31, E33 and R20 for inside the ear
Blue shorts: B24, B28
Red Mask: R24, R29, R39
Ombre cape: R39, R24, YR6, Y32
Then I fussy cut him out with my favorite Fiskars Spring Loaded Reverse Scissors (these were a life-saver since my arthritis has been acting up lately) and popped him up on foam dots for added interest.
This card, and others I crafted with this InLoveArtShop design team package is shared in the following video:
Disclosure: The dies used in this post were gifted to me free of charge as part of my design team package. Many of the supplies I’ve used for today’s project are linked. Some may be affiliate links, which means if you make a purchase I receive a small commission at no extra cost to you. I truly appreciate your support toward the costs of running this blog!
This card is being entered into the following challenges:
Simon Says Stamp Monday Make Your Own Background Challenge
Simon Says Stamp Wednesday Anything Goes Challenge
Penny Black and More Boys and Men Challenge
Creatalicious Anything Goes with Optional Birthday Challenge
Crafts Galore Encore Anything Goes Challenge
Lil Patch of Crafty Friends Anything Goes Challenge
Through the Craft Room Door Anything Goes Challenge
When Inloveartshop.com reached out to me to resume my design team work, I took it as a motivation and sign that to remember self-care (which for me is crafting). I picked out a handful of dies, and when they arrived (about a month after I placed my order) I was immediately inspired to return to crafting. NOTE: My readers can get 15% off their entire order from InLoveArtShop.com by using the code FSCraftyPaws at check out.
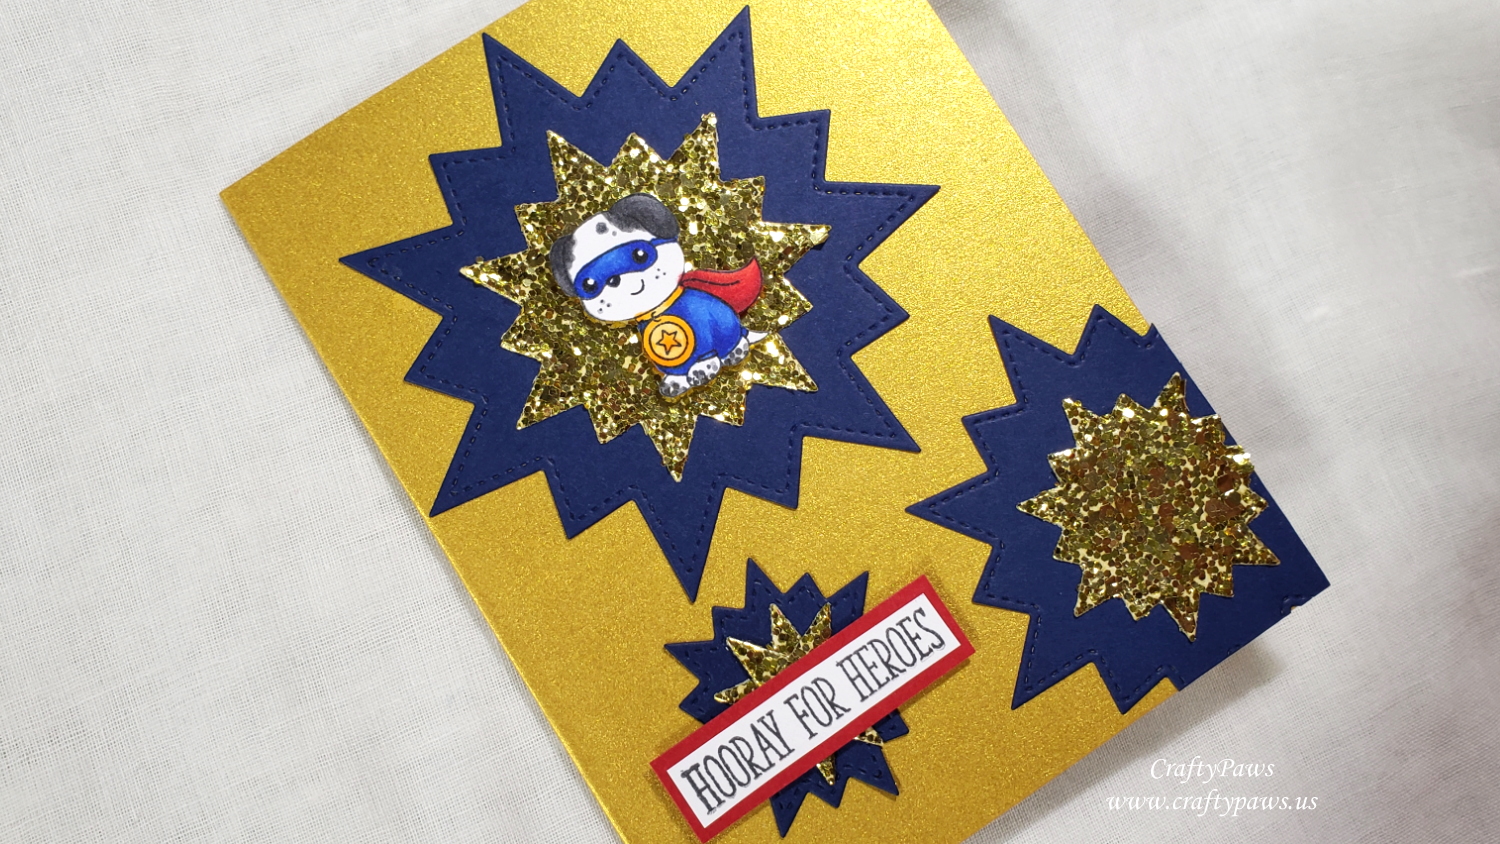
I absolutely fell in love with the Nesting Dies Set and had so many superhero card ideas running through my mind. This first card is made with just some scrap glittered card stock, navy card stock, shimmery gold card stock (for the card base), and a cute puppy super hero from the Clearly Besotted Caped Cuties Stamp Set (retired, but a recent re-issue is available HERE).
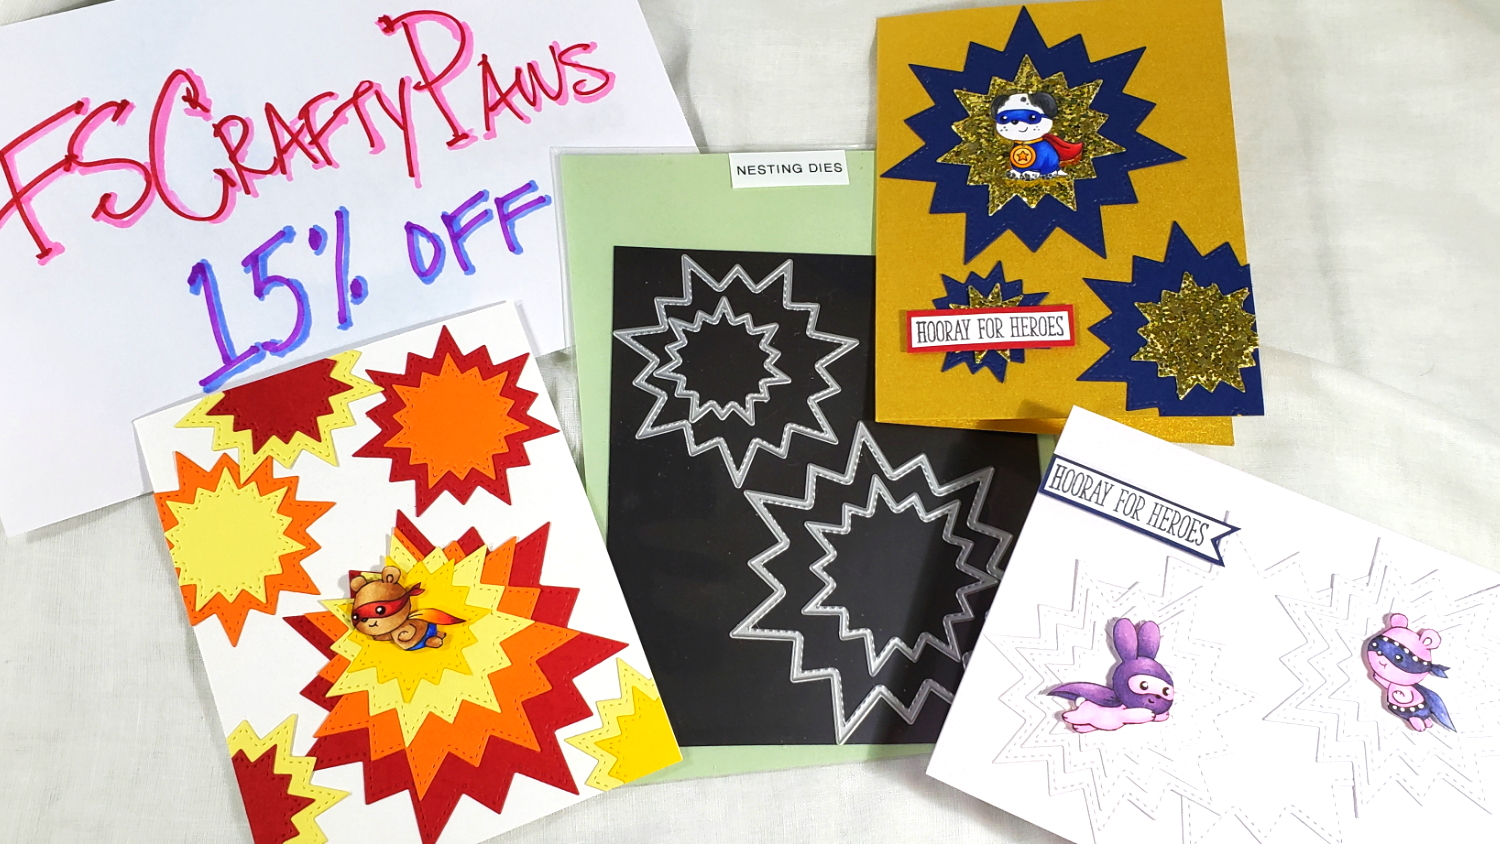
For the explosions, I used every other size of the Nesting Dies to cut out the bursts in the glittered card stock and the navy card stock, leaving a bit of space between (if I had used every size, the burst would have been much closer together). I also used a star die and stacked them to make athe center of the smallest burst. Since the star obviously didn’t look like the other bursts, I covered that last burst with the sentiment from the Clearly Besotted Hooray For Heroes Stamp Set (retired).
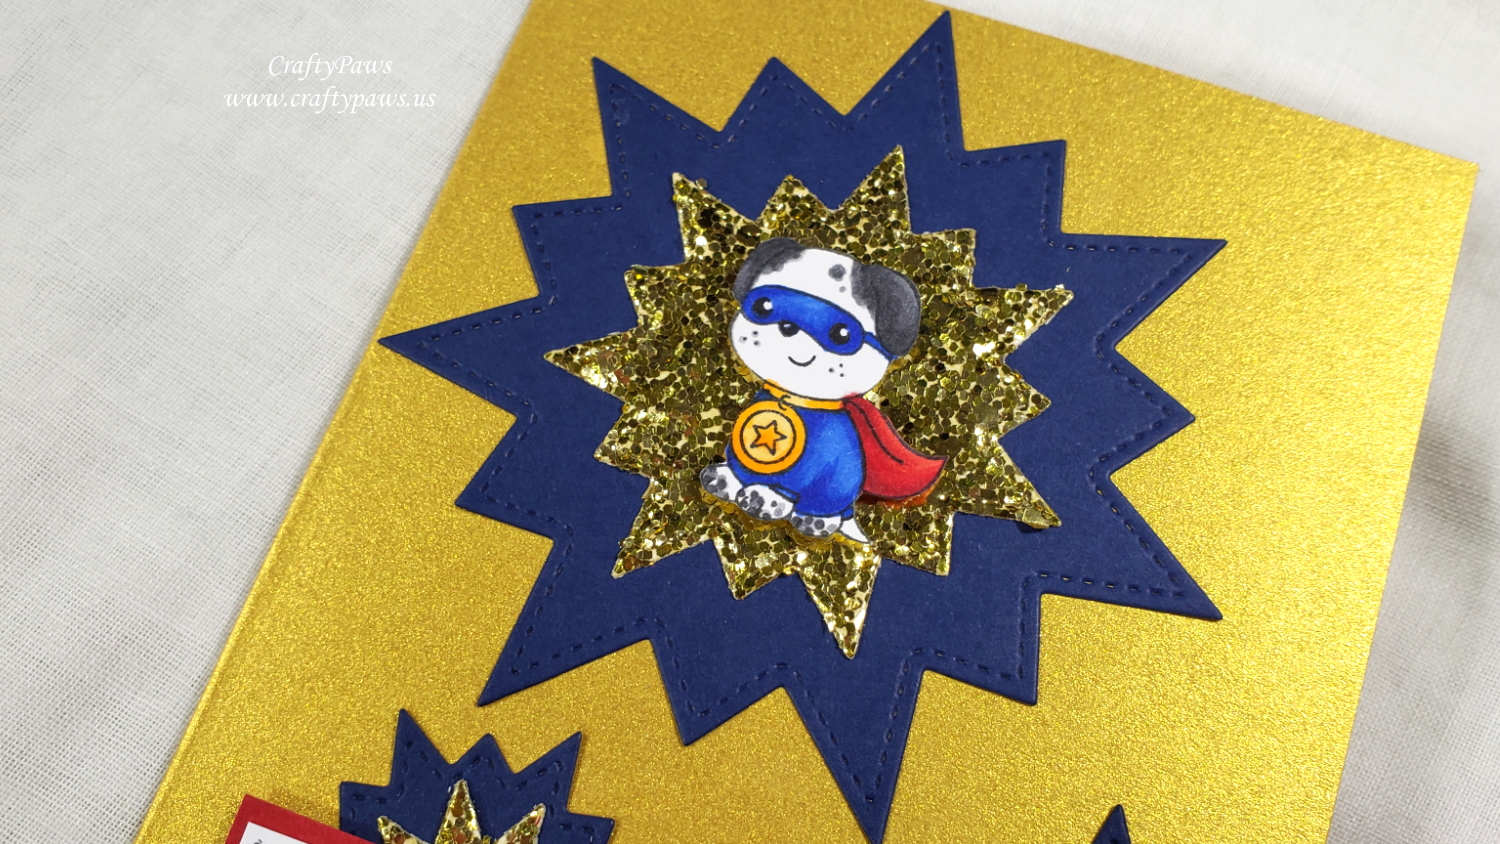
I used the following Copic colors to make the puppy super hero look like our Babaloo:
Black spots: N3, N5, N7
Gold medallion: Y32, Y38, YR16
Blue suit: B24, B28
Red cape: R24, R29, R39
Then I fussy cut him out and popped him up on foam dots to add a little dimension.
This card, and others I crafted with this InLoveArtShop design team package is shared in the following video:
Disclosure: The dies used in this post were gifted to me free of charge as part of my design team package. Many of the supplies I’ve used for today’s project are linked. Some may be affiliate links, which means if you make a purchase I receive a small commission at no extra cost to you. I truly appreciate your support toward the costs of running this blog!
This card is being entered into the following challenges:
Lil Patch of Crafty Friends Anything Goes Challenge
Through the Craft Room Door Anything Goes Challenge
Penny Black and More Men and Boys Challenge
Crafts Galore Encore Anything Goes Challenge
Simon Says Stamp Monday Make Your Own Background Challenge
Simon Says Stamp Wednesday Anything Goes Challenge
Creatalicious Anything Goes with Optional Birthday Challenge
]]>
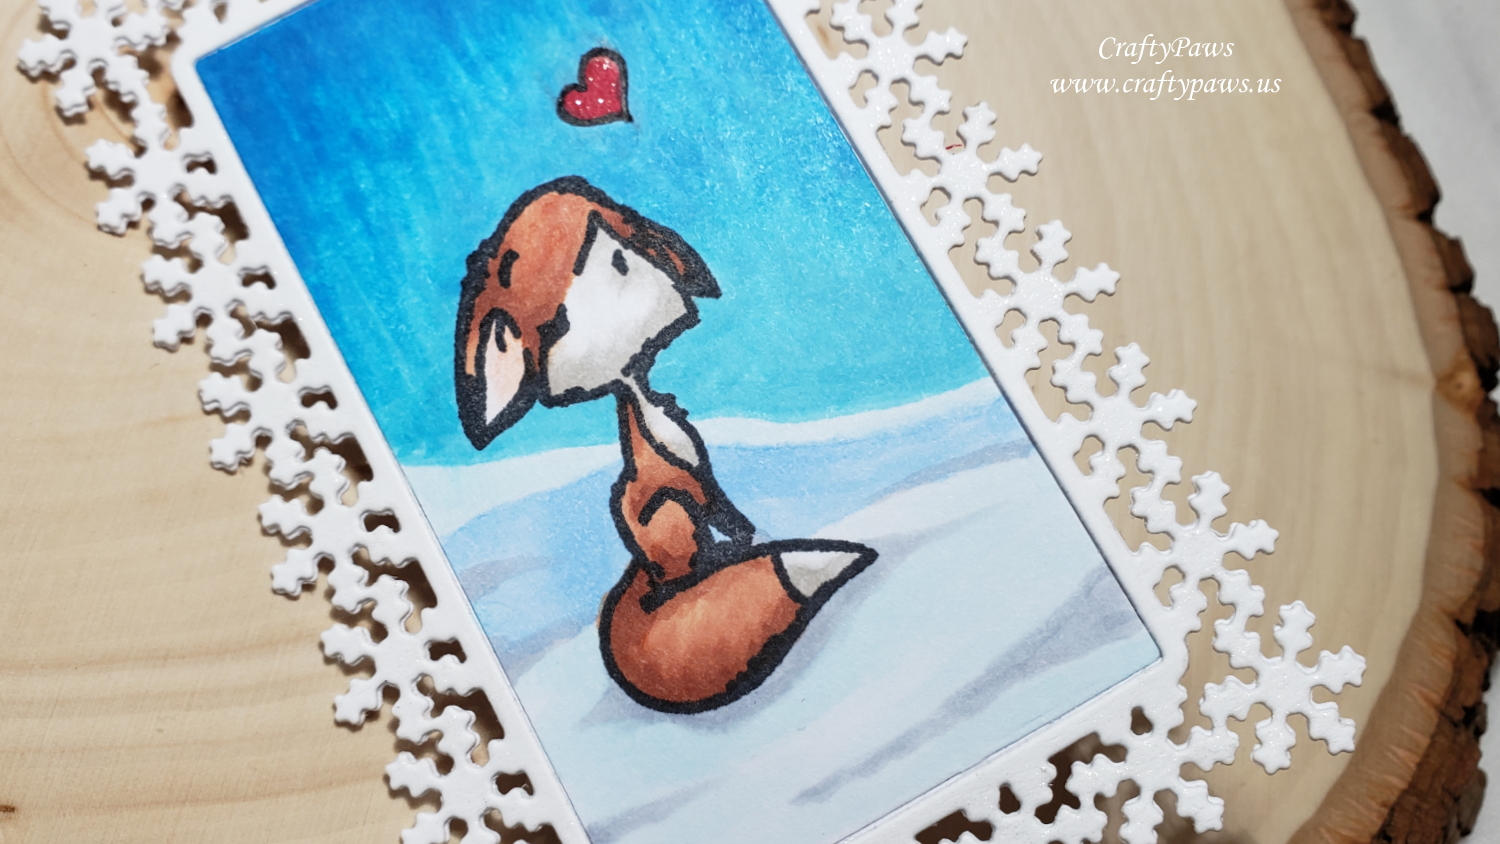
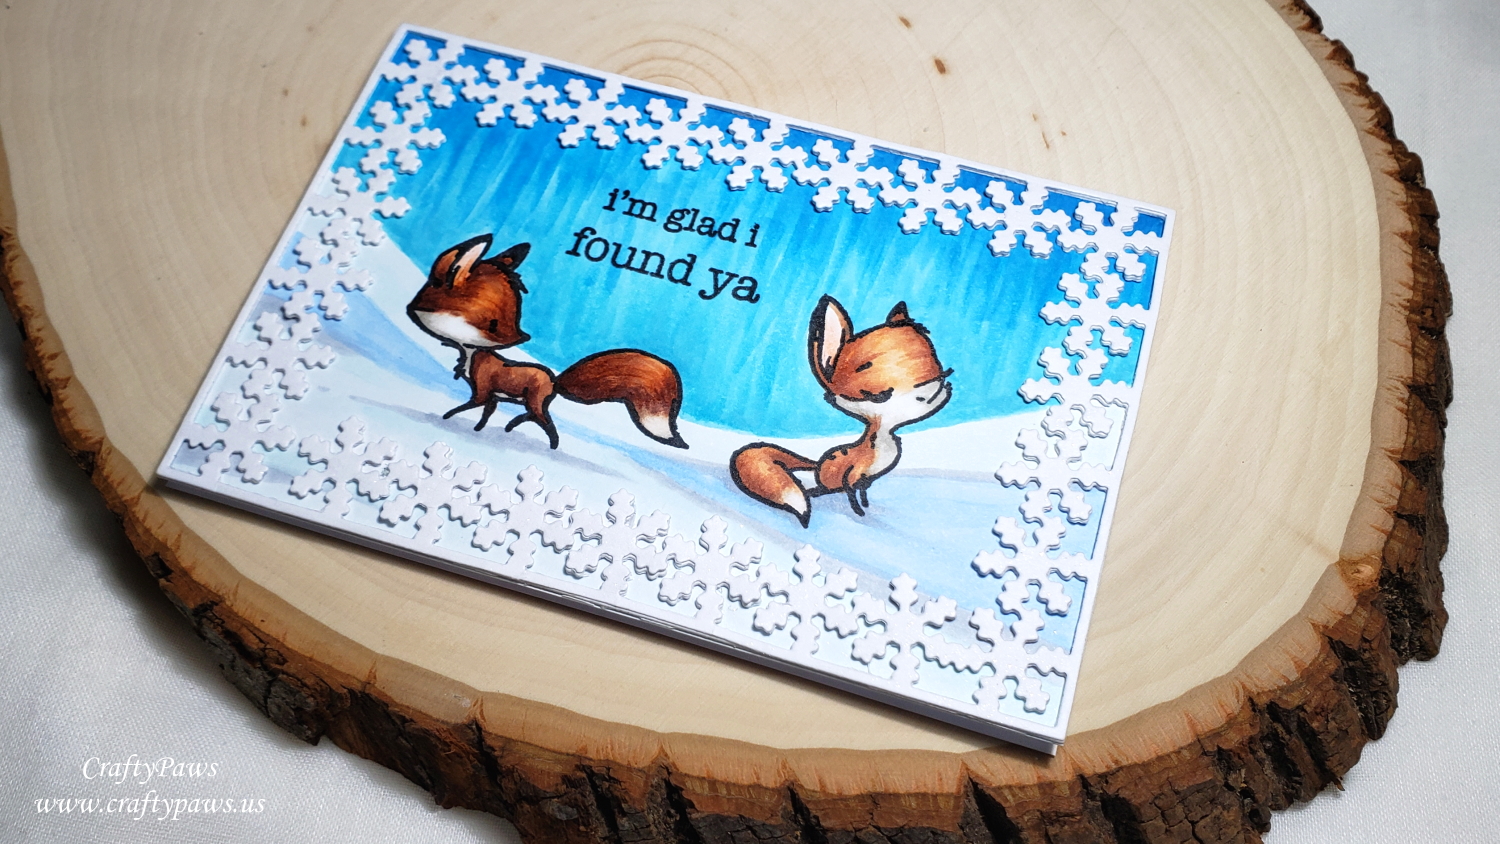
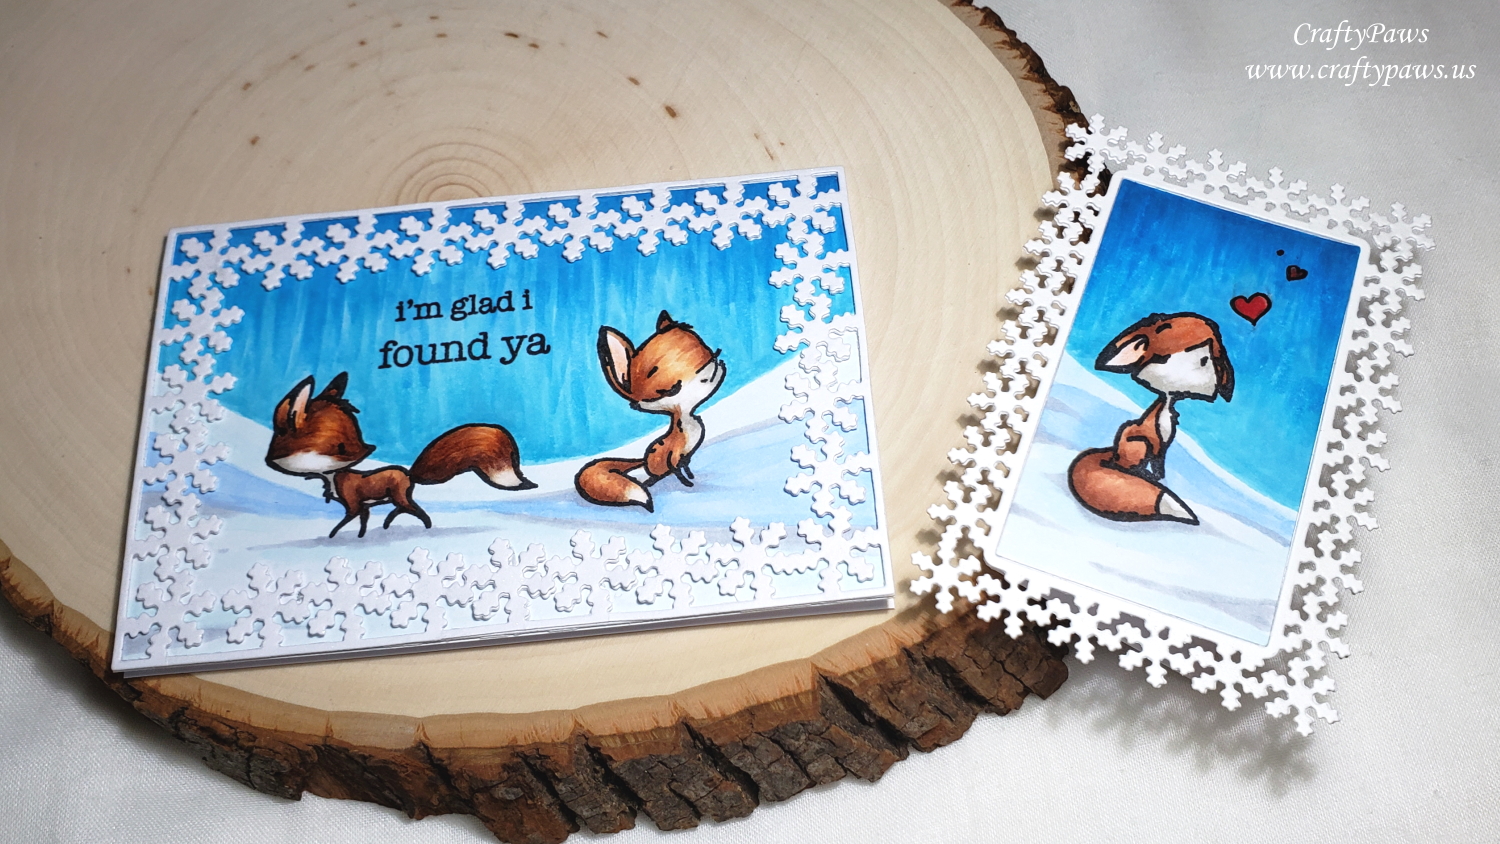
The Snowflake Frame Dies at first glance seem like they might be best for Christmas or New Years, but as I didn’t get to use them this past holiday season, I decided they would make the perfect festive and wintery frames for Valentines scene cards. Obviously Valentines Day occurs when it is the full height of winter, and creating simple foxy winter scenes with the Picket Fence Studios “Like a Crafty Fox” stamp set (one of my new favorites) seemed like a natural fit.
I used the following Copic colors to color up the foxes and the snowing scenes:
Fox Howling: Ears: R30; White fur: W2 and W3; Brown fur: E11, E13 and E15
Hearts (drawn in with a 0.1 pt Copic Multiliner Pen): E32 and R29 and a bit of Clear Wink of Stella for shimmer
Feminine Fox: Ears: R30; White fur: W2 and W3; Brown fur: E21, E13 and E15
Fox Looking Back: Ears: R30; White fur: W2 and W3; Brown fur: E11, E23 and E18
Snowy Ground: B32, B000 and C2
Crisp Sky: B01, B02 or BG01 and B04
I stacked two to three layers of the Snowflake Frames to build up card structure strength and dimension. To add a little sparkle, I topped the last layer with Clear Wink of Stella.
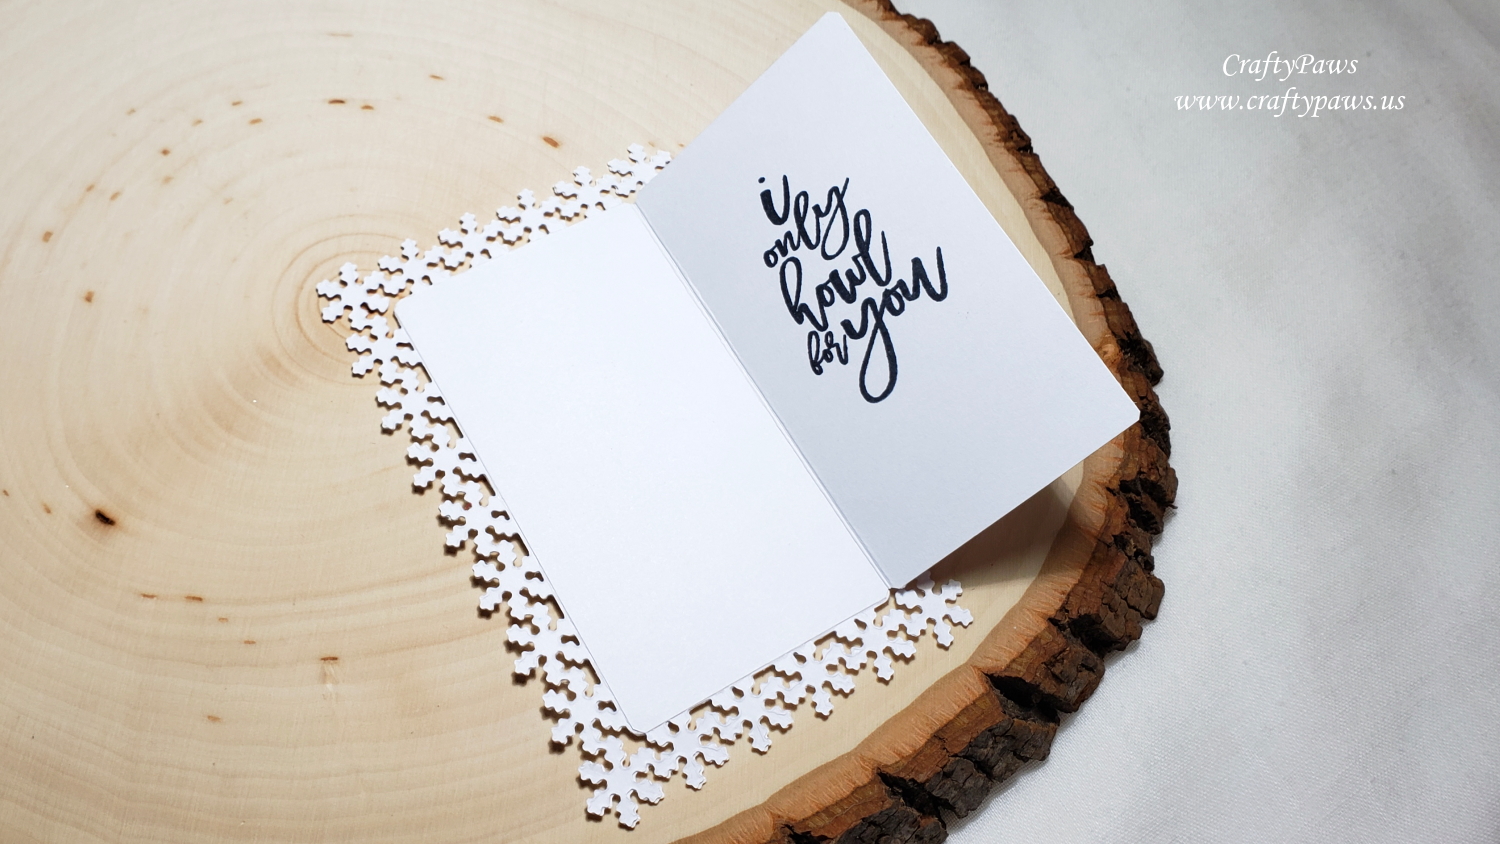
For the little card (that I thought would be a fun note to include with a packed snack for Mr. CraftyPaws), I used the sentiment, “i only howl for you” on the inside. There is just enough room to add a short handwritten. For the main Valentines Day card, I used the first three words of one sentiment, “i’m glad i caught you” (masking off the unwanted words with a strip of washi tape before inking and removing the mask before stamping) and the “found ya” sentiment, both from the Picket Fence Studios “Like a Crafty Fox” stamp set. I thought that sentiment could express the sentiment of the boy fox doing a double-take of the feminine foxy girl. 🙂
CLICK on the following picture to watch the process video:
These cards are being entered into the following challenges:
Crafts Galore Encore Anything Goes Challenge
Penny Black and More Make it Feminine Challenge
Crafty Gals Corner Winter Fun Challenge
Stamping Sensations Favorite Stamp Challenge
Creatalicious Anything Goes with Optional Add a Snowflake Challenge
Word Art Wednesday Anything Goes Challenge
Simon Says Stamp Work it Wednesday Snowflakes Challenge
]]>
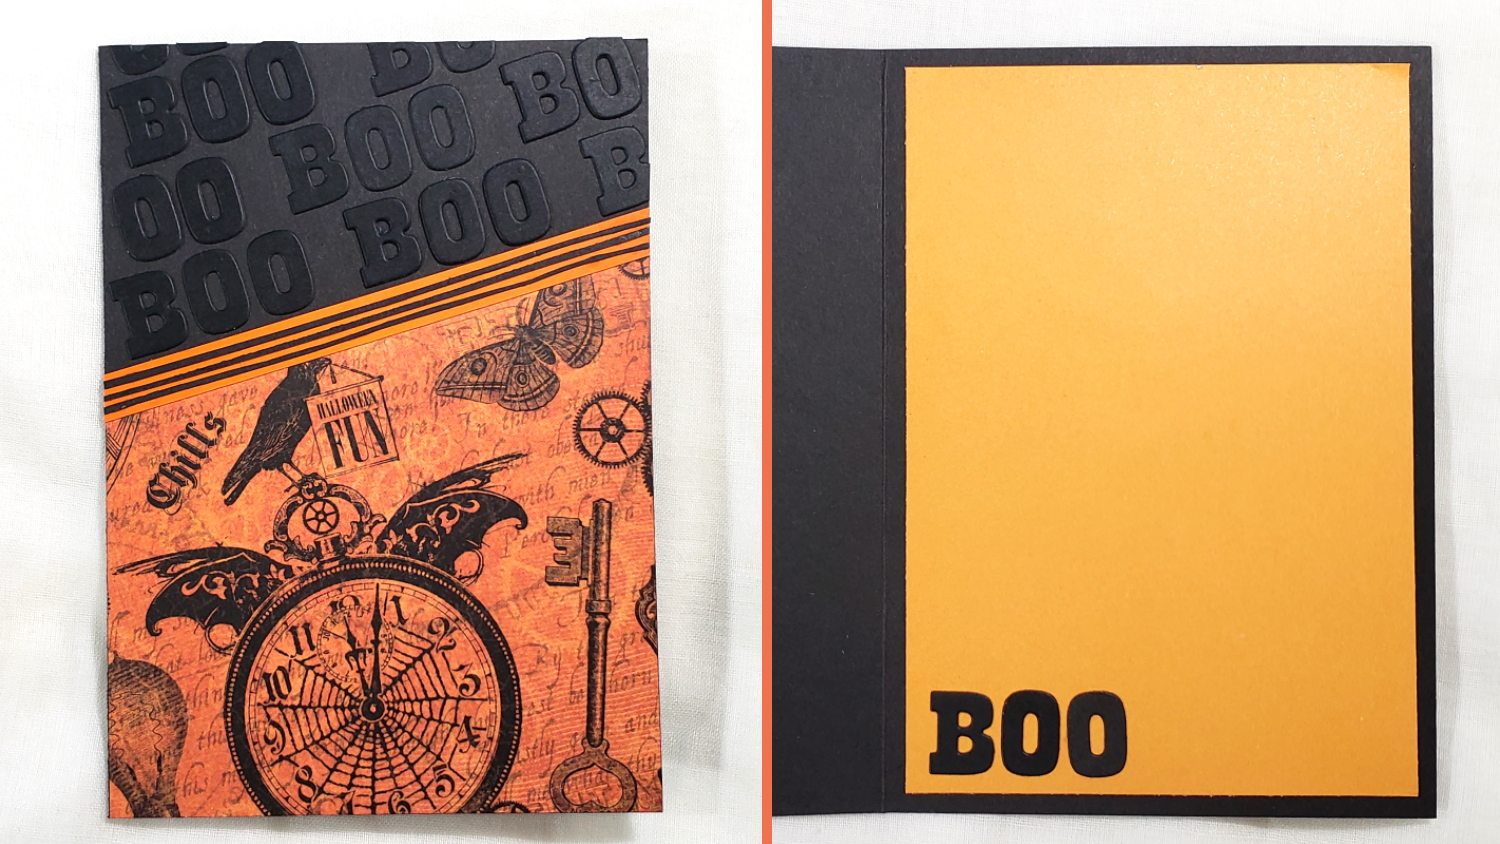
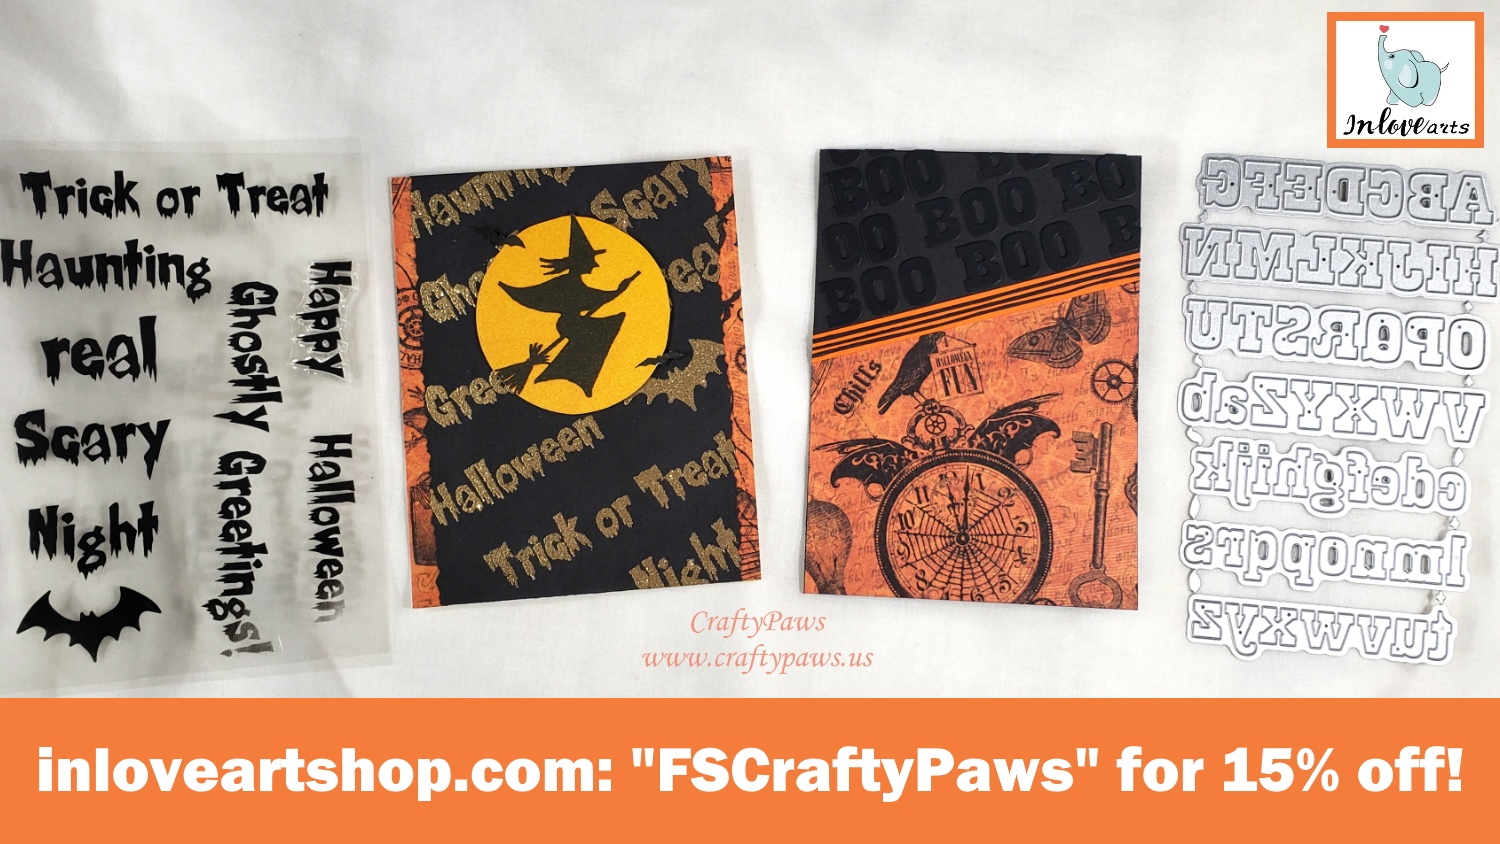
The BOO card is one that could easily be modified for any holiday or occasion just swapping out the patterned paper and using different words to repeat at the top 1/3 of the card. I die cut the letters “B” and “O” a bunch from the die set so that I could repeat “BOO”, including adding some differences in depth for alternating single and double layered BOOs. I wanted it to have a sophisticated look so I used premium extra thick black card stock matching my card base. For the lower 2/3 of the card, I used a scrap of Graphic 45 Steampunk Spells Collection. I also used a little scrap of orange card stock to add a finishing edge between the patterned paper and the die cut Boos.
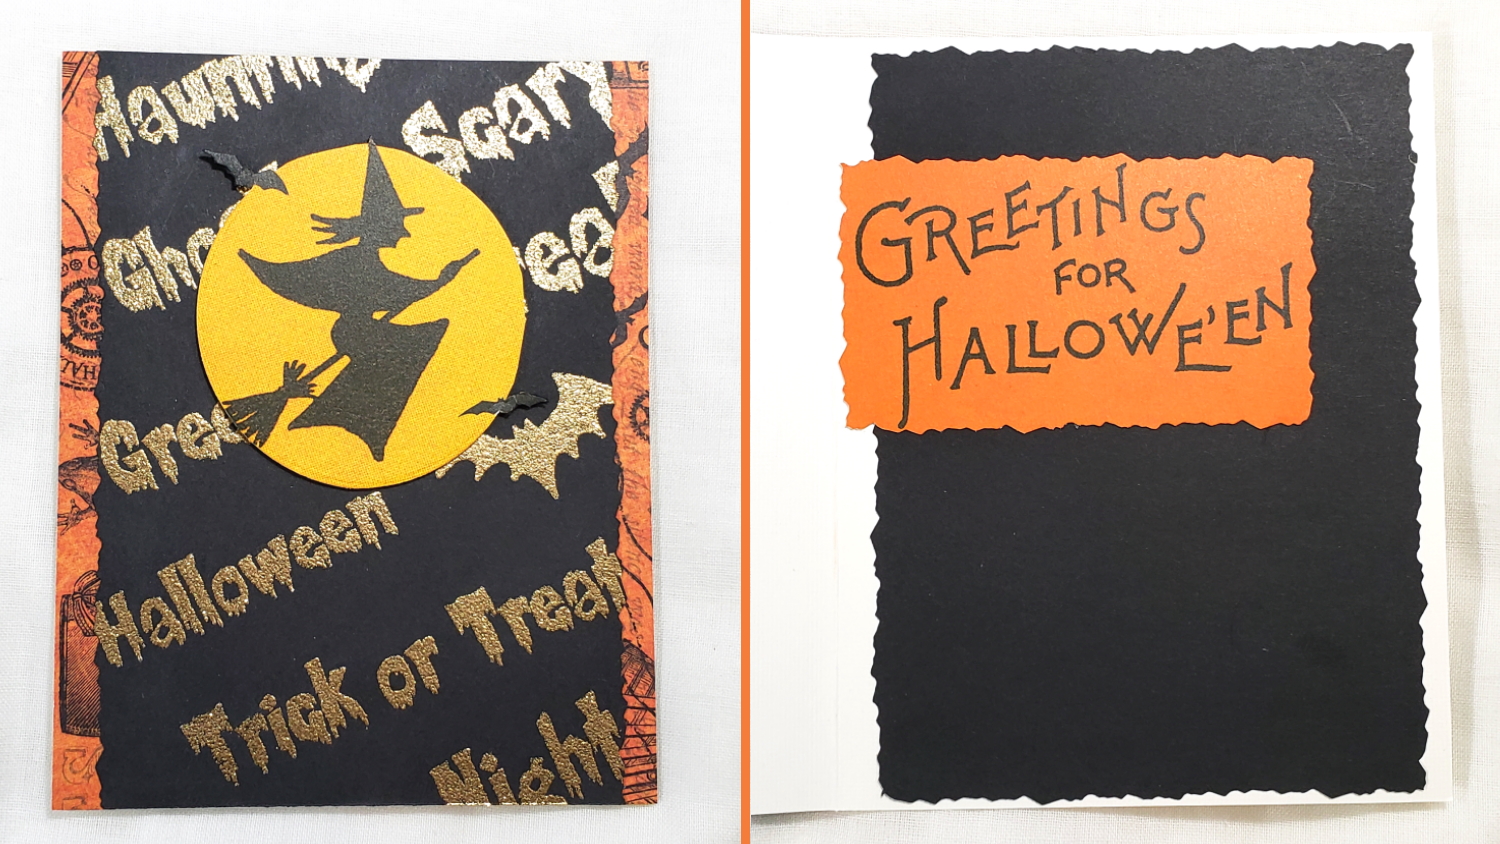
The Halloween Word Background card was also done on black cardstock but this time I wanted more contrast, so rather than using black embossing powder, I used Ranger Gold Tinsel Embossing Powder with VersaMark Ink to stamp out and heat emboss all but one of the stamps from the Halloween Word Stamp Set. I then cut down the card front with an oldie but a goodie – my Fiskars Deckle patterned paper edger scissors! I trimmed the edges of both sides of the card front with more of the left over Graphic 45 Steampunk Spells Collection paper, and then cut the whole thing down to fit a standard card base. Then I took a silhouetted witch flying in front of a moon flanked by two bats and popped that ephemera piece on foam dots to add a little dimension. For the inside of the card, I used my Deckle scissors again and cut down a black card liner and a trimmed down sentiment that read, “Greetings for Halloween”.
CLICK on the following picture to watch the start to finish process video of crafting both cards:
Disclosure: Many of the supplies I’ve used for today’s project are linked. Some may be affiliate links, which means if you make a purchase I receive a small commission at no extra cost to you. I truly appreciate your support toward the costs of running this blog!
]]>