
I was so happy to be able to easily create this over-sized card using the Inloveartshop Stackables Spiral Pattern Decor Dies to create a background that highlights two focal point images. I cut out 4 sizes of the stackable spiral circles in various shades of purple — lavender, periwinkle, and deep purple. I stacked them progressively smaller and then spaced them out on a white card front on a periwinkle card base. To keep a cohesive look, I connected the stacked spirals with a strip of lavender card stock through the middle of the card. I also used a simple circle die (from the versatile Diemond Dies Die-Normous Stack-Ems Circle Nesting Die Set) to create a light background from which the puppy images could pop. NOTE: My readers can get 20% off by using the DISCOUNT CODE: G-36967 at the Inloveartshop checkout.
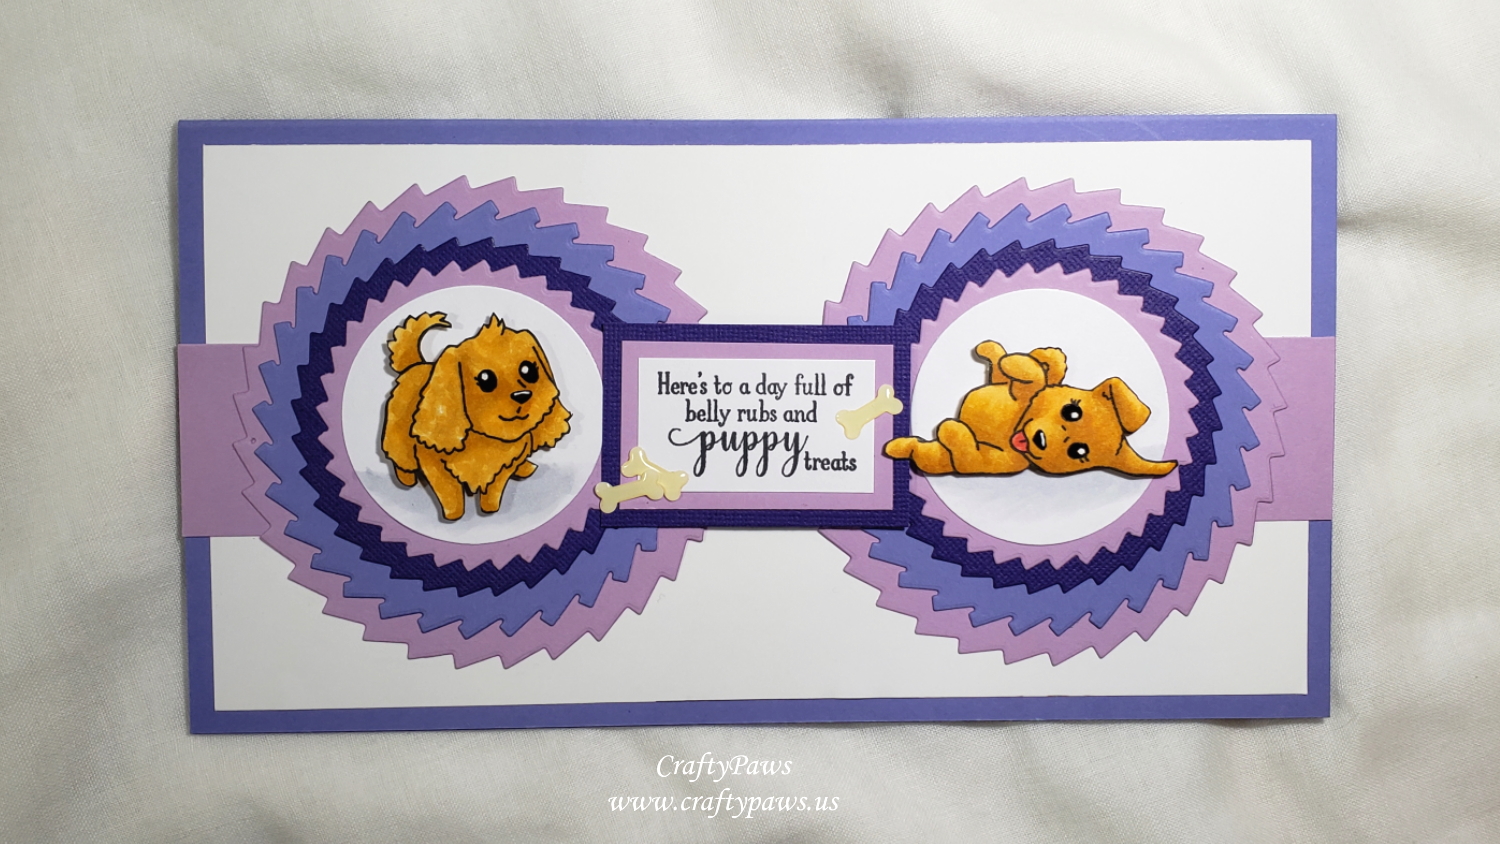
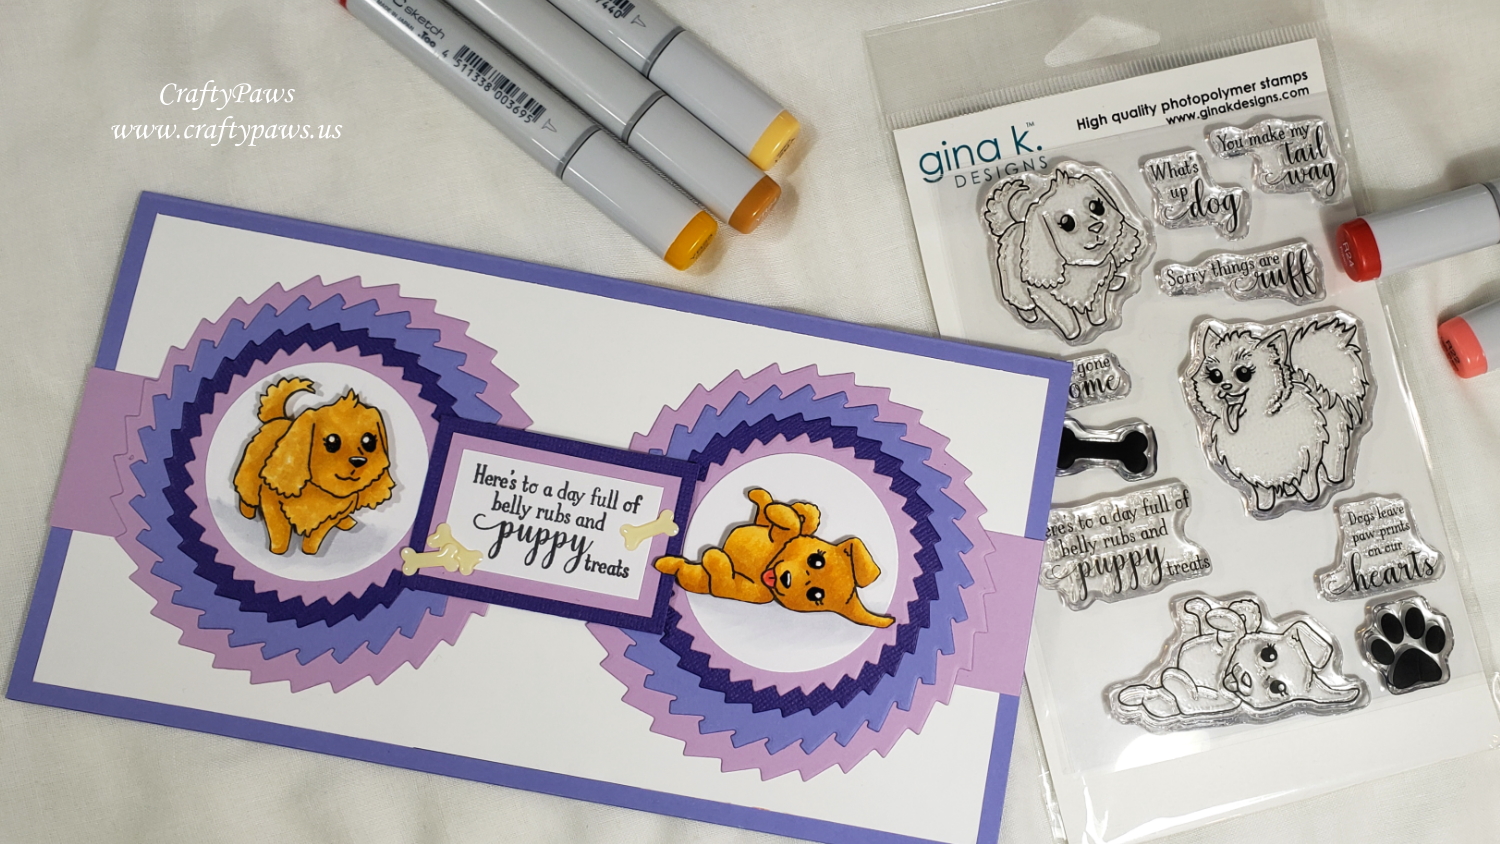
For the focal images, I finally got to color up the poodle and the paws-up puppy from the Gina K Designs “Playful Pups” stamp set (retired). As my niece’s new puppy is an apricot mini poodle (like my sweet Biscuit was), I colored up the dogs with the following Copic colors:
Fur: YR21, YR23, YR24
Nose: W7
Tongue: R22 and R24
Ground for background white circles: C1
After fussy cutting them with my Fiskars Spring Loaded Reverse Scissors, I inked the edges of the cut images with a Memento Tuxedo Black Marker for a clean finished look. I also popped up the puppies on double sided foam adhesive to add even more dimension.
For the sentiment, I used the “Here’s to a day full of belly rubs and puppy treats” from the same stamp set. To help the sentiment stand out, I matted them with more scraps of the lavender and deep purple card stock that I had used for the background, and I also back the sentiment with more double sided foam adhesive. I had a few enamel bones from a Doodlebug Designs sticker set from the Puppy Play Collection (retired), so I added 3 to the sentiment for embellishments.
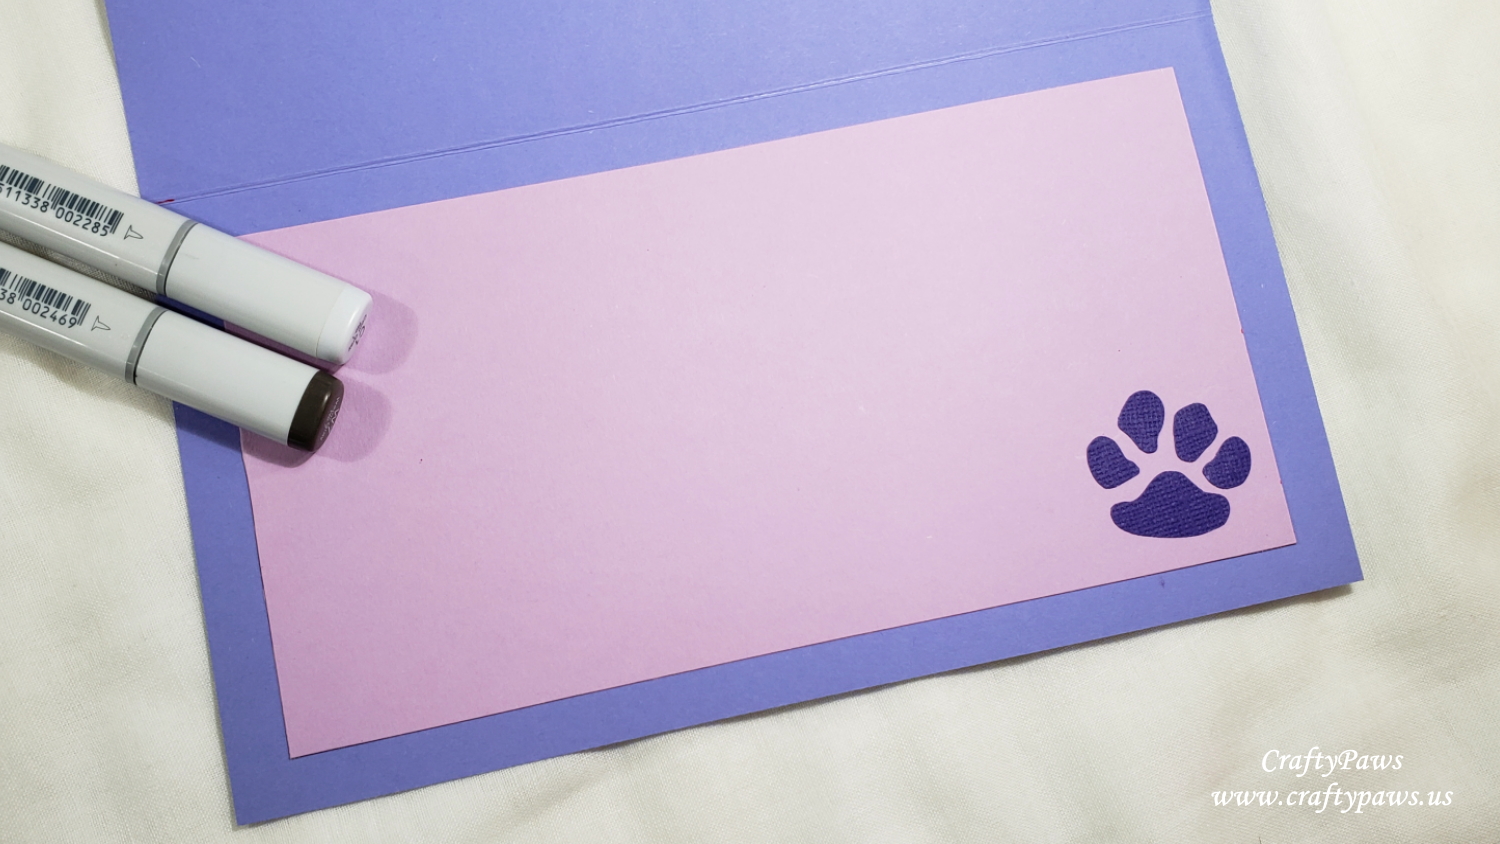 For the inside card liner, I used the remainder of the lavender card stock sheet. And for a little interest, I also used an old Fiskars Furry Friends Paw Squeeze Punch with a bit of the deep purple card stock for an accent paw print inside the card.
CLICK on the picture below to watch the card making video:

Disclosure: Many of the supplies I’ve used for today’s project are linked. Some may be affiliate links, which means if you make a purchase I receive a small commission at no extra cost to you. I truly appreciate your support toward the costs of running this blog!
This card is being entered into the following challenges:
Creatalicious Anything Goes with Optional Use Green Challenge
Word Art Wednesday Anything Goes Challenge
Through the Craft Room Door Anything Goes Challenge
Crafts Galore Encore Anything Goes Challenge
Stamping Sensations Monochromatic Challenge – purples
]]>
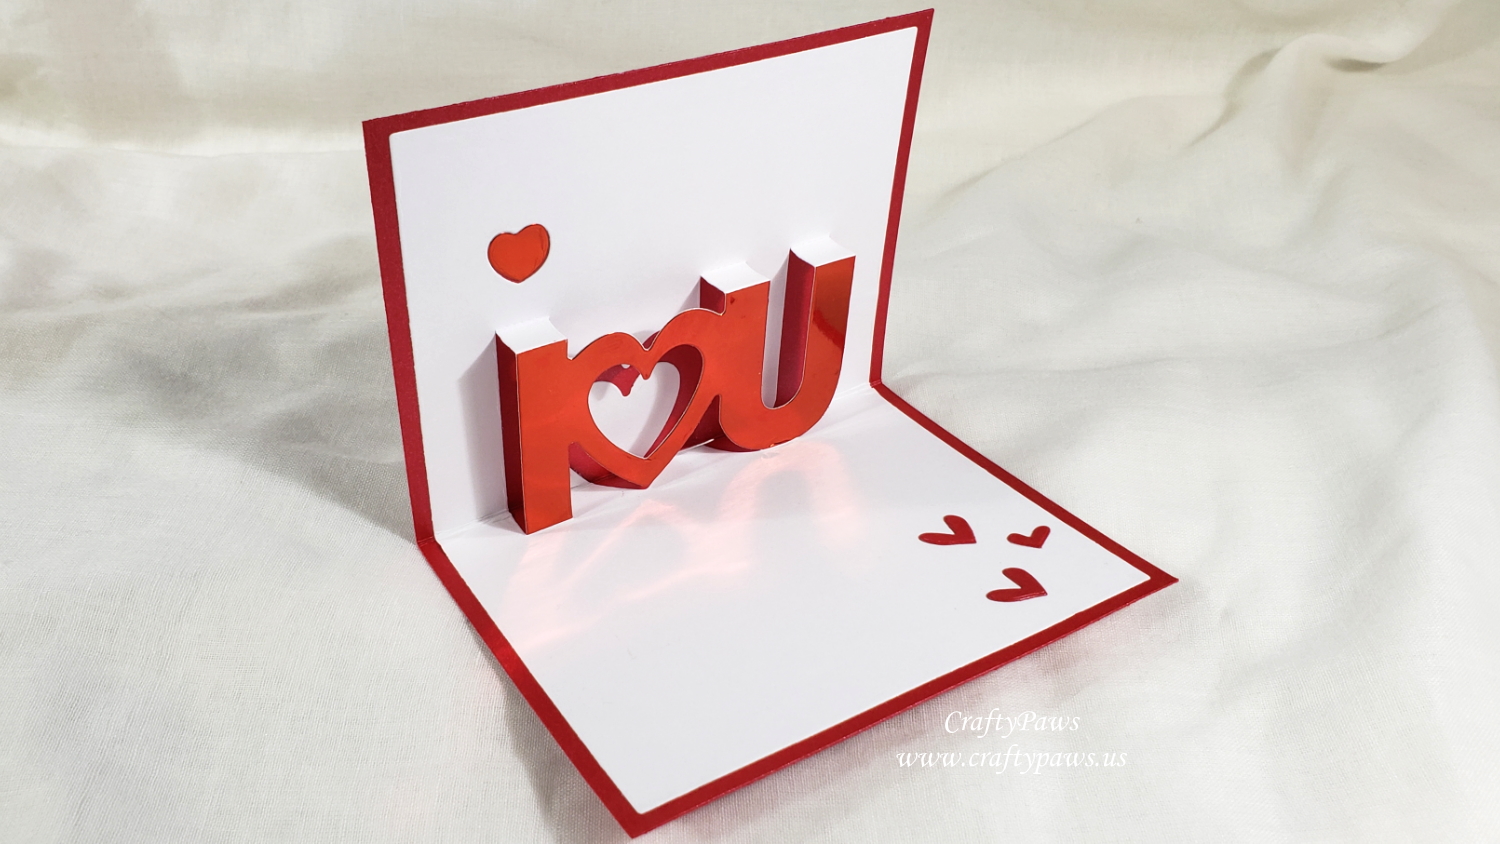
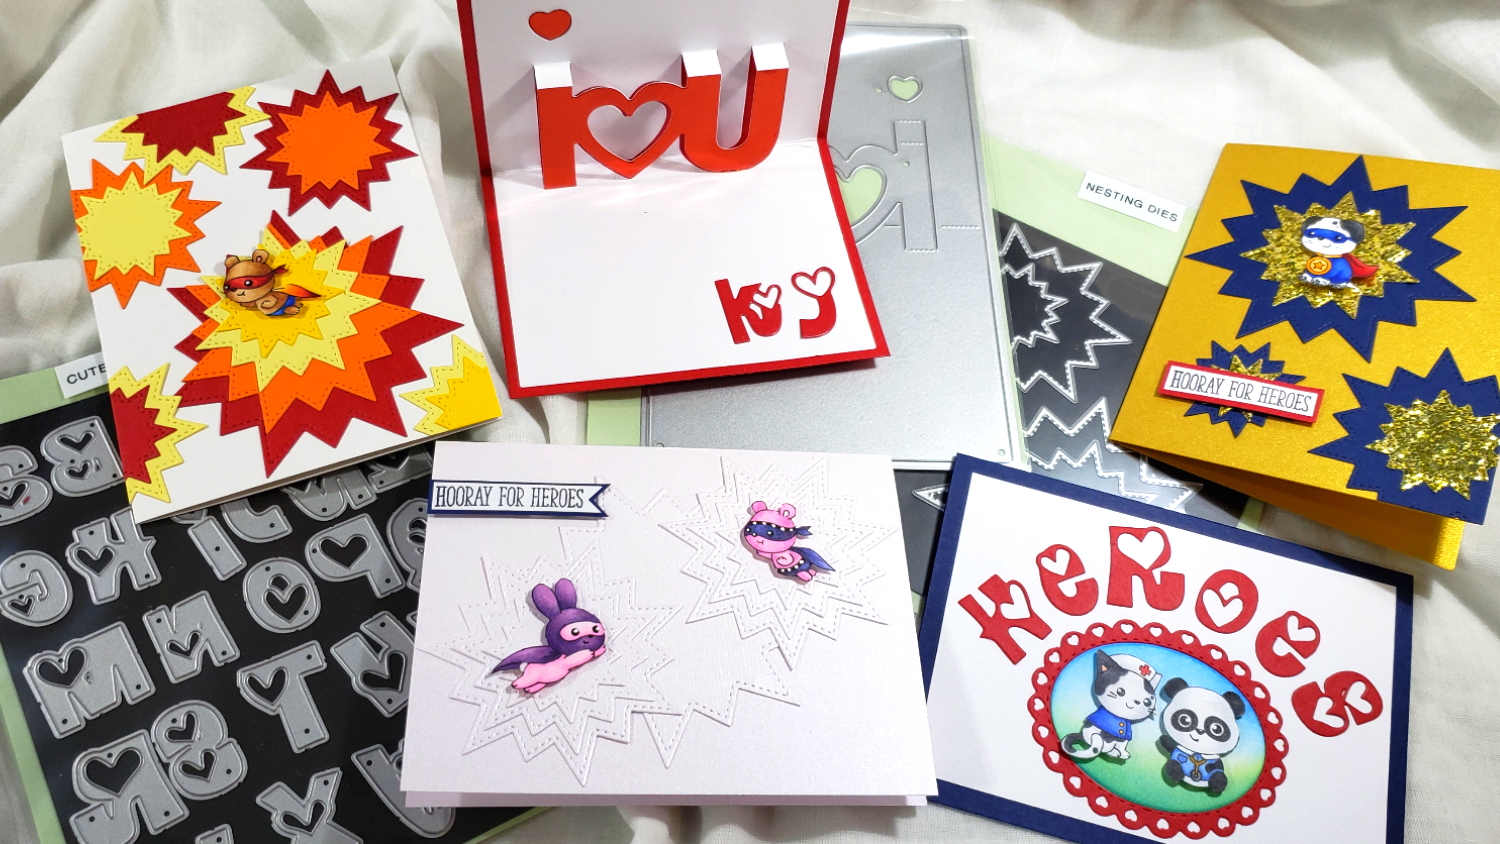
Anyway, as with all the holidays and birthdays this crazy year, Father’s Day kind of snuck up on me. So today, I whipped together this fast fun pop up card for my dad. I used 3 die sets from InloveArtShop: Cute Love Heart Alphabet Dies (SKU: DMZH813): https://bit.ly/2z3JaeK ; I Love U Pop Up Card Die (SKU: DMZH514): https://bit.ly/2ze11A1 ; and Hollow Heart Frame Dies (SKU: DMZH385): https://bit.ly/2xCpZZ6 PLEASE NOTE: My readers get 15% off their entire order at InLoveArtShop by using the coupon code: FSCraftyPaws at check out.

The inside of the card was super easy to craft using the I Love U Pop Up Card Die. I die cut a piece of white card stock with the I {heart} U die that results in a card liner about 7.25″ x 4.5″. Then I folded up (mountain) along the dotted lines by the tops of the letters and heart, and folded down (valley) along the dotted lines by the base of the letters and heart. I cut the card base from shimmery red card stock to measure 7.5″ x 4.75″ so that there would be a 1/8″ border all around. Lastly, I used wet glue along the back of the white card stock (except for the pop out tab areas) and lined up the center fold with the card base center fold. I also lined up the inside of the heart and glued that white die cut into place. Using a bone folder I burnished down the white card liner to make sure all the glued parts were secure. To add an extra sparkle, I die cut the I {heart} U again from red metallic card stock and fussy cut out the tops and bottoms so that I could glue this high shine layer over the heart dotting the I as well as the I {heart} U.
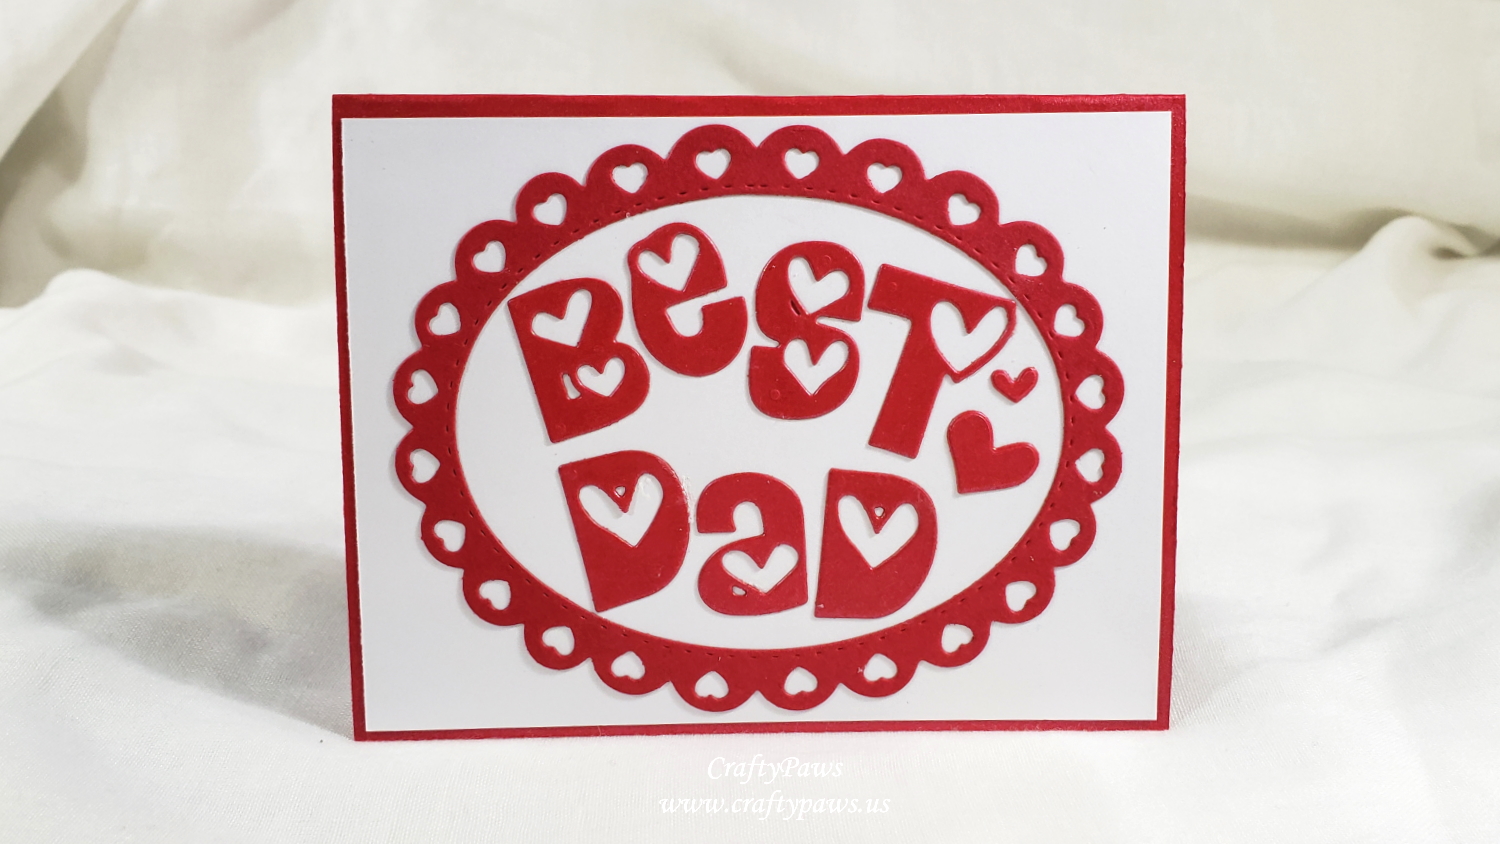
For the card front, I used plain white card stock just a bit smaller than the card base. Then I die cut the middle sized Hollow Heart Frame Die from the same shimmery red card stock. Lastly, I die cut the letters from the Cute Love Heart Alphabet Dies to spell out “BEST DAD”, using a couple of the spare hearts that were left over from the letters as decorations.
Although this was a fast-to-craft card, I think my dad will really like the fun pop up element. He loves interactive and unusual cards and will have no idea how easy this was to make. 🙂 CLICK on the picture below to watch the card in action:
This card is being entered into the following challenges:
Creatalicious Anything Goes with Optional No Designer Paper Challenge
Word Art Wednesday Anything Goes Challenge
Lil Patch of Crafty Friends Anything Goes Challenge
Through the Craft Room Door Anything Goes Challenge
Crafty Gals Corner You’re The Man Challenge
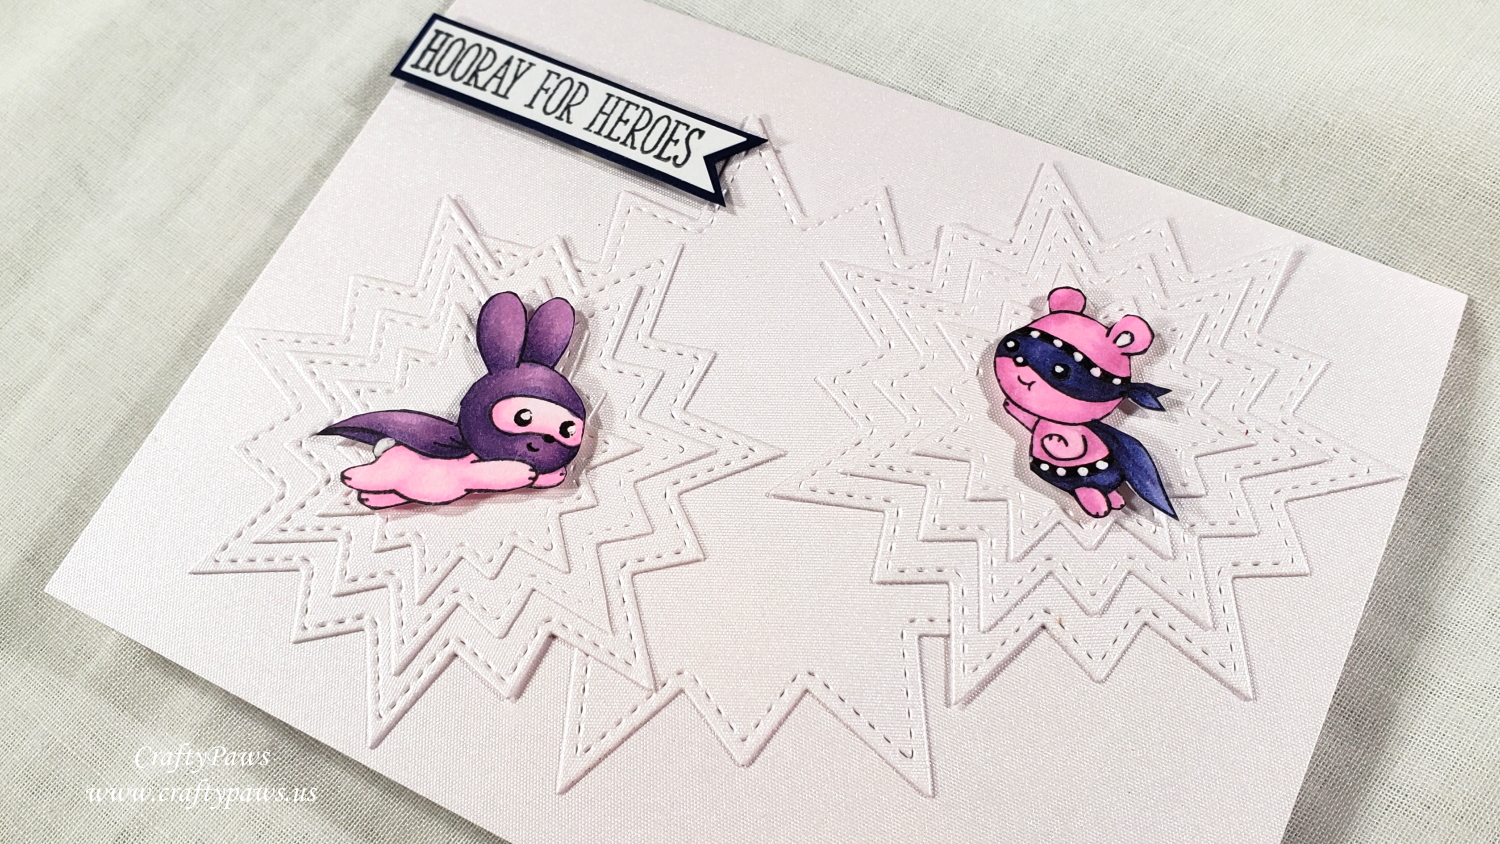
For this card, I decided to try to make the explosive background created with the Nesting Dies Set more like those cartoon reverberations. I used a white card stock card base and then used linen-textured white card stock for all the layered bursting nesting dies. The pops of color came into play as I decided to Copic color the caped cutie bunny and teddy bear as female superheros in pinks and purples:
Bunny body: RV000, RV00, and RV02
Teddy body: RV00, RV02, and RV55
Bunny costume: V12, V15, and V17
Teddy costume: BV02, BV04, and BV08
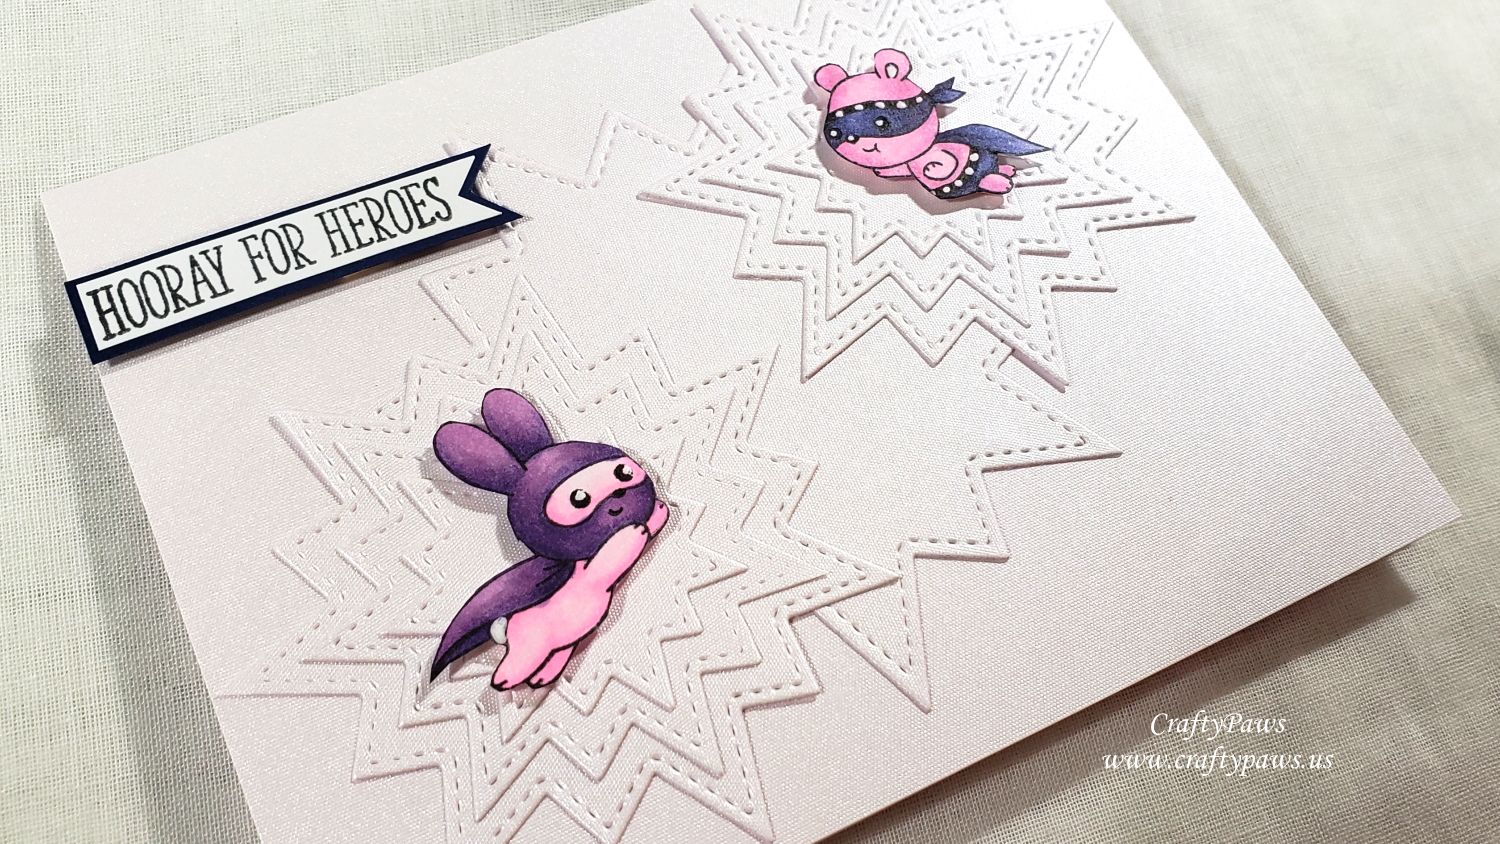
Because I accidentally bled my colors when coloring up the Teddy’s costume outside the lines I doodled on black and white striped accent bands with a 0.05 Copic Multiliner Pen and a Uniball Signo White Gel Pen. I also used the white gel pen to highlight the critters’ eyes, the bunny tail and inside the teddy’s ear. I used Fiskars Spring Loaded Reverse Scissors to fussy cut them out and popped them up on foam dots for added dimension.
This card, and others I crafted with this InLoveArtShop design team package is shared in the following video:

Disclosure: The dies used in this post were gifted to me free of charge as part of my design team package. Many of the supplies I’ve used for today’s project are linked. Some may be affiliate links, which means if you make a purchase I receive a small commission at no extra cost to you. I truly appreciate your support toward the costs of running this blog!
This card is being entered into the following challenges:
Word Art Wednesday Anything Goes Challenge
Crafty Gals Corner For the Ladies Challenge
Simon Says Stamp Monday Make Your Own Background Challenge
Creatalicious Anything Goes with Optional Birthday Challenge
Crafts Galore Encore Anything Goes Challenge
Lil Patch of Crafty Friends Anything Goes Challenge
Through the Craft Room Door Anything Goes Challenge
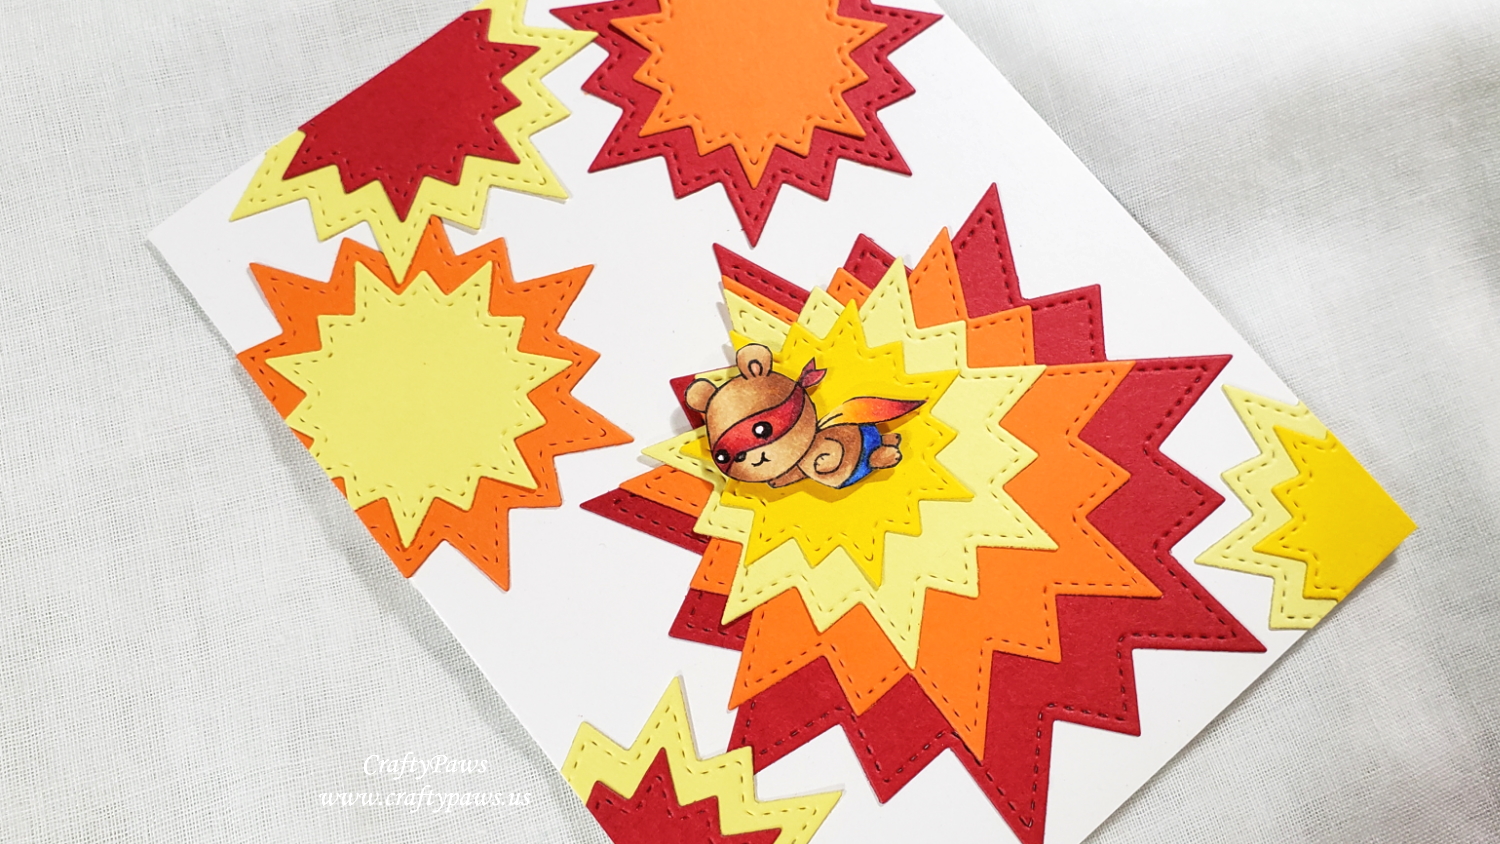
I have fallen in love with the Nesting Dies Set and have so many superhero card ideas (and I think we can all agree that we need real super heroes especially now). This card is made with just some scrap card stock in red, orange, and yellows (I love how you can really use up lots of scraps with dies). I created a background of what I thought looked like explosions (I have been watching some old Batman shows, and I think I had the “kapows” on my mind), and I created a focal burst by offsetting a series of the Nesting Dies so that it might look like a little super hero was soaring toward us (anyone remember the opening tune to “Mighty Mouse”? – That’s where the title of this blog post comes from). The teddy bear super hero is from the Clearly Besotted “Caped Cuties” Stamp Set, which is retired, but a recent re-issue is available HERE.
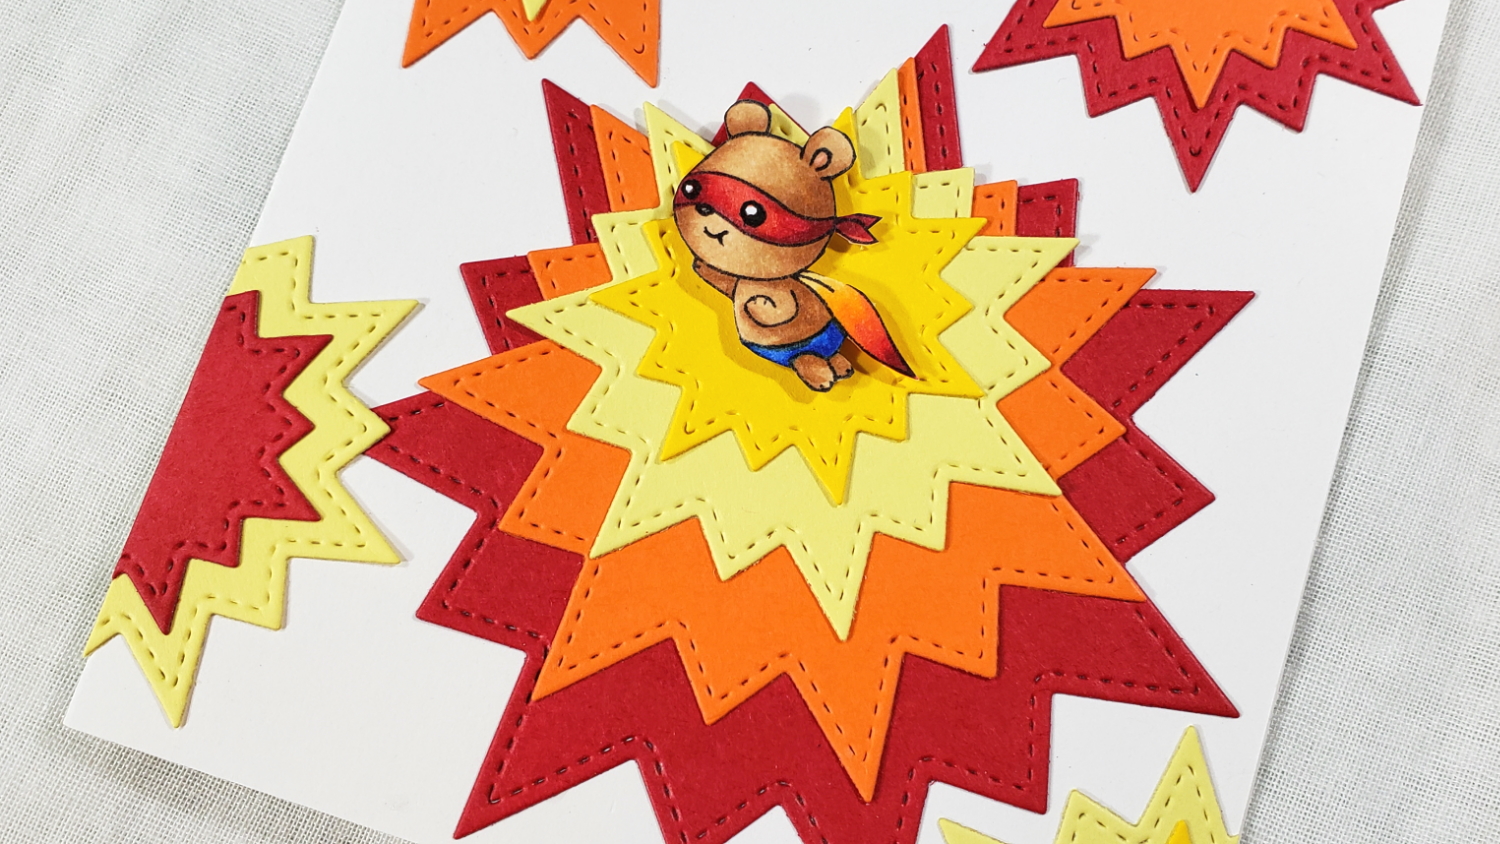
I used the following Copic colors to color up the cute super hero:
Teddy bear: E30, E31, E33 and R20 for inside the ear
Blue shorts: B24, B28
Red Mask: R24, R29, R39
Ombre cape: R39, R24, YR6, Y32
Then I fussy cut him out with my favorite Fiskars Spring Loaded Reverse Scissors (these were a life-saver since my arthritis has been acting up lately) and popped him up on foam dots for added interest.
This card, and others I crafted with this InLoveArtShop design team package is shared in the following video:
Disclosure: The dies used in this post were gifted to me free of charge as part of my design team package. Many of the supplies I’ve used for today’s project are linked. Some may be affiliate links, which means if you make a purchase I receive a small commission at no extra cost to you. I truly appreciate your support toward the costs of running this blog!
This card is being entered into the following challenges:
Simon Says Stamp Monday Make Your Own Background Challenge
Simon Says Stamp Wednesday Anything Goes Challenge
Penny Black and More Boys and Men Challenge
Creatalicious Anything Goes with Optional Birthday Challenge
Crafts Galore Encore Anything Goes Challenge
Lil Patch of Crafty Friends Anything Goes Challenge
Through the Craft Room Door Anything Goes Challenge
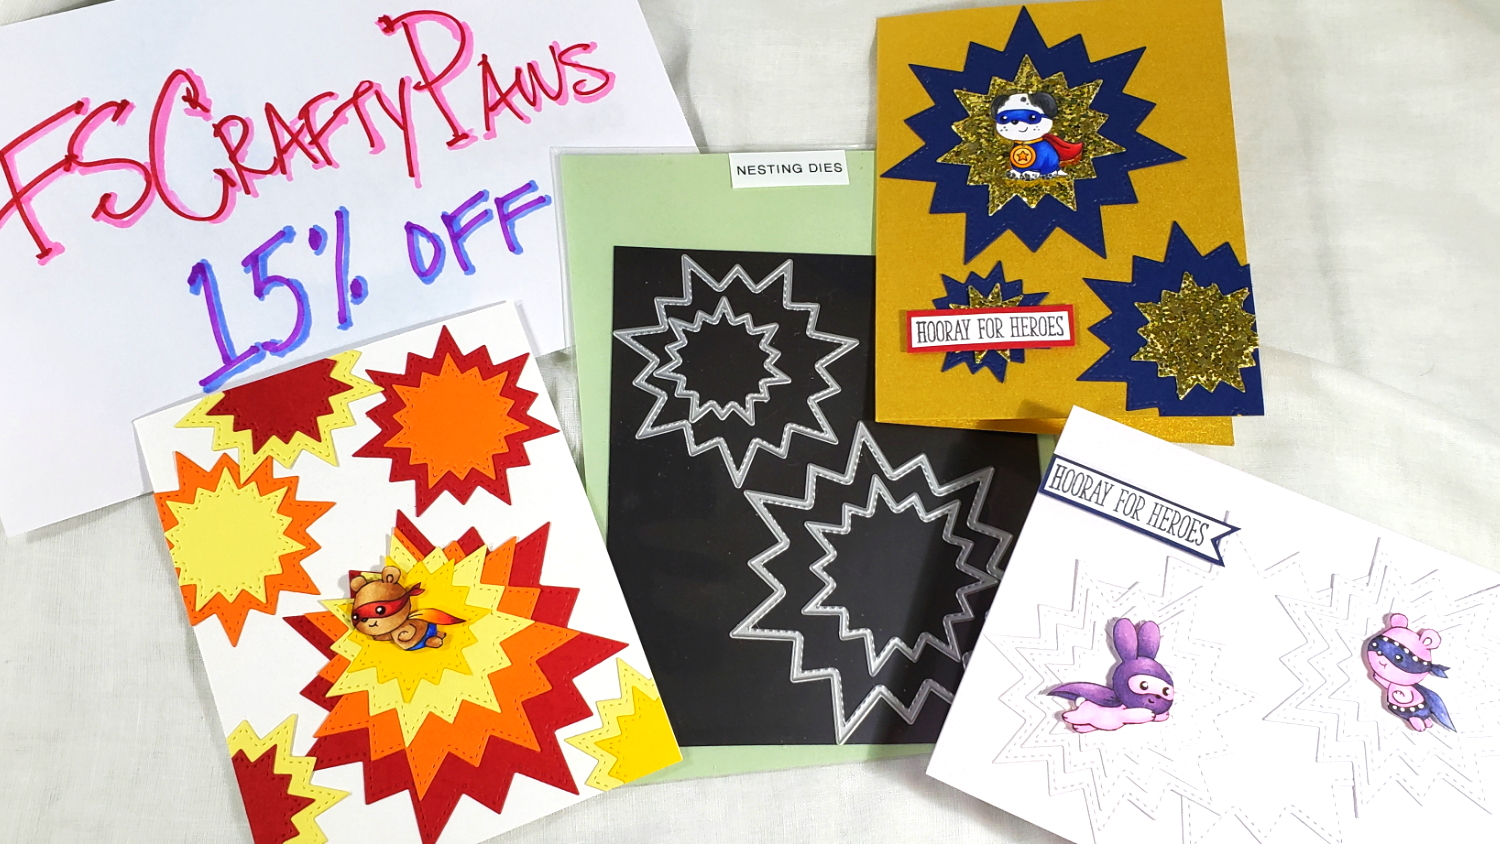
When Inloveartshop.com reached out to me to resume my design team work, I took it as a motivation and sign that to remember self-care (which for me is crafting). I picked out a handful of dies, and when they arrived (about a month after I placed my order) I was immediately inspired to return to crafting. NOTE: My readers can get 15% off their entire order from InLoveArtShop.com by using the code FSCraftyPaws at check out.
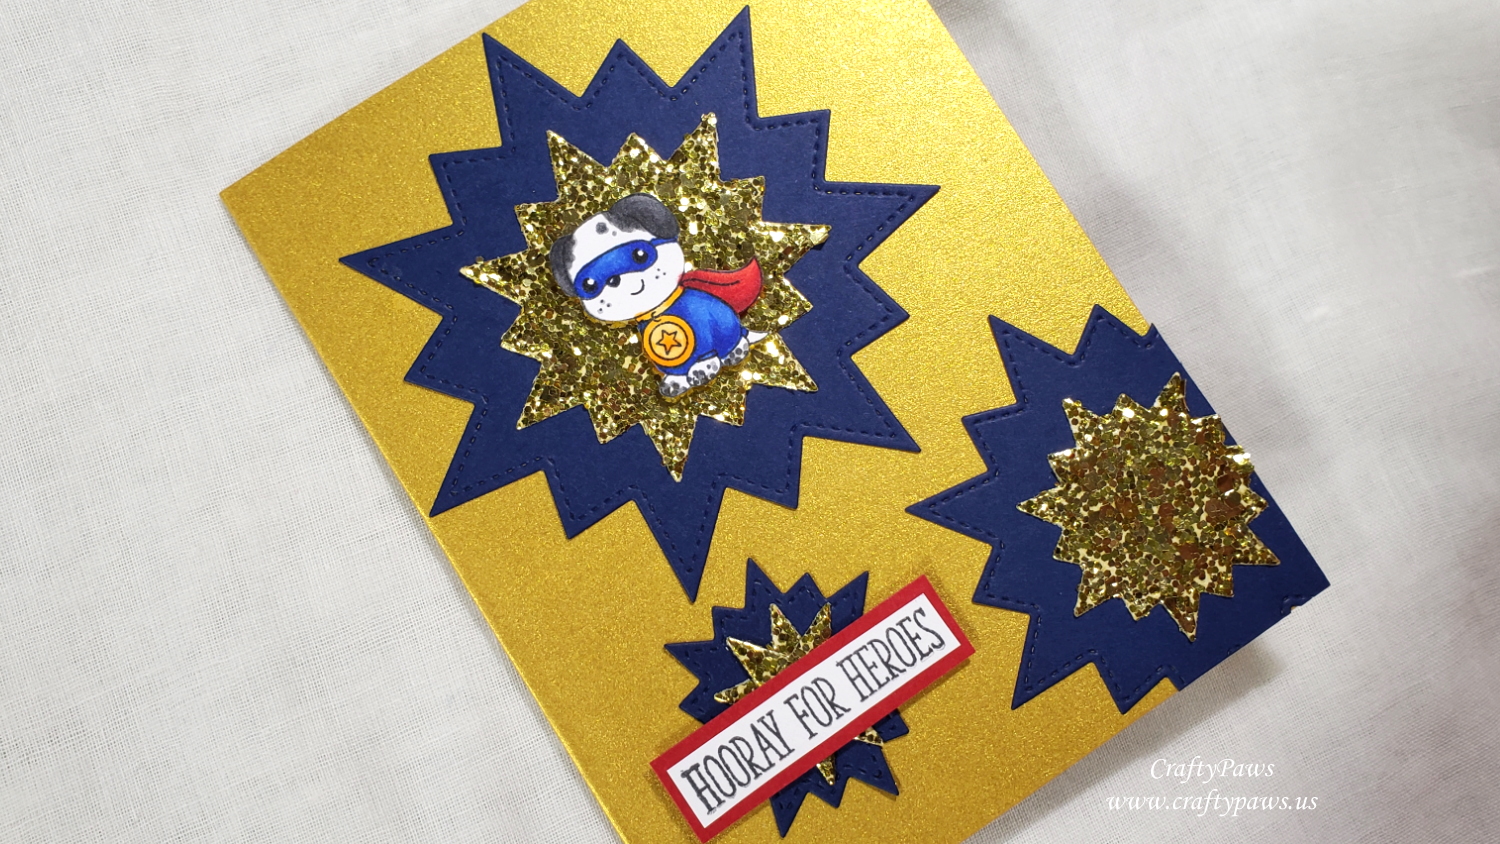
I absolutely fell in love with the Nesting Dies Set and had so many superhero card ideas running through my mind. This first card is made with just some scrap glittered card stock, navy card stock, shimmery gold card stock (for the card base), and a cute puppy super hero from the Clearly Besotted Caped Cuties Stamp Set (retired, but a recent re-issue is available HERE).
For the explosions, I used every other size of the Nesting Dies to cut out the bursts in the glittered card stock and the navy card stock, leaving a bit of space between (if I had used every size, the burst would have been much closer together). I also used a star die and stacked them to make athe center of the smallest burst. Since the star obviously didn’t look like the other bursts, I covered that last burst with the sentiment from the Clearly Besotted Hooray For Heroes Stamp Set (retired).
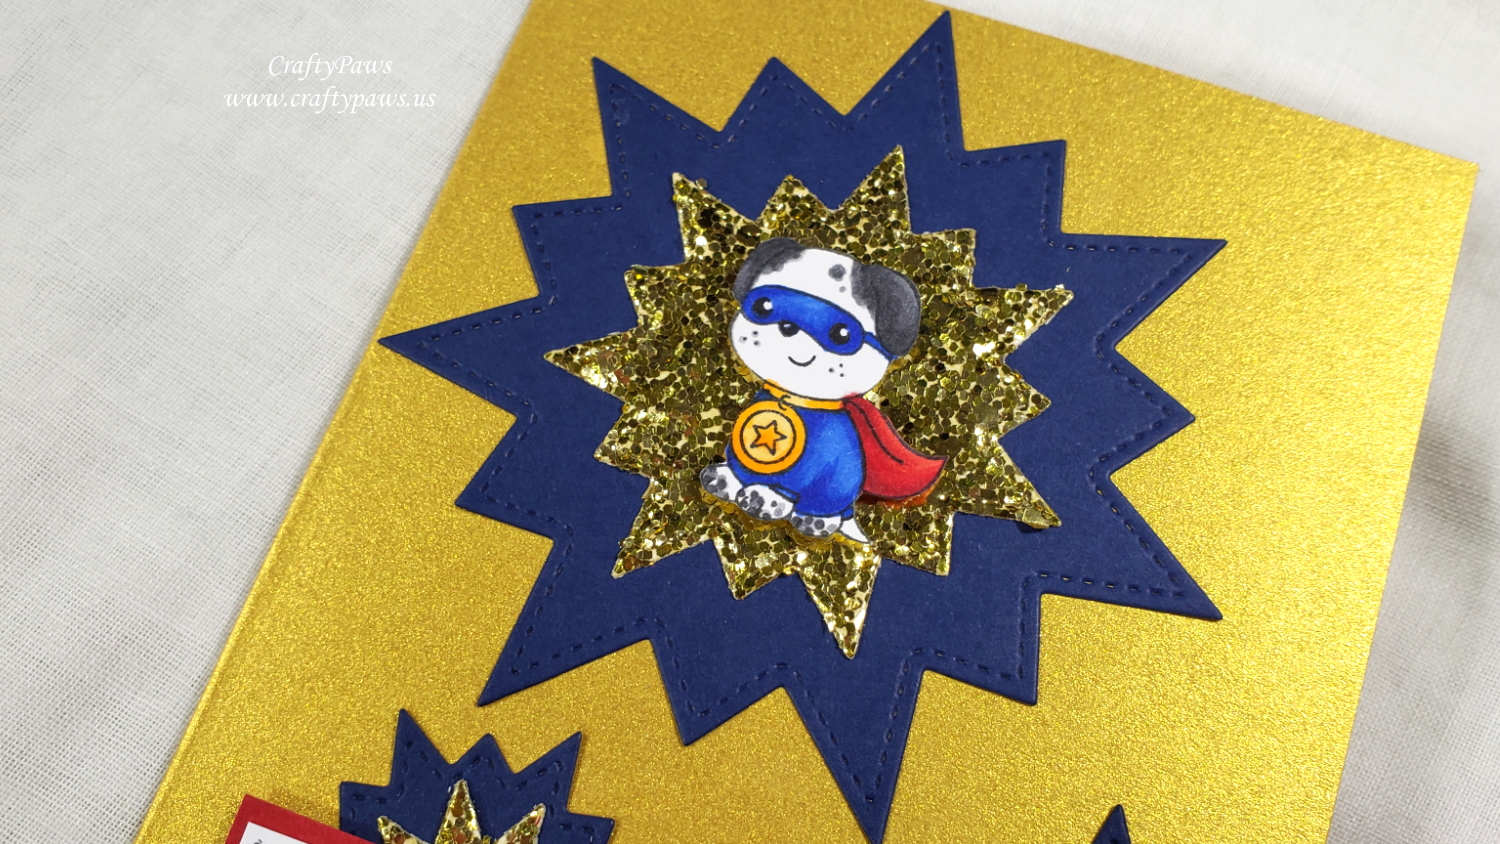
I used the following Copic colors to make the puppy super hero look like our Babaloo:
Black spots: N3, N5, N7
Gold medallion: Y32, Y38, YR16
Blue suit: B24, B28
Red cape: R24, R29, R39
Then I fussy cut him out and popped him up on foam dots to add a little dimension.
This card, and others I crafted with this InLoveArtShop design team package is shared in the following video:
Disclosure: The dies used in this post were gifted to me free of charge as part of my design team package. Many of the supplies I’ve used for today’s project are linked. Some may be affiliate links, which means if you make a purchase I receive a small commission at no extra cost to you. I truly appreciate your support toward the costs of running this blog!
This card is being entered into the following challenges:
Lil Patch of Crafty Friends Anything Goes Challenge
Through the Craft Room Door Anything Goes Challenge
Penny Black and More Men and Boys Challenge
Crafts Galore Encore Anything Goes Challenge
Simon Says Stamp Monday Make Your Own Background Challenge
Simon Says Stamp Wednesday Anything Goes Challenge
Creatalicious Anything Goes with Optional Birthday Challenge
]]>

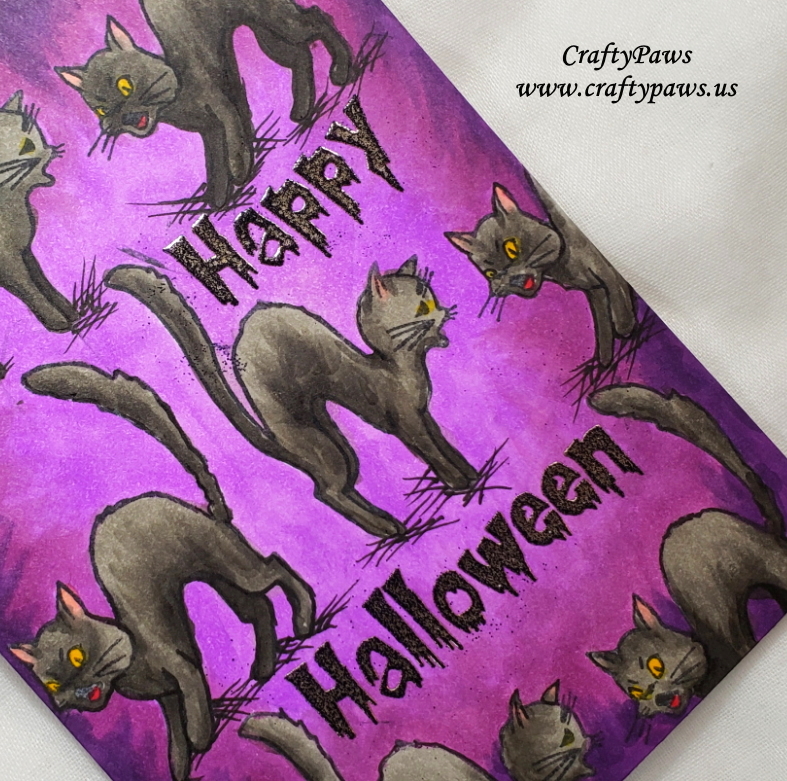
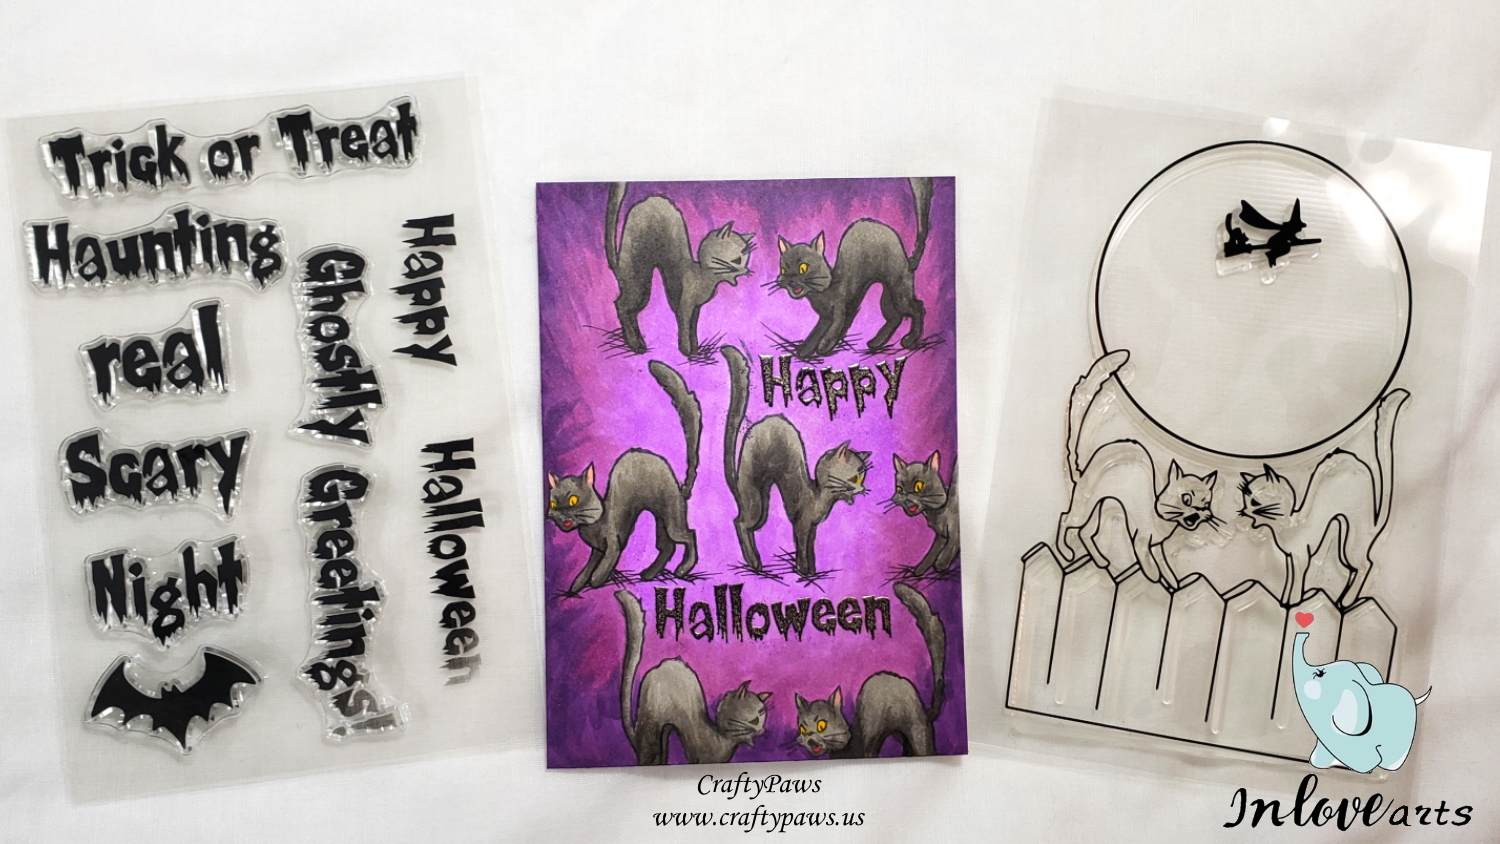
I essentially inked the stamp selectively — just around the cats, and wiping away over-inked areas like the moon and fence post tops with my DIY stamp shammy. Then I would reposition my card front around on my MISTI stamp tool and stamp the cats again. Leaving enough space to also heat emboss the sentiment, “Happy Halloween” from the Halloween Word Stamp Set, I was able to get most of 7 cats on this card!
Then I used the following Halloween/fall Copic colors to fully color up this card front:
Background: W04, V06 and V09
Cats: W3, W5, W7 with R21 ears and Y19 eyes and R29 tongue
Lastly, I used VersaMark Ink to stamp out the sentiment and Ranger Liquid Platinum Embossing Powder and Ranger Super Fine Black Embossing Powder to heat emboss the sentiment. The platinum base with the black overlay matched the warm grey of the cats perfectly and added a hint of shine and dimension to pull the card perfectly together.
CLICK the following picture to watch the whole start to finish crafting video:
Disclosure: Many of the supplies I’ve used for today’s project are linked. Some may be affiliate links, which means if you make a purchase I receive a small commission at no extra cost to you. I truly appreciate your support toward the costs of running this blog!
This Halloween kitties card is being entered into the following challenges:
Penny Black and More Animals Challenge
Simon Says Stamp Monday Stamp It Challenge
Creatalicious Anything Goes with Optional Humor Challenge
Simon Says Stamp Work it Wednesday Celebrate It Challenge
Through the Craft Room Door Anything Goes Challenge
Crafty Gals Corner Fall Colors Challenge
Crafting By Design Anything Goes Challenge
The Male Room Autumn Challenge
]]>
For this initial re-start blog post, I’m just sharing the various items I chose from their incredibly well-priced and chock-full online store. The following is a video of the haul:
Please check out https://inloveartshop.com/ and if you make a purchase, please use the coupon code: FSCraftyPaws for 15% off your order!
Supplies:
Alphabet Letter Dies: http://bit.ly/2LDGOpv
Floral Eyelet Frame Dies: http://bit.ly/2LD3bLR
Polaroid Photo Frame Dies: http://bit.ly/2LPnXZ1
Snowflake Frame Dies: http://bit.ly/2LFaTF8
Halloween Cats On The Fence Stamps: http://bit.ly/2LFPsE0
Halloween Words Stamps: http://bit.ly/2LvpLpy
Over the next few weeks, I’ll be using various of these items in start-to-finish craft project videos.
Disclosure: The supplies I’ve shared in today’s video were provided to me at no charge in exchange for my review and use on YouTube, and they are linked with affiliate links above, which means if you make a purchase I receive a small commission at no extra cost to you. I truly appreciate your support toward the costs of running this channel and my blog!
]]>