For the card base, I used favorite papers from my scrap box from the Graphic 45 “Steampunk Spells” and the “Bohemian Bazaar” collections. I also knew I wanted to add a little sparkle so I laid down some sparkly gold glitter tape for the floor where the girl and her pups are walking and also created a couple of paw prints by laying down two rows of the tape on thin copy paper and punching out a small paw print with a Marvy Uchida punch. I backed the paws with white card stock and then framed it with another layer of black card stock. I also used some letter stickers to spell out “crafty” and backed that on black card stock to create my name, “CraftyPaws”. Because I knew I was going to raise at least some of these on foam adhesive, I also edged the black card stock on all the pieces with a Faber-Castell SB width PITT artist pen (this eliminates the white edge and gives a more finished look).
For the images, I paper pieced the girl’s T-shirt and skirt with tiny scraps from my scrap box (in patterns I thought I would wear in shades of my favorite color, blue) and used the following Copic colors: Hair: C7, C9 and B02; Shoes: C7 and 9; Skin: E50, 51, and 53; Blush: R11; Dog in arms: W1, W3, E 23 and E25; Poodle: E11 and E21; Leash: B02. I also used a little Glossy Accents over everyone’s eyes, the dogs’ noses, and the girl’s shoes.
The following is a video tutorial on the Copic coloring, paper piecing, and card assembly:
https://www.youtube.com/watch?v=SUlcnv8Cxzw&feature=youtu.be
This card is being entered into the following challenges:
The Pink Elephant Anything Goes Challenge and
The Paper Nest Dolls Anything Goes Challenge
Thanks for stopping by and have a great day! WOOF
]]>
I colored up these two foxes from C.C. Designs called, “Sir Rupert with Tea” and “Sir Rupert with Cane” using the following Copic colors and pens: Hat and bow tie: B95 and 97; Dark brown ears and paws: C74 and 79; White tail, chest and snout: W1 and 3; Eyes: BG75 and 78; Brown of body: E97 and 99. Chair for the tea sipping fox: YR31 and 24; Staff for the walking fox: Clear Star Gelly Roll pen. White shine spot on eyes: White Gelly Roll pen. Darkening edges of fussy cut images: Faber Castell PITT artist pen in SB size. Lastly, to add some dimension, I added Glossy Accents to the eyes, glasses, walking staff, and tea cup and saucer.
The following is a process video showing how I colored the walking fox:
Thanks for stopping by. Please subscribe if you wish, and have a great day! WOOF
]]>
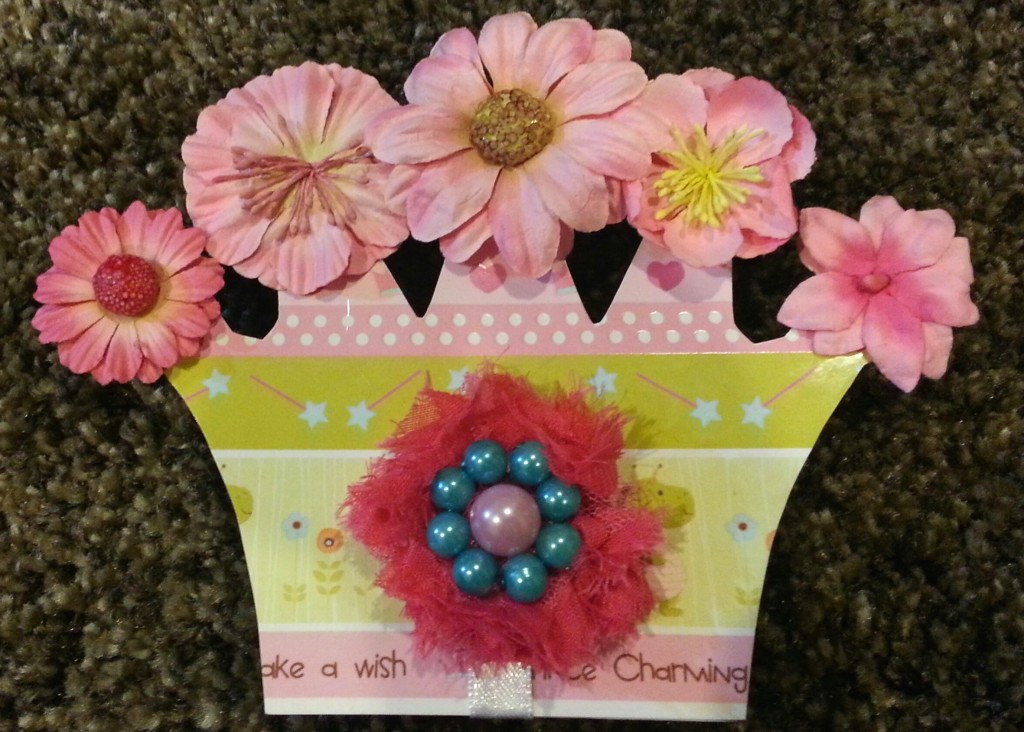 I started with a wonderful card base by Petaloo, from their Plain & Simple collection. The base is chipboard covered with white paper in the shape of a crown. Brilliant, right?! All the decorating is the crafter’s choice. I covered the front of the card with some fun imaginesce paper called, “Princess Promenage.” Then I hot glued different pink Recollections paper flowers on the tops of each of the crown points. For the magnetized closure, I used a little scrap of glittered floral paper from K & Company for the side with the magnet and a handmade pink, lavender and teal flower for the front. To create a finished look, I covered the backs of each accordian fold with more of that scrap glittered floral paper and on the fronts I used pink damask foiled paper (also from K & Company) to create a soft background for the images I planned to color and add.
The images I used were from one of my favorite stamp lines, Gorjuss Girls. The first is a girl nestled in the crook of her magical pet fox and is called, “Stole.” The second is a girl taking flight on the back of a giant dove and is called, “Flying Above It All.” The following are the Copic colors I used for the first image: Fox: N0 and N2 (top coated with clear Wink of Stella); Skin: E000, 00 and 11 and blush: R11; Hair: E31, 37 and 29; Dress and Boots: BG23 and 45; and Striped socks: C1, 3, 5, and 7. I also added some white dots with a white Sakura Gelly Roll pen to soften the solid span of the dress. To add some fun and continue the princess theme I added a blue-green bling crown and teal and pale blue bling hearts to denote the love that the little girl and fox feel for one another.
The following are the Copic colors I used for the second image: Dove: W1 and 3 (top coated with clear Wink of Stella) and beak: Y32; Hair: E31, 37 and 39; Skin: E000, 00 and 11 and blush: R11; Stocking/boots: C1, 3, 5, and 7. Again to denote the love that the little girl and dove feel for one another I added pink and purple bling hearts and topped the little girl’s head with a pink sparkly bling crown.
I fussy cut both of the images out with my Tonic spring loaded scissors (which are great for folks who struggle with hand pain or arthritis). For the couple of places where I had to cut into the image without an edge starting place, I used an Exacto knife (HINT: replace the blades regularly to get sharp, easier cuts). I also edged each image carefully with my Faber-Castell SB size Pitt Pen to hide the white edge of the fussy cut images. Lastly, I wanted to add a little bit more dimension to these focal images so I also popped them up on foam adhesive.
The following is a video share of this card:
This card is also being entered into the Simon Says Stamp Monday Anything Goes Challenge and
Seize the Birthday Anything Goes Challenge
Thanks for stopping by! Please subscribe if you wish, and have a great day. WOOF!
]]>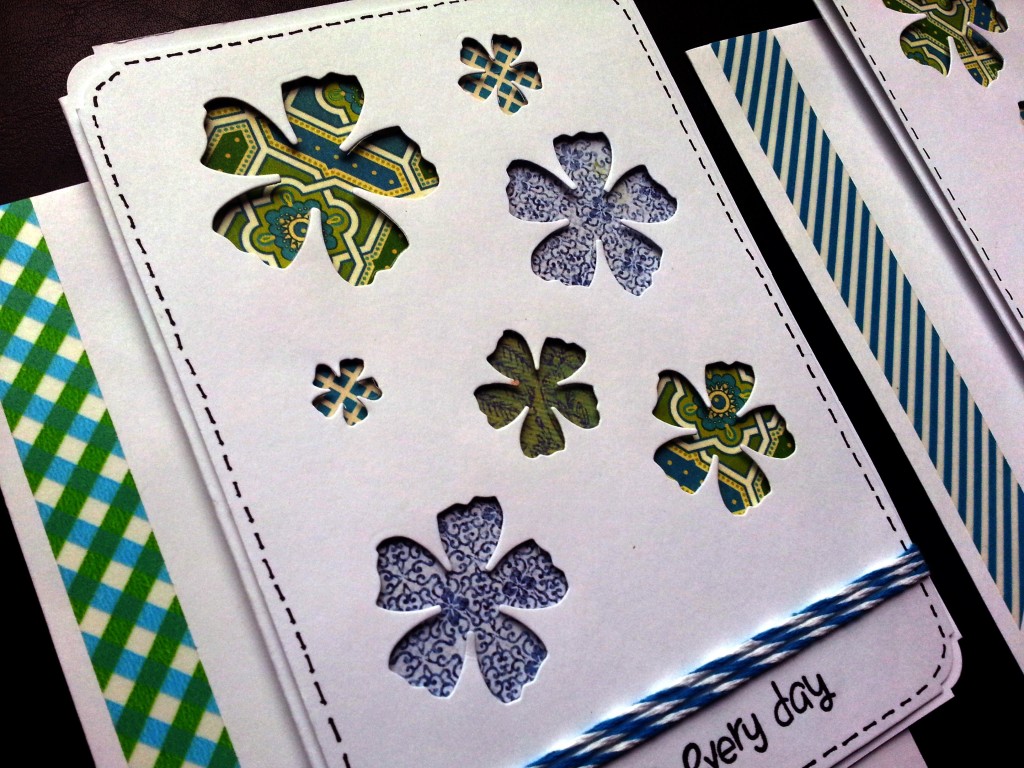 These cards take advantage of the negative space created by small dies. I used the whole 7 piece set of the Diemond Dies sugarplum flower die set. [DIEMOND DIES COUPON CODE: thankskristina is still active for 10% off your entire Diemond Dies purchase and free shipping on orders of $35 or more!] Then I “back-filled” each cut out with some small scraps of patterned paper (If you recognize some of these, it could be because they are the bits left over from the Steampunk Scarlett tag I made last week), using strips of foam tape to add a little depth and shadow interest. The papers I used were from My Mind’s Eye “Everyday Tango” and Graphic 45 “Bohemian Bazaar”.
For the sentiments, I used the Lawn Fawn’s “Critters at the Dog Park” and “Love You S’more” stamp sets. For the “love everyday”, I had to do a little masking, as it was two different stamps, but it was quick and easy (the tutorial video below shows how easy!).
To add a little more interest, I used a Faber-Castell M size PITT artist pen to draw in some faux stitch lines. On one of the cards I also added some teal and white bakers twine. Finally, just to make the gift set a little more special, I took some washi in a similar color family to the patterned papers I used and put a little banner all around the envelopes.
The following is a video share of these cards including a step-by-step tutorial:
This card is being entered into the Lawnscaping Patterned Paper Challenge and
The Paper Nest Dolls Anything Goes Challenge
Thanks for stopping by and have a great day. WOOF!
]]>
 I used a little paper doily, some pink satin ribbon and a little crinkled pink seam binding to add some softness to the front. At the bottom, to add a little more interest, I punched out a little border using my Martha Stewart iron gate border punch. This is one of my favorites because of all the detail to it, but I think it is retired.
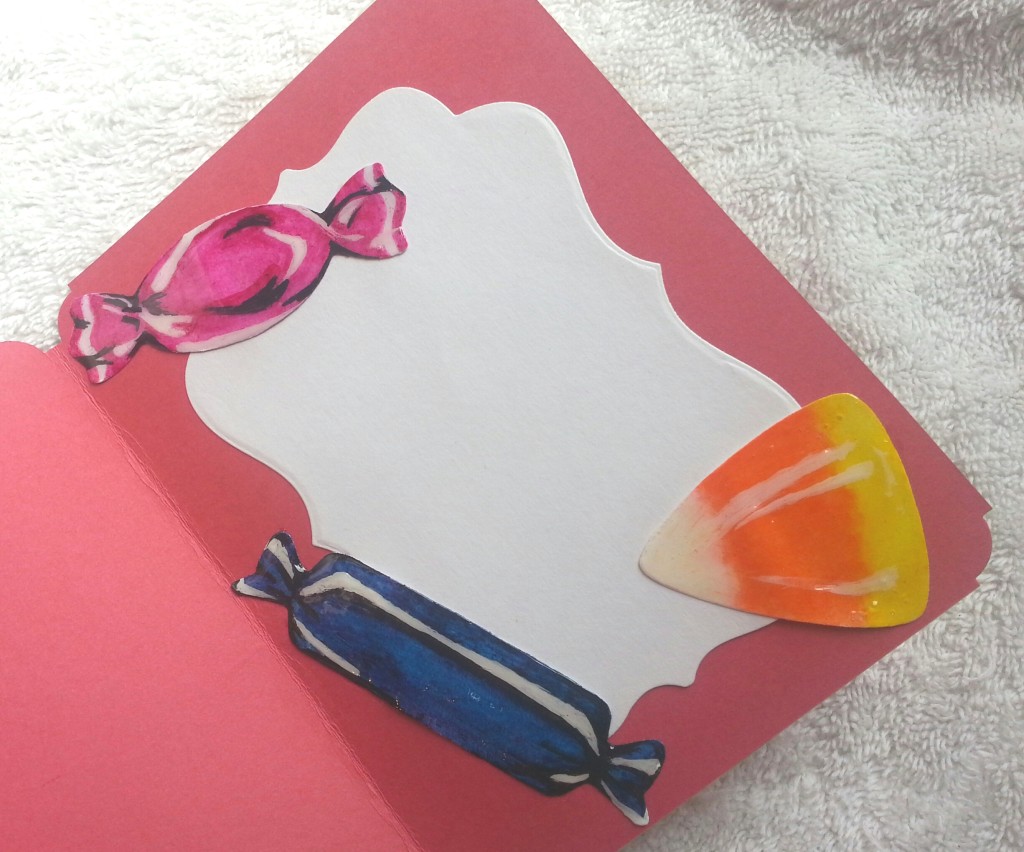
On the inside I used the largest of the Diemond Dies Labels 1 Nesting die set (I find that I use this die all the time to make cards since it is the perfect size for standard A2 card message areas) to set up a place where I could write my note and then had some fun making some candy embellishments using the Diemond Dies candy die set. Remember, use Diemond Dies coupon code: thankskristina for 10% off your entire purchase and free worldwide shipping on orders of $35 or more!
The coloring of these candies was really fun to figure out. I used my Derwent Inktense watercolor pencils to color in the bases (but you could probably just cut colored card stock). Then I took my white gesso with a thin paint brush to add in highlights. The final touch came from using my M size Faber Castell black PITT pen to put in low lights or shadows. That is the trick; to create a 3-D look with 2-D images or die cuts you have to include highlights and low lights.
The following is a video share of this card:
This card is being entered into the Simon Says Stamps Wednesday Watercolor Challenge and
The Kraftin’ Kimmie Anything Goes Wonderful Wednesday Challenge and
The Paper Nest Dolls Anything Goes with a Bow Challenge and
The Aviary: Paper Wings Halloween Challenge and
Craft-Dee BowZ Anything Goes with a Handmade Bow Challenge
Thanks for stopping by and have a great day! WOOF
]]>
Anyway, when I found out that a YT crafty friend, Mataya (YT: minnescrapper) was hosting a challenge about using dies that we have not (or rarely) used, the Tim Holtz Fanciful Flight die that I purchased through an eBay auction came to mind. Why not make myself feel better about purchasing this die by using it on an art journal page? I wanted to try out all the permutations of wing combinations and really PLAY. The varying results were perfect for the sentiment I wanted to reflect: “You can SOAR with whatever wings you have.”
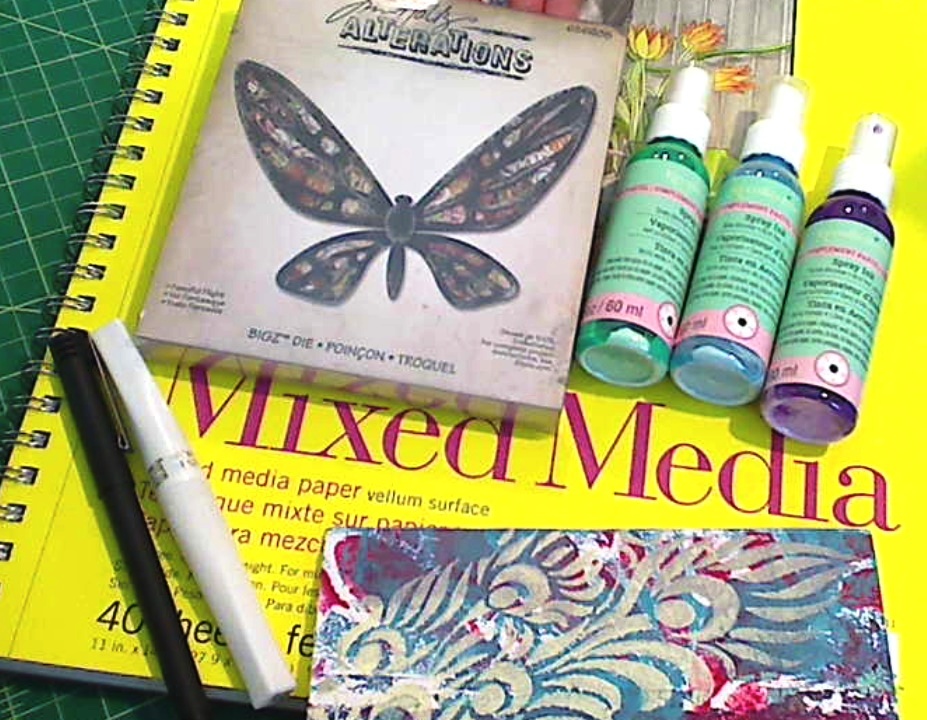 I sprayed the paper initially with three Recollections shimmer mists in blue, purple and green. Then I used the die to cut out lots of wing segments from black cardstock and some fabulous background papers that were made and gifted to me by my friend Rosa (YT: ColorXplosion by Rosa). All the unique patterns on the papers really helped bring life to the butterflies, moths, and other flying insects.
I also used a Fiskars stamp set called “Butterfly Magic” to stamp small and medium sized dragonflies to add to the feeling of a flurry of wings that I wanted to create.
I printed out the sentiment on my computer, cut out the words and lined the edges using my Faber Castell Pitt Pens (sizes: SC and F). Lastly I sketched in “flight patterns” for each flying insect and then added some colorful sequins (just to add a little “magic”). 🙂
This art journal page is also being entered into the Raisinboat Summertime Challenge.
The following is a video share of the project:
Thanks for stopping by and have a great day. WOOF
]]>