To go along with a surprise special gift from the heart, I whipped together this quick and easy interactive card for him using Lil Inker Designs “Quick Notes” stamps and a Lil Inker Designs “Quick Notes Star Fold Out Die” (both retired) that I’ve had in my stash for about 4 years and never before used (yes, so embarrassing, but true). I used an orange and peach polka dot card base that a crafty friend sent me as part of a prize package about 5 years ago, and some patterned papers that may be even older.
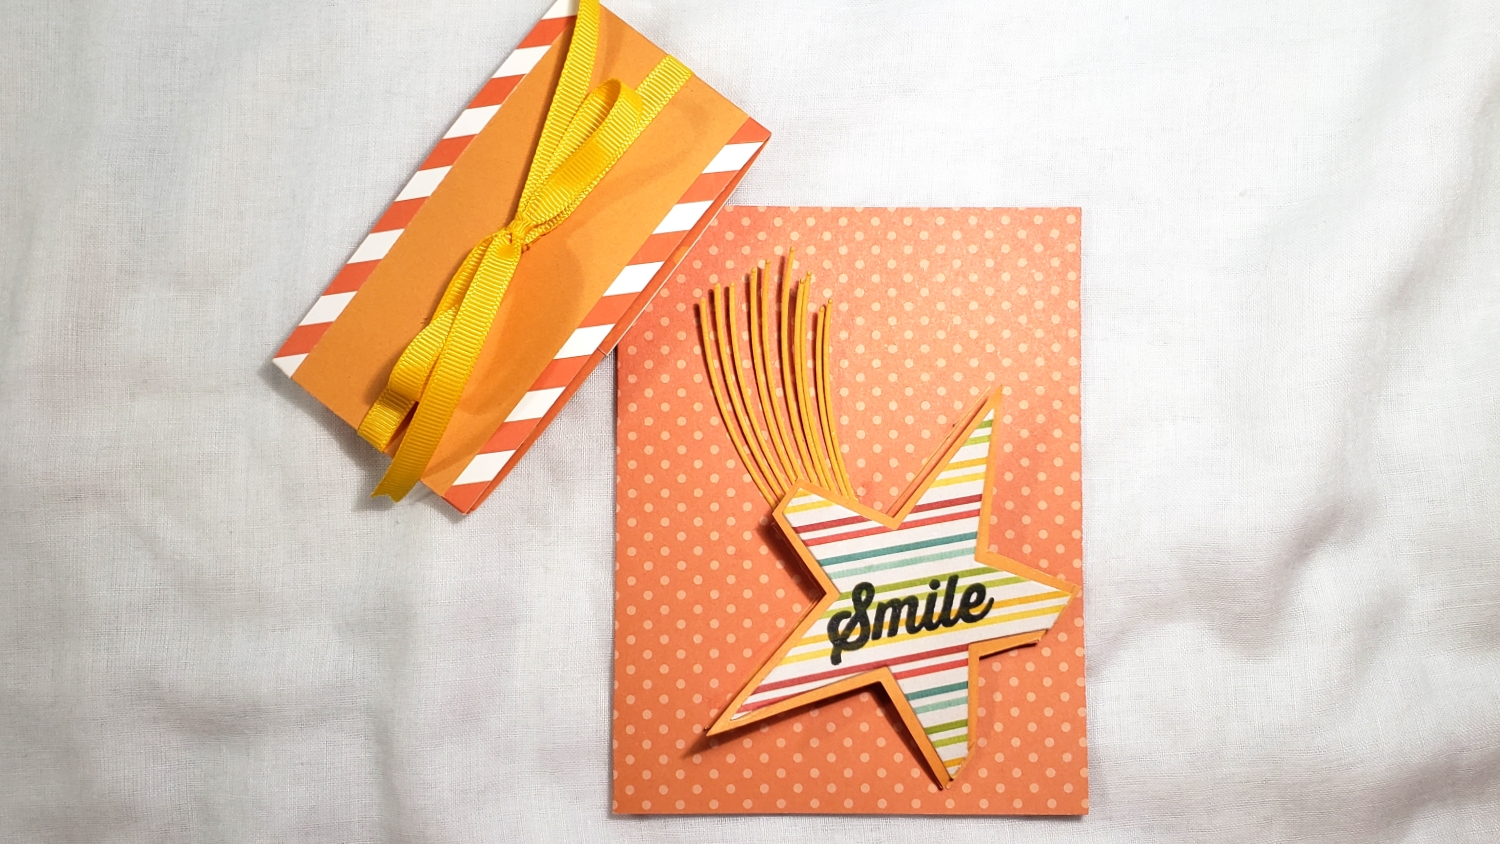
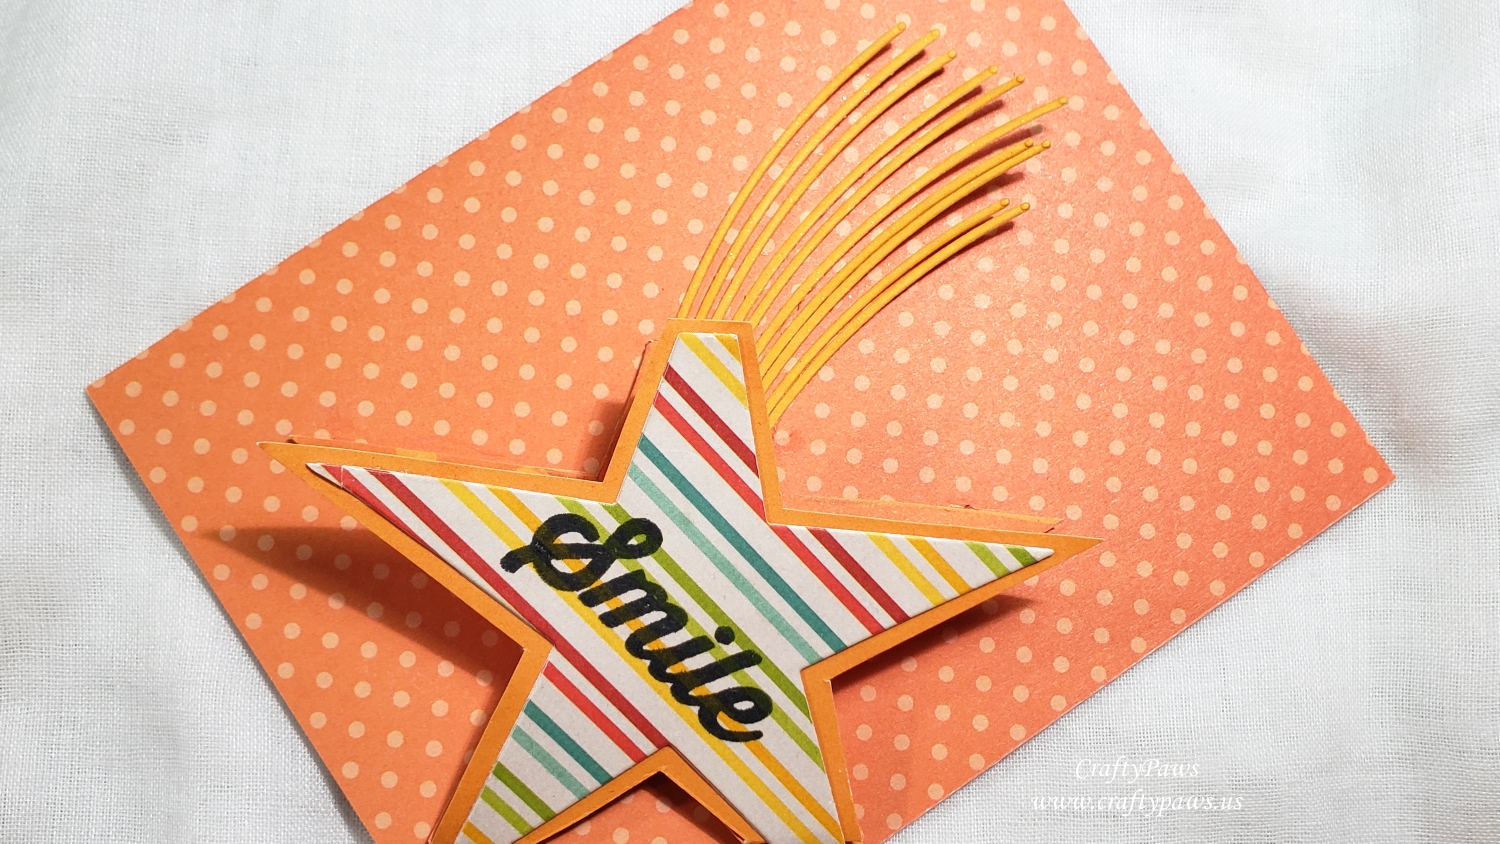
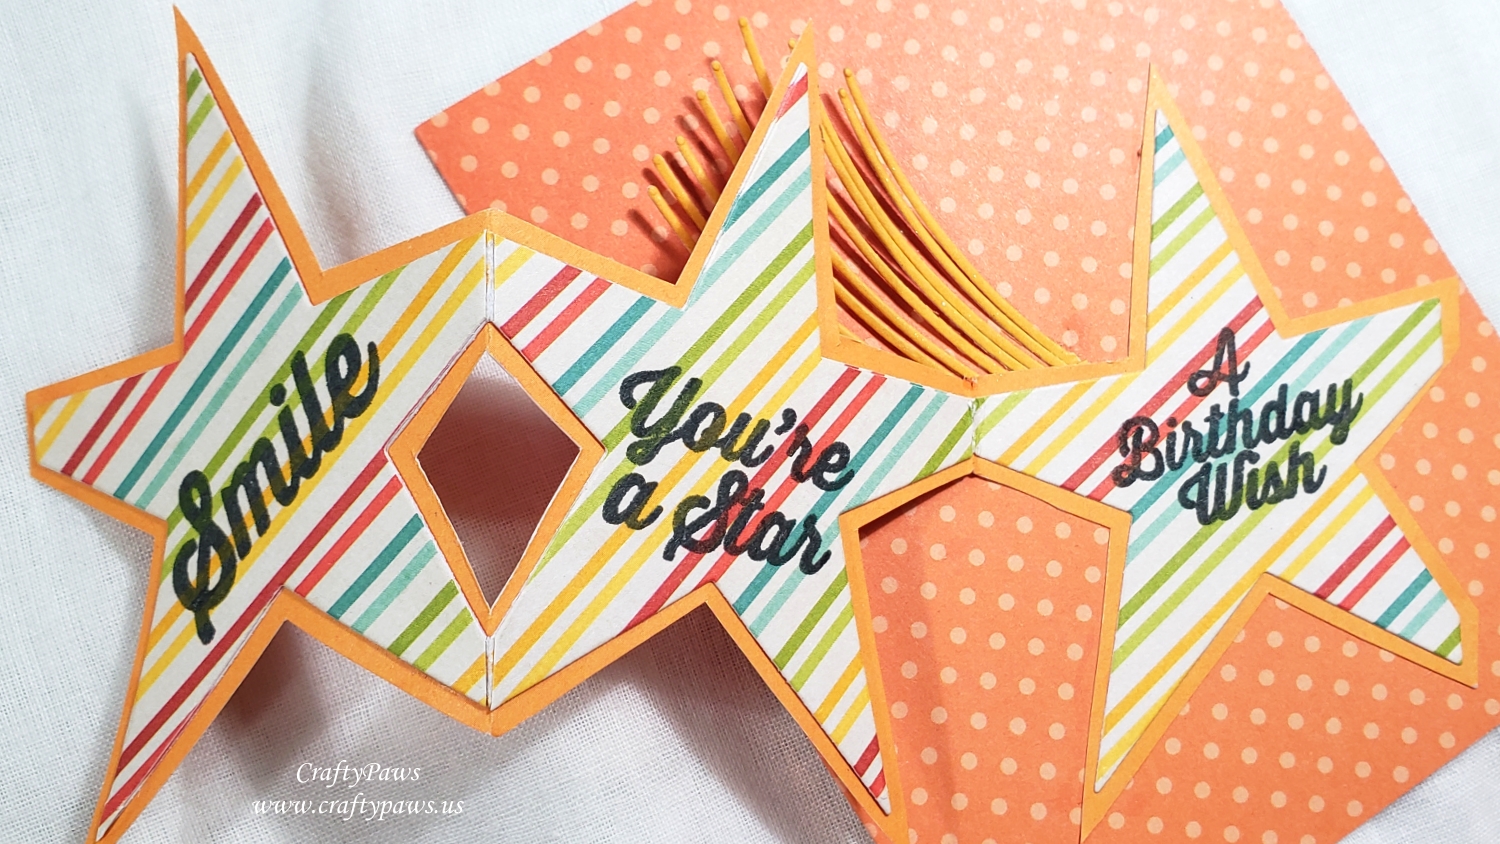
I guess with the 4th of July, I had stars and stripes on my mind so I used the star fold out die with a scrap of rainbow striped paper. To make it a little bolder, I hand outlined the die cut with a 1/8″ margin all around on goldenrod colored cardstock and hand fussy cut out a mat with my Fiskars Spring Loaded Scissors and an X-Acto Blade. Then using my old trusty EK Success Stamp-a-ma-jig, I stamped “Smile”, “You’re a Star”, and “A Birthday Wish” on each of the stars. Originally I was just going to glue this on the card front, but then I thought it could use a little more pizzazz so I used the My Favorite Things “Shooting Star” die with more of the goldenrod colored cardstock and used the 2 sets of tails from that tucked under the fold out stars. For added shimmer, I coated all the tails with Clear Wink of Stella.
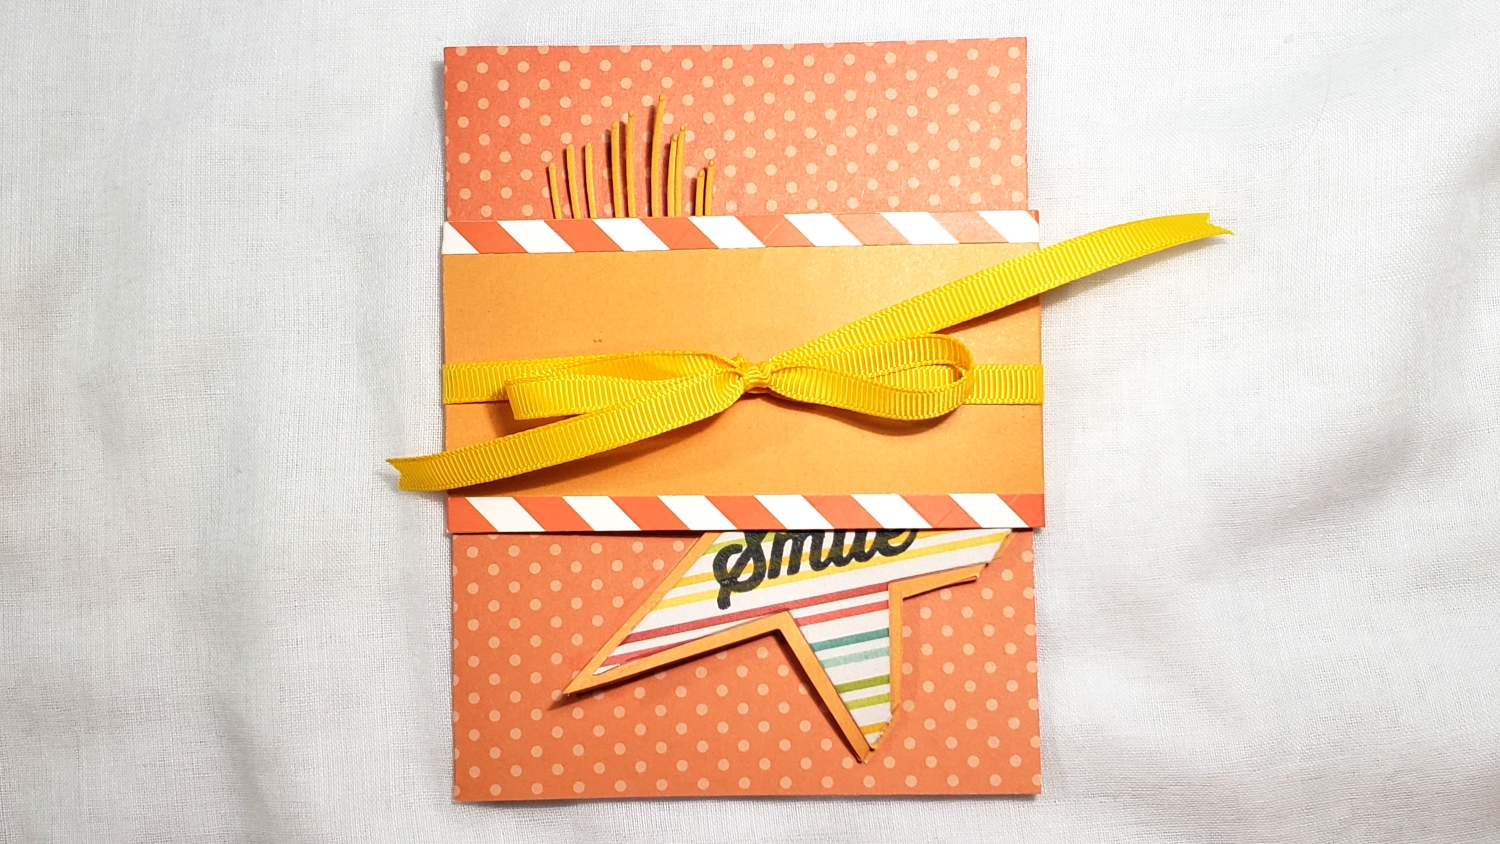
Then I decided to keep the fold out stars closed, I needed a belly band. I crafted one from more of the goldenrod cardstock and edged both the top and bottom with a 1/4″ orange and white striped patterned paper. To make the whole card seem more like a gift itself, I tied a grosgrain yellow ribbon around the belly band. This was a simple card to craft (no fussy Copic coloring, which is very unusual for me), but I think it came out looking very special for my nephew’s very special birthday!
CLICK on the following picture to watch the process video:
Disclosure: Many of the supplies I’ve used for today’s project are linked. Some may be affiliate links, which means if you make a purchase I receive a small commission at no extra cost to you. I truly appreciate your support toward the costs of running this blog!
This card is being entered into the following challenges:
Simon Says Stamp Wednesday Stars and/or Stripes Challenge
Fab ‘n’ Funky Stars and/or Stripes Challenge
Creatalicious Anything Goes with Optional 2 or More Design Papers Challenge
Word Art Wednesday Anything Goes Challenge
Lil Patch of Crafty Friends Anything Goes Challenge
Through the Craft Room Door Anything Goes Challenge
Crafts Galore Encore Anything Goes Challenge
613 Avenue Create Anything Goes with Optional More than One Fold Challenge – WINNER
Crafting By Design Anything Goes Challenge
The Male Room Multiple Layers Challenge
]]>
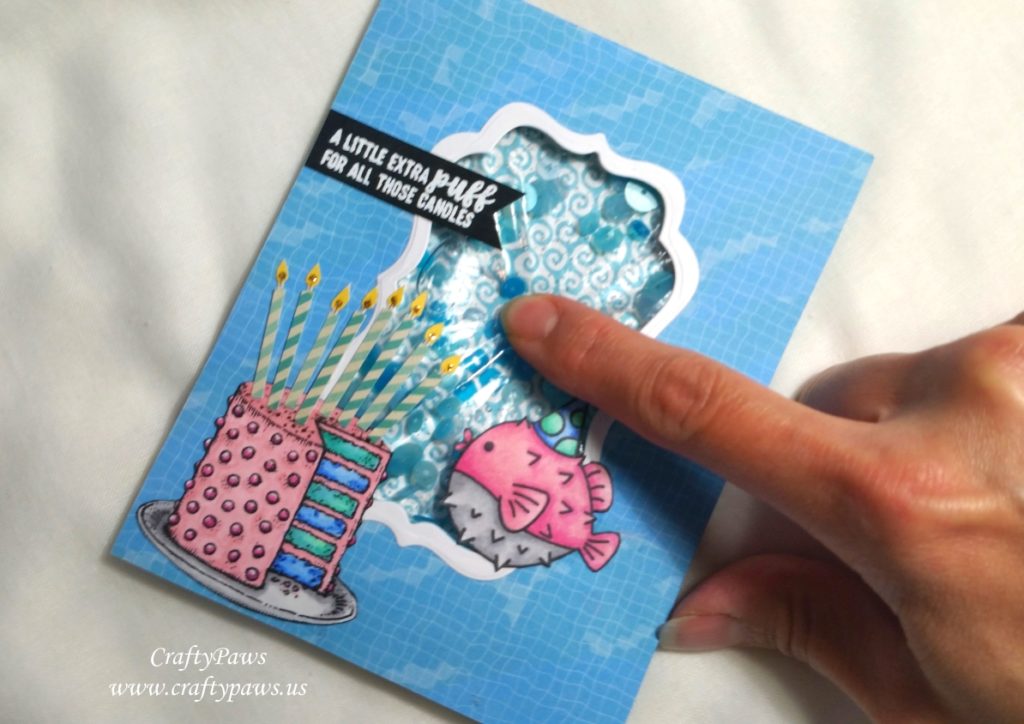
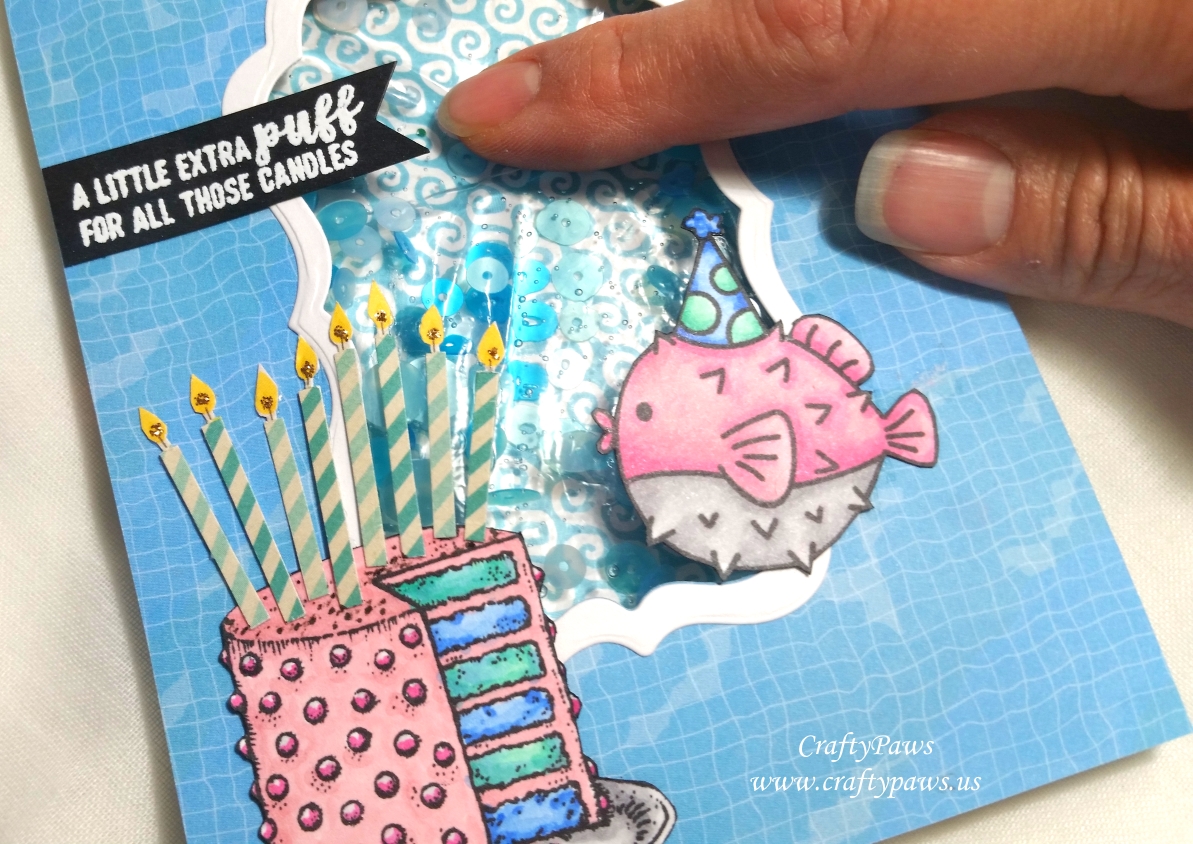 First I made the water shaker using a small zip-lock bag that I filled with hand sanitizer gel and light and medium blue sequins from the “You Are My Sunshine” collection sequins pack from the Kit. I made sure it was sealed up tight and then sandwiched it between two patterned papers. To support the edges of the card front, I surrounded the water shaker pocket with 11 mm foam dots after taping the shaker pocket to the card base. The background waves and the watery pool floor patterned papers are both from the Carta Bella “Summer Splash” paper collection from the Kit. For the card front, I die cut a window and framed it using the fourth and fifth largest dies from the Diemond Dies Labels 1 Nesting Die Set. I thought the curvy lines of this nesting die coordinated nicely with the watery theme of this card.
Note: My readers can get 10% off and free worldwide shipping on all orders of $35 or more from Diemond Dies by using the coupon code: thankskristina PLUS: This nesting die set is currently (as of June 6, 2018) reduced from $23.99 to $14.99!!!
 The inspiration for this card came from the adorable puffer fish from the Avery Elle “Sea-Prise!” stamp set from the Kit. I Copic colored this cutie with the following colors and fussy cut him out: RV11, RV55, B21, B24, BG11, BG23, N0, N2, and N3. Then I glued him into the lower right corner of the die cut window.
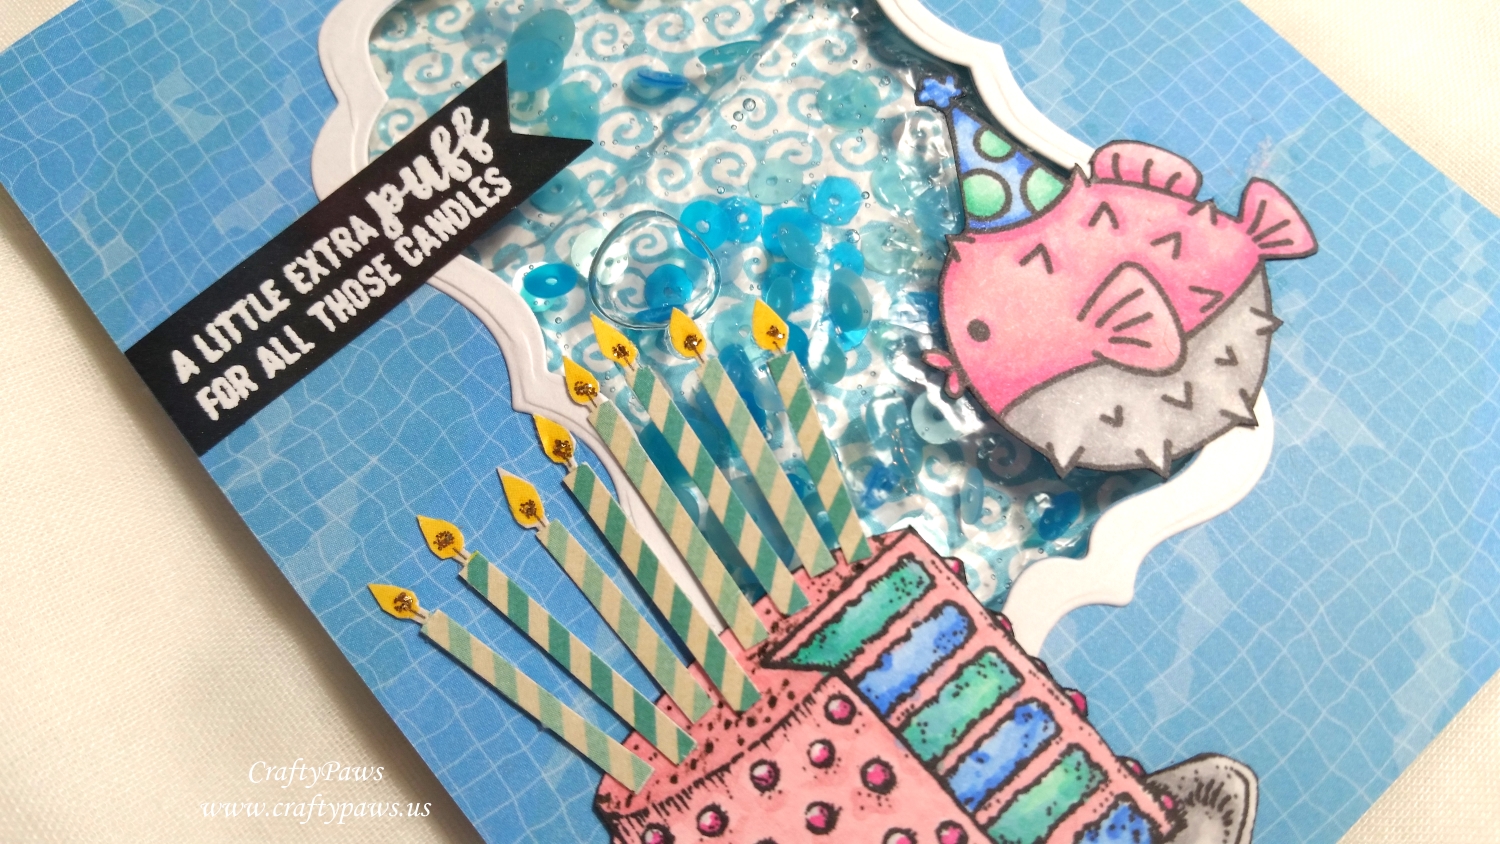
To give him something to blow, I also stamped, Copic colored (with the same colors I used on the fish), and fussy cut out a cake from the Power Poppy “Party Time” stamp set. I eliminated the cake topping banner and replaced them with eight striped candles that I fussy cut from an old patterned paper from my scrap box (sorry this is so old I have no idea what paper collection these candles are from). To make these birthday candles pop a bit more and stand up to the color intensity of the rest of the card, I added Champagne Stickles to the base of each candle flame. This added sparkle was a great, festive finishing touch.
I also cut off the foot of the cake stand so that the whole assembly would fit better on the card front with the puffer fish. The sentiment, also from the Avery Elle “Sea-Prise!” stamp set, is heat embossed with VersaMark Ink and Ranger Super Fine White Embossing Powder and says, “A little extra PUFF for all those candles.”
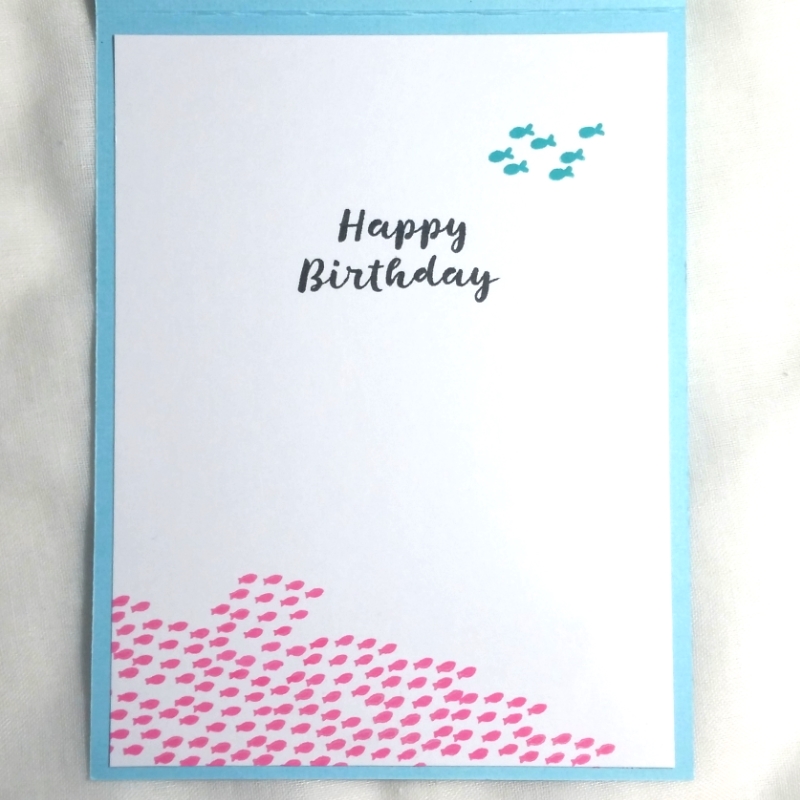
For the inside of the card, I used the school of fish stamp from both the Avery Elle “Sea-Prise!” (for upper right) and the Echo Park “Vitamin Sea” (for lower left) stamp sets. I repeated the colors from the card front by using the Tim Holtz Distress Oxide Inks in Peacock Feathers and Picked Raspberry. Because I wanted the inside card liner to have more visual weight at the bottom, I stamped out the school of fish repeatedly to make it a big mass (like the sort I’ve been seeing in the BBC Blue Planet video series). For the sentiment, I used the simple “Happy Birthday” stamp from the Power Poppy “Party Time” stamp set.
Click the following picture to watch the process video of crafting this card:
This water shaker card is being entered into the following challenges:
Cute Card Thursday Anything Goes Challenge
Simon Says Stamp Monday Red, White and/or Blue Challenge
Simon Says Stamp Wednesday Red, White and/or Blue Challenge
Word Art Wednesday Anything Goes Challenge
Creatalicious Anything Goes with Optional Hero Challenge
CAS-ual Friday Heat Embossing Challenge
Simon Says Stamp Work it Wednesday the Great Outdoors Challenge
Card Mania Anything Goes Challenge
Lil Patch of Crafty Friends Anything Goes Challenge
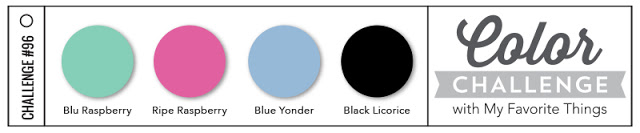
MFT Card Sketch Challenge #96
]]>
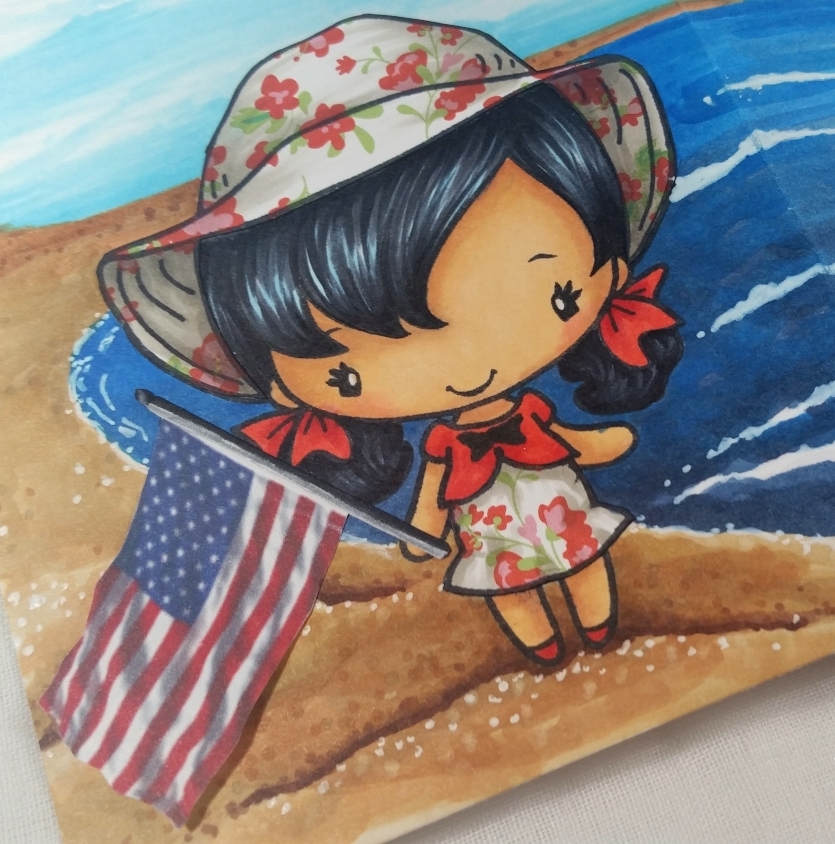 Well, of course I wanted to make a special card so I decided to create patriotic and summer beach-y scene card with a cutie representing my friend who lives in the U.S. on one side a senior cutie representing her grandmother on the other side.
I printed out U.S. and South Korean flags from my computer and fussy cut them out so the ladies could each hold a flag showing where they are. I glued down the staffs and popped up the ends of the flags with double side foam dots for a bit of dimension (I don’t want too much dimension since this will have to be mailed to South Korea).
While an ocean separates them, they are joined in love. The sentiment is stamped out with Hangul alpha stamps, and says “Congratulations!” and “I love you!” in Korean. I doodled some wonky hearts with a Black Copic Multiliner Pen in 0.03 and 0.1 pt to fill out the off-kilter sentiments (the Hangul alpha stamps are very blocky and had a childish crooked look so I thought these hearts added to that free spirit).
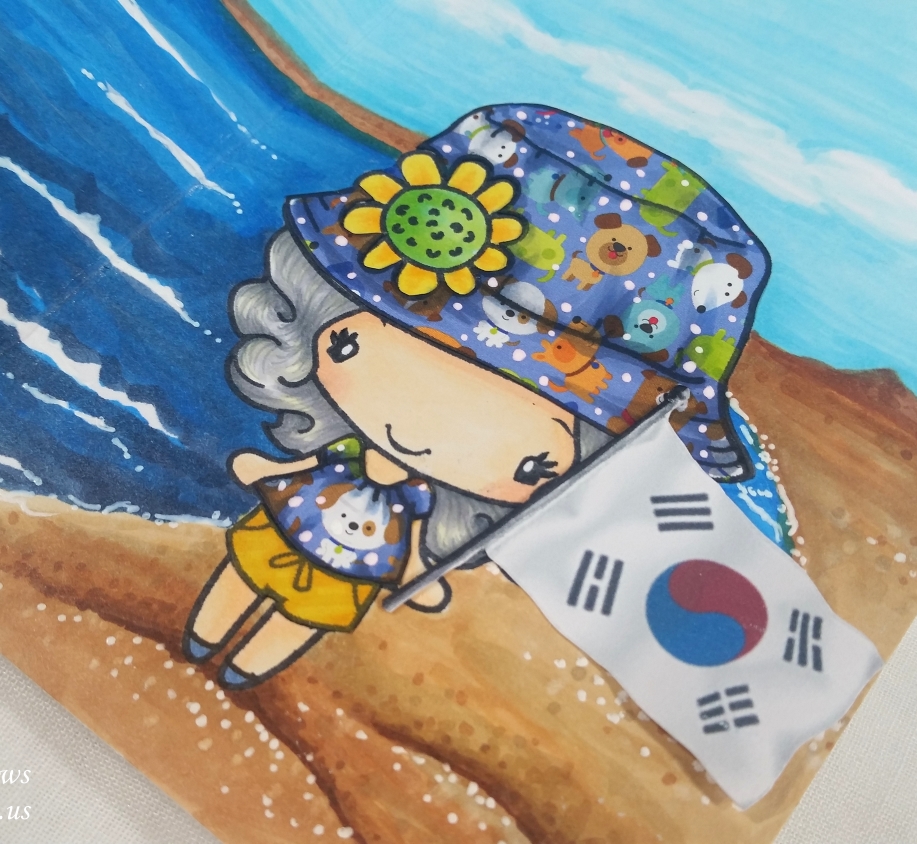 I Copic colored the ladies, who are from The Greeting Farm’s “Sunny Kit”, and I paper pieced their hats and outfits with papers from American Crafts “Spring” collection and the Doodlebug Designs “Puppy Love” collection. For the puppy paper, I also added some white Gel Pen dots to brighten up the patterned paper a bit. I used the following Copic colors:
Young girl: Hair: B01, C7 and C9; Skin: E51, E21, E53, E11 and R20; Bows and jacket: R14 and R27; Shading on paper pieced hat and dress: W1, W3 and W5
Senior lady: Hair: Y00, W1, W3 and Warm Gray Copic Multiliner Pen for detailed strands; Skin: E00, E50, E51, and R30; Shading for Hat and top: B45, C3, and C5
As you may have noticed, I slightly altered the stamped images to remove the bare midriff of the younger girl and eliminate the stripes and adding short sleeves for the older lady. Since this is a birthday card for a 99 year old, I thought making the outfits a bit more modest would be the way to go. 🙂
For the scene, I used lots of Copic colors to create two coasts for the ladies to stand on, an ocean to separate them, and a sky that connects them all together. These are the colors I used:
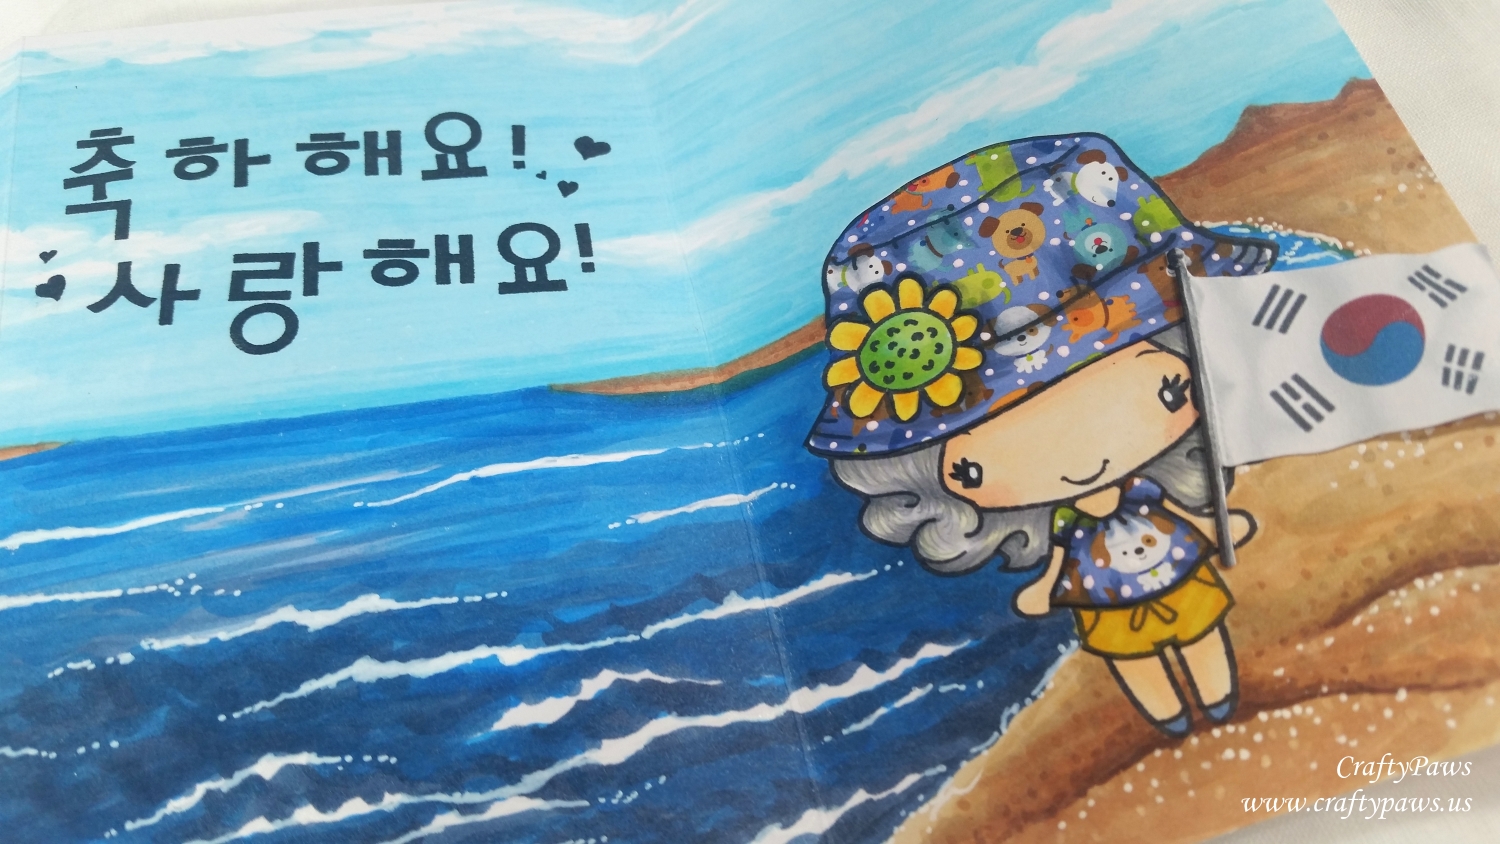
Coasts: E31, E33, E41, E43, E55, E25 and Stabilo Uni-ball White Gel Pen for extra highlight dots for sandy texture
Ocean: B93, B06, B95, B97, B99 with the bare white card stock and added Stabilo Uni-ball White Gel Pen highlights for the foaming waves
Sky: Bare white card stock left for clouds and B000, B00 and B01
The following is a video sharing the card and includes a tutorial on how to paper piece stamped images with patterned paper:
This special birthday card is being entered into the following challenges:
The Greeting Farm Farm Fresh Summer Fun Challenge
Simon Says Stamp Work It Wednesday Summer Challenge
Simon Says Stamp Wednesday Anything Goes Challenge
Creatalicious Anything Goes Challenge with Optional Red White and Blue
Word Art Wednesday Anything Goes Challenge
Through the Craft Room Door Anything Goes Challenge
Crafty Gals Corner Anything Goes Challenge
MarkerPOP Summer Fun Challenge
]]>
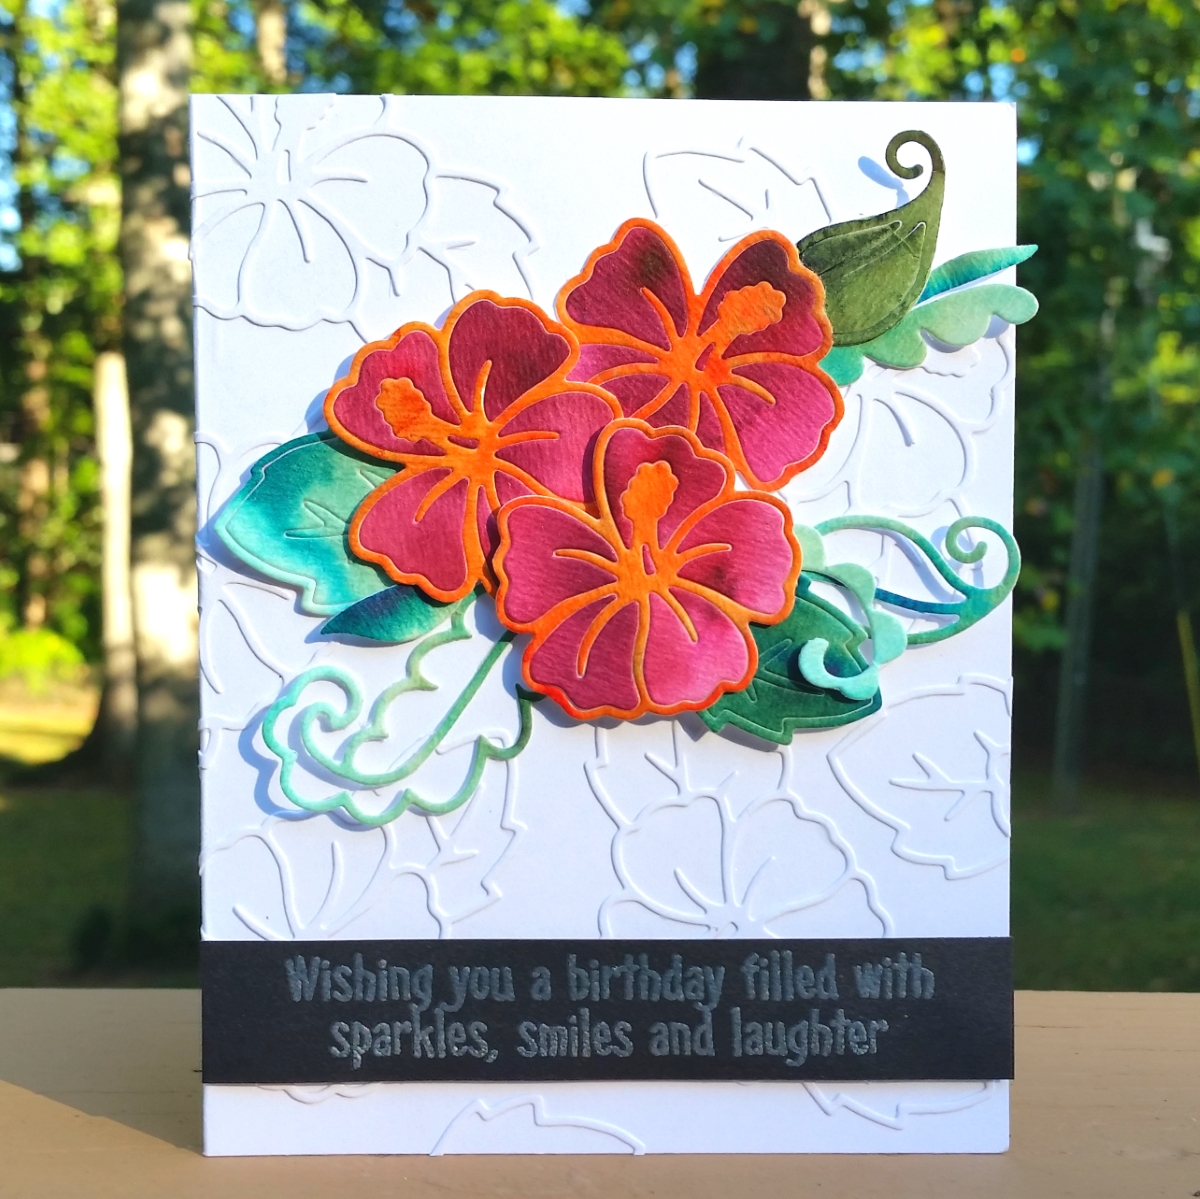 First I wanted to just use the outline portion of the Hibiscus Die to create a faux embossed look for the card background. I die cut it out 10 times from white card stock and glued them down onto a white card base using Art Glitter Glue with a fine tip nozzle in a random pattern, making sure to have some of these flower outlines run off the edges of the card base and wrapping them even to the back of the card. I love this all-white, subtle yet interesting textured background.
Then for the focal flower cluster, I used 140 lb Strathmore watercolor paper, a paint brush, a water-filled spray bottle, and Ken Oliver Color Bursts in Merlot, Burnt Orange, Yellow Ochre and Terre Verte to create watercolored scraps with lots of variations in color tones. I then used the Hibiscus Die to cut three flowers from the merlot red paper, three flowers from the yellow ochre/burnt orange paper, a couple of the Hibiscus Die leaves and two of the Paisley Die Set flourishes from the terre verte paper. I used just the outlines of the flowers (cutting off the leaf portions) from the yellow ochre/burnt orange paper and inset the merlot red flower petals. For the leaves and paisley flourishes, I popped some of the inner sections out and used them as additional foliage. To add to the dimensional look, I used 1/16″ and 1/8″ foam dots behind the hibiscus flowers and glued down only the base of each leaf behind the flowers so the leaf ends were free to hang off the card front.
Lastly, for the sentiment, I used a retired Hero Arts Clear Princess stamp set (sorry there is no official name on the packaging). I heat embossed some Recollections Snow embossing powder onto a black card stock scrap with the sentiment that says, “Wishing you a birthday filled with sparkles, smiles and laughter.”
The following is a process video sharing how I made this card:
This card is being entered into the following challenges:
Winnie & Walter Background Building with Shay Challenge
Word Art Wednesday Anything Goes Challenge
Addicted to CAS Watercolor Challenge
Simon Says Stamp Work It Wednesday Red, Orange and Yellow Challenge
Ceafts Galore Encore Anything Goes Challenge
Through the Craft Room Door Anything Goes Challenge
Crafty Gals Corner Punches/Die Cuts Challenge
Addicted to Stamps and More CAS Challenge
MarkerPOP Color Challenge

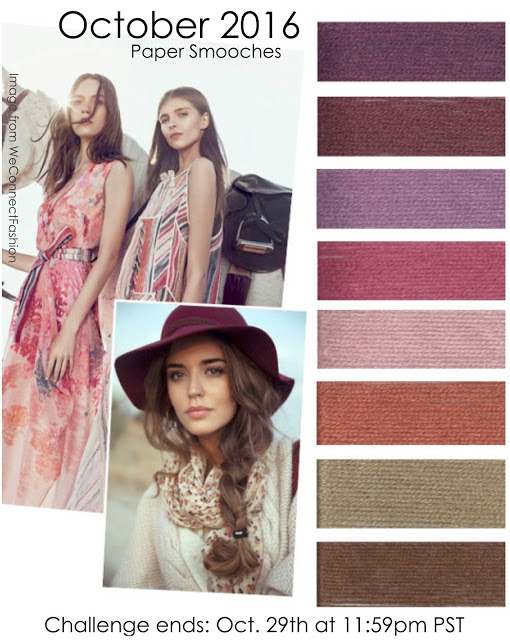
Paper Smooches Fall Color Story Challenge
]]>
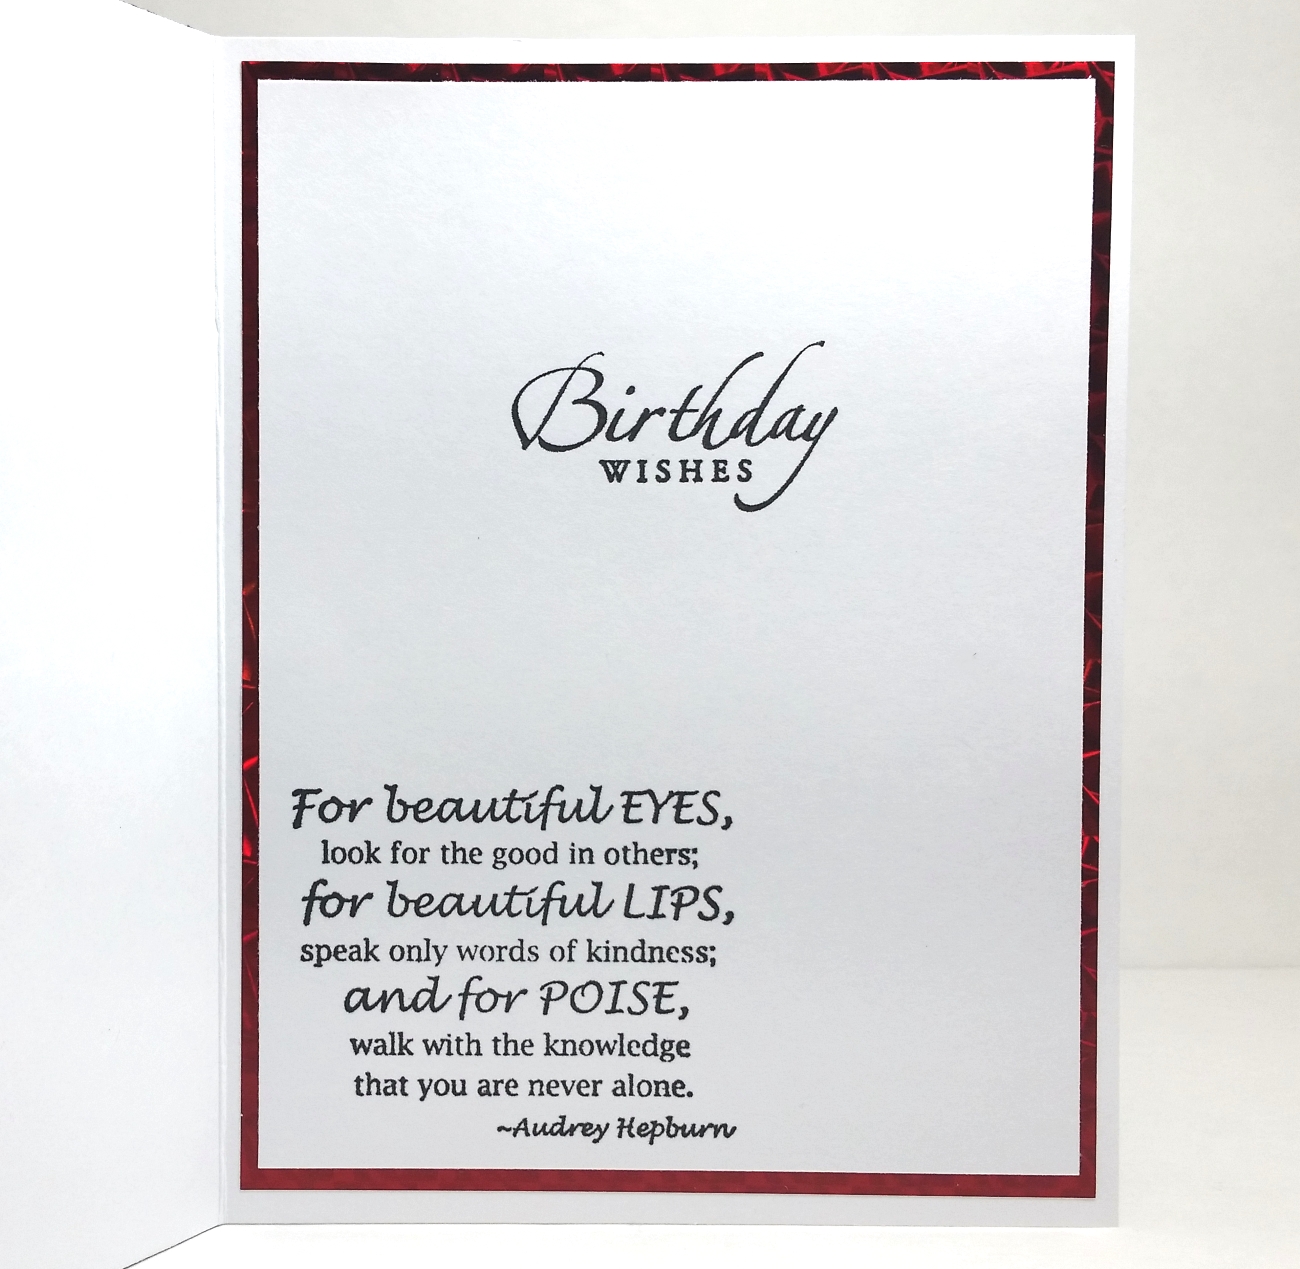 I used the “Uptown Girl Audrey Loves Makeup” Stamping Bella stamp and colored her up with the following Copics:
Skin: E50, 51, 53 plus R20 for blush and B000 for eye shadow
Hair: E55, 57
Little black dress (LBD) and shoes: C0, 2, 4, 6, 8
Red purse (which I “quilted” by doodling on light dashes in a diamond pattern) and bows in hat: R14, 17, and 37
Clear Wink of Stella to add just a bit of shimmer to her purse and the left side of dress
I fussy cut her out (this was a labor of love since these Stamping Bella images are so thin and delicate) and popped her up on double sided foam adhesive to be framed by a beautiful quilted border background that I created using a Crafter’s Companion die called “Friend.” I used the die to emboss some white card stock and then fussy cut out the center area to eliminate the Friend word. The key to embossing with dies is to use a silicone rubber pad and an impression pad rather than normal cutting plates (if you’re interested in the exact sandwich, I share it in my video linked below).
Then I blended on some Hickory Smoke Tim Holtz Distress Ink to highlight all the beautiful embossing. It seemed almost like magic to me that the kind of country trellis die could be transformed to look more like the quilting on a Channel bag by using it to emboss rather than die cut! After adding some Cranberry Stickles around the border of the frame to add some sparkle (because, really, what 18 year old doesn’t want a little glitter on a birthday card?), the card was done!
The following is a video share, including a mini tutorial for how to emboss with dies:
This card is being entered into the following challenges:
Simon Says Stamp Wednesday Make for the Border Challenge
Seize the Birthday Anything Goes Challenge
Word Art Wednesday Anything Goes Challenge
Addicted to Stamps and More Make Your Mark Challenge
Through the Craft Room Door Anything Goes Challenge
MFT Camp Create Divine Dry Embossing Challenge
![]()
![]()
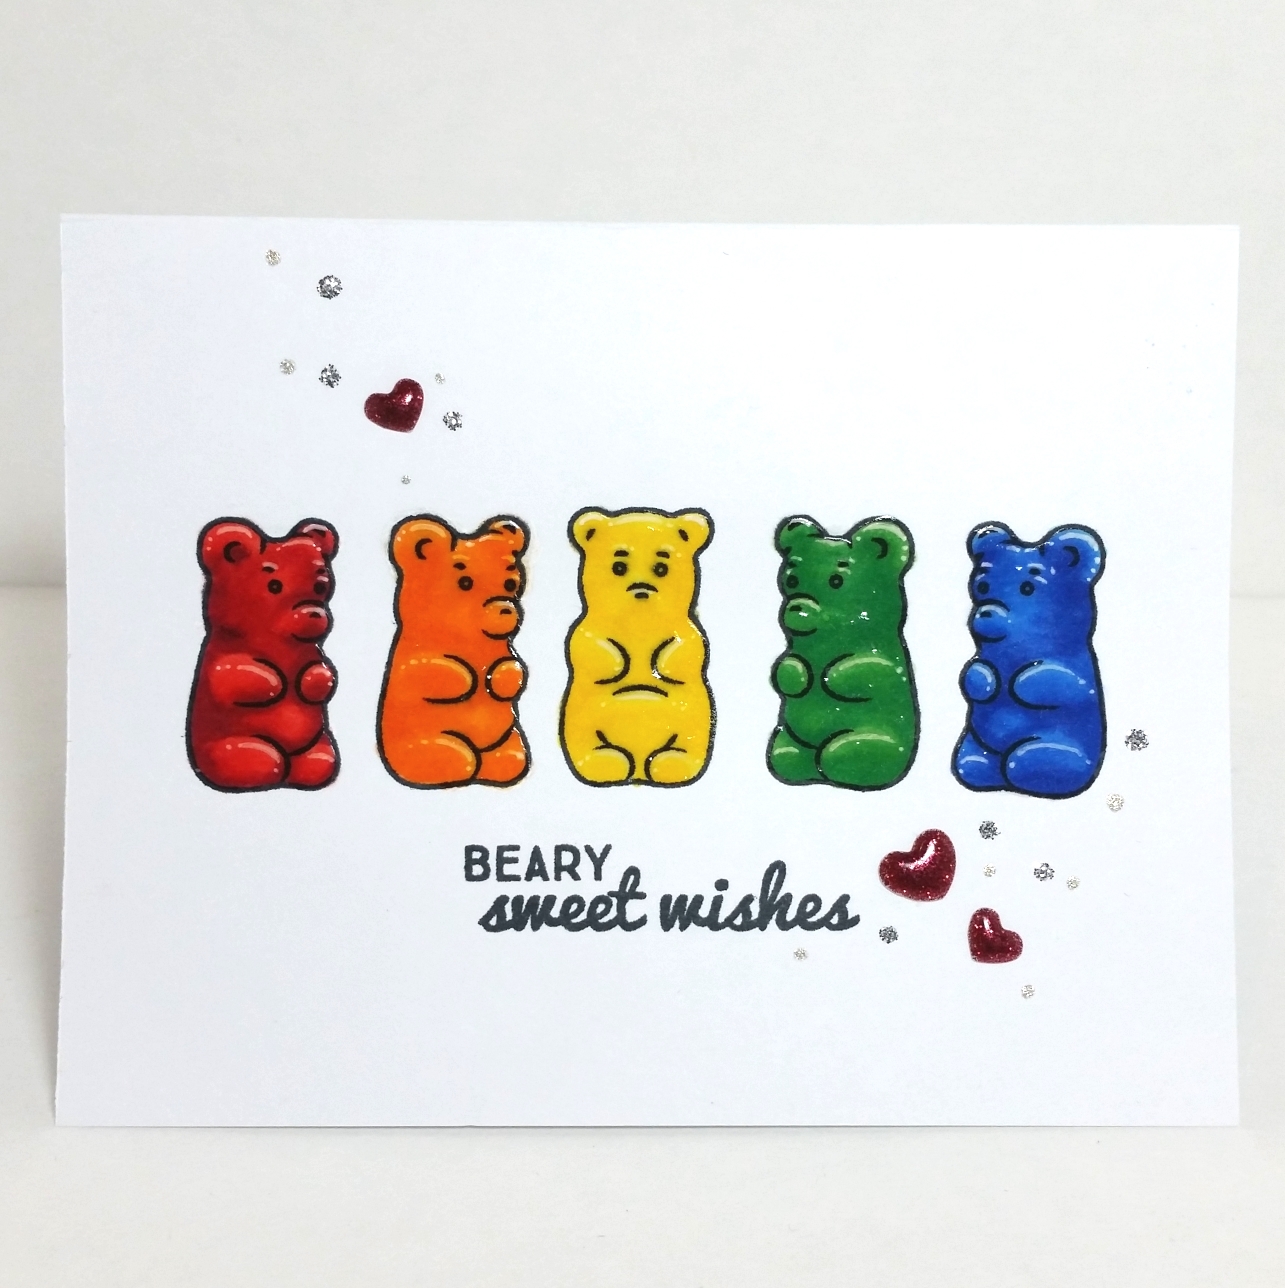 I used the MISTI to position the center bear in the center of the card and flank the left and right facing bears, “just so.” It also allowed me to repeatedly stamp, as needed to ensure clean, clear images. The coloring was relatively simple, except that I wanted to try to give each colored bear a translucent and shiny gummy look. To do this, I used a full range of light to dark shades for each color as follows (listed light to dark):
Red: R32, 35, 37 and 39
Orange: YR000, Y17, YR65 and YR04
Yellow: Y11, 13 and 08
Green: G12, YG09 and G09
Blue: B01, 21, 24 and 18
To accentuate the highlight areas, I also added some curved lines and dots with a white Sakura Gelly Roll Pen and then topped each gummy bear with a healthy coating of Glossy Accents. That added such a great shine.
I wanted to keep this card CAS so all I did to add a little extra interest and sparkle was add some Michaels dollar bin red glitter heart enamel dots, glittery silver Stickles dots, and some small doodled dots with a Sakura Clear Star Gelly Roll Pen.
This card is being entered into the following challenges:
CAS-ual Fridays Tic Tac Toe Challenge – enamel dots, no patterned paper, and glitter or sparkle
Word Art Wednesday Anything Goes Challenge
Seize the Birthday Bold and Bright Challenge
![]()
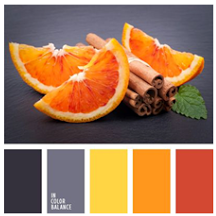
Seven Hills July Color Challenge – yellow, orange and red
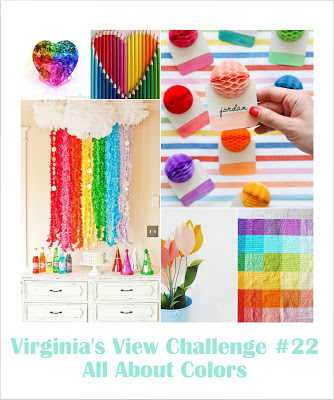
Virginia’s View All About Colors Challenge
MFT Camp Create Fantastic Foiling – Shine Challenge
![]()
![]()
]]>
 As many of your know, my brother is dealing with kidney failure and just a few months ago, we worried that he would not make it to his 52nd birthday. As we pass his birthday this week, we feel so blessed that he has made it this far and we have hope that he is going to get more good news soon (please keep us in your prayers).
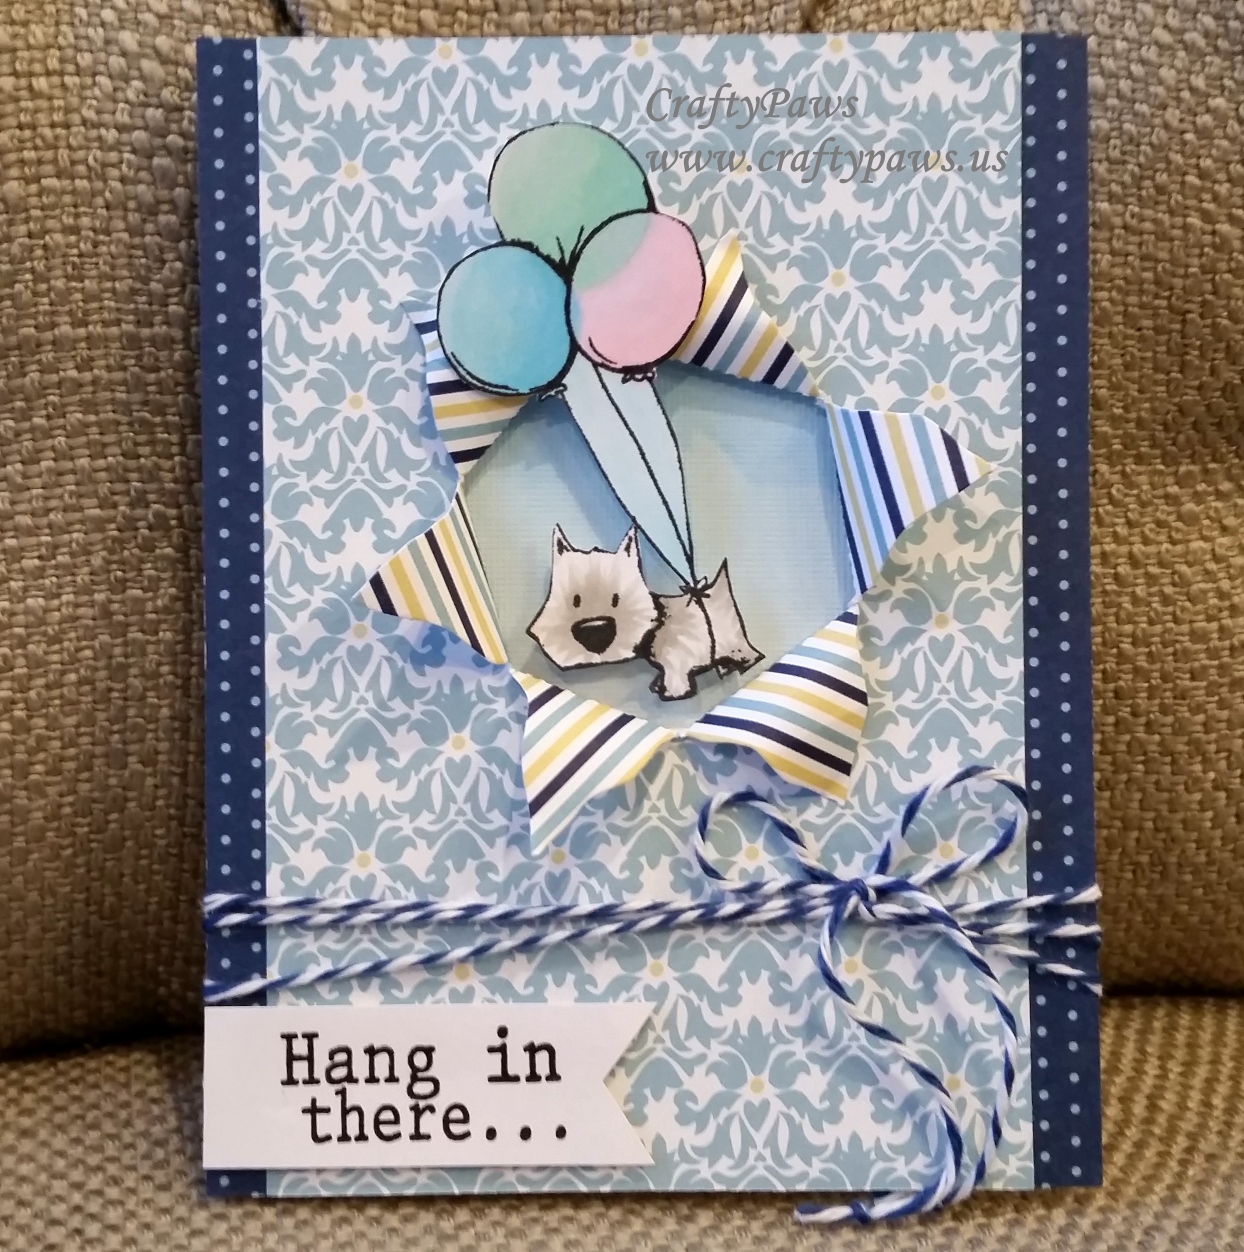
I am late making this card for him, but I wanted to use the adorable “Flying High” stamp set from Tiddly Inks and the Pretty Pink Posh Peek-a-boo die to make this quick birthday card for him. Amazingly the stamp set includes sweet puppies (my brother is a real dog lover), the sentiment “Happy Birthday,” as well as the sentiment “Hang in there….” It’s like the stamp set was made for him.
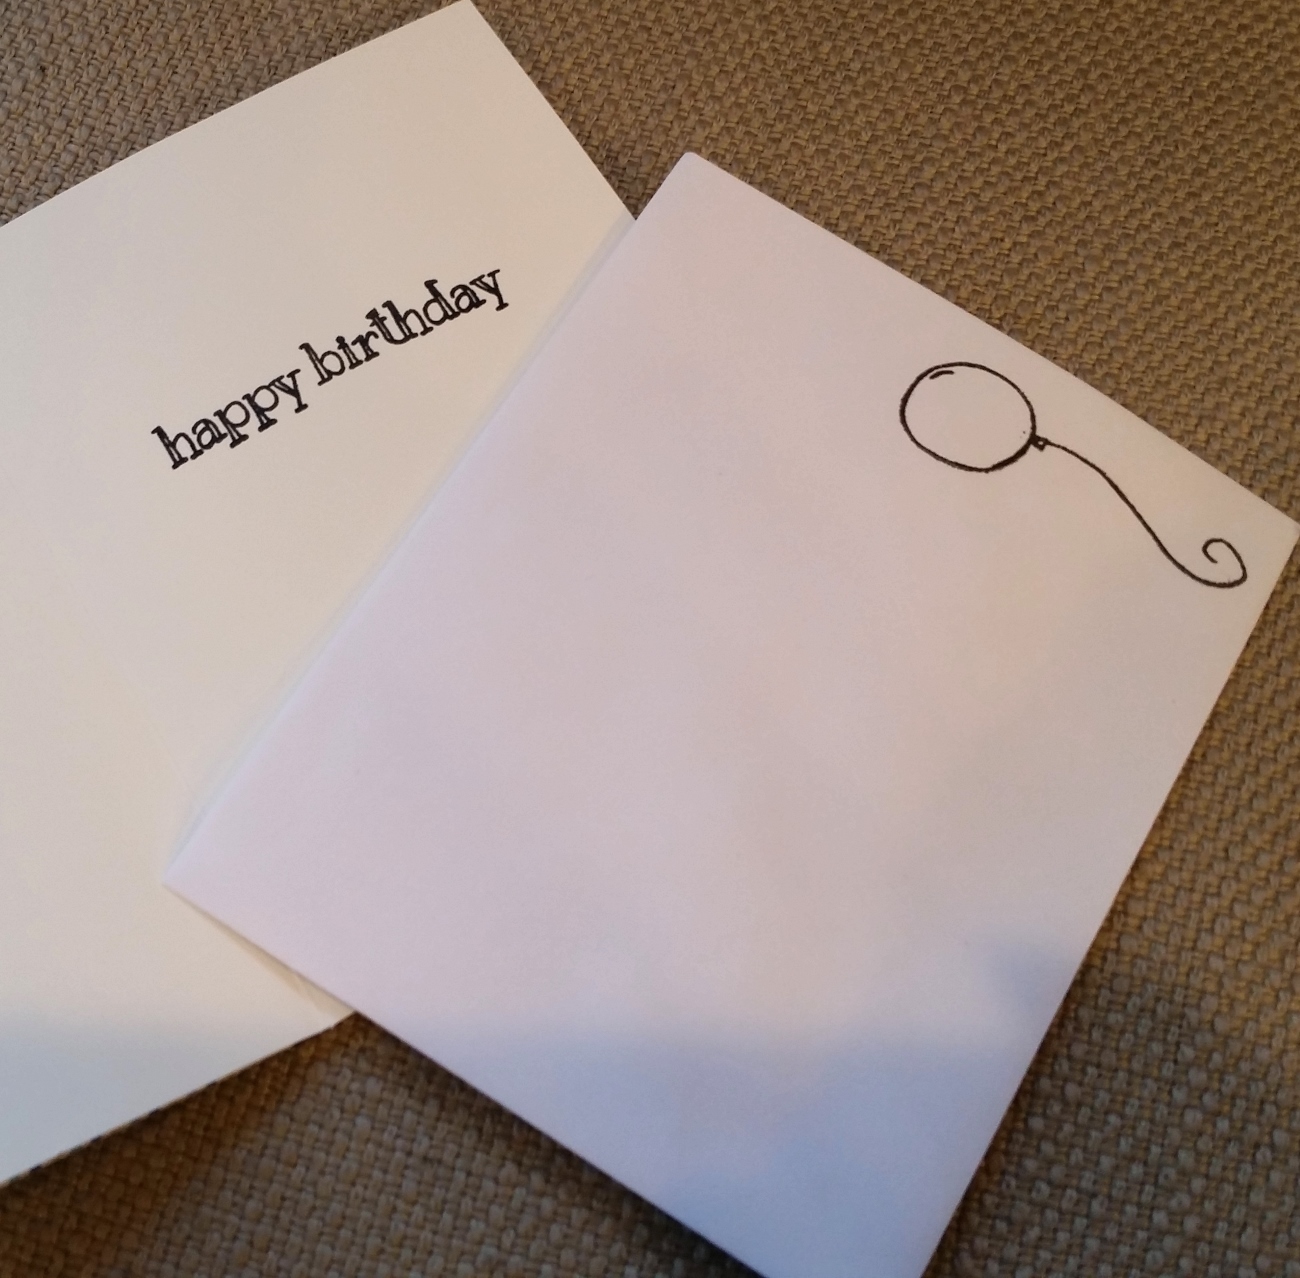 The Copic coloring of the image was super simple, the biggest “tricky” part being the translucent look I wanted for the balloons. The puppy is colored with W1 and 3. The balloons are colored with B000 and 00; G000 and 00; and RV000 and 00. Then because I didn’t want to try to Xacto cut between the balloon strings I used the B000 to color the “air” and hoped they would blend with the background card base color.
The papers I used are all from the My Mind’s Eye Moments collection, except the card base, which was from a Michaels special hot buy set called “Dip Dyed.” I also used some navy and white baker’s twine wrapped around the top layer of the card (which was popped up on double sided foam adhesive for a little extra dimension. It is a simple card, but I really love the dimension and fun of the puppy floating through the bursting peek-a-boo opening. I hope my brother will enjoy it too. 🙂
This card is being entered into the following challenges:
Simon Says Stamp Work It Wednesday STAMPtember Challenge
Simon Says Stamp Wednesday Wrap It Up Challenge
Through the Craft Room Door Anything Goes Challenge
Crafts Galore Encore Make A Card Challenge
Lil Patch of Crafty Friends Anything Goes Challenge
The Daily Marker 30 Day Coloring Challenge
613 Avenue Create Anything Goes Challenge
Seize the Birthday Anything Goes Challenge
]]>
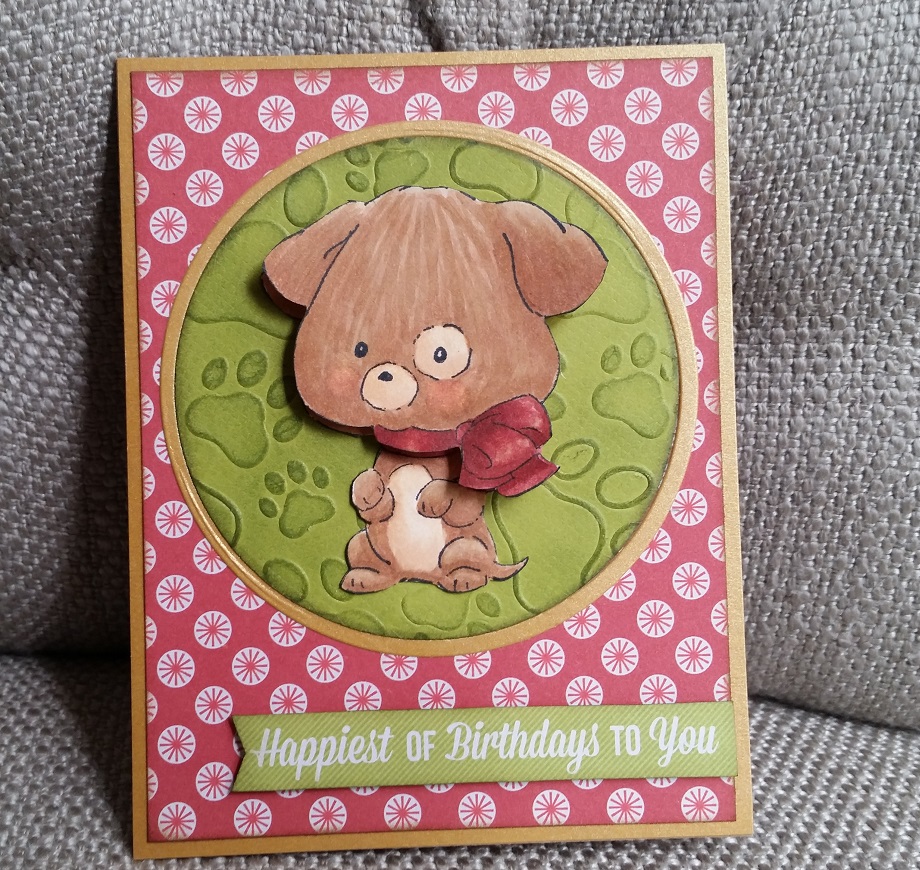 I salvaged a green circle die cut embossed with doggy paw prints (from a Darice embossing folder) and Forest Moss distress inking and a gold shimmery ring die cut that was left over from my peek a boo bulldog card from a few days ago. Then I chose the adorable I Wuff You Art Impressions stamp (that I picked up at the Scrapbook Expo a couple months ago and have been itching to ink up) to make the focal point. Isn’t he so adorbs?! My brother-in-law is a big dog lover so I knew he would like this.
I stamped out the image twice and colored 1 image with these Copic colors:
Light parts of pup: E50, 51 and 53
Dark parts of pup: E31, 33, and 35
Ribbon bow: E13, 07 and 09 (to match the background paper)
Blush: R20
The second image I just colored the edges with E33 (for the dog parts) and E07 (for the bow parts). I didn’t fret too much about blending or exactness on this second image since I was going to fussy cut around the whole thing, and it was going to go under the first carefully colored image. I fussy cut both images and for the top image I separately cut the head and bow away from the body. To add a little extra sumthin’ sumthin’ I made a DIY action wobble for that head piece so the pup can nod his head up and down. I luv it when my pup, Bandito, does that. 🙂 The sentiment and the papers are from an old paper collection from my stash–sorry I can’t remember the brand.
And the punch line? I frantically finished the last addition of popping up the sentiment on double sided foam adhesive as my sister pulled into the driveway to take me to the airport. I made it just in time! I got a call tonight from my brother-in-law thanking me and oohing and ahhing over the card.
This card is being entered into the following challenges:
Art Impressions Shake It Off Challenge – WINNER
Simon Says Stamp Anything Goes Wednesday Challenge
MarkerPOP Anything Goes Challenge
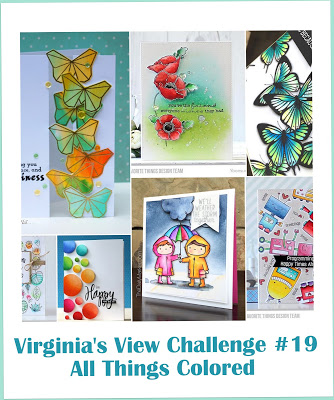
Virginia’s View All Things Colored Challenge
Thanks for stopping by and have a wonderful crafty day. WOOF
]]>
I decided to create a bouquet of balloon animals that are flying through the air, trying to carry along a girl from the Mama Elephant “In My Heart” stamp set–think of Russell, the little boy from the movie “Up!” that was traveling by a house carried along by a slew of balloons. 🙂
To create the balloon bouquet, I created a post-it note mask for each chubby chum. After stamping each one on the card base, I placed the mask on top before stamping the the next chubby chum so that I could make them appear as though some of them were in front of others. As I imagined these balloons to be made of mylar rather than rubber, I did not try to create a translucent look.
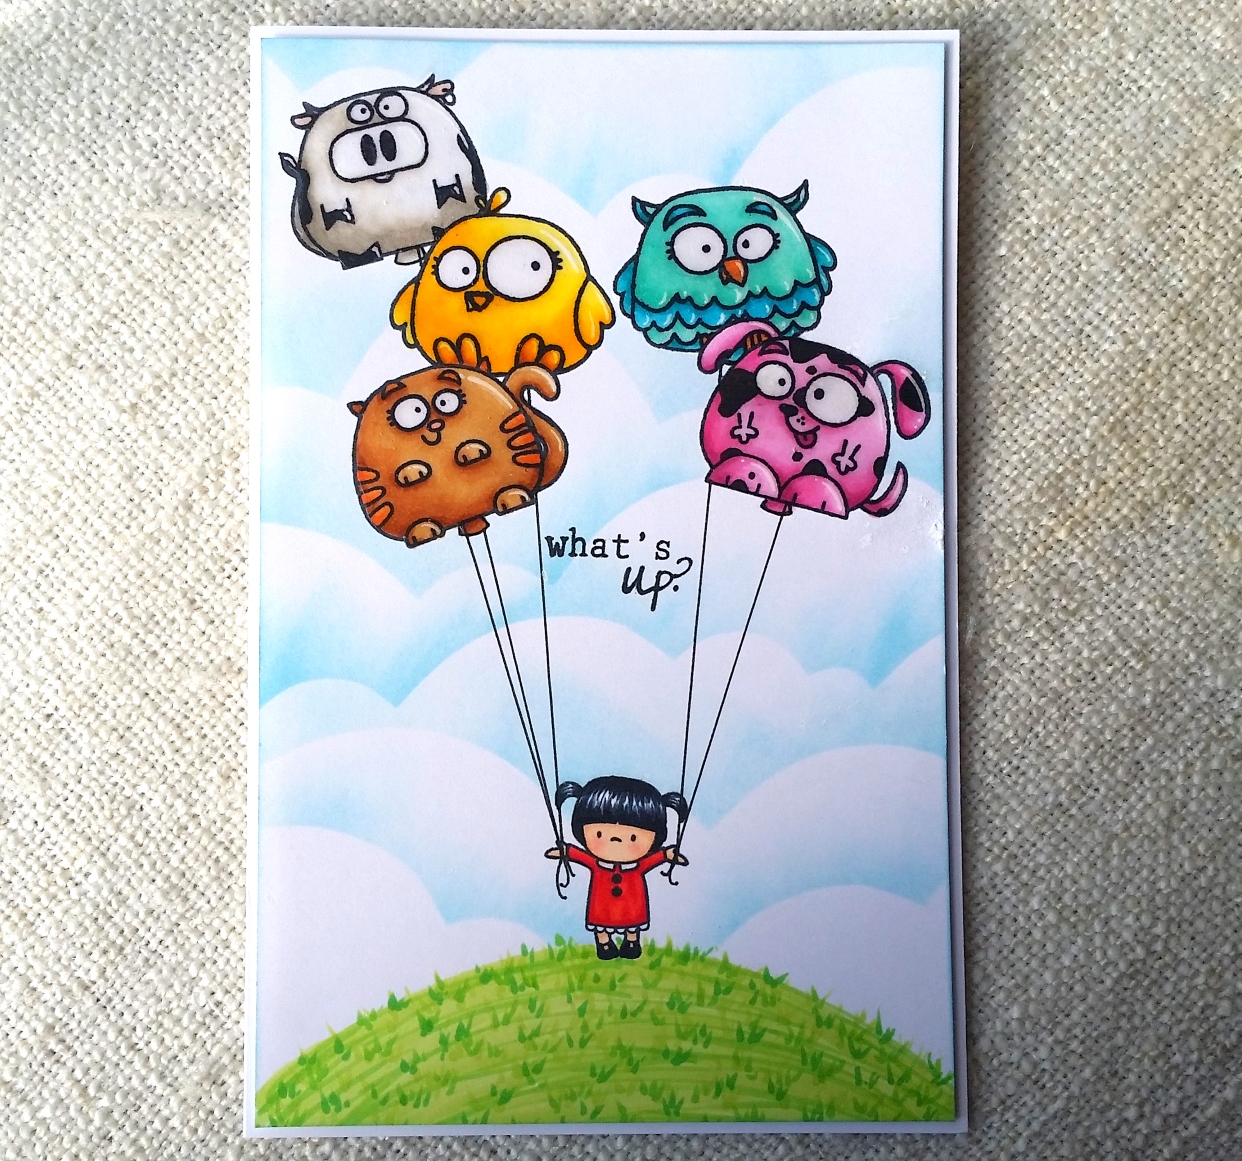 Then with a Copic multi-liner pen, I drew in the mouth of each balloon and used a ruler to draw the strings from the balloons to the little girl’s outstretched hands.
I used the following Copic colors for each of the animals and for the girl:
Girl’s hair: B01, C7 and C9
Girl’s Skin: E000, 00, 11 and R20
Girl’s Dress: R22, 24 and 29 with C1 for the white collar and lace trim
Chick: Y11, 15, 17 and E15
Cow: W1, W3, 0 and R30 for ears
Cat: E31, 33, 37, 97 and R20 for nose
Owl: BG10, 32, 23, 45, 49 and E97 and 33 for beak and feet
Dog: RV52, 55, 66
I also added highlights with a white Sakura Gelly Roll Pen and put a coat of Glossy Accents over the whole lot of balloons.
To create a look of a sky filled with puffy clouds, I sketched out a row of different sized arches onto some scrap card stock and hand cut it out. This was the mask I used to ink around using Tim Holtz Distress Ink in Tumbled Glass. For the grassy hill, I lightly drew in a hill with a pencil and colored and drew in grass with Copic colors: YG03, 07 and 09.
The following is a process video for creating this card:
This card is being entered into the following challenges:
AAA Cards Maskerade Challenge
Paper Smooches Anything Goes Challenge
![]()
Seize the Birthday Anything That Flies Challenge
![]()
Through The Craft Room Door Anything Goes Challenge – WINNER
Lil Patch of Crafty Friends Anything Goes Challenge
Thanks for stopping by, and I hope you’re having a great day! WOOF
]]>
The card base is Bazzill pink textured cardstock. I layered a scrap piece of white cardstock and then used an extra piece of pink cardstock which I ran through my Big Kick with a happy birthday embossing folder. To pick up the raised parts of the embossed paper, I smudged on white ink with my index finger. To add more interest and a springy look to the background, I also glued white flower and small pearlescent sequins.
The cutie patootie stamped image is from Little Blue Button Stamps and is called Miss Lilly Big Cupcake. I colored her up with my Chromatix and Copic markers and added some extra sparkle and shine with Glossy Accents on her eyes and the cherry and glitter glue on the frosting of the cupcake. To give Miss Lilly and the cupcake something to stand on, I used my Martha Stewart doily edge punch and added some sheer blue ribbon to pick up the color of Miss Lilly’s headband and dress.
Thanks for stopping by, and have a great day! WOOF
]]>