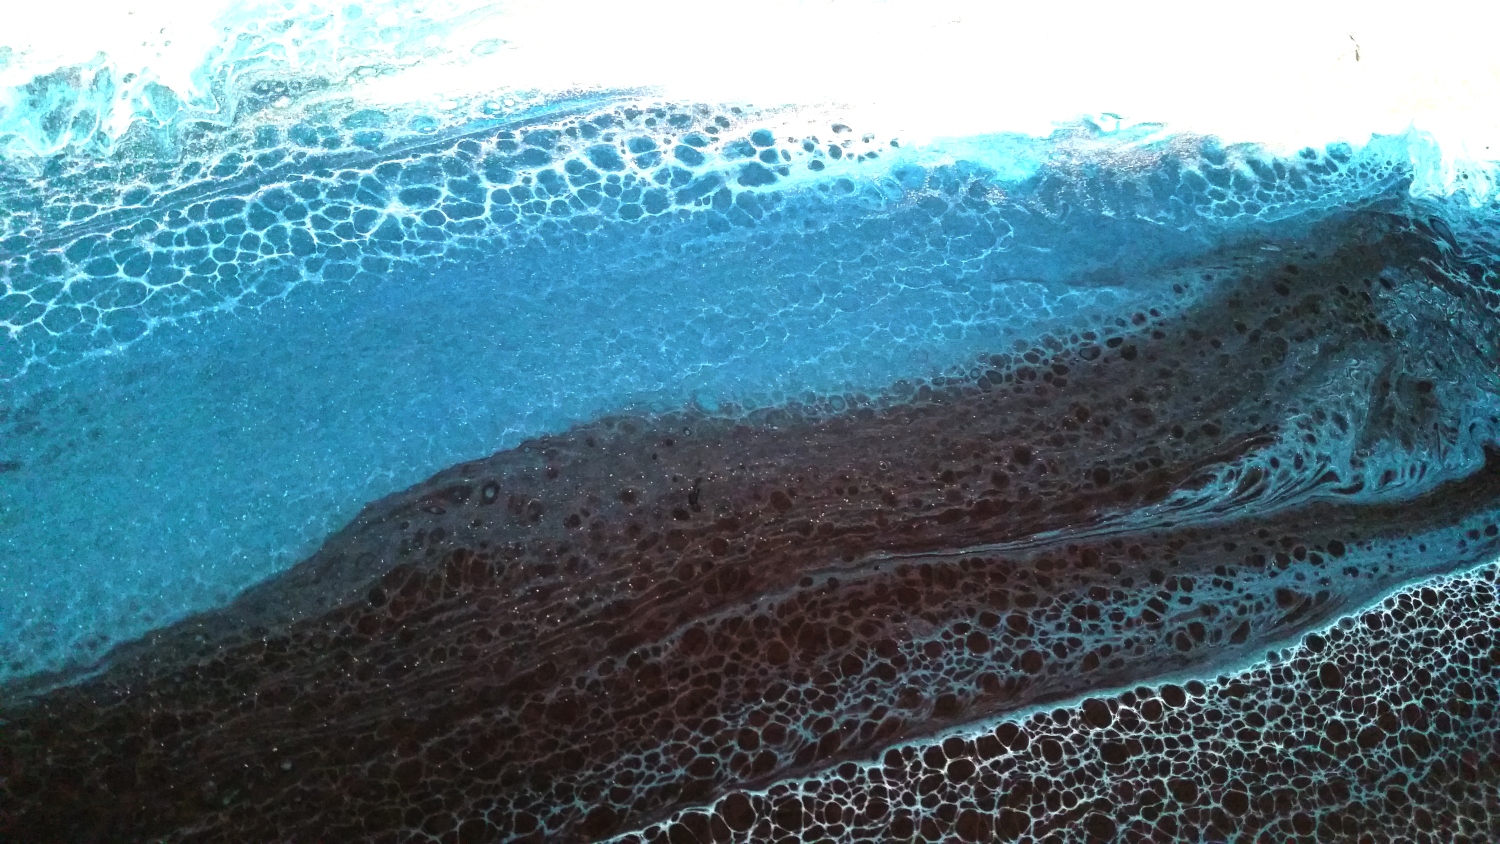
I started first by gessoing the entire canvas with Liquitex Basic White Gesso. After a couple of hours of dry time, I mixed my 4 acrylic pour mixes, 1 part paint to 2 parts Flood Floetrol with a squirt (yes, that’s the technical term – LOL) of Silicone Treadmill Lubricant. To cover about 2/3rds of the background, I mixed up about a quart of white. One of my favorite ocean-y blues is the Artist’s Loft Metallic Cobalt Blue Acrylic Paint so I mixed up about a pint of that. To add a fun sparkle to the piece, I mixed up about a cup of Martha Stewart Silver Glitter Acrylic Paint. Then I had a couple of deep dark blues (sorry I don’t remember the brand) that I mixed with black (about 1:3) to create an almost black pour.

I poured and brushed out the white on the top 2/3rds of the canvas, including the edges. Then I poured out the other paints, going from silver to cobalt and blue-black from top to bottom on the lower 1/3rd of the canvas. Next I did a bunch of swiping with an Ateco offset baking spatula, wiping off the spatula after every swipe so as not to muddy the paints. It is truly magical how the cells form after each swipe.
When I was fairly happy with the amount of mixing and separation of the colors, I paused to grab my blow dryer. I set the temperature to cool and turned on the power to high to push the top layers of paint even further. Some folks like more control, and manually blow through straws, but I find that for the large canvases I do, a blow dryer is much more effective. I love being able to move the paint without actually touching it to create softer tendrils of paint. I also push a lot of paint to the edges of the canvas to avoid getting too thick a layer in the middle, which sometimes leads to cracking or crazing as paintings dry.
Please click on the following picture to watch the process video (I apologize for the shakiness; I couldn’t find my portable tripod so I’m doing this hand held):
Disclosure: Many of the supplies I’ve used for today’s project are linked. Some may be affiliate links, which means if you make a purchase I receive a small commission at no extra cost to you. I truly appreciate your support toward the costs of running this blog!
This painting is being entered into the following challenges:
613 Avenue Create Anything Goes with Optional Clean and Simple Challenge
Word Art Wednesday Anything Goes Challenge
Creatalicious Anything Goes with Optional Circles Challenge
Lil Patch of Crafty Friends Anything Goes Challenge
Through the Craft Room Door Anything Goes Challenge
Crafts Galore Encore Anything Goes Challenge
Crafter’s Castle Anything Goes with Optional Fall/Halloween Challenge
The Corrosive Anything Goes Challenge
]]>
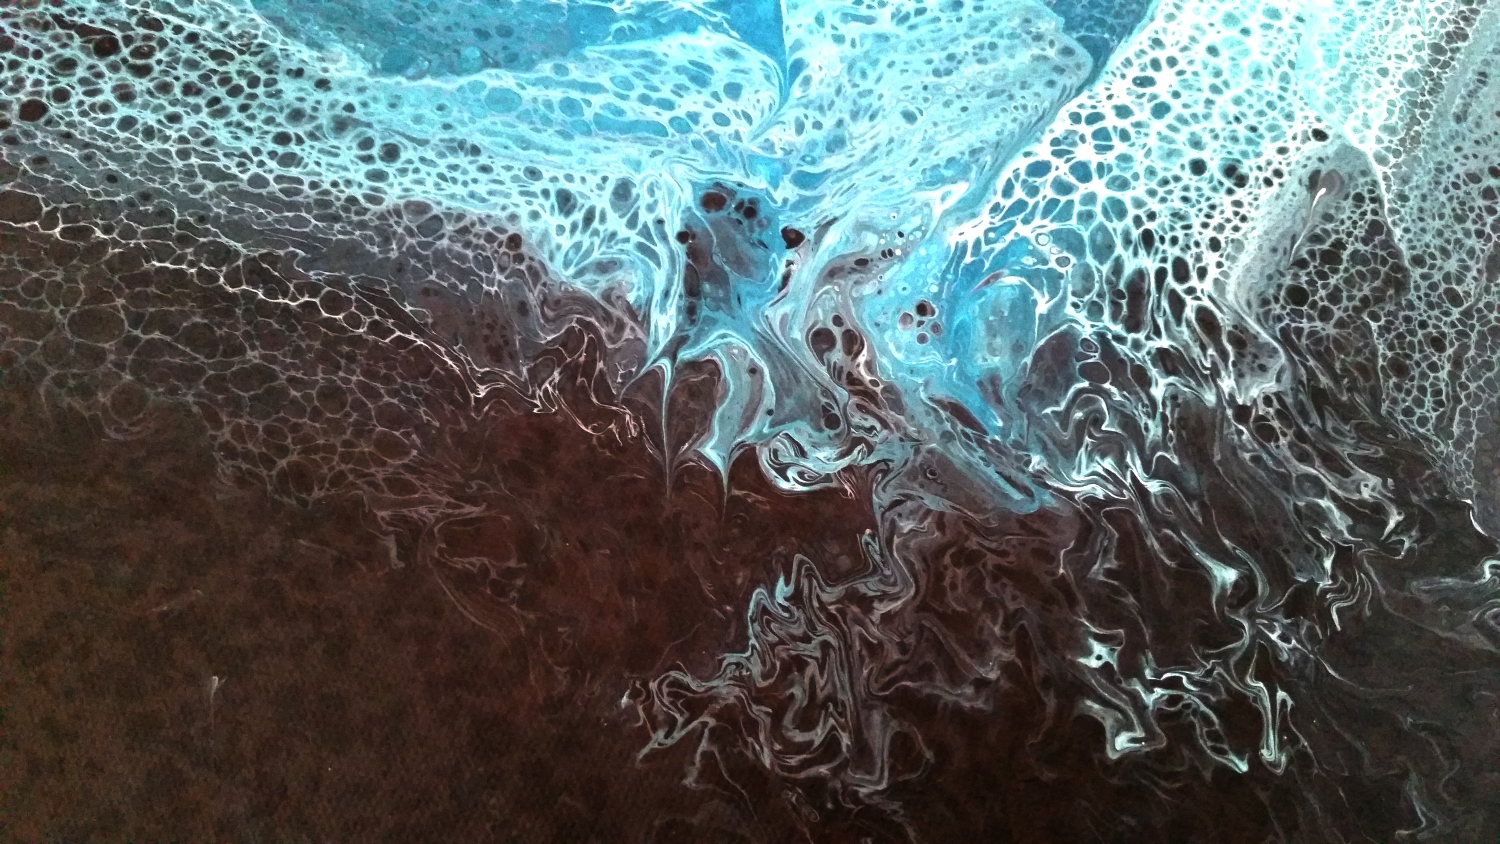
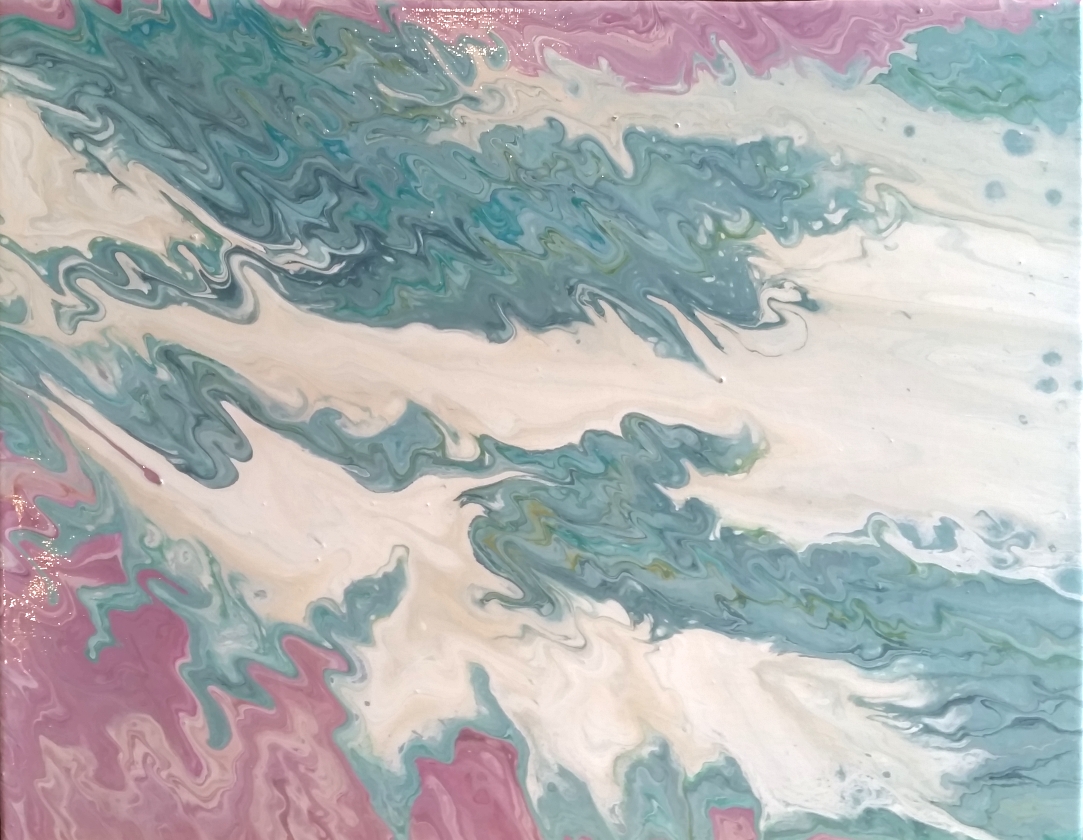
I prepared a 24″ x 30″ canvas that I picked up at Michaels during one of their 70% off sales with white gesso. Then I used various paints salvaged from prior acrylic pours to create a blue-black and a blue-green. I also mixed up some Craftsmart Bright Blue and a Martha Stewart Multi-Surface Antique Silver Glitter Paint with some Flood Floetrol additive (1:2) from Lowes (Home Depot no longer carries this).
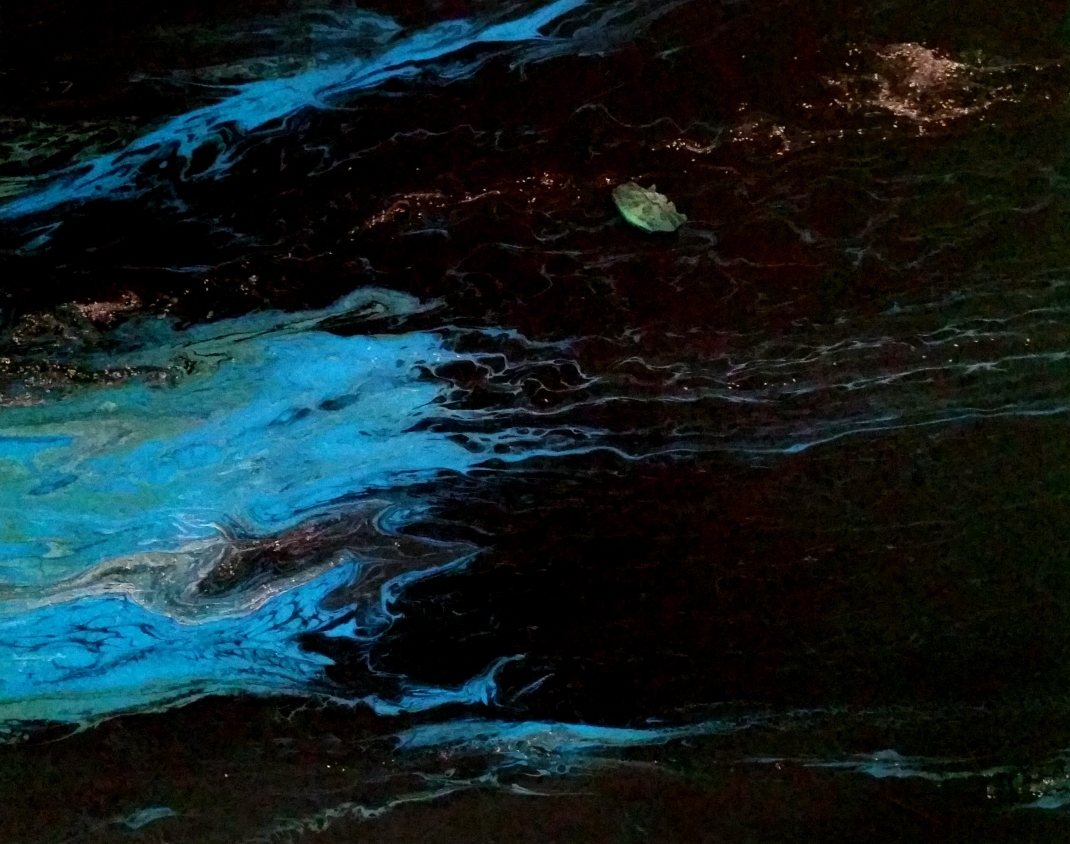
I splattered and poured all the mixed paints individually (rather than combining into a dirty pour) across the canvas, making sure that there was enough paint to flow off all the edges of the canvas for full coverage. Then I took wet paper towels and swiped them across the paints to pull light layers of paint over one another, creating phenomenal cells (which later turned into ribbons for a beautiful gaseous look). I probably used up about 20 paper towels, tossing them after each swipe so as to prevent muddying the colors.
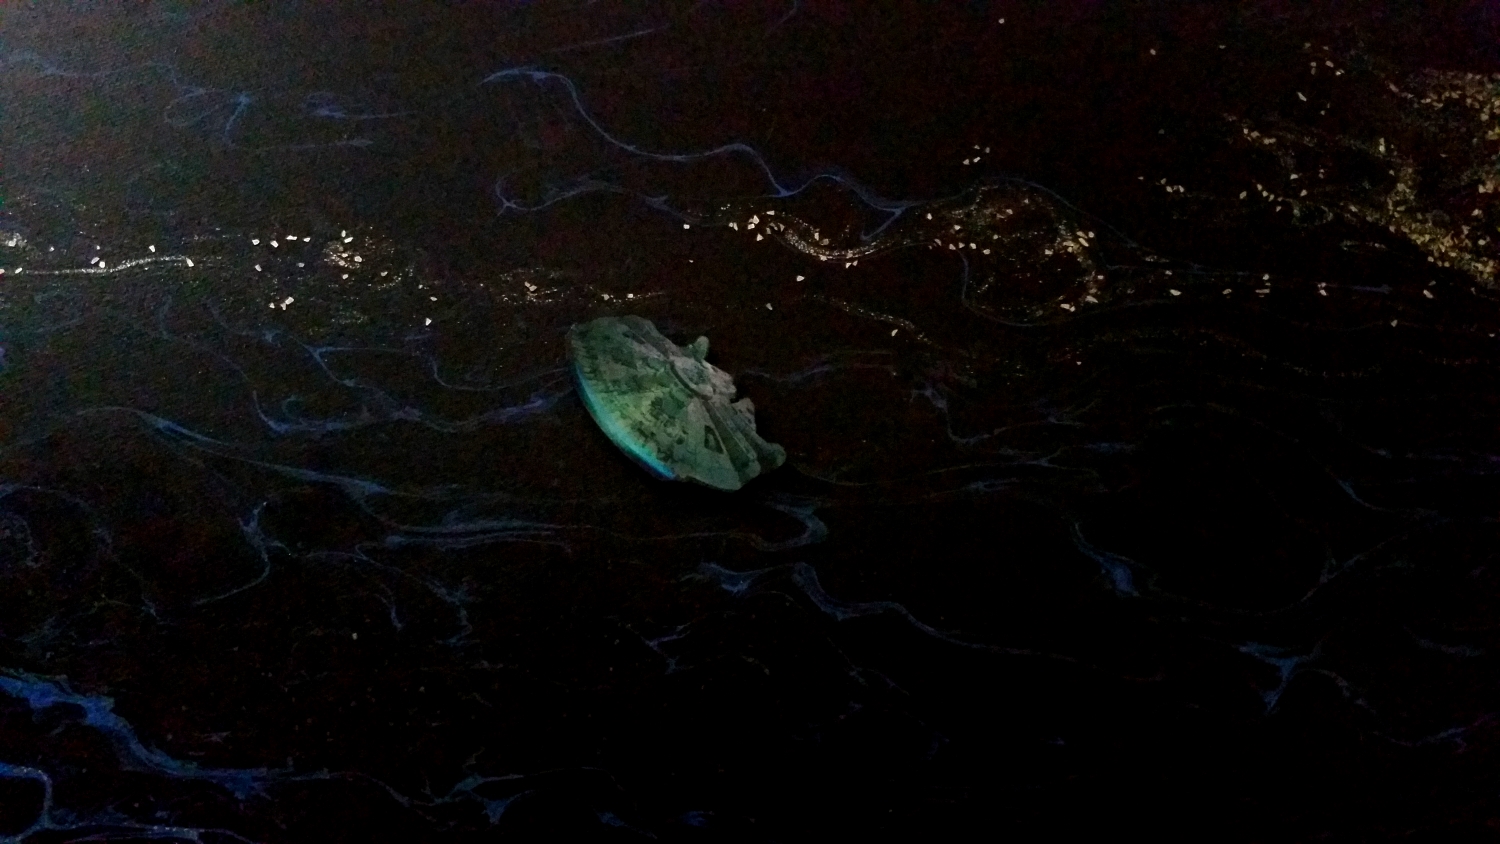
Then I started tipping the canvas to help pull and push the paints even more across the canvas. The results were totally unexpected (which is one of the things I love about acrylic flow art), and I lost a lot of the brighter blue areas. However, letting the paint flow with slight tipping adjustments gave the piece a wonderful galaxy look. To add sparkle and the look of stars, I also sprinkled on some Melissa Francis Glass Glitter in Silver, especially in the areas where I could find thin streams of the Martha Stewart antique glitter paint or where I thought I could emphasize a blue ribbon of paint in a predominantly dark area of the painting.
Then to make this bespoke piece extra special for Mr. CraftyPaws, I added an image of the Millenium Falcon that I found online. I sized it and then printed and fussy cut it out 6 times so that I could create a bit of dimension by adding thin double sided foam adhesive between each layer. Then I coated the top image with a bit of Gloss Mod Podge before finding it a home in this galaxy painting.
Click the following picture to watch the process video of this acrylic pour (sorry I lost the tipping part of the process):

Disclosure: Many of the supplies I’ve used for today’s project are linked. Some may be affiliate links, which means if you make a purchase I receive a small commission at no extra cost to you. I truly appreciate your support toward the costs of running this blog!
This painting is being entered into the following challenges:
Word Art Wednesday Anything Goes Challenge
Creatalicious Anything Goes with Optional No Squares or Rectangle Card Challenge
Card Mania Anniversary Challenge
613 Avenue Create Anything Goes with Optional Magic/Fantasy Challenge
Catch the Bug Anything Goes Challenge
The Corrosive Challenge Anything Goes
Simon Says Stamp Monday Sprinkles and Splatters Challenge
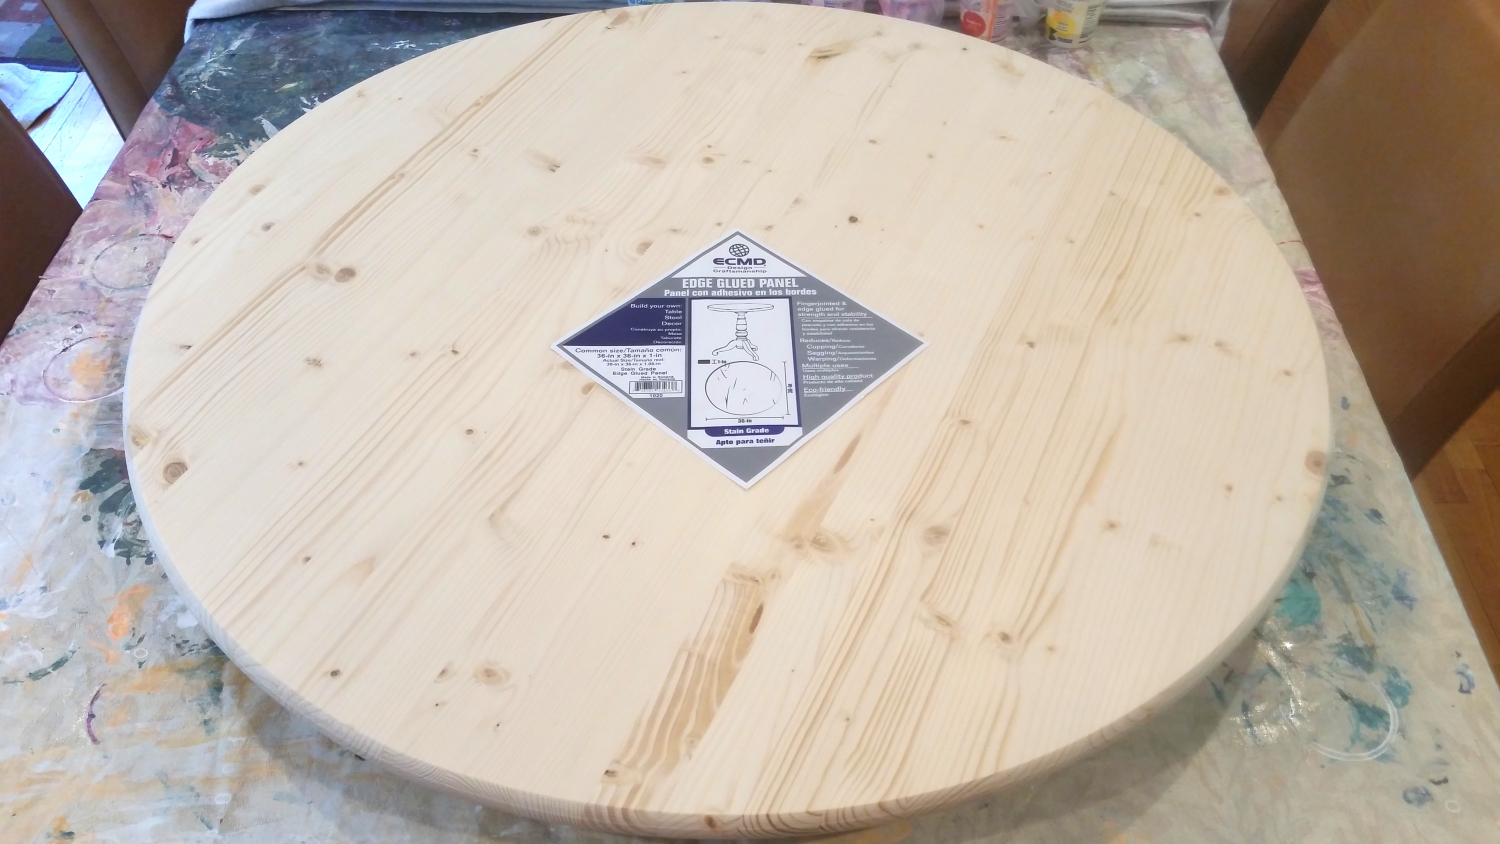
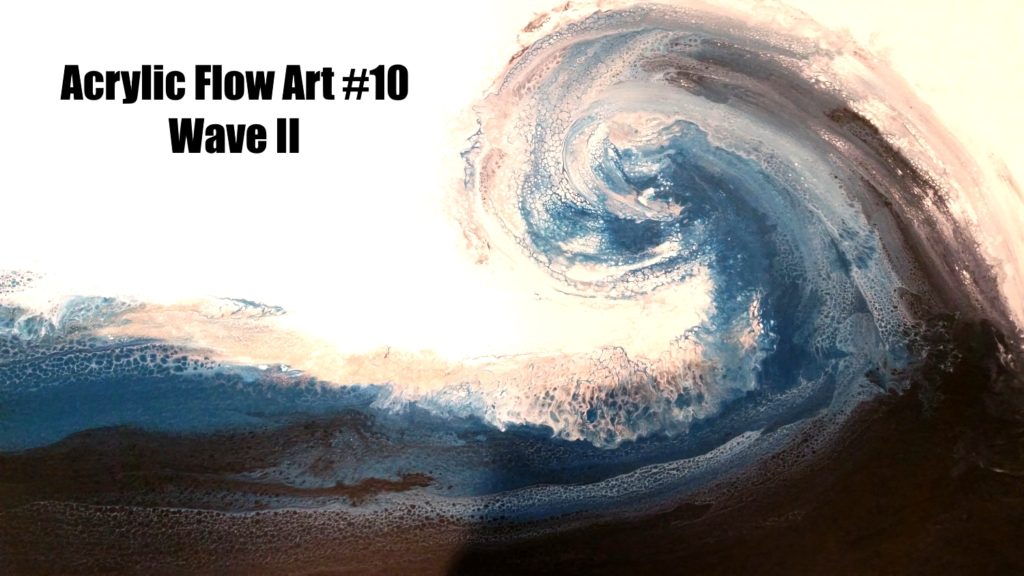
I knew I wanted to create a round piece so I also picked up a 36″ round wooden table top at my local Lowes Home Improvement Store (our local Home Depot only carried 24″ and smaller). I took my time and really picked through the stack in order to try to find one that was not too pock marked, warped or had too many large knots in the wood.
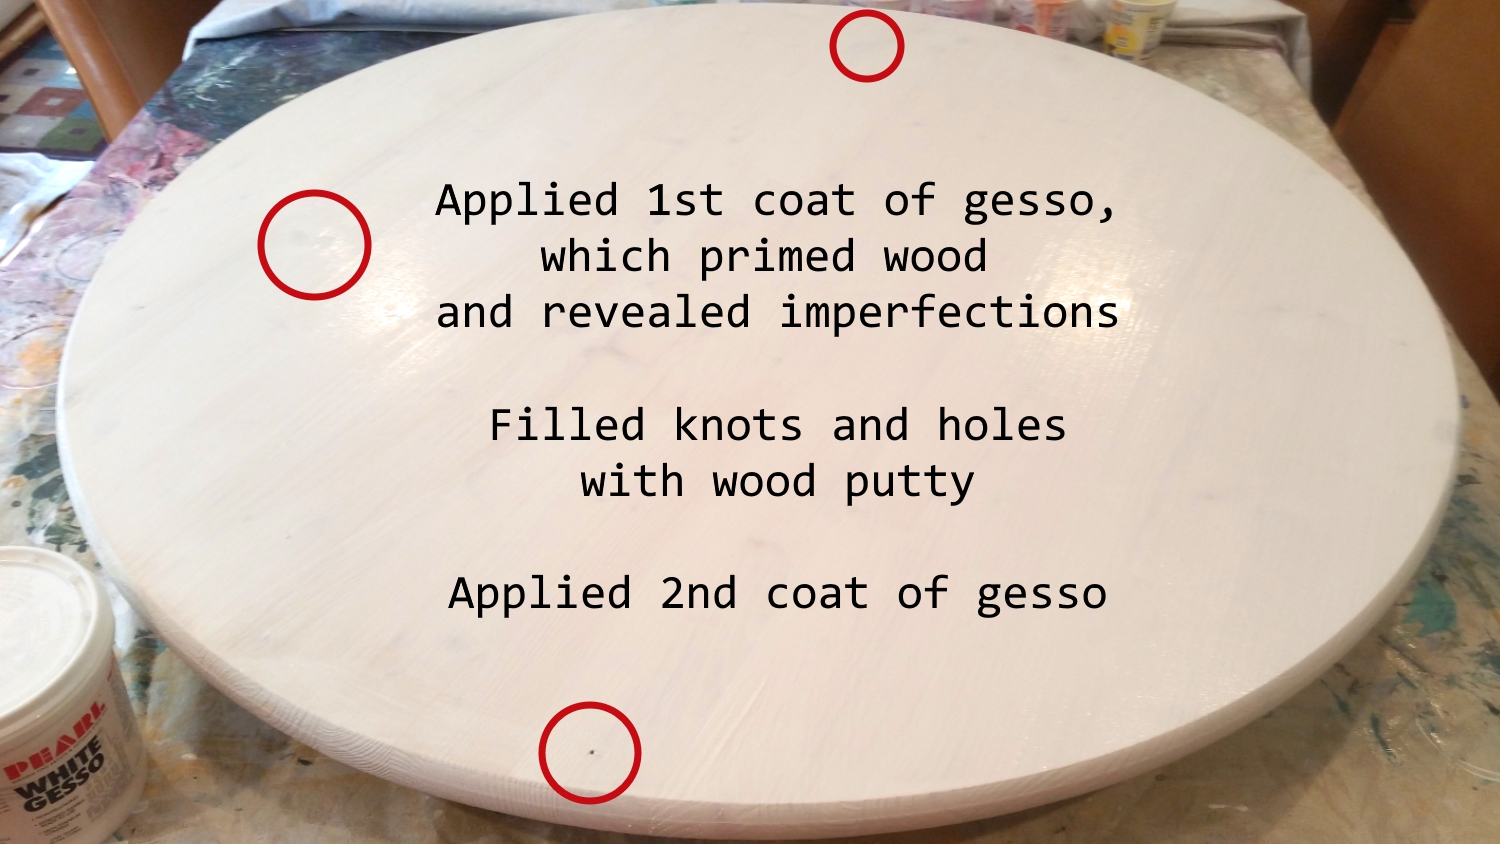
To prepare the wood, I coated it with White Gesso and let it dry for a few hours. This seemed to reveal and highlight the few holes and knots in the wood, so I filled all these imperfections with DAP wood filler putty and let that fully dry too. I put down one more coat of white gesso and after a few more hours dry time, my “canvas” had a clean and smooth finish, ready for the pour.
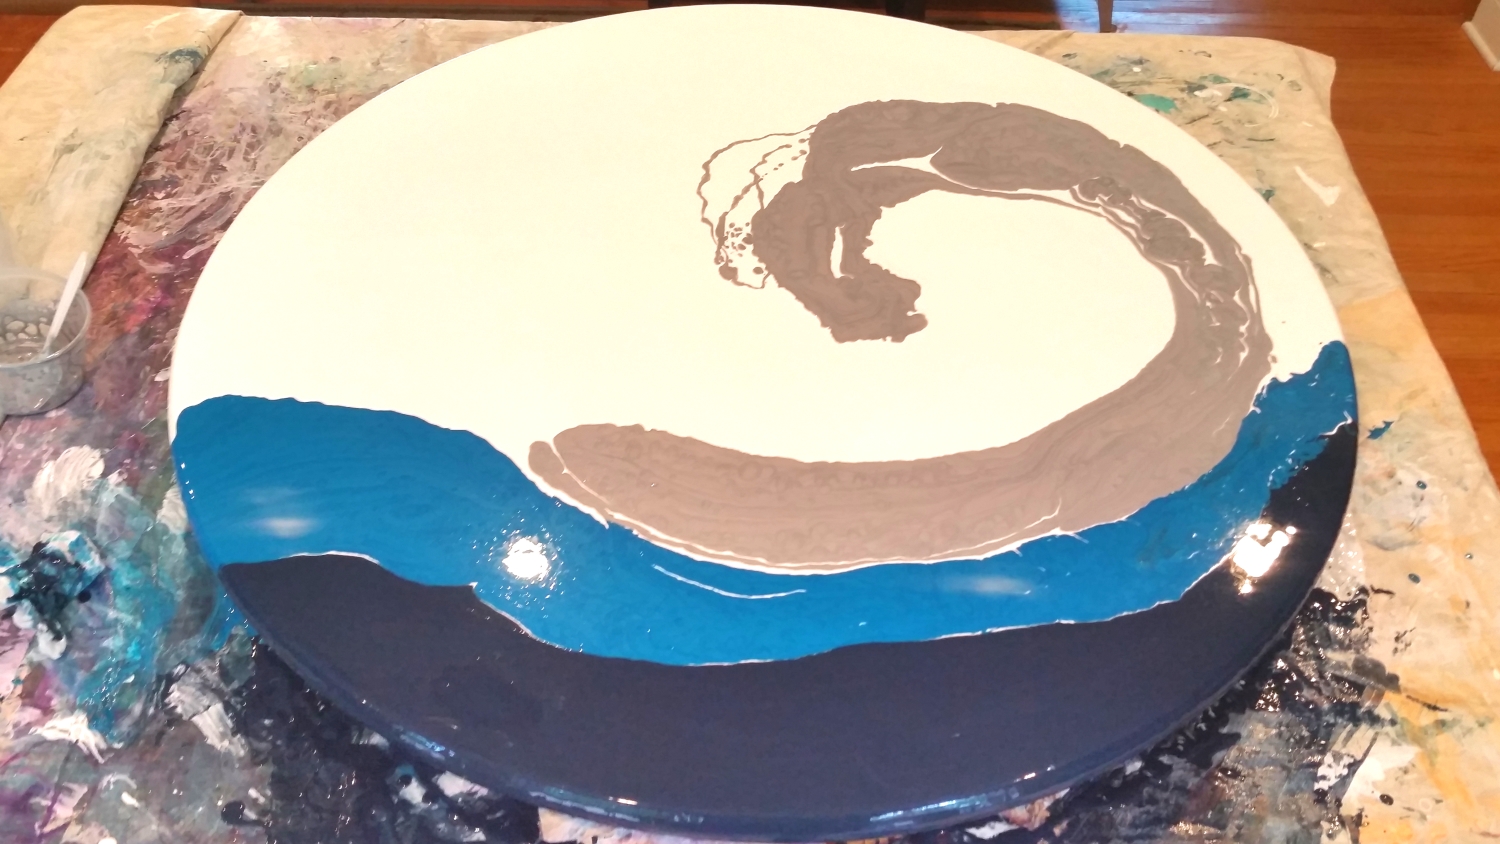
I finally got a chance to try an acrylic pour with a swiping technique (the cell formation created from a light swiping is amazing), and it was so cool! I used left over Craftsmart and Sargent White, mixed a very dark (almost black) blue, a DecoArt Elegant Finish Metallic Shimmering Silver, and an Artist’s Loft Metallic Cobalt Blue. To each cup, I added 2 parts Flood Floetrol to 1 part paint. I added a bit of water if I thought the paint solution needed more thinning, but I was careful not to water them down too much because the binding agents in acrylic paint can be over diluted and I didn’t want flaking or chipping of my finished piece in the long term. Then to each cup (except the white), I also added about 10 drops of treadmill silicone lubricant.
I first flooded the wood round with the white, making sure to get the sides coated too. Next I poured the darkest shade at the bottom, then the cobalt then a swirl toward the upper right with the silver. Then I used a large Wilton Icing Spatula to lightly swipe the paints from the lower left, across toward the upper right and then swirled a bit in the center. I wiped my spatula and did the reverse, starting from the white in the middle and back around and down toward the lower left. With each swipe, more and more incredible cells formed and a real watery look started to evolve.

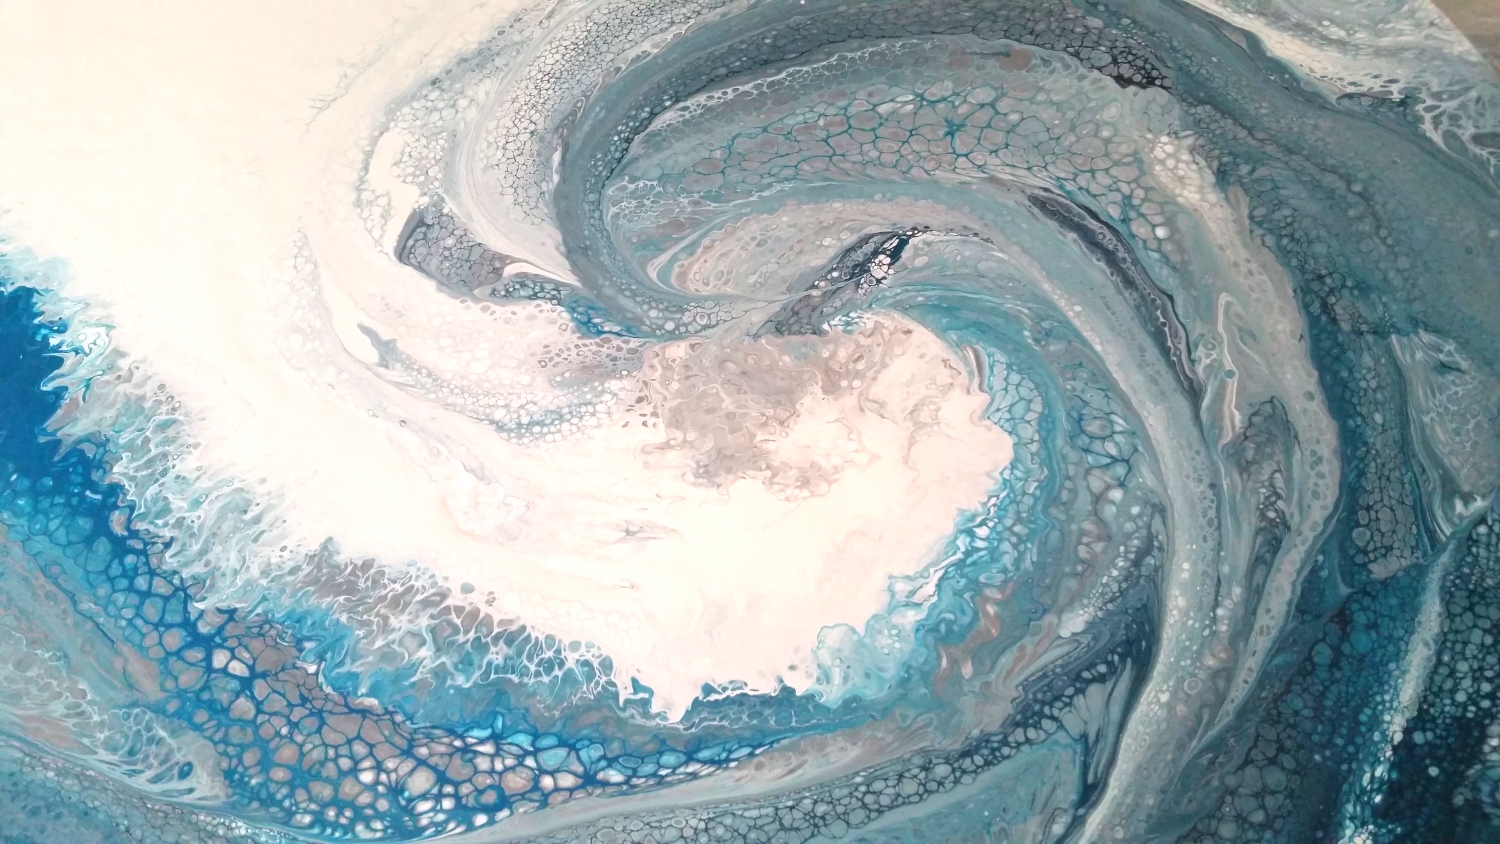
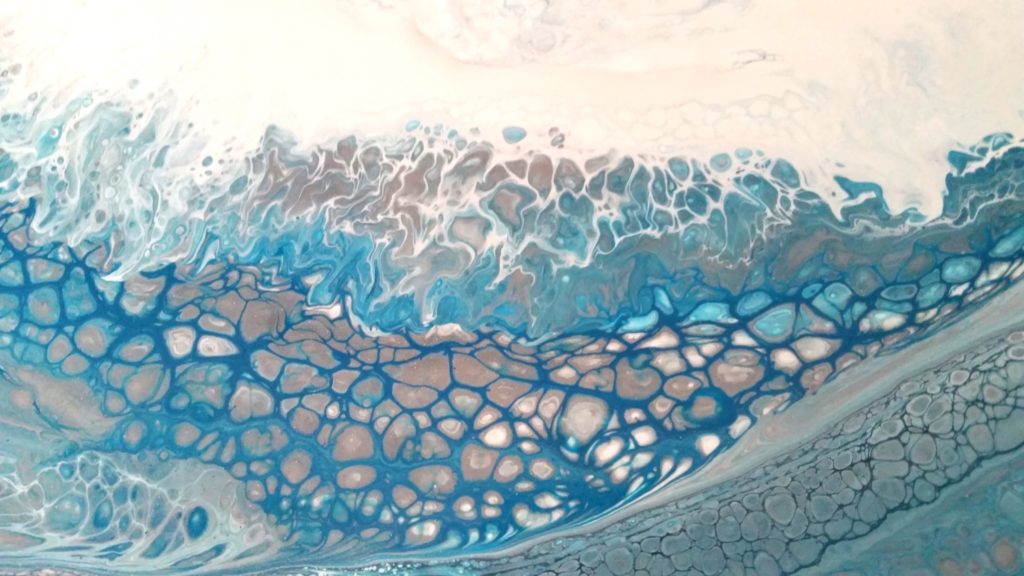
I don’t have a heat torch (folks use these to draw out more cells), so I tried using my heat tool to elicit some more cells in the darkest areas, but that heat must have been too weak. So next I tried my hair dryer on high heat and power to push and thin the paint in certain areas. The feathering that occurred, especially in the middle white areas that I wanted to expand into the silver and cobalt blue areas, was beautiful and the delicate tendrils that emerged matched the thin cells already revealed from the swiping.
Click on the following picture to watch the video share (not a process video) of this acrylic flow art piece:
This acrylic flow art is being entered into the following challenges:
Simon Says Stamp Wednesday Anything Goes Challenge
Word Art Wednesday Anything Goes Challenge
Creatalicious Anything Goes with Optional Hero Challenge – WINNER
Simon Says Stamp Work it Wednesday the Great Outdoors Challenge
Card Mania Anything Goes Challenge
Lil Patch of Crafty Friends Anything Goes Challenge
Crafty Gals Corner Anything Goes Challenge
613 Avenue Create Anything Goes with Optional Create Your Own Paper Challenge
Through the Craft Room Door Anything Goes Challenge
The Corrosive Blog Anything Goes Challenge
]]>
But first, after you’ve let your paintings fully cure (2-3 weeks), you need to clean the canvases of all additives like silicone (which would resist and create pitting if not removed before adding the polycrylic). To do that, I brushed on baby powder (others use flour or talc) all over the canvases and used a soft but firm bristle brush to really try to absorb all the silicone. Next I used microfiber cloths wet with water to fully wipe away all the baby powder and silicone. I rinsed and wrung out the microfiber cloths 4 times for each canvas, just to make sure they were completely clean. I let the canvases dry again for another 24 hours.
For the Minwax Polycrylic, I used a fine finish foam paint roller for the larger canvases and a soft bristle synthetic paint brush (not an expensive one) for the edges of the paintings and the smaller canvas. I put on 3 coats of the polycrylic on each canvas, waiting about 3 hours between coats. While it was not hard to wash my small paint brush, getting all the polycrylic out of the foam paint roller between each use would have been very wasteful and hard to do. So here’s a tip for you: wrap your painting tools in plastic wrap between uses. This keeps the brushes and foam rollers from drying out and getting hard. This worked like a charm for me.
The following is a video sharing the process of cleaning and varnishing my paintings:
This white, jade and rose colored acrylic pour is being entered into the following challenges:
Word Art Wednesday Anything Goes Challenge
Creatalicious Anything Goes With Optional All that Glitters Challenge
Card Mania Anything But a Card Challenge
Lil Patch of Crafty Friends Anything Goes Challenge
Crafty Gals Corner Anything Goes Challenge
]]>
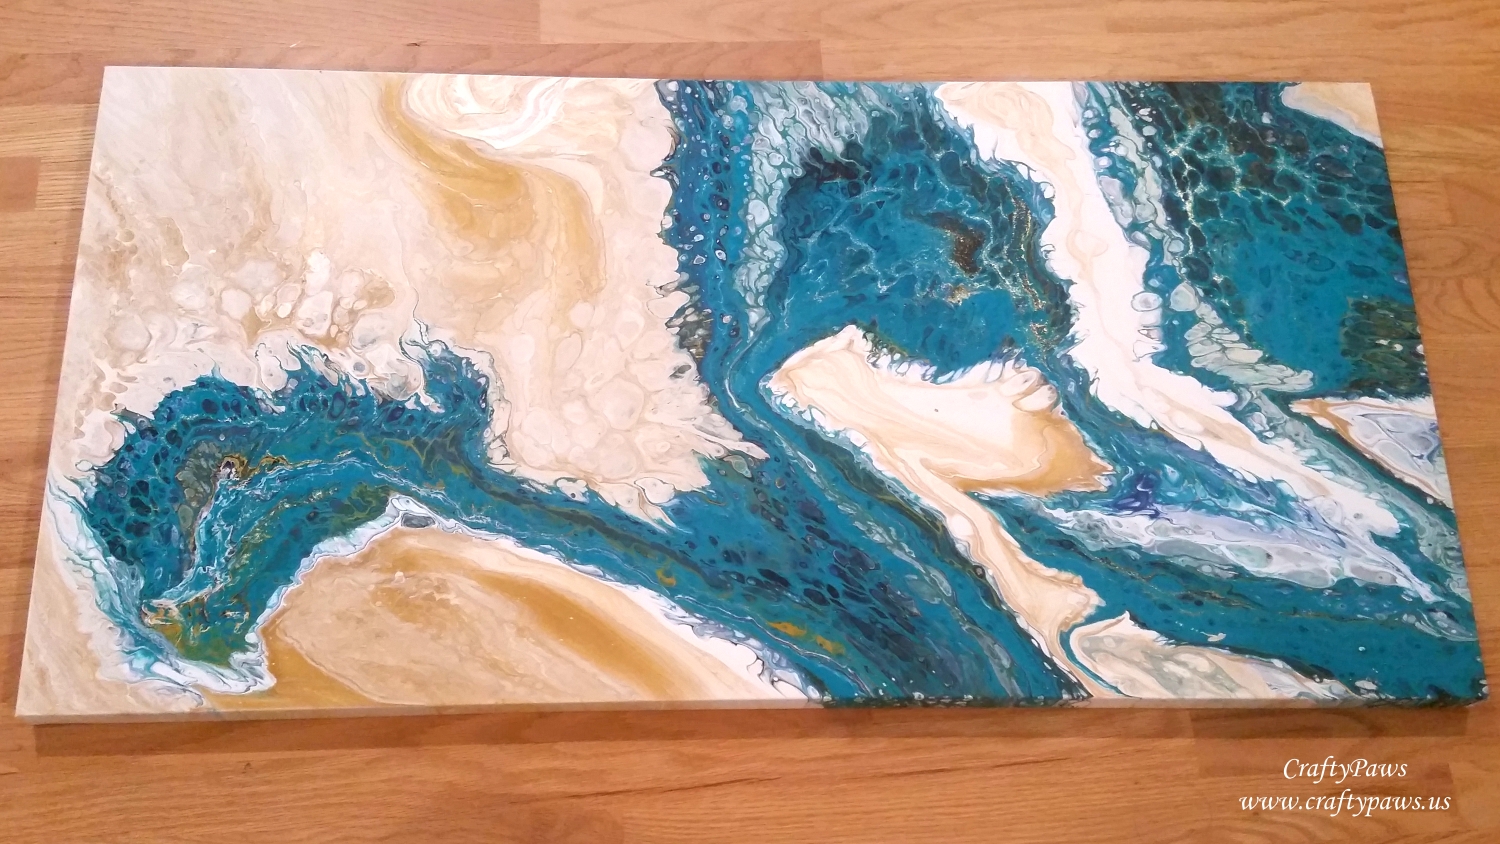
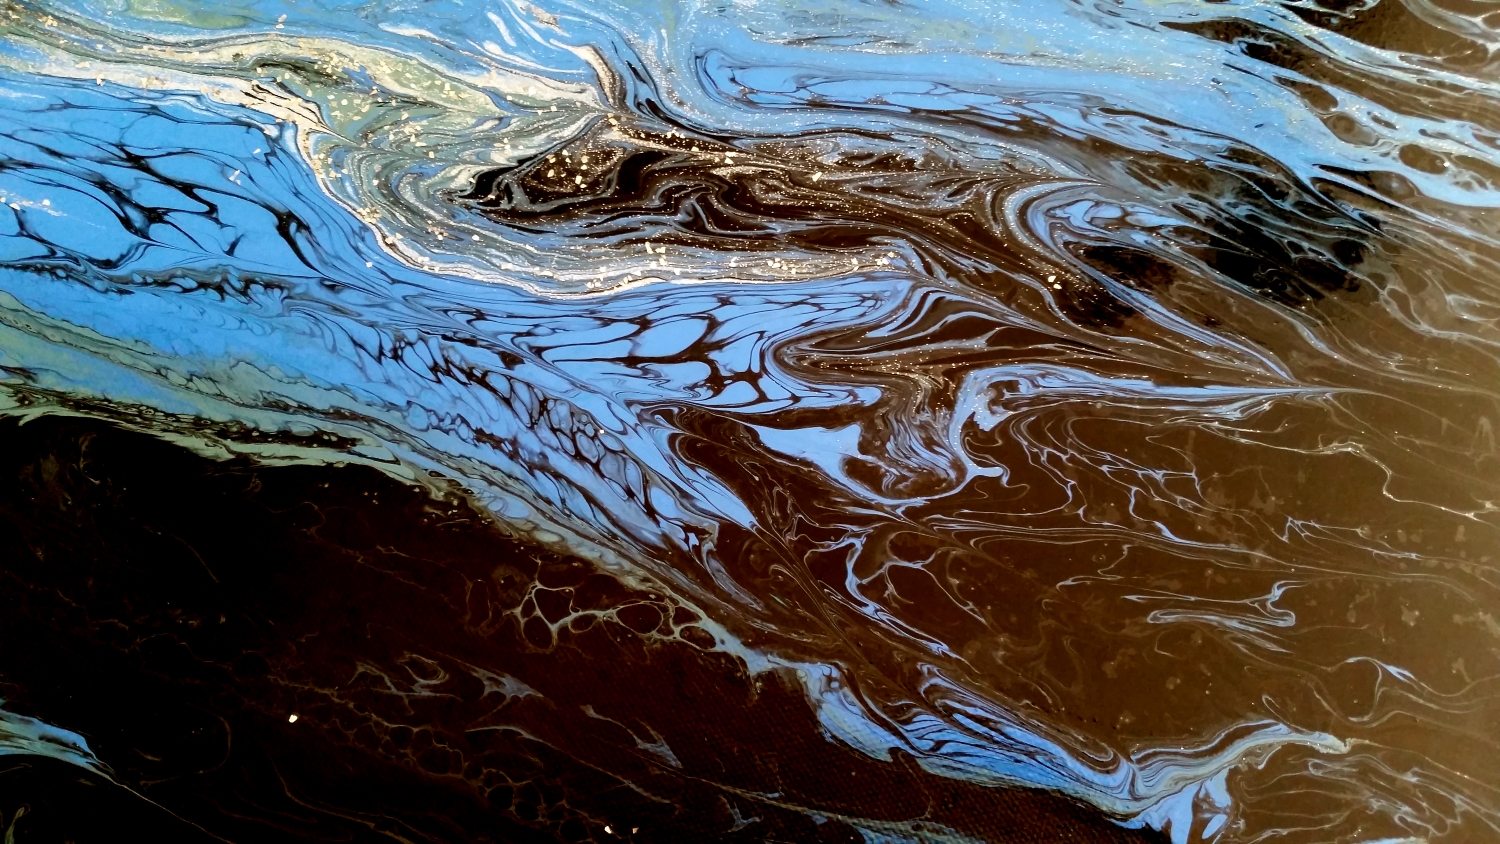
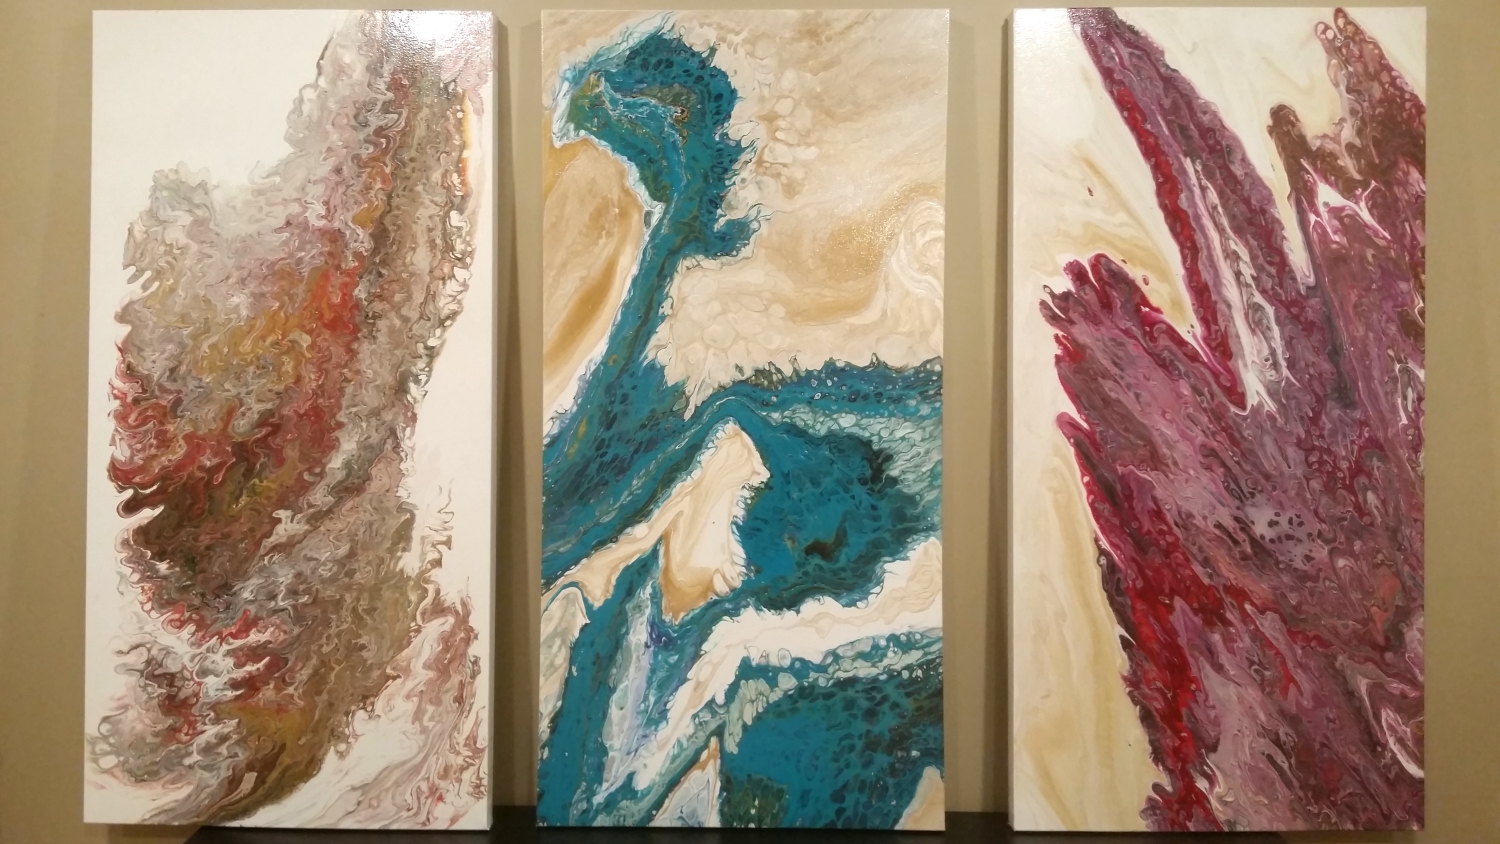
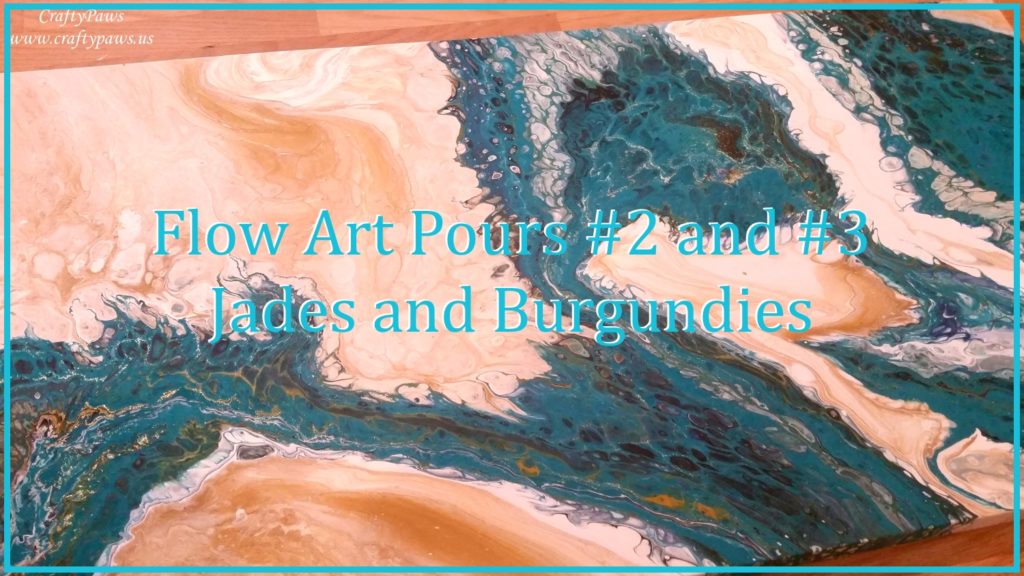
For my second canvas, I wanted to create something fresh with blues and greens while complimenting these brighter hues with golden earthy colors so that the piece would fit in the office lobby space, which is all in browns and creams. So I used the following paints from my stash: Ranger Dylusions Vibrant Turquoise; Apple Barrel Dutch Blue and Black; Craft Smart Bright Blue, Turquoise, Black and White; DecoArt Fluid Acrylic Metallic Gold; Sargent Art Acrylic in White and Black; and Martha Stewart Multi-Surface Glitter Paint in Florentine Gold.
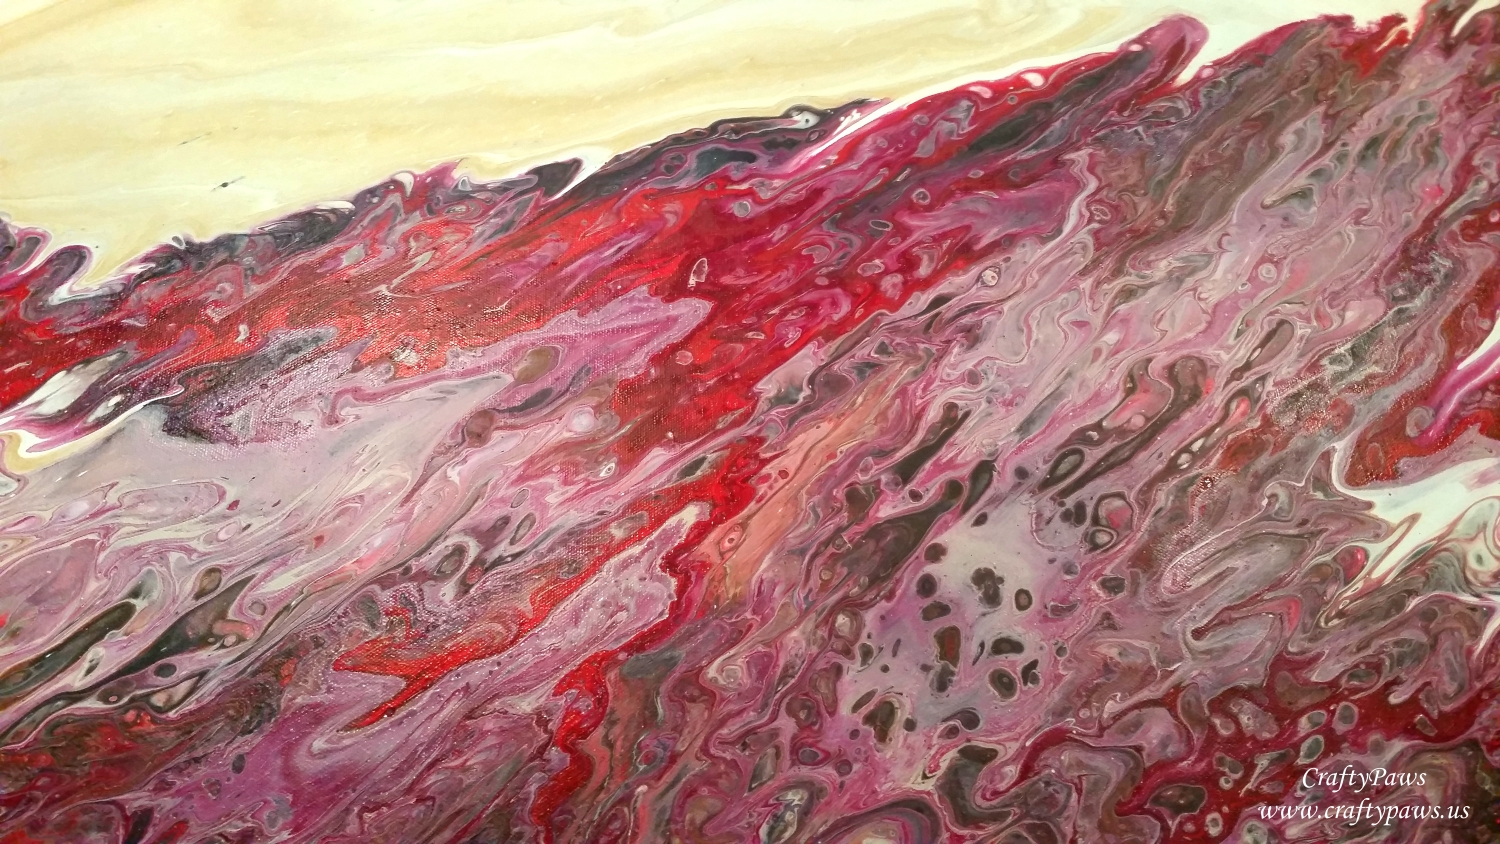
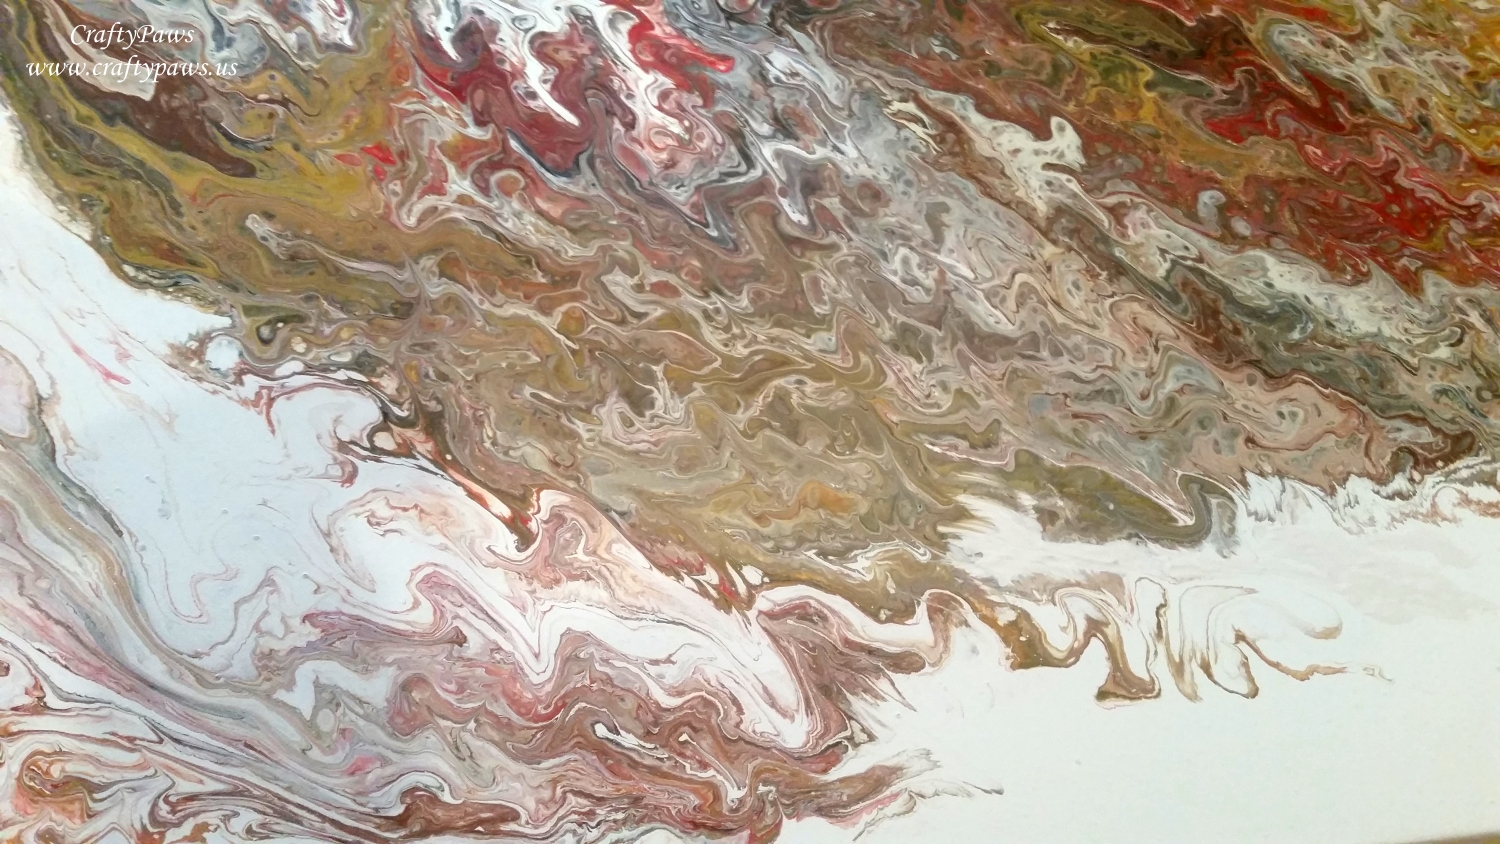
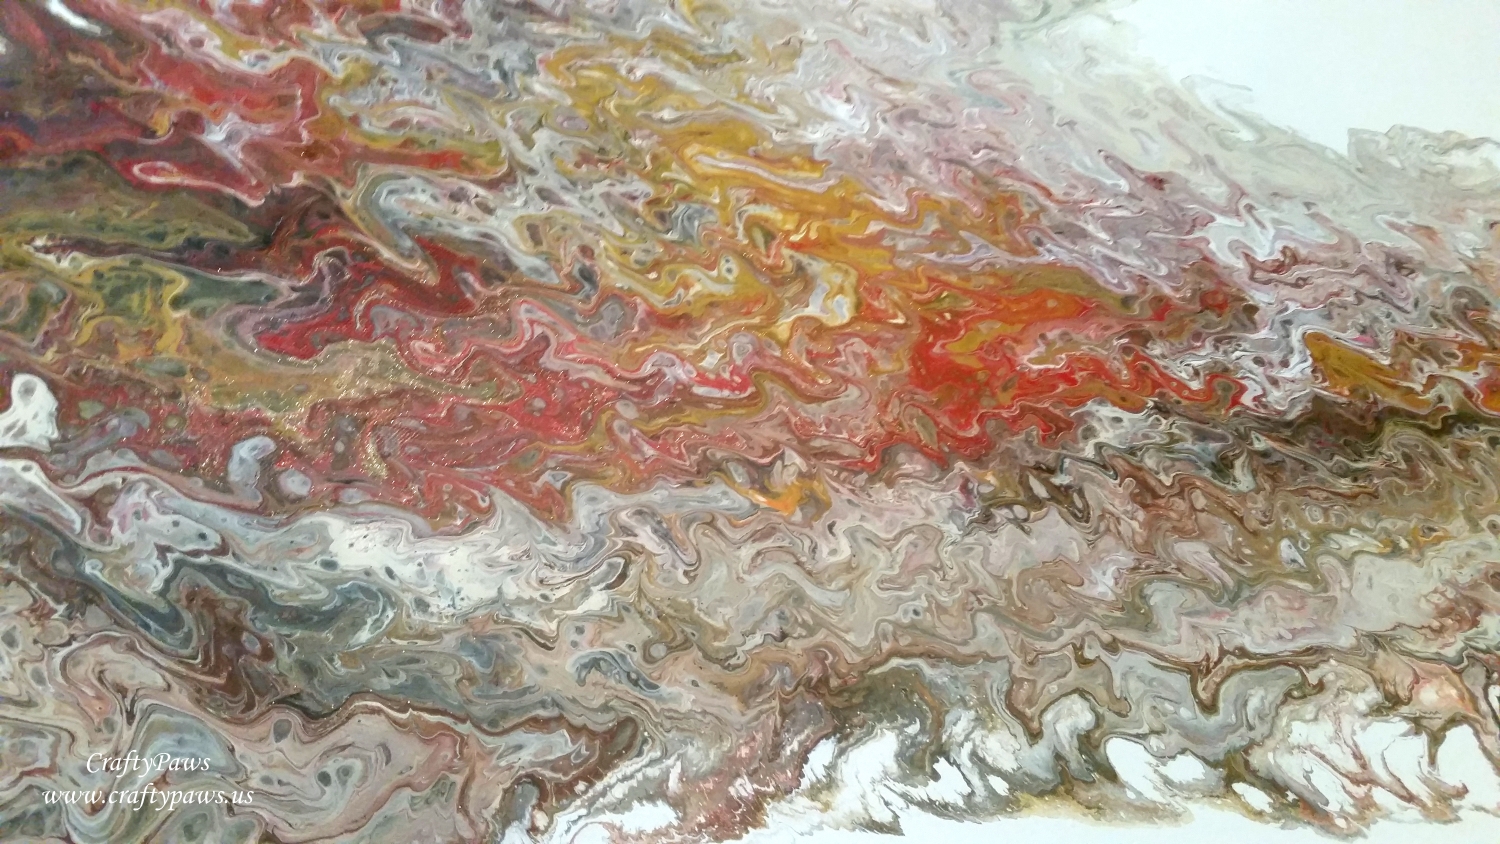
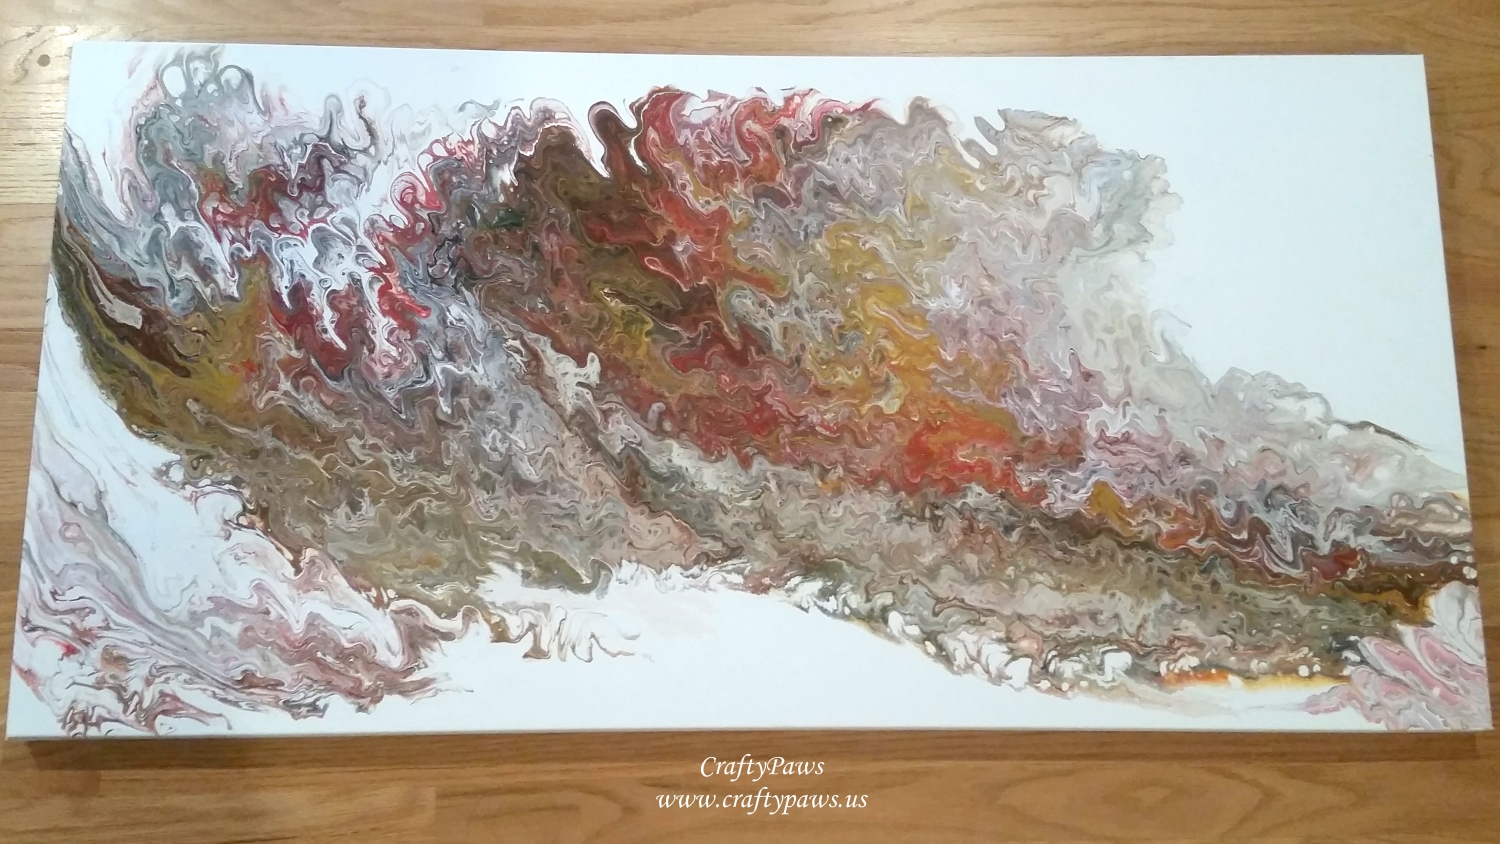
For my third canvas, I wanted something really vibrant with a dominant burgundy color along with some calmer golden creamy tones in the “negative space” part of the canvas so I used these paints from my stash: DecoArt Fluid Acrylics in Quinacridone Violet and Pyrrole Red; Martha Stewart Satin Multi-Surface Putty; Folk Art Metallic Antique Gold; Sargent Art Acrylics in White and Black; and Martha Stewart Multi-Surface Glitter Paint in Florentine Gold.
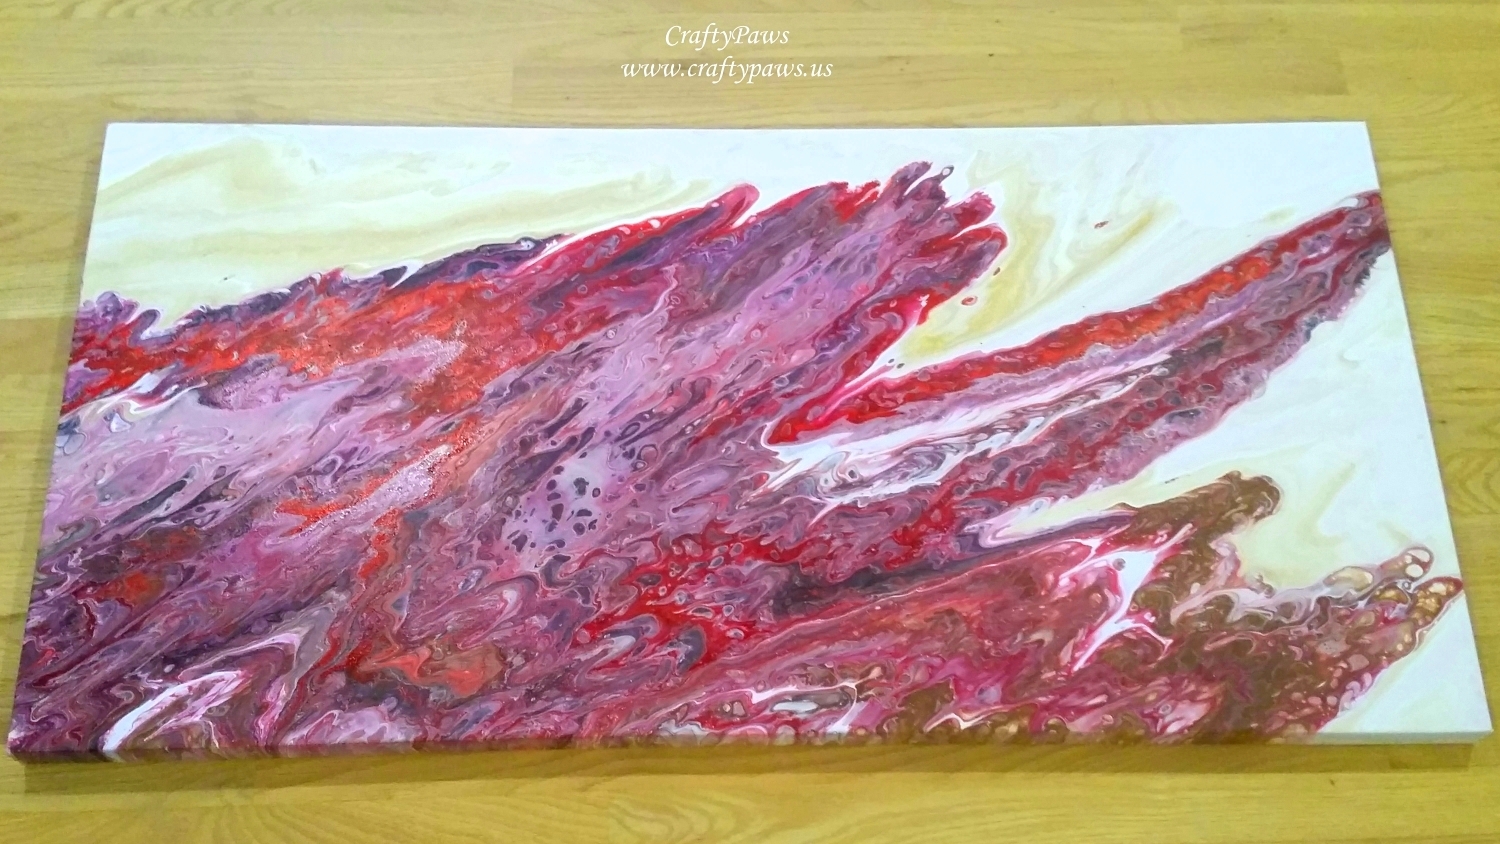
For both of these canvases, I used a double dirty pour and tilting technique. I wanted lots of fluidity, energy and cell formation, and I think by mixing one dirty pour with the dominant colors and a second dirty pour with just the white and metallic gold for the negative spaces, a good balance and harmony emerged. I now have to wait for about a week to 10 days before I can clean the silicone from the canvases so that I can varnish them – stay tuned for the next installment of this series!
The following is a process video of more paint mixing, pouring and tilting:
Disclosure: Many of the supplies I’ve used for today’s project are linked. Some may be affiliate links, which means if you make a purchase I receive a small commission at no extra cost to you. I truly appreciate your support toward the costs of running this blog!
This canvases are is being entered into the following challenges:
Lil Patch of Crafty Friends Anything Goes Challenge
Addicted to CAS Gold Challenge
Card Mania Anything But a Card Challenge
Crafters Castle Anything Goes with Optional Share a Favorite Technique Challenge
Over 4 days, I watched a LOT of YouTube videos and read a lot of blogs about acrylic flow art painting and picked up tips, product recommendations, sample ideas, etc. I had a bunch of different paints in my stash that I wanted to use and it seemed mixing different brands and types really didn’t matter (some people even used left over house paint). YAY!
The formula I used for plain acrylic paints is:
A. 2 parts Flood Floetrol (available at home improvement stores like Lowes) to 1 part paint
B. Water to thin out the mixture to a thin, drippy consistency (amount needed varies by thickness of paint); and
C. 5-8 drops of silicone (I used treadmill silicone lubricant because we had it in the house, but other folks use rubbing alcohol, or certain hair oils) for about 1 cup – 3/4 pint of paint/Floetrol mixture.
Mix A-B well until smooth and then add in the silicone and stir lightly.
The formula for metallics, white acrylic paint for negative space paintings, and glitter (yes, GLITTER) paints was the same, except I did not add any silicone (some people used an Elmer’s glue with water solution rather than Floetrol for metallic paints because they claimed Floetrol dulled the metallics, but others said it made no difference). I chose to stick with Floetrol (primarily because I purchased a gallon and I wanted to use it up and not dirty up another container).
The following are the paints I used:
For an earth tones canvas (my first), I used: DecoArt Fluid Acrylics in Yellow Ochre, Metallic GOLD, Pyrrole Red, and Titan Buff; Craft Smart Brown and White; Sargent Art Black Acrylic Paint; and Martha Stewart Glitter Acrylic Craft Paint in Florentine Gold. To cover a canvas this size it took about 2.5 qts of paint/floetrol/water mixture.
Some other tips and supplies I used:
1. Wooden craft sticks to mix the paint-Floetrol-silicone solutions (chopsticks or plastic spoons work just as well, but I had a bunch of these in my stash from the dollar store).
2. To-go plastic containers for mixing each paint color as well as larger ones for creating the dirty pour mixtures (other folks use plastic cups from the dollar store or recycled empty apple sauce or yogurt cups).
3. Gesso to prep my canvases (I wanted to make sure I did everything I could to assure clean, smooth pours) even though I had purchased pre-gessoed canvases
4. Scale to simplify measuring paints and Floetrol
5. Pipette to add varying amounts of water into paint-Floetrol mixtures as needed to thin out for pouring
6. Wilton offset spatula to move around paint on the canvas
7. Michaels 24″ x 48″ canvases in the best Level 3 quality (I thought thicker framing on Level 3 canvases would be helpful for such large canvases that would have to support a lot of paint weight while drying) were 70% off during a flash sale.
The quantities of each paint color varied and the way the dirty pour mixture came out was totally unexpected. My OCD nature made me a bit uneasy, but the adventurer in me was THRILLED! I loved how this came out and my clients did too! I am really in love with this new craft technique.
The following is a video sharing the paint mixing and pouring process:
Disclosure: Many of the supplies I’ve used for today’s project are linked. Some may be affiliate links, which means if you make a purchase I receive a small commission at no extra cost to you. I truly appreciate your support toward the costs of running this blog!
This canvas is being entered into the following challenges:
Lil Patch of Crafty Friends Anything Goes Challenge
Addicted to CAS Gold Challenge
Card Mania Anything But a Card Challenge
Crafters Castle Anything Goes with Optional Share a Favorite Technique Challenge