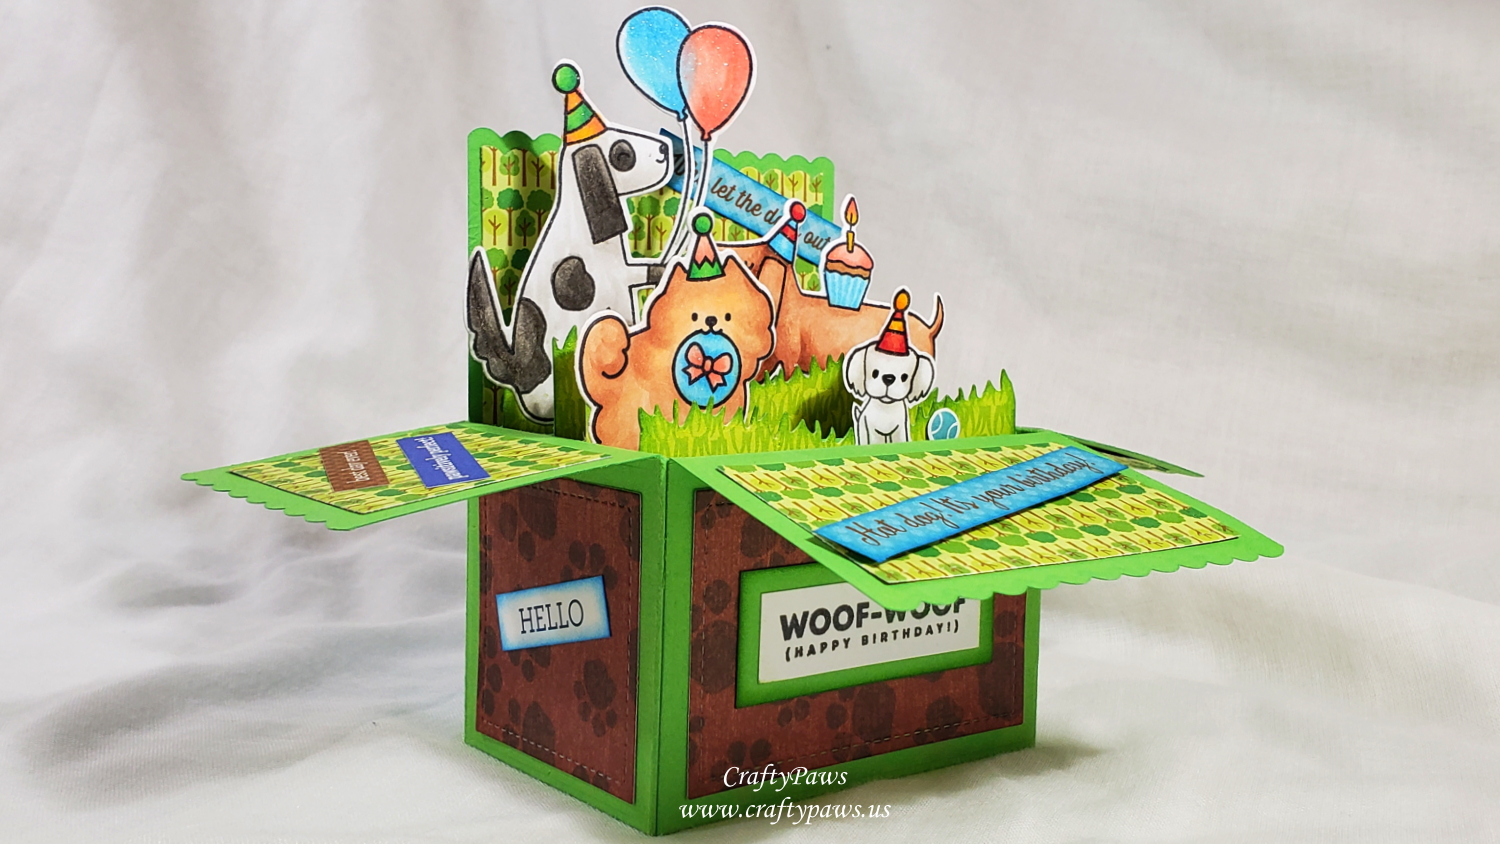
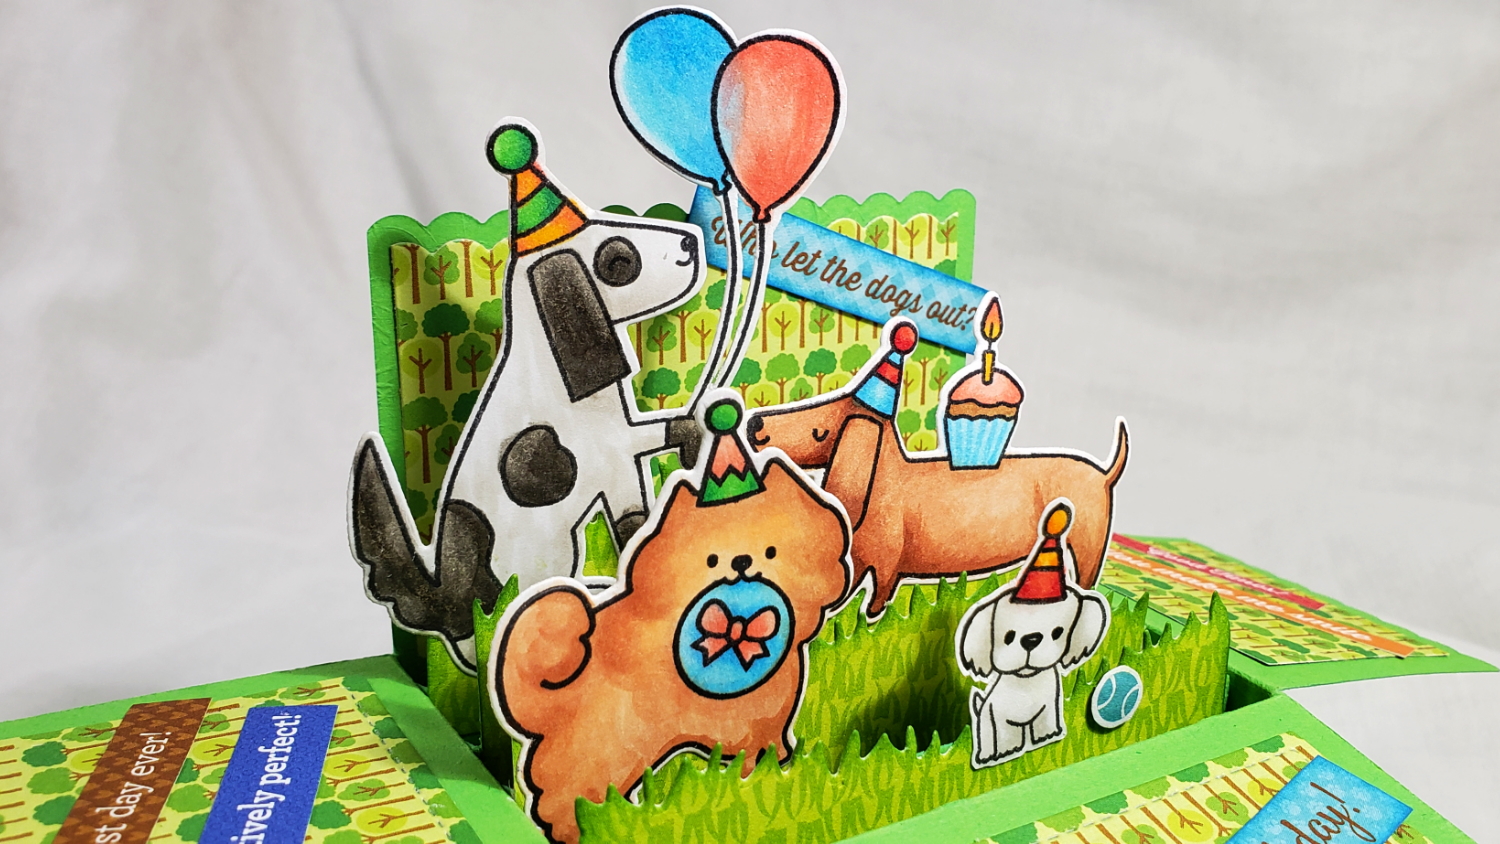
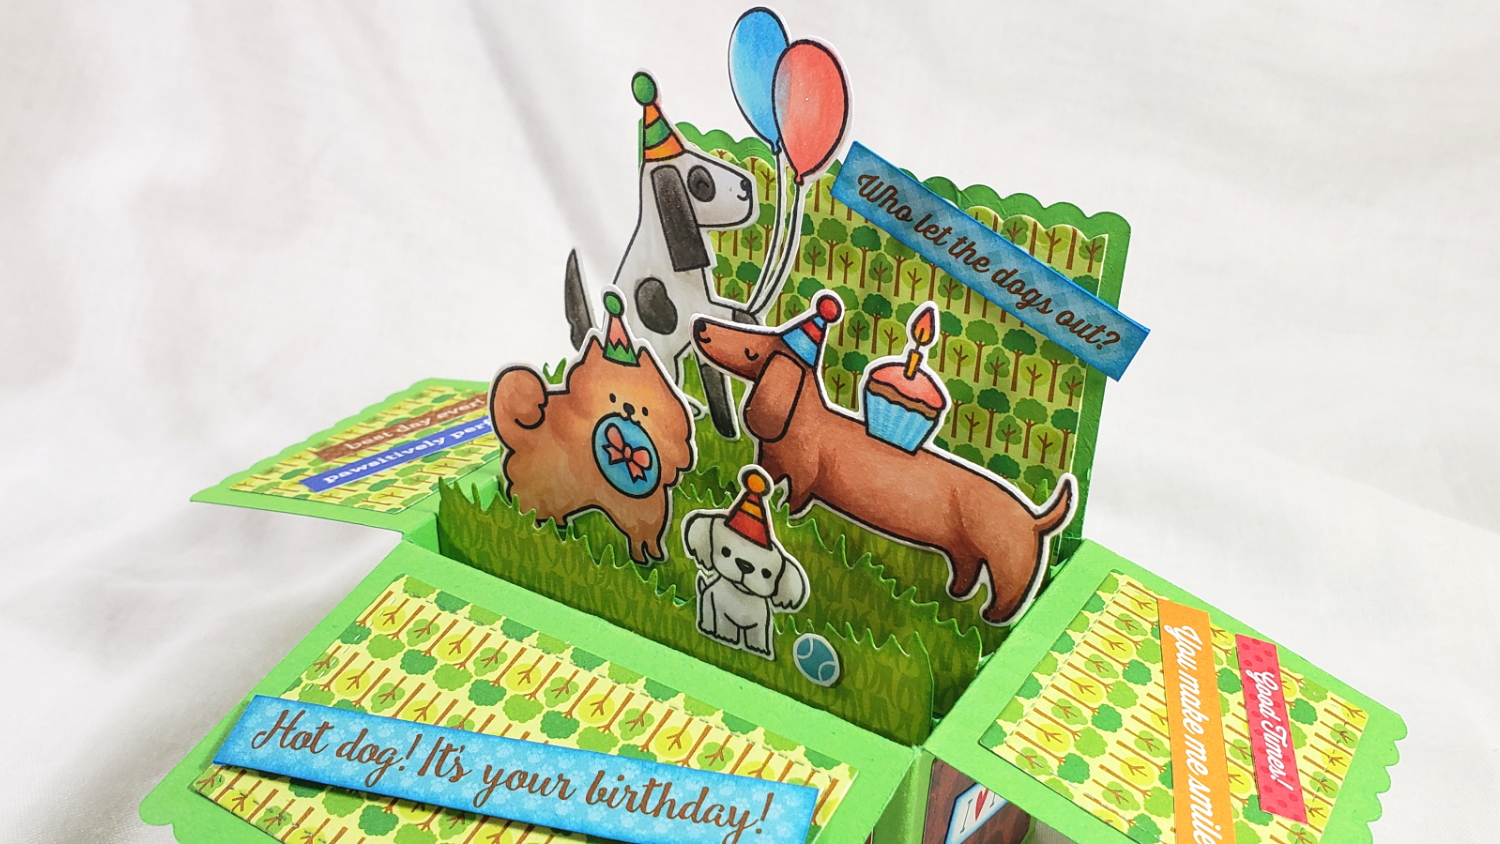
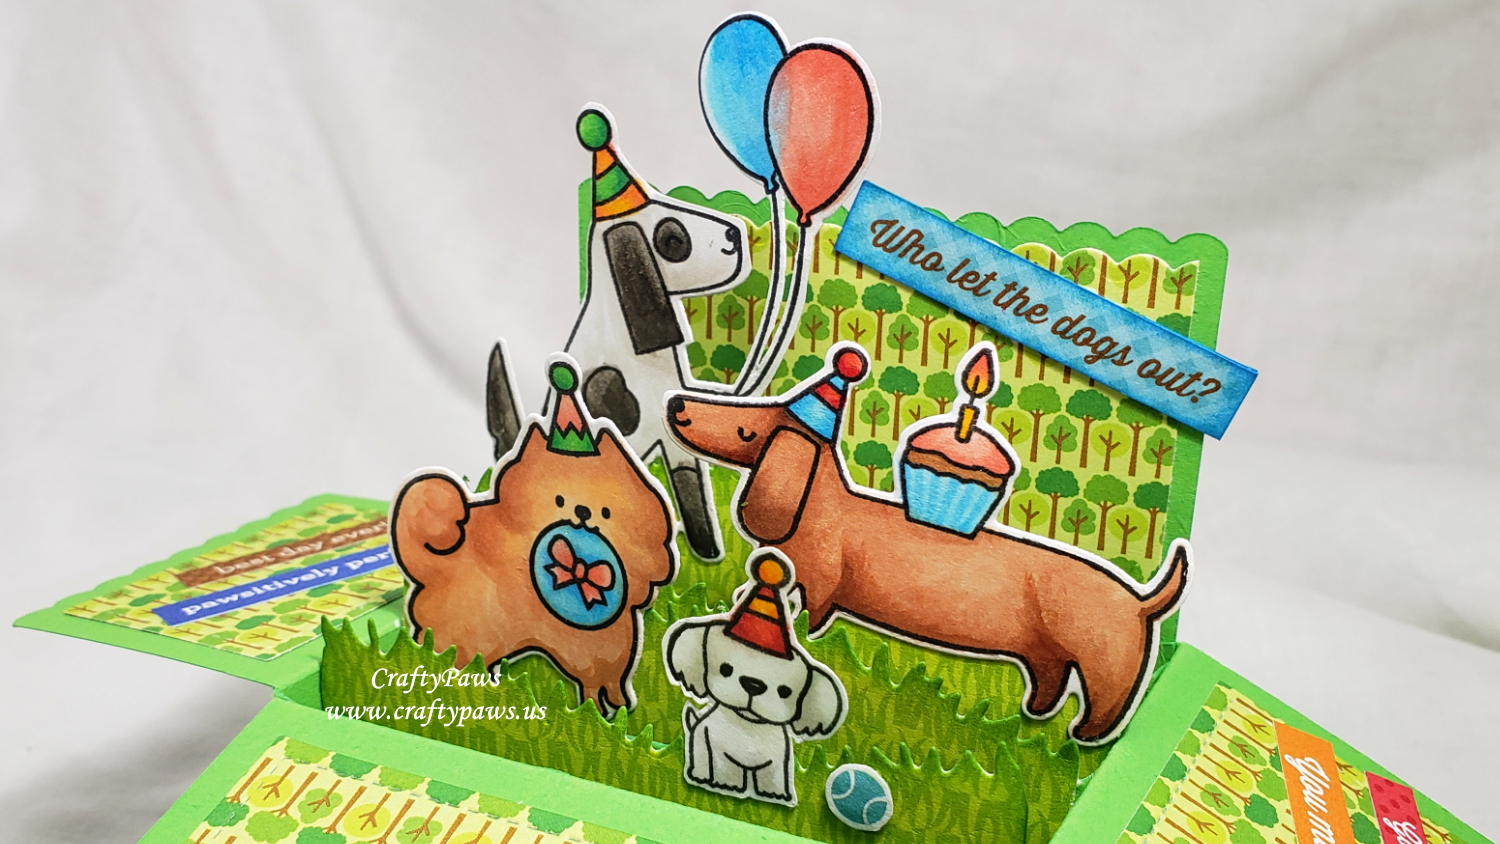
I’m making my nephew a fun pop up birthday card showcasing his newfound love of dogs. I used the quirky Waffle Flower Birthday Puppies Stamp Set and Die Set that features dogs with party hats and gifts as well as a pup from The My Favorite Things Friends at First Sip Stamp Set that I altered to make look like his new Bichon puppy, Bobo, with a party hat.
I used the following Copic colors (I’m very rusty, so please excuse the messy coloring):
Red: R14, R17 and R29
Pink: R20 and R22
Blue: B00, B01 and B02
Yellow/Orange: Y38 and YR07
Green: YG07, YG09 and G17
Cupcake candle and cake: Y38, R14, E22
Pomeranian: E00, E11 and E13
Bichon (Bobo): 0, W0 and W1
Dachshund: E11, E13, E15 and E25
Black and White Spotted Dog: W1, W4, and W7
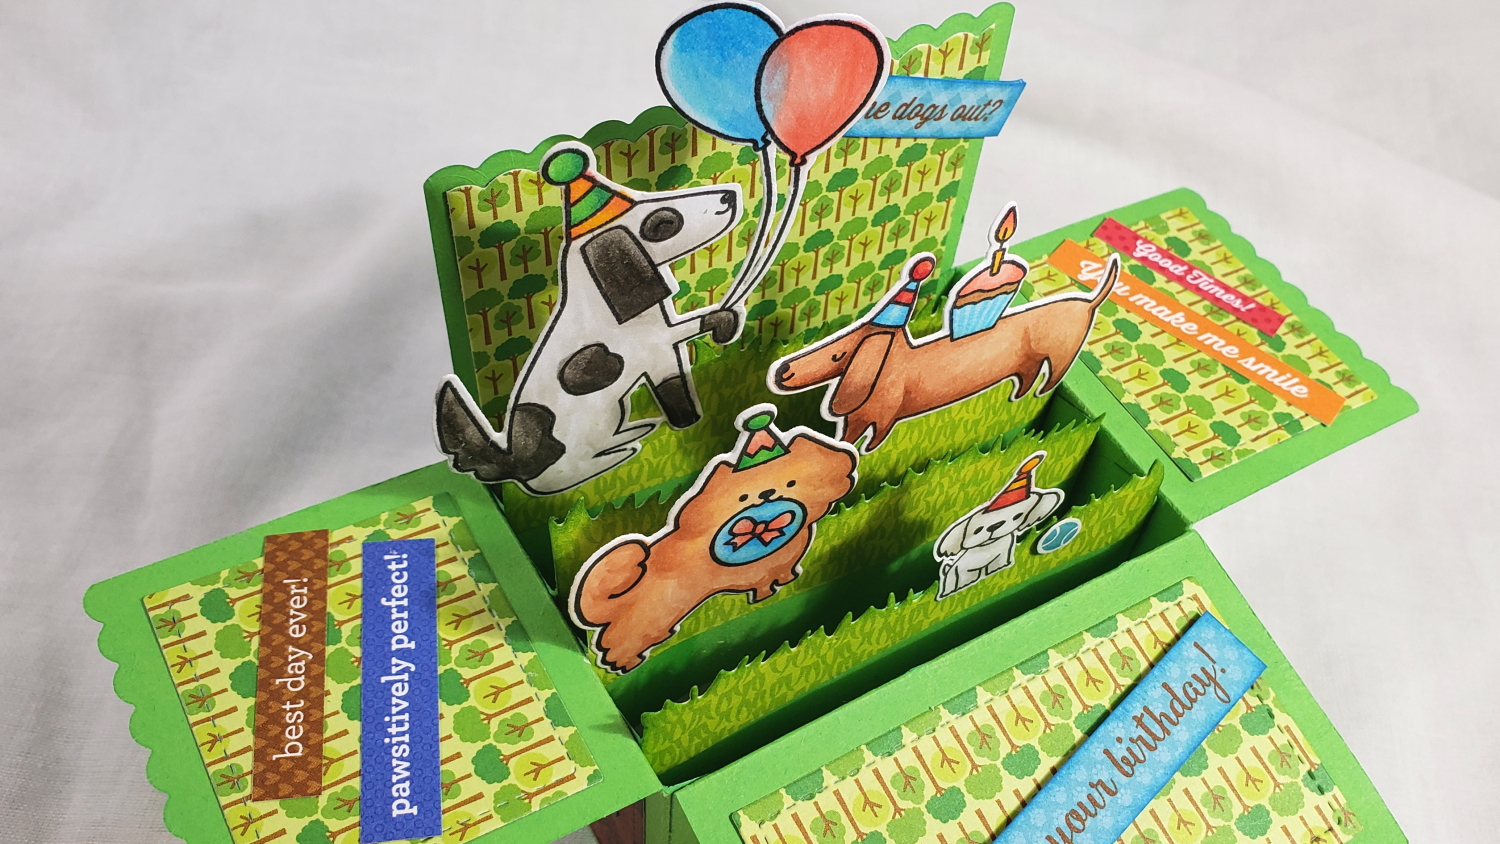
For the card base, I used basic green card stock that I picked up at Lidl for $2. For the decorative patterned papers, I used the Doodlebug Designs “Puppy Love” and the DCWV “The Pets Stack” (retired but still carried by resellers, which you can find by Googling them). I had fun also cutting apart some of the sentiments from the Puppy Love papers to further embellish the card flaps. To help the sentiments and the grassy layers pop a bit more, I also blended on some Tim Holtz Distress Ink in Mowed Lawn and Salty Ocean on the edges.
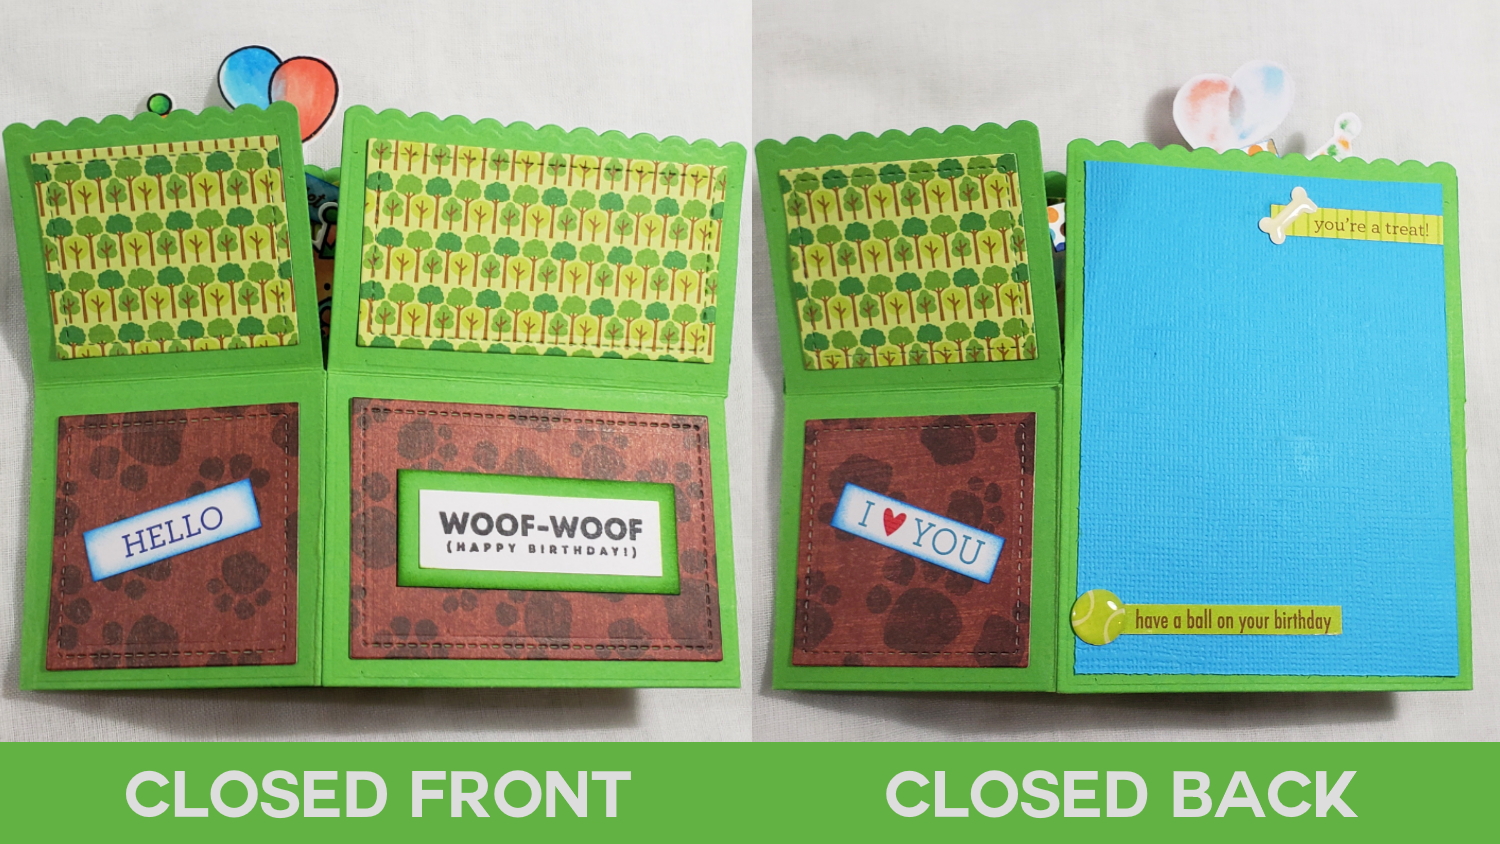
I left the back panel straight (unfolded) and added a blue construction paper liner so I could write my note. But it seemed too plain, so I added a couple of extra sentiments from the cut apart sheet and then added puffy bone and puffy ball stickers from the Doodlebug Design Shape Sprinkles “Puppy Play” Sticker Set to match the papers and add dimension and interest.
CLICK on the following picture to watch the card making video. I show a sampling of stamp altering, Copic coloring and how to assemble and decorate the box pop up card.
Disclosure: Many of the supplies I’ve used for today’s project are linked. Some may be affiliate links, which means if you make a purchase I receive a small commission at no extra cost to you. I truly appreciate your support toward the costs of running this blog!
This card is being entered into the following challenges:
Simon Says Stamp Monday Fun and Quirky Challenge
Creatalicious Anything Goes with Optional Interactive/Fun Fold Cards Challenge
Word Art Wednesday Anything Goes Challenge
Lil Patch of Crafty Friends Anything Goes Challenge
Fab ‘n’ Funky Anything Goes Challenge
Through the Craft Room Door Anything Goes Challenge
Crafty Gals Corner One for the Boys Challenge
Crafts Galore Encore Anything Goes Challenge
]]>
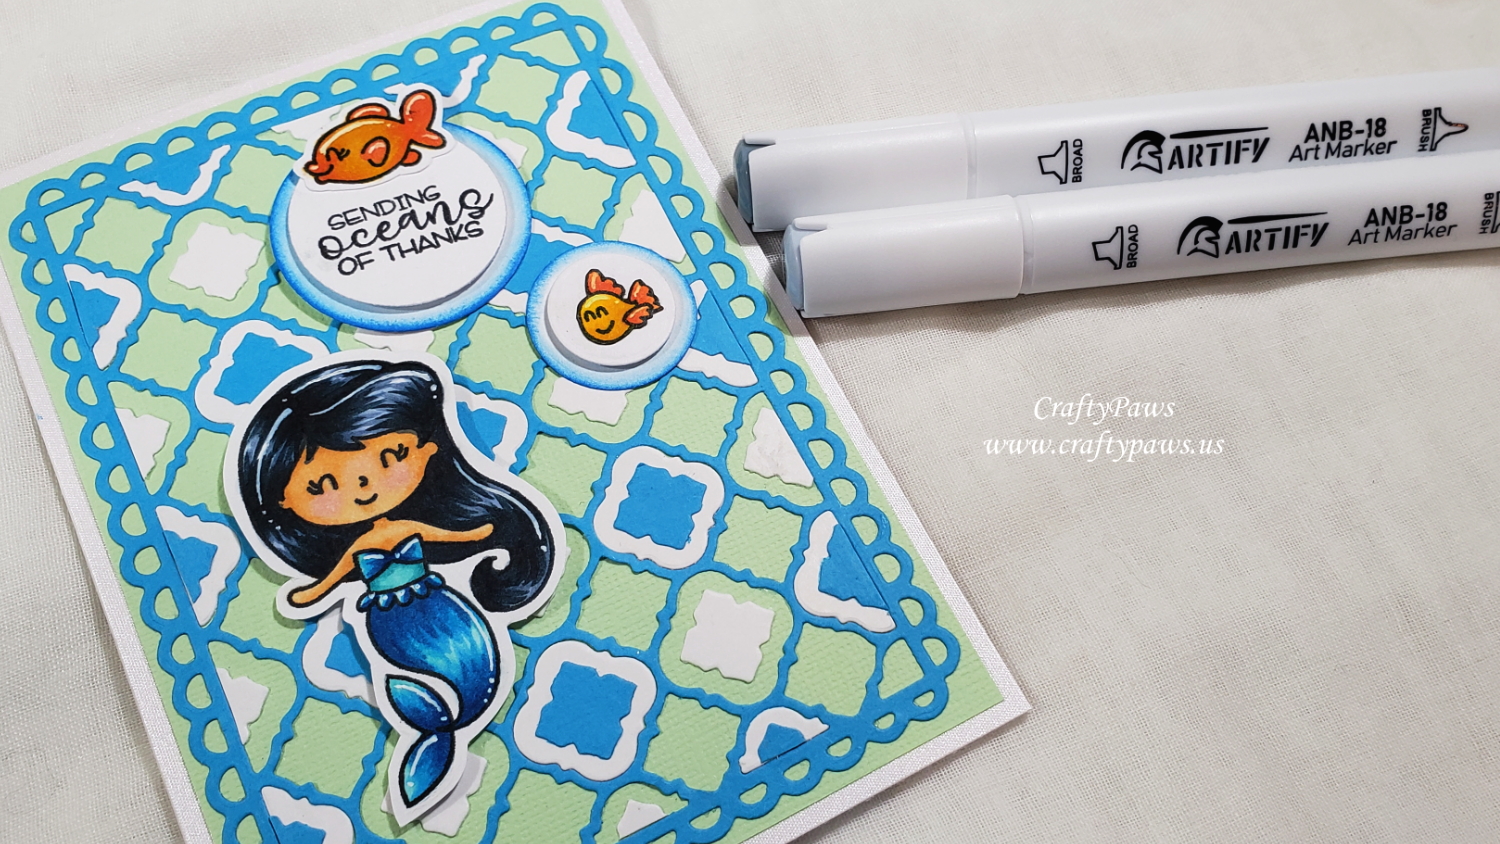
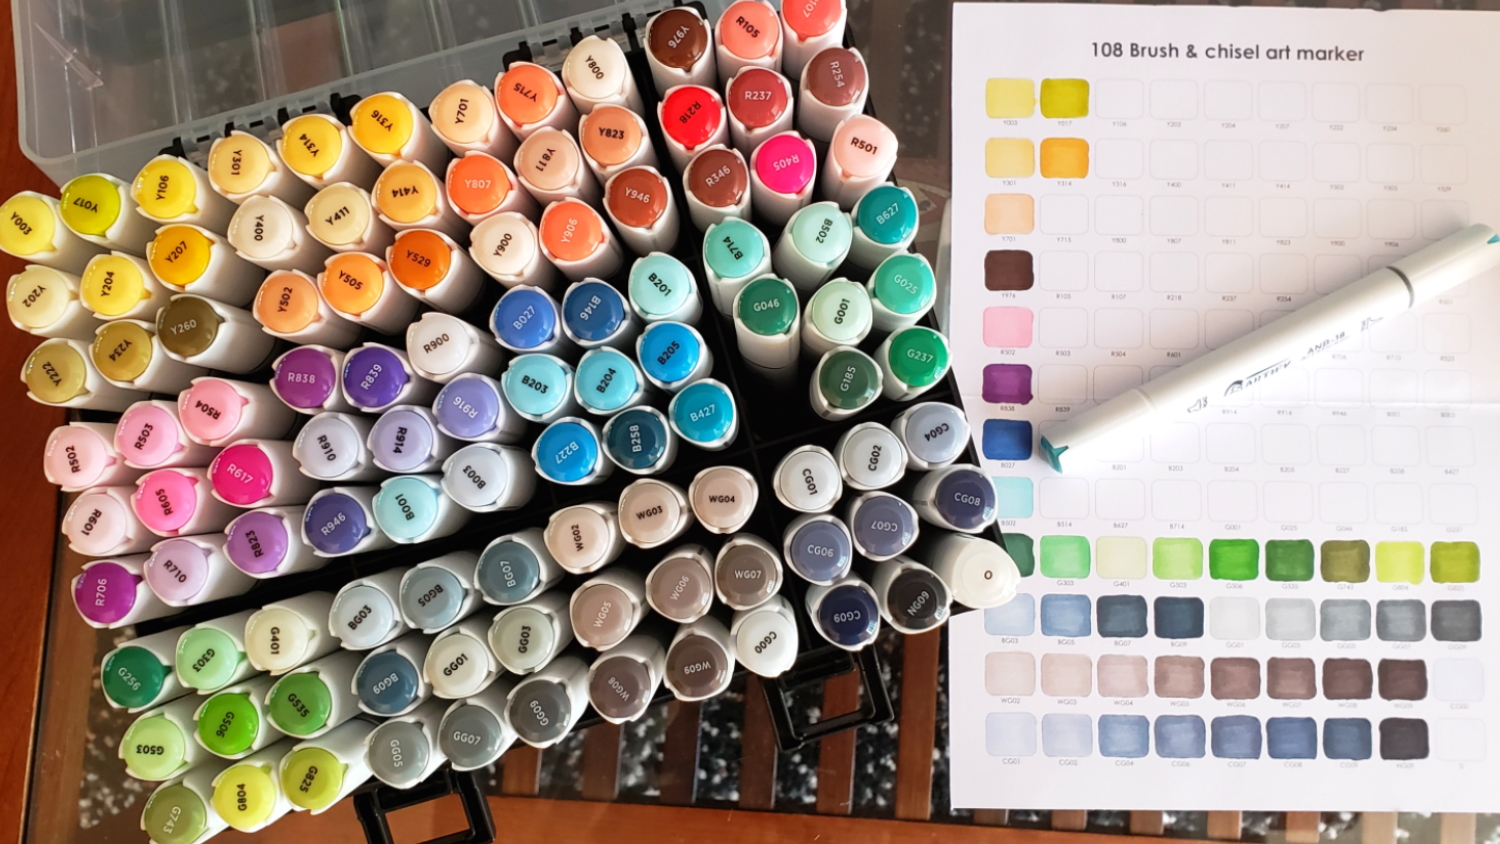
Then I got to coloring up the mermaid and the little fishes from the Avery Elle “Sea Babies” mini stamp set (retired). To coordinate with the cardstock colors I used in the background, I used these Artify marker colors:
Mermaid Body suit/tail: B502, B514, B204, B227
Mermaid Hair: CG01, BG05, BG09
Mermaid Skin: Y900, Y701, Y811, R501
Fishes: Y414, Y505, Y715, Y204, Y207, WG09
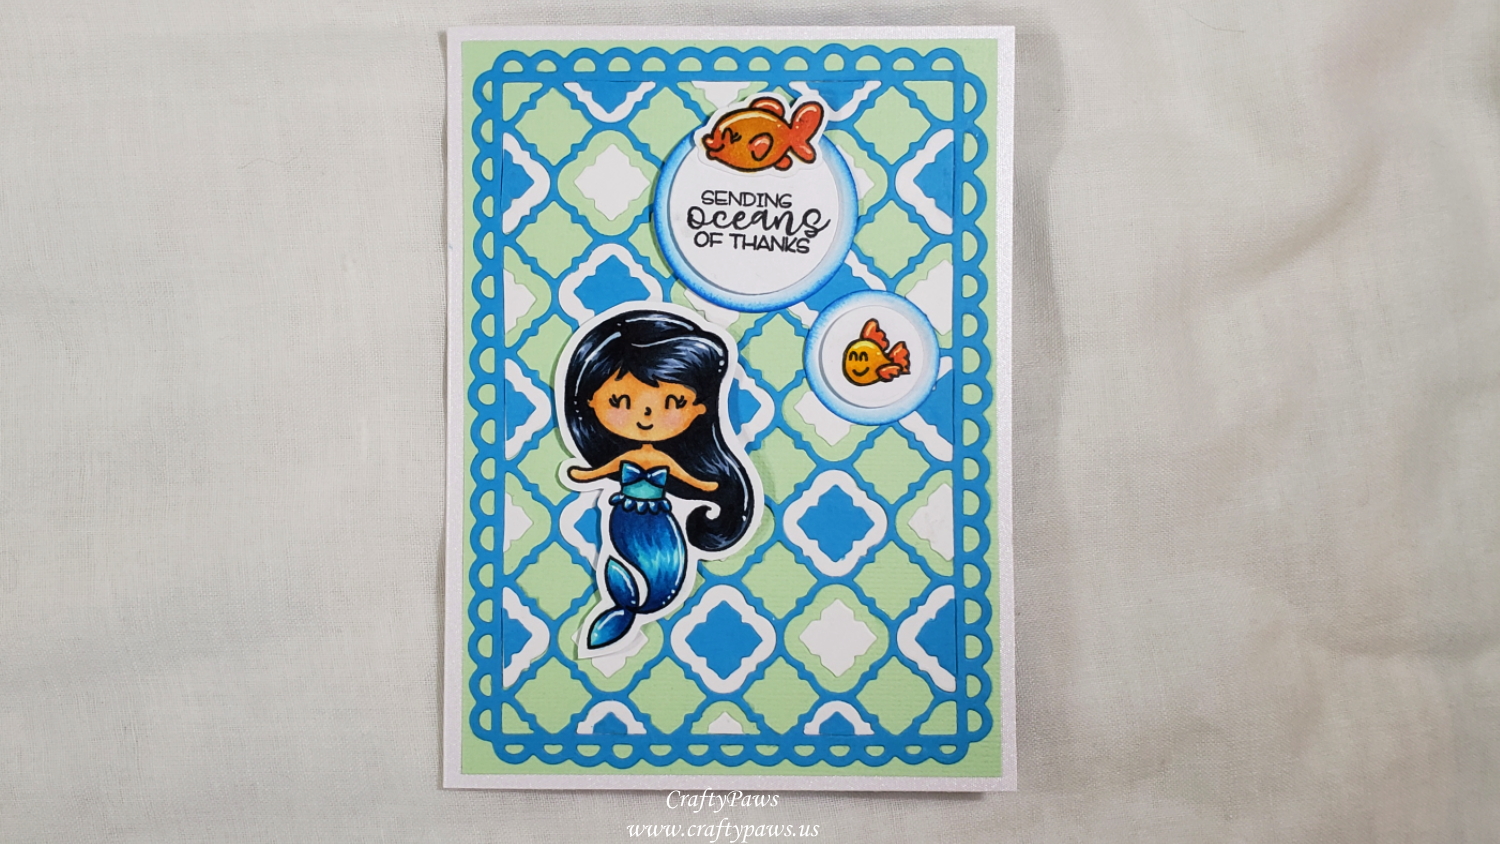
The colors blended well, but I was not used to the quantity of the ink that came out (I guess my Copic markers are dry — LOL). These markers are really juicy so I had to try to keep a lighter touch. I was really impressed with the coverage and brightness of these markers and I would recommend them as a budget-friendly alternative to Copic markers. I also added highlights with my trusty Uniball Signo White Gel Pen.
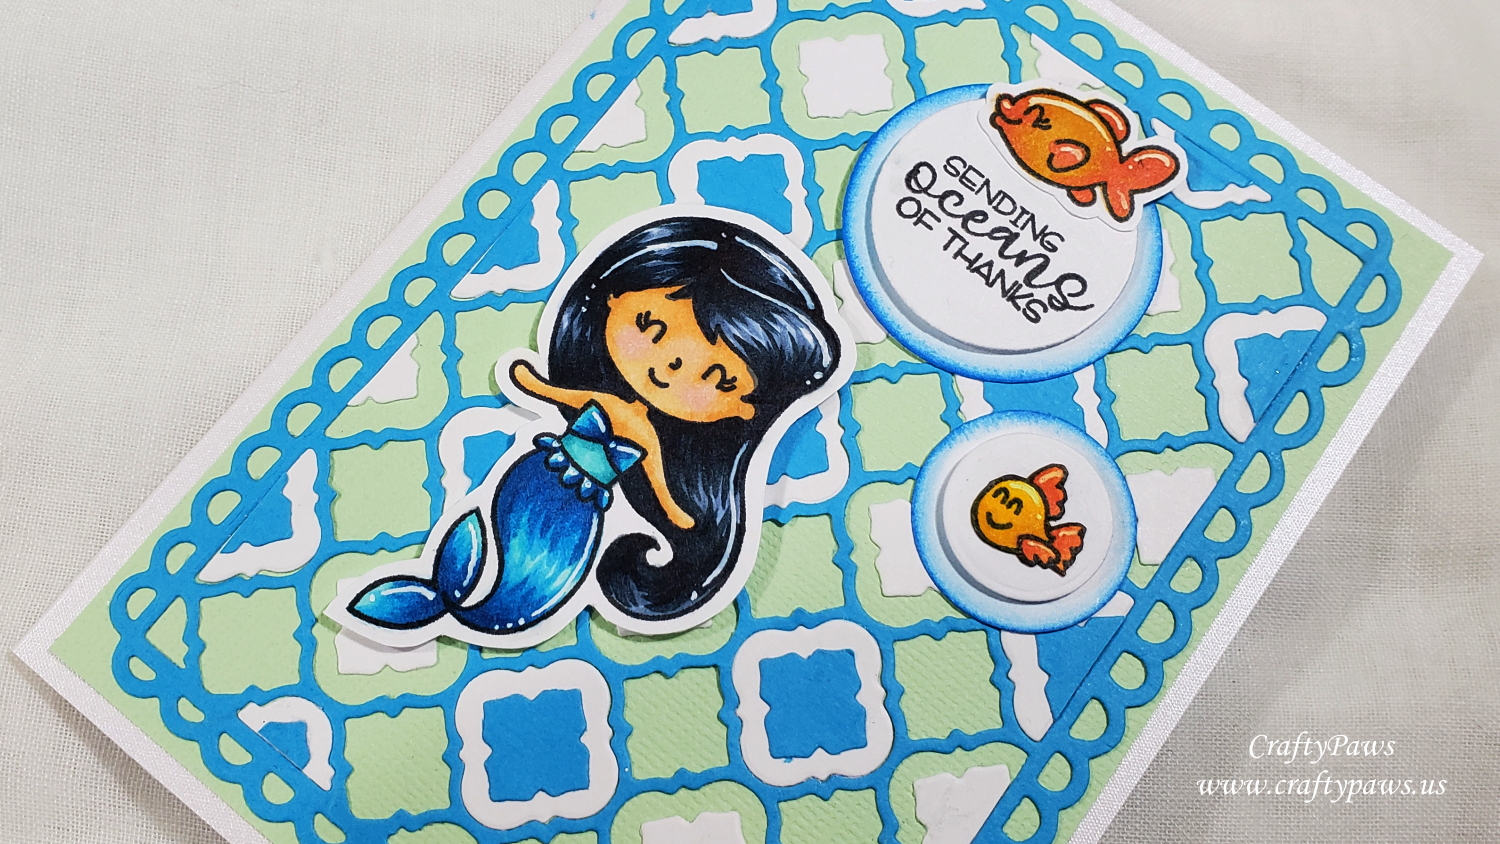
I fussy cut out the mermaid and the fishes with my Fiskars Spring Loaded Reverse Scissors, leaving a bit of a white margin all around so that she would pop a bit from the busy background. For the fishes, I decided that even with the white margin, they were too small and might be fighting with the busy background so I decided to put them on “bubbles” that I die cut using the four smallest circles from the Diemond Dies Die-Normous Stack-Ems Circle Nesting Die Set. I stacked two circle die cuts, added some depth with double sided foam adhesive between them, and blended some Salty Ocean Distress Ink on the lower circle. For the larger circle and fish, I also stamped in the combined sentiment from the stamp set: “Sending Oceans of Thanks”. So that the mermaid would not be overshadowed by the bubbles, I popped her up on double sided foam adhesive too.
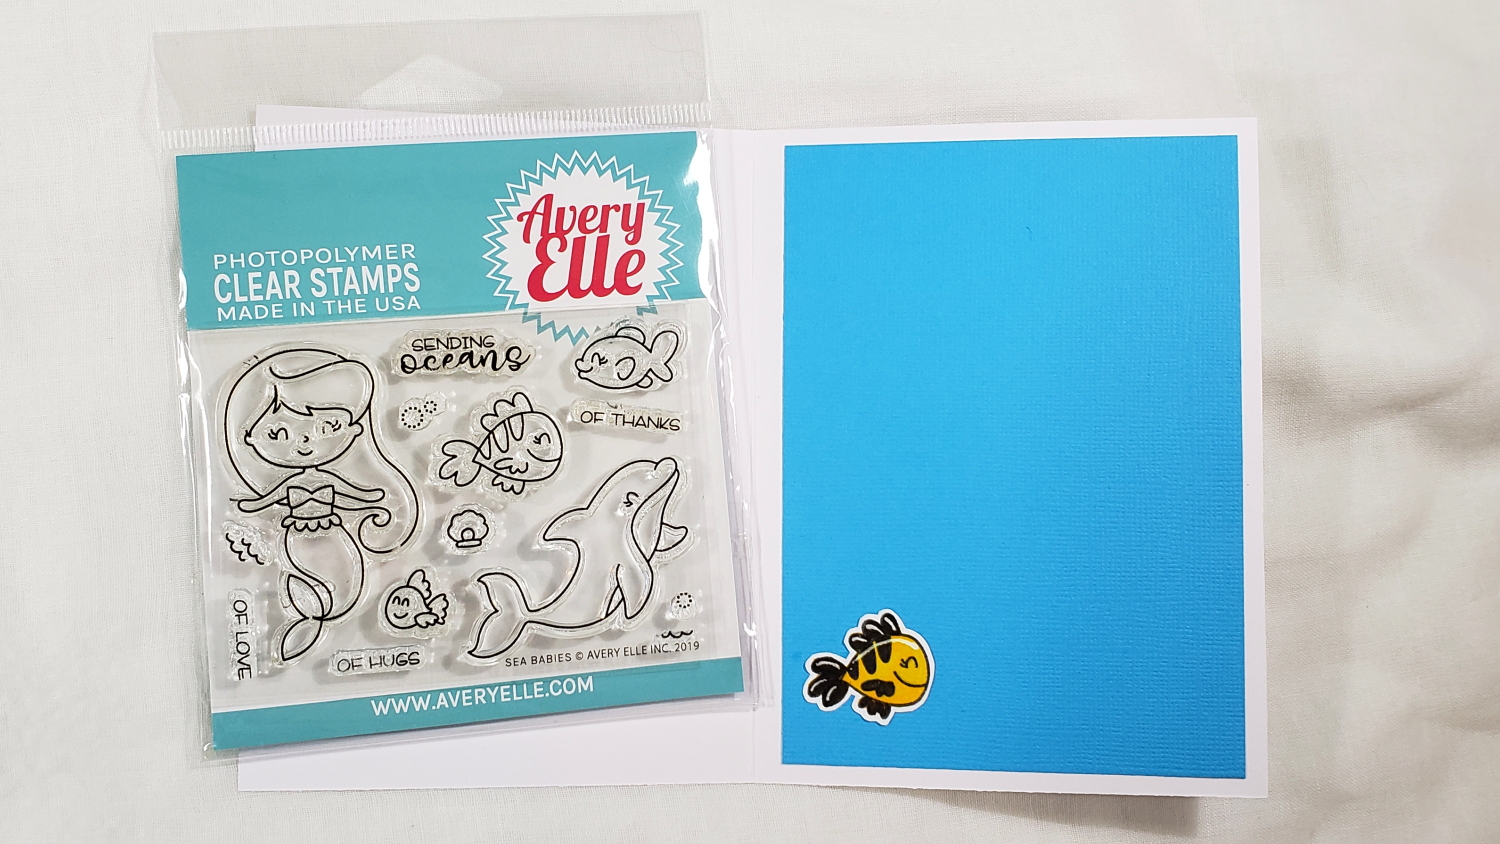
For the inside card liner, I simply used a scrap of aquamarine cardstock to match one of the background cardstock colors. And for a finishing touch, I added a third Artify-colored fish from the stamp set that I fussy cut and glued to the lower left.
CLICK on the following picture to watch the card making process video:
This card is being entered into the following challenges:
Crafts Galore Encore Anything Goes Challenge
Creatalicious Anything Goes with Optional Slim Line Card Challenge
Word Art Wednesday Anything Goes Challenge
Through the Craft Room Door Anything Goes Challenge
Stamping Sensations Fantasy and Magical Challenge
]]>
Pros:
1. Incredibly well priced
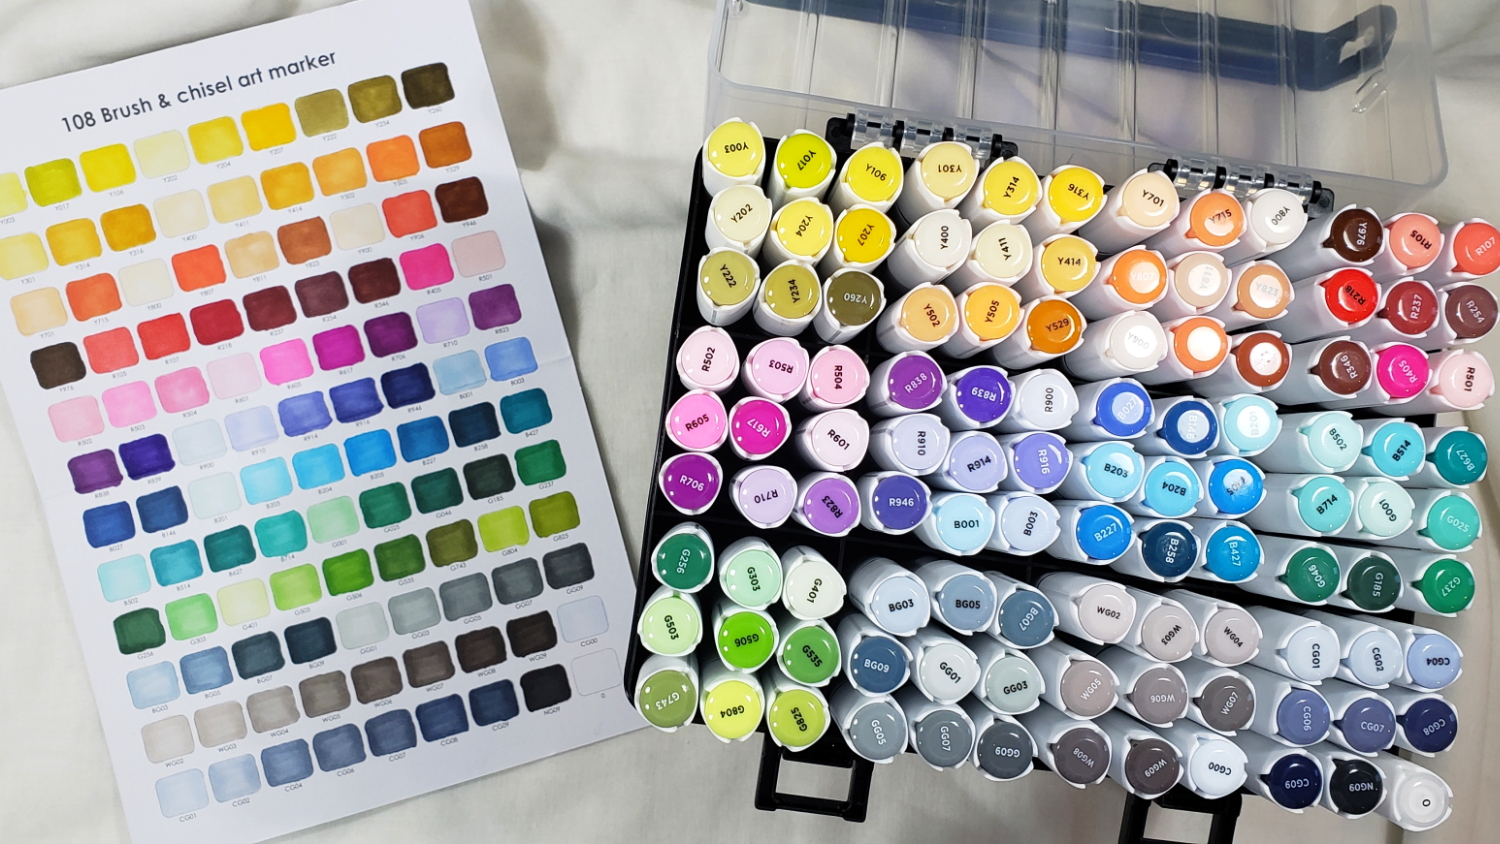
2. Markers themselves seem strong and well made – triangular barrel shaped body prevents rolling/dropping
3. The caps are secure and click into place (little chance of dried out markers due to loose caps)
4. Colors are plentiful, saturated, and blend well
5. There is not a strong odor (unlike Sharpies)
6. Comes with great, well organized swatch sheet
7. Comes packaged in fantastic organizing carrying case (another budget saver!)
Cons:
1. Markers are not labeled on the barrels (only on the caps) so caps can get misplaced from matching markers if both are removed in use (not an issue for me since I never take both caps off in use)
2. Chisel tip end may not be perfectly positioned for easy use given the triangular barrel shape of markers (not an issue for me since I don’t use the chisel nibs)
3. Swatch sheet paper may be different from the type you use so colors may appear different (easy to fix – copy onto your preferred paper to swatch)
4. Possibly lesser quality of nibs (time will tell with more usage)
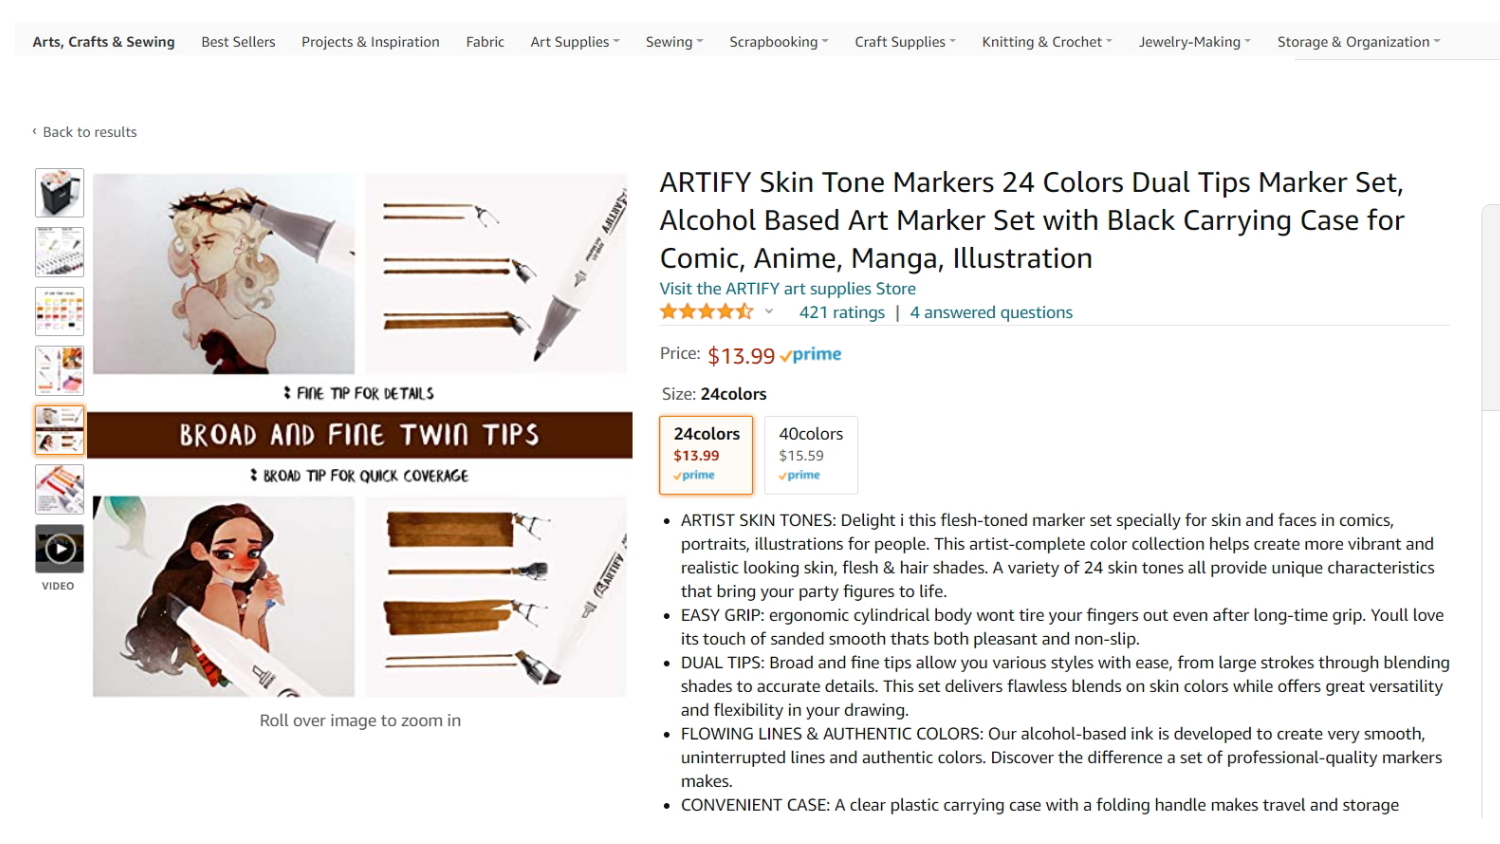
This is an amazing budget-friendly set of alcohol markers, and I am really impressed. These would be great for kids, adults starting out on coloring, during travels, and so much more! Honestly, if I had not started out my coloring journey with Copic Markers (which range from approximately $5.85 to $8 per marker depending on sales, sets, and country of purchase), I would seriously consider getting these Artify markers.
CLICK on the picture below to watch my full review:
]]>

I was so happy to be able to easily create this over-sized card using the Inloveartshop Stackables Spiral Pattern Decor Dies to create a background that highlights two focal point images. I cut out 4 sizes of the stackable spiral circles in various shades of purple — lavender, periwinkle, and deep purple. I stacked them progressively smaller and then spaced them out on a white card front on a periwinkle card base. To keep a cohesive look, I connected the stacked spirals with a strip of lavender card stock through the middle of the card. I also used a simple circle die (from the versatile Diemond Dies Die-Normous Stack-Ems Circle Nesting Die Set) to create a light background from which the puppy images could pop. NOTE: My readers can get 20% off by using the DISCOUNT CODE: G-36967 at the Inloveartshop checkout.
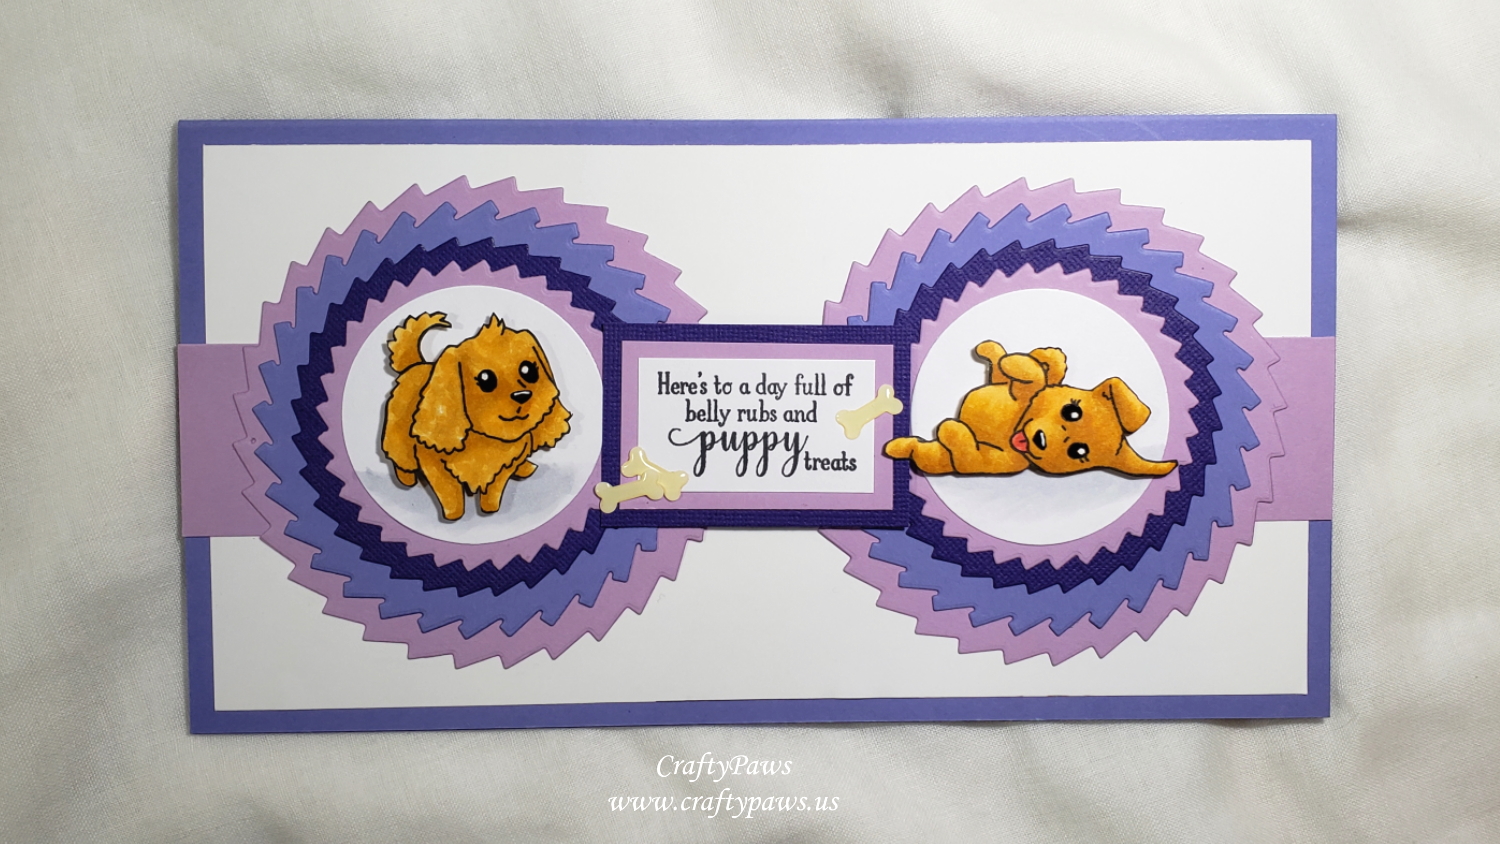
For the focal images, I finally got to color up the poodle and the paws-up puppy from the Gina K Designs “Playful Pups” stamp set (retired). As my niece’s new puppy is an apricot mini poodle (like my sweet Biscuit was), I colored up the dogs with the following Copic colors:
Fur: YR21, YR23, YR24
Nose: W7
Tongue: R22 and R24
Ground for background white circles: C1
After fussy cutting them with my Fiskars Spring Loaded Reverse Scissors, I inked the edges of the cut images with a Memento Tuxedo Black Marker for a clean finished look. I also popped up the puppies on double sided foam adhesive to add even more dimension.
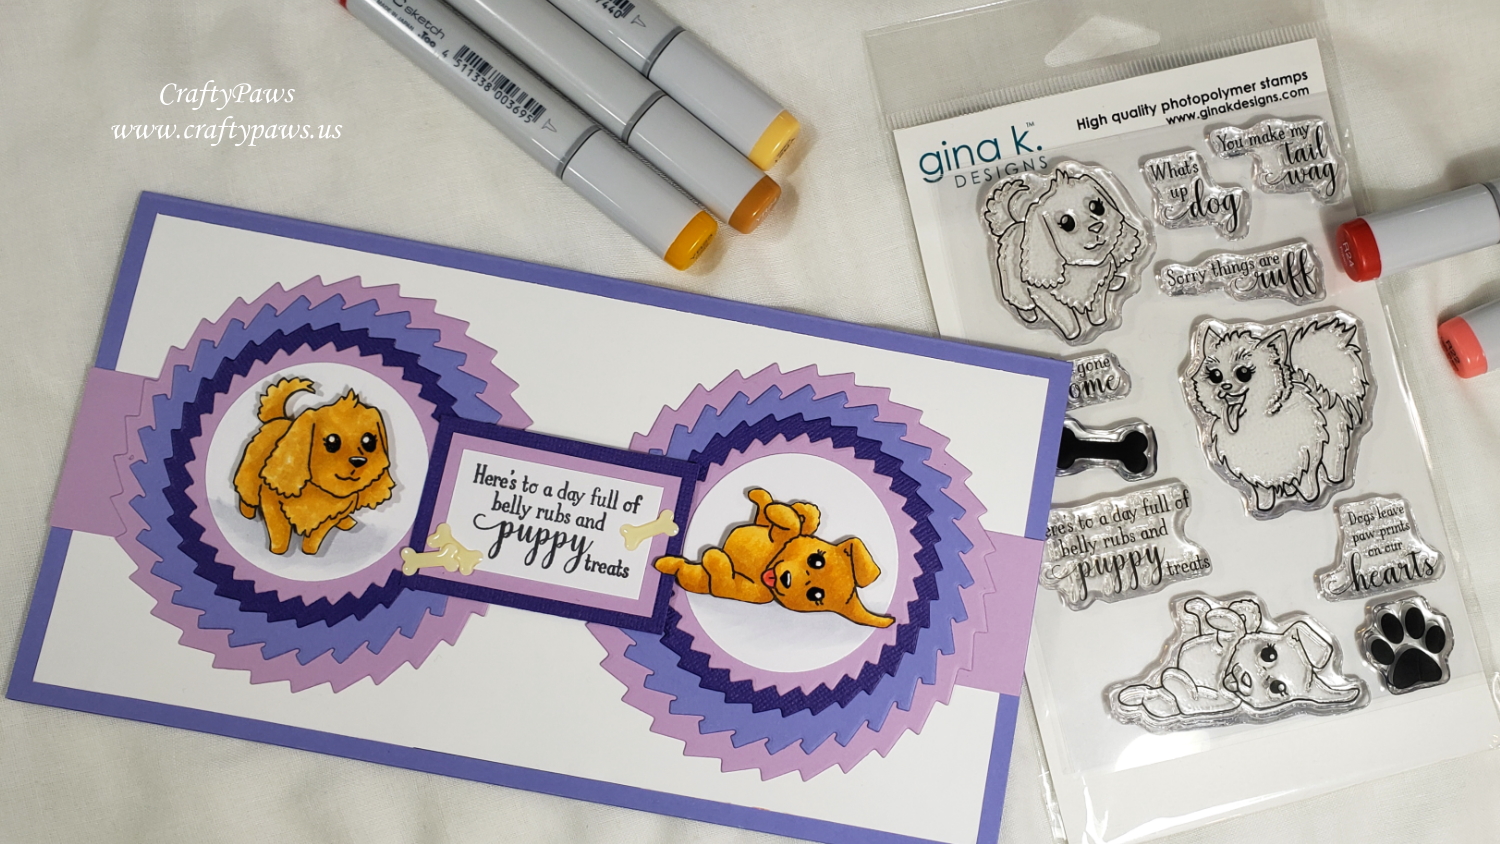
For the sentiment, I used the “Here’s to a day full of belly rubs and puppy treats” from the same stamp set. To help the sentiment stand out, I matted them with more scraps of the lavender and deep purple card stock that I had used for the background, and I also back the sentiment with more double sided foam adhesive. I had a few enamel bones from a Doodlebug Designs sticker set from the Puppy Play Collection (retired), so I added 3 to the sentiment for embellishments.
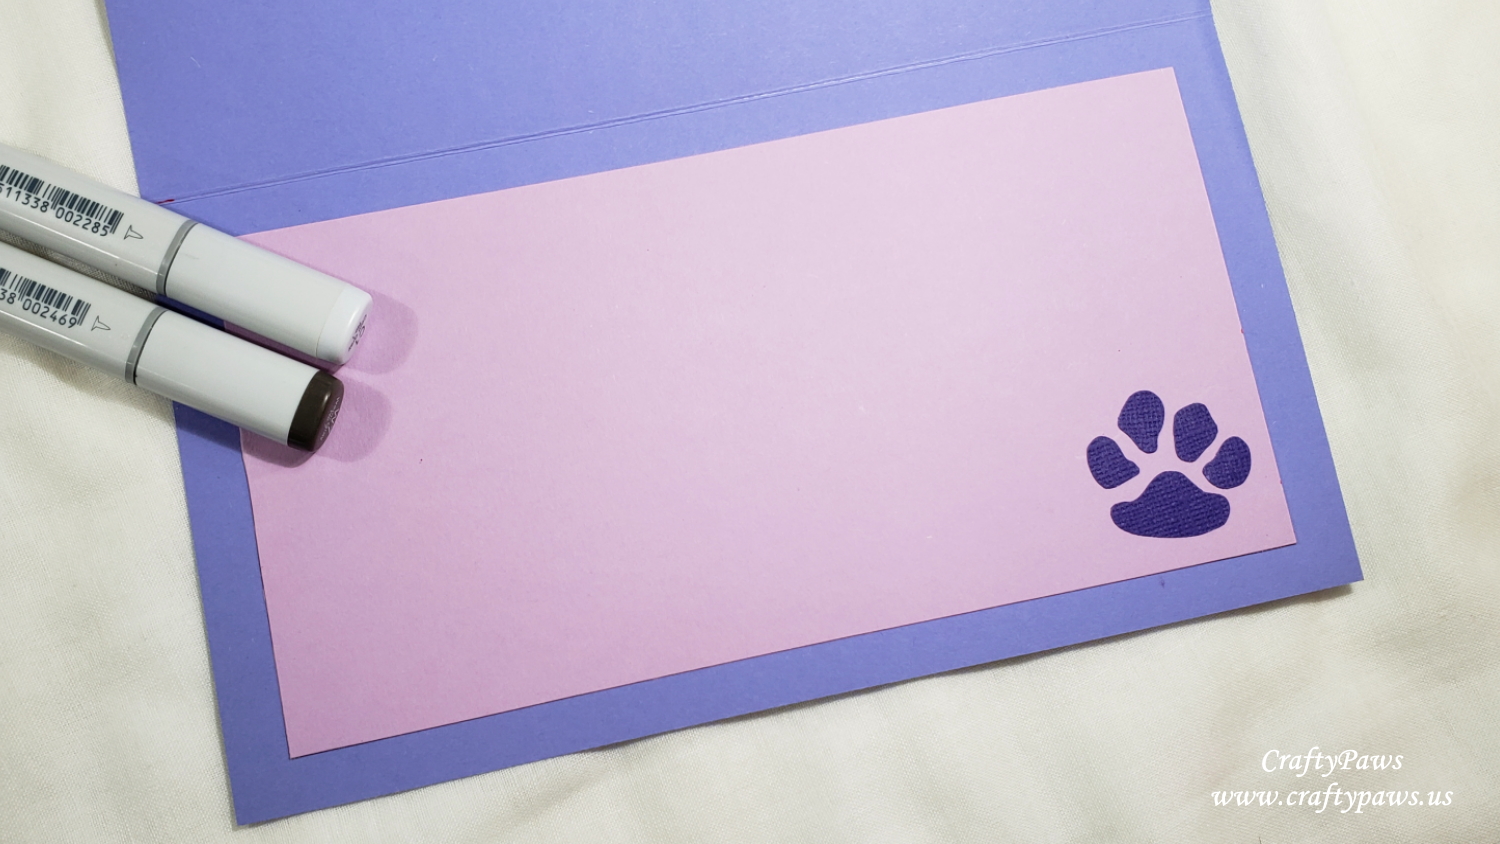 For the inside card liner, I used the remainder of the lavender card stock sheet. And for a little interest, I also used an old Fiskars Furry Friends Paw Squeeze Punch with a bit of the deep purple card stock for an accent paw print inside the card.
CLICK on the picture below to watch the card making video:

Disclosure: Many of the supplies I’ve used for today’s project are linked. Some may be affiliate links, which means if you make a purchase I receive a small commission at no extra cost to you. I truly appreciate your support toward the costs of running this blog!
This card is being entered into the following challenges:
Creatalicious Anything Goes with Optional Use Green Challenge
Word Art Wednesday Anything Goes Challenge
Through the Craft Room Door Anything Goes Challenge
Crafts Galore Encore Anything Goes Challenge
Stamping Sensations Monochromatic Challenge – purples
]]>
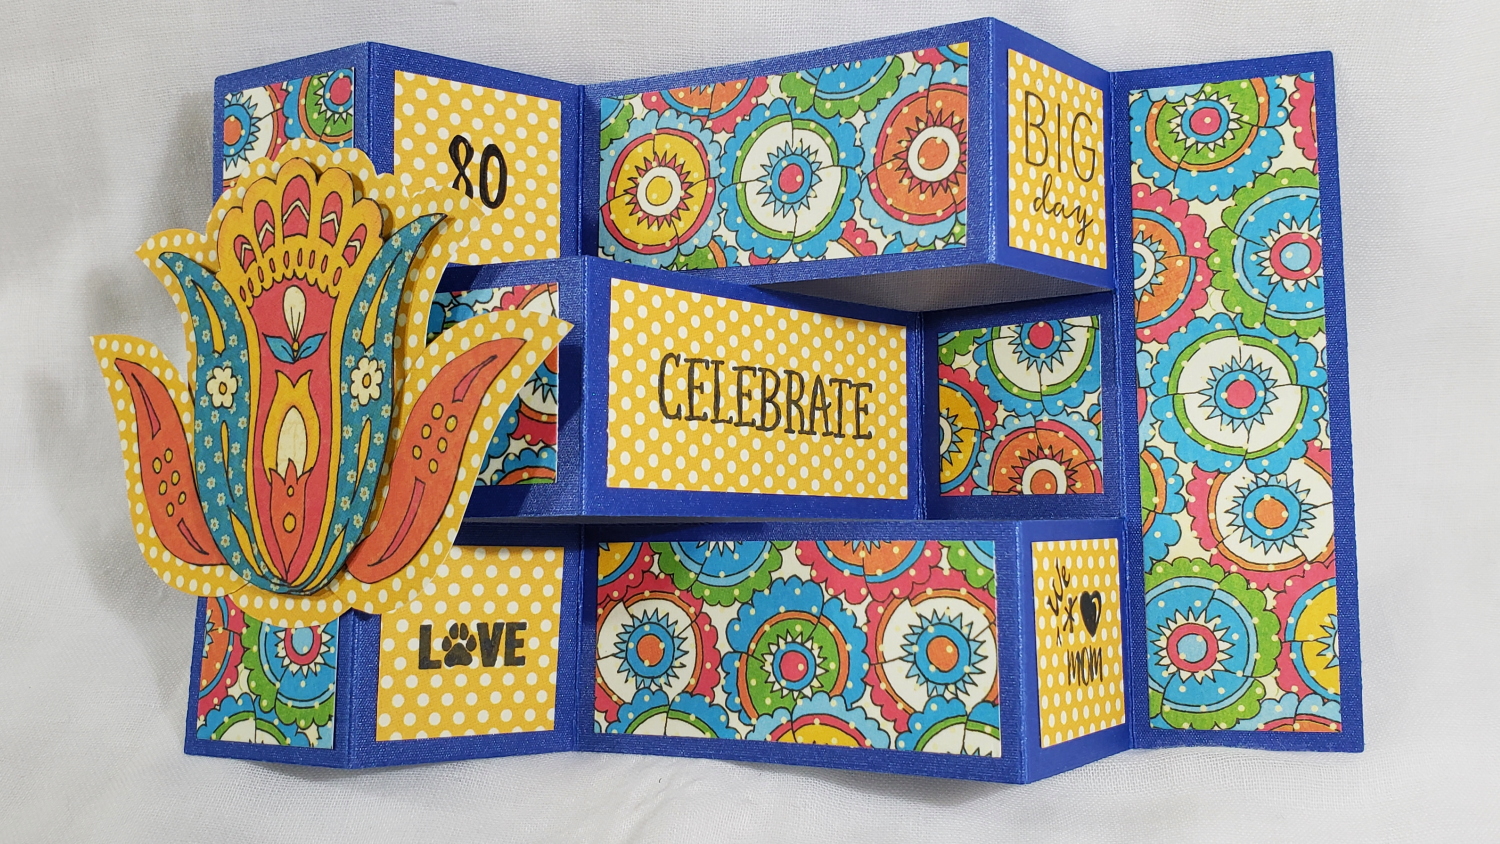
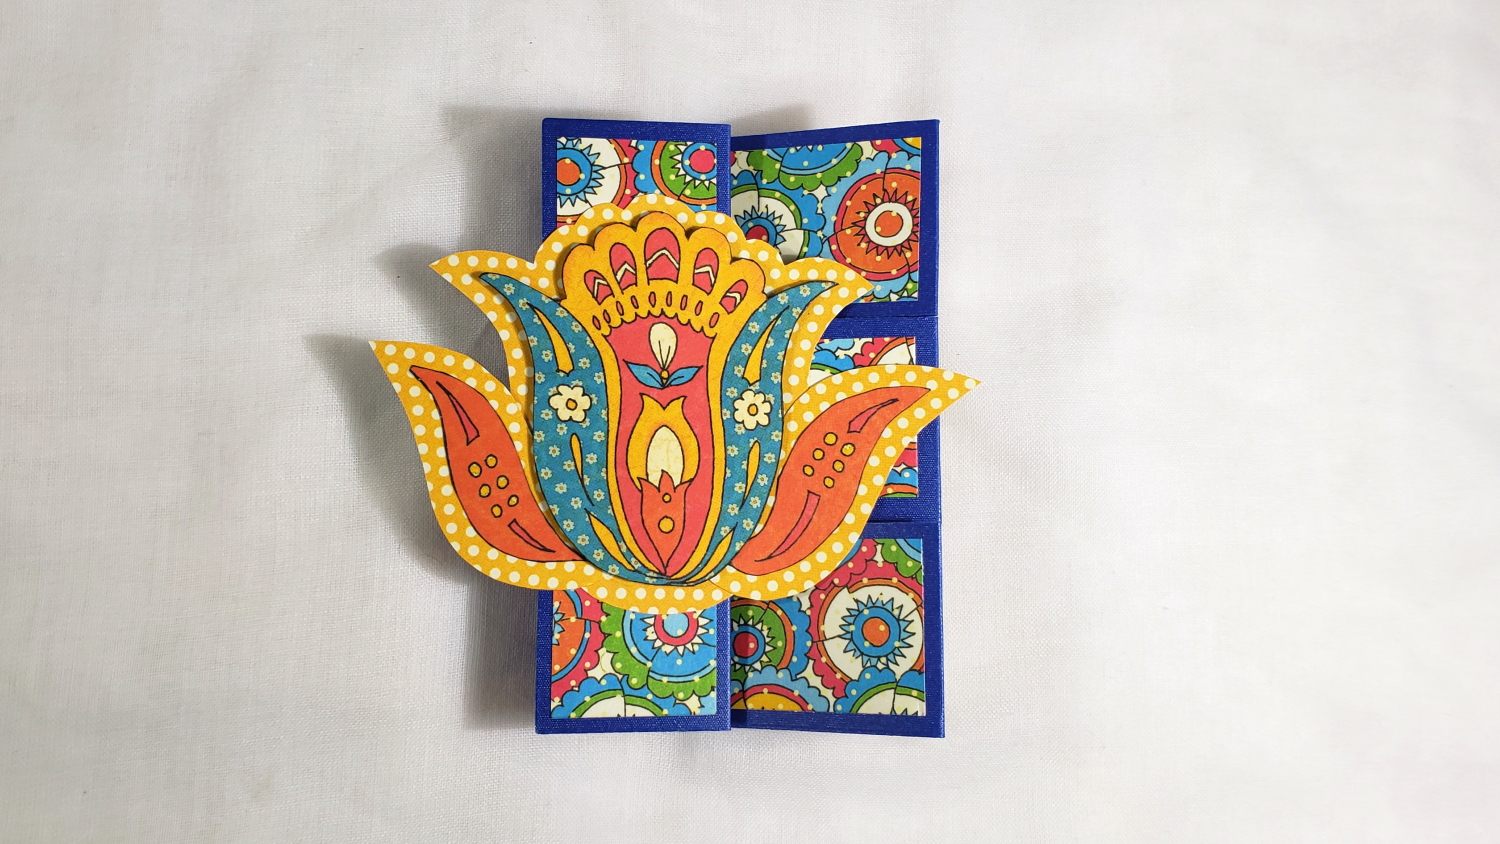
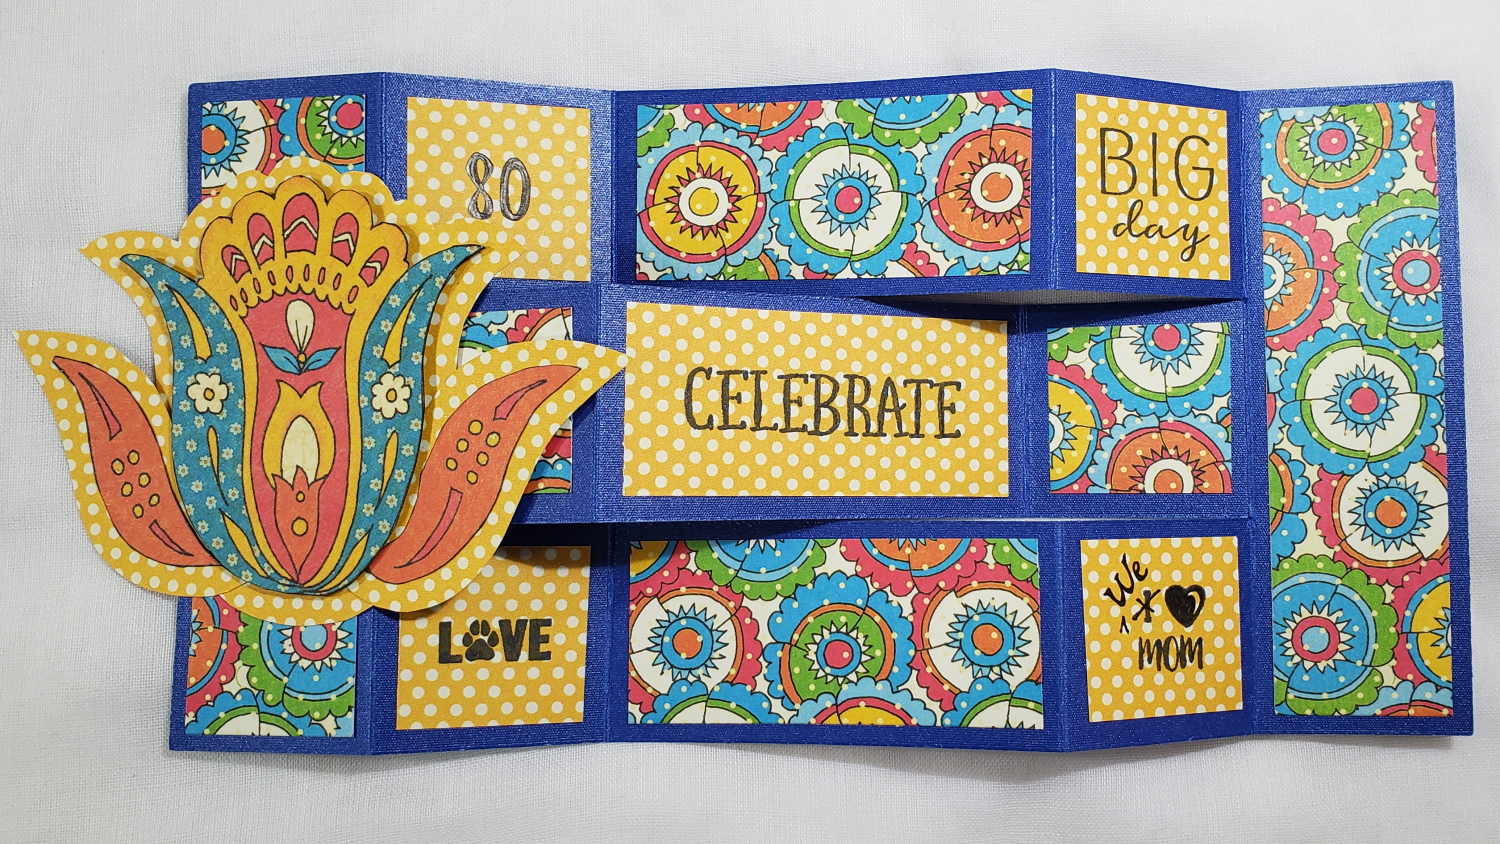
I decided to use this Large Foldable Scrapbooking Album Die (I’m not sure why it was named this, but this die is perfect for making a super special 3D pop up card) to create this easy and fun 3D fun fold card. I used the die to cut and emboss some thick dark blue card stock as well as a beautiful Graphic 45 patterned paper from the Bohemian Bazaar Collection. I used a teflon bone folder to sharpen all the embossed fold lines of the dark blue cardstock. This made the accordion folding easy and crisp. Then I cut down the patterned paper along the fold lines. I then cut down each piece by 1/4″ on 2 sides of each patterned paper piece so that I could prep each panel of the card for a matted look. I glued down each patterned piece onto the dark blue panel of the card base. I alternated the floral side with the reverse yellow polka dot side on each panel for a fun energetic feel. I also took the dominant tulip image from another piece of the Bohemian Bazaar Collection and fussy cut it out using my Fiskars Spring Loaded Scissors. I popped it up on double sided foam adhesive and free hand cut out a yellow polka dot mat around it before gluing it on the front vertical panel of the card.
For the sentiments, I used a combination of stamps from the following stamp sets as well as free hand writing with a Faber Castell PITT pen in XS point: The Greeting Farm “The Snuggle Is Real”; The Greeting Farm “I Love Mom”; and Power Poppy “Party Time”.
CLICK on the picture below to watch my entire Inloveartshop DT package as well as a “how-to” on this special 3D card:
Disclosure: Many of the supplies I’ve used for today’s project are linked. Some may be affiliate links, which means if you make a purchase I receive a small commission at no extra cost to you. I truly appreciate your support toward the costs of running this blog!
This card is being entered into the following challenges:
Simon Says Stamp Monday Use Something Green Challenge
Simon Says Stamp Wednesday Beautiful Blossoms Challenge
Creatalicious Anything Goes with Optional I Got the Blues
Word Art Wednesday Anything Goes Challenge
Lil Patch of Crafty Friends Anything Goes Challenge
Crafts Galore Encore Anything Goes Challenge
Crafty Gals Corner Add a Heart Challenge
]]>
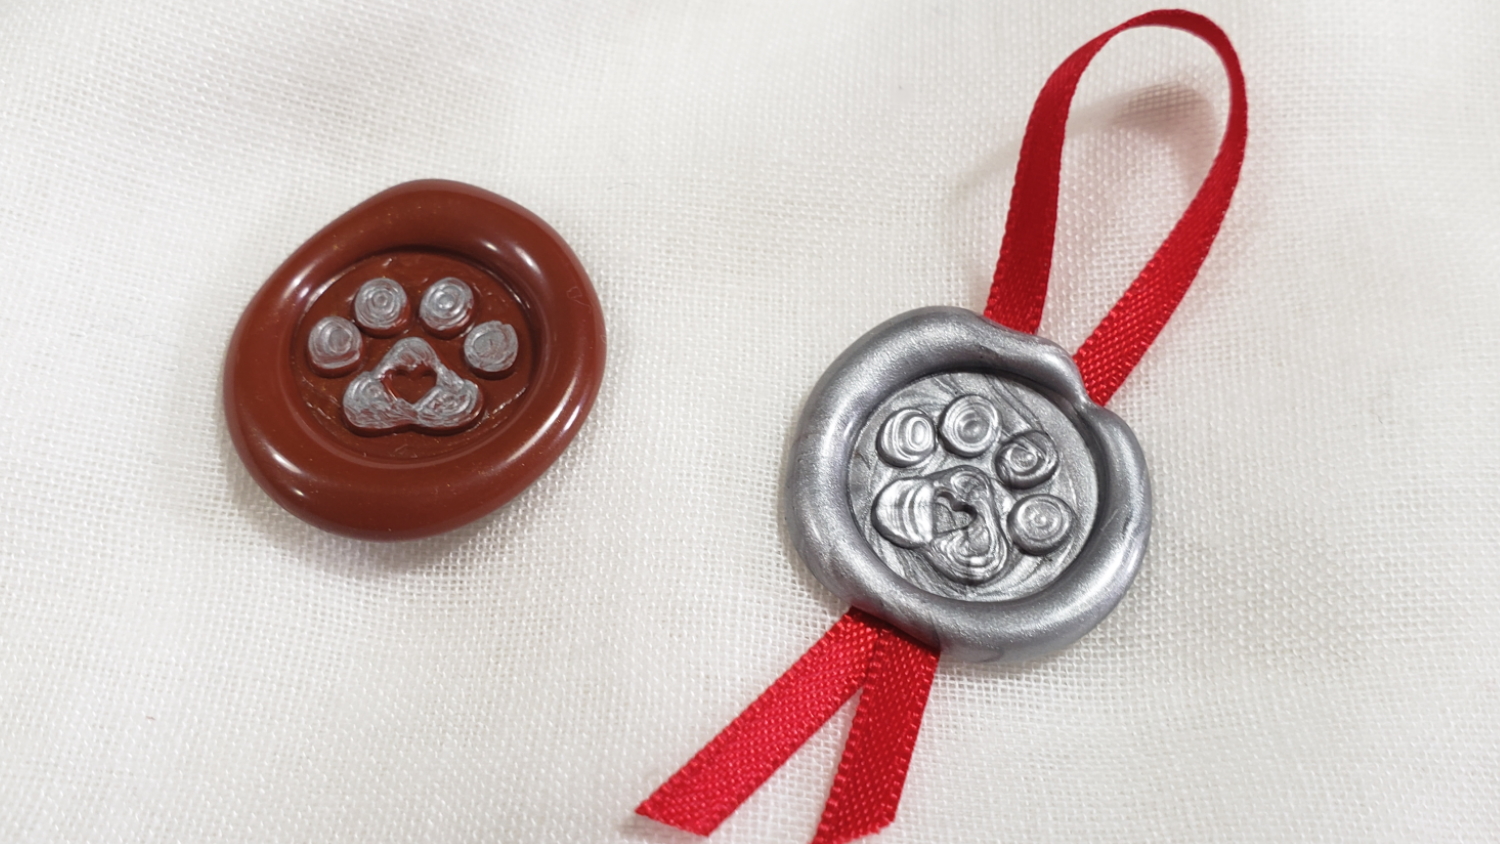
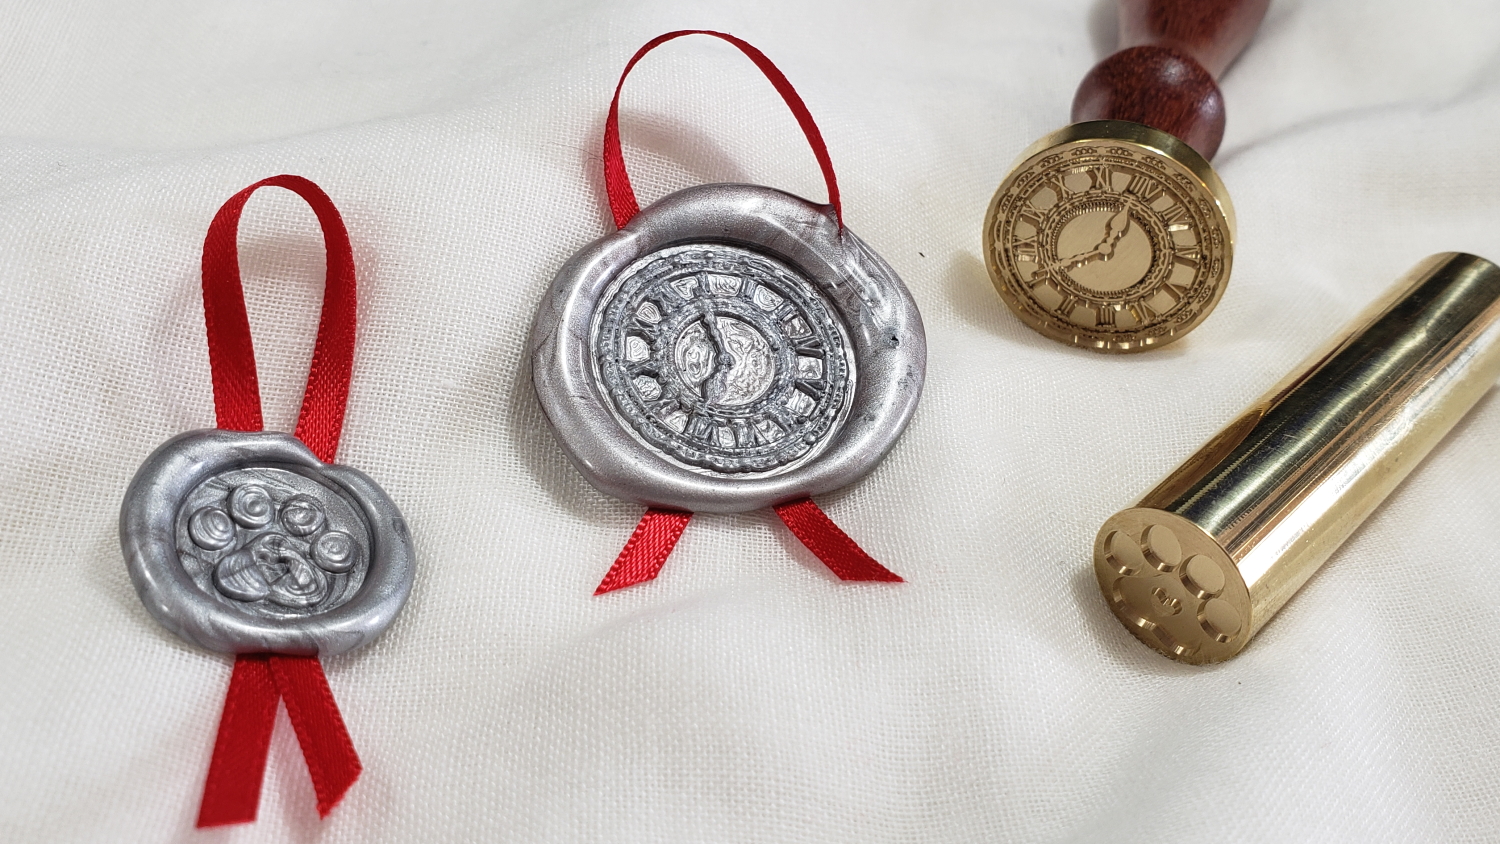
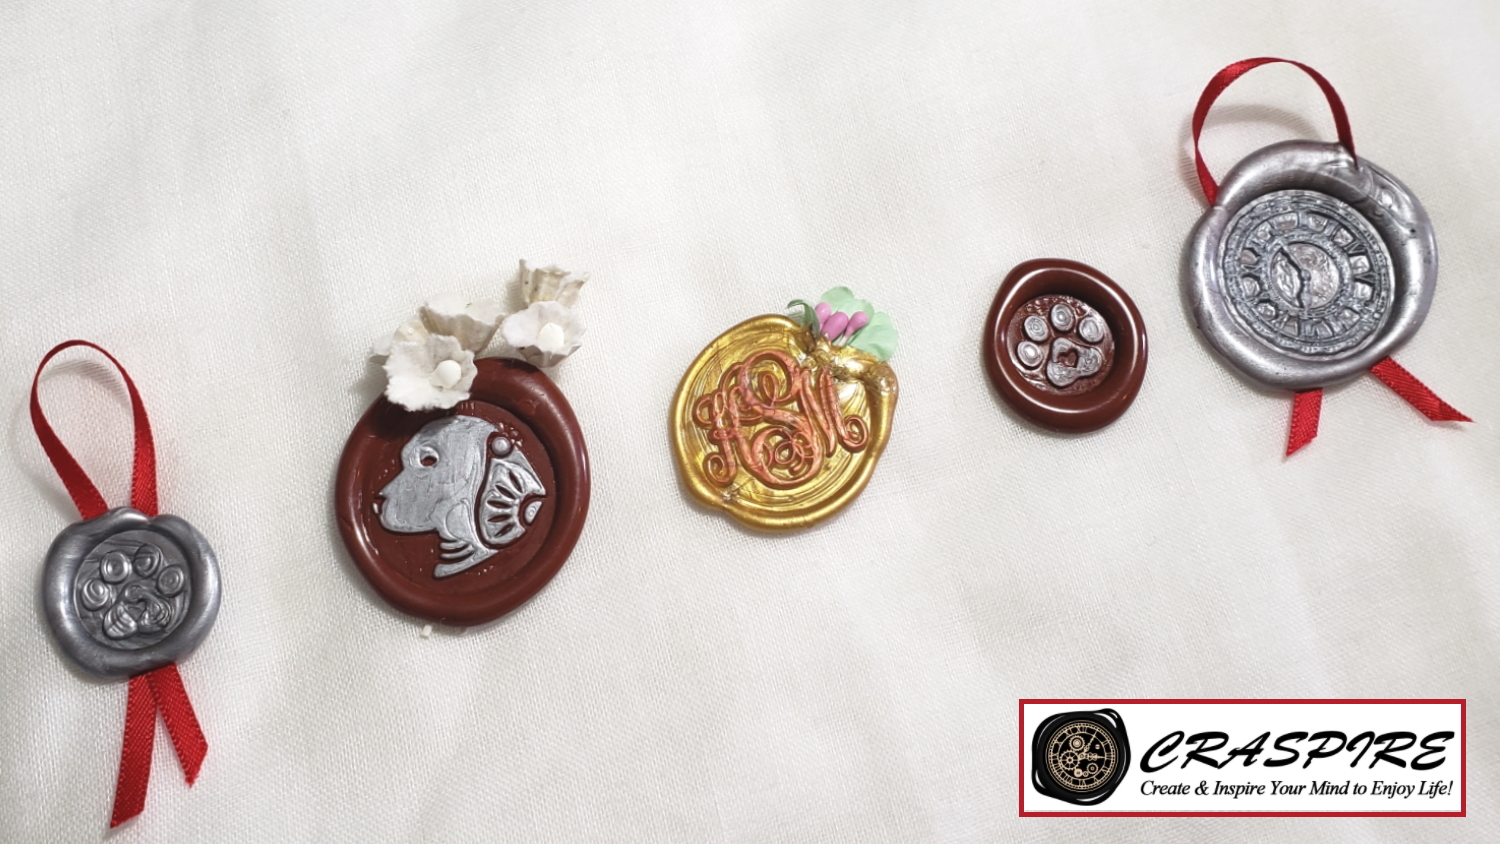
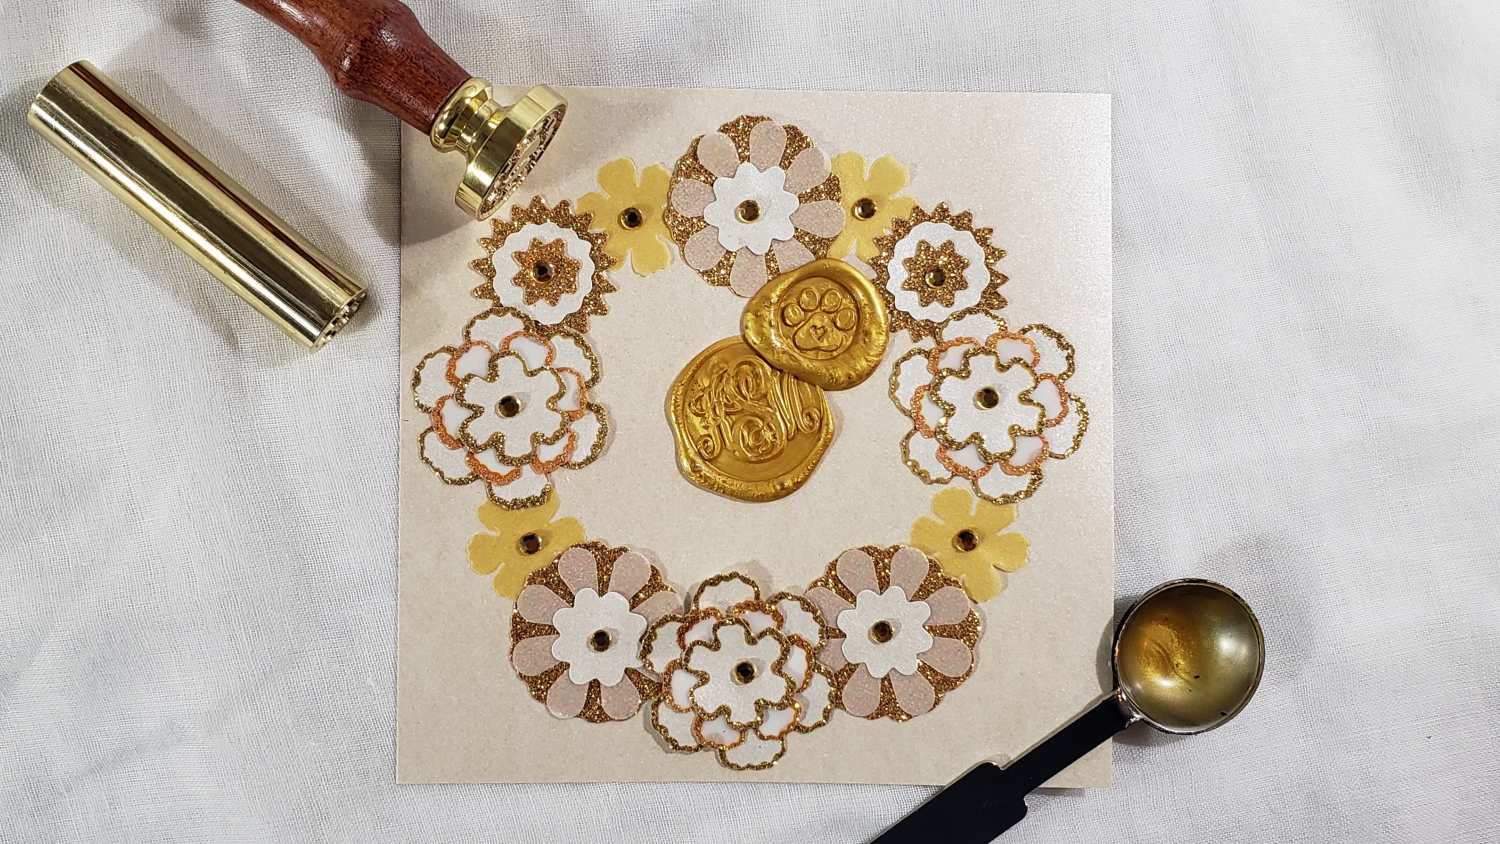
I had the full starter kit that includes 3 different colored wax sticks, a sample wax stamp (mine has a clock, but they have a whale and a magic circle image too), a melting spoon, and a couple of tea lights in a pretty giftable box, the Chinese Zodiac Dog, and a smaller Paw Print with a Heart. I also designed a monogram stamp and Craspire made me a Custom Stamp with that design.
Since I knew it might be a while before I got to craft again, I decided to make a bunch of wax seal embellishments at once. I also got out some tiny paper flowers, my Sharpie metallic markers, and some bits of satin ribbon to add unique touches to the embellies.
I used a non-stick mat (mine is a jumbo size, but you can use a simple silicone baking sheet mat) to pour my melted wax and easily assemble these embellishments. It was fun to test out these ideas that have been floating around in my head for a while. Making a bunch at once will also save me from having to do multiple clean ups, etc. whenever I want to add these special elements to a card or envelope.
CLICK on the photo below to watch the demonstration video:
Thanks for stopping by today! PAWS to enjoy the process!
]]>
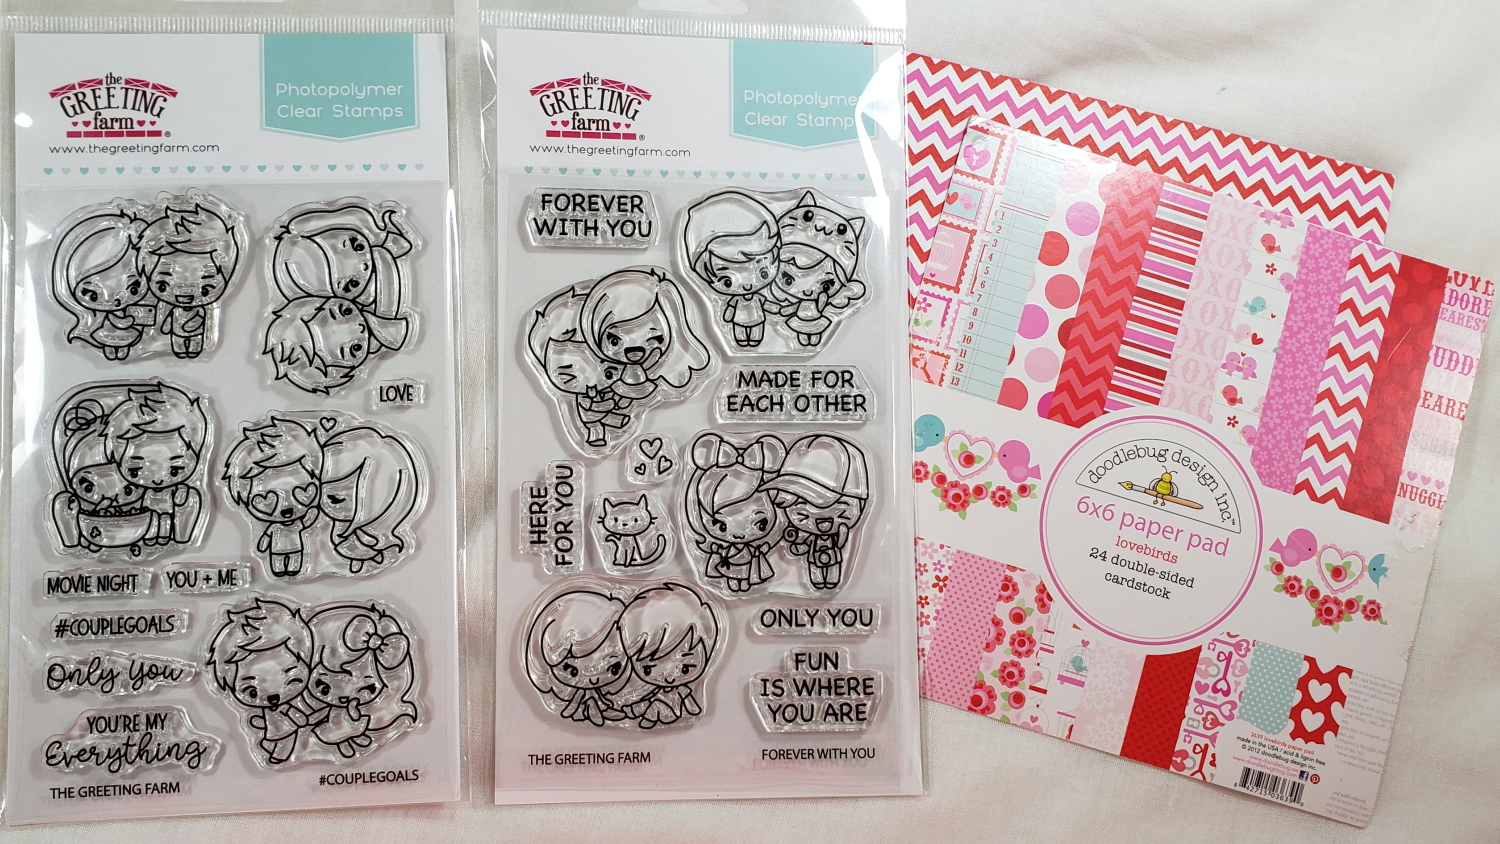
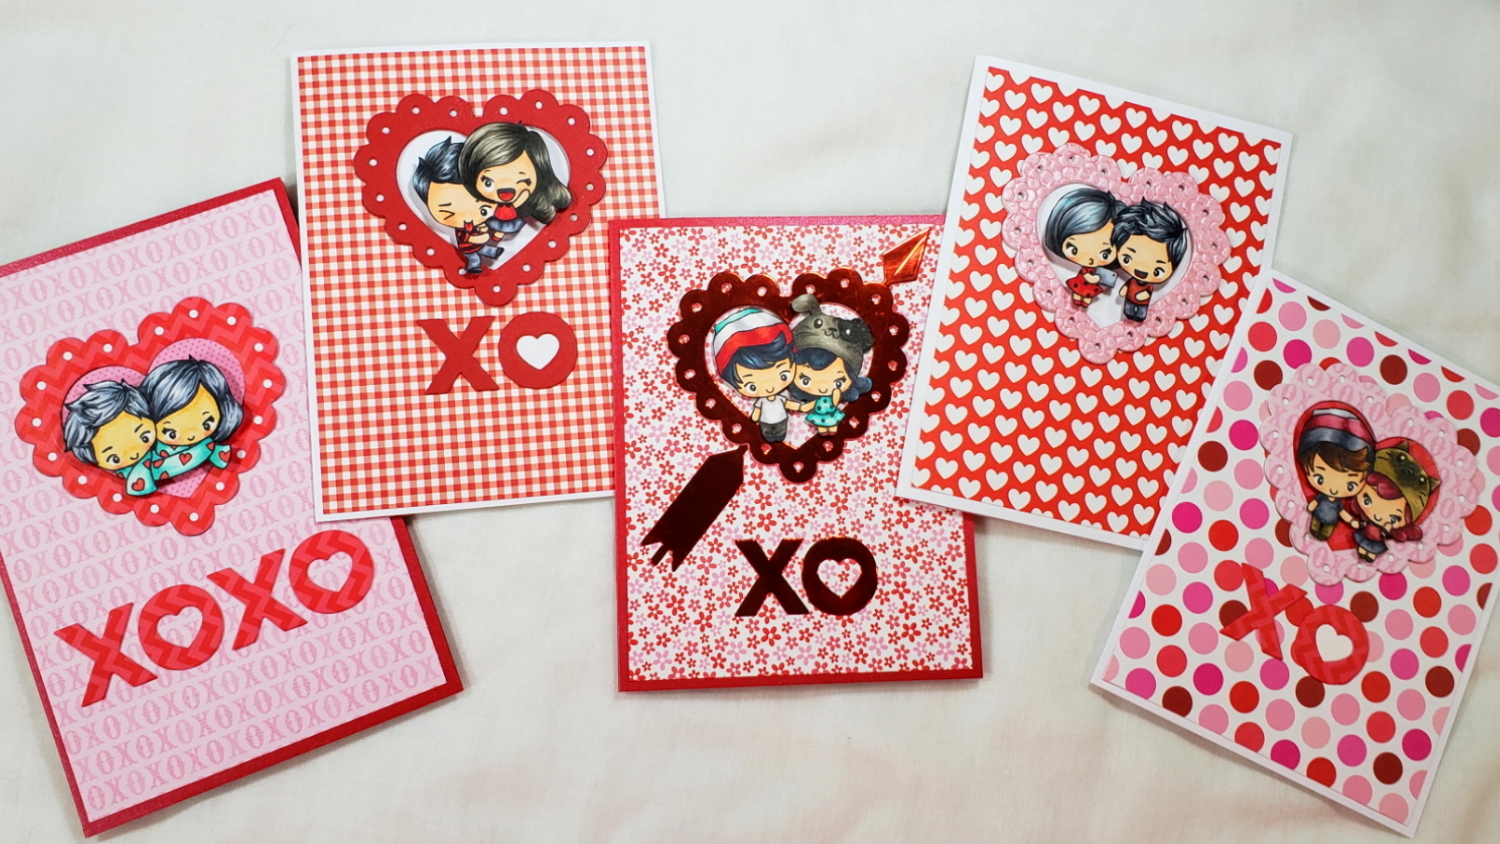
The first thing I did was pick the images that I thought could best represent my parents, my older sister and her husband, my niece and her boyfriend, my nephew and his girlfriend, and a crafty friend who loves cats and her hubby. Then I went through and Copic colored up each couple as follows:
Senior Couple Sharing a Single Scarf:
Hair: C00, C0, C3, C5 and C7 with Signo Uniball White Gel Pen
Skin: E50, E51, R30
Scarf: BG11, BG23, BG49 and R27
Older Couple Taking a Selfie:
Dress, and Shoes: R24, R27 and R29 with Black Polka Dots doodled in with a 0.05 pt. Copic Multiliner Pen
Girl Hair: B00, N0, N3, and N5
Boy Hair: B00, N2, N5, N6 and Uniball Signo White Gel Pen
Skin: E000, E00, E01 and R30
Shirt: C2, R14, R27 and R29 with Collar and Cuffs doodled in with a 0.05 pt. Copic Multiliner Pen
Pants: N2, N4, N6
Camera: N0 and N2
Boy Holding Up Girl Couple:
Skin: E000, E00, E01 and R30 and Tongues: R24 and R27
Pants and Skirt: N2, N4, N6
Boy and Girl Tops and Girl Shoes: R24, R27, and R29 with Stripes and Collar added with a 0.05 pt. Copic Multiliner Pen
Boy Shoes: C10
Boy Hair: B0000, B00, N2, N4, and N6
Girl Hair: E40, W4, W5, W7 and W9
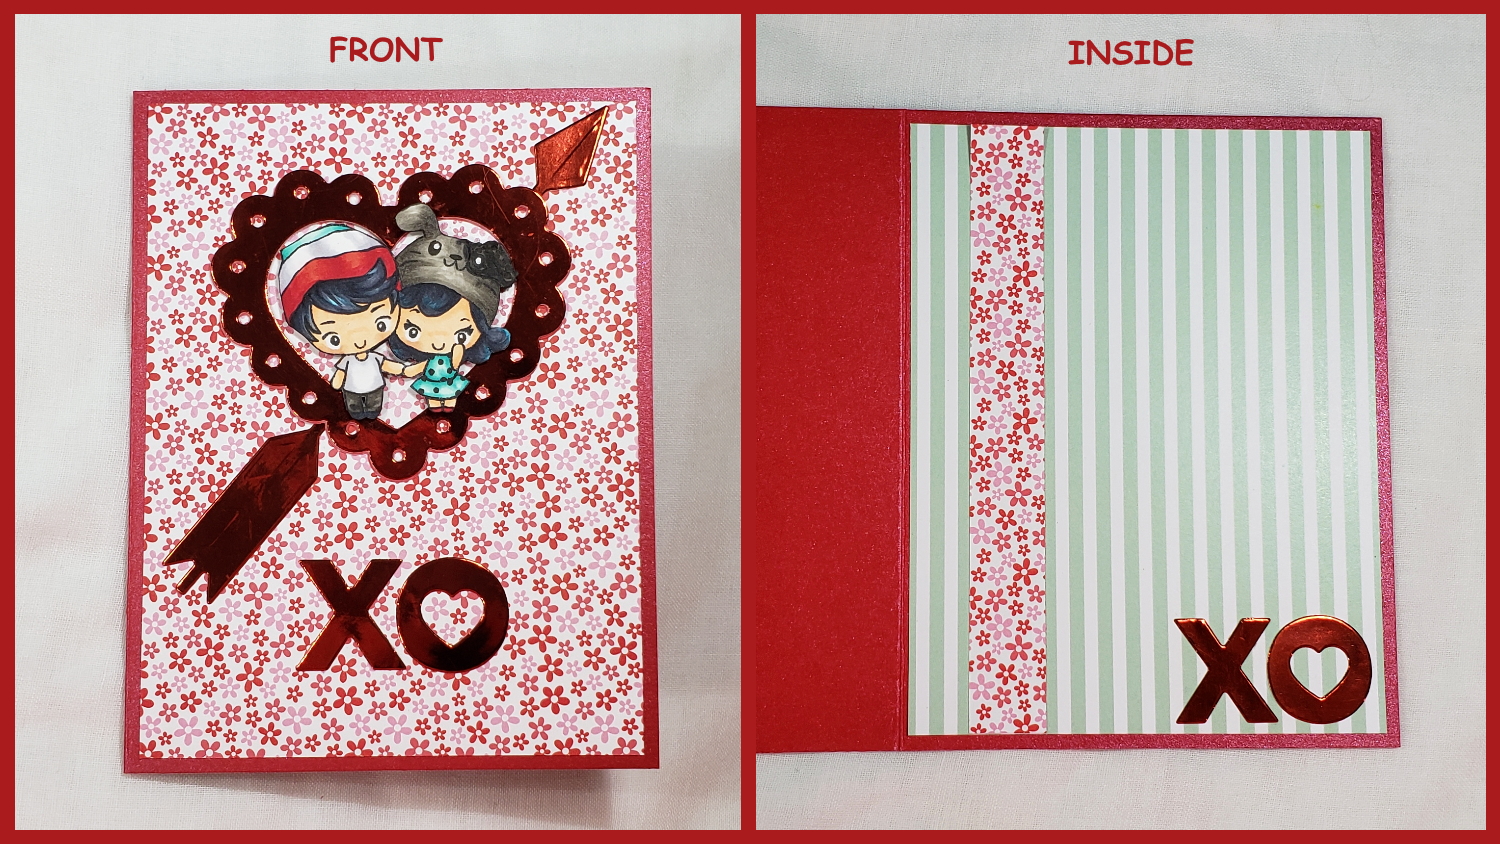
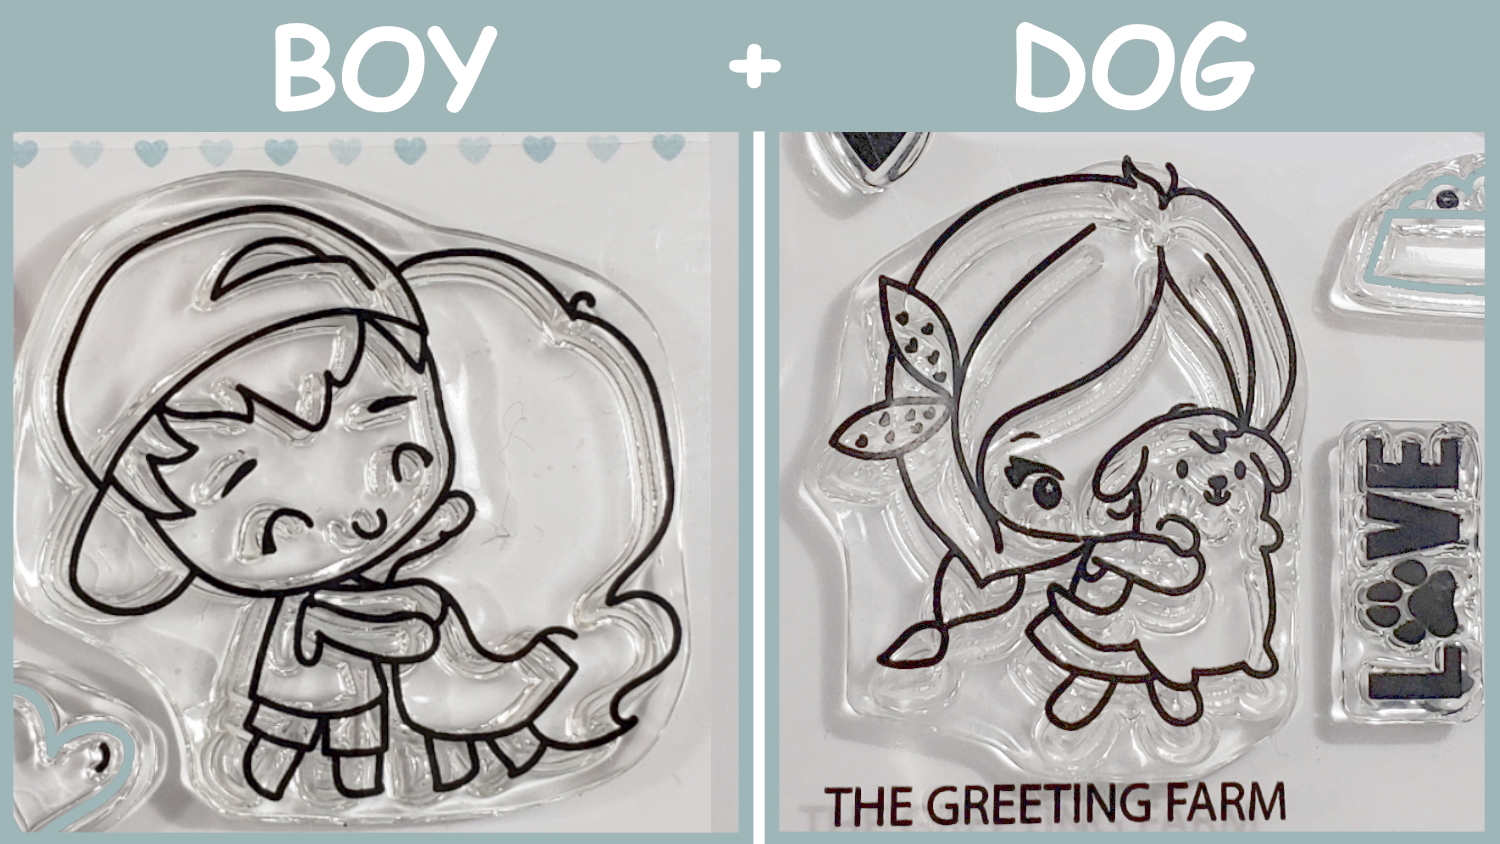
Couple With Hats – I altered the girl’s hat from a cat to a dog with a 0.05 pt. Copic Multiliner Pen:
Skin: E000, E00, E01 and R30
Hair: B01, C3, C5, C7
Shirt and White Stripe in Hat: C1 and 0 Blender Marker
Red Shoes and Red Stripe in Hat: R24, R27 and R29
Blue Green Dress and Stripe:BG11, BG23, and BG13
Fuzzy Dog Hat and Boy Pants: W3, W4, W5, and W7
Couple With Hats – Girl’s Hat is Siamese Cat:
Skin: E000, E00, E01 and R30
Boy Hair: E50. E53, E55, and E57
Girl Hair, Girl Shirt and Boy Hat Burgundy Stripe: R81, R83, R85, R89 with Stripes added with a 0.05 pt. Copic Multiliner Pen
Siamese Cat and Boy’s Pants: E84, E87, and E89
Girl Skirt, Boy Shirt, and Boy Hat Grey Stripe: C3, C4 and C6
Boy Hat White Stripe: C0
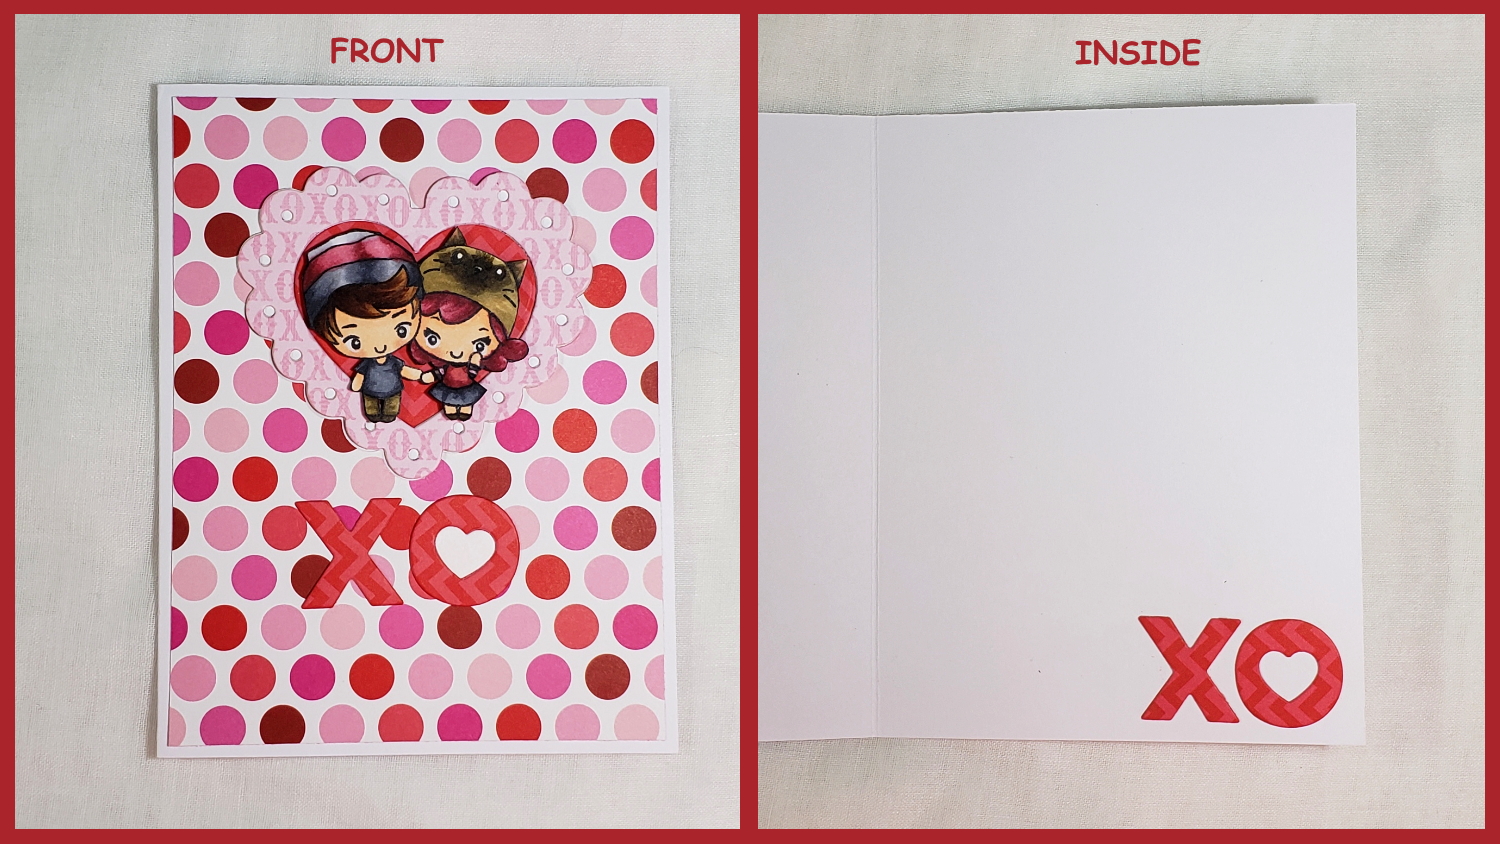
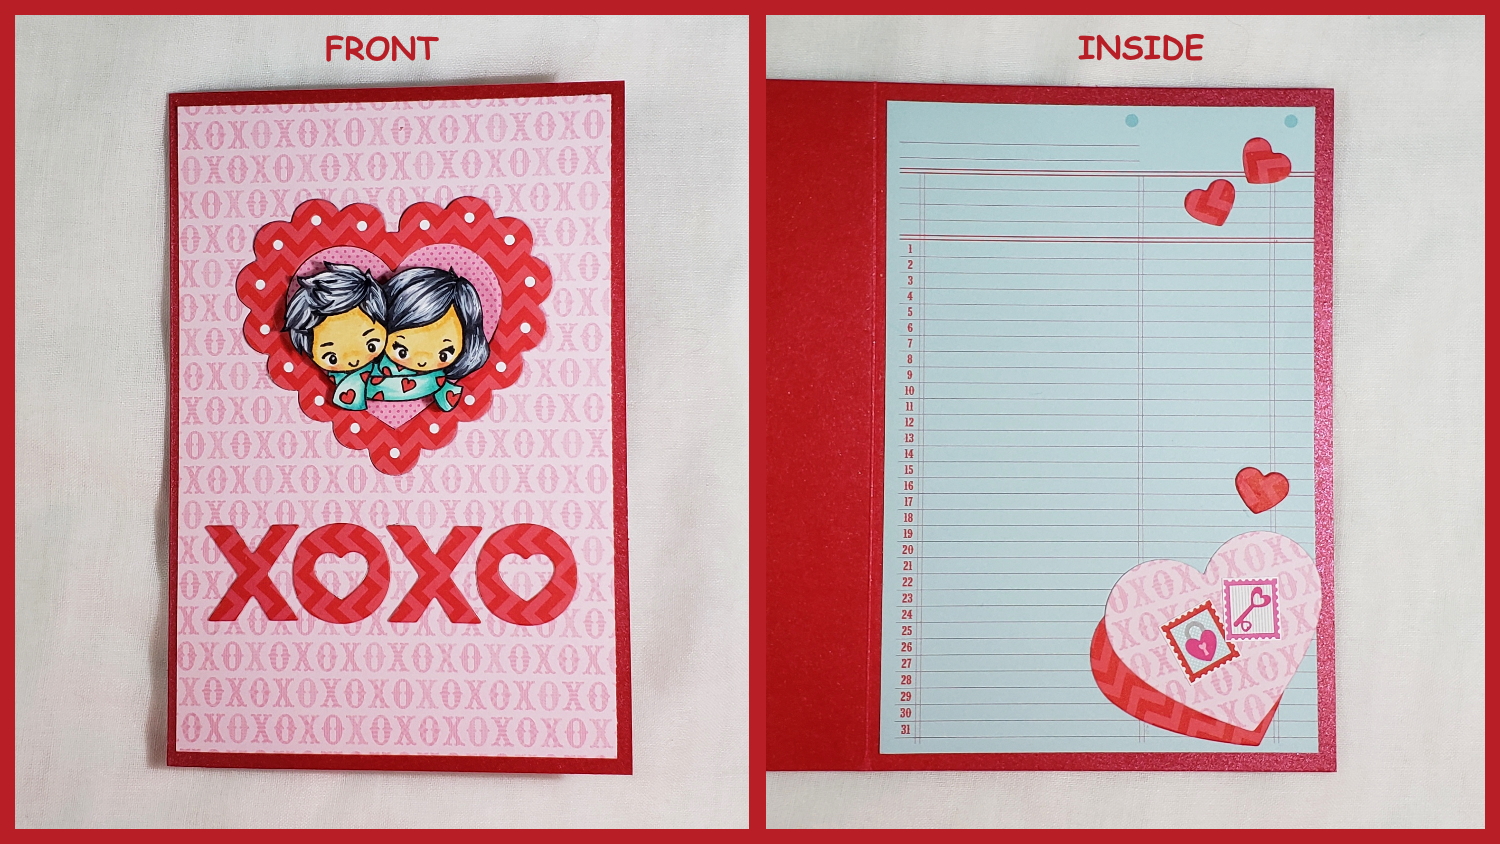
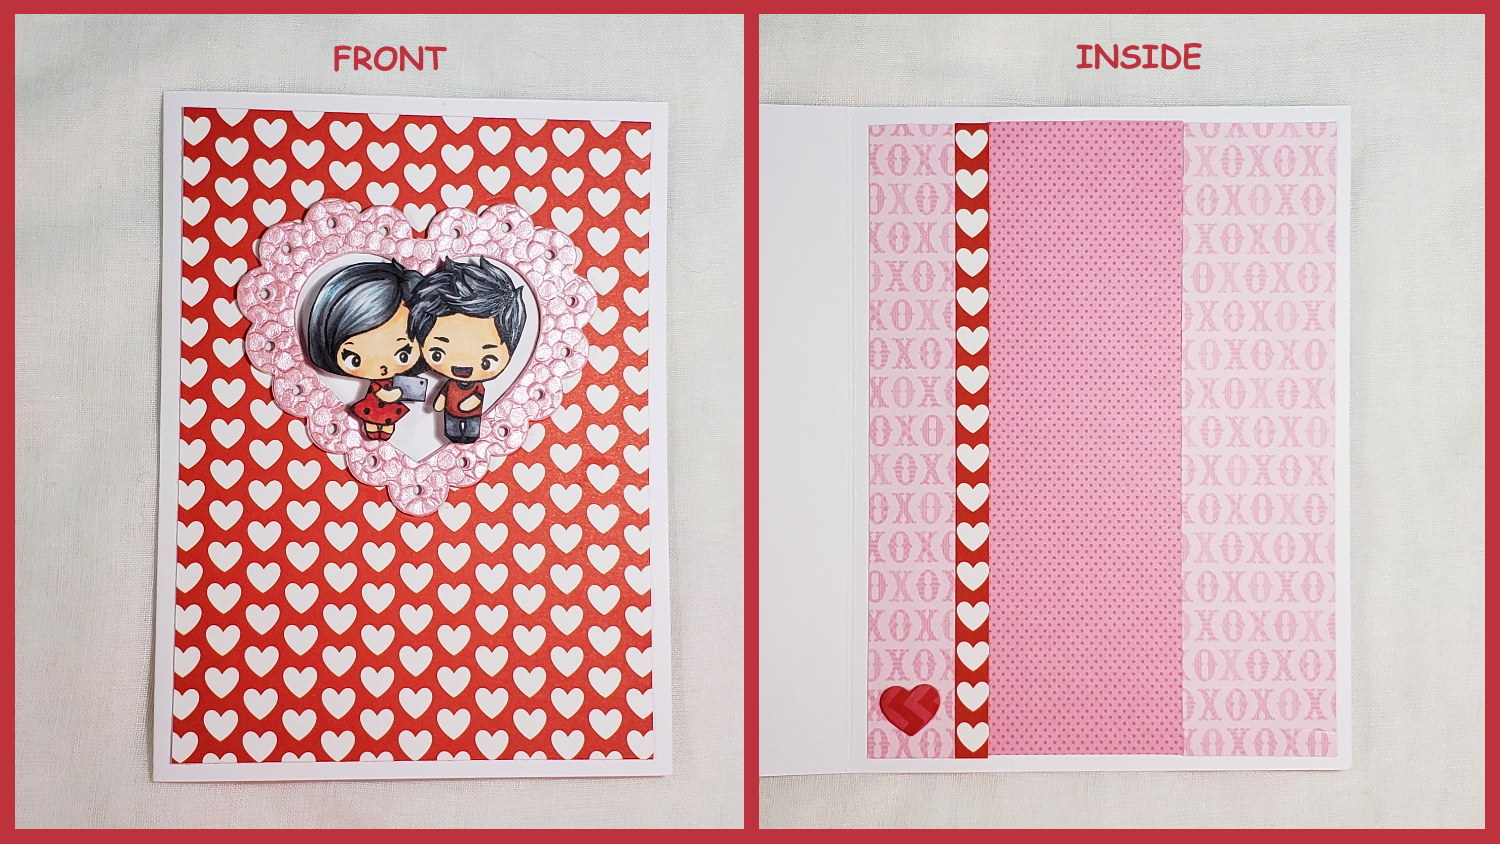
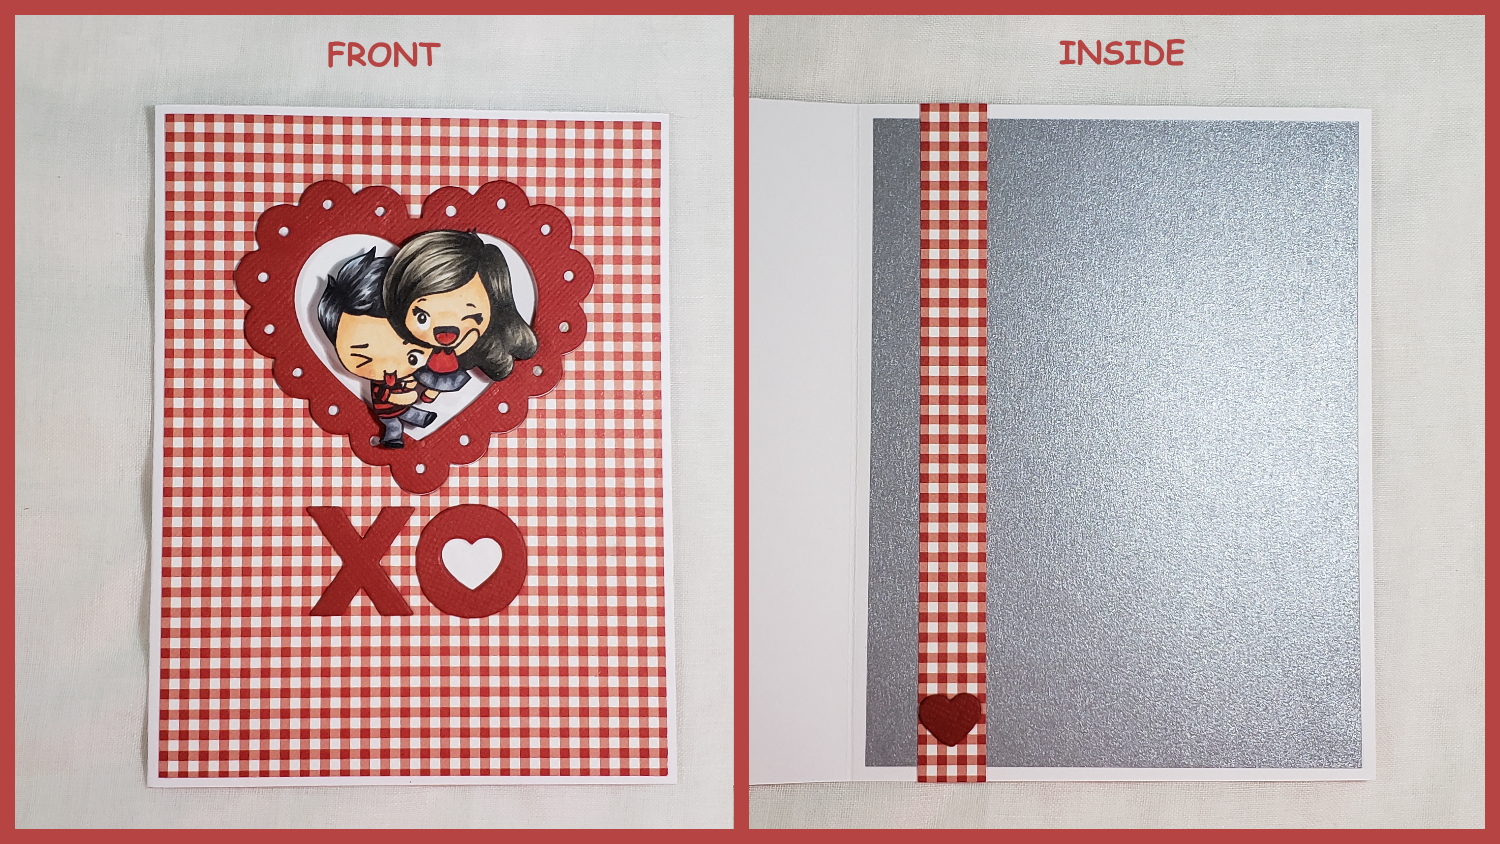
I fussy cut each couple with Fiskars Spring Loaded Scissors, inked the edges of the cut images with a Memento Tuxedo Black Marker (for a finished look), and made each of the couples the main focal point of the card fronts. The dies simply framed the images and accented the cards inside and out. The scalloped heart frame die cuts and the “Xs” and “Os” die cuts were stacked and glued together to add a little extra depth, and the couples were all adhered with foam dots to add dimension and interest. I was also able to use up all the scraps to decorate and line the inside of the cards!
CLICK on the photo below to watch the Copic coloring process video:
Disclosure: Many of the supplies I’ve used for today’s project are linked. Some may be affiliate links, which means if you make a purchase I receive a small commission at no extra cost to you. I truly appreciate your support toward the costs of running this blog!
These cards are being entered into the following challenges:
Simon Says Wednesday Love Is In The Air Challenge
Creatalicious Anything Goes with Optional Hugs and Kisses Challenge
Word Art Wednesday Anything Goes Challenge
Fab ‘n’ Funky Anything Goes Challenge
Through the Craft Room Door Anything Goes Challenge
Crafts Galore Encore Anything Goes Challenge
Stamping Sensations Colour My World Challenge
]]>
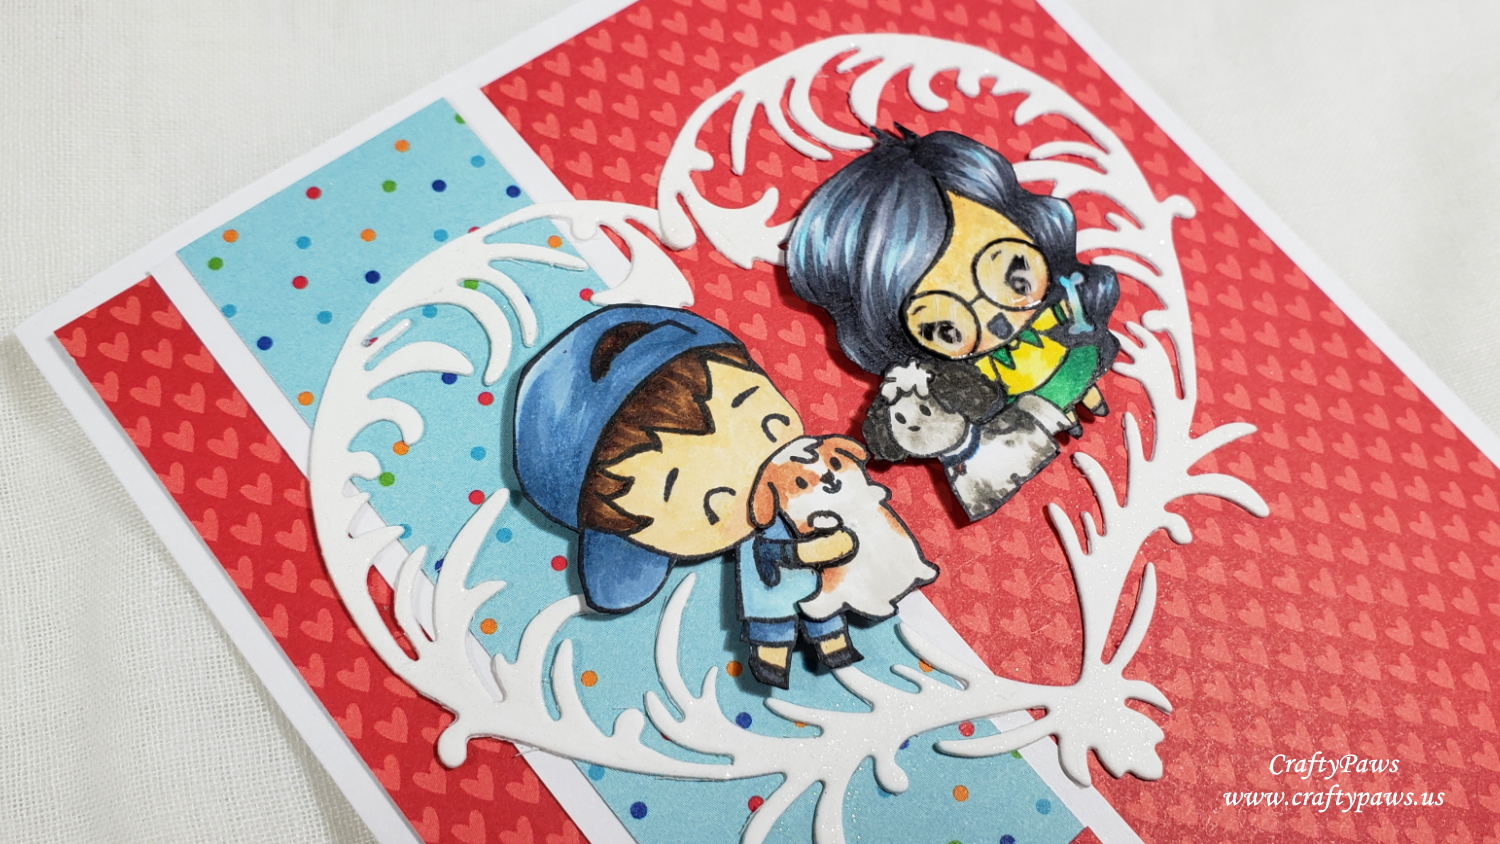
I used the boy and girl hugging image from “So This is Love” and just used the little boy facing toward the left to represent Mr. CraftyPaws. I altered him a bit more by doodling on short sleeves with a 0.05 pt Copic Multi-liner Pen since Mr. CraftyPaws would never wear a sleeveless shirt (lol). Then I stamped out just the little pup being held up by the girl with a braid from “The Snuggle Is Real” set to represent our little Havanese, Bandito, and tucked him in Mr. CraftyPaws’ arms.

For the girl representing me, I thought the girl with the glasses from The Snuggle Is Real would be the closest match. However, our Lhasapoo, Babaloo, does not look anything like the bulldog in that stamp. So I masked off the bulldog and doodled on the rest of the skirt of the little girl, adding details like the collar and long cuffed sleeves, with a 0.05 pt Copic Multi-liner Pen. For the dog representing Babaloo, I used the little dog with the bow from the same stamp set, but masked off the bow and doodled on a top-knot and shortened the ears and tail.
![]()
Then it was a matter of coloring up all the images to make them look like a family portrait!
Boy (Mr. CraftyPaws): Hair: E55, E57 and E59; Hat, Shirt and Shorts: B52, B93, B97; Skin: E50, E51, R30; Vest: B000 and B52
Brown and White Dog (Bandito): W0, E11 and E13
Black and White Dog (Babaloo): W0, W3, W5, W7 with B97 collar
Girl (Me): Hair: B01, C3, C5 and C7; Skin: E50, E51, E53. R30; Collar and Skirt: G05 and G09; Sweater: Y02 and Y08; Bone W0 and B01
To add a little shine, I added some glass streak marks on the glasses with a Signo Uniball White Gel Pen and topped the glasses with Ranger Glossy Accents. I fussy cut all the images with my favorite Fiskars Spring Loaded Scissors, inked all the edges for a finished look with a Memento Tuxedo Black Marker, and layered them together.

For the card front design, I decided to pull out one of my heart dies, the Diemond Dies Je T’Adore Heart, to “frame” the family portrait. I coated the frame with a coating of Clear Wink of Stella for some added shimmer. For the background papers, I used my much hoarded (and one of my FAVORITE) Doodlebug Designs “Puppy Love” 6 x 6 Paper Pad and picked out a heart patterned paper and used the reverse pale blue polka dot paper for a little strip of added interest. I backed that strip with white cardstock to match the width of the white border of the card front, and place that strip, toward the left side, following the design rule of thirds.

Lastly, for the sentiments I used the phrases from the cut apart pages of the Puppy Love paper pad that I thought would suit a Valentine’s Day card for Mr. CraftyPaws: “Great News…”, “I {heart} You” (with dabs of Glossy Accents on the hear), and “We Belong Together” are staggered along the left bottom third of the card front. On the inside card liner, I used, “Good Times!”, “Pawsitively Perfect!” and “You’re a Treat!” It was so fun designing and crafting this totally personal card for Mr. CraftyPaws. He’ll never know the extra steps I took to make this customized family portrait card, but I know he’ll love it all the same.
CLICK on the following picture to watch the process video and enter the GIVEAWAY from the YouTube video for a chance to win a set of The Greeting Farm “The Snuggle Is Real” stamp set!
Disclosure: Many of the supplies I’ve used for today’s project are linked. Some may be affiliate links, which means if you make a purchase I receive a small commission at no extra cost to you. I truly appreciate your support toward the costs of running this blog! All giveaway rules are listed in the description box of the YouTube video. The giveaway is not sponsored by or in any way affiliated with YouTube, Instagram, or The Greeting Farm.
This card is being entered into the following challenges:
Simon Says Stamp Wednesday Anything Goes Challenge
Creatalicious Anything Goes Challenge with optional use of craft
Word Art Wednesday Anything Goes Challenge
Lil Patch of Crafty Friends Anything Goes Challenge
Through the Craft Room Door Anything Goes Challenge
Crafts Galore Encore Anything Goes Challenge
Stamping Sensations Favorite Stamps Challenge
]]>
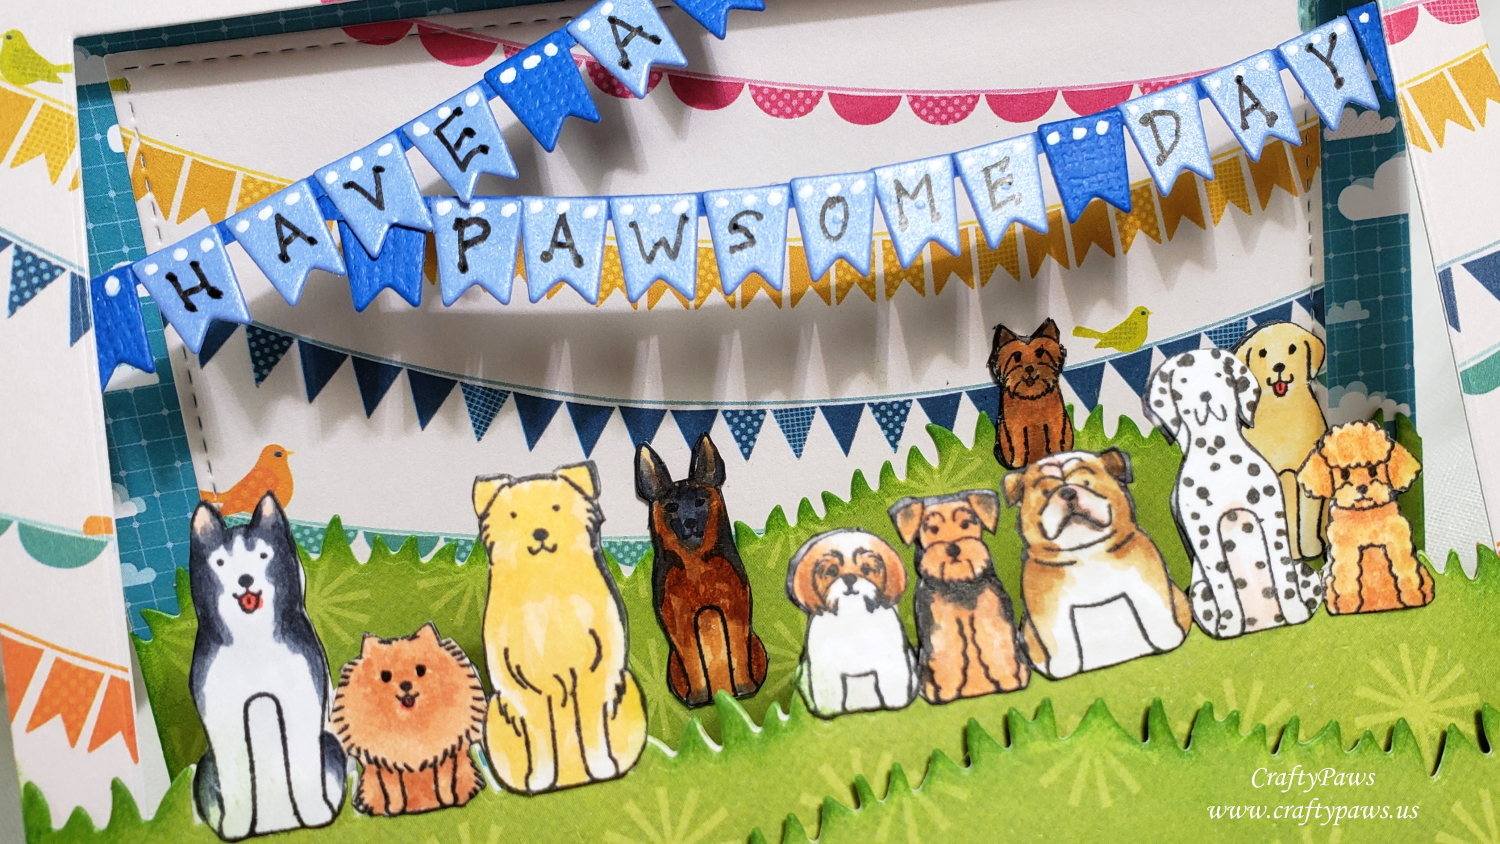
These are the Copic colors I used to color up each of the dogs:
Husky: R20, R24, C00, C5, C7
Pomeranian: E11, E13
Golden Retriever: W1, E51, E53, Y21
Havanese: W0, E11, E97, E37
Airedale Terrier: E11, E97, W5, W7
Bulldog: 0, W5, R20, E31, E35
Dalmatian: R30, W0, W7
Poodle: E51, E21, E11
Labrador Retriever: W0, E50, E51
Norwich Terrier: E30, E33, E13, E44
German Shepherd: R20, E21, E33, E23, C5, C7
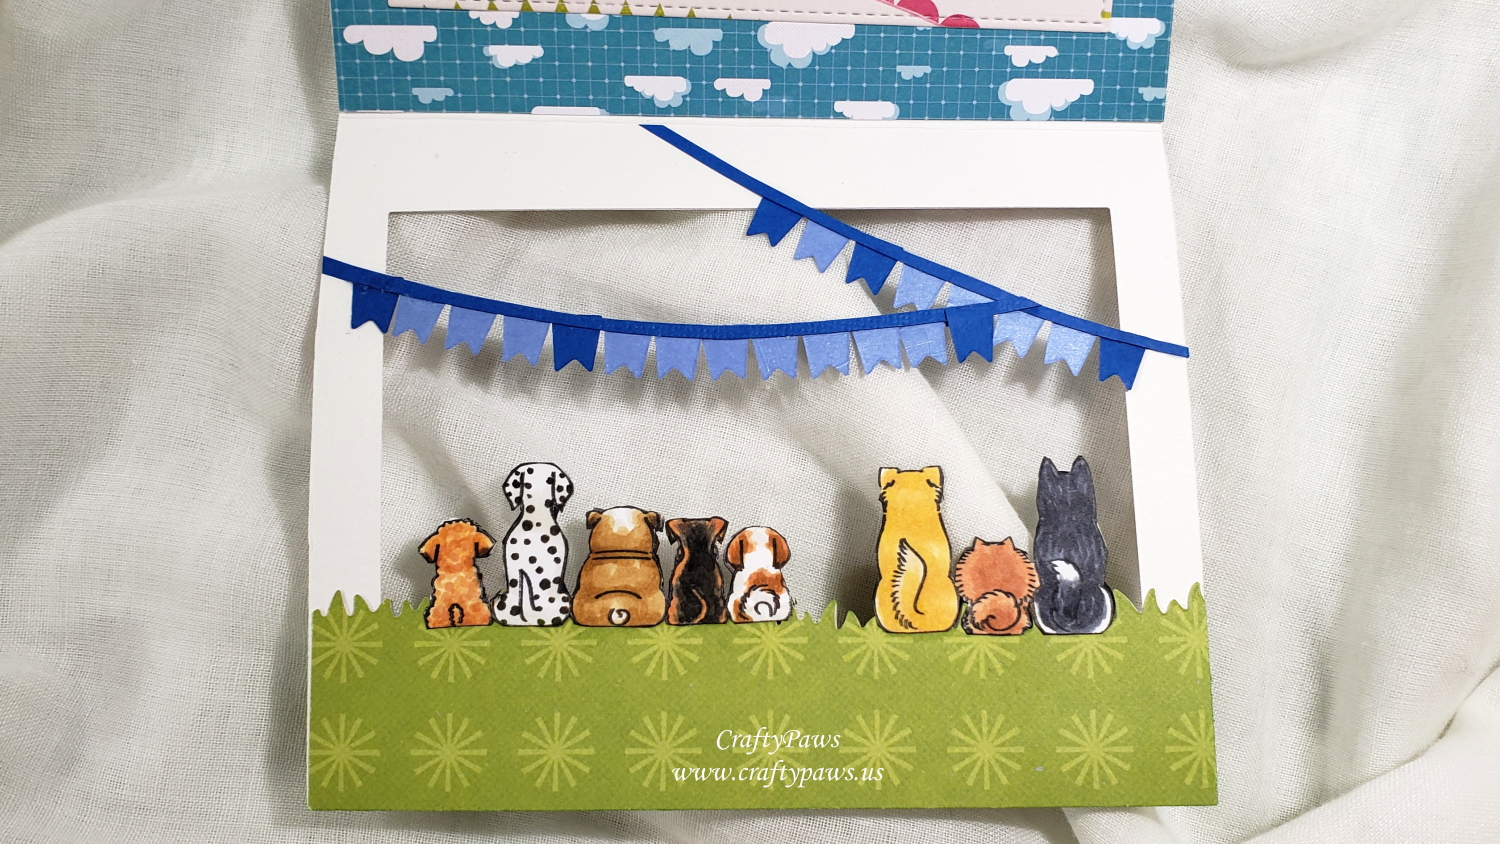
I fussy cut all the dogs, front and back, with my trusty Fiskars Spring Loaded Scissors and inked all the edges with a Memento Tuxedo Black Marker.
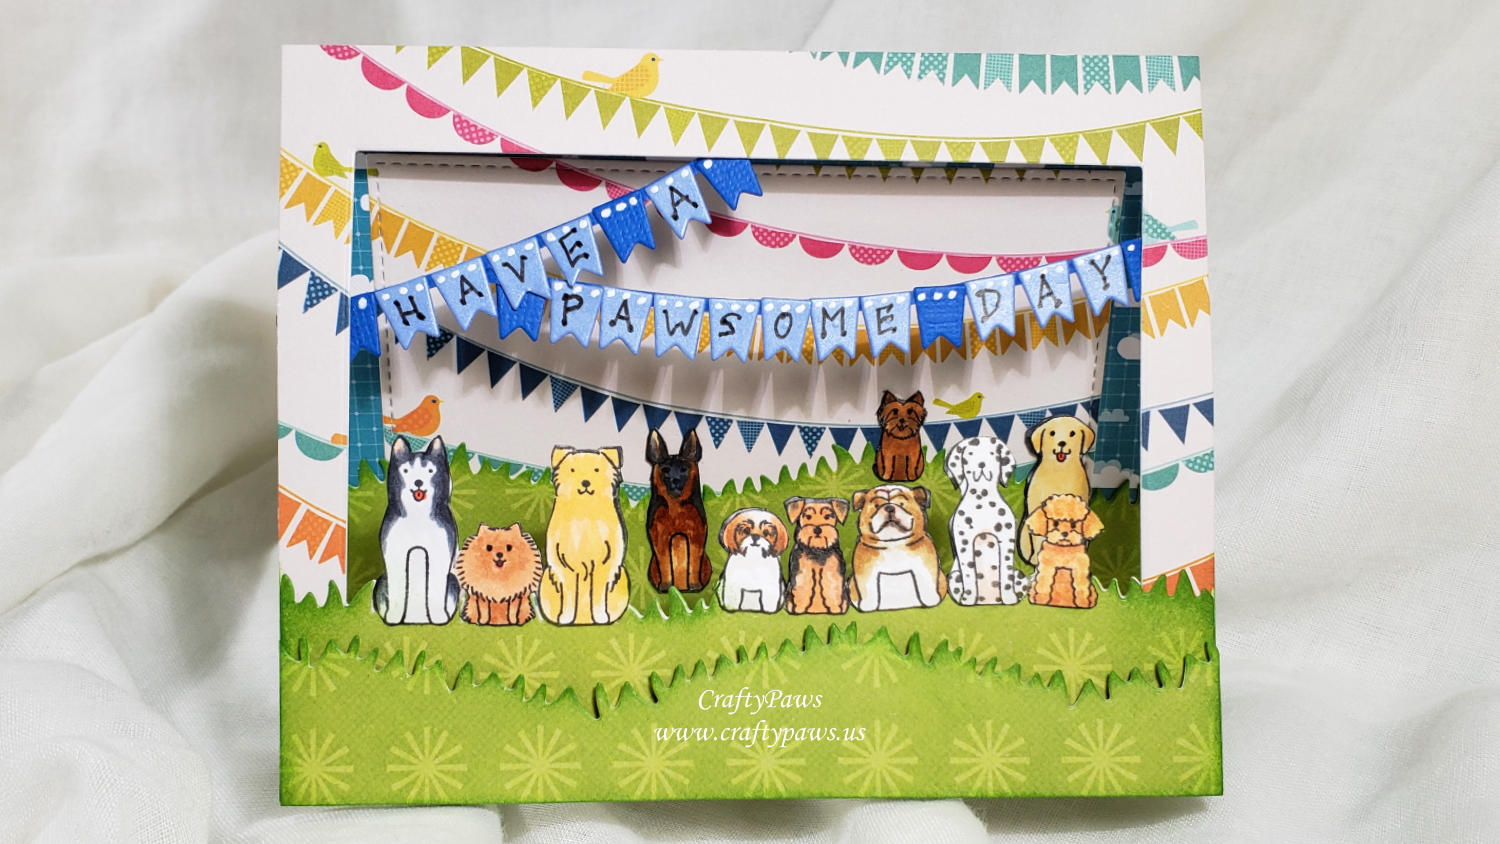
Then to design the card, I knew I wanted to take advantage of the back sides of the dogs so I wanted a card with a window. I used the larges of the MFT Die-namics Stitched Rectangles Dies to cut out a hole. Then I wanted a “ground” for the pups so I used the MFT Grassy Hills Dies to cut four grounds from a scrap of green patterned paper (front layer popped up on double sided foam adhesive, ground in front of window, ground behind window, and background scene ground). I used Tim Holtz Distress Ink in Mowed Lawn to ink all the edges for a bit of added visual dimension.
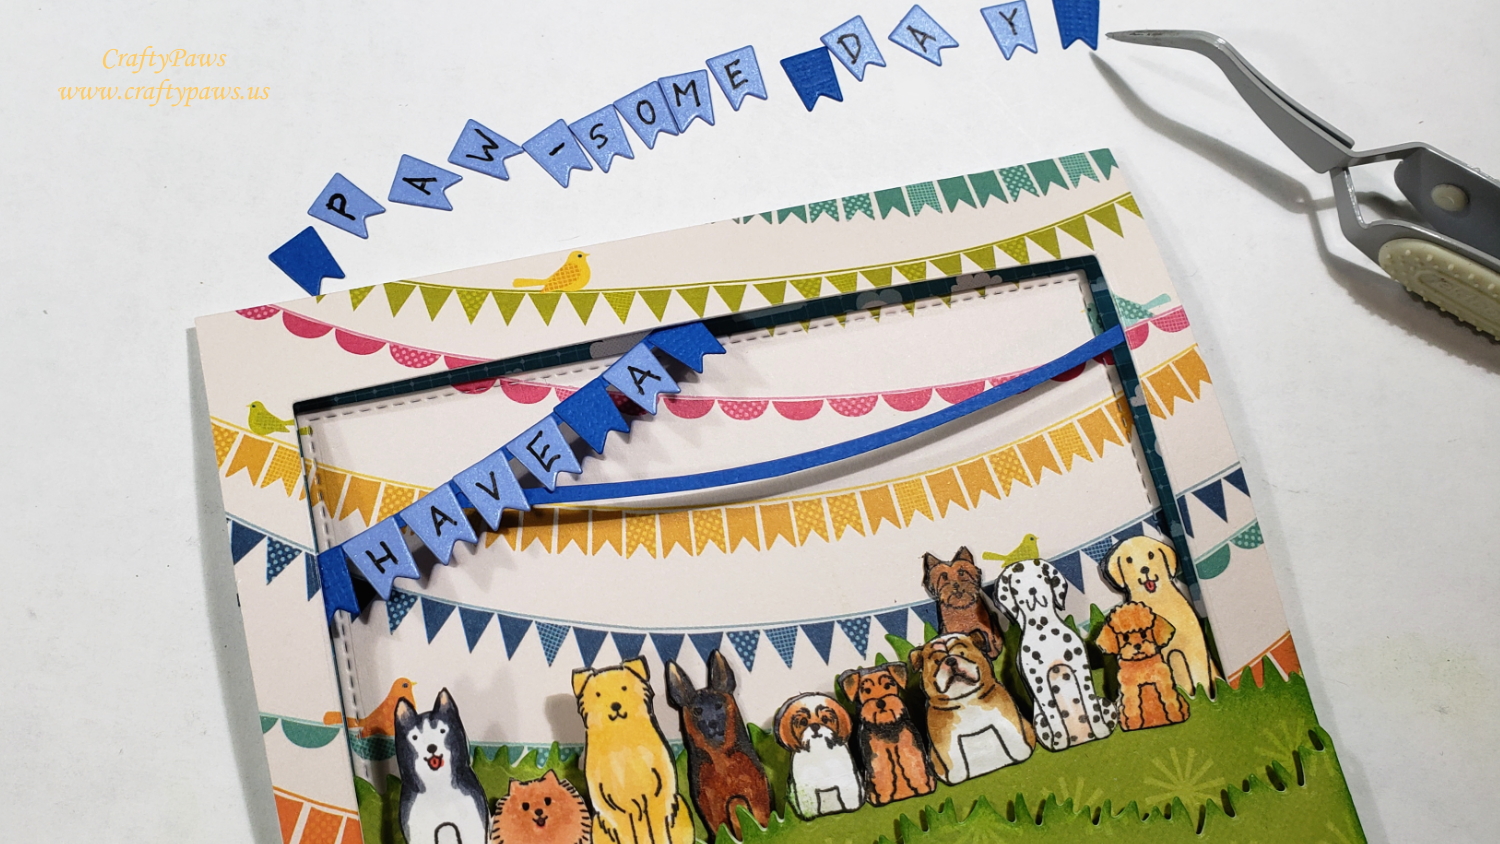
For the background, I found a festive banners patterned paper from an old Pebbles “Sunny Side” 6 x 6 paper pad and for the edges of the inside liner, I found a fun cloud patterned paper from an old Studio Calico “Here and There” 6 x 6 paper pad. For the sentiment, I wanted to continue with the 3D layered look so I used a Lawn Fawn Stitched Journaling Card Die Set that had tiny pennants so I could make my own banner that I attached behind the front window and wrote, “HAVE A PAWSOME DAY” with a Faber-Castell S pt. Pitt Pen. For added detail, I added dots to the tops of each pennant with a Uniball Signo White Gel Pen.

Because the window was too small to lay out all the dogs in a row, as they were in the stamps, I cut them apart and added groups of them: The first three were the Husky, Pomeranian, and the Golden Retriever. Then I left a little space so you could see the grassy bottom edge of the window. Next came the Havanese, the Airedale Terrier, Bulldog, Dalmatian, and Miniature Poodle. The German Shephard, Norwich Terrier, and Labrador Retriever were perfect for the inside liner and added lots of interest to the inside layer of the card. I think it actually came out better this way than having all the dogs in a single row. Sometimes rolling with the adjustments necessary as we craft a card, makes the card even better than we originally envisioned!
CLICK on the following picture to watch the process video:
Disclosure: Many of the supplies I’ve used for today’s project are linked. Some may be affiliate links, which means if you make a purchase I receive a small commission at no extra cost to you. I truly appreciate your support toward the costs of running this blog!
This card is being entered into the following challenges:
Lil Patch of Crafty Friends Anything Goes Challenge
Simon Says Stamp Monday Use a New/Unused Stamp Challenge
Simon Says Stamp Wednesday Something New Challenge
Creatalicious Anything Goes with Optional Good Luck Charms Challenge
Word Art Wednesday Anything Goes Challenge
Through the Craft Room Door Anything Goes Challenge
Crafts Galore Encore Anything Goes Challenge
Stamping Sensations Favorite Stamps Challenge
]]>

I selected a full starter kit (which would make a fantastic gift) that includes 3 different colored wax sticks, a sample wax stamp (mine has a clock, but they have a whale and a magic circle image too), a melting spoon, and a couple of tea lights in a pretty giftable box. I also chose a Chinese Zodiac Dog (coincidentally I was born in the year of the dog – how perfect, right?!) and a smaller Paw Print with a Heart.
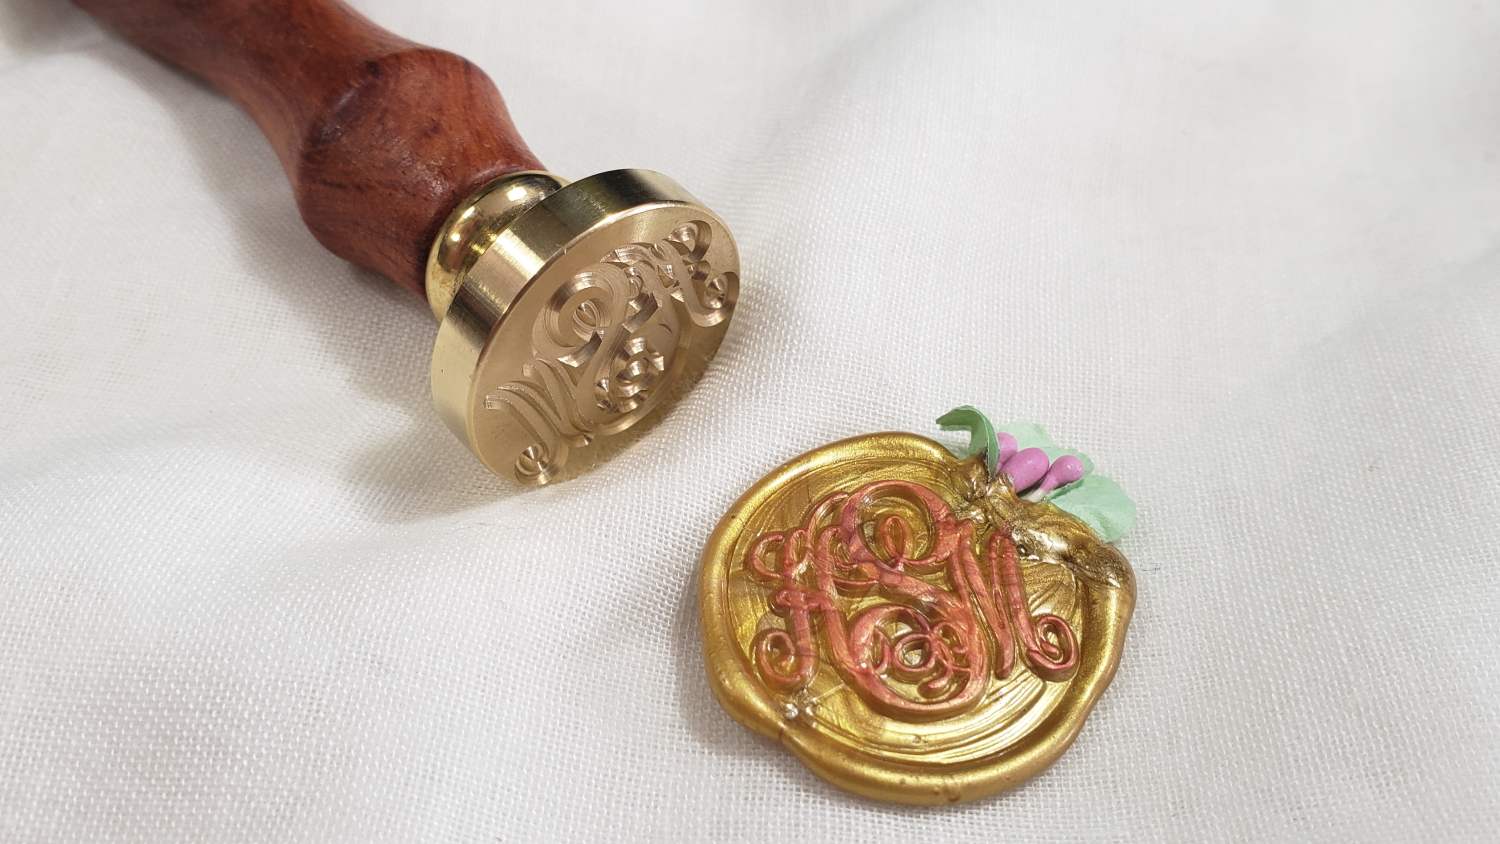
Lastly, I decided I would go for it and design a Custom Wax Seal Stamp and used paint.net to design an interlocking vine style monogram. This is the picture I sent them. They promptly sent me a proof of the custom stamp, and after just 1 tweak (I wanted it a little larger to fill the 1″ diameter of the seal), I approved it for production. I got everything in about 2 weeks all the way from China. They worked really fast, produced what looks like high quality products, and shipped via FedEx. I loved everything!
 By the way, I found that my Ranger spinning ink blender tool holder was the perfect place to store my new wax seal stamps too. The rich wooden handles of the stamps look so pretty stored and displayed this way on my craft desk.
CLICK on the photo below to watch my video sharing my unboxing and my first attempts at trying wax seals:
Disclosure: I do not receive any commissions from any of the links in this post or for my video or review. However, I did receive these products to try and review free of charge.
]]>