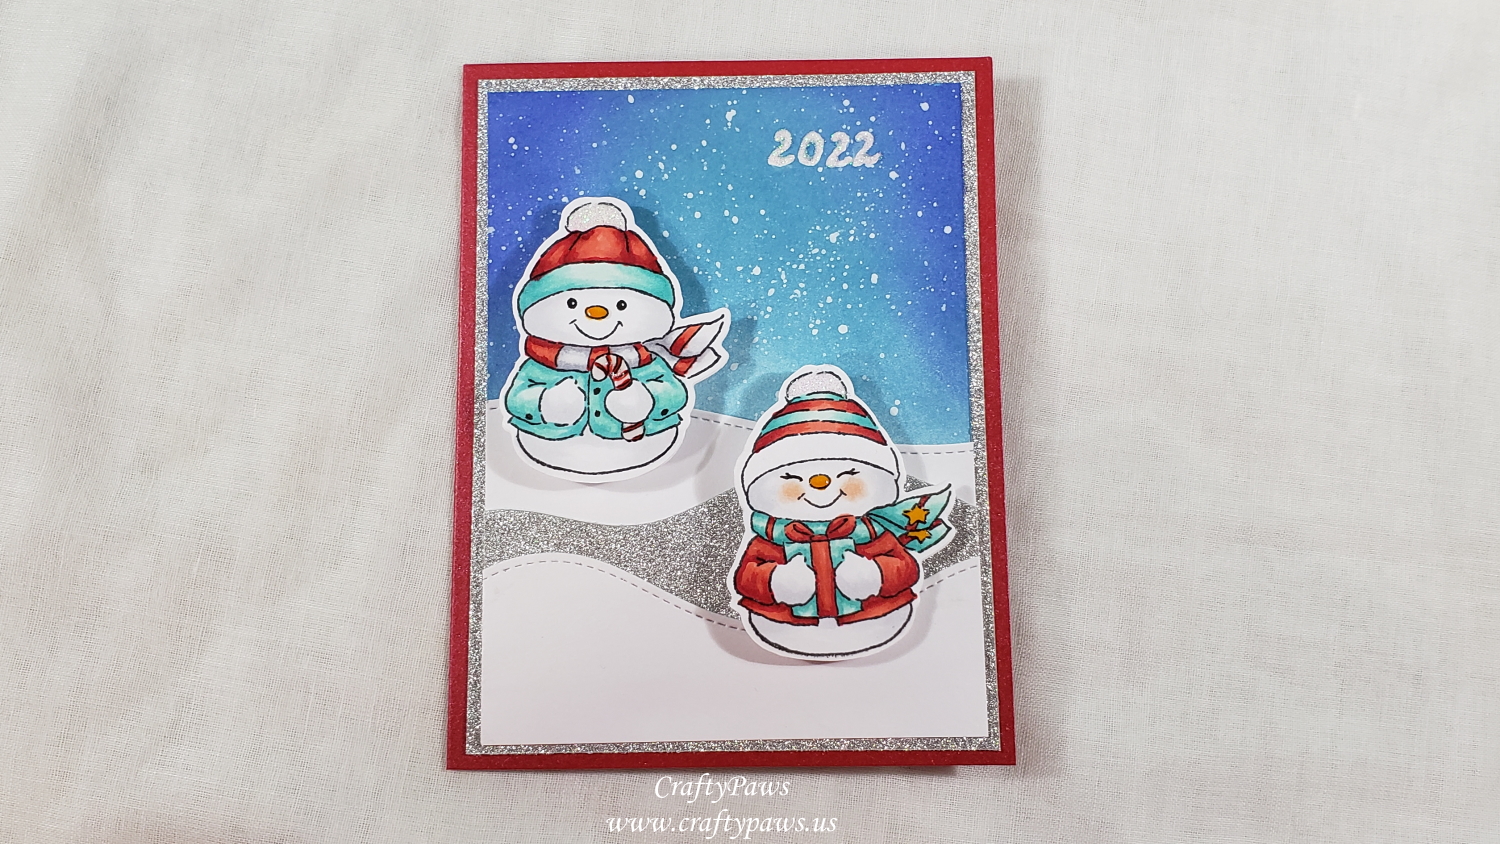
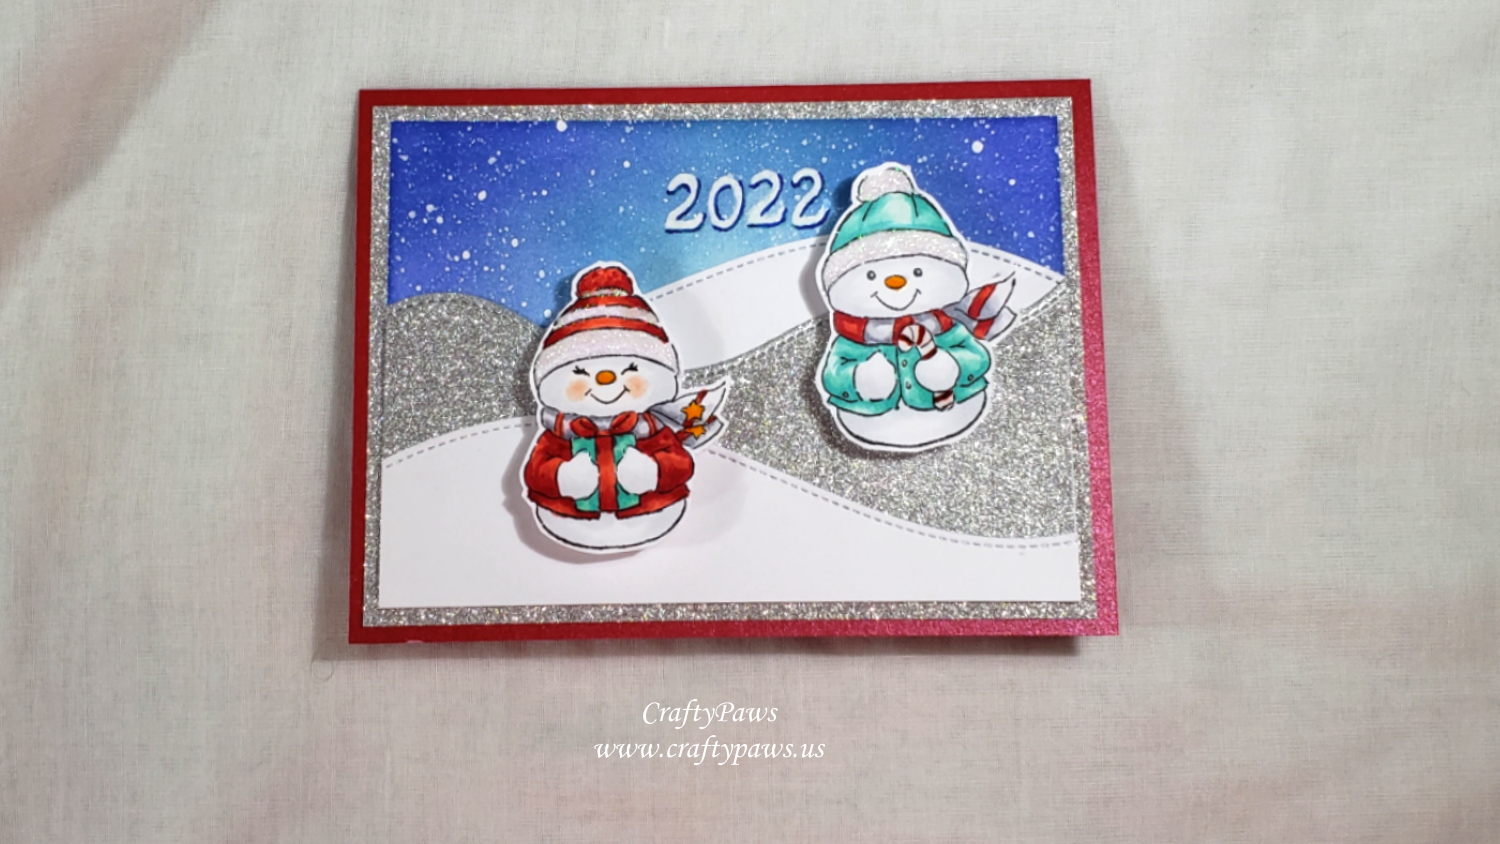
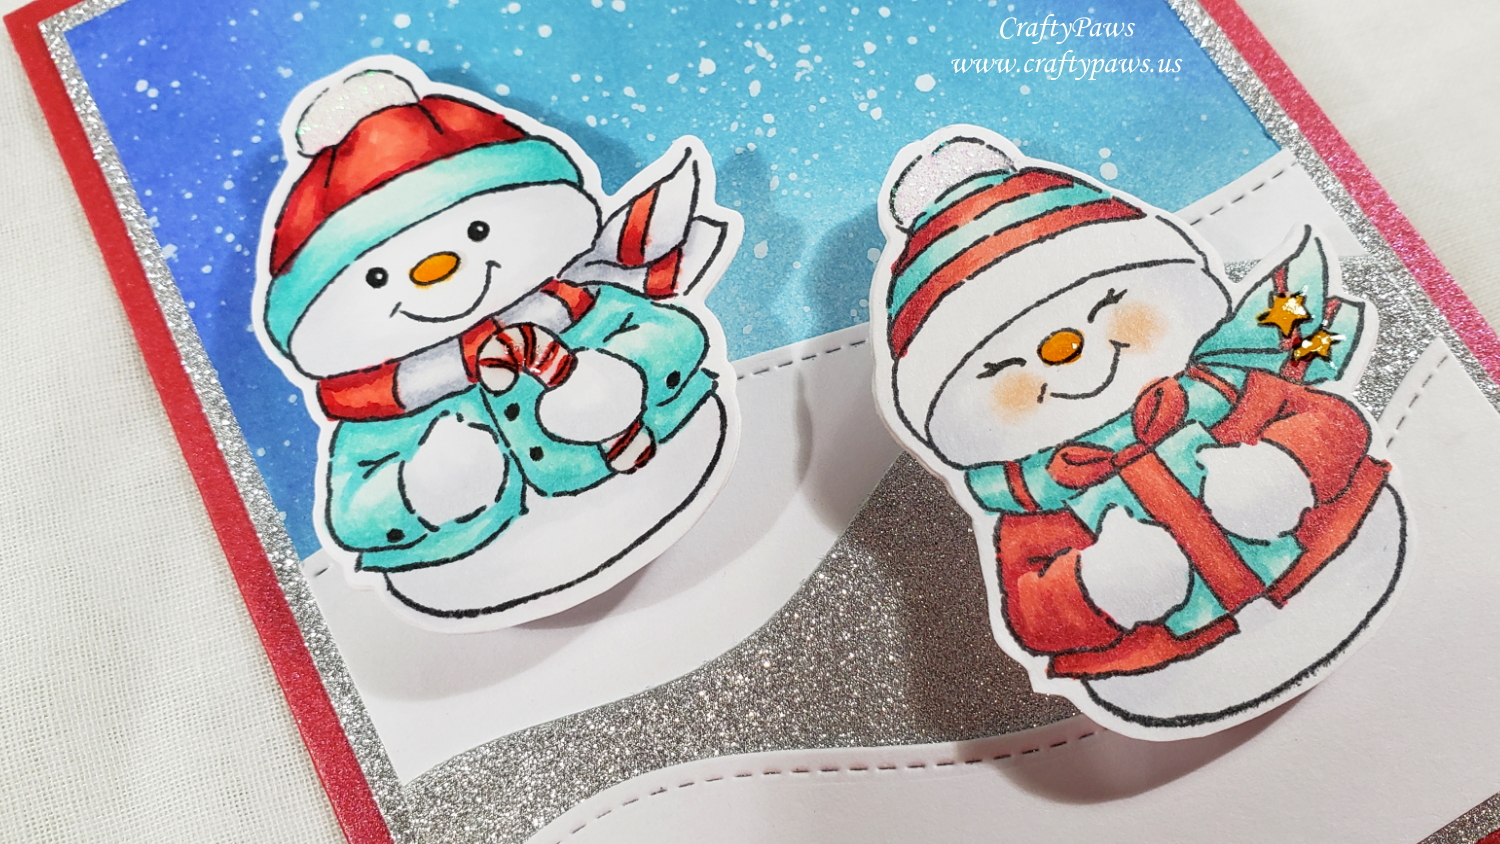
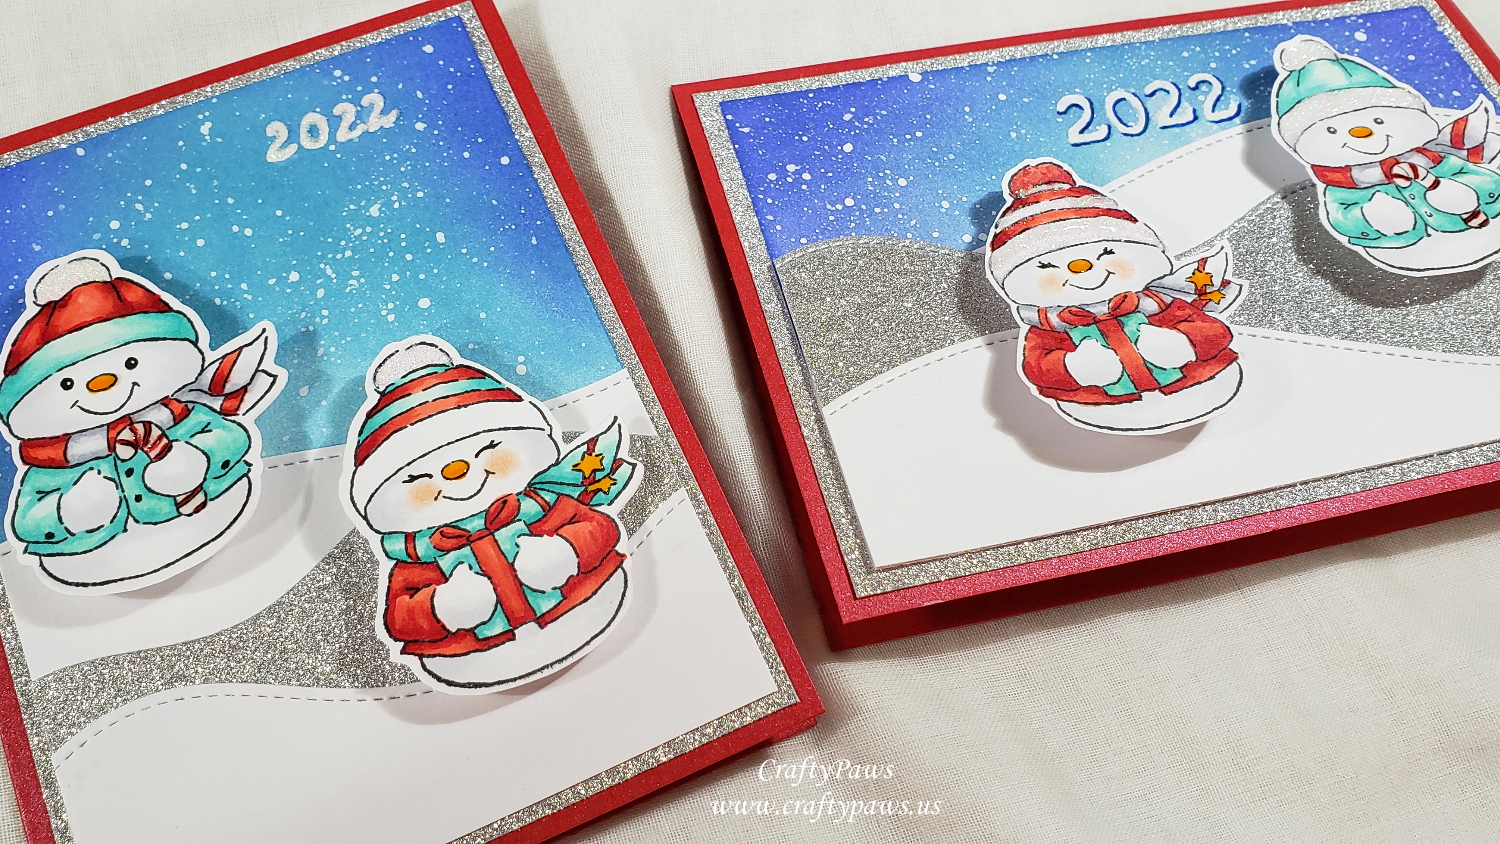
I used the Art Impressions Hampton Art snowman stamp and die set that I picked up a couple of years ago but had failed to use until now. The snowman and snowwoman (I made one more feminine by drawing in lashes with a 0.1 pt Copic Multiliner Pen) were pretty simple to color up, and with the cutting die that fit both images, they were really easy to prep. i used the following Copic markers to simply color them up in one of my favorite holiday color combinations (aqua, red, and white (grey)):
Noses (as if they were carrots) and stars on scarf: Y38 and YR04
Blush: R30, softened with 0 colorless blender
Aqua: BG10, BG32 and BG13
Red: R22, R24 and R29
White (grey): C00, C1 and C3
For the background, I wanted to create a sky with falling snow and a foreground with layers of snowy hillsides. I used one of my most used dies for the layers of snow, the Lawn Fawn Stitched Hillside Die. To add texture and sparkle, the middle layer was cut from silver fine glitter cardstock and the first and third layers were from plain white cardstock. The sky was made by blending on Tim Holtz Distress Ink in Broken China and Blueprint Sketch, and splattering white acrylic paint with an old toothbrush for a snowy effect.
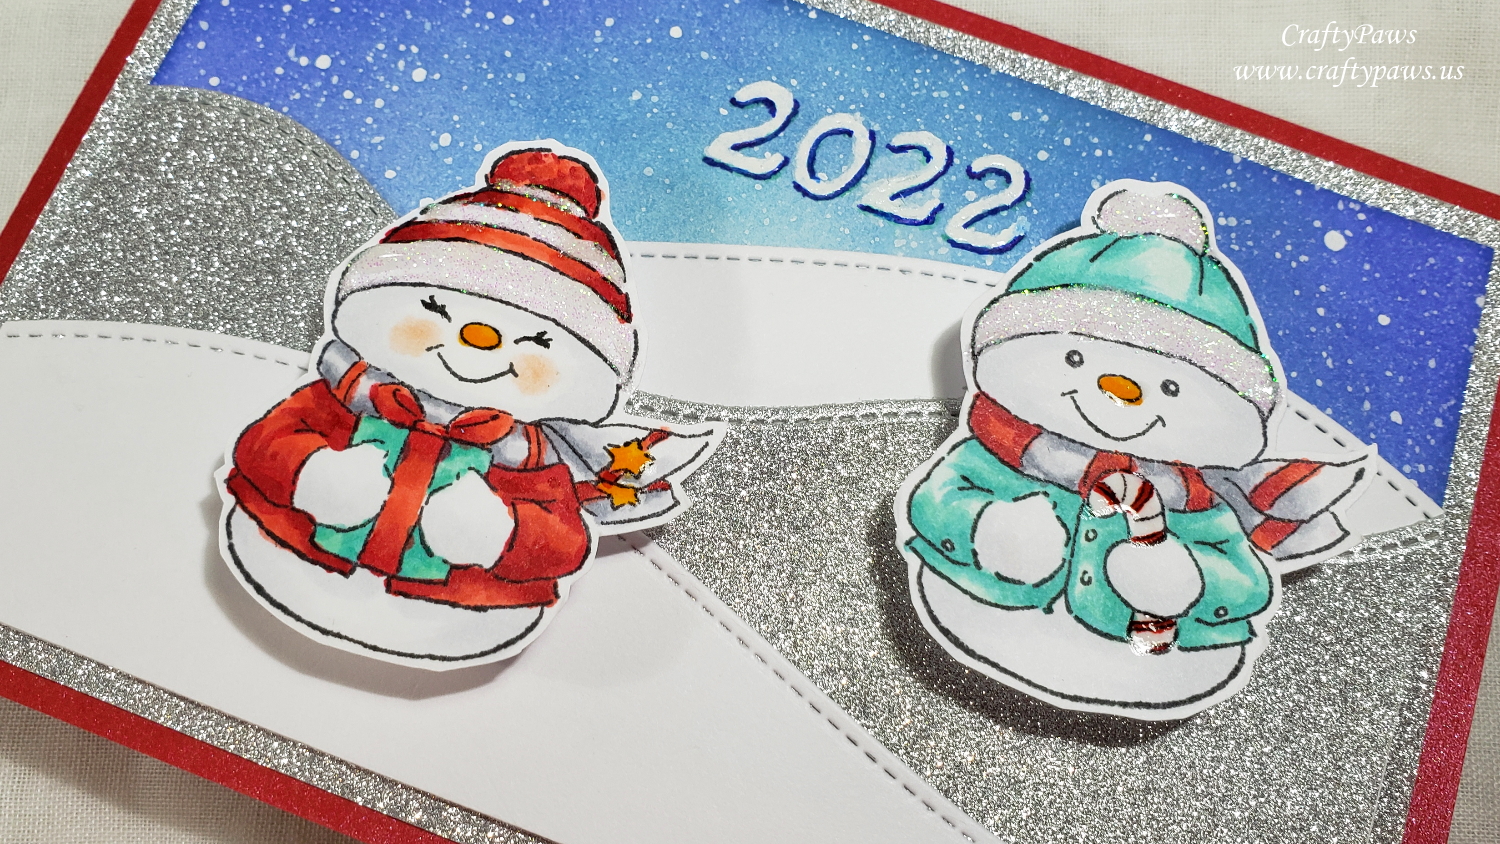
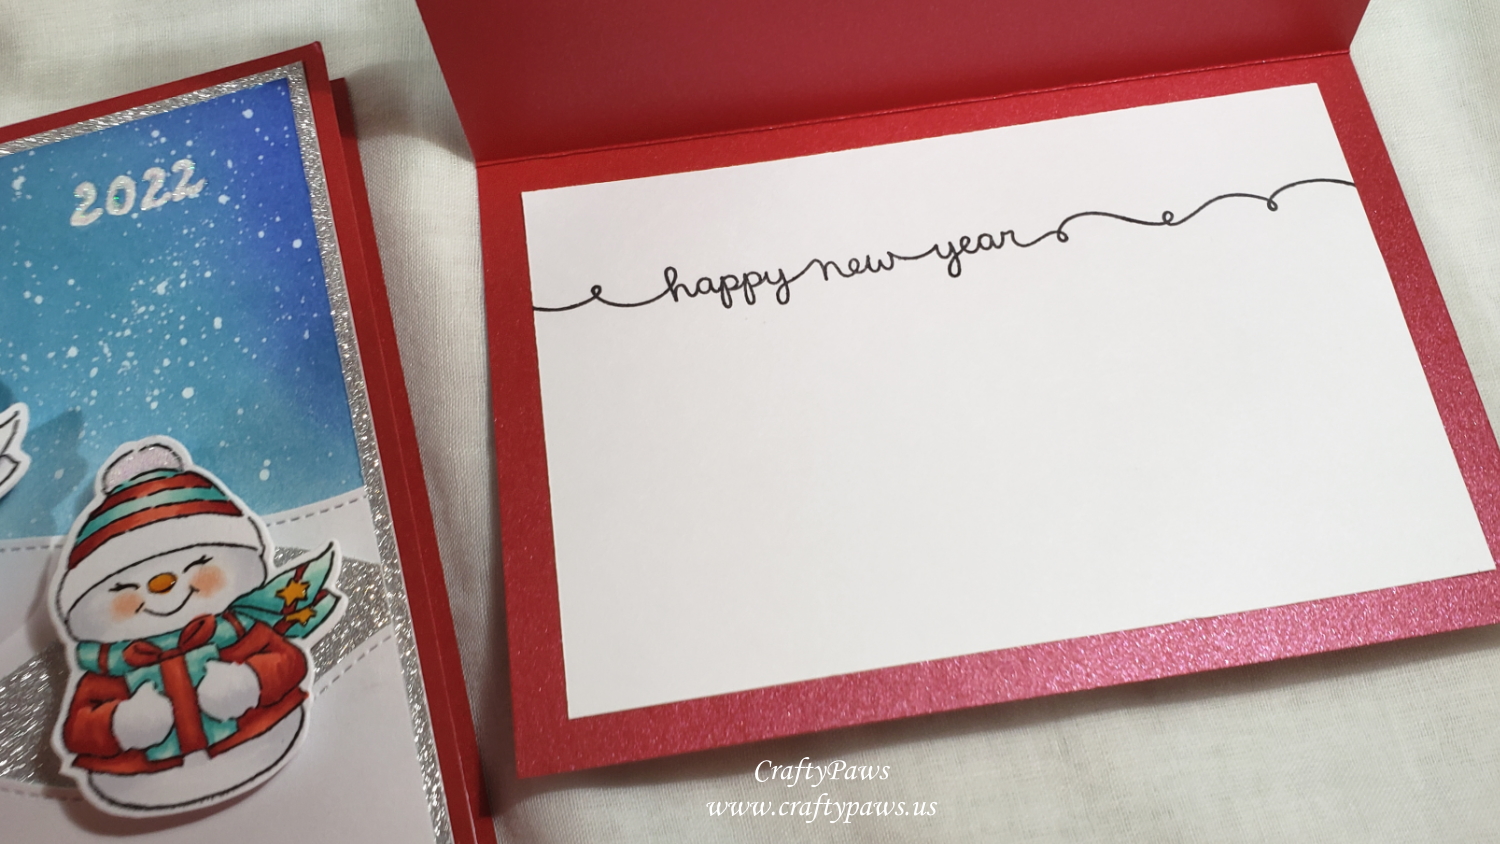
To make this a new years card, rather than a holiday card, I used a white paint Sharpie marker to write “2022” and used glitter glue to add sparkle or added shadowing with an Ultra Fine Point Sharpie marker in navy. For the inside card liner, I used another favorite sentiments stamp set, the Lawn Fawn Winter Scripty Sayings to add a “happy new year” sentiment.
To add a classic festive look, I matted the card front onto more fine glitter silver cardstock before putting the whole thing on a shiny red cardstock card base. I also added shine to the candy cane and noses with Ranger Glossy Accents and sparkle to the snow people’s clothes with glitter glue. Lastly, to inject some added fun, I put the snow people up on InkyStamper Wobbles (I’ve made these by hand with wire wrapped around a pencil, but I have to say, using ready-made ones are much easier).
Please CLICK on the photo below to watch the process video of how to craft this card:
Disclosure: Many of the supplies I’ve used for today’s project are linked. Some may be affiliate links, which means if you make a purchase I receive a small commission at no extra cost to you. I truly appreciate your support toward the costs of running this blog!
These cards are being entered into the following challenges:
Through the Craft Room Door Anything Goes Challenge
Crafts Galore Encore Anything Goes Challenge
Crafty Gals Corner Merry and Bright Challenge
Word Art Wednesday Anything Goes Challenge
]]>
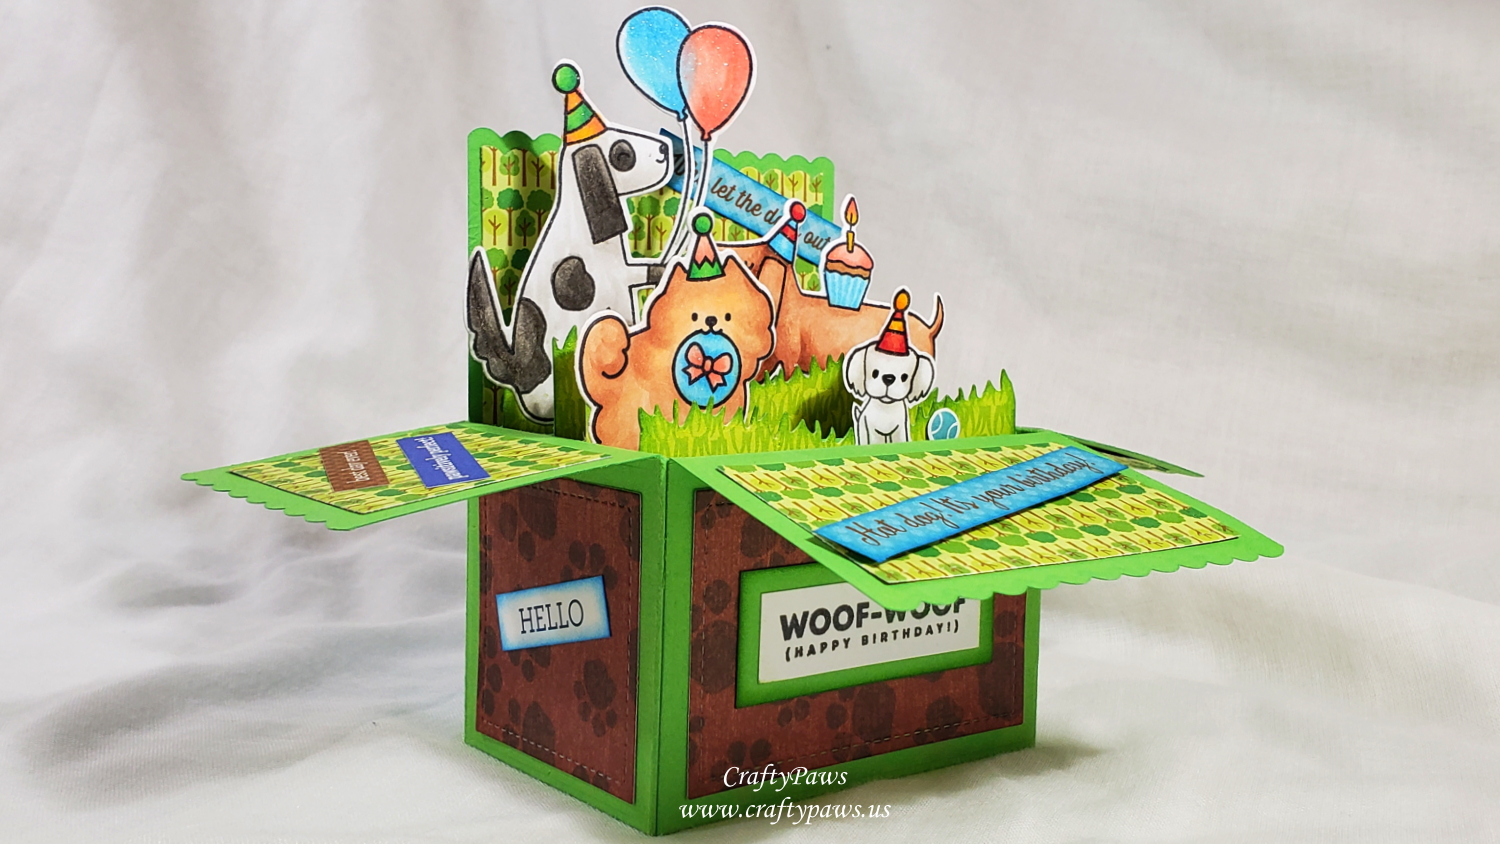
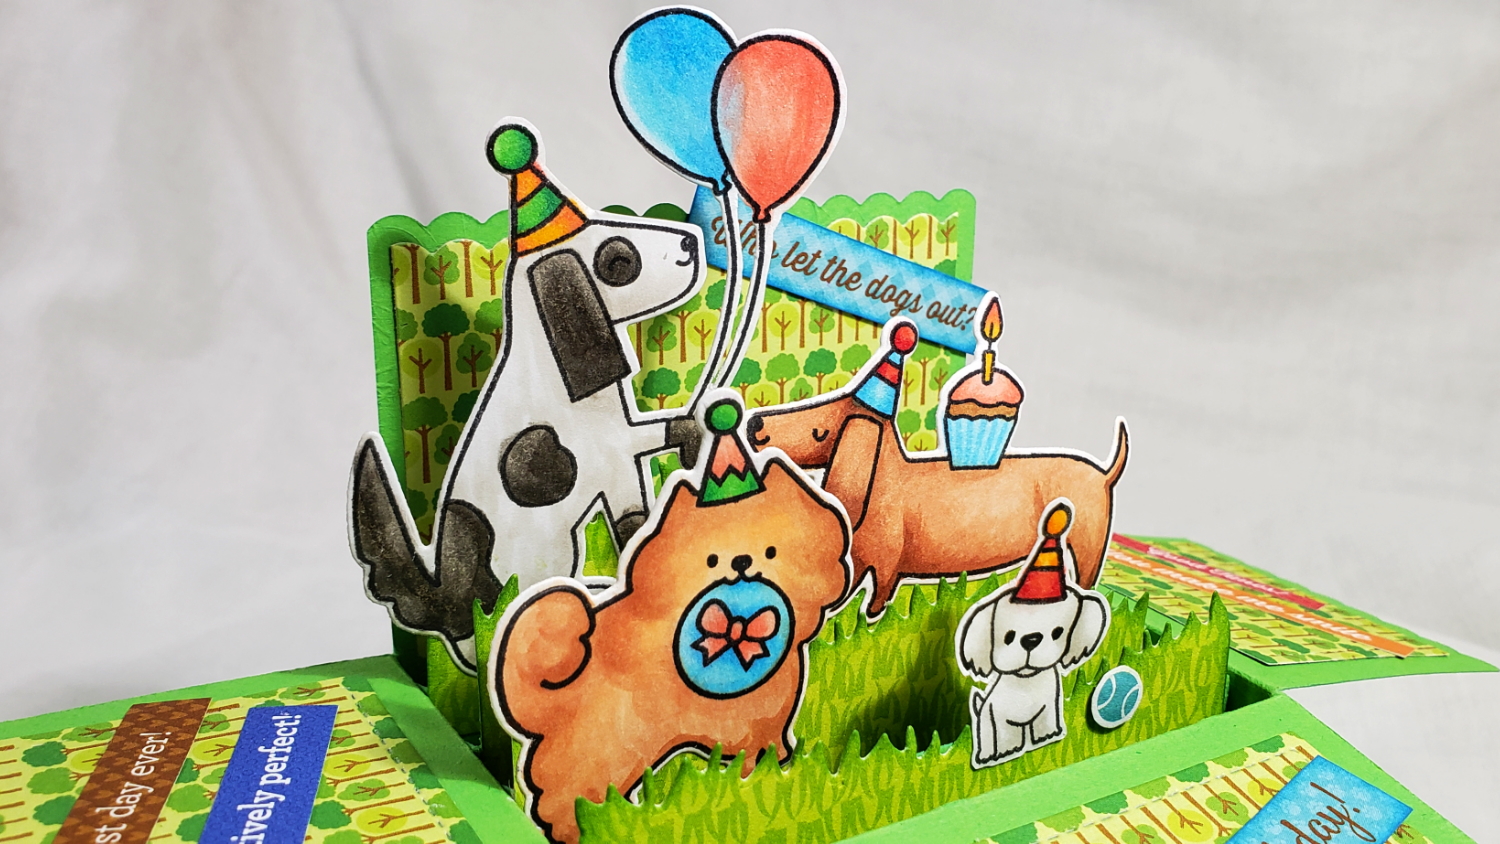
I’m making my nephew a fun pop up birthday card showcasing his newfound love of dogs. I used the quirky Waffle Flower Birthday Puppies Stamp Set and Die Set that features dogs with party hats and gifts as well as a pup from The My Favorite Things Friends at First Sip Stamp Set that I altered to make look like his new Bichon puppy, Bobo, with a party hat.
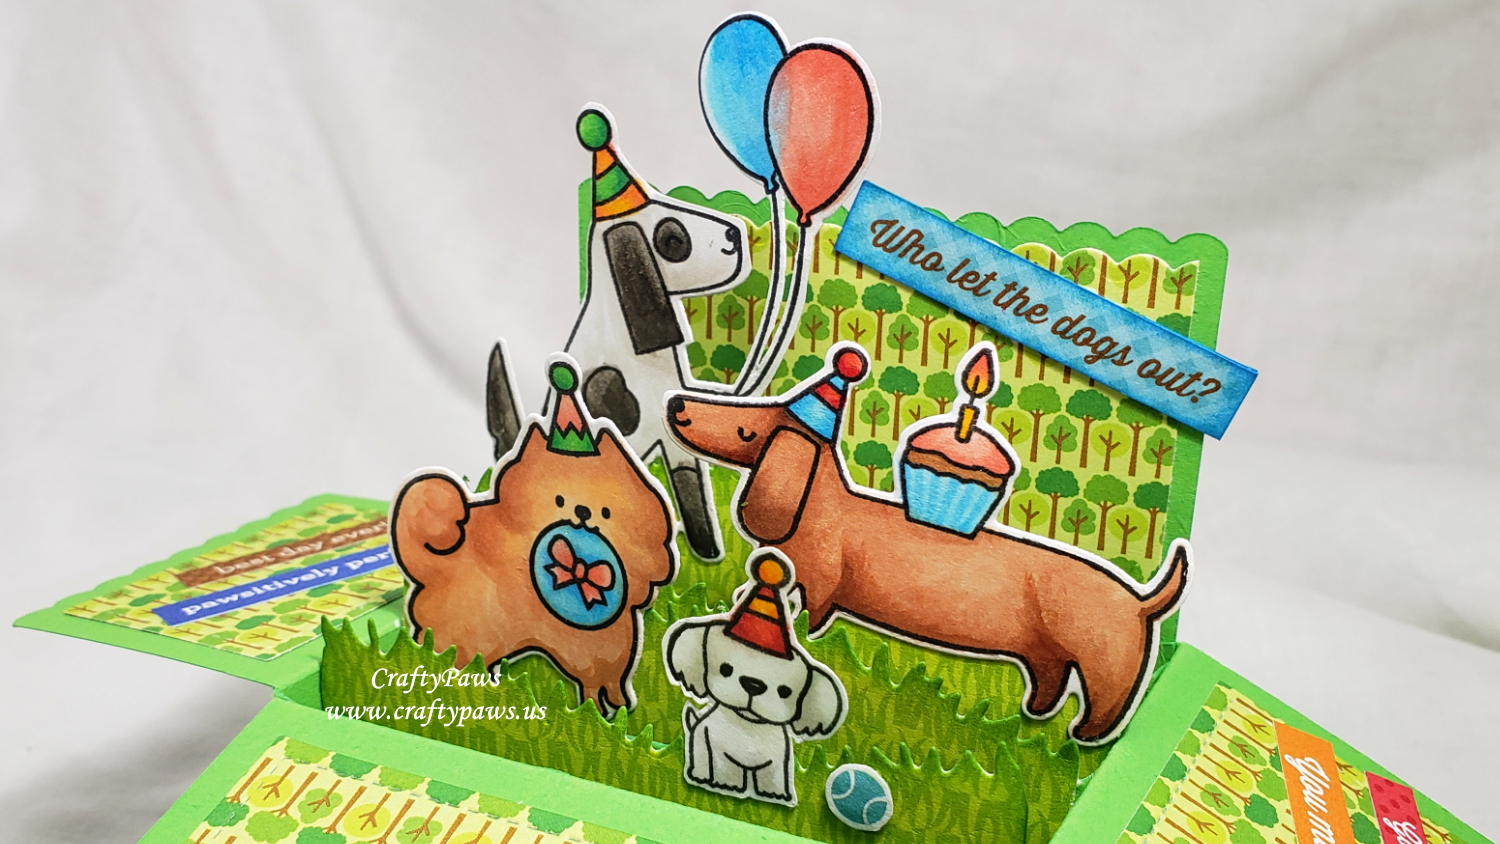
I used the following Copic colors (I’m very rusty, so please excuse the messy coloring):
Red: R14, R17 and R29
Pink: R20 and R22
Blue: B00, B01 and B02
Yellow/Orange: Y38 and YR07
Green: YG07, YG09 and G17
Cupcake candle and cake: Y38, R14, E22
Pomeranian: E00, E11 and E13
Bichon (Bobo): 0, W0 and W1
Dachshund: E11, E13, E15 and E25
Black and White Spotted Dog: W1, W4, and W7
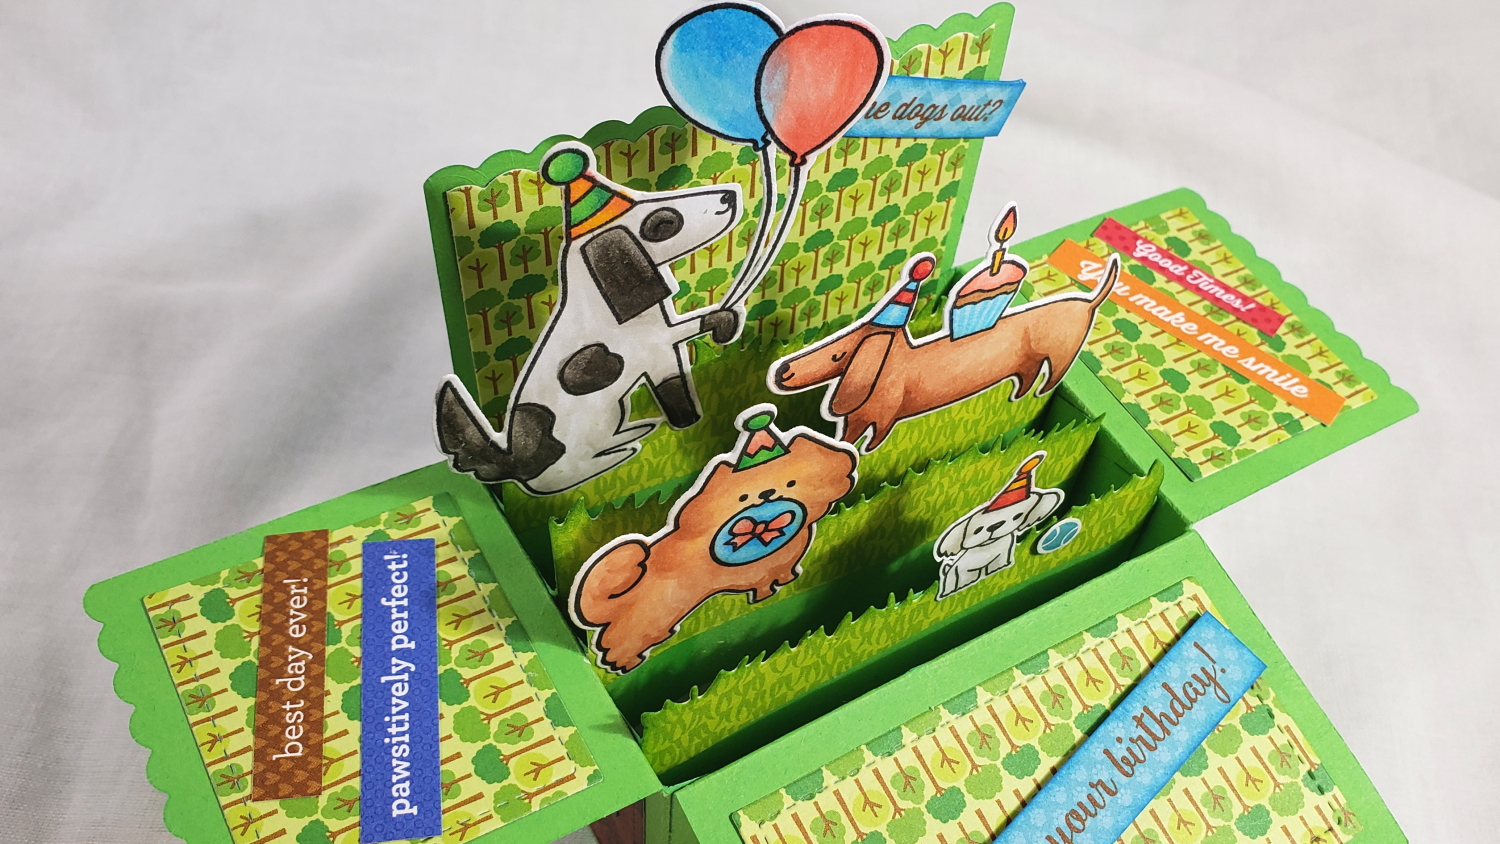
For the card base, I used basic green card stock that I picked up at Lidl for $2. For the decorative patterned papers, I used the Doodlebug Designs “Puppy Love” and the DCWV “The Pets Stack” (retired but still carried by resellers, which you can find by Googling them). I had fun also cutting apart some of the sentiments from the Puppy Love papers to further embellish the card flaps. To help the sentiments and the grassy layers pop a bit more, I also blended on some Tim Holtz Distress Ink in Mowed Lawn and Salty Ocean on the edges.
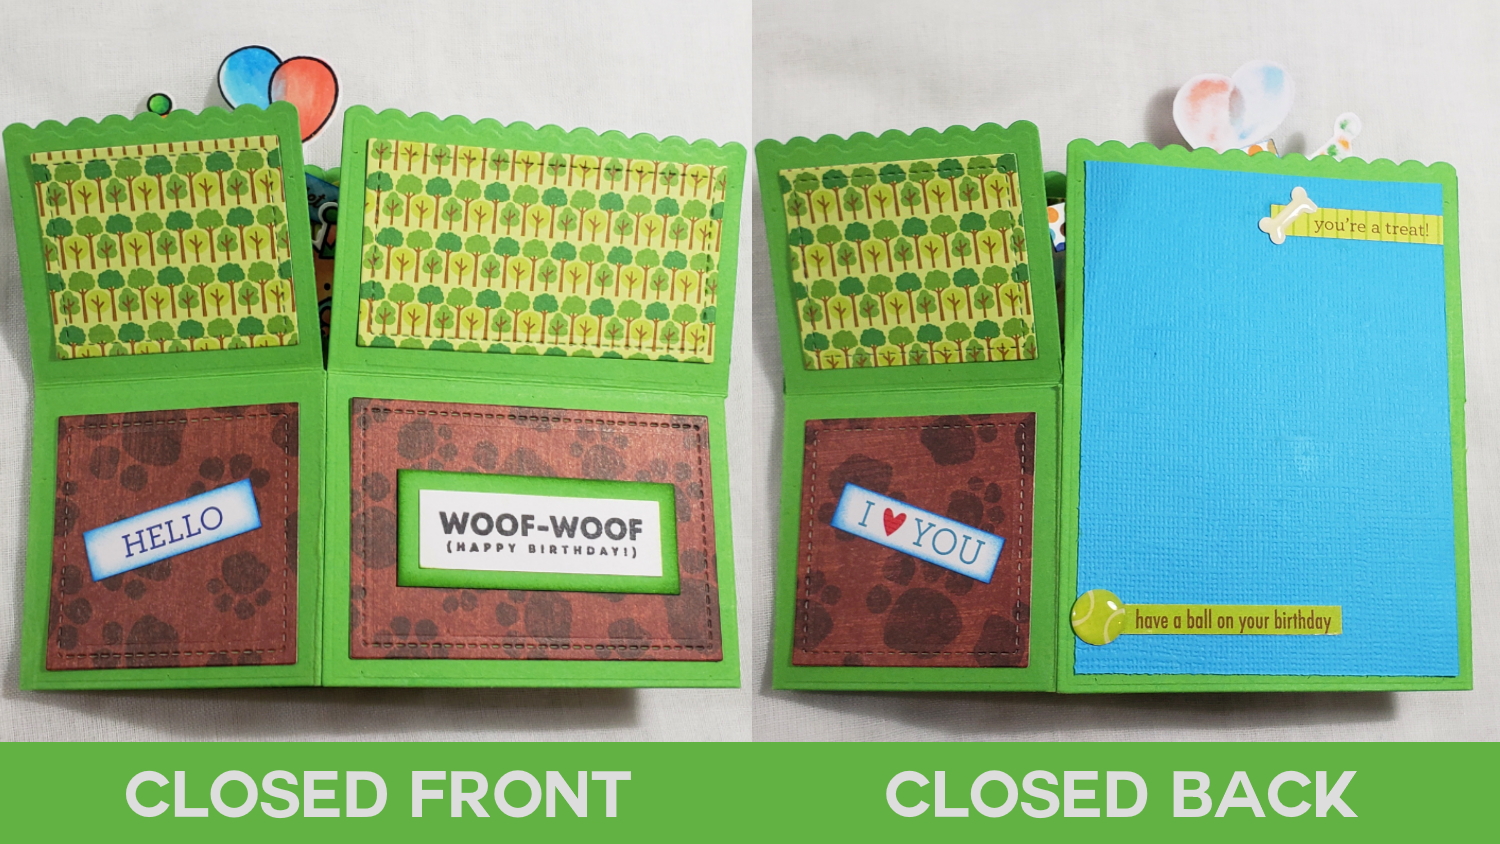
I left the back panel straight (unfolded) and added a blue construction paper liner so I could write my note. But it seemed too plain, so I added a couple of extra sentiments from the cut apart sheet and then added puffy bone and puffy ball stickers from the Doodlebug Design Shape Sprinkles “Puppy Play” Sticker Set to match the papers and add dimension and interest.
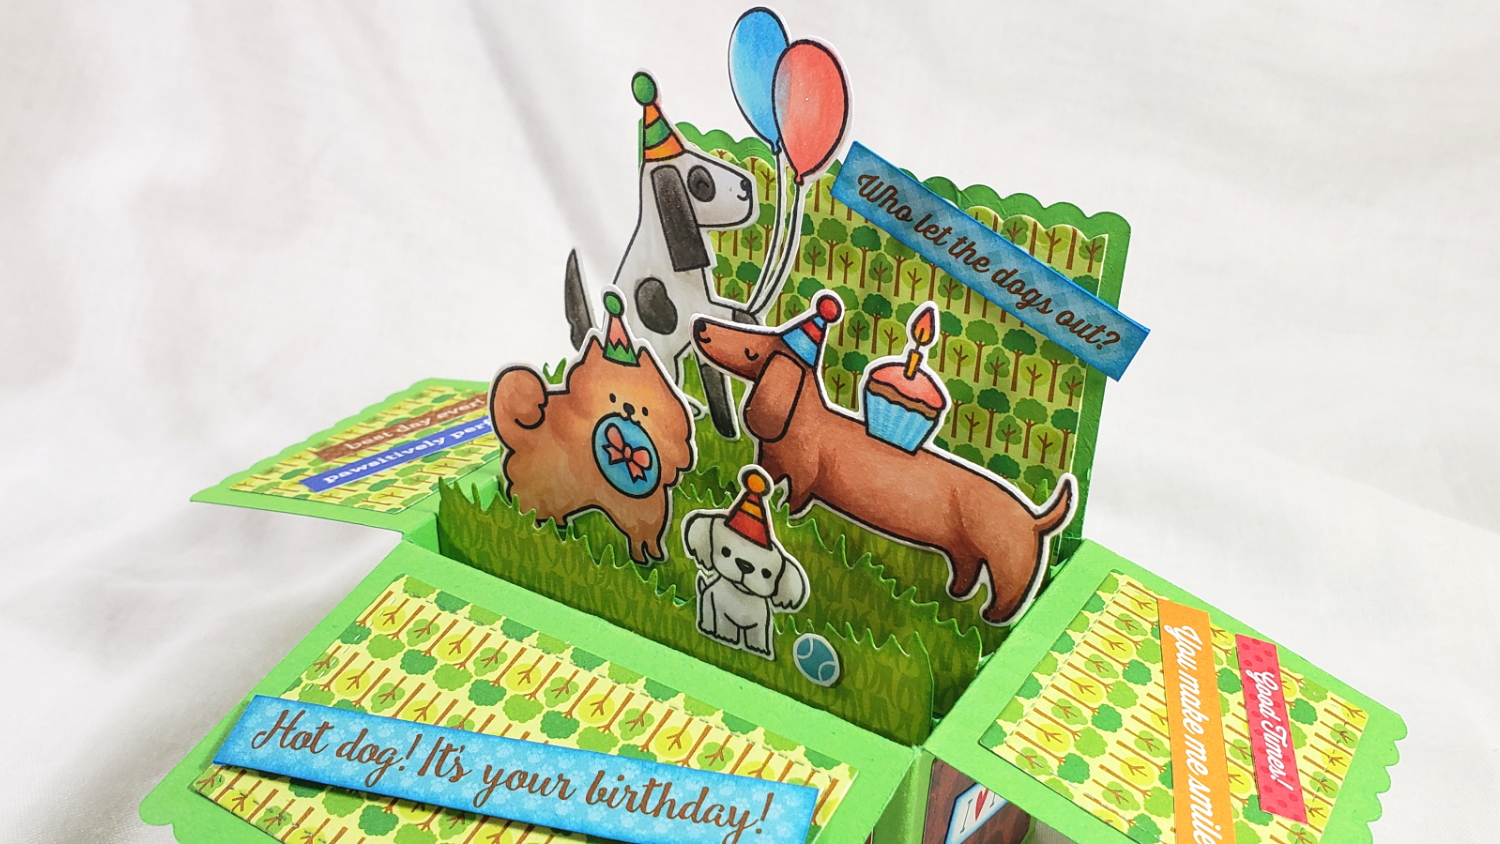
CLICK on the following picture to watch the card making video. I show a sampling of stamp altering, Copic coloring and how to assemble and decorate the box pop up card.
Disclosure: Many of the supplies I’ve used for today’s project are linked. Some may be affiliate links, which means if you make a purchase I receive a small commission at no extra cost to you. I truly appreciate your support toward the costs of running this blog!
This card is being entered into the following challenges:
Simon Says Stamp Monday Fun and Quirky Challenge
Creatalicious Anything Goes with Optional Interactive/Fun Fold Cards Challenge
Word Art Wednesday Anything Goes Challenge
Lil Patch of Crafty Friends Anything Goes Challenge
Fab ‘n’ Funky Anything Goes Challenge
Through the Craft Room Door Anything Goes Challenge
Crafty Gals Corner One for the Boys Challenge
Crafts Galore Encore Anything Goes Challenge
]]>
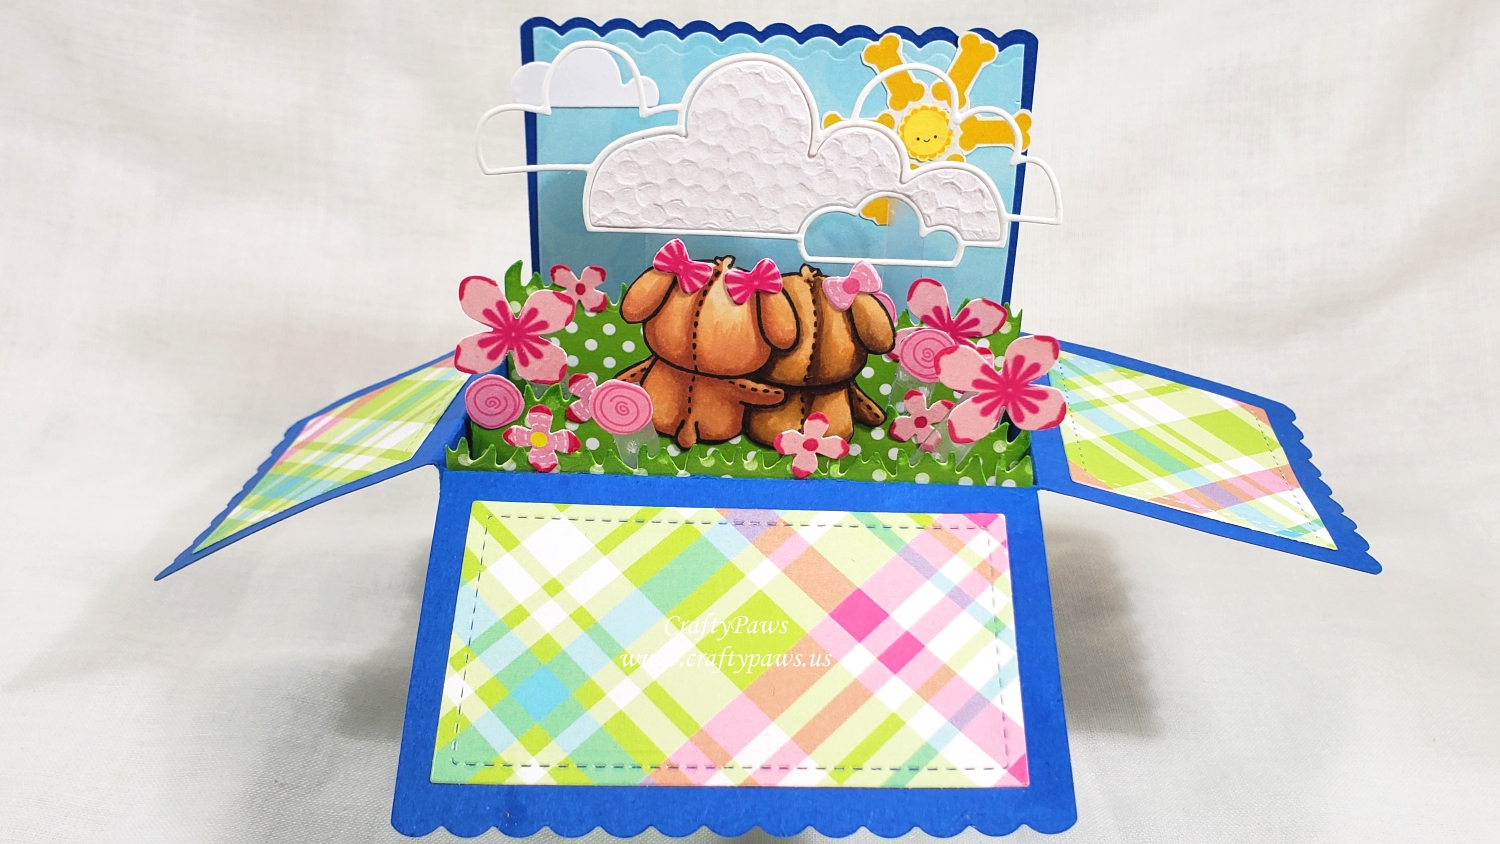
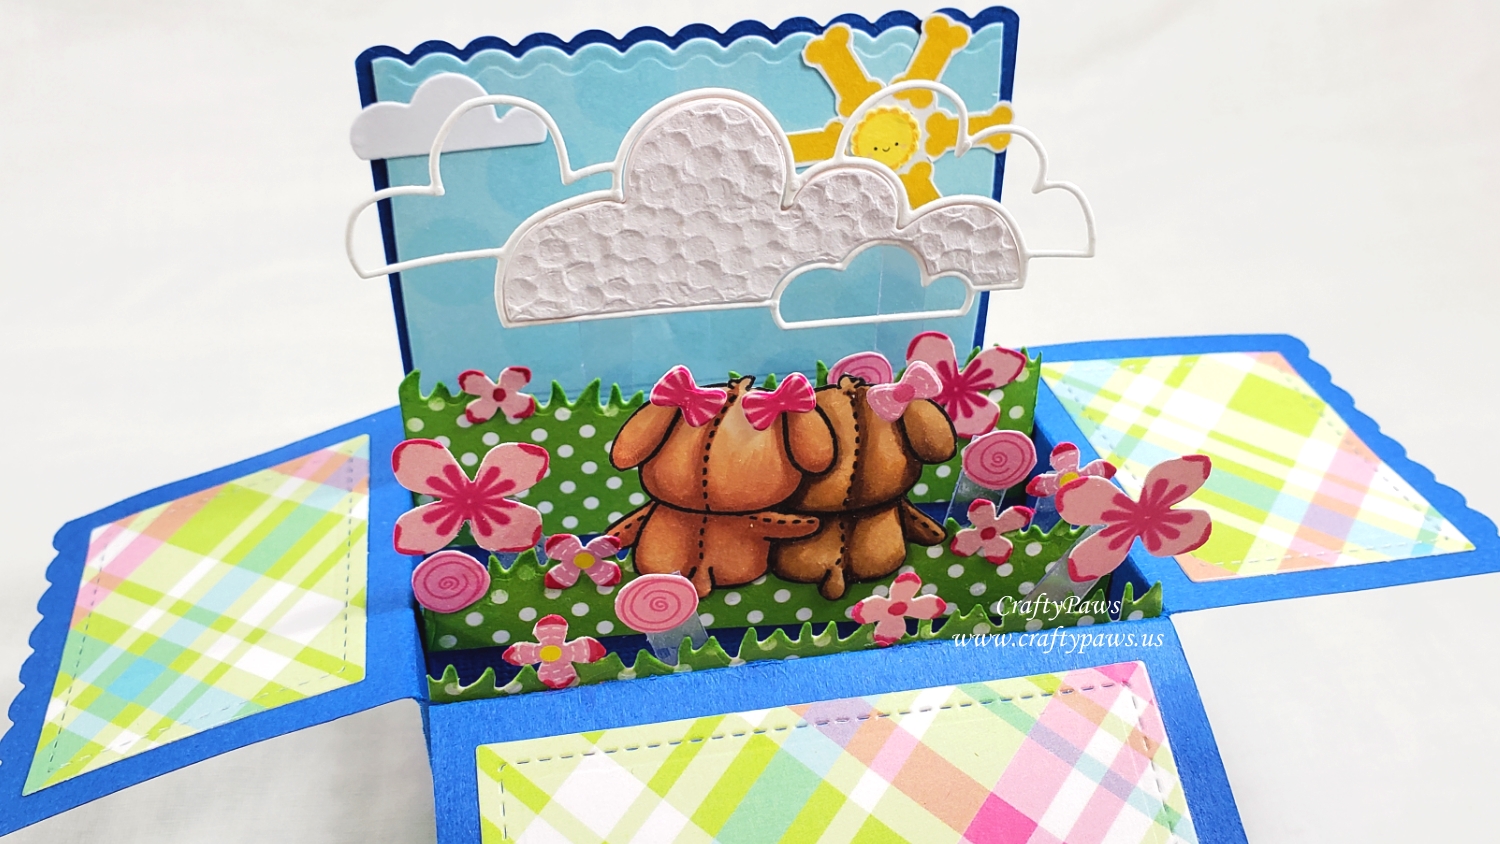
I wanted to create a special, interactive and full card for her, so I got out my Hampton Art-Mama Elephant Lovey Puppy Stamp and Die Set and decided to use the pair of puppies huddled together to represent the two of us — the way we used to daydream about the future together.
The left puppy is colored with Copic E21, E13 and E15
The right puppy is colored with E50, E53, E55 and E57
I fussy cut them out with my Fiskars Spring Loaded Scissors, inked their edges with a Momento Tuxedo Black Marker, and set them aside to prep the card base.
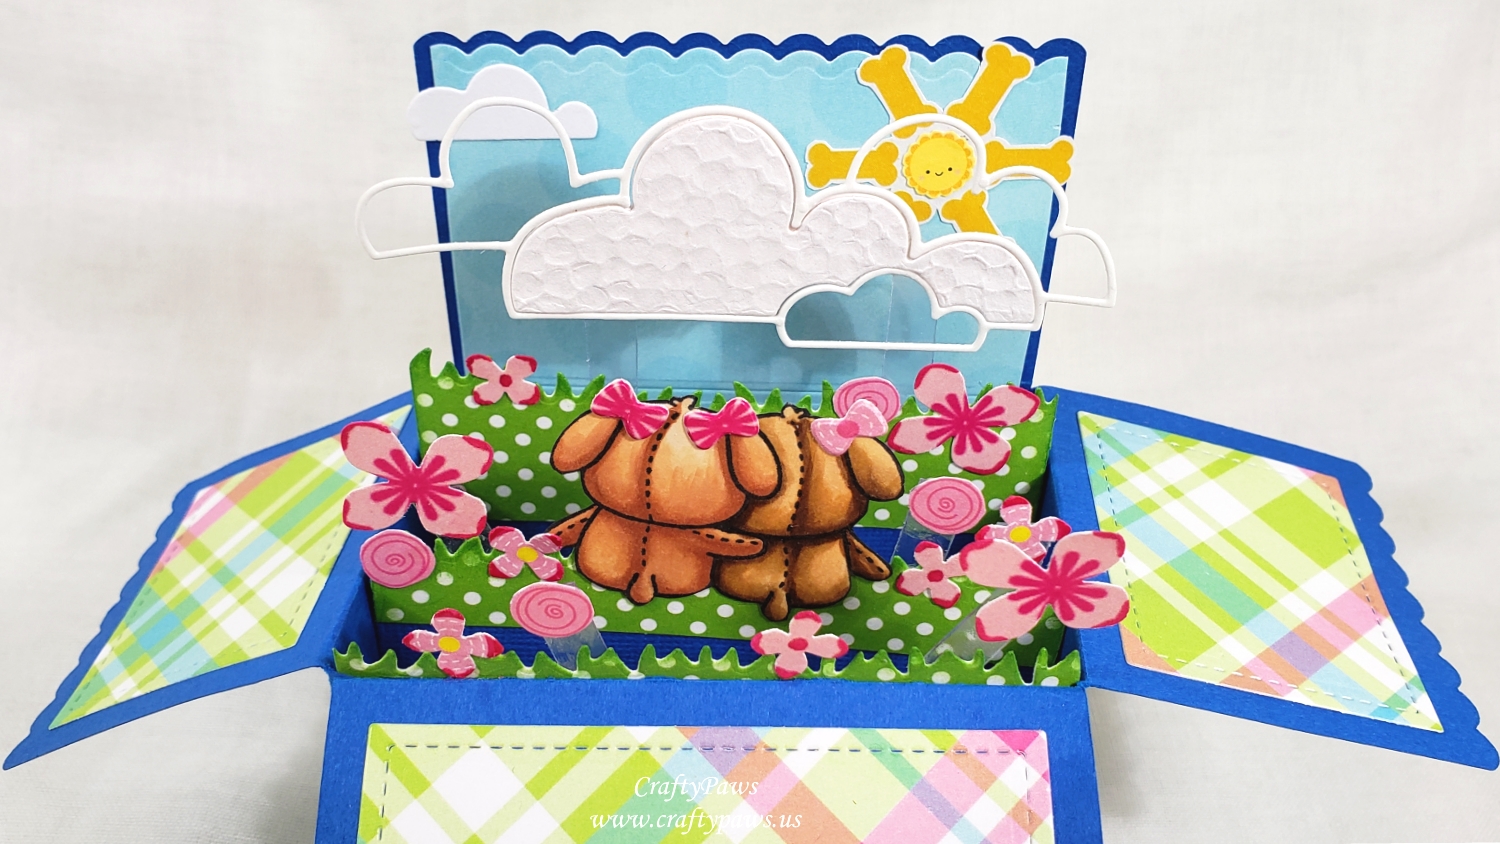
I created the pop up box card structure with an 8.5″ x 11″ piece of blue card stock using the Lawn Fawn Scalloped Box Card Pop Up Die Set. I also used scraps of plaid, pale blue polka dot, and small green and white polka dot patterned papers to decorate each panel and add a grassy ground. I inked the edges of the green polka dot paper cut with the MFT Grassy Hills Die-Namics Dies with Tim Holtz Distress Ink in Mowed Lawn to give a finished look.
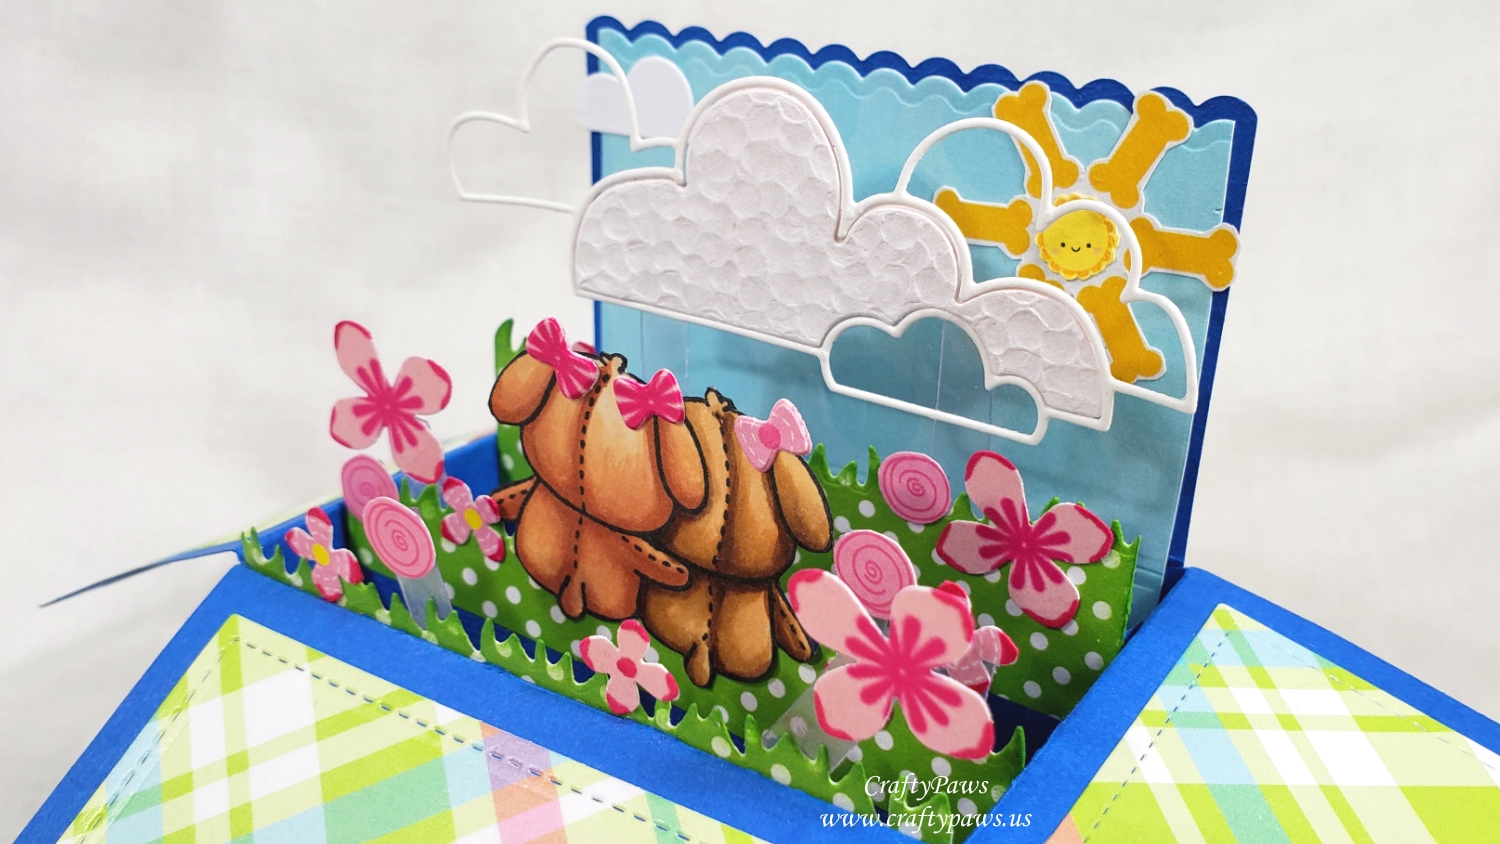
Then on to the fun decorating! I found a scrap of doggy bone paper that I fussy cut out to make a kind-of sun, centering it with a fussy cut actual sun image from another scrap left no room for doubt that this was supposed to represent a sun. To create a scenic background, I used an old Simon Says Stamp Cloud Banks Die (retired) and inset some textured white paper only into the main center cloud to create interest and see-through dimension. Then I used an old Martha Stewart Hydrangea Trio Punch (also retired; but THIS ONE from EK Success is very similar), various pink patterned paper scraps, and a Copic RV09 to create the feeling of a bountiful summer flower garden. The clouds and many of the flowers were attached with Ranger Multi Medium Matte to clear plastic strips I reclaimed/upcycled from craft packaging to suspend them into the air/space above the box card.
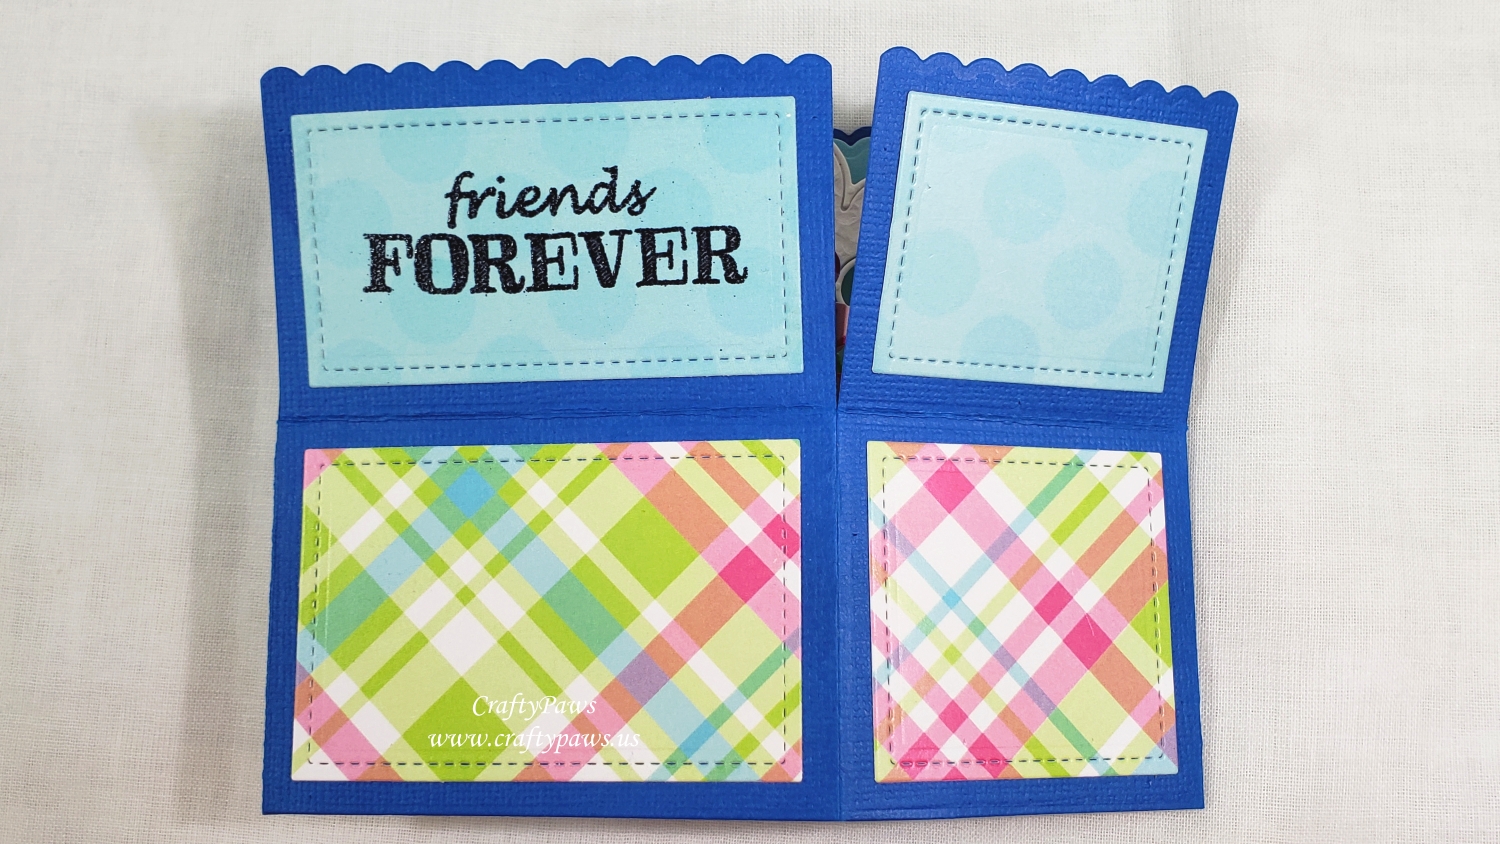
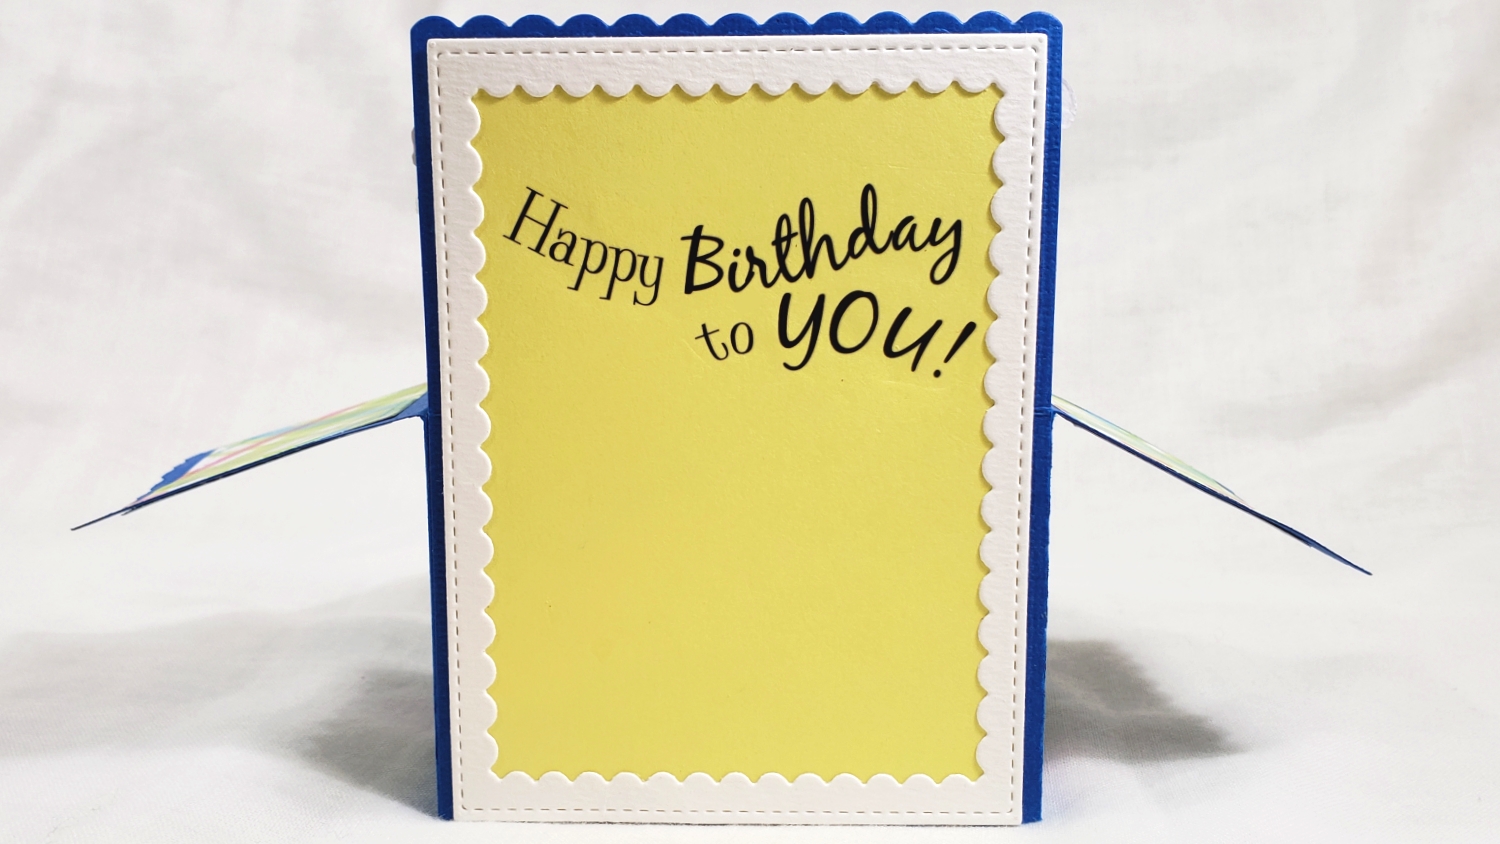
For the underside of the main flap (which will be seen first when the recipient takes the card out of the envelope), I prepped a die cut stitched rectangle from more of the pale blue polka dot patterned paper with my EK Success Powder Tool and heat embossed the sentiment, “Forever FRIENDS” with VersaMark Ink and Ranger Black Embossing Powder. For the back side of the card (where the message will be written), I used a Pretty Pink Posh Scalloped Frame Die and some scrap yellow card stock. I also used up another rub on from my stash that reads, “Happy Birthday to You!”
CLICK on the following picture to watch the process video of crafting this pop up box card:
Disclosure: Many of the supplies I’ve used for today’s project are linked. Some may be affiliate links, which means if you make a purchase I receive a small commission at no extra cost to you. I truly appreciate your support toward the costs of running this blog!
This card is being entered into the following challenges:
Crafting By Design Happy Birthday Challenge
Creatalicious Anything Goes with Optional Spots and/or Stripes Challenge
Word Art Wednesday Anything Goes Challenge
Simon Says Stamp Work It Wednesday Summer Vibes Challenge
Stamping Sensations Show Your True Colors Challenge
Crafty Gals Corner Polka Dots and/or Stripes Challenge
MFT Stamps Birthday Project Challenge
Lil Patch of Crafty Friends Anything Goes Challenge
Penny Black and More Blossoms, Butterflies and Bugs Challenge
Through the Craft Room Door Anything Goes Challenge
]]>

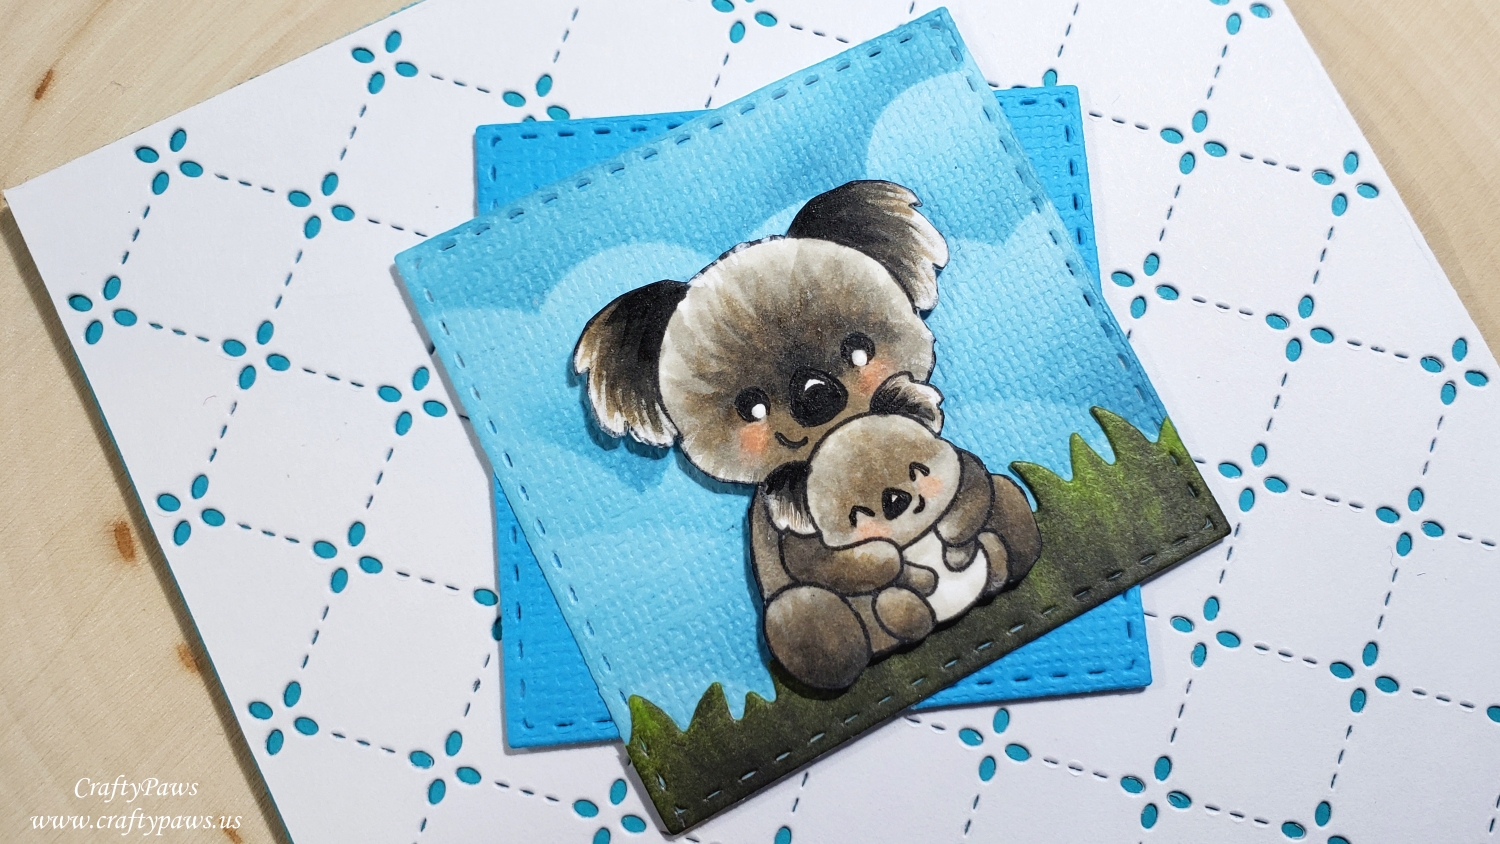
I started with a blue card base and then used the adorable Lawn Fawn “Quilted Backdrop Die” to create a clean white overlay. Then I used a couple of pale blue and mid-tone blue scraps of card stock that I cut down with one of the Simon Says Stamp Stitched Squares Die Set. I used the lighter one for the main background, but to add a bit of interest, I blended on clouds using the My Favorite Things Clouds Stencil with Broken China Tim Holtz Distress Ink.
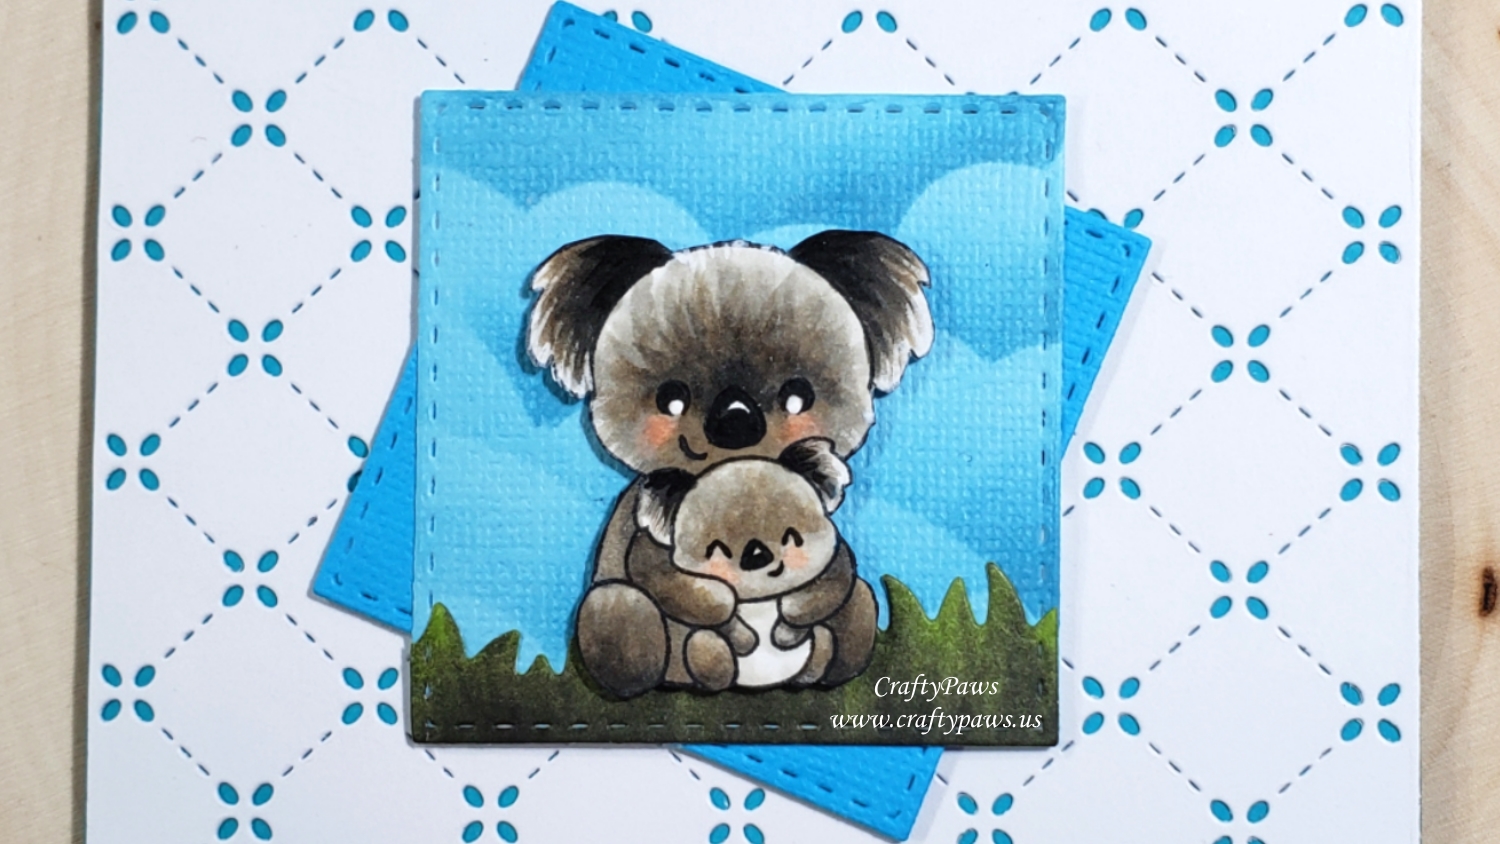
Then for the adorable koalas, I Copic colored them with the following colors:
W0, W1, W5 W7, W9, R30 and E43
I also used a Uniball Signo White Gel Pen to add some white fur texture and highlights to the papa koala’s eyes, and a Copic Multiliner Pen in 0.03 pt to re-define and darken the eyes and noses of both koalas.
Then I fussy cut them using my favorite Fiskars Spring Loaded Scissors and inked the edges with a Momento Tuxedo Black Marker.
Lastly, I colored up a plain white card stock scrap with W5 and YG25 and used an My Favorite Things Grassy Hills Die-namics Die (if not available near you, there is a similar Lawn Fawn Grassy Hillside Borders Die) with the Simon Says Stamp Stitched Squares Die Set to add a grassy ground on which the koalas could sit.
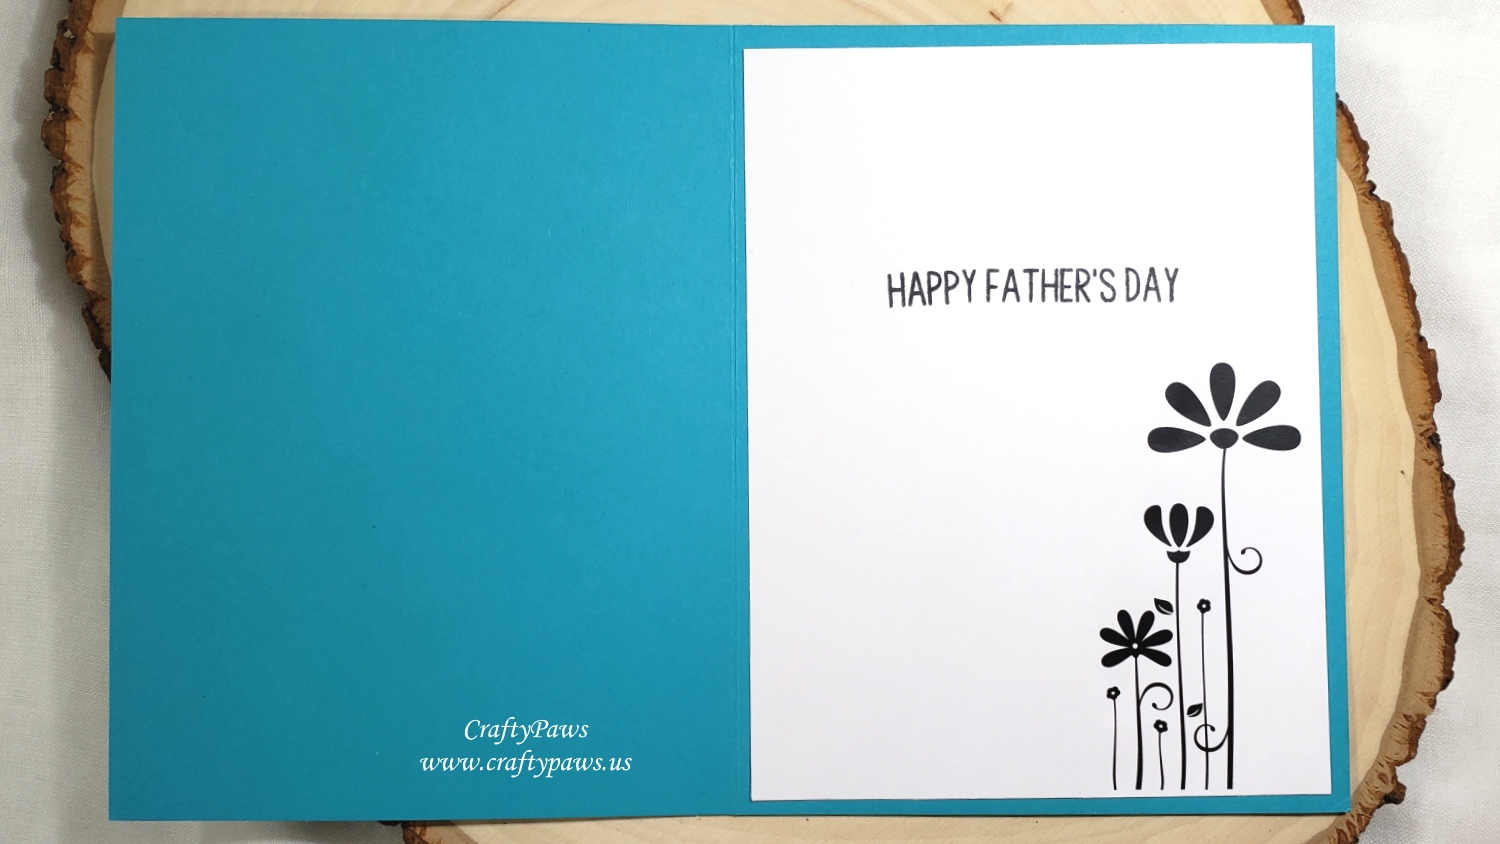
The sentiment, which was also from the Clearly Besotted “Just the Two of Us” stamp set, was stamped with VersaMark Ink heat embossed with Ranger Super Fine Detail White Embossing Powder onto the last scrap of the pale blue card stock. For the inside card liner, I stamped out “HAPPY FATHER’S DAY” from the Kindred Stamps “Galactic Adventures” stamp set (which happened to still be sitting on my cluttered desk from my last card), and I used an old rub-on grouping of graphic flowers that seemed to coordinate well with the pattern on the Lawn Fawn “Quilted Backdrop Die”.
CLICK on the following picture to watch the process video:
Disclosure: Many of the supplies I’ve used for today’s project are linked. Some may be affiliate links, which means if you make a purchase I receive a small commission at no extra cost to you. I truly appreciate your support toward the costs of running this blog!
This card is being entered into the following challenges:
Word Art Wednesday Anything Goes Challenge
Through the Craft Room Door Anything Goes Challenge
Crafts Galore Encore Anything Goes Challenge – WINNER
Crafter’s Castle Anything Goes with Optional Mixed Media Challenge
Craft Gal’s Corner You’re the Man Challenge
MFT Sketch Challenge 441
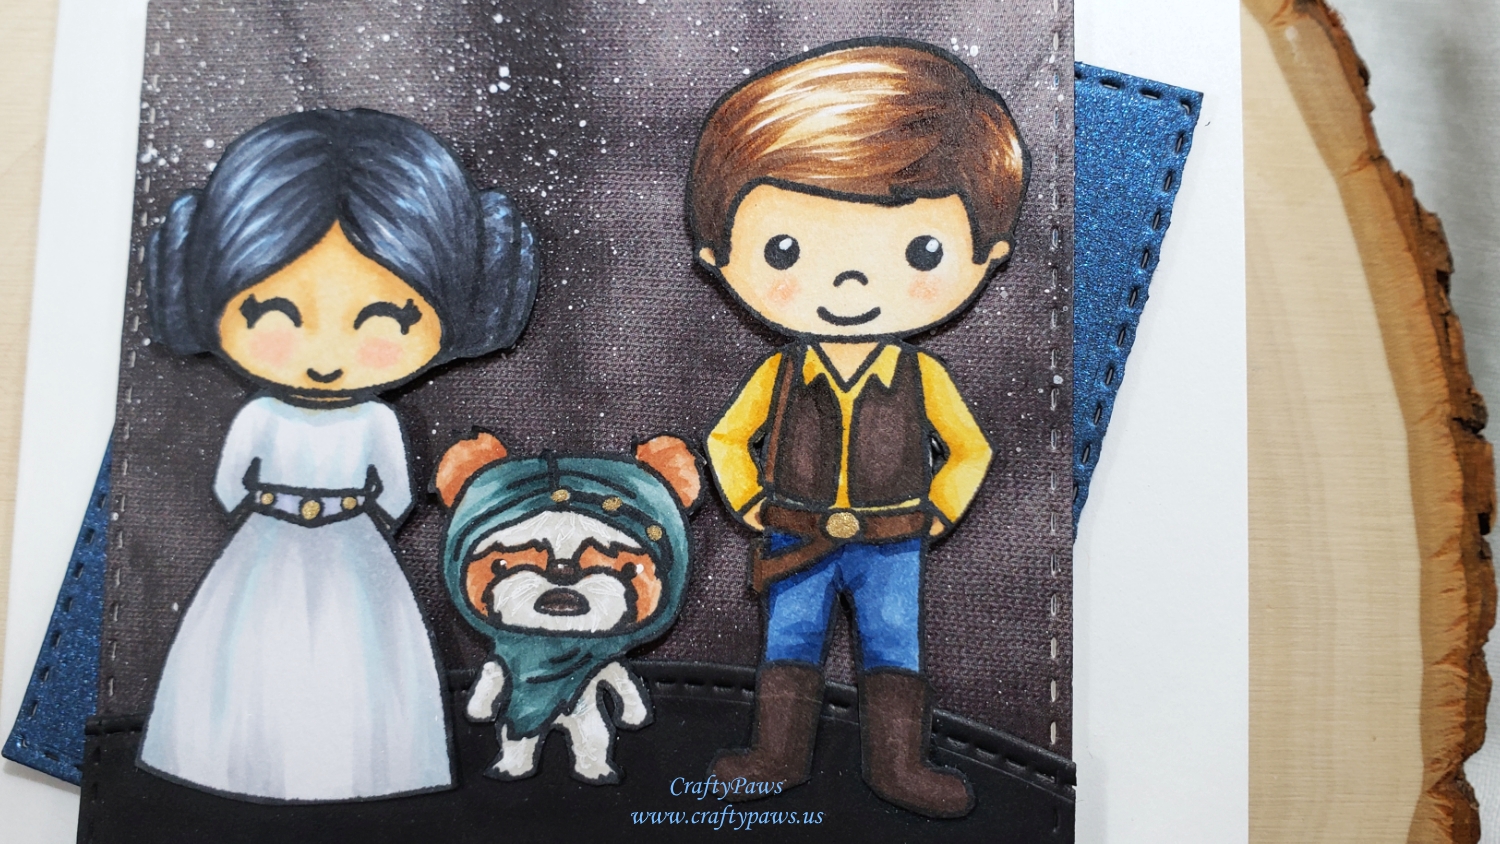
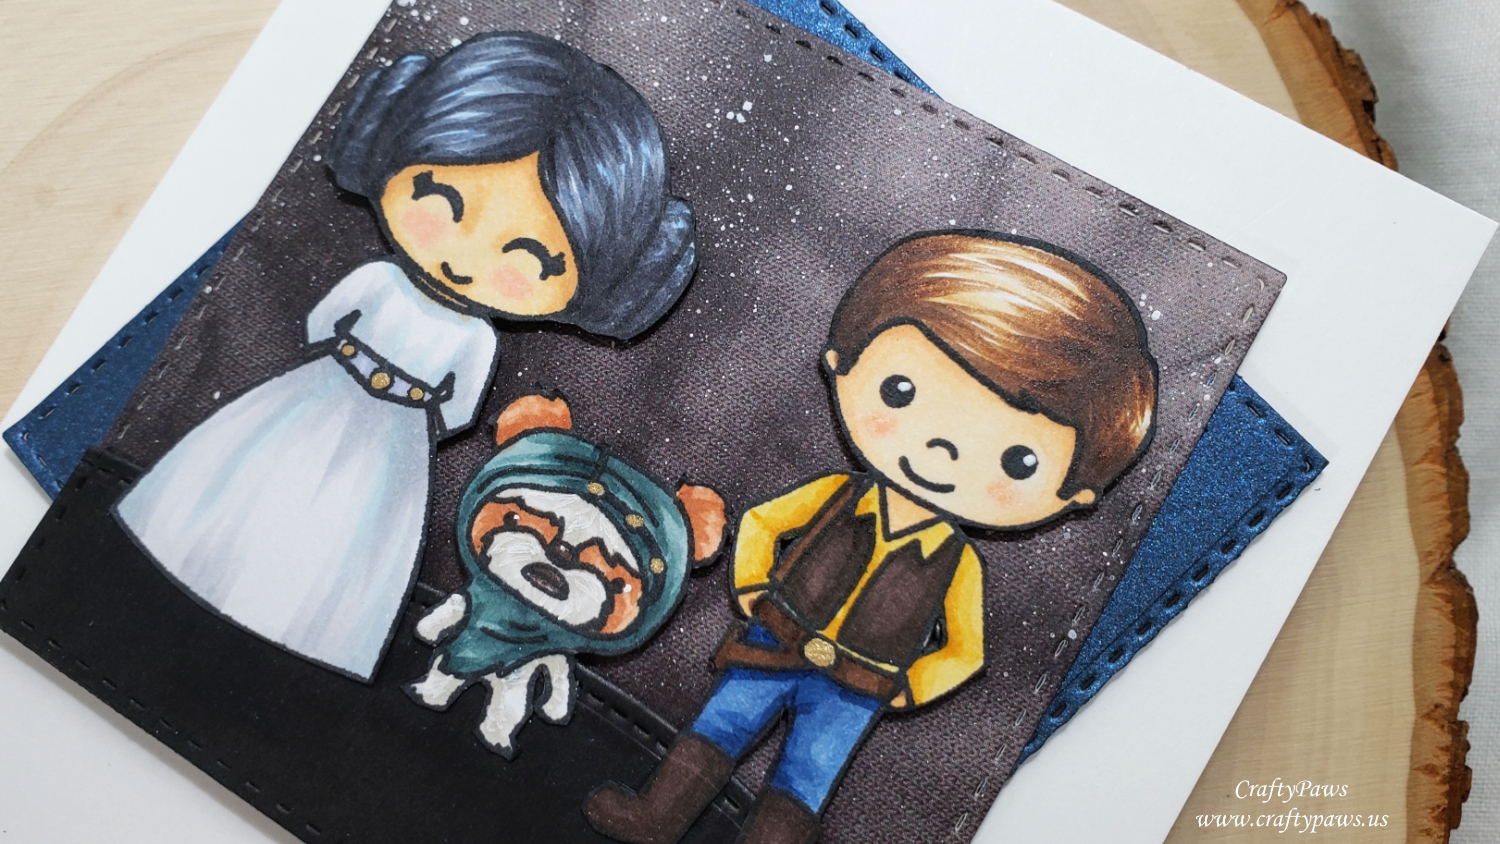
I decided that I could be Princess Leia, Mr. CraftyPaws could be Han Solo, and our Bandito could be (of course) an Ewok and used the following Copic colors:
Princess Leia: Hair: C6, C8, B000; Skin: E50, E51, E53, R21; Dress: C0, C1, C2, B32; Belt; C2 and B60
Han Solo: Hair: E53, E57, E59; Skin: E50, E51, E53, R30; Pants: B34 and B37; Belt: E59 and E79; Vest and Boots: E79 and E49; Shirt: Y21 and YR24
Ewok: Fur: W0, W1, E11, E13, E15; Headpiece: BG72, BG75 and BG78
I also used a Gold Gelly Roll Pen to add shiny details to Leia’s belt, the Ewok’s headpiece, and Han’s belt
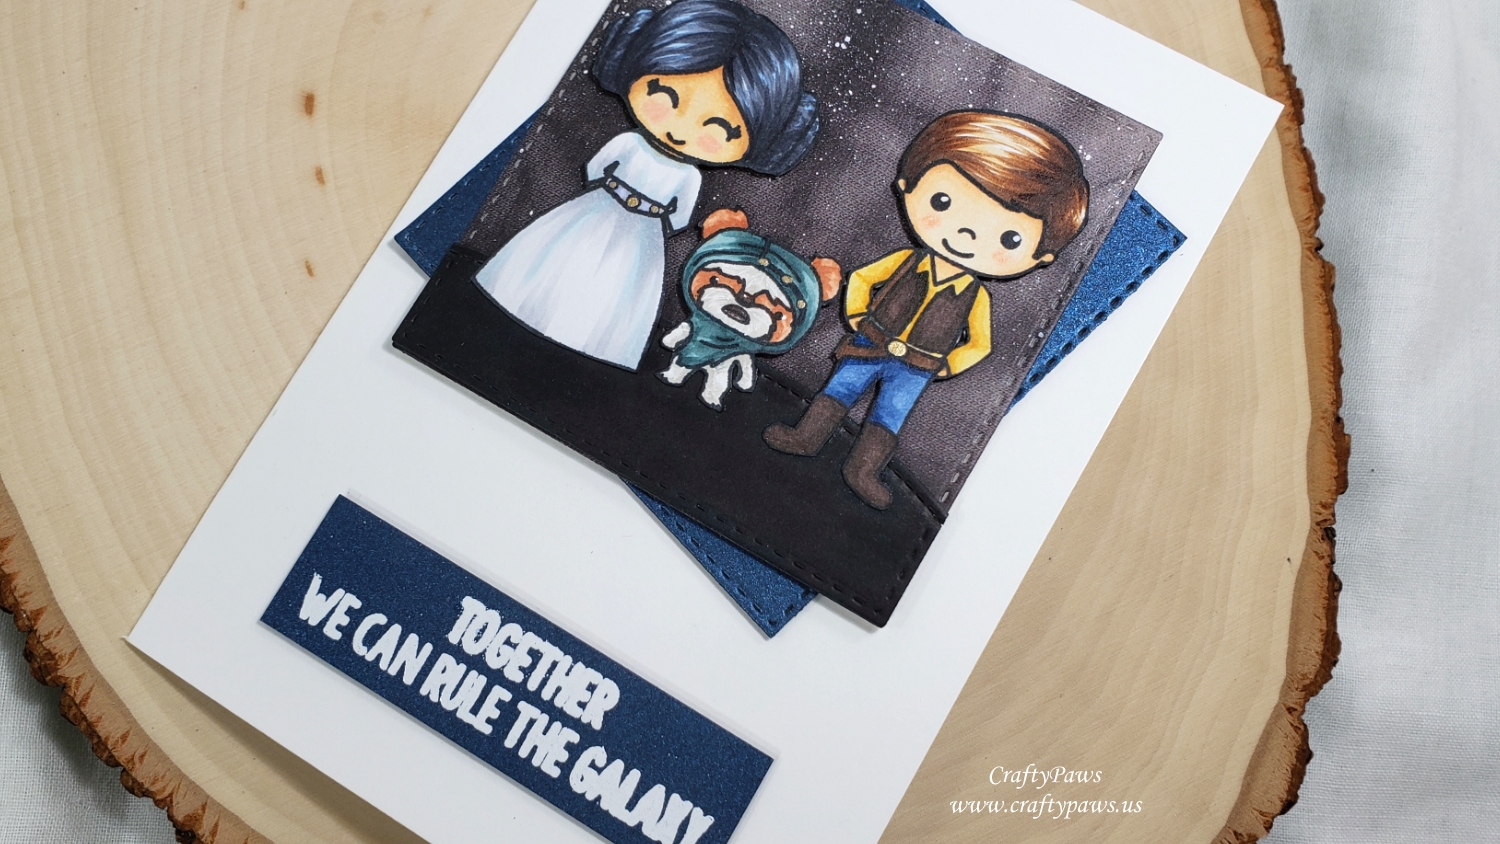
As these images are clearly the “stars” of the card (pun intended), I kept the backgrounds simple. I die cut some black and grey patterned paper from an old DCWV The Tie-Dyed Stack (retired) using a Simon Says Stamp Stitched Squares Die. I splattered some watered down Copic Opaque White to create a galaxy background, and used black card stock and the Simon Says Stamp Stitched Squares Die and a Lawn Fawn Stitched Hillside Die to create a ground for the characters.
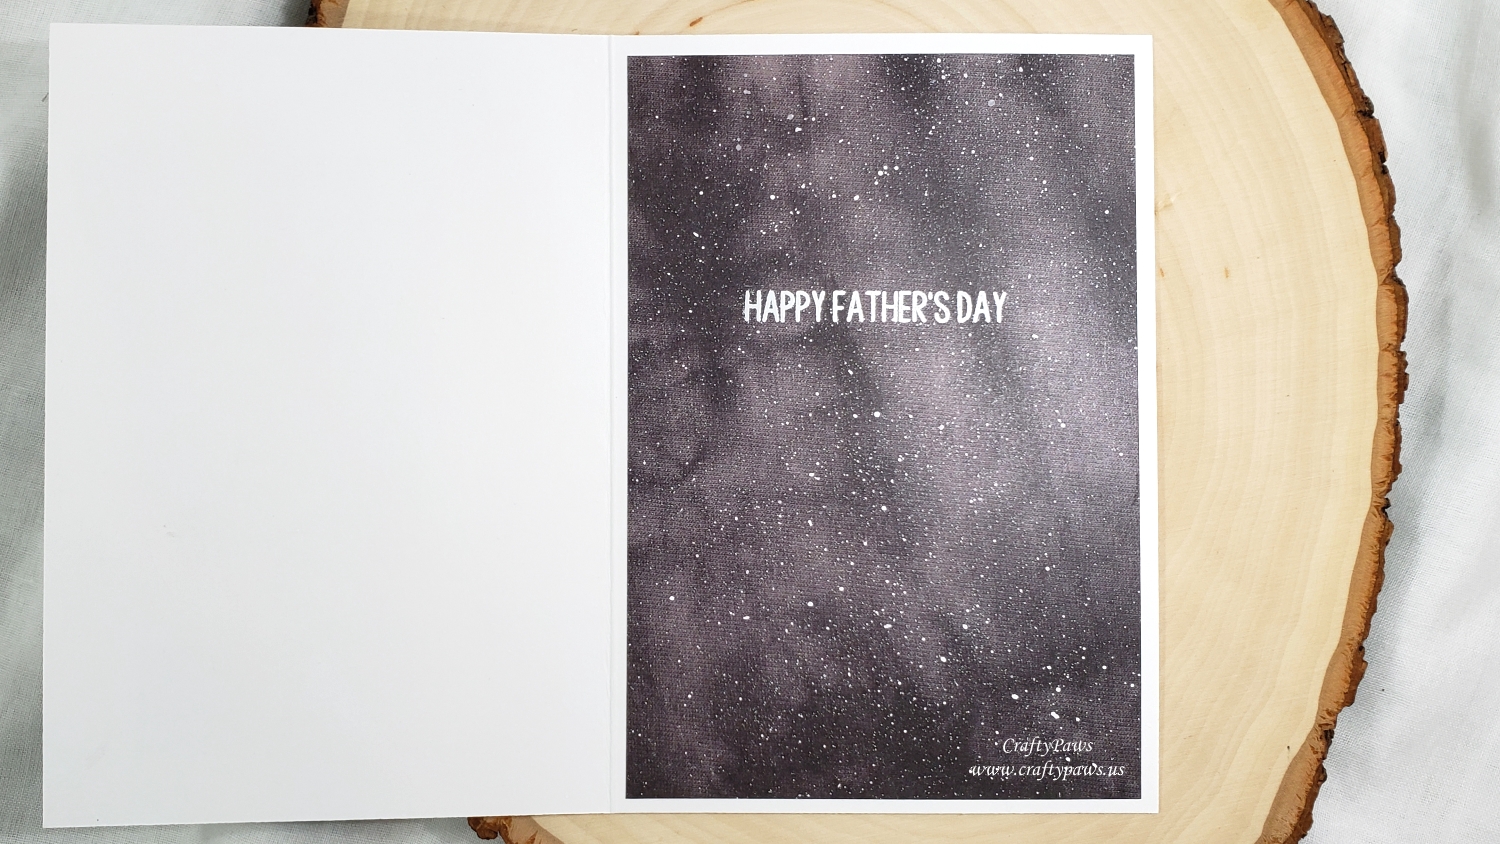
To add some more color, I die cut another stitched square from navy blue shimmer card stock and offset it behind the galaxy background square. Using VersaMark Ink and Ranger Super Fine Detail White Embossing Powder, I also heat embossed the sentiment, “Together We Can Rule the Galaxy” on more navy blue shimmer card stock to repeat the color and give the card a cohesive look. The sentiment, characters, and the squares assemblage are all popped up on double sided foam tape for added dimension and interest. The inside of the card liner was created by using more of the black and grey tie-dyed patterned paper with splattered on “stars.” The sentiment inside is also heat embossed, and simply says, “Happy Father’s Day”.
CLICK on the following picture to watch the process video of crafting this card:
Disclosure: Many of the supplies I’ve used for today’s project are linked. Some may be affiliate links, which means if you make a purchase I receive a small commission at no extra cost to you. I truly appreciate your support toward the costs of running this blog!
This card is being entered into the following challenges:
Word Art Wednesday Anything Goes Challenge
Creatalicious Anything Goes with Optional Blue Challenge
Through the Craft Room Door Anything Goes Challenge
Crafts Galore Encore Anything Goes Challenge
Lil Patch of Crafty Friends Anything Goes Challenge
Crafter’s Castle Anything Goes with Optional Mixed Media Challenge
Craft Gal’s Corner You’re the Man Challenge
MFT Sketch Challenge 441
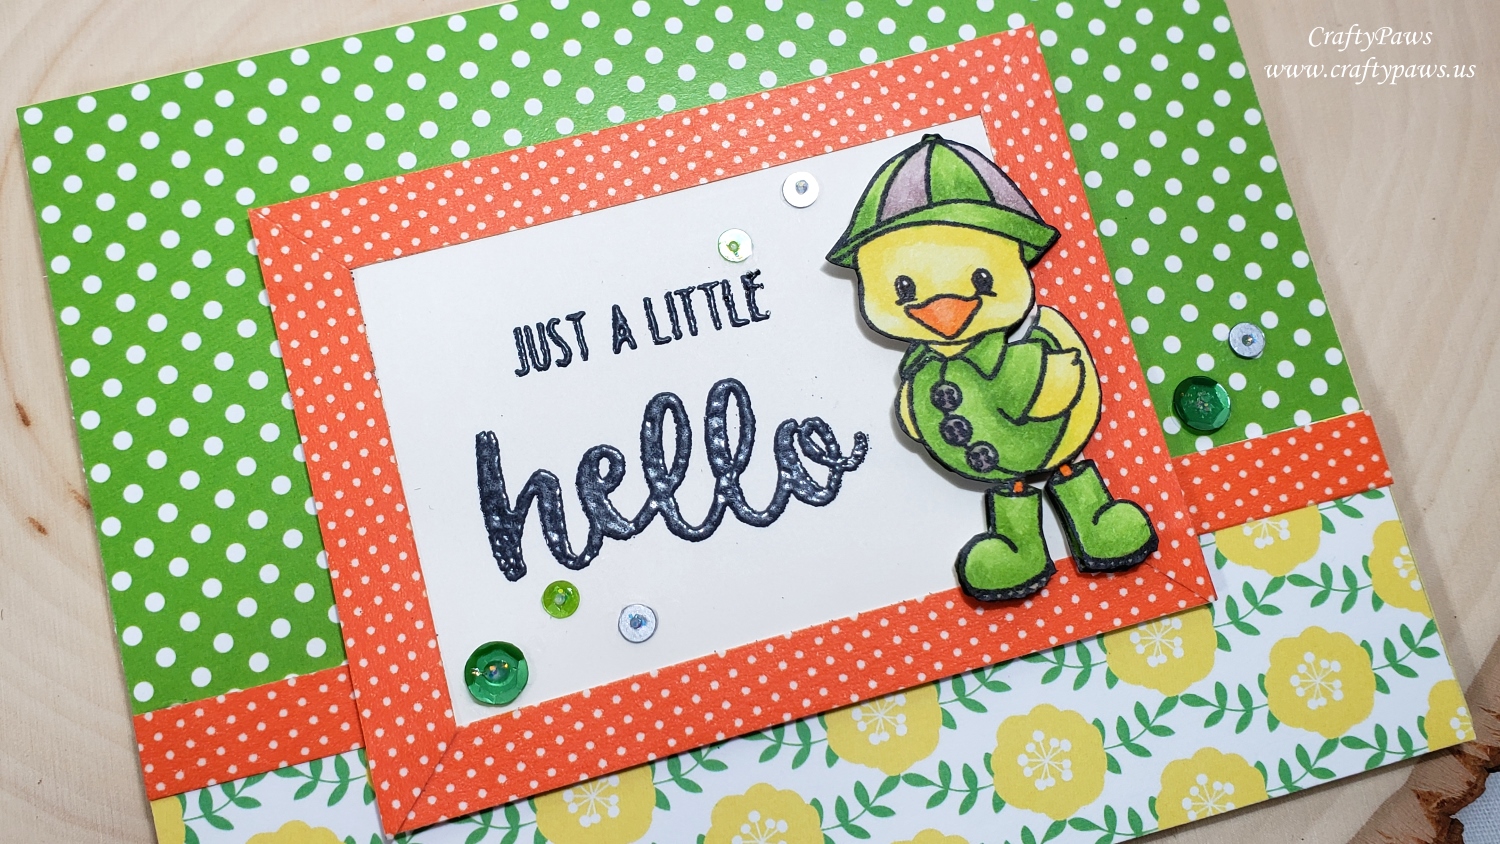
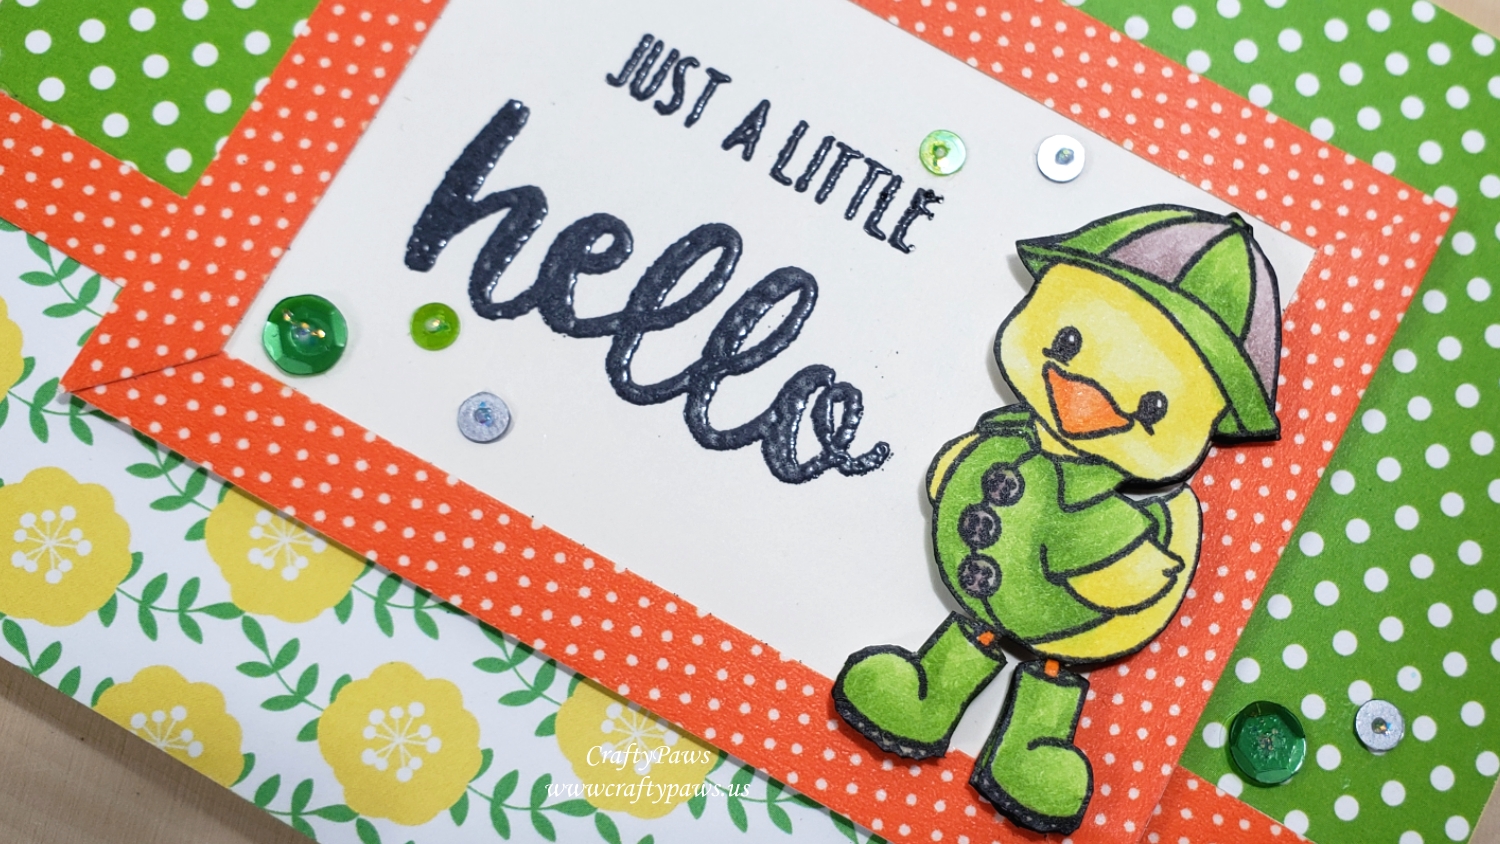
So for this card, I used two impressions of the same cute duck in a rain slicker image from the Scrapping for Less “Just Ducky” stamp set. I colored one up with Copics in fun summer citrus colors (summer showers are a constant where I live — in fact there is a huge thunder storm passing as I type):
Duck: Y11, Y13, YR00, YR04
Rain Slicker, Boots and Hat: YG03, YG25, E70, E71
I simply colored and inked the edges (using a Momento Tuxedo Black Marker) of the second image of the duck as an under layer to add dimension to the image by stacking it with double sided foam adhesive. I find that a simple trick like this really adds a lot of interest and is appreciated by card recipients (especially if they are not crafters and don’t know how easy this is!) 🙂
For the card front, I looked through my scrap box and found a fun green polka dot and a yellow floral patterned papers. I used the green on 2/3 of the front and the floral on 1/3 of the front. When I went looking for an orange patterned paper, I couldn’t find one, but did find a small orange polka dot washi tape! I used that washi tape on white card stock (so it would not show through the patterned papers beneath) and glued the strips around a piece of cream card stock as a frame as well as between the green polka dot and yellow floral papers.
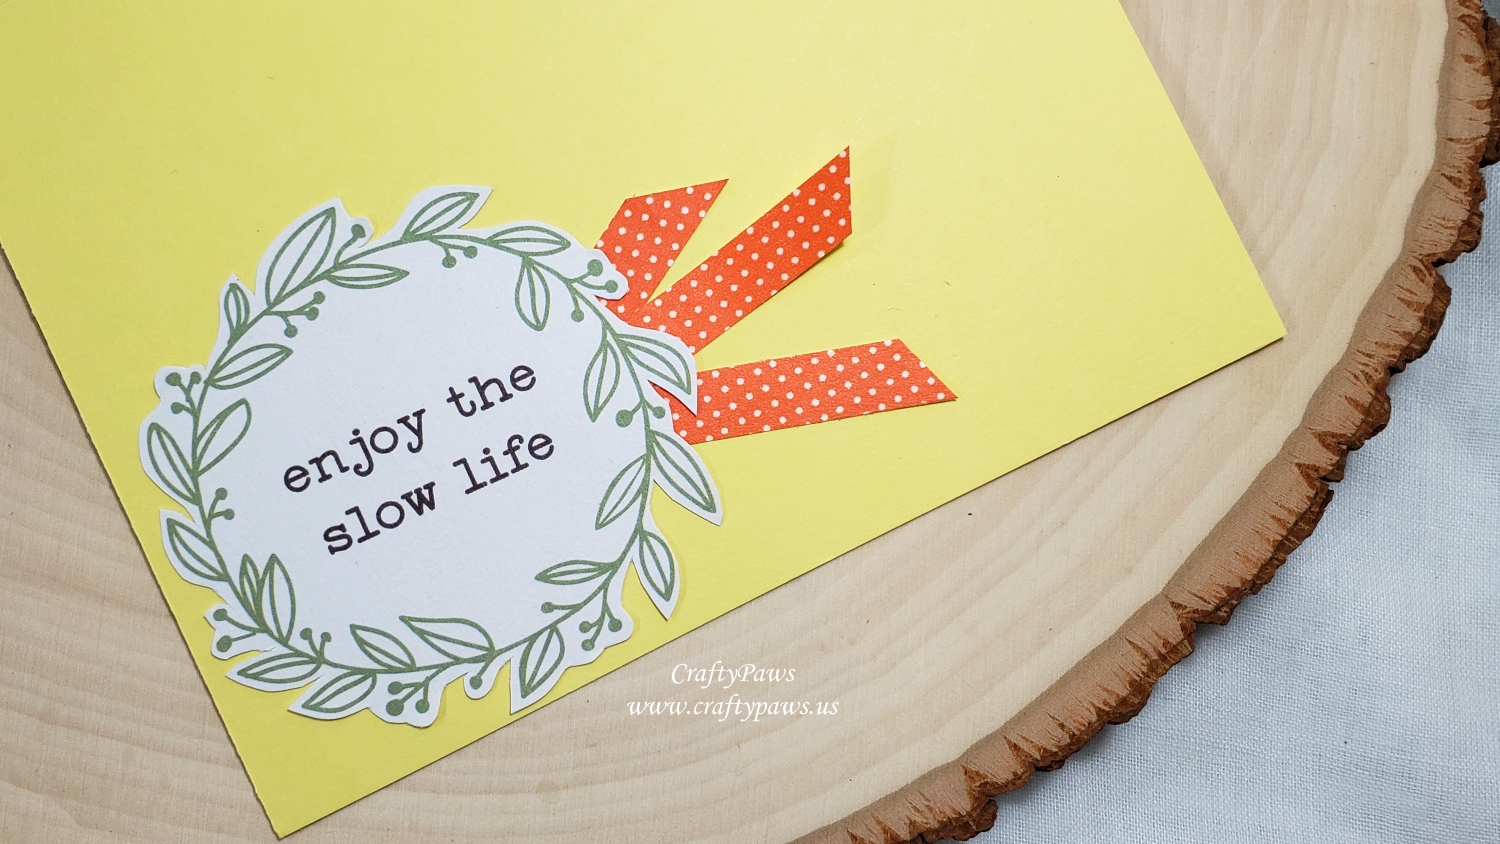
For the sentiment, I decided to heat emboss “JUST A LITTLE HELLO” from the Neat and Tangled “Better Together” stamp set. I used the EK Success Powder Tool to cut down on static, VersaMark Ink for the stamping, and Zing Charcoal embossing powder to create a thick embossed look that wasn’t too black/stark. I mounted that on more double sided foam adhesive to add a more dimension. Lastly, I used Ranger Multi-Medium Matte Adhesive to glue on 7 sequins in green and grey and topped them with Icicle Stickles to add a little extra sparkle too. The inside liner was kept simple with a Scrapping for Less ephemera piece that says, “enjoy the slow life” inside a green wreath. The only adornments to the inside sentiment are three orange polka dot flags made from left over washi tape scraps; this was an easy way to keep the inside coordinated with the card front.
CLICK on the following picture to watch the process video:
This card is being entered into the following challenges:
Crafter’s Castle Anything Goes with Optional Mixed Media Challenge
Simon Says Stamp Wednesday Masculine Challenge
Word Art Wednesday Anything Goes Challenge
Simon Says Stamp Work it Wednesday Summer Vibes Challenge
Crafting by Design Anything Goes Challenge
Stamping Sensations Show Your True Colors Challenge
Crafts Galore Encore Anything Goes Challenge
Through the Craft Room Door Anything Goes Challenge
MFT Color Challenge 118
]]>
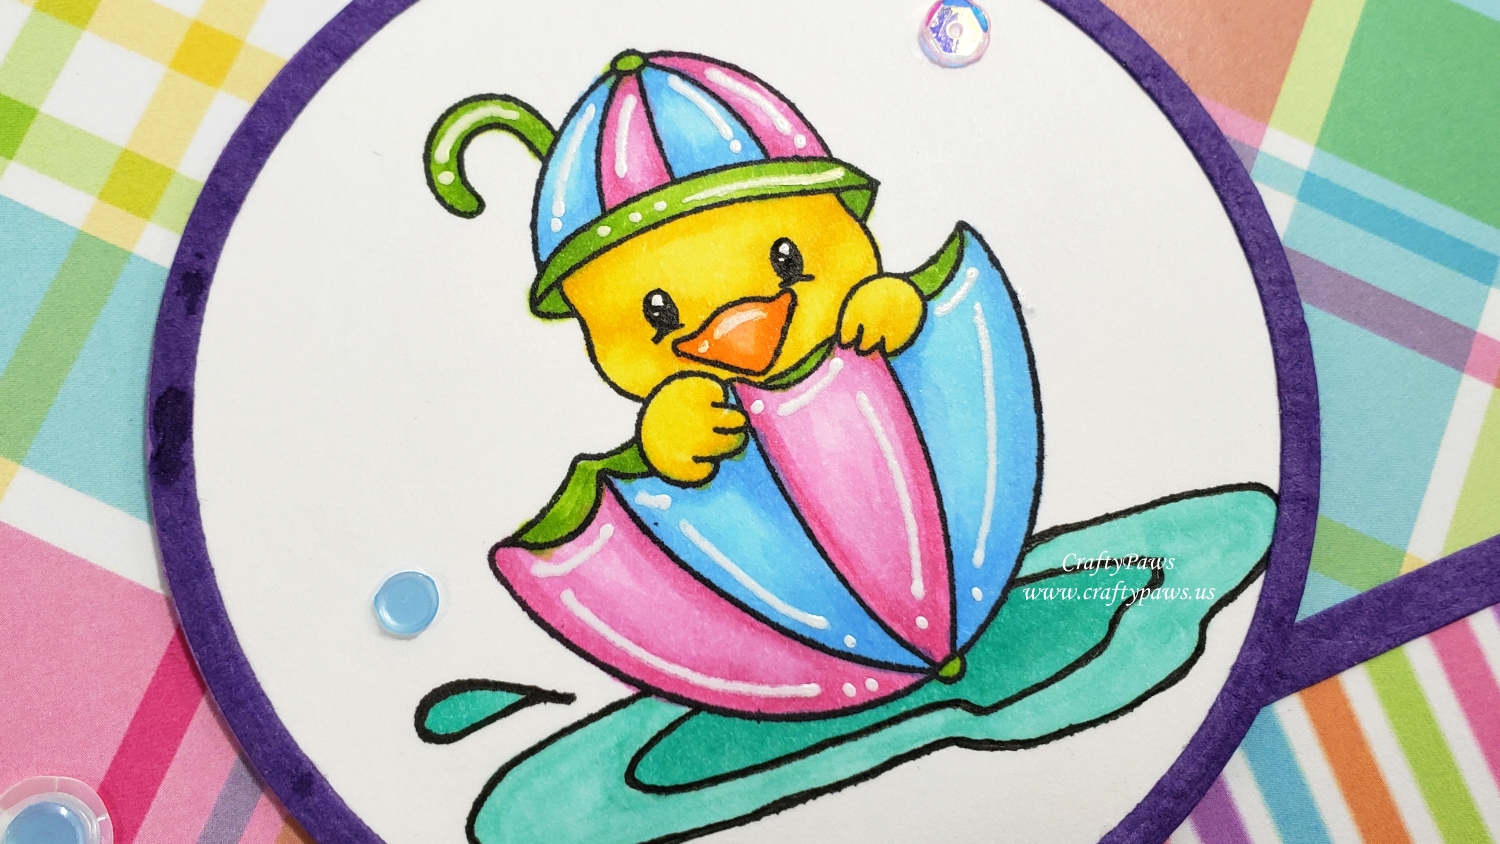
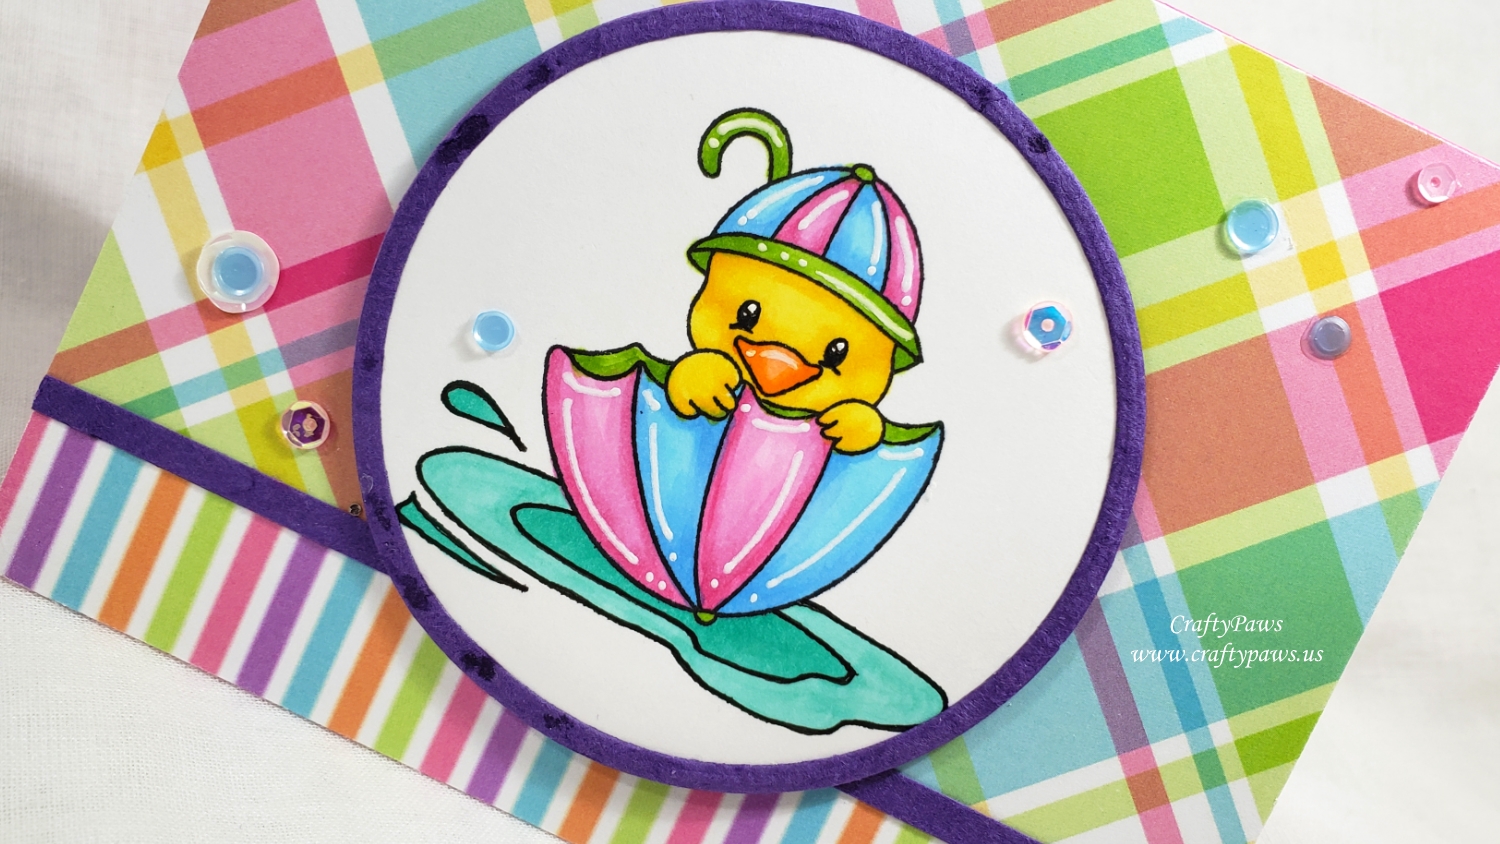
I colored up the duck tucked into the upturned umbrella with the following Copic colors to match the patterned plaid papers from the same Scrapping for Less collection:
Duck: Y13, Y15, YR00, YR16
Umbrella: B00, B12, YG03, YG25, RV52, RV55
Puddle that I doodled in with a Copic Multiliner Pen in 0.03 pt and re-outlined with a Faber-Castell XS point PITT Artist Pen: BG32 and BG23
I also added white highlight marks to the umbrella and the duck’s bill with a Uniball Signo White Gel Pen.
I used the Diemond Dies Die-Normous Stack-Ems Circle Nesting Die Set to cut out the image as well as die cut a frame for the image with purple handmade paper (for some added texture). I then used a plaid patterned paper and a striped pattern paper from this month’s Scrapping for Less Kit and covered the card front with these two patterned papers (about 2/3 and 1/3). I positioned a thin strip from more of the purple handmade paper between the two patterned papers to create a clean separation. Then I positioned the framed image centered on the card and overlapping the two patterned blocks.
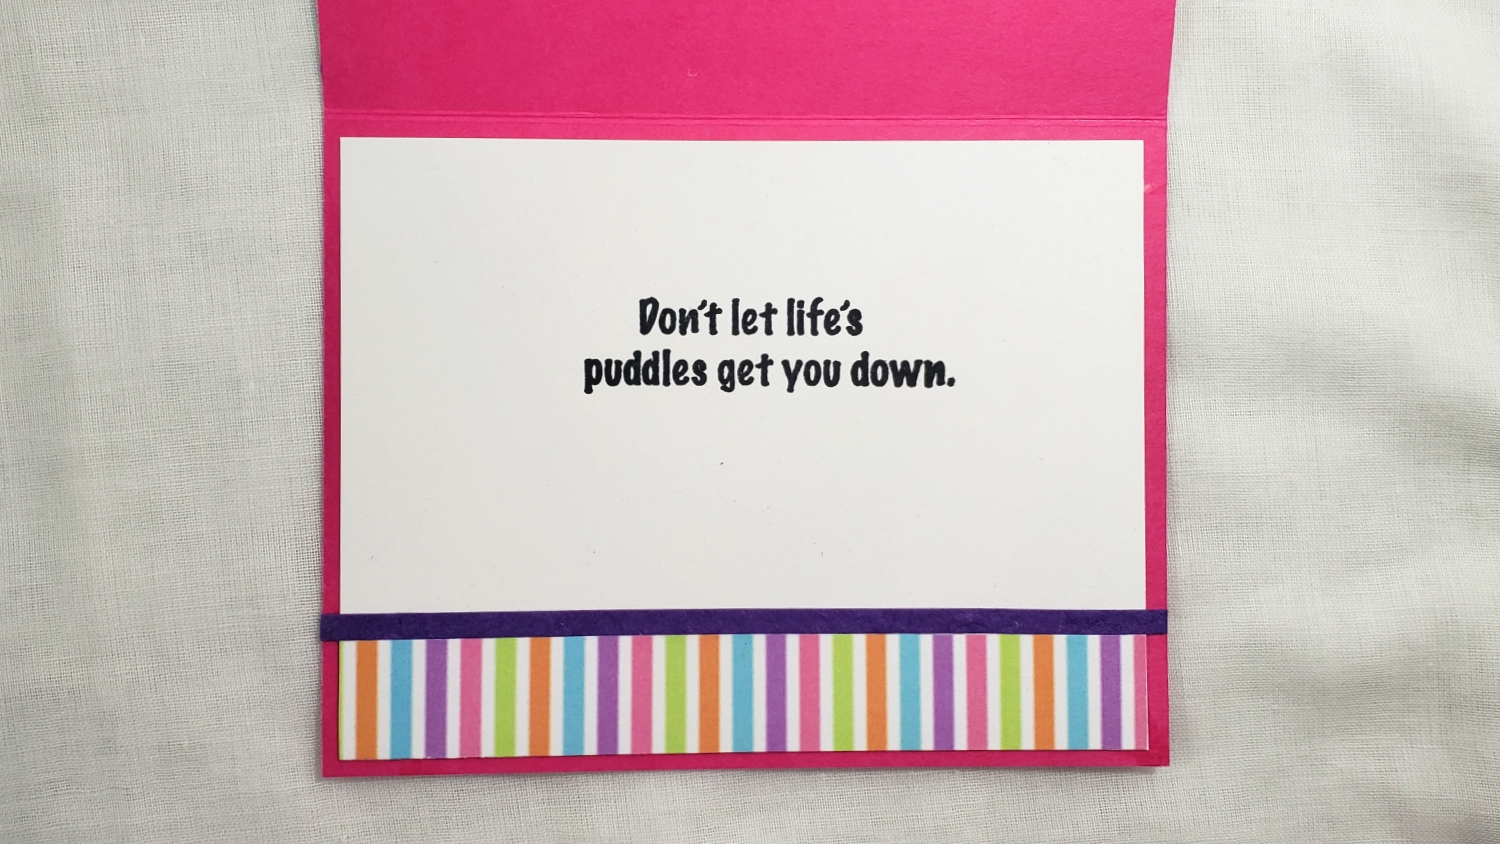
For the inside of the card, I used a sentiment from the Scrapping for Less add-on kit that says, “Don’t let life’s puddles get you down.” I used another scrap of the striped paper to coordinate the inside liner with the card front and added a similar purple strip to edge the striped paper from the white of the card liner. Lastly, as a finishing touch, I used Ranger Multi-Matte Medium to adhere 7 sequins on the card front to add a little sparkle and interest.
CLICK on the following picture to watch the start-to-finish card crafting video:
Disclosure: Many of the supplies I’ve used for today’s project are linked. Some may be affiliate links, which means if you make a purchase I receive a small commission at no extra cost to you. I truly appreciate your support toward the costs of running this blog!
This card is being entered into the following challenges:
Simon Says Stamp Monday Frame It Challenge
Word Art Wednesday Anything Goes Challenge
Creatalicious Anything Goes with Optional No Rectangles or Square Cards Challenge
Through the Craft Room Door Anything Goes Challenge
Cards Galore Encore Anything Goes Challenge
Penny Black and More Anything Goes Feminine Challenge
Simon Says Stamp Wednesday Bright Colors Mood Board Challenge
The following is a video with the live selection of the randomly selected winner:
]]>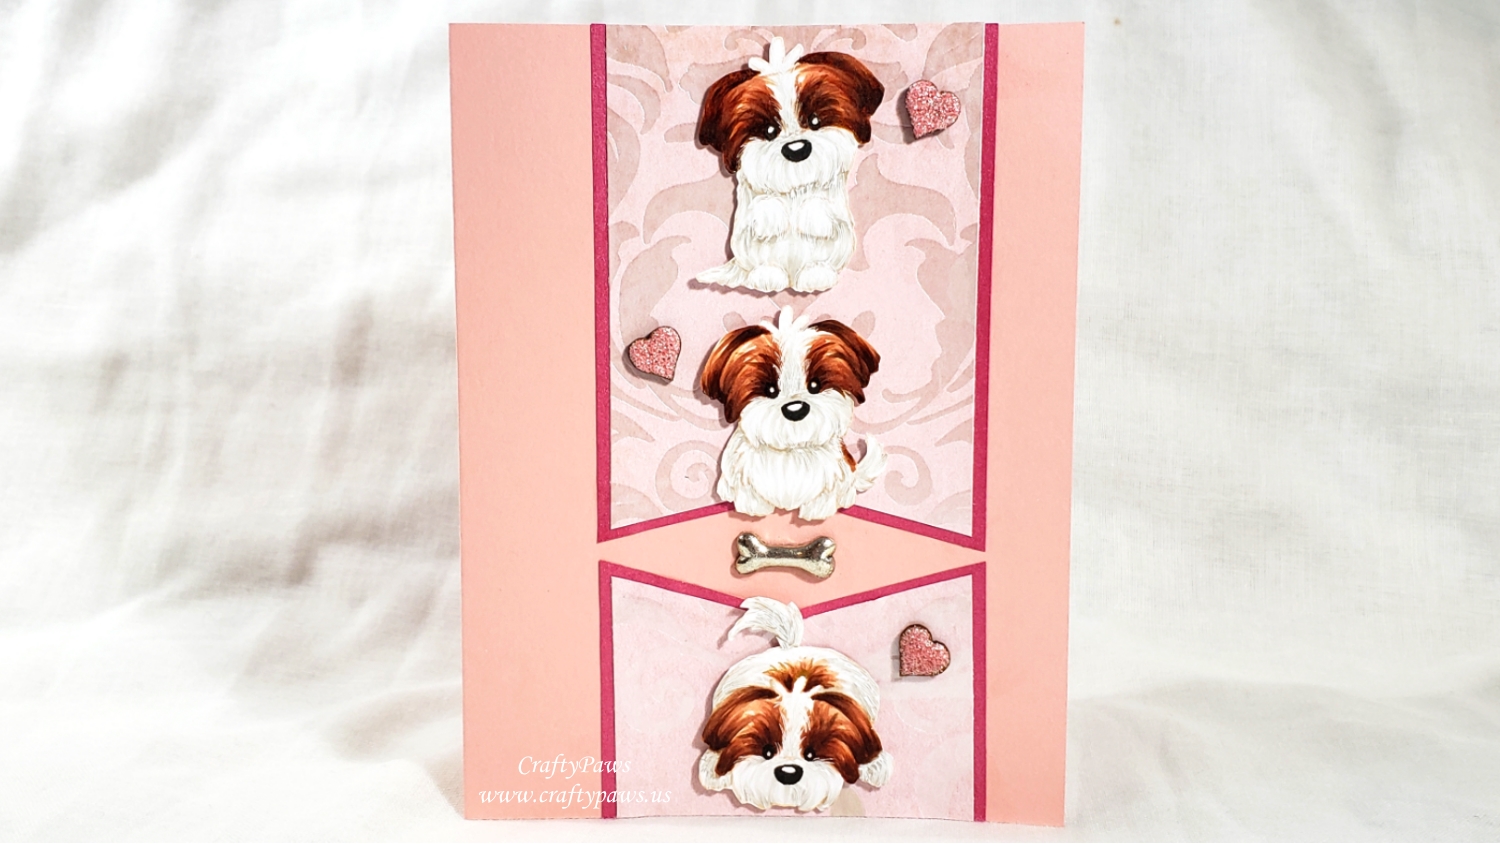
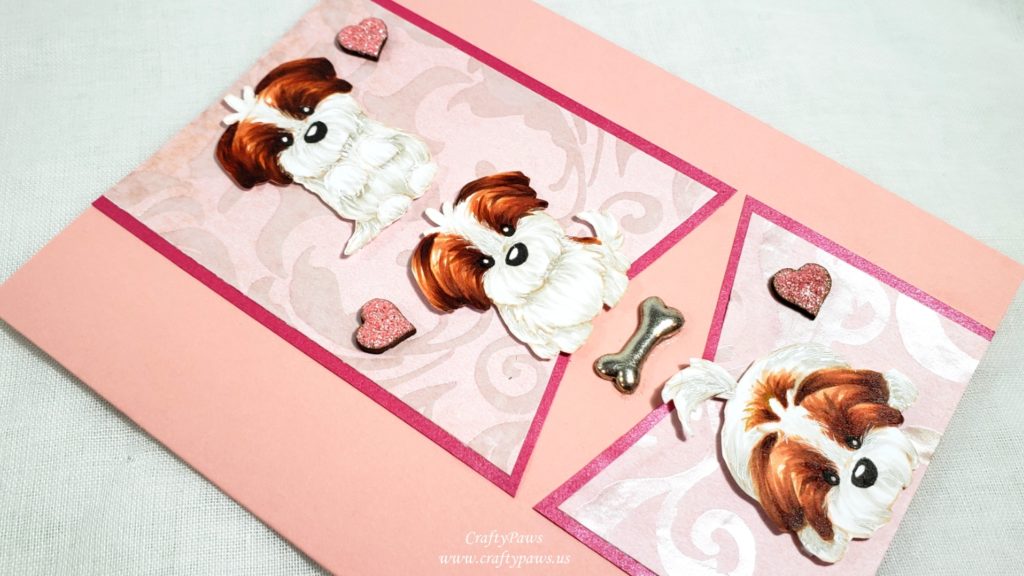
I used Memento Desert Sand Ink to ink them up to try a bit of no line Copic coloring, and I really love the results. To color up the pups like my sweet Havanese, I used a Copic Multiliner in 0.3 pt to define the eyes and noses, a White Sakura Gelly Roll gel pen to add white fur texture, and the following Copic colors:
White fur: W0 and W2
Brown fur: E11, E13, E15, and E57
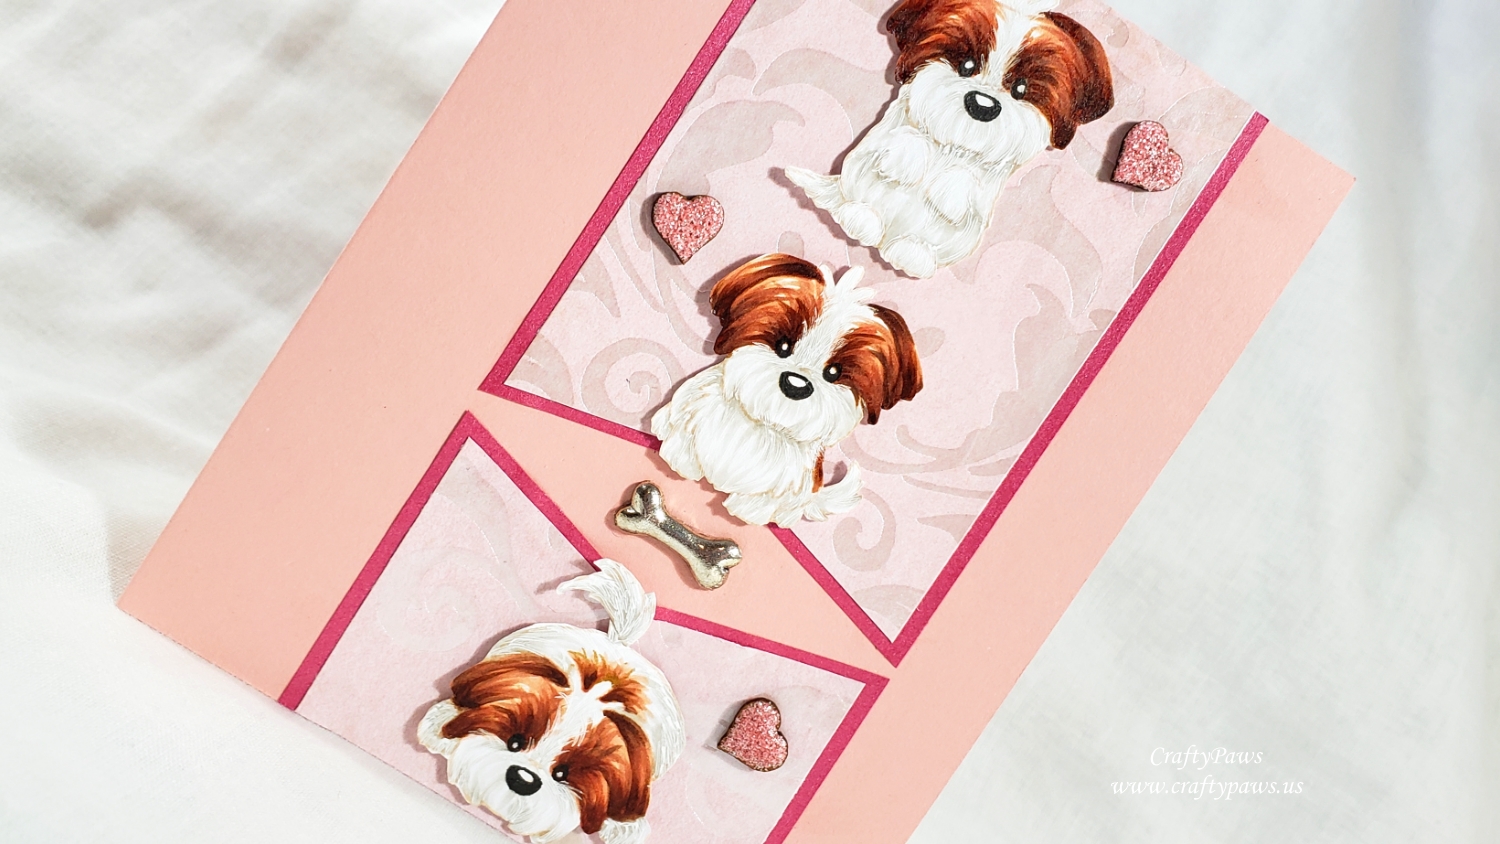
I fussy cut them out with my favorite Fiskars spring loaded reverse scissors. Then to highlight them, I mounted them with foam tape onto scraps of pale pink tone on tone damask patterned paper that I cut into pennant and mounted on dark pink shimmer card stock. The standing and sitting pups were positioned on the upper pennant and the pup ready to play was positioned on the lower.
I used 3 small wooden hearts from my stash and coated them with Hibiscus Pink Stickles for sparkle (I had to let these dry overnight) and glued a heart by each puppy. I cut off the shank of a metal bone button and it fit perfectly glued in with E6000 as an embellishment in the gap created by the two facing pennants, between the 2nd and 3rd puppies.
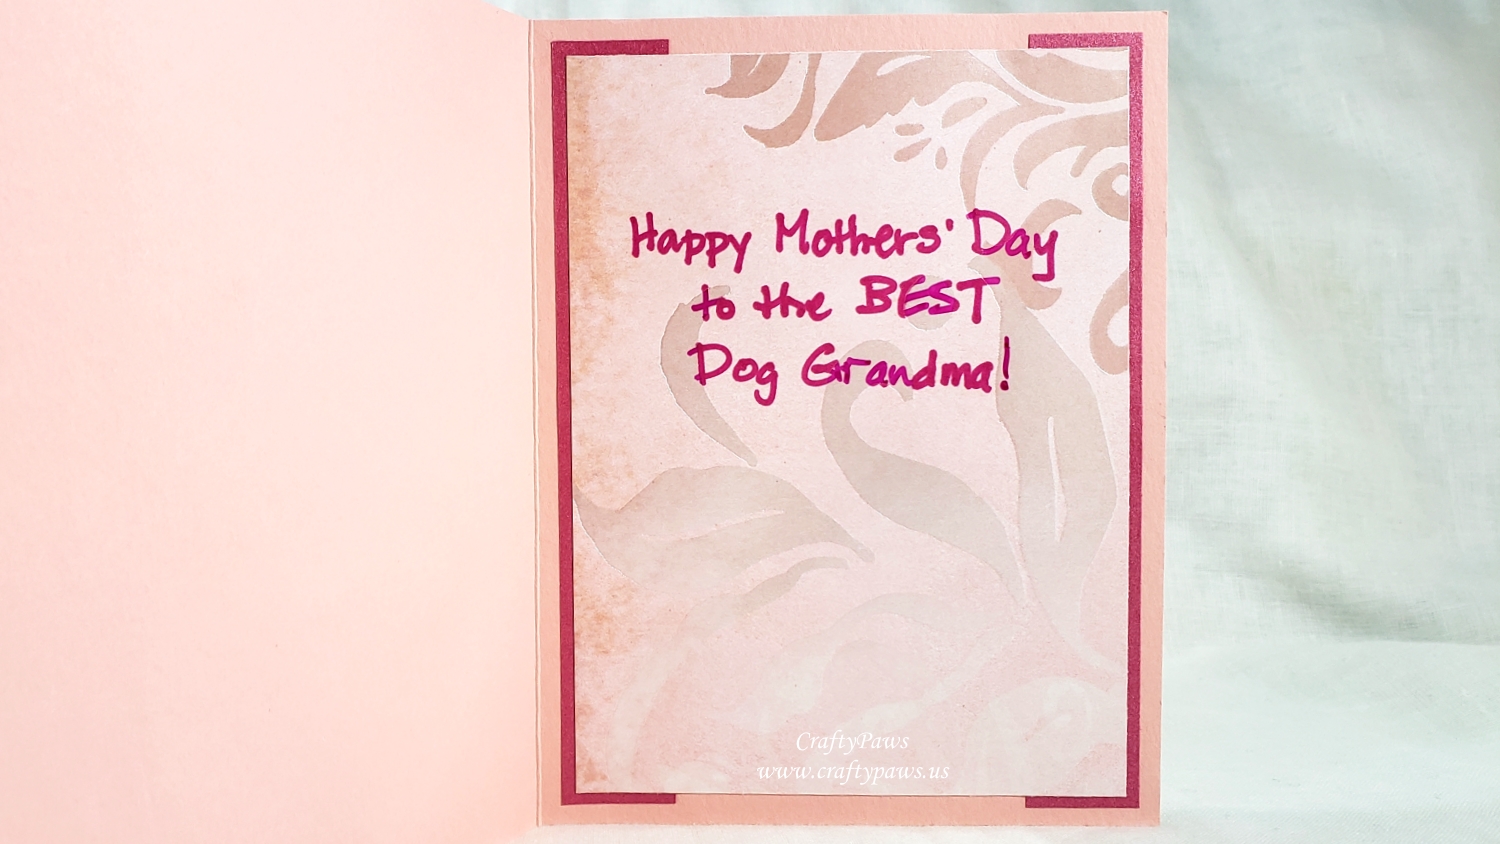
I used the left over scraps of the damask paper and the dark pink shimmer card stock to create a simple liner for the card. I hand printed the sentiment, “Happy Mothers Day to the BEST Dog Grandma!” using a hot pink Permanent Fine Point Sharpie.
CLICK on the following picture to watch the crafting process video:
Disclosure: Many of the supplies I’ve used for today’s project are linked. Some may be affiliate links, which means if you make a purchase I receive a small commission at no extra cost to you. I truly appreciate your support toward the costs of running this blog!
This puppy themed Mothers’ Day card is being entered into the following challenges:
Simon Says Stamp Wednesday For a Special Lady Challenge
Word Art Wednesday Anything Goes Challenge
Creatalicious Anything Goes with Optional Flowers Challenge
Simon Says Stamp Work It Wednesday Pet Project Challenge
Penny Black and More All Things Feminine with Anything Goes Challenge
Crafts Galore Encore Anything Goes Challenge
Through the Craft Room Door Anything Goes Challenge
Lil Patch of Crafty Friends Anything Goes Challenge
MFT Stamps Sketch Challenge #436
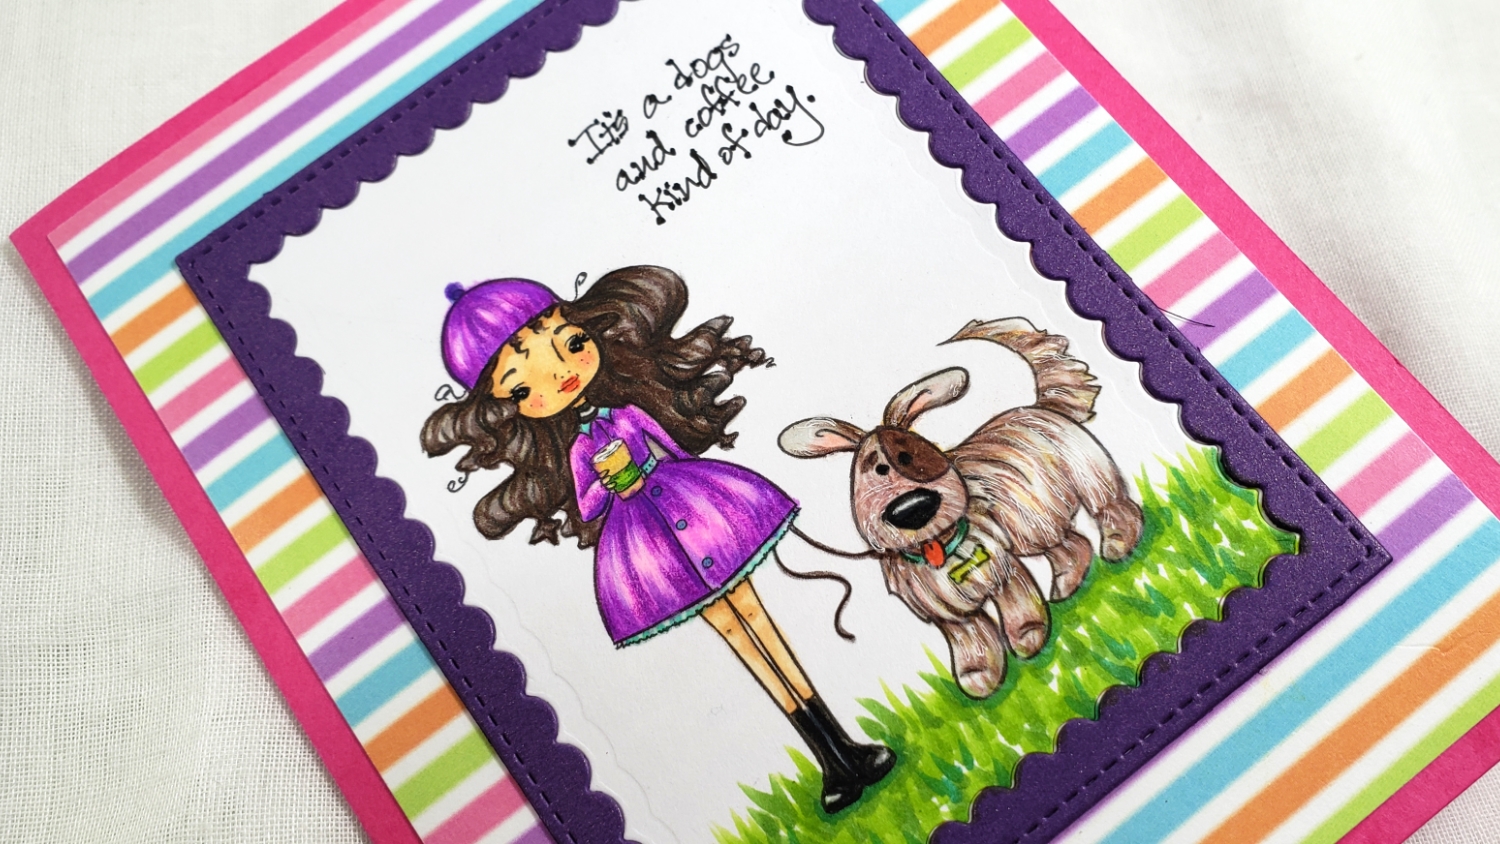
As my garden is in full spring bloom and I’ve been working outdoors a LOT painting my patio furniture, I thought I would pick some bright spring colors for this image. I first colored up Anna and Spike with the following Copics:
Skin: E51, E21 and R20 for blush
Hair: W1 and W3
Dress and hat: RV02, V04 with trim of dress using: BG11, BG13
Coffee cup: W1, YR21, YG25
Spike: W1, W3, YR21 and R20 for ears; Dog Collar: BG11, BG13; Dog Tag: YG25 and YR21
Lips and tongue: R08
Boots: W5 and W7
Grass: YG25, YG17 and G17
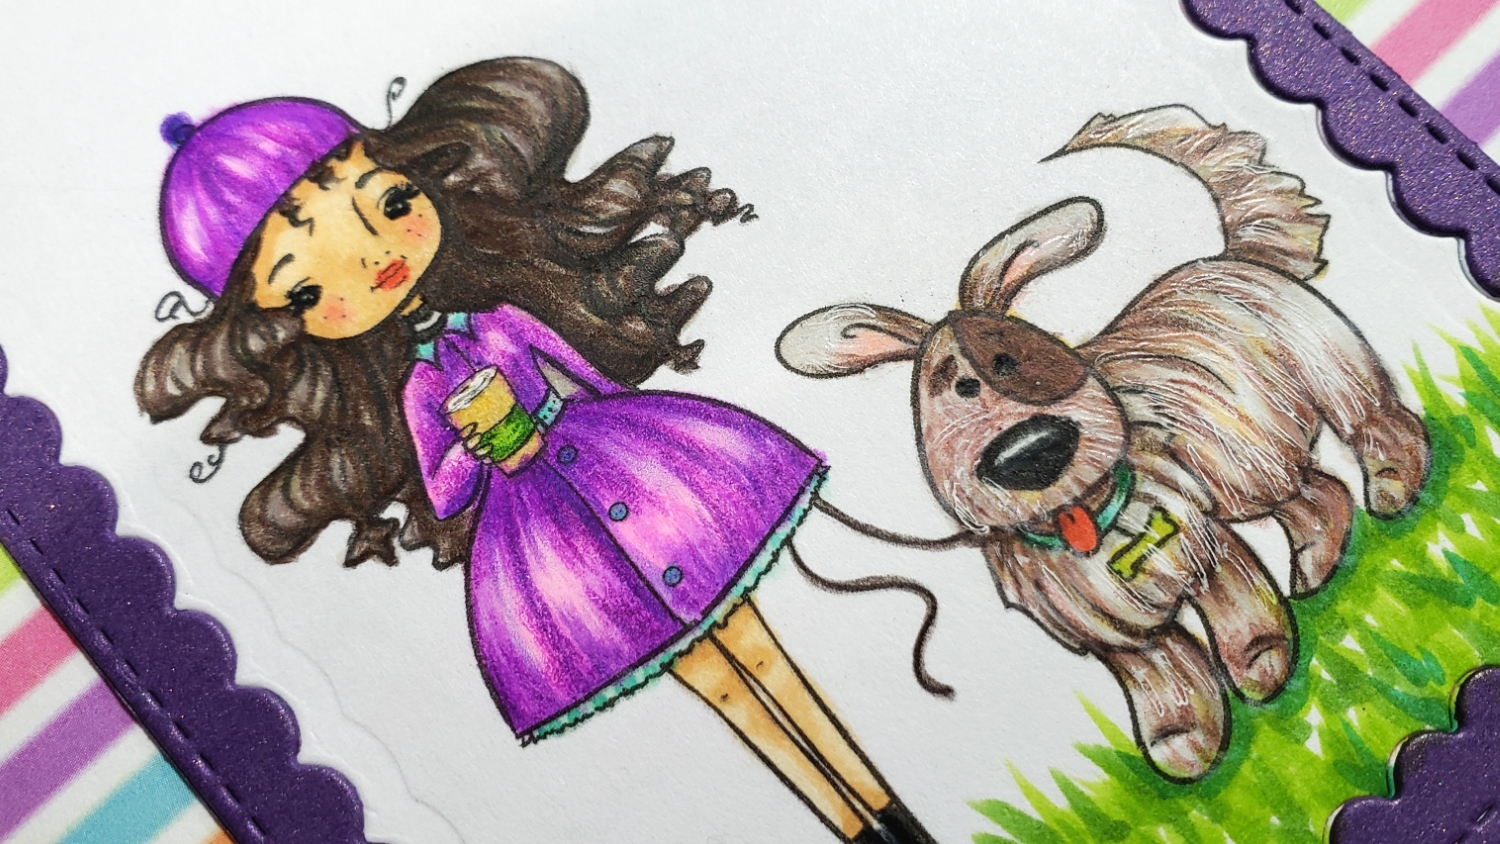
Then to add detail and texture I used the following Prismacolor Premier Color Pencils:
Hair: Metallic Gold (PC 950), Dark Umber (PC 947), Black (PC 935) and White (PC 938)
Dress: White (PC 938), Dahlia Purple (PC 1000),and Violet (PC 932)
Boots: Black (PC 935) and White (PC 938)
Spike: Chestnut (PC 1081), Dark Umber (PC 947), and White (PC 938) (I also added extra white fur with a Sakura White Gelly Roll Pen)
Coffee cup and Dog collar: Dark Green (PC 908)
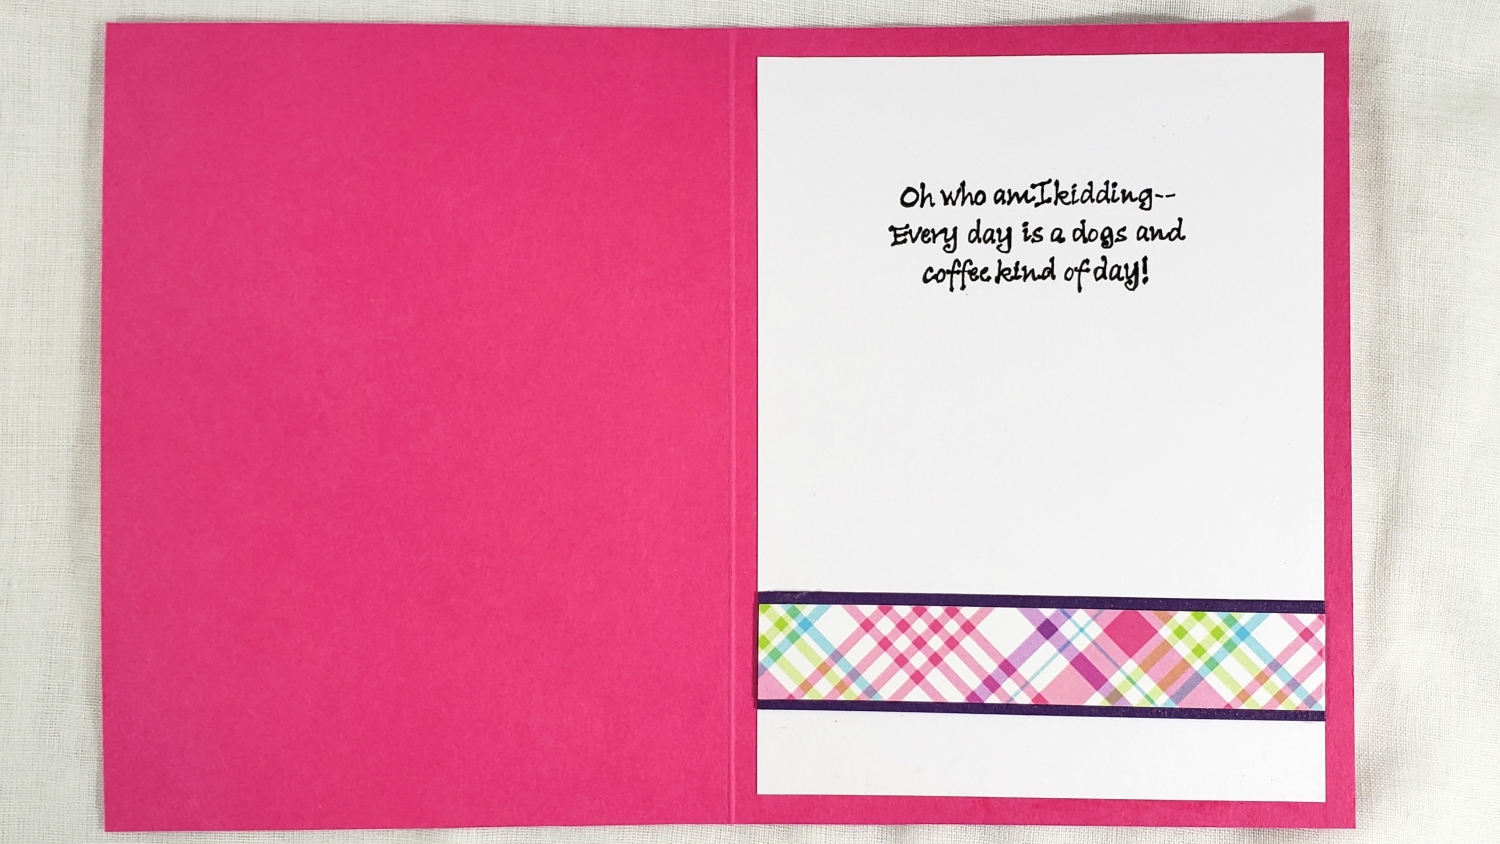
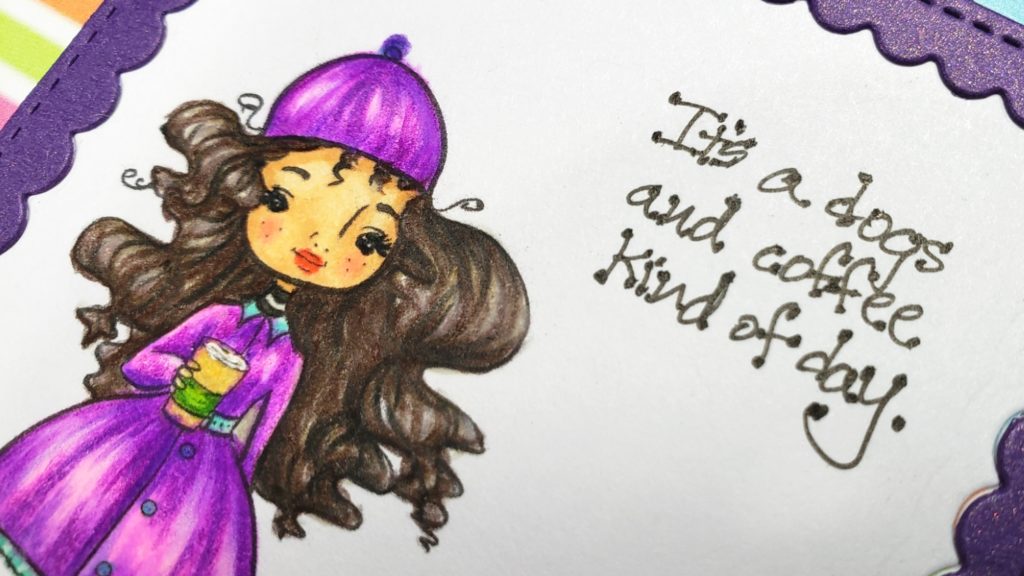
To keep the card focused on the colored image, I used complimentary colored card stock in bright pink for the card base, a fun striped rainbow colored card stock for the background, and a dark purple card stock for the frame around the picture. The frame was die cut using the smaller of the Pretty Pink Posh Scallop Frames Die Set. For a simple sentiment, I used a Faber Castell Pitt Pen in XS to hand write: “It’s a dogs and coffee kind of day.” on the front, and on the inside, it says: “Oh who am I kidding — Every day is a dogs and coffee kind of day!” And to keep the continuity of the card going, I used a plaid paper (the reverse of the striped paper on the card front) and a bit of extra dark purple card stock to add a patterned detail on the inside liner sheet.
CLICK on the following picture to watch a process video of creating this card (start to finish):
Next on the YouTube Craft Room Helpers Collaboration + Giveaway lineup is Jeanie – Scrapbookingmamaw: https://youtu.be/MJRJ2P5cvI0
Crafting By Design Anything Goes Challenge
Simon Says Stamp Work it Wednesday Pet Project Challenge
Word Art Wednesday Anything Goes Challenge
Creatalicious Anything Goes Challenge with Optional Flowers
Through the Craft Room Door Anything Goes Challenge
Crafts Galore Encore Anything Goes Challenge
]]>