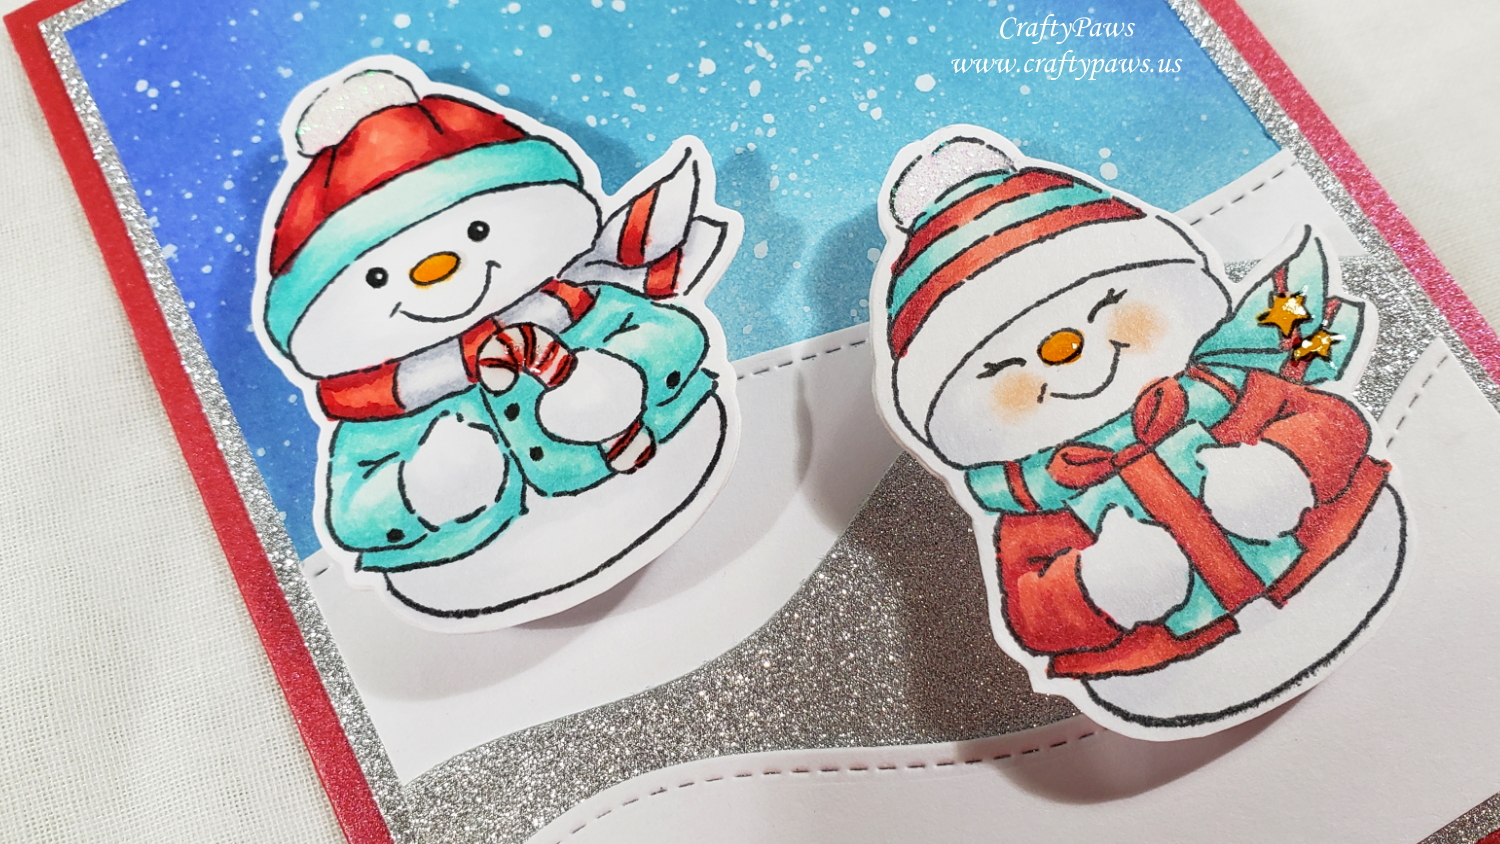
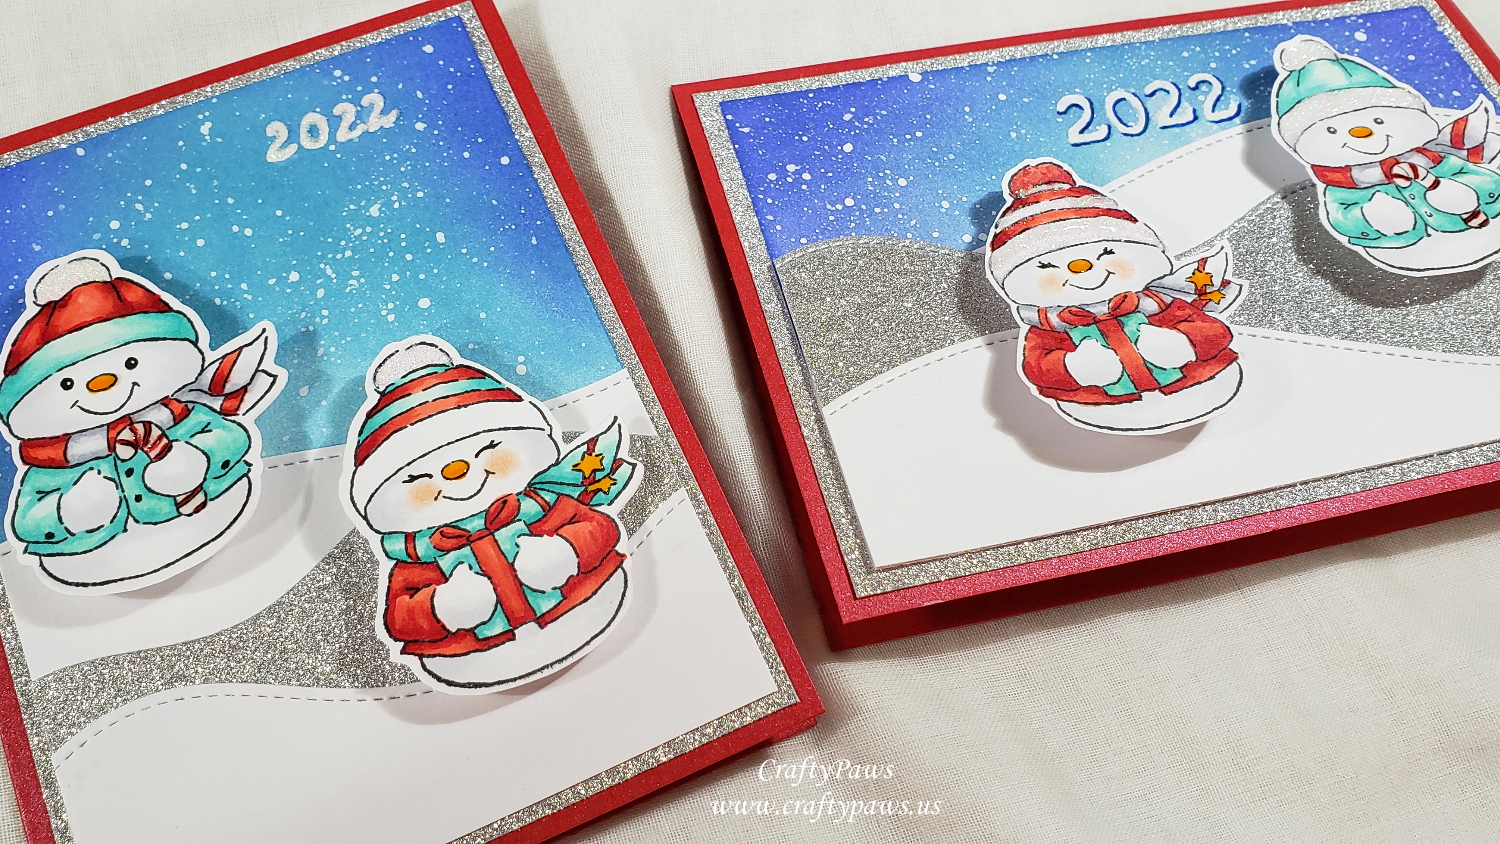
I used the Art Impressions Hampton Art snowman stamp and die set that I picked up a couple of years ago but had failed to use until now. The snowman and snowwoman (I made one more feminine by drawing in lashes with a 0.1 pt Copic Multiliner Pen) were pretty simple to color up, and with the cutting die that fit both images, they were really easy to prep. i used the following Copic markers to simply color them up in one of my favorite holiday color combinations (aqua, red, and white (grey)):
Noses (as if they were carrots) and stars on scarf: Y38 and YR04
Blush: R30, softened with 0 colorless blender
Aqua: BG10, BG32 and BG13
Red: R22, R24 and R29
White (grey): C00, C1 and C3
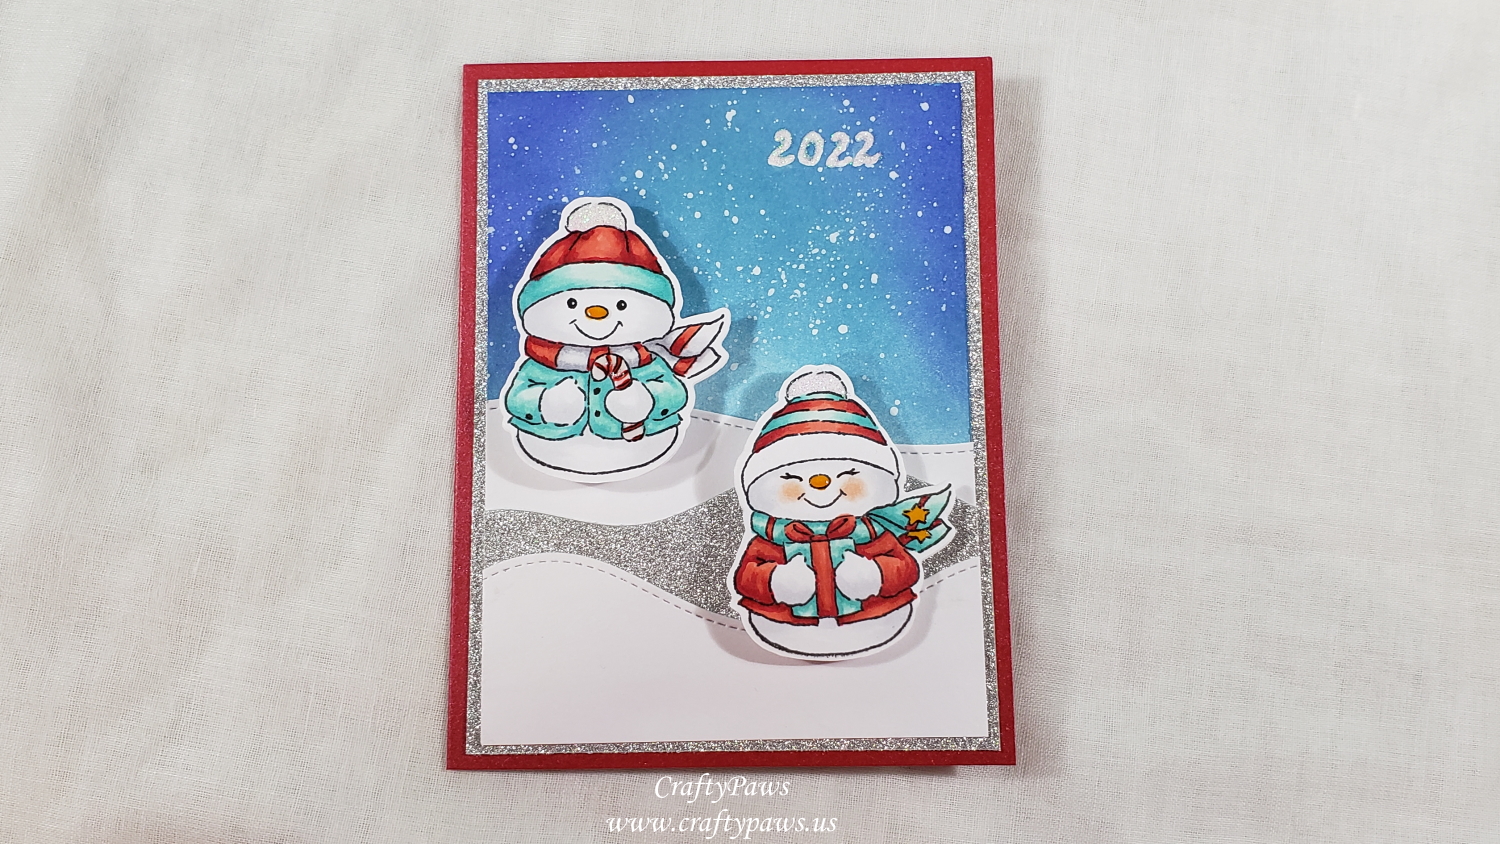
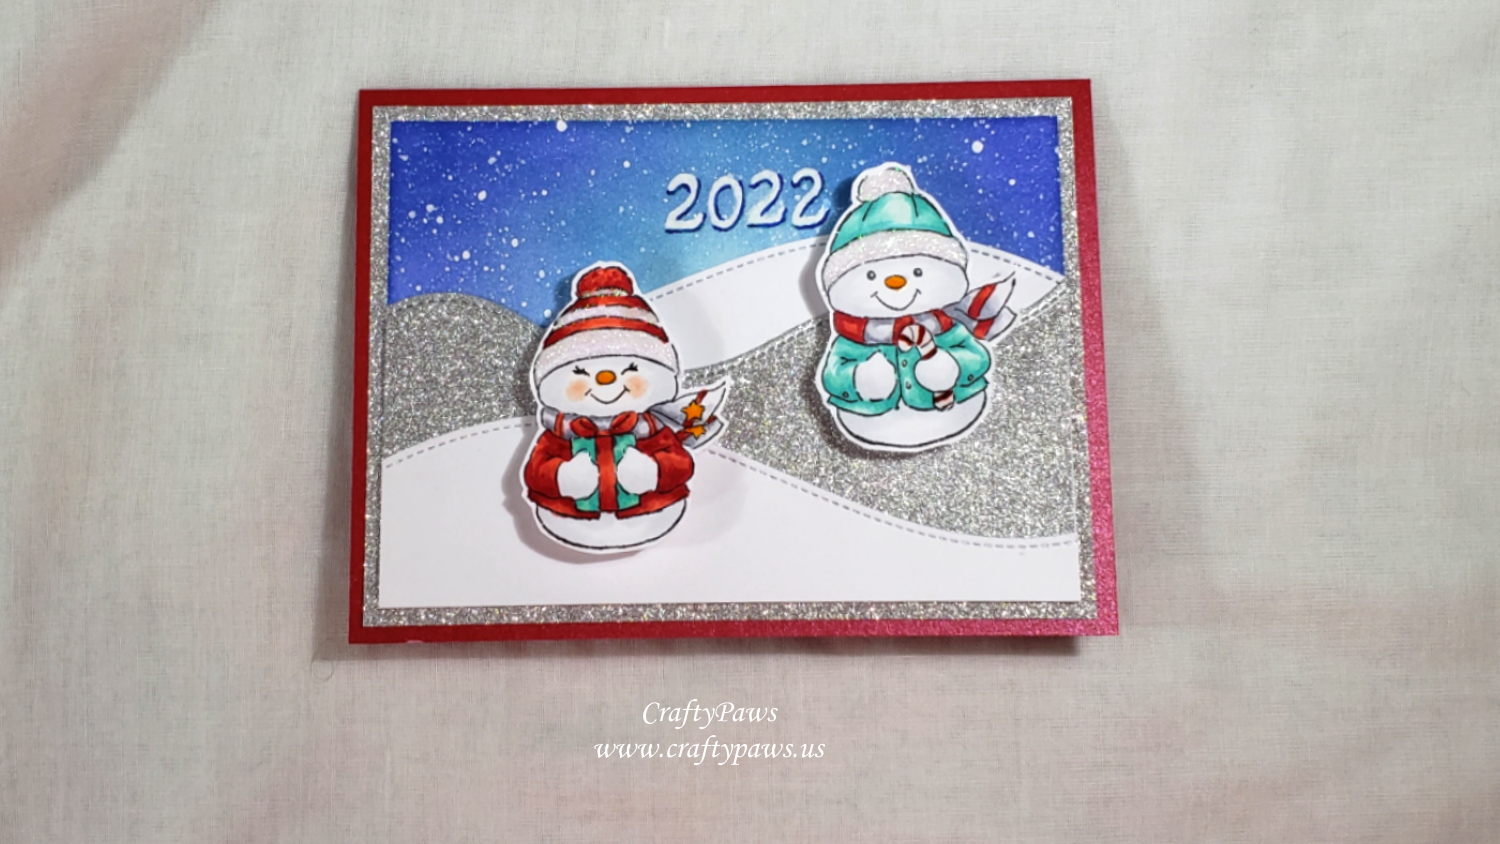
For the background, I wanted to create a sky with falling snow and a foreground with layers of snowy hillsides. I used one of my most used dies for the layers of snow, the Lawn Fawn Stitched Hillside Die. To add texture and sparkle, the middle layer was cut from silver fine glitter cardstock and the first and third layers were from plain white cardstock. The sky was made by blending on Tim Holtz Distress Ink in Broken China and Blueprint Sketch, and splattering white acrylic paint with an old toothbrush for a snowy effect.
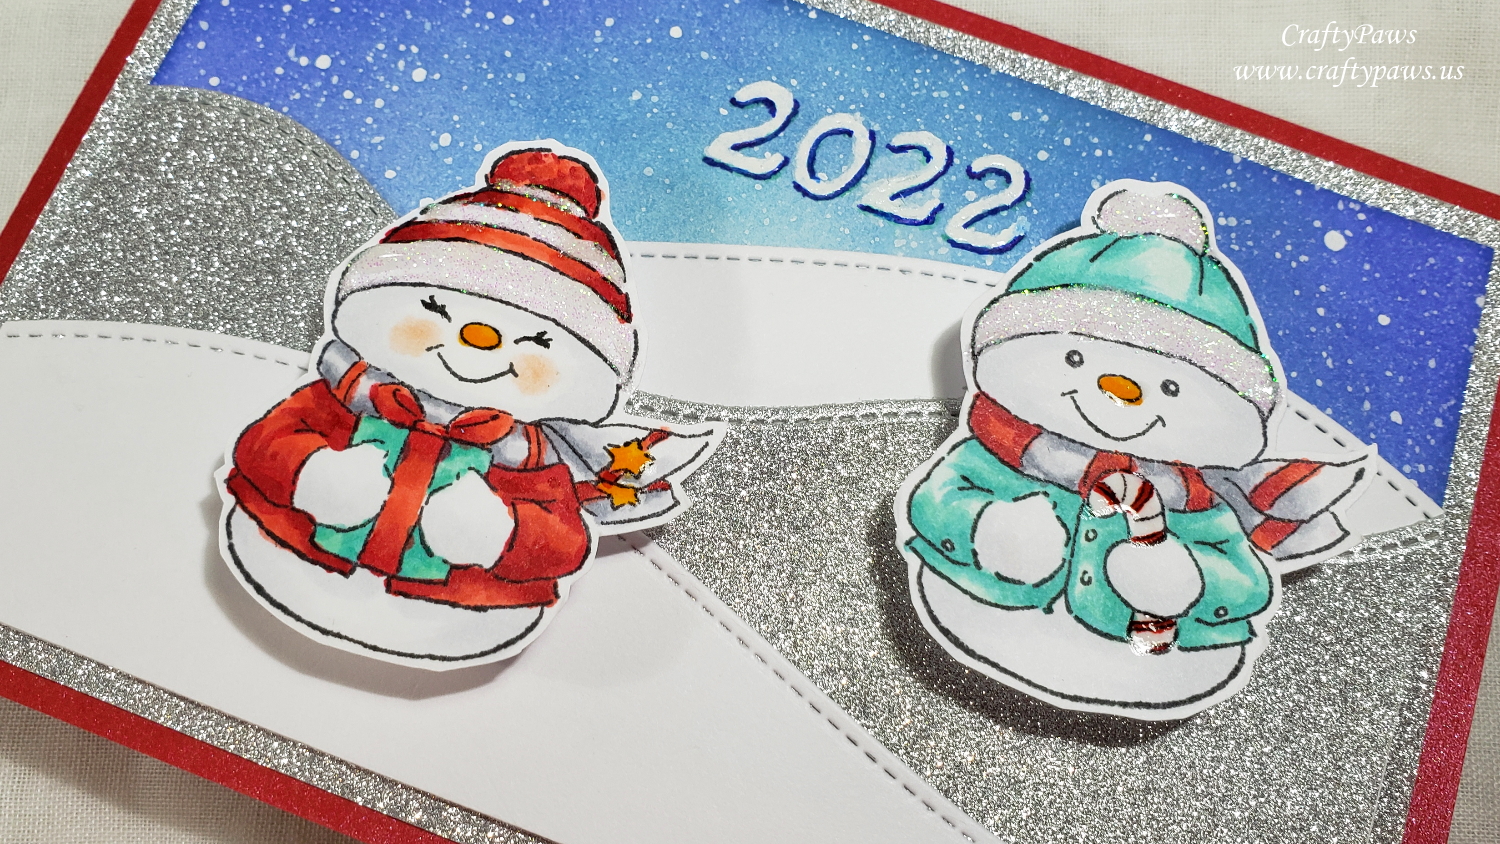
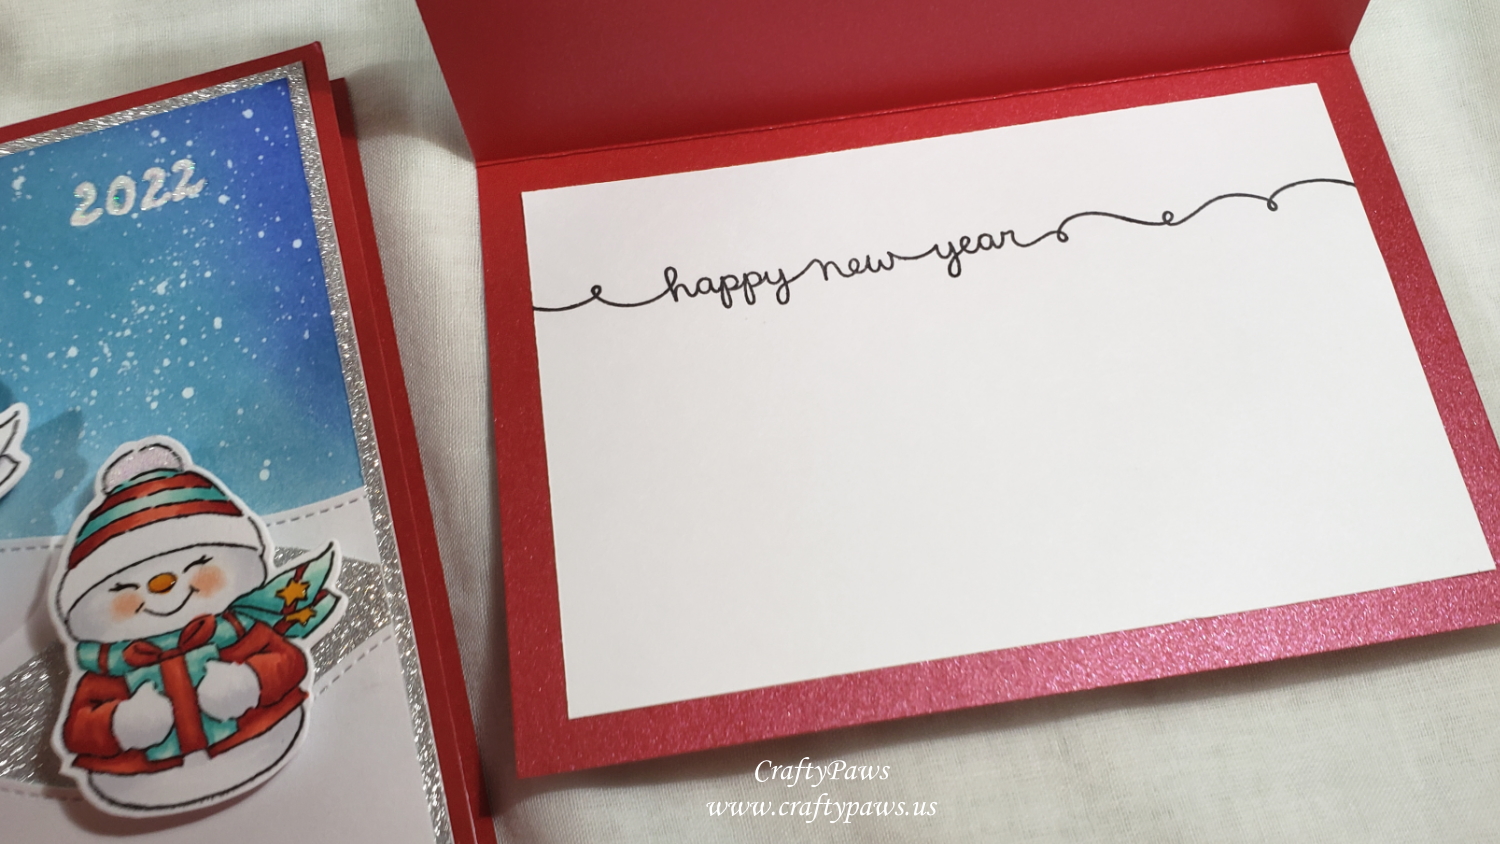
To make this a new years card, rather than a holiday card, I used a white paint Sharpie marker to write “2022” and used glitter glue to add sparkle or added shadowing with an Ultra Fine Point Sharpie marker in navy. For the inside card liner, I used another favorite sentiments stamp set, the Lawn Fawn Winter Scripty Sayings to add a “happy new year” sentiment.
To add a classic festive look, I matted the card front onto more fine glitter silver cardstock before putting the whole thing on a shiny red cardstock card base. I also added shine to the candy cane and noses with Ranger Glossy Accents and sparkle to the snow people’s clothes with glitter glue. Lastly, to inject some added fun, I put the snow people up on InkyStamper Wobbles (I’ve made these by hand with wire wrapped around a pencil, but I have to say, using ready-made ones are much easier).
Please CLICK on the photo below to watch the process video of how to craft this card:
Disclosure: Many of the supplies I’ve used for today’s project are linked. Some may be affiliate links, which means if you make a purchase I receive a small commission at no extra cost to you. I truly appreciate your support toward the costs of running this blog!
These cards are being entered into the following challenges:
Through the Craft Room Door Anything Goes Challenge
Crafts Galore Encore Anything Goes Challenge
Crafty Gals Corner Merry and Bright Challenge
Word Art Wednesday Anything Goes Challenge
]]>

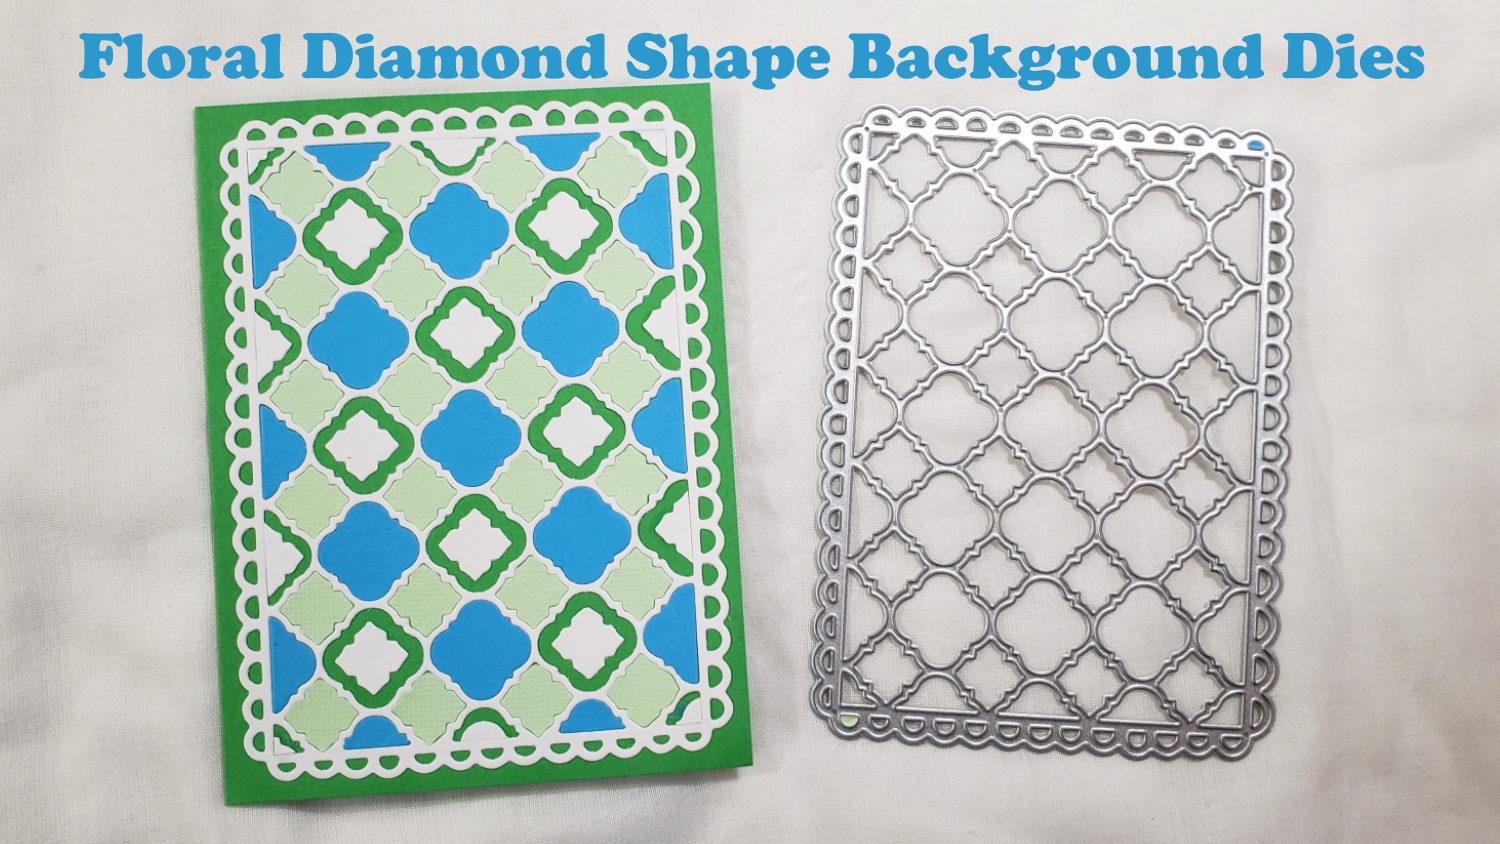
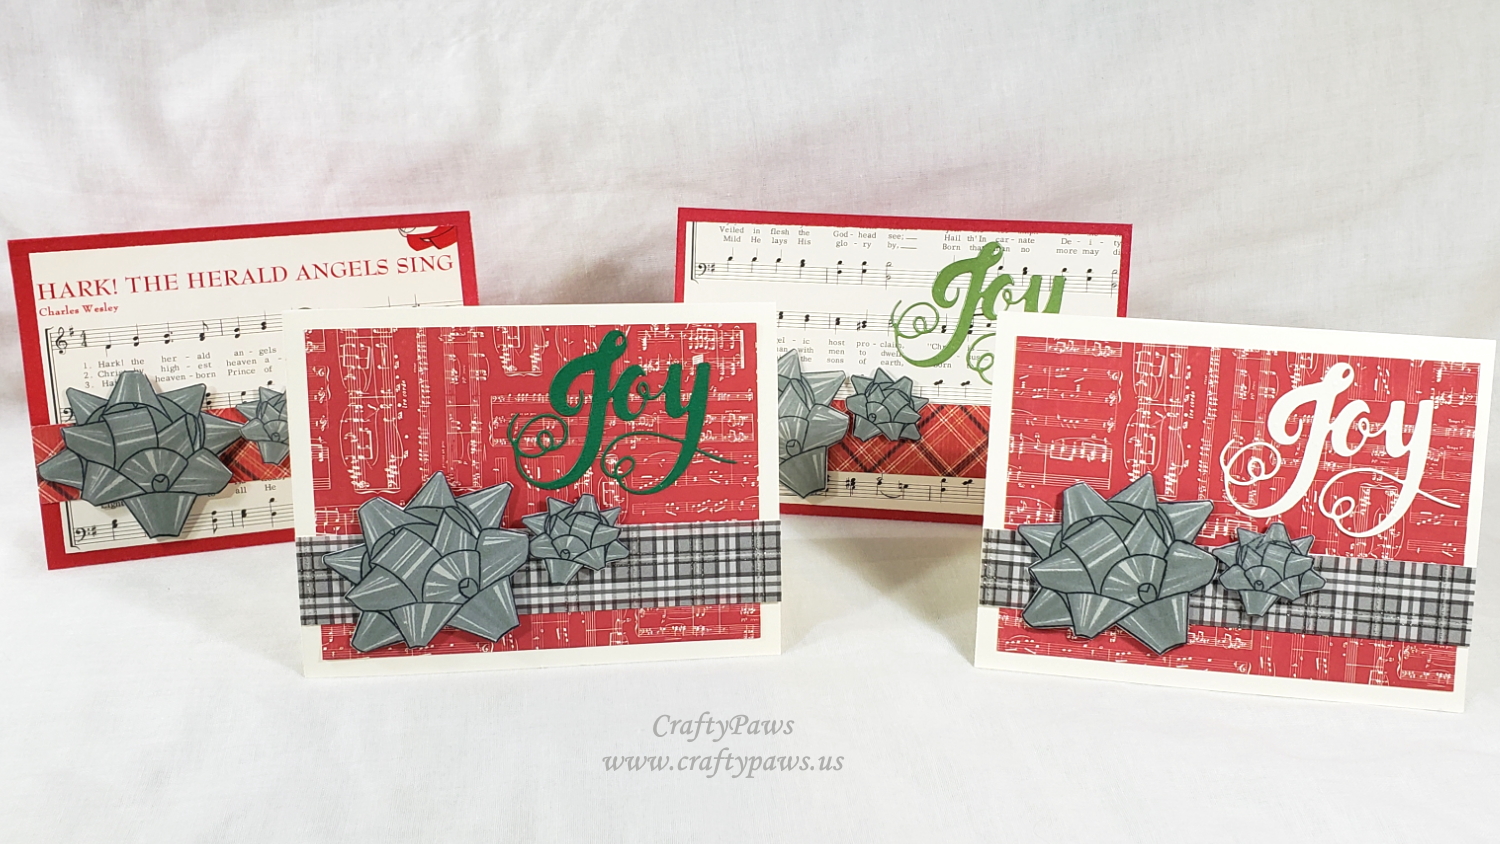
As I looked down the barrel of less than 1 week to Christmas, I started to panic, noting that I only had 1 pre-made handmade holiday card. So I decided to try to make some “mass-make” cards. I used the Altenew Bells and Bows stamp and die set, the JOY from the Diemond Dies Holiday Words Die Set, and a card base I made ages ago with the Floral Diamond Shape Background Dies. NOTE: I’m not sure if these codes still work, but at Diemond Dies you might try “thankskristina” at checkout for 10% off and free shipping on orders of $35 or more AND at inloveartshop.com you might try the code G-36967 for 20% off.
First I stamped out the big and small bows as well as the bell using 3 grey tone Lawn Fawn Fundamentals inks in Manatee, Hippo, Storm Cloud, and my Memento Tuxedo Black. (Watch my video below to get some tips on how to best align the layering stamps for perfect results!) Then I used the accompanying dies to cut them out. Lastly I created card bases with scraps from my patterned paper scrap bin using the rule of thirds to make 4 cards and added the stamped bows with double sided foam adhesive to add special handmade details and dimension:
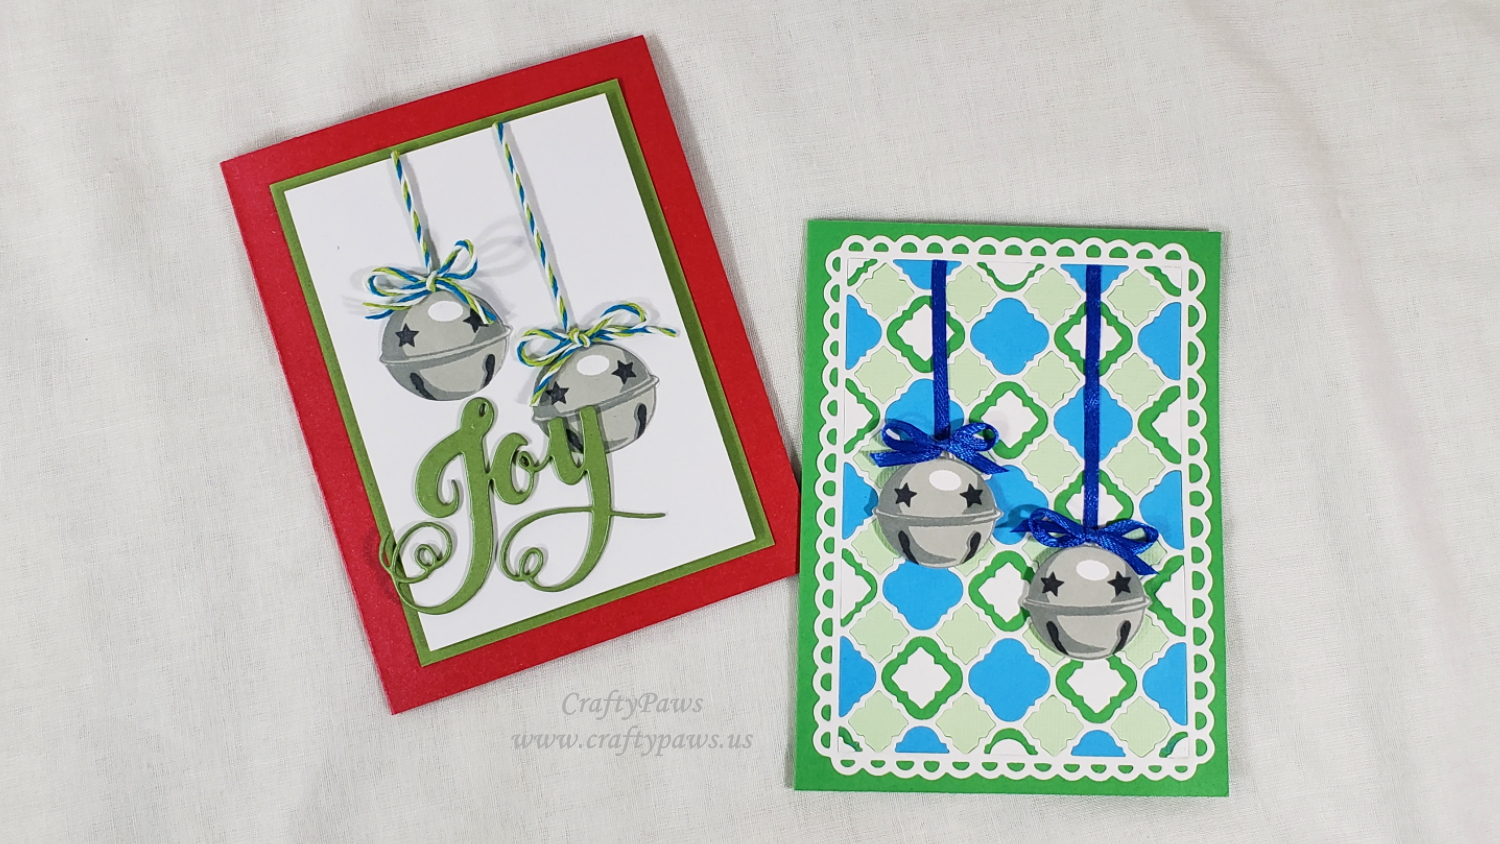
I decided to pair the remaining 4 stamped bells onto 2 cards that I made using an old card base made with the aforementioned inloveartshop floral diamond background die with thin blue satin ribbon and another layered card base using tri-colored bakers twine. I think the key to making quick cards but getting the payoff (and credit) for the unique special feeling of handmade is to add dimension with foam adhesive, interest with ribbons and twine, or bling it on with glittered papers or sequins.
CLICK on the picture below to watch my video tutorial:
Disclosure: Many of the supplies I’ve used for today’s project are linked. Some may be affiliate links, which means if you make a purchase I receive a small commission at no extra cost to you. I truly appreciate your support toward the costs of running this blog!
These cards are being entered into the following challenges:
Stamping Sensations Choose a Theme and Stamp It Challenge
Crafts Galore Encore Anything Goes Challenge
Simon Says Stamp Wednesday Bling It On Challenge – especially the glittered plaid Joy cards
Creatalicious Anything Goes with Optional Traditional Christmas Colors Challenge
Word Art Wednesday Anything Goes Challenge
]]>
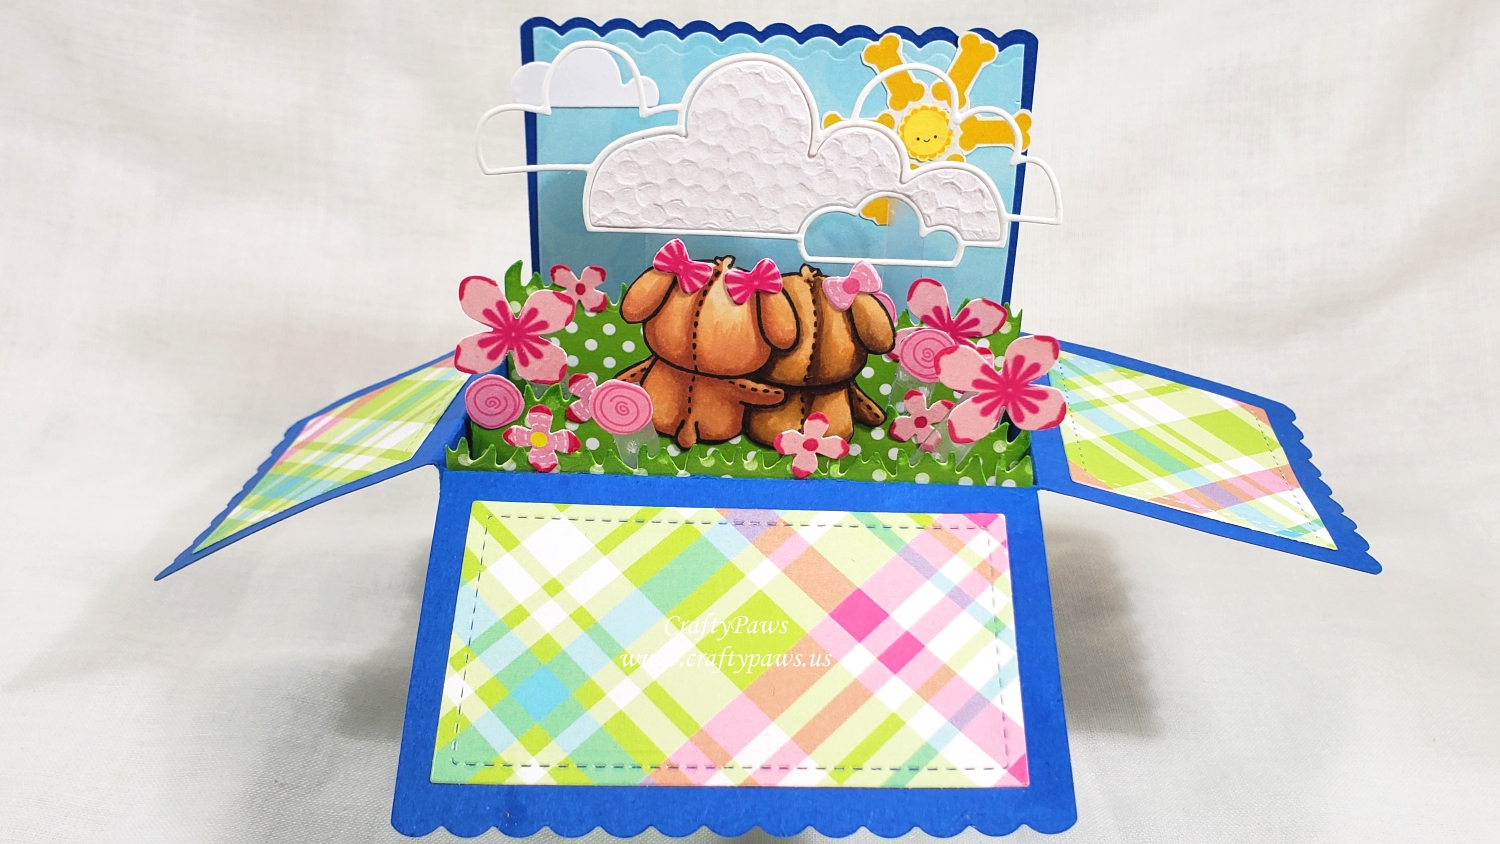
I wanted to create a special, interactive and full card for her, so I got out my Hampton Art-Mama Elephant Lovey Puppy Stamp and Die Set and decided to use the pair of puppies huddled together to represent the two of us — the way we used to daydream about the future together.
The left puppy is colored with Copic E21, E13 and E15
The right puppy is colored with E50, E53, E55 and E57
I fussy cut them out with my Fiskars Spring Loaded Scissors, inked their edges with a Momento Tuxedo Black Marker, and set them aside to prep the card base.
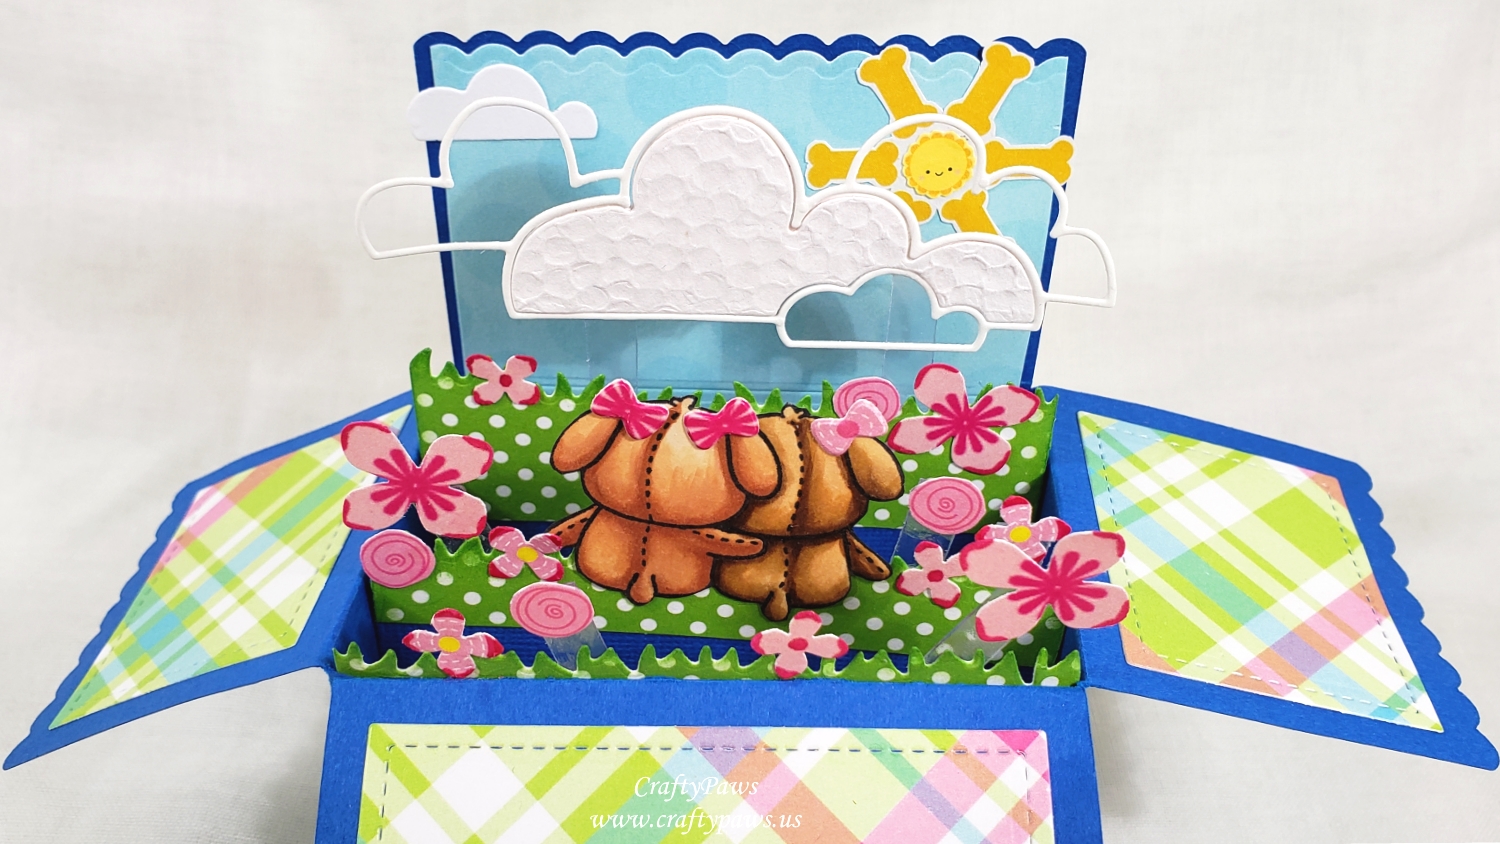
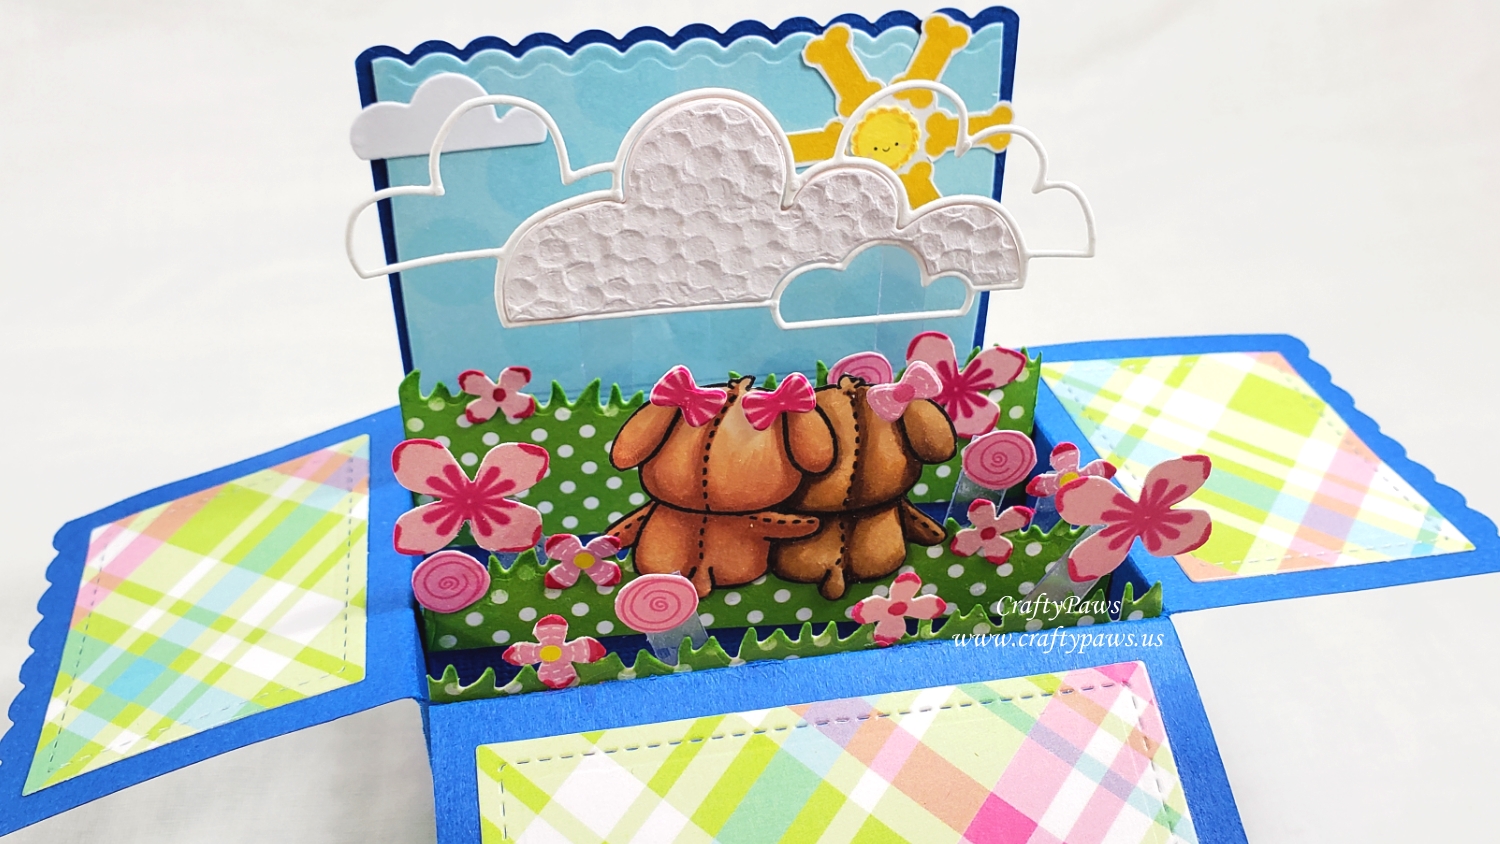
I created the pop up box card structure with an 8.5″ x 11″ piece of blue card stock using the Lawn Fawn Scalloped Box Card Pop Up Die Set. I also used scraps of plaid, pale blue polka dot, and small green and white polka dot patterned papers to decorate each panel and add a grassy ground. I inked the edges of the green polka dot paper cut with the MFT Grassy Hills Die-Namics Dies with Tim Holtz Distress Ink in Mowed Lawn to give a finished look.
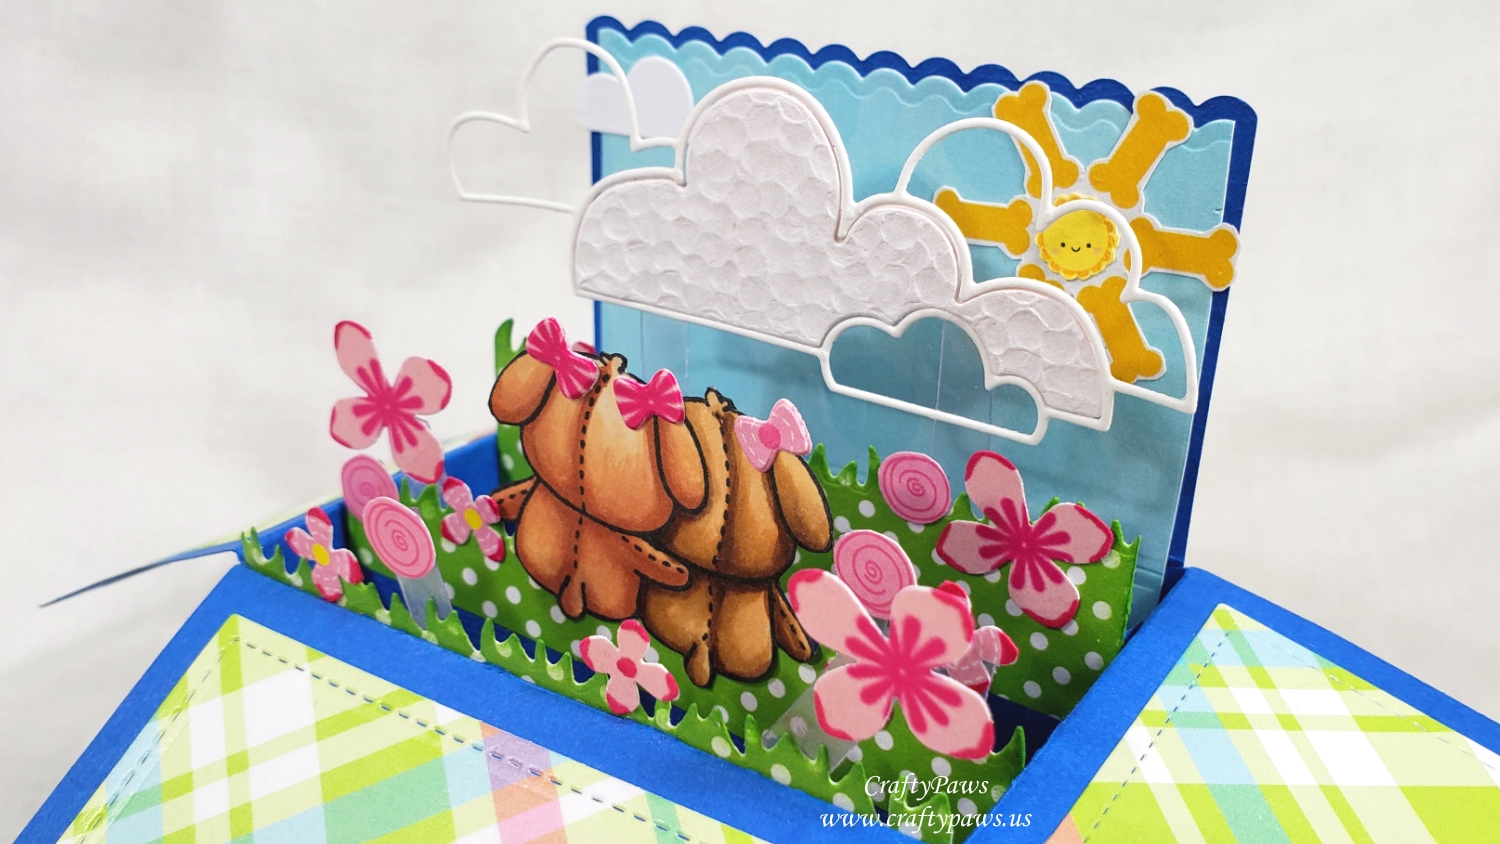
Then on to the fun decorating! I found a scrap of doggy bone paper that I fussy cut out to make a kind-of sun, centering it with a fussy cut actual sun image from another scrap left no room for doubt that this was supposed to represent a sun. To create a scenic background, I used an old Simon Says Stamp Cloud Banks Die (retired) and inset some textured white paper only into the main center cloud to create interest and see-through dimension. Then I used an old Martha Stewart Hydrangea Trio Punch (also retired; but THIS ONE from EK Success is very similar), various pink patterned paper scraps, and a Copic RV09 to create the feeling of a bountiful summer flower garden. The clouds and many of the flowers were attached with Ranger Multi Medium Matte to clear plastic strips I reclaimed/upcycled from craft packaging to suspend them into the air/space above the box card.
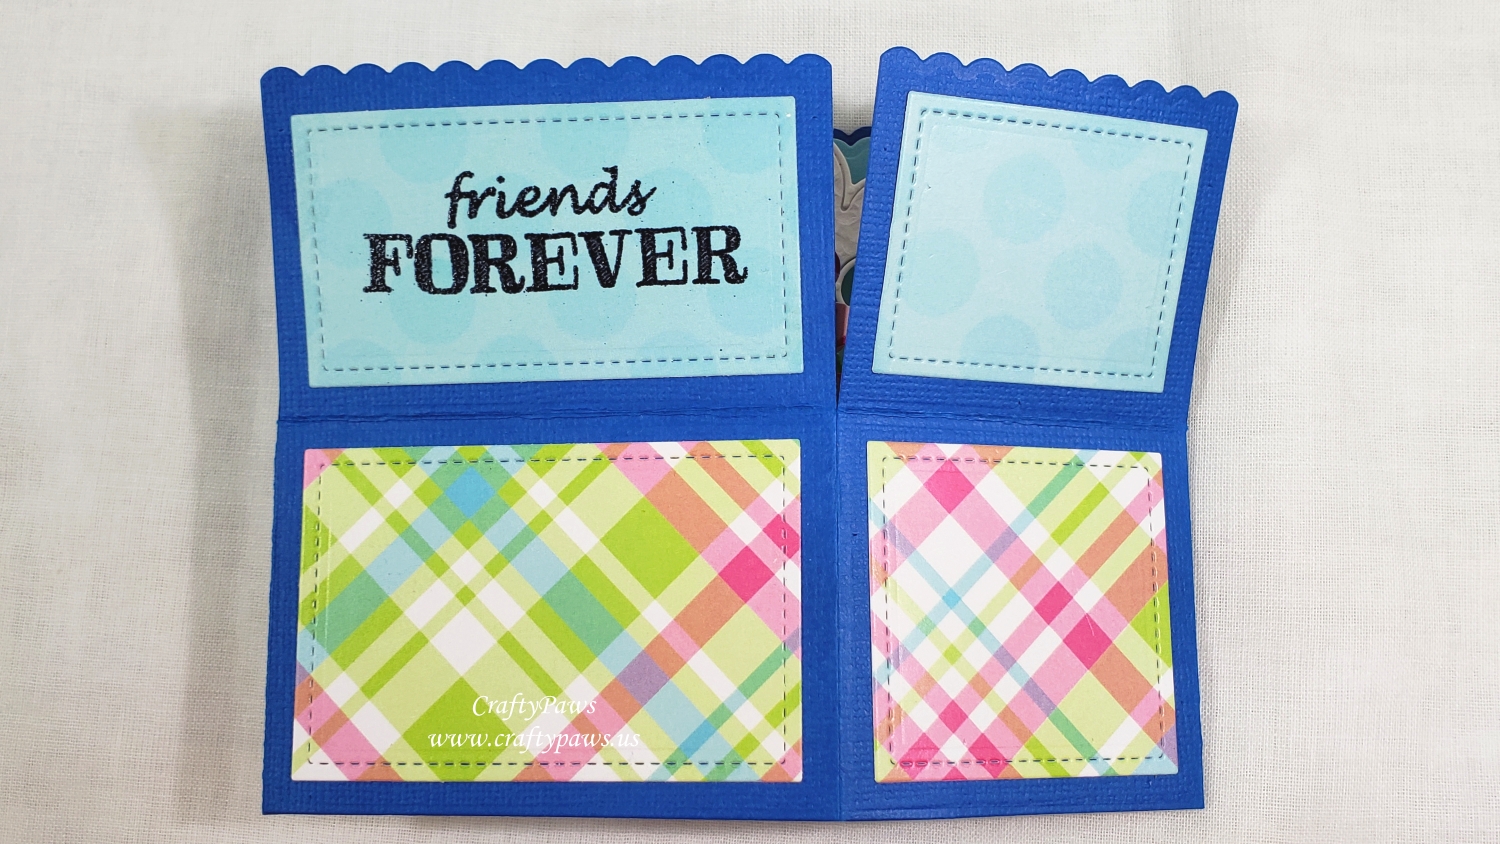
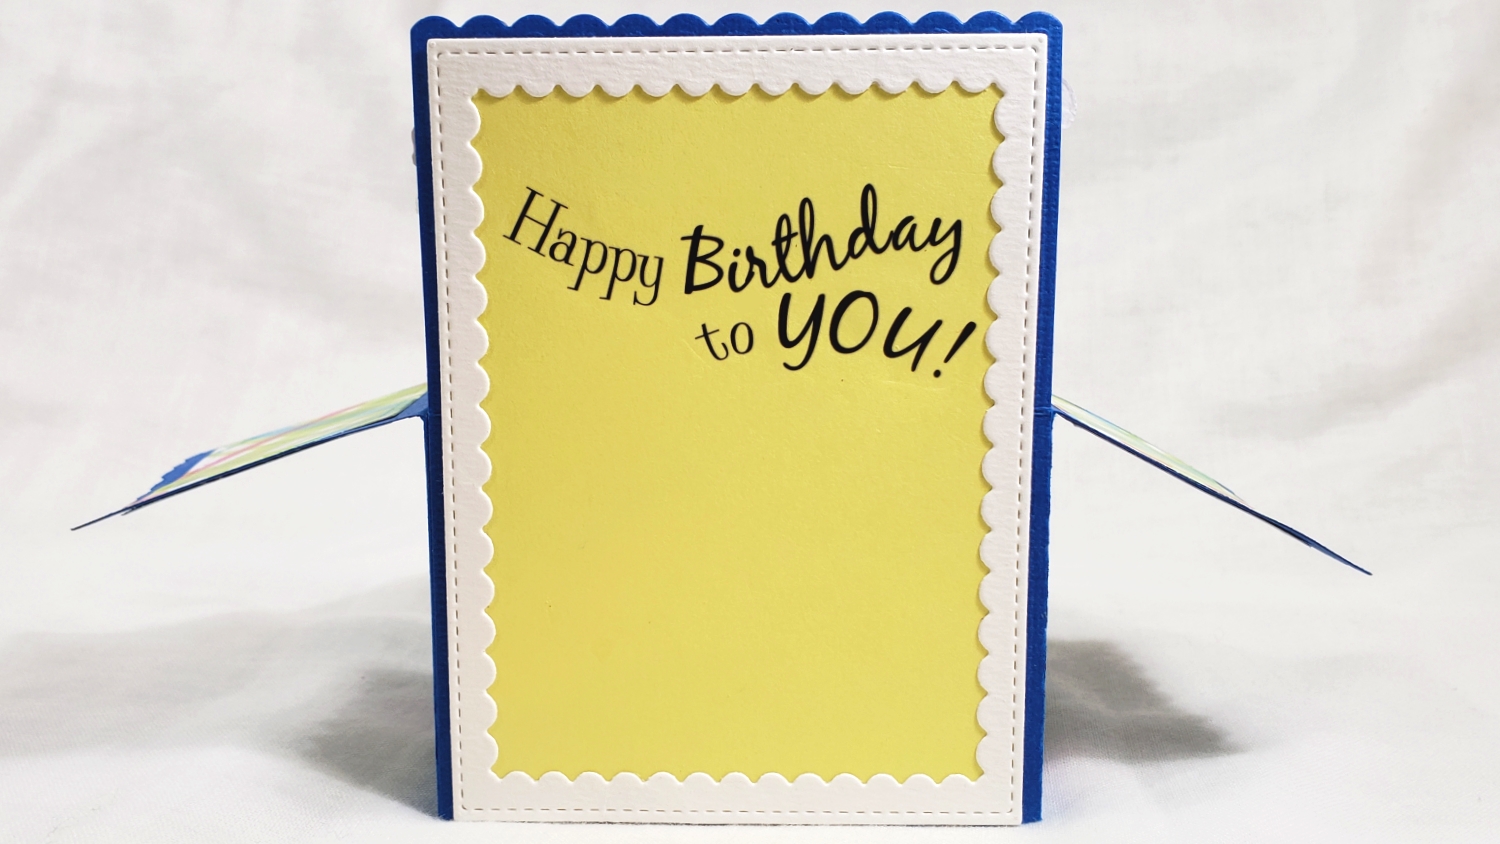
For the underside of the main flap (which will be seen first when the recipient takes the card out of the envelope), I prepped a die cut stitched rectangle from more of the pale blue polka dot patterned paper with my EK Success Powder Tool and heat embossed the sentiment, “Forever FRIENDS” with VersaMark Ink and Ranger Black Embossing Powder. For the back side of the card (where the message will be written), I used a Pretty Pink Posh Scalloped Frame Die and some scrap yellow card stock. I also used up another rub on from my stash that reads, “Happy Birthday to You!”
CLICK on the following picture to watch the process video of crafting this pop up box card:
Disclosure: Many of the supplies I’ve used for today’s project are linked. Some may be affiliate links, which means if you make a purchase I receive a small commission at no extra cost to you. I truly appreciate your support toward the costs of running this blog!
This card is being entered into the following challenges:
Crafting By Design Happy Birthday Challenge
Creatalicious Anything Goes with Optional Spots and/or Stripes Challenge
Word Art Wednesday Anything Goes Challenge
Simon Says Stamp Work It Wednesday Summer Vibes Challenge
Stamping Sensations Show Your True Colors Challenge
Crafty Gals Corner Polka Dots and/or Stripes Challenge
MFT Stamps Birthday Project Challenge
Lil Patch of Crafty Friends Anything Goes Challenge
Penny Black and More Blossoms, Butterflies and Bugs Challenge
Through the Craft Room Door Anything Goes Challenge
]]>

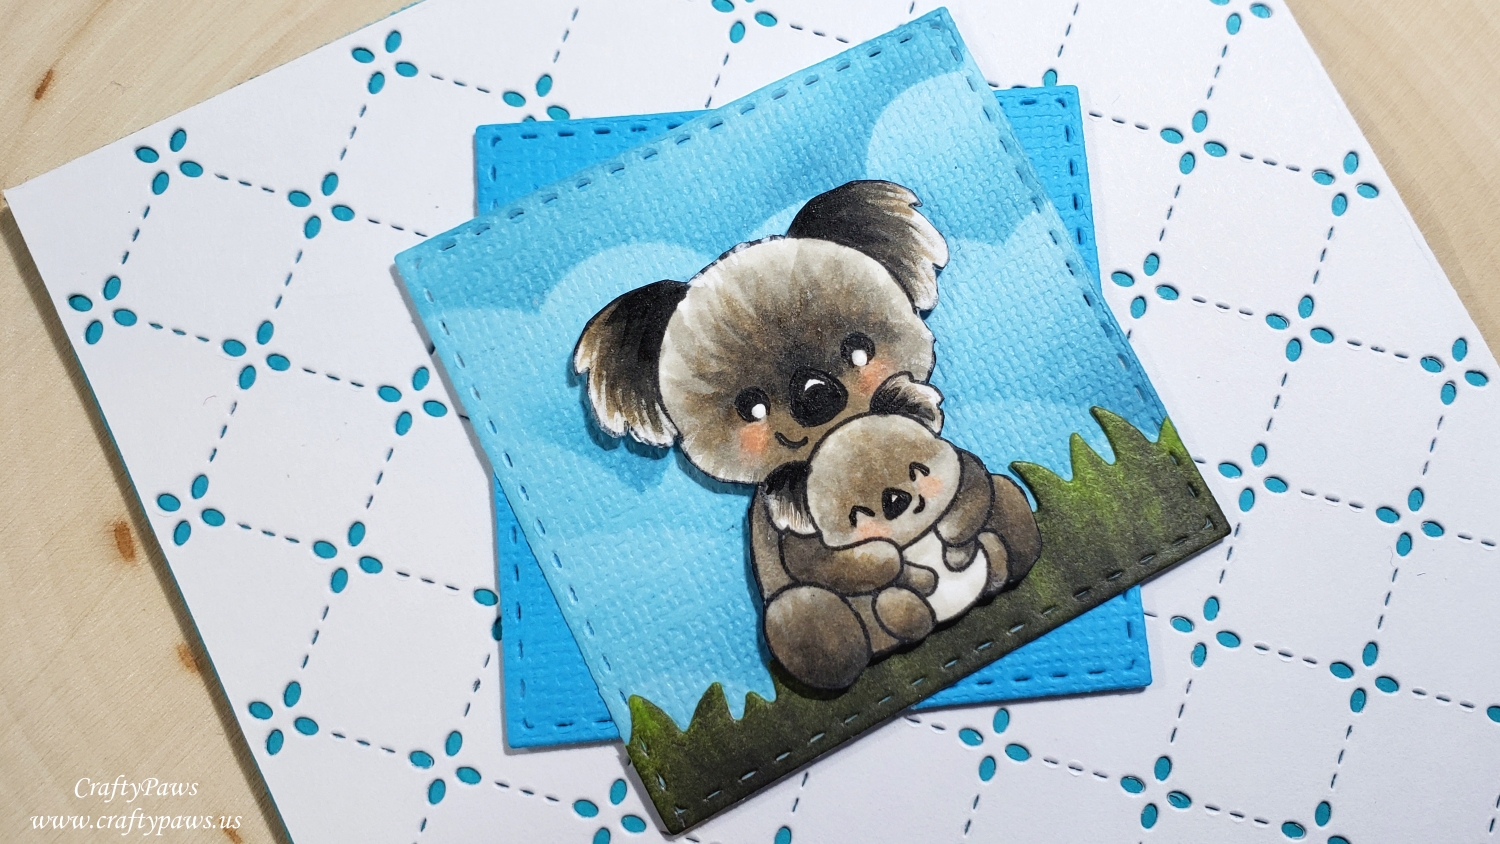
I started with a blue card base and then used the adorable Lawn Fawn “Quilted Backdrop Die” to create a clean white overlay. Then I used a couple of pale blue and mid-tone blue scraps of card stock that I cut down with one of the Simon Says Stamp Stitched Squares Die Set. I used the lighter one for the main background, but to add a bit of interest, I blended on clouds using the My Favorite Things Clouds Stencil with Broken China Tim Holtz Distress Ink.
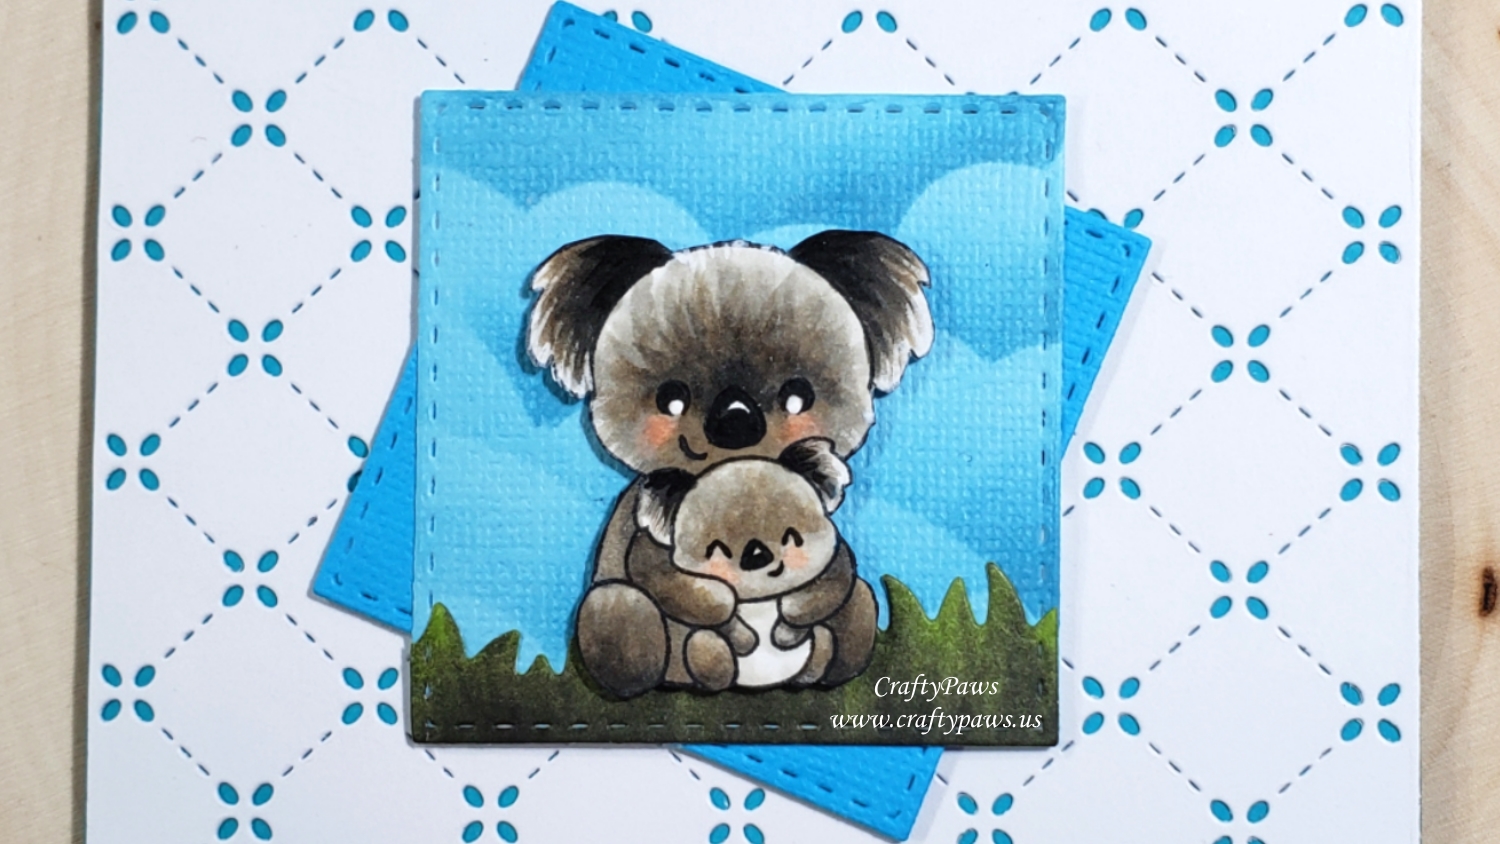
Then for the adorable koalas, I Copic colored them with the following colors:
W0, W1, W5 W7, W9, R30 and E43
I also used a Uniball Signo White Gel Pen to add some white fur texture and highlights to the papa koala’s eyes, and a Copic Multiliner Pen in 0.03 pt to re-define and darken the eyes and noses of both koalas.
Then I fussy cut them using my favorite Fiskars Spring Loaded Scissors and inked the edges with a Momento Tuxedo Black Marker.
Lastly, I colored up a plain white card stock scrap with W5 and YG25 and used an My Favorite Things Grassy Hills Die-namics Die (if not available near you, there is a similar Lawn Fawn Grassy Hillside Borders Die) with the Simon Says Stamp Stitched Squares Die Set to add a grassy ground on which the koalas could sit.
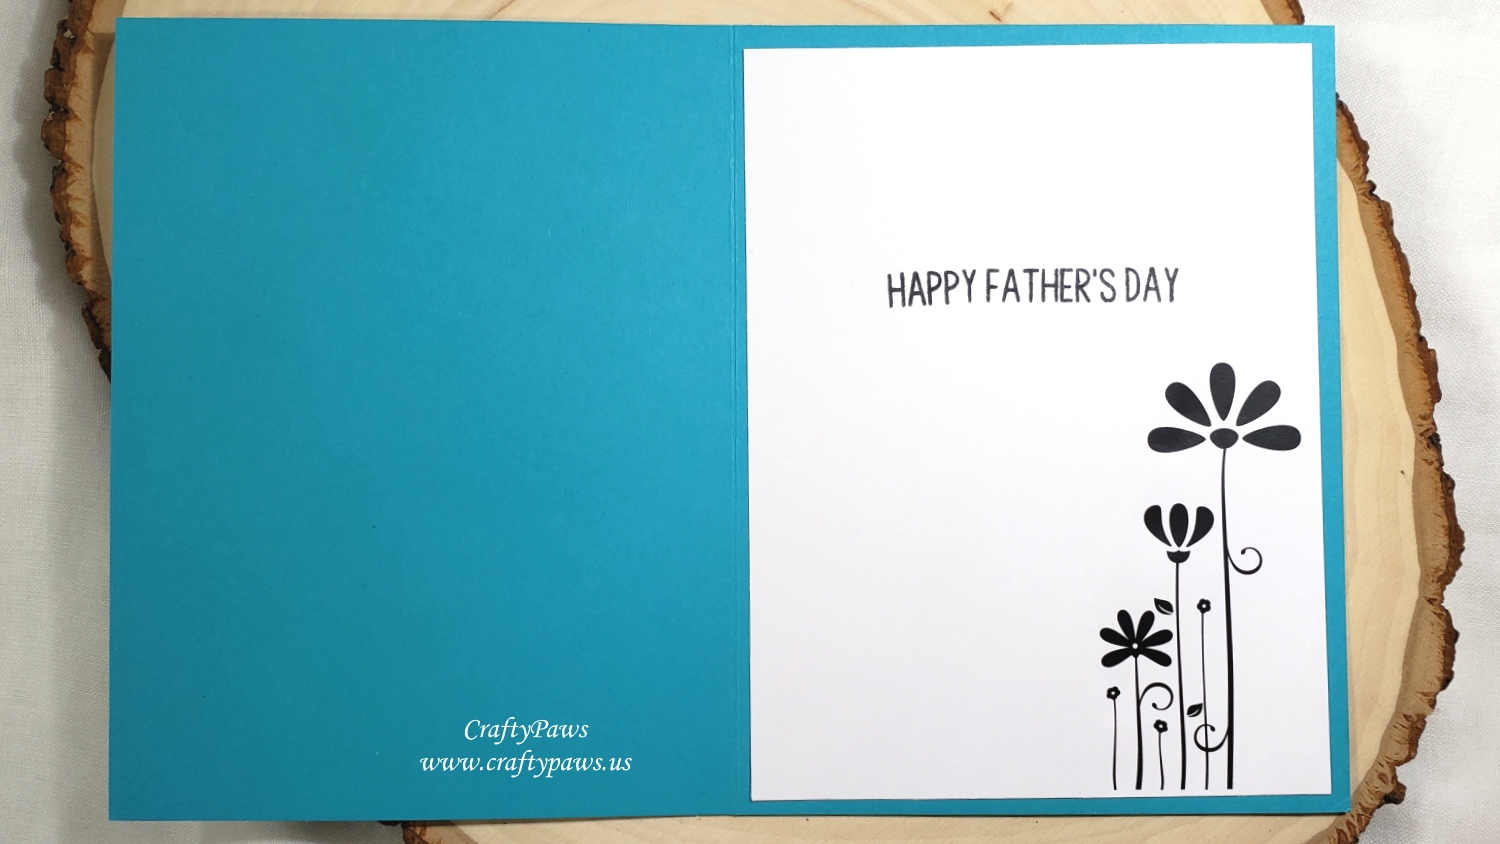
The sentiment, which was also from the Clearly Besotted “Just the Two of Us” stamp set, was stamped with VersaMark Ink heat embossed with Ranger Super Fine Detail White Embossing Powder onto the last scrap of the pale blue card stock. For the inside card liner, I stamped out “HAPPY FATHER’S DAY” from the Kindred Stamps “Galactic Adventures” stamp set (which happened to still be sitting on my cluttered desk from my last card), and I used an old rub-on grouping of graphic flowers that seemed to coordinate well with the pattern on the Lawn Fawn “Quilted Backdrop Die”.
CLICK on the following picture to watch the process video:
Disclosure: Many of the supplies I’ve used for today’s project are linked. Some may be affiliate links, which means if you make a purchase I receive a small commission at no extra cost to you. I truly appreciate your support toward the costs of running this blog!
This card is being entered into the following challenges:
Word Art Wednesday Anything Goes Challenge
Through the Craft Room Door Anything Goes Challenge
Crafts Galore Encore Anything Goes Challenge – WINNER
Crafter’s Castle Anything Goes with Optional Mixed Media Challenge
Craft Gal’s Corner You’re the Man Challenge
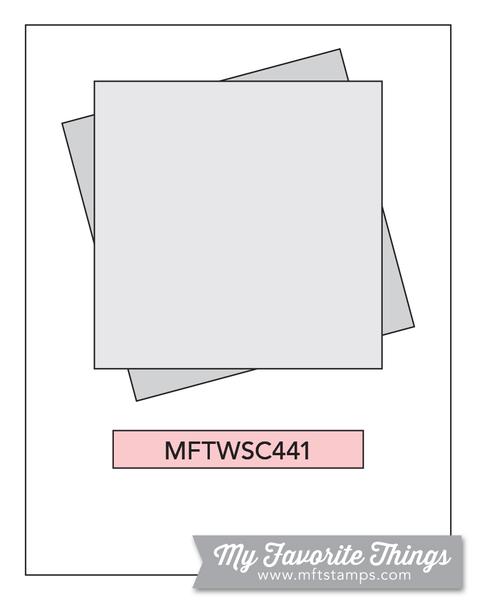
MFT Sketch Challenge 441
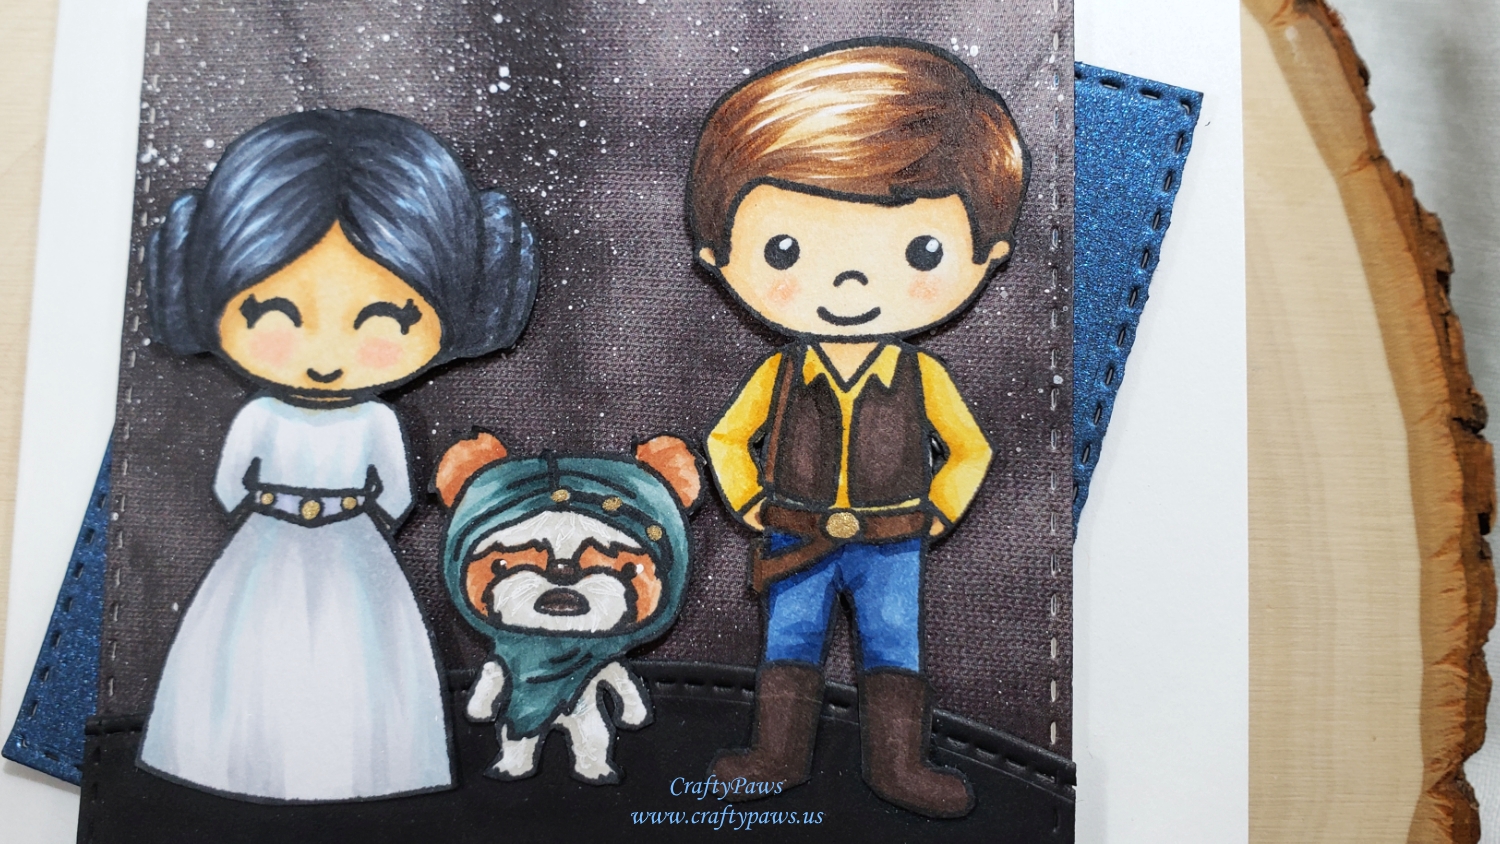
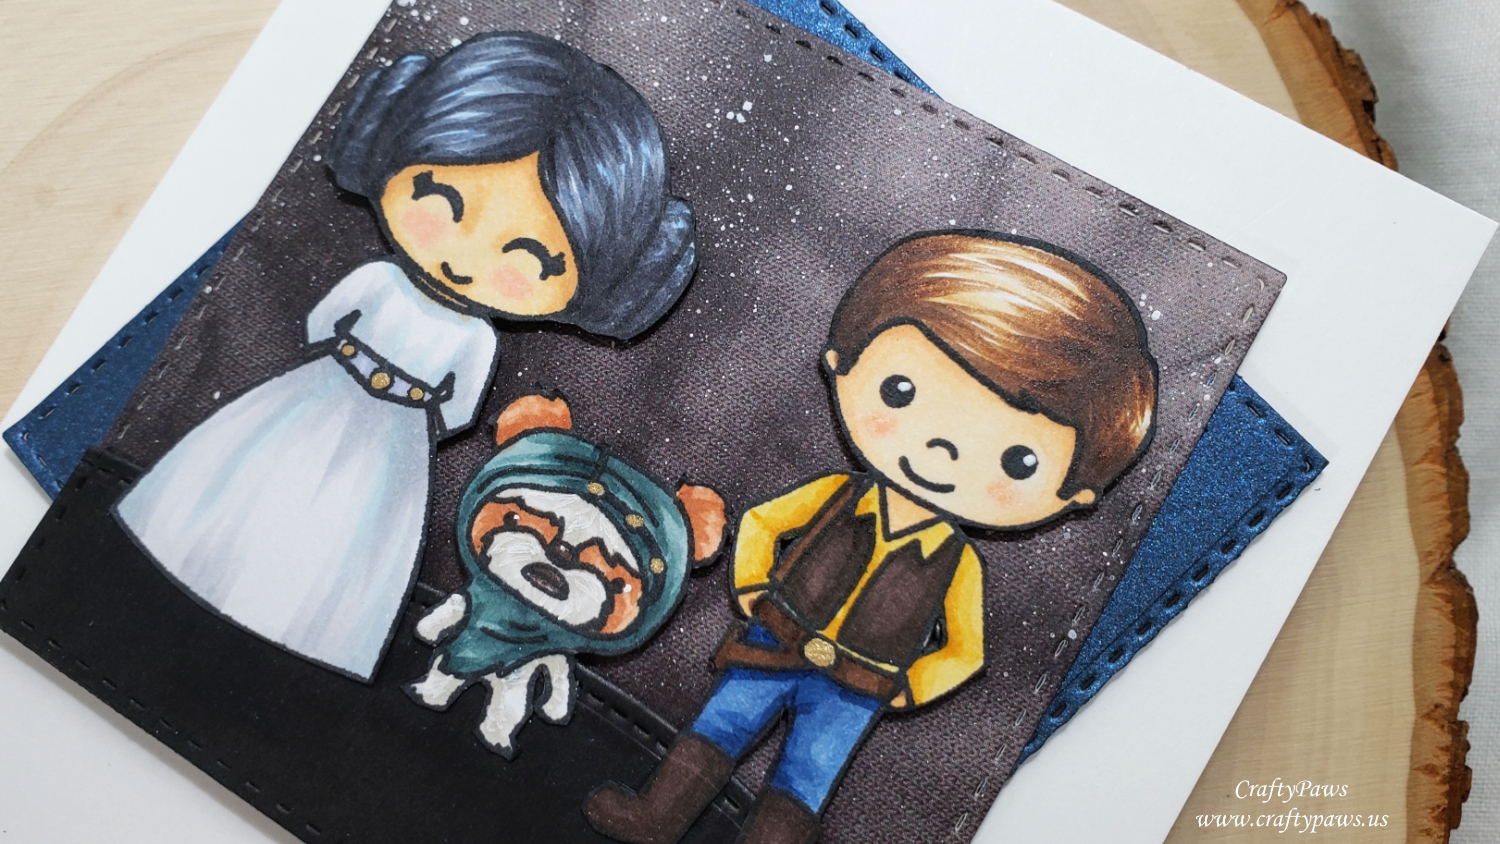
I decided that I could be Princess Leia, Mr. CraftyPaws could be Han Solo, and our Bandito could be (of course) an Ewok and used the following Copic colors:
Princess Leia: Hair: C6, C8, B000; Skin: E50, E51, E53, R21; Dress: C0, C1, C2, B32; Belt; C2 and B60
Han Solo: Hair: E53, E57, E59; Skin: E50, E51, E53, R30; Pants: B34 and B37; Belt: E59 and E79; Vest and Boots: E79 and E49; Shirt: Y21 and YR24
Ewok: Fur: W0, W1, E11, E13, E15; Headpiece: BG72, BG75 and BG78
I also used a Gold Gelly Roll Pen to add shiny details to Leia’s belt, the Ewok’s headpiece, and Han’s belt
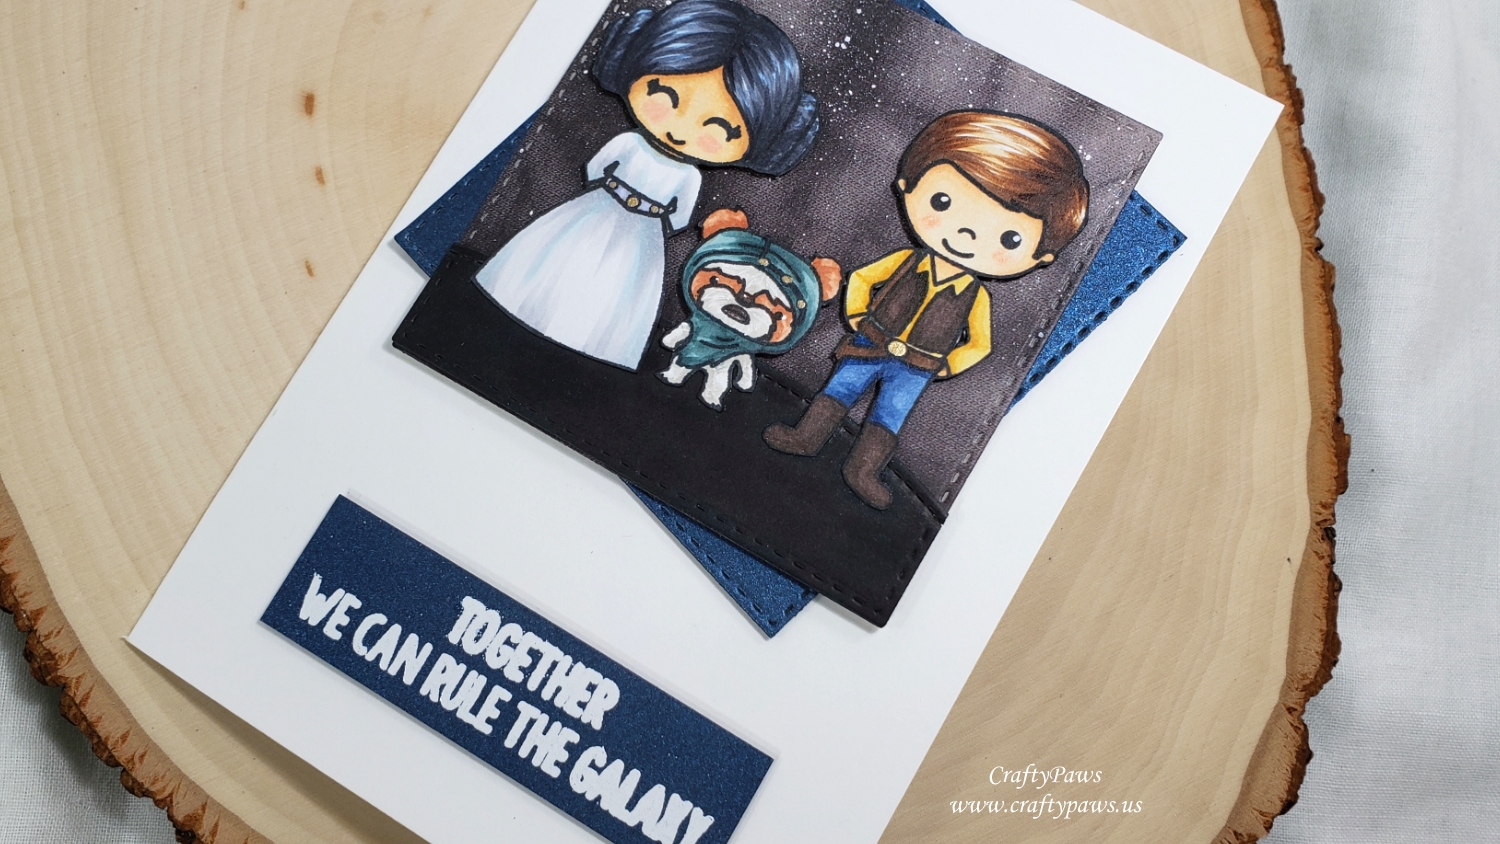
As these images are clearly the “stars” of the card (pun intended), I kept the backgrounds simple. I die cut some black and grey patterned paper from an old DCWV The Tie-Dyed Stack (retired) using a Simon Says Stamp Stitched Squares Die. I splattered some watered down Copic Opaque White to create a galaxy background, and used black card stock and the Simon Says Stamp Stitched Squares Die and a Lawn Fawn Stitched Hillside Die to create a ground for the characters.
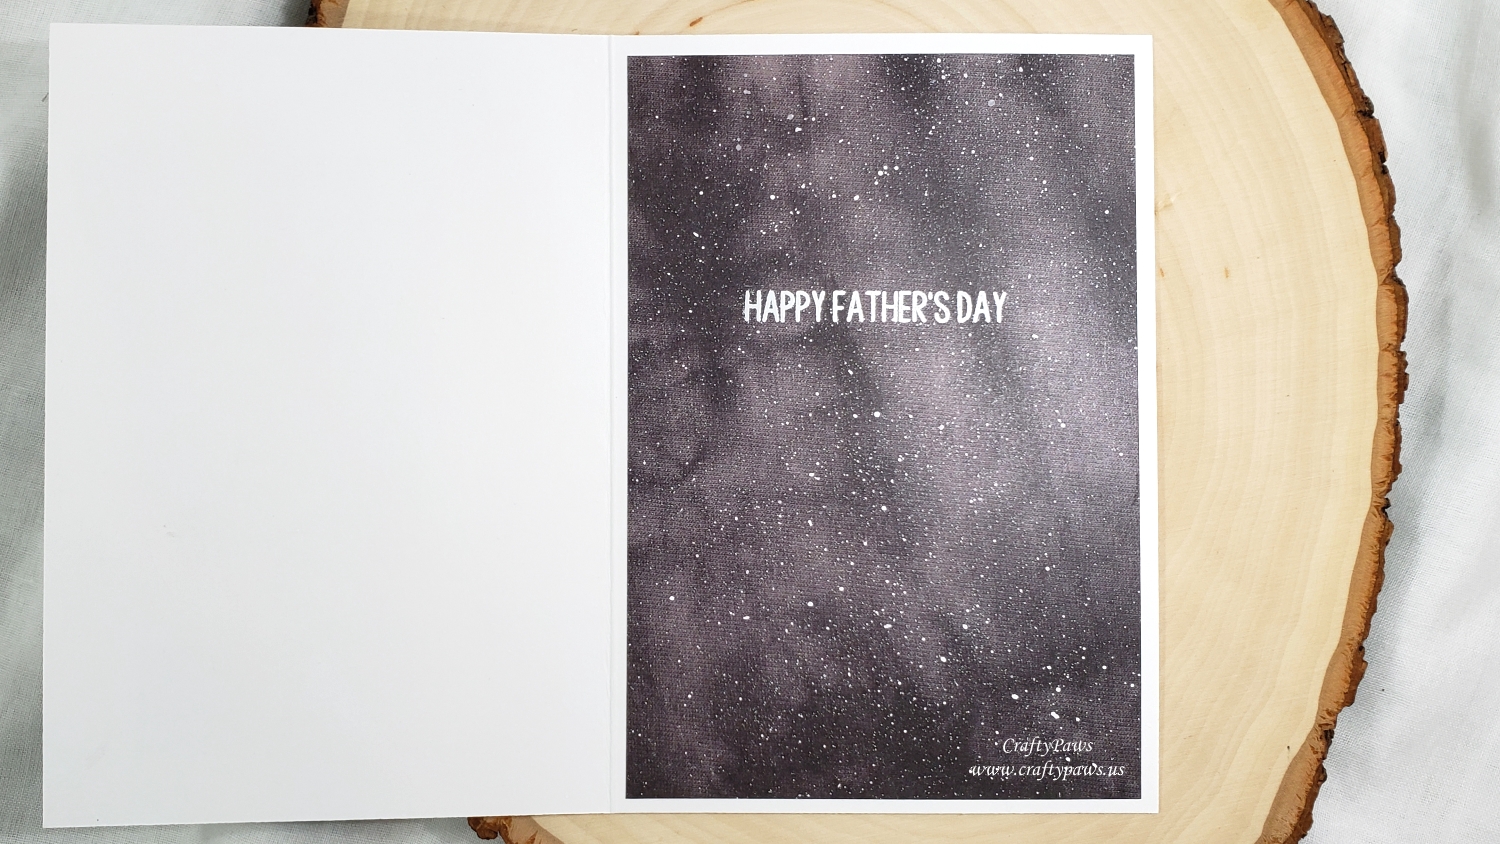
To add some more color, I die cut another stitched square from navy blue shimmer card stock and offset it behind the galaxy background square. Using VersaMark Ink and Ranger Super Fine Detail White Embossing Powder, I also heat embossed the sentiment, “Together We Can Rule the Galaxy” on more navy blue shimmer card stock to repeat the color and give the card a cohesive look. The sentiment, characters, and the squares assemblage are all popped up on double sided foam tape for added dimension and interest. The inside of the card liner was created by using more of the black and grey tie-dyed patterned paper with splattered on “stars.” The sentiment inside is also heat embossed, and simply says, “Happy Father’s Day”.
CLICK on the following picture to watch the process video of crafting this card:
Disclosure: Many of the supplies I’ve used for today’s project are linked. Some may be affiliate links, which means if you make a purchase I receive a small commission at no extra cost to you. I truly appreciate your support toward the costs of running this blog!
This card is being entered into the following challenges:
Word Art Wednesday Anything Goes Challenge
Creatalicious Anything Goes with Optional Blue Challenge
Through the Craft Room Door Anything Goes Challenge
Crafts Galore Encore Anything Goes Challenge
Lil Patch of Crafty Friends Anything Goes Challenge
Crafter’s Castle Anything Goes with Optional Mixed Media Challenge
Craft Gal’s Corner You’re the Man Challenge
MFT Sketch Challenge 441
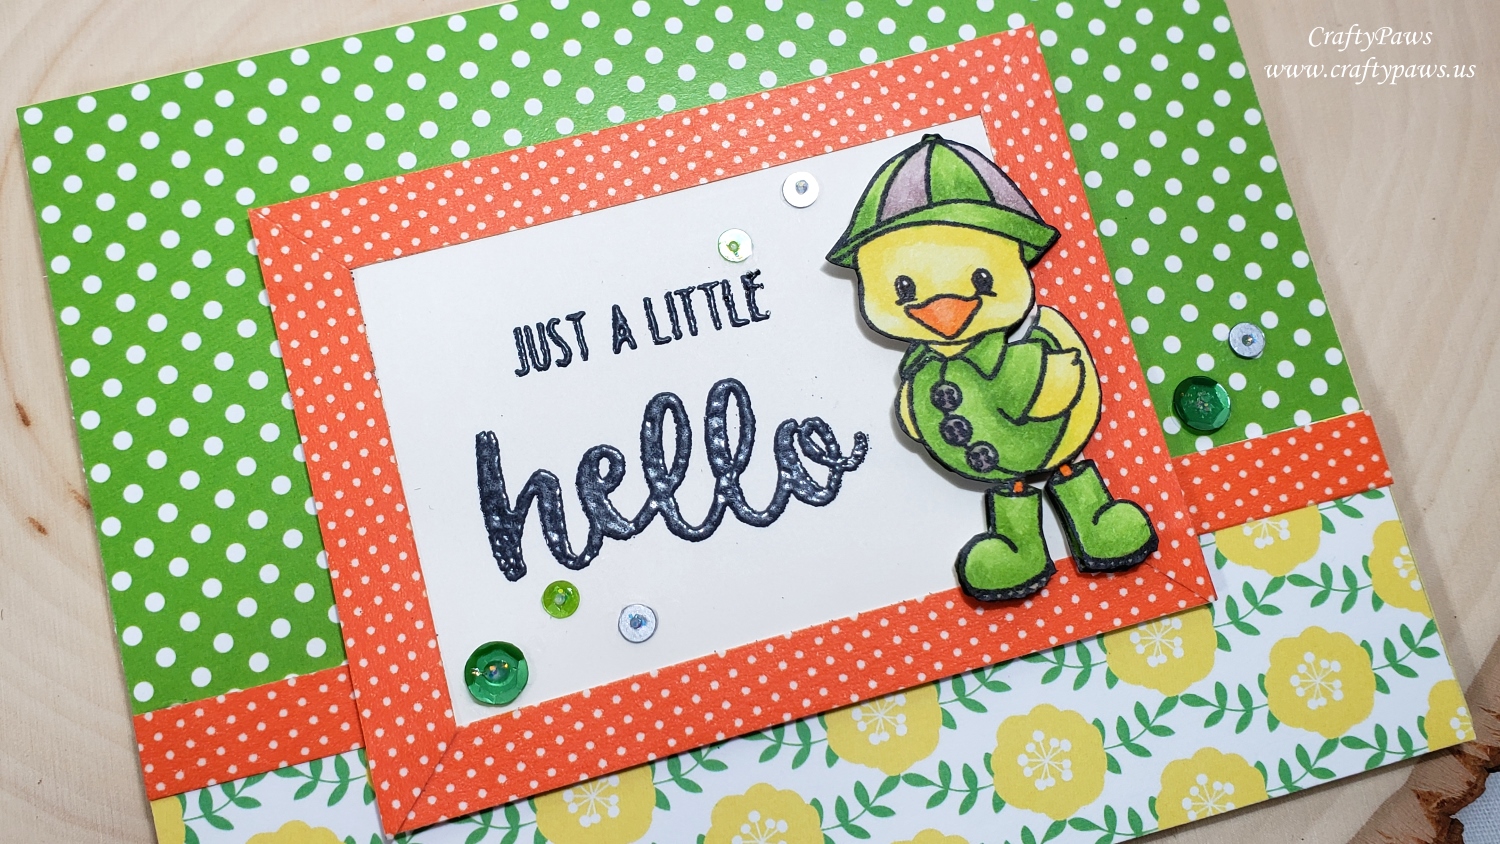
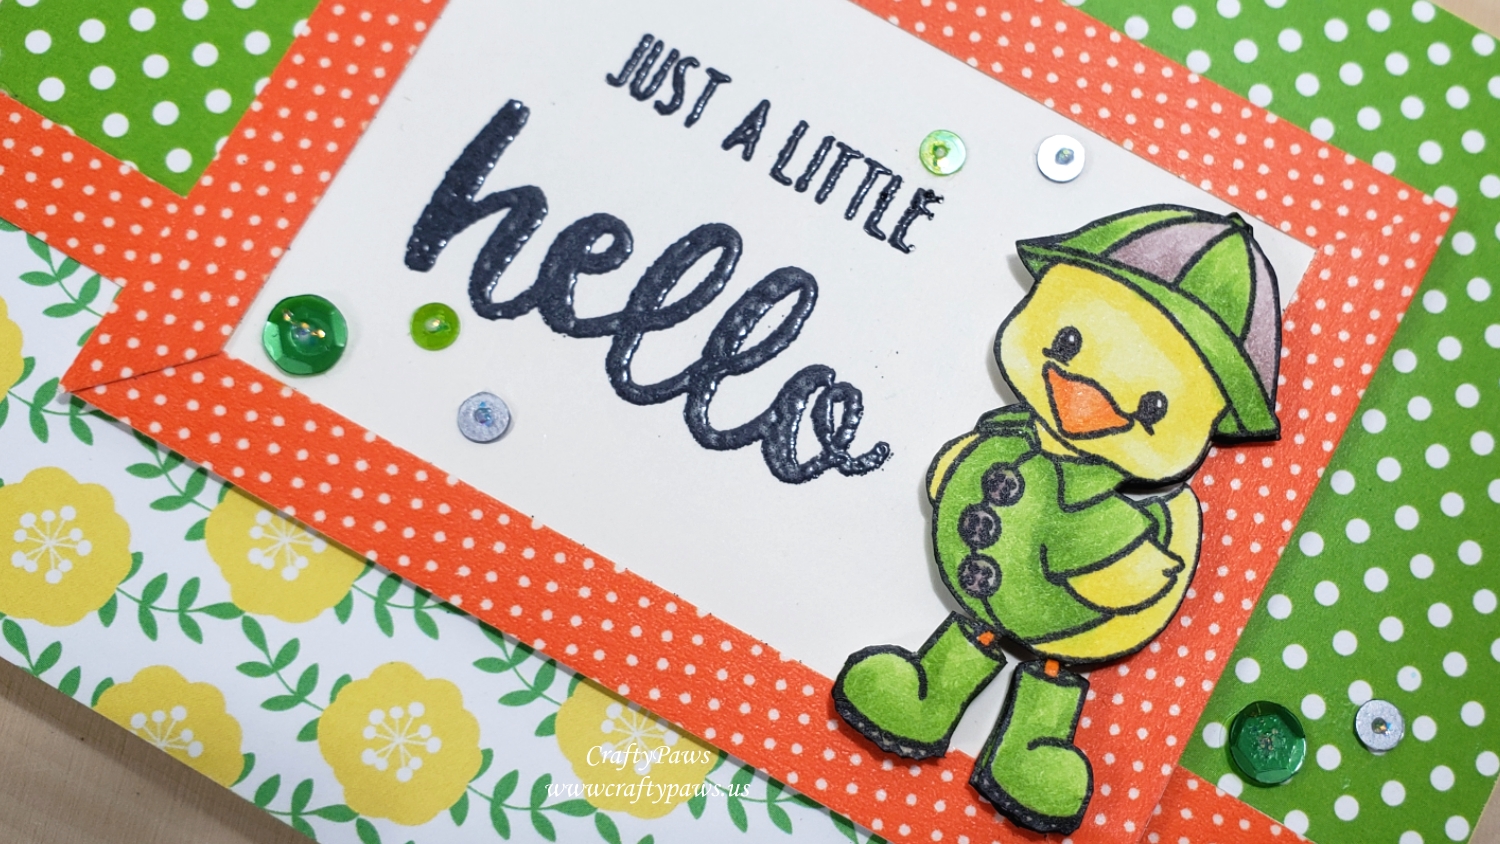
So for this card, I used two impressions of the same cute duck in a rain slicker image from the Scrapping for Less “Just Ducky” stamp set. I colored one up with Copics in fun summer citrus colors (summer showers are a constant where I live — in fact there is a huge thunder storm passing as I type):
Duck: Y11, Y13, YR00, YR04
Rain Slicker, Boots and Hat: YG03, YG25, E70, E71
I simply colored and inked the edges (using a Momento Tuxedo Black Marker) of the second image of the duck as an under layer to add dimension to the image by stacking it with double sided foam adhesive. I find that a simple trick like this really adds a lot of interest and is appreciated by card recipients (especially if they are not crafters and don’t know how easy this is!) 🙂
For the card front, I looked through my scrap box and found a fun green polka dot and a yellow floral patterned papers. I used the green on 2/3 of the front and the floral on 1/3 of the front. When I went looking for an orange patterned paper, I couldn’t find one, but did find a small orange polka dot washi tape! I used that washi tape on white card stock (so it would not show through the patterned papers beneath) and glued the strips around a piece of cream card stock as a frame as well as between the green polka dot and yellow floral papers.
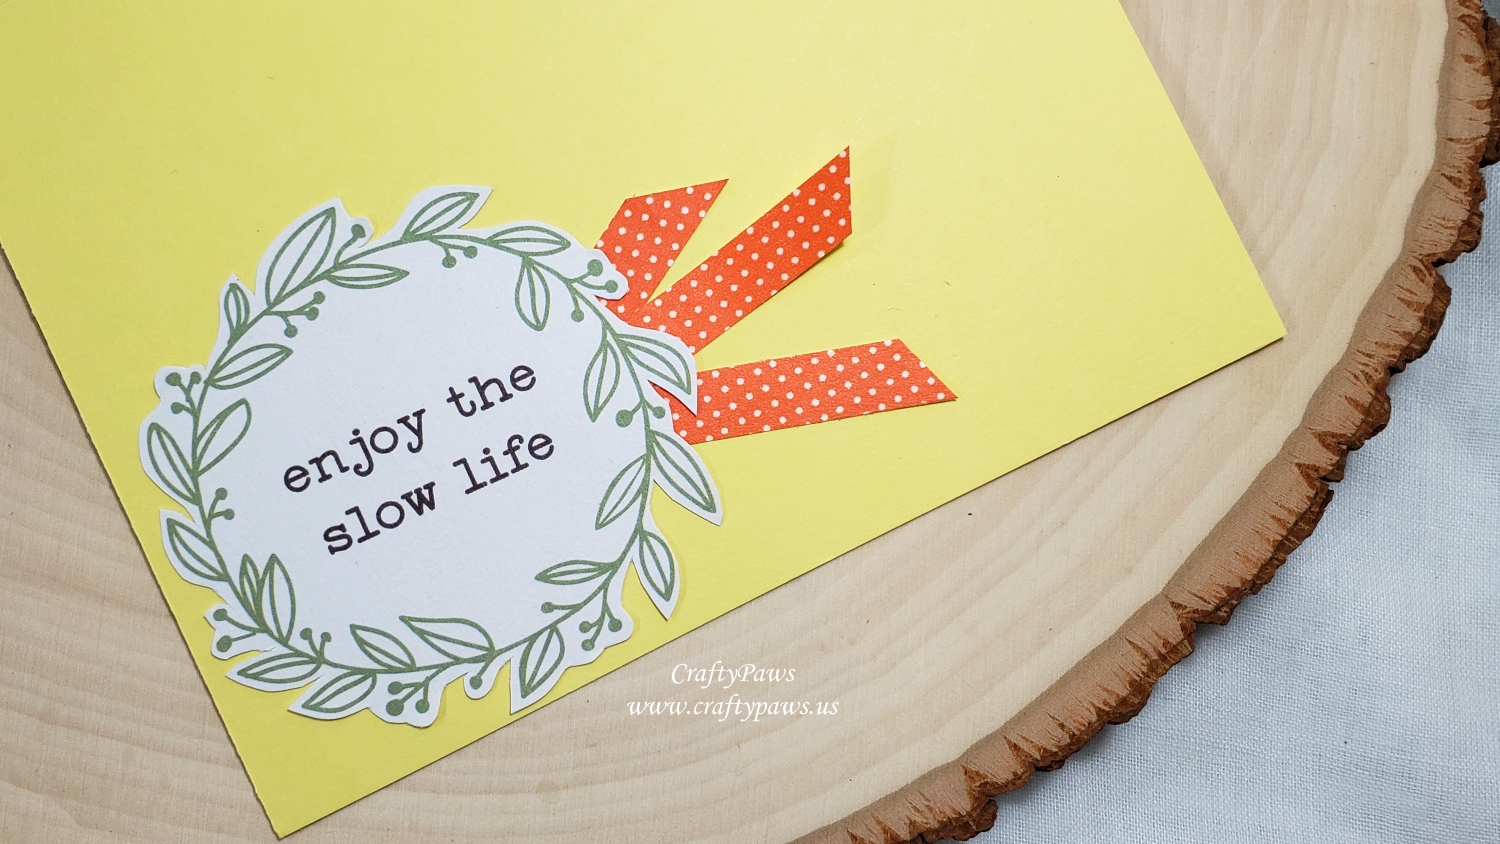
For the sentiment, I decided to heat emboss “JUST A LITTLE HELLO” from the Neat and Tangled “Better Together” stamp set. I used the EK Success Powder Tool to cut down on static, VersaMark Ink for the stamping, and Zing Charcoal embossing powder to create a thick embossed look that wasn’t too black/stark. I mounted that on more double sided foam adhesive to add a more dimension. Lastly, I used Ranger Multi-Medium Matte Adhesive to glue on 7 sequins in green and grey and topped them with Icicle Stickles to add a little extra sparkle too. The inside liner was kept simple with a Scrapping for Less ephemera piece that says, “enjoy the slow life” inside a green wreath. The only adornments to the inside sentiment are three orange polka dot flags made from left over washi tape scraps; this was an easy way to keep the inside coordinated with the card front.
CLICK on the following picture to watch the process video:
This card is being entered into the following challenges:
Crafter’s Castle Anything Goes with Optional Mixed Media Challenge
Simon Says Stamp Wednesday Masculine Challenge
Word Art Wednesday Anything Goes Challenge
Simon Says Stamp Work it Wednesday Summer Vibes Challenge
Crafting by Design Anything Goes Challenge
Stamping Sensations Show Your True Colors Challenge
Crafts Galore Encore Anything Goes Challenge
Through the Craft Room Door Anything Goes Challenge
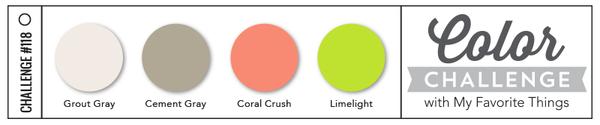
MFT Color Challenge 118
]]>
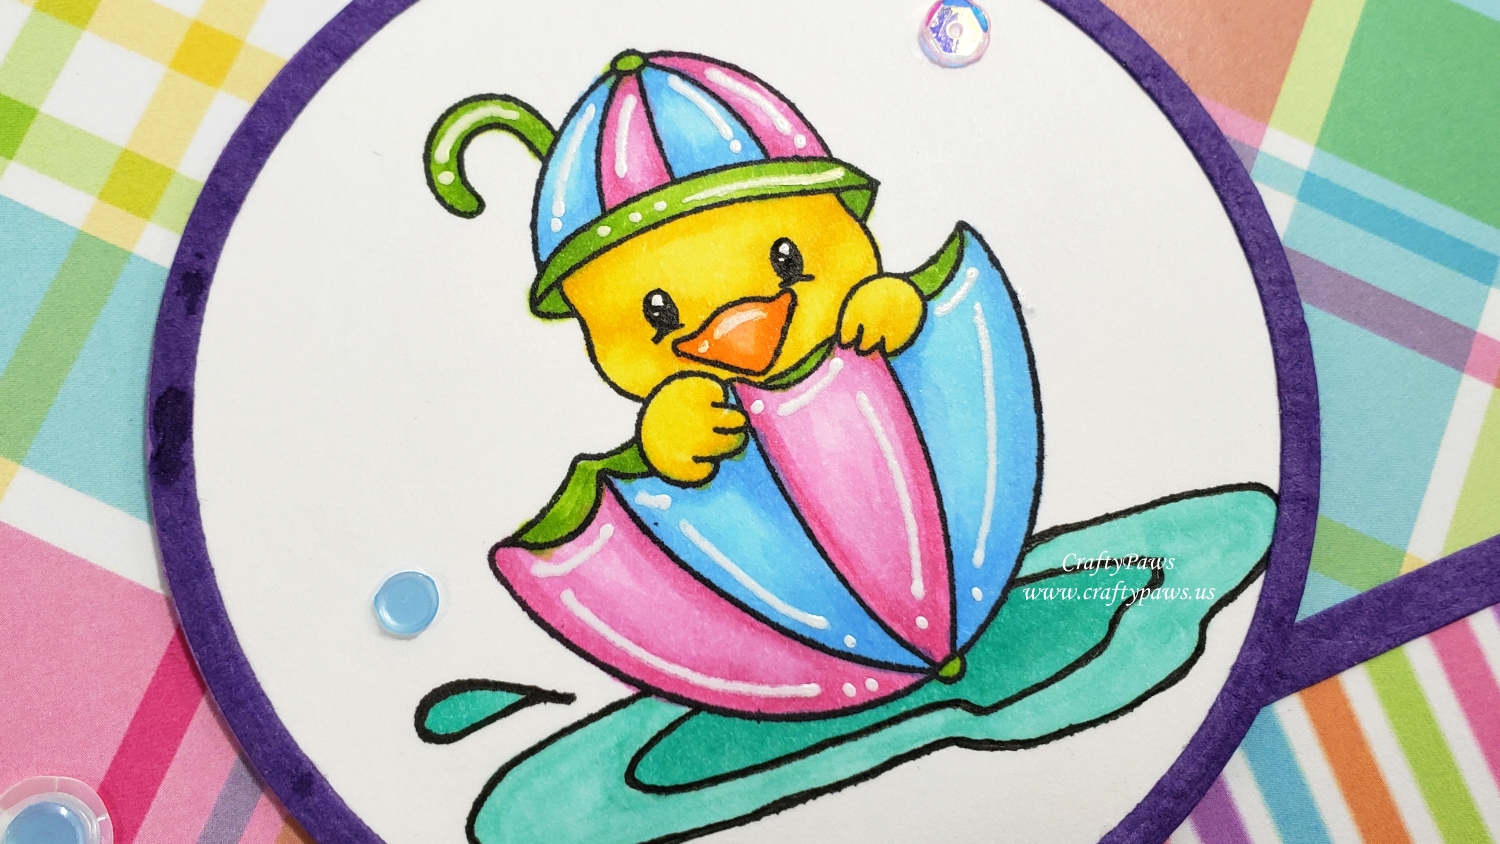
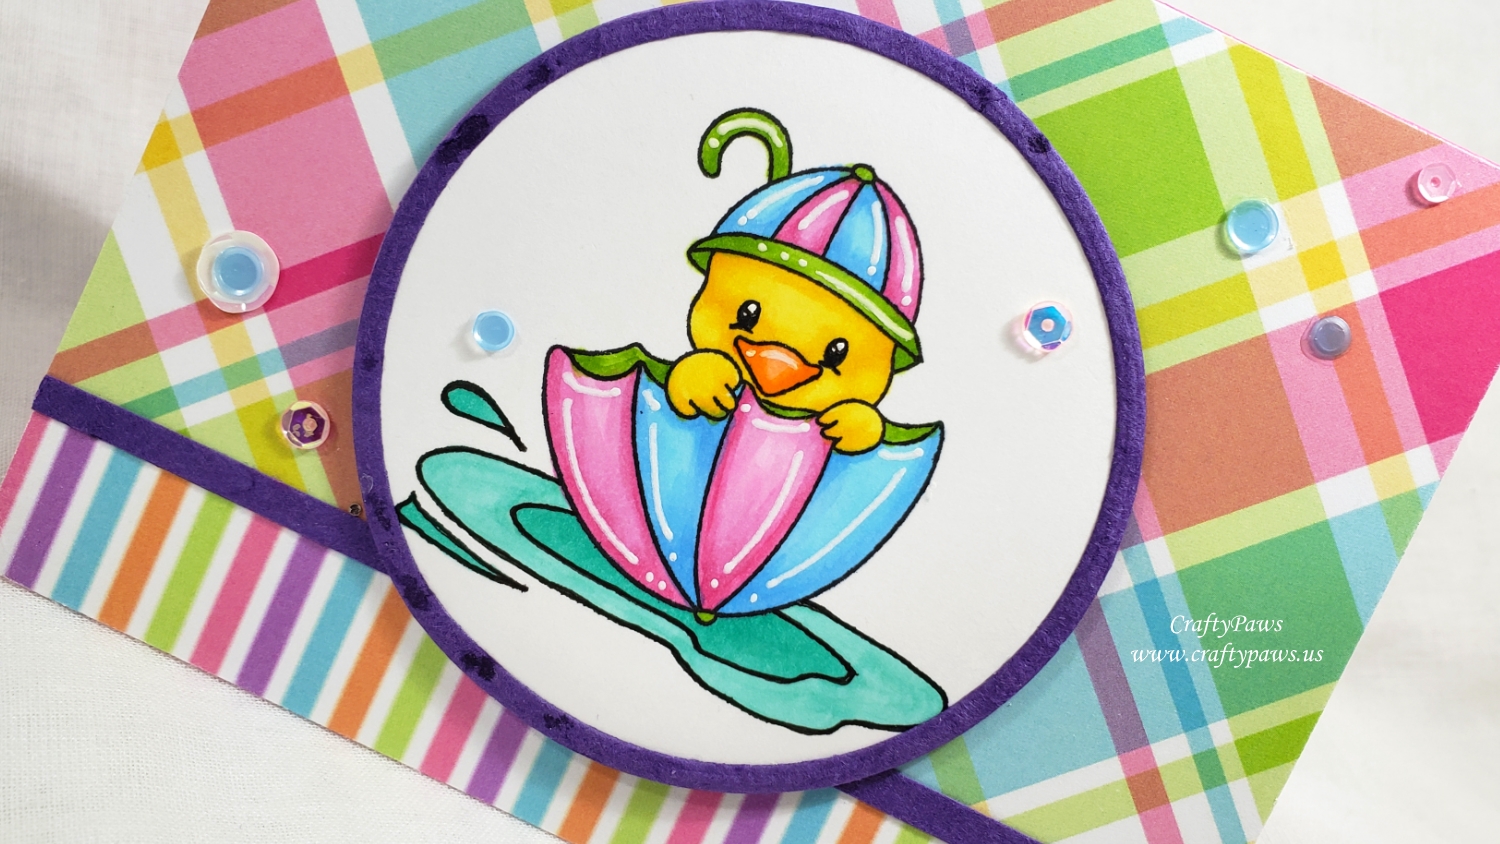
I colored up the duck tucked into the upturned umbrella with the following Copic colors to match the patterned plaid papers from the same Scrapping for Less collection:
Duck: Y13, Y15, YR00, YR16
Umbrella: B00, B12, YG03, YG25, RV52, RV55
Puddle that I doodled in with a Copic Multiliner Pen in 0.03 pt and re-outlined with a Faber-Castell XS point PITT Artist Pen: BG32 and BG23
I also added white highlight marks to the umbrella and the duck’s bill with a Uniball Signo White Gel Pen.
I used the Diemond Dies Die-Normous Stack-Ems Circle Nesting Die Set to cut out the image as well as die cut a frame for the image with purple handmade paper (for some added texture). I then used a plaid patterned paper and a striped pattern paper from this month’s Scrapping for Less Kit and covered the card front with these two patterned papers (about 2/3 and 1/3). I positioned a thin strip from more of the purple handmade paper between the two patterned papers to create a clean separation. Then I positioned the framed image centered on the card and overlapping the two patterned blocks.
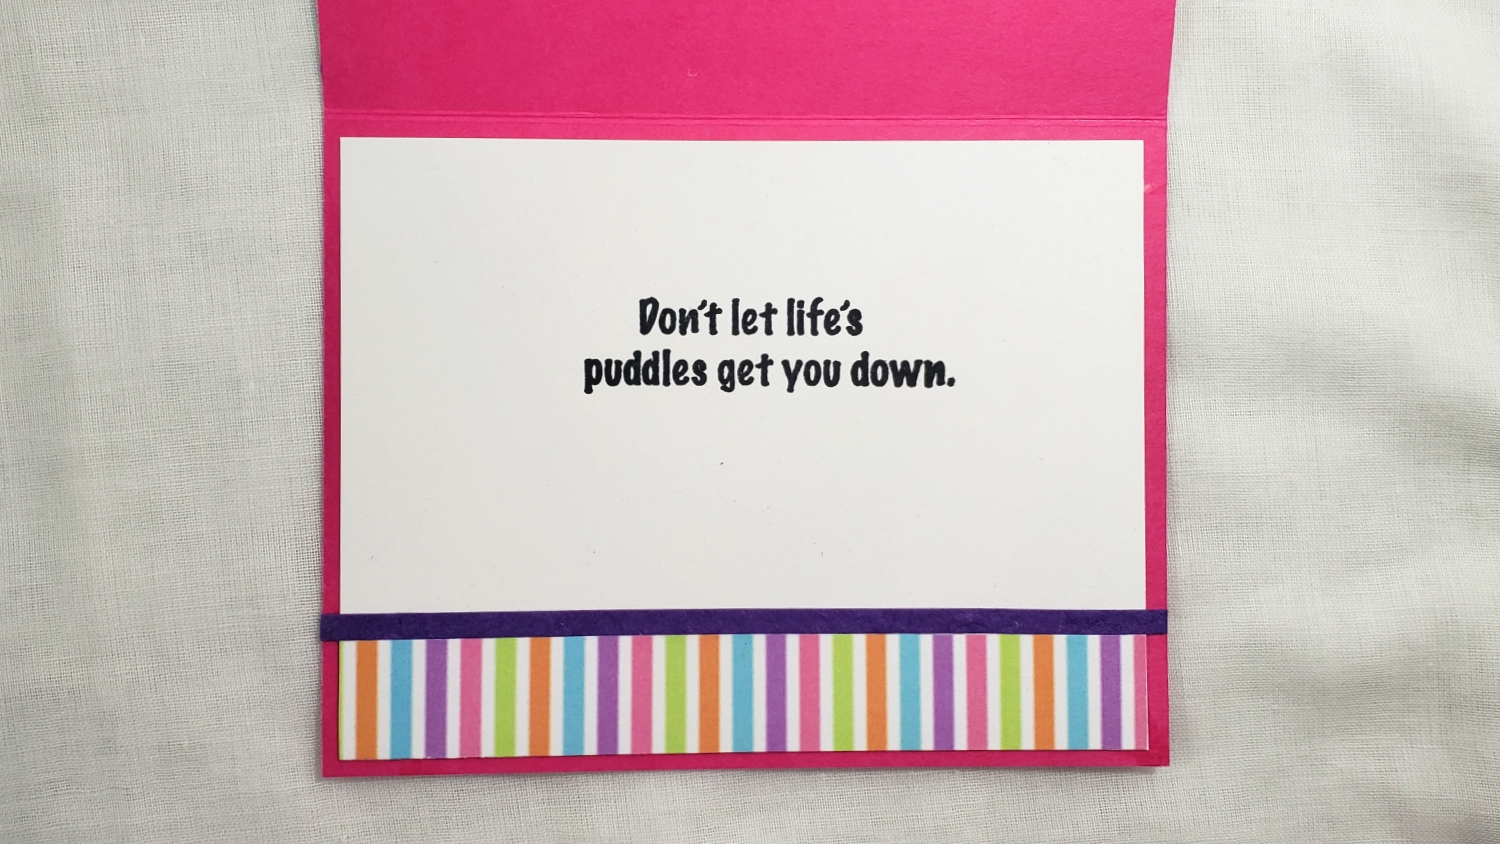
For the inside of the card, I used a sentiment from the Scrapping for Less add-on kit that says, “Don’t let life’s puddles get you down.” I used another scrap of the striped paper to coordinate the inside liner with the card front and added a similar purple strip to edge the striped paper from the white of the card liner. Lastly, as a finishing touch, I used Ranger Multi-Matte Medium to adhere 7 sequins on the card front to add a little sparkle and interest.
CLICK on the following picture to watch the start-to-finish card crafting video:
Disclosure: Many of the supplies I’ve used for today’s project are linked. Some may be affiliate links, which means if you make a purchase I receive a small commission at no extra cost to you. I truly appreciate your support toward the costs of running this blog!
This card is being entered into the following challenges:
Simon Says Stamp Monday Frame It Challenge
Word Art Wednesday Anything Goes Challenge
Creatalicious Anything Goes with Optional No Rectangles or Square Cards Challenge
Through the Craft Room Door Anything Goes Challenge
Cards Galore Encore Anything Goes Challenge
Penny Black and More Anything Goes Feminine Challenge
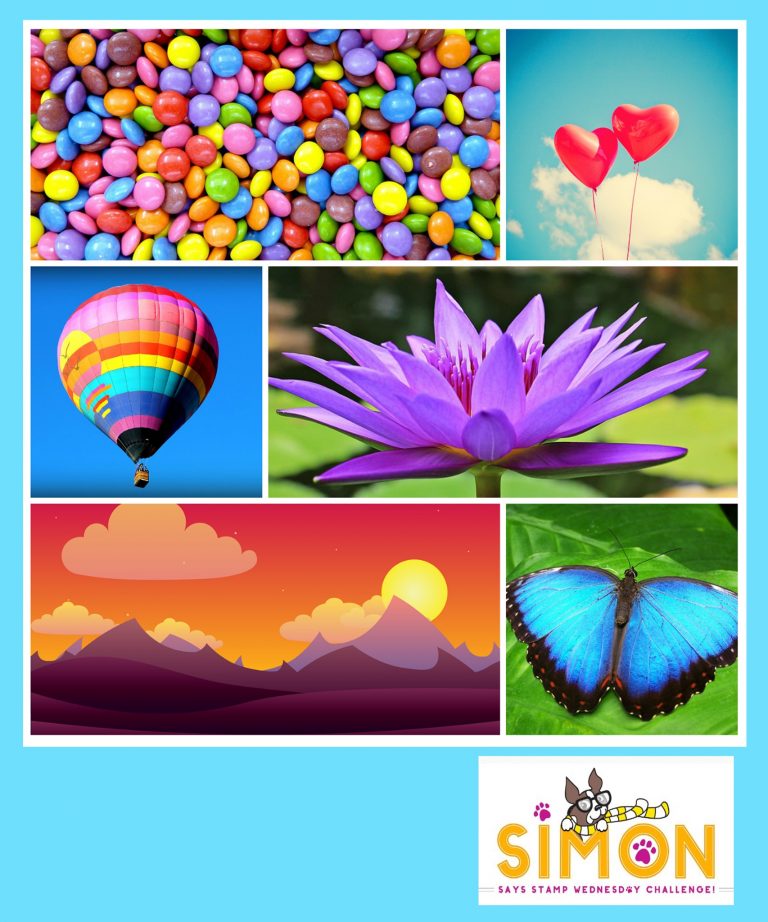
Simon Says Stamp Wednesday Bright Colors Mood Board Challenge
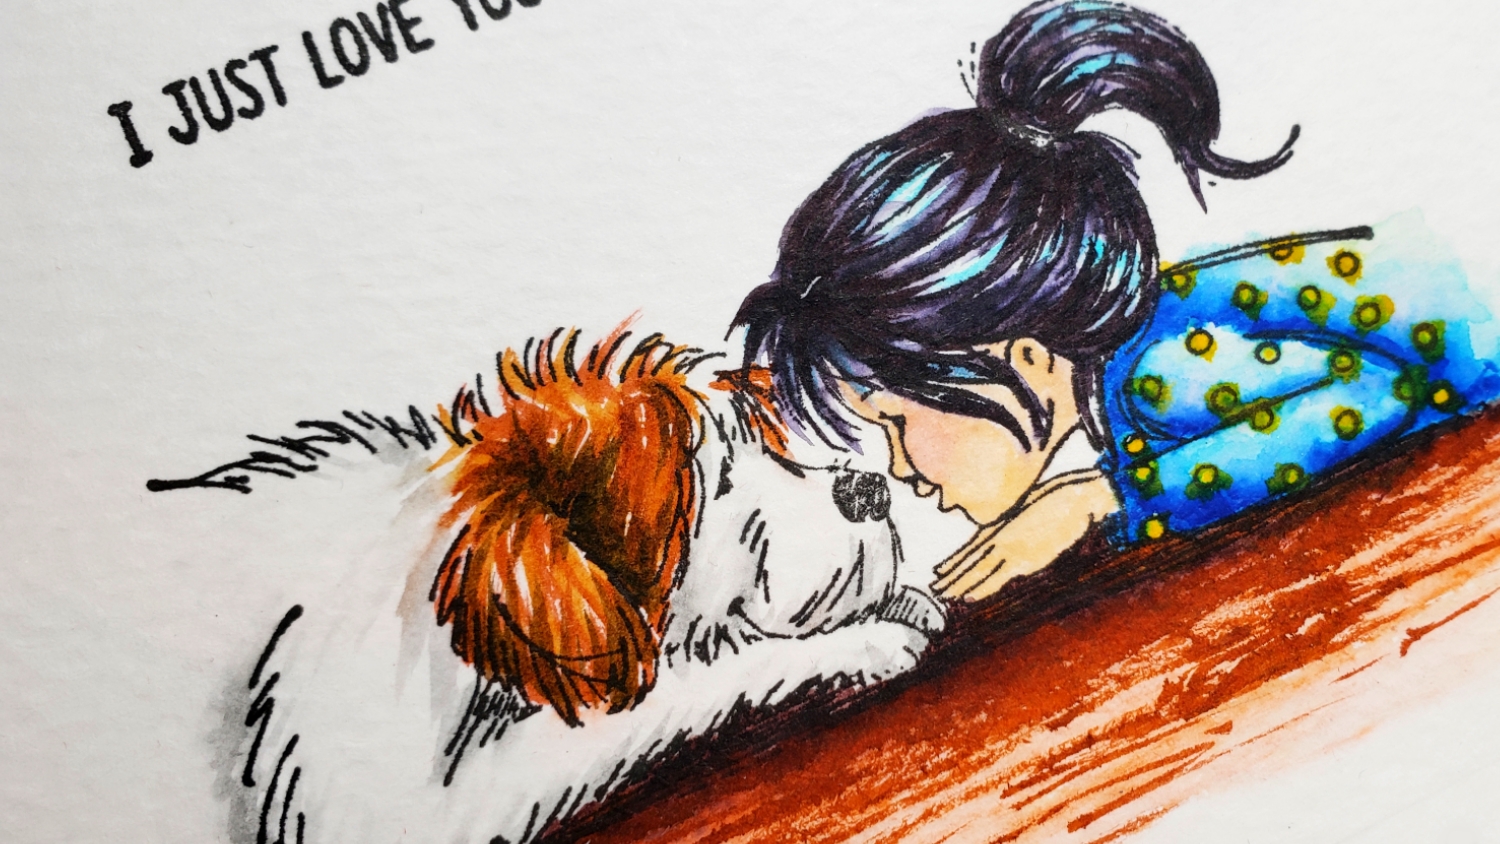
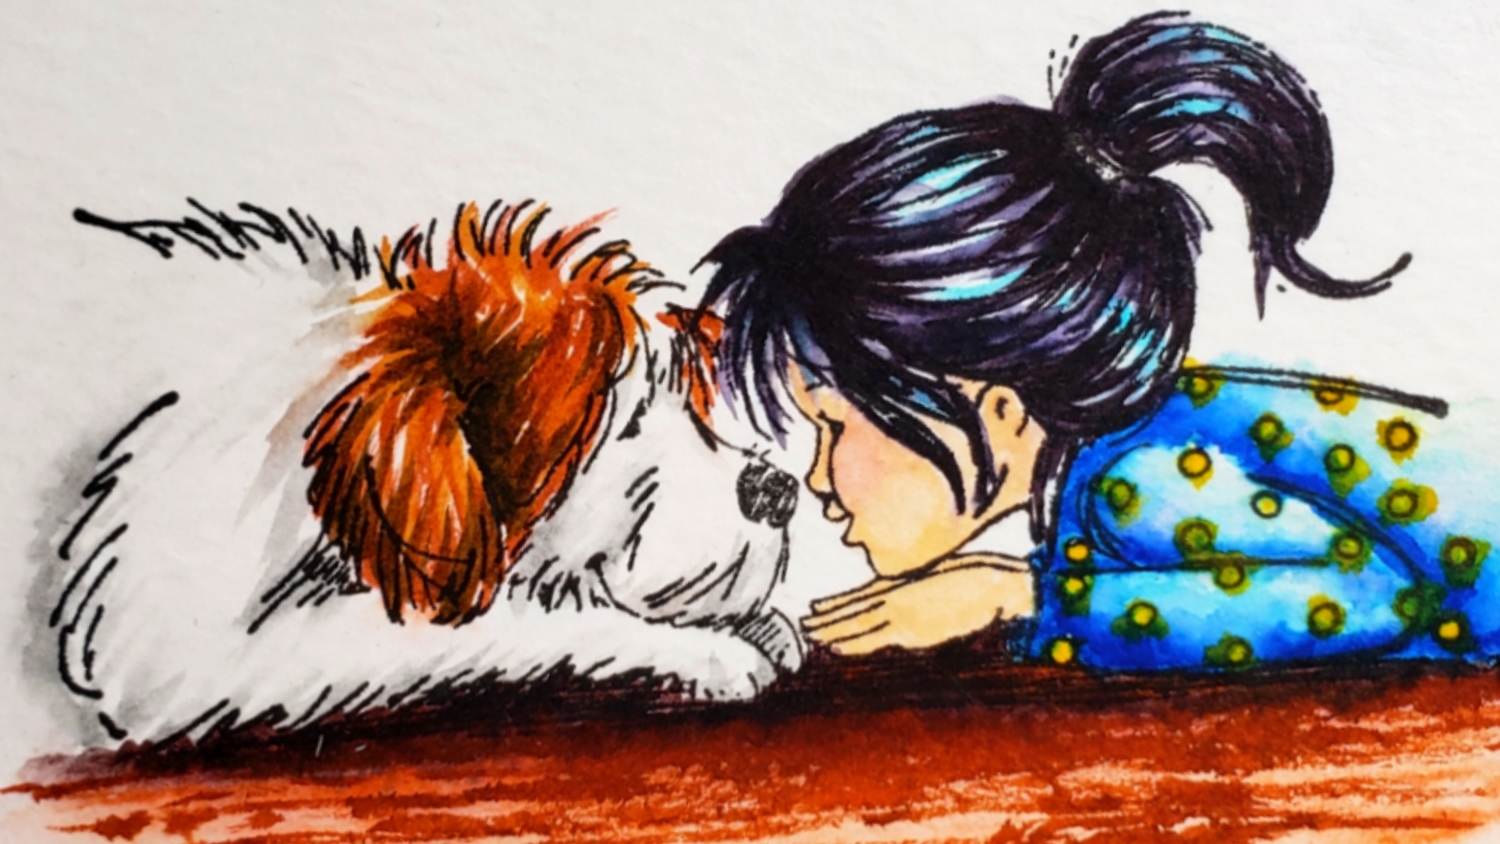
The drawing of the stamp is very artistic, and I thought coloring it up with my Zig Clean Color Real Brush Markers and Pentel water brush would be a great way to dip my toe back into watercoloring. I stamped out the image onto Strathmore Watercolor Paper using VersaFine Onyx Black Ink and used the following Zig colors:
Puppy: Light gray (091); Light Brown (061); Brown (060); Mid Brown (065)
Girl’s hair: Light Blue (036); Black (010)
Girl’s skin: Flesh (071); Pale Pink (028)
Girl’s shirt: Yellow (050); Persian Blue (032)
Floor: Brown (060); Dark Brown (062)
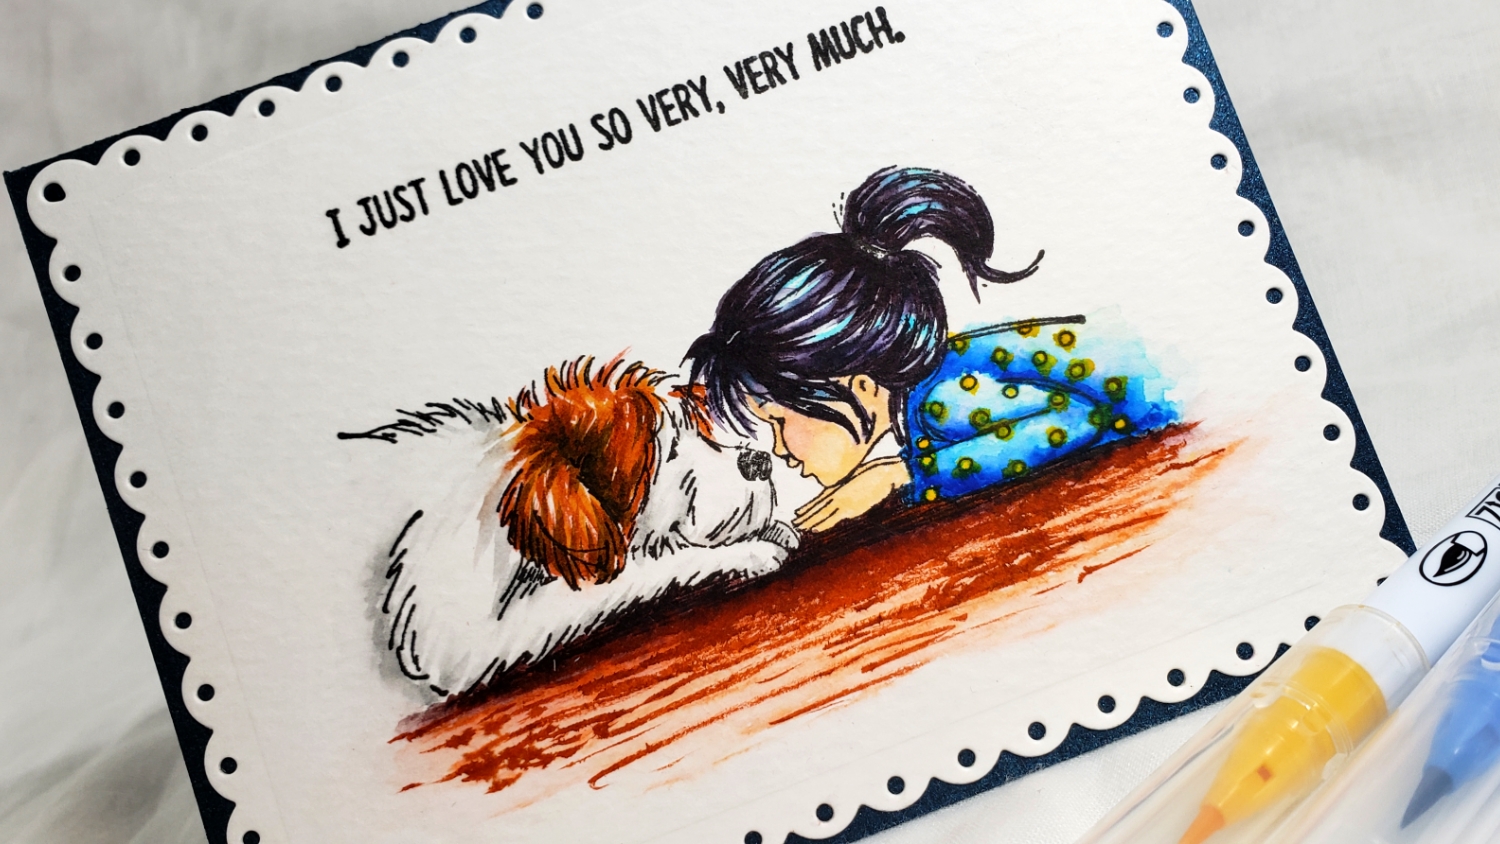
I then stamped the sentiment, “I Just Love You So Very, Very Much.” centered above the image. Then to keep it simple, I used a Lawn Fawn Fancy Scalloped Rectangle Stackables Die to cut out the image and mounted it on a shimmery dark blue card base. I like how the die cut has the tiny cut out circles to let through the blue color and shimmer of the card base.
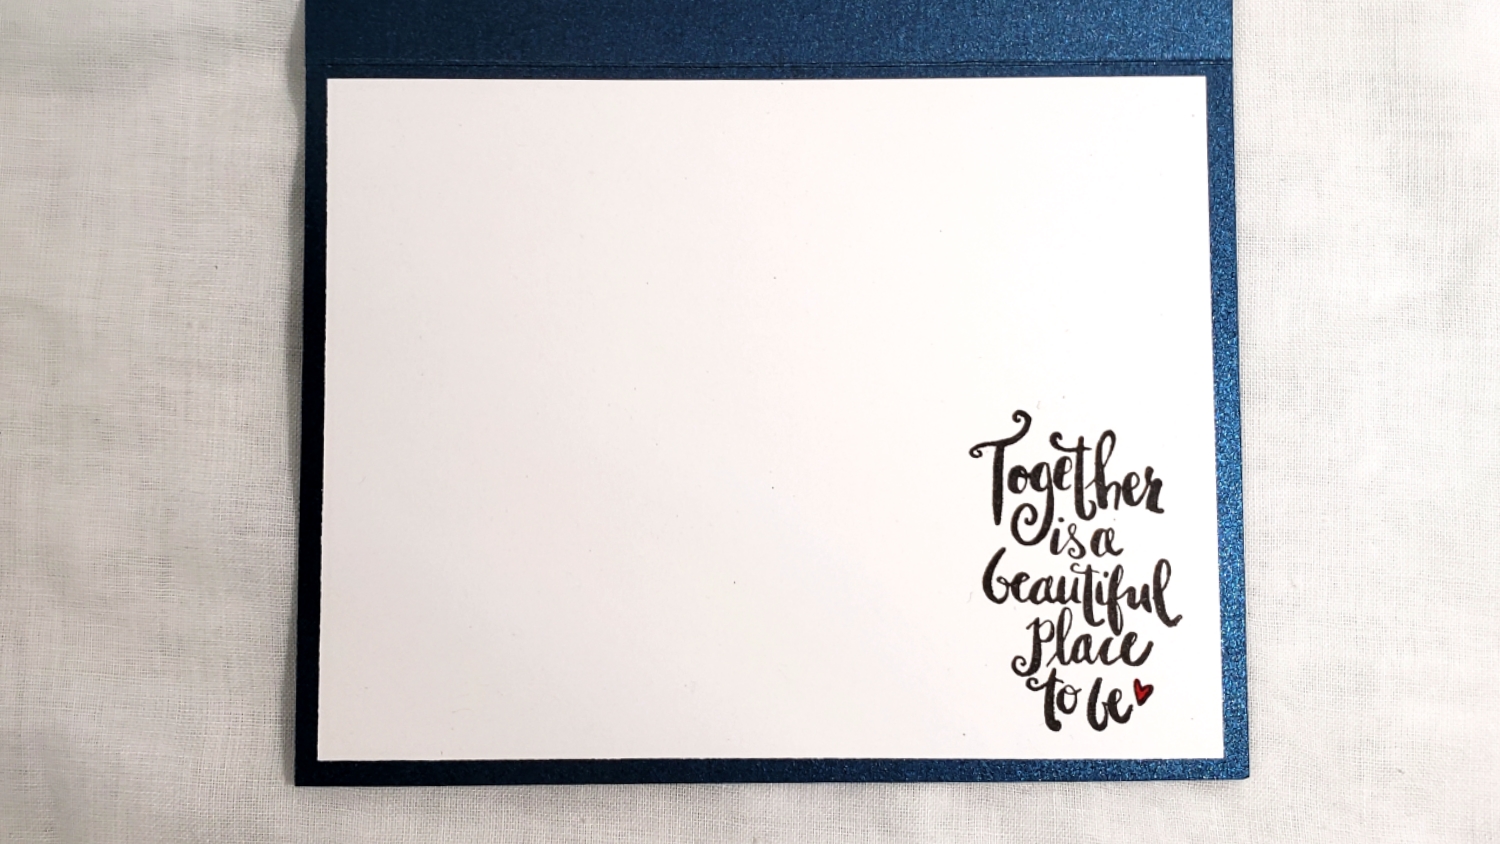
For the inside liner, I used the other sentiment from the stamp set, “Together is a beautiful place to be” in the lower right corner. I really love the font of this sentiment and I liked it off centered like this. To add a delicate finishing touch, I colored in the tiny heart at the end of the sentiment with a Carmine Zig Clean Color Real Brush Marker.
Please CLICK on the following picture to watch the process video of crafting this card:
Disclosure: Many of the supplies I’ve used for today’s project are linked. Some may be affiliate links, which means if you make a purchase I receive a small commission at no extra cost to you. I truly appreciate your support toward the costs of running this blog!
This card is being entered into the following challenges:
Word Art Wednesday Anything Goes Challenge
Creatalicious Anything Goes Challenge with Optional no rectangle or square cards
Simon Says Stamp Work it Wednesday Pet Project Challenge
Crafting by Design Anything Goes Challenge
Penny Black and More All Things Feminine Challenge
Crafts Galore Encore Anything Goes Challenge
Through the Craft Room Door Anything Goes Challenge
Lil Patch of Crafty Friends Anything Goes Challenge
]]>
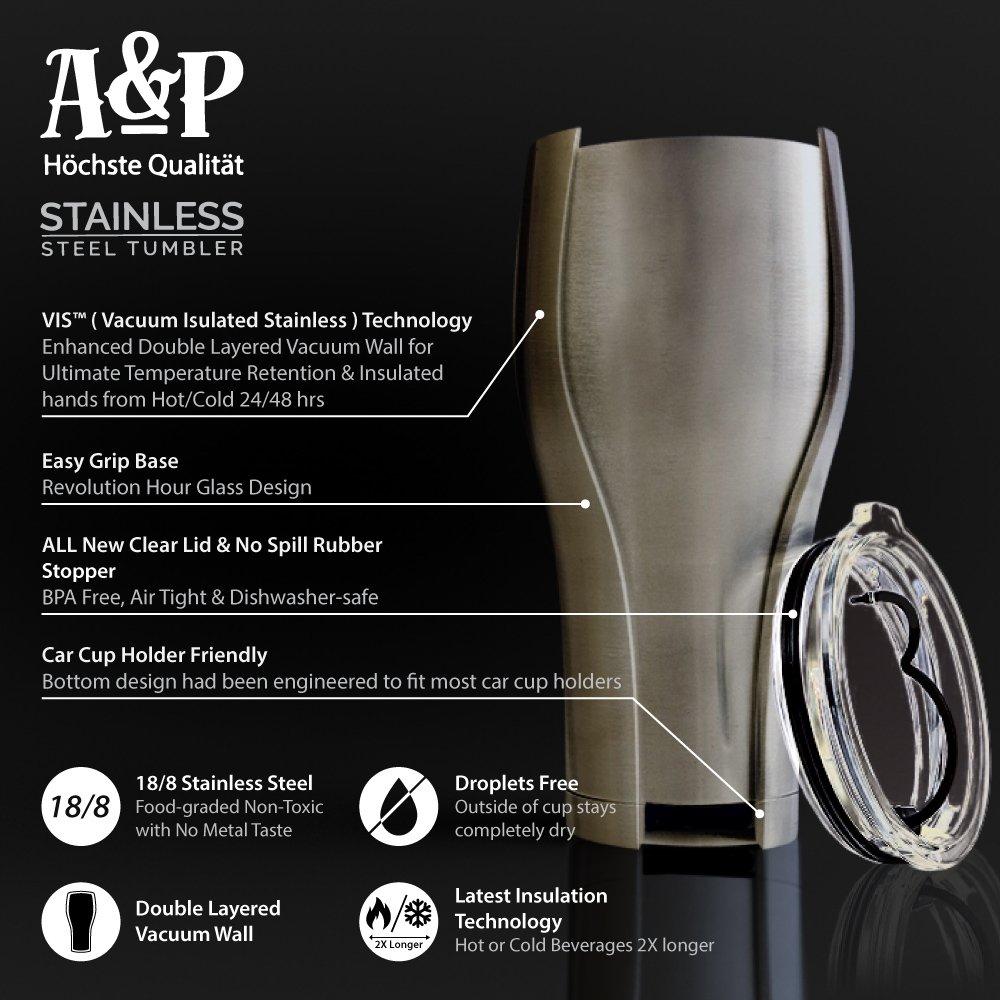
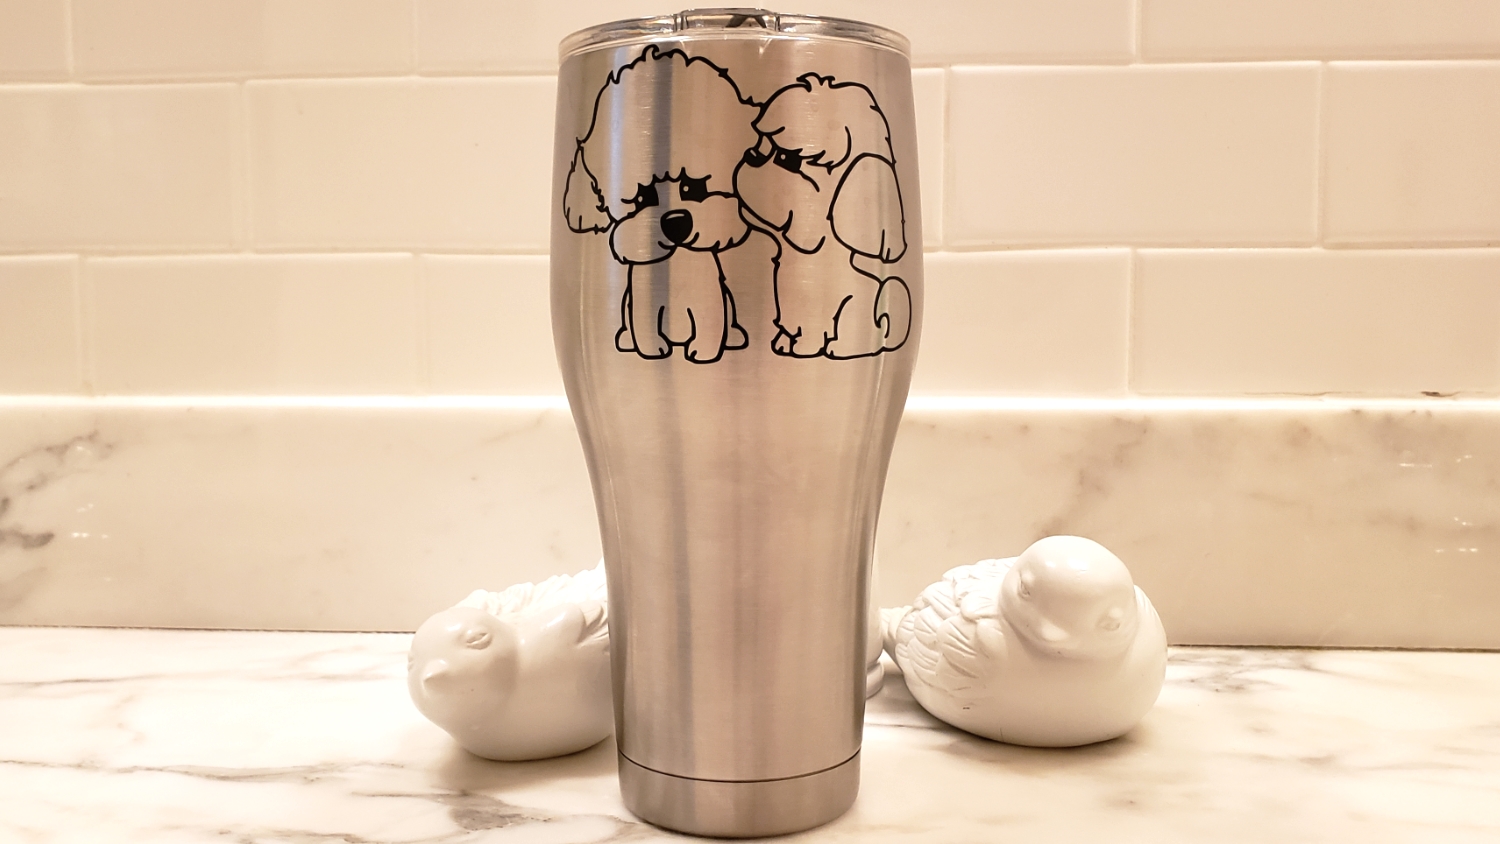
First off, Aric (the A of A&P) told me that their company was a small US based mom and pop company, so I knew I wanted to give their product a try and support them if I thought that they had a good product. Secondly, my hubby has a similar tumbler from a different company that he swears by but it is about $20 more (which I am unwilling to spend when the same funds could be used for crafting supplies – LOL). Third, I confirmed that I was free to provide whatever feedback and review; there were no strings attached to the free mug. Fourth (and lastly), I was able to personalize my tumbler with a vinyl decal of my sweet pups (this is also my CraftyPaws logo) using my Silhouette, and every time I see this I smile.
So long story short I agreed to do the trial and review, and I am so pleased to say that I love it! I use it for my daily morning vitamin drink and it has been wonderful to be able to keep this extra chilly all morning as I concentrate on my work or crafting. I have a couple of minor suggestions for improvement, and if you’re interested in the details of my experience and review please watch the video by CLICKING on the picture below:
Thanks for stopping by, and I hope you’re having a wonderful crafty day!
]]>
The following is a video with the live selection of the randomly selected winner:
]]>