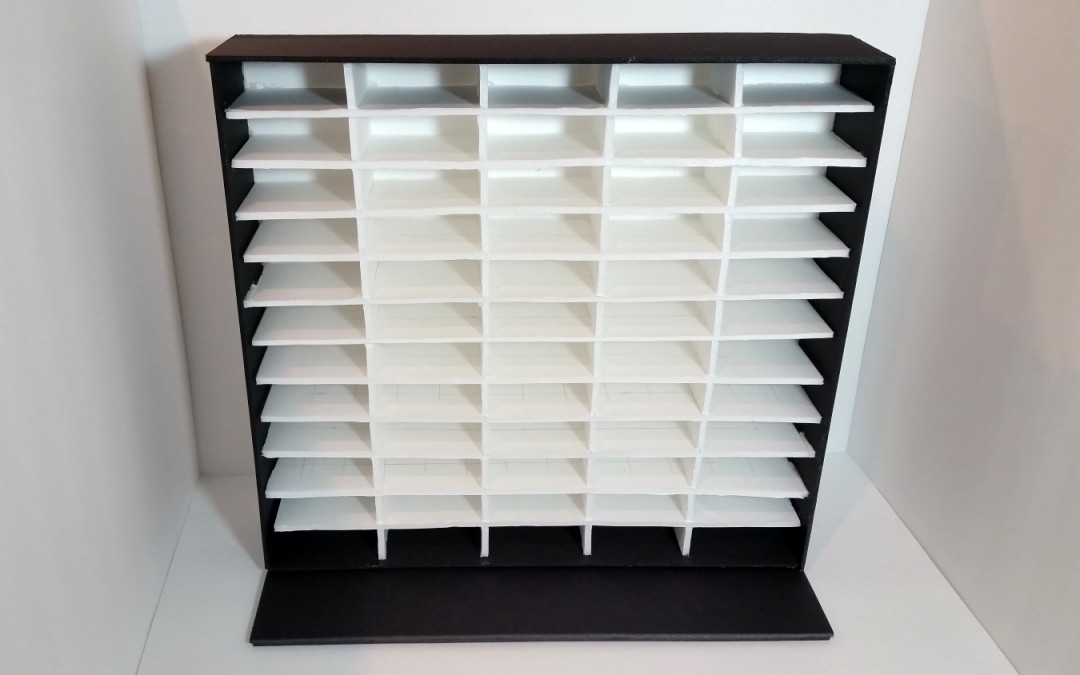
I’ve been hesitant to spend ~$60 on an ink pad storage unit (yes, I had all these ink pads lying around on my craft desk for months in piles–ugh). I mean really, with that kind of money I could buy so many more fun crafty goodies! So I finally took the time to design, measure and cut foam core to make this awesome DIY unit that I LOVE and that cost me less than $4!
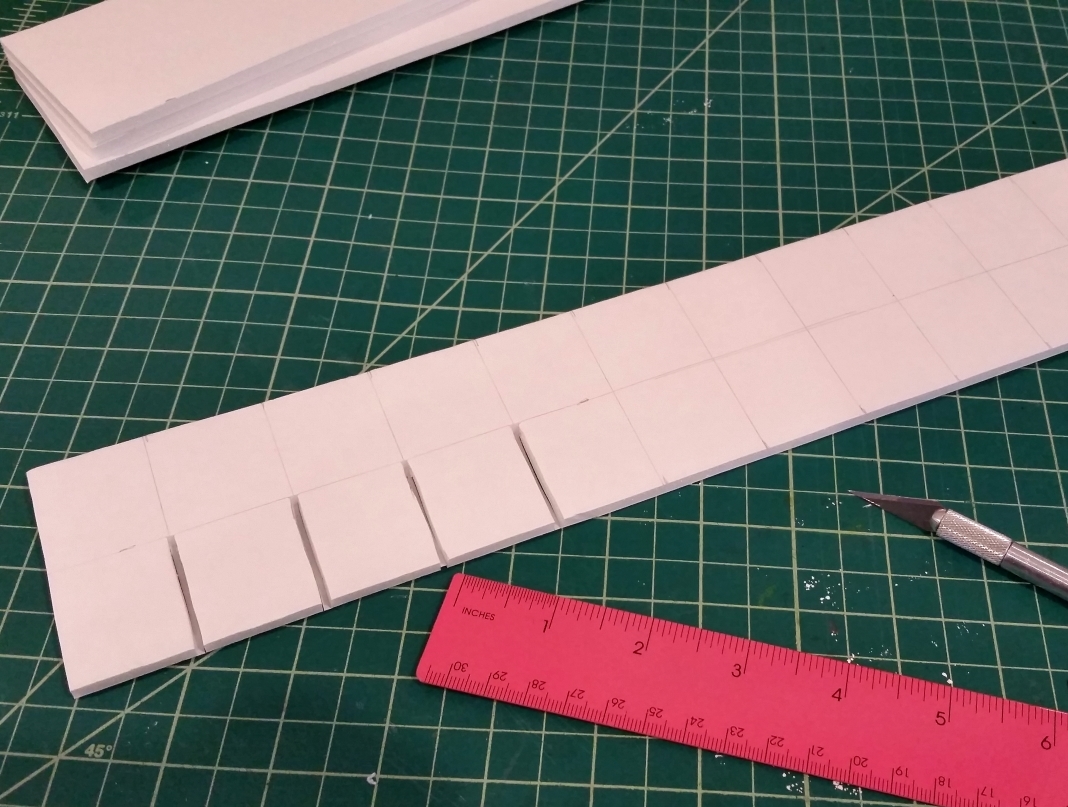
Vertical Pieces With 11 Half-Way Slits Being Cut (note I had to widen the slits)
Here’s what you’ll need:
1. 3 large pieces of foam core (I picked up my white at the Dollar Tree and my black at Staples)
2. Ruler (a T-square ruler might simplify the measuring and a metal ruler is better for cutting along but neither is necessary)
3. Cutting blade (I used an X-Acto Knife and a new sharp X-Acto replacement blade
which made all these cuts a breeze)
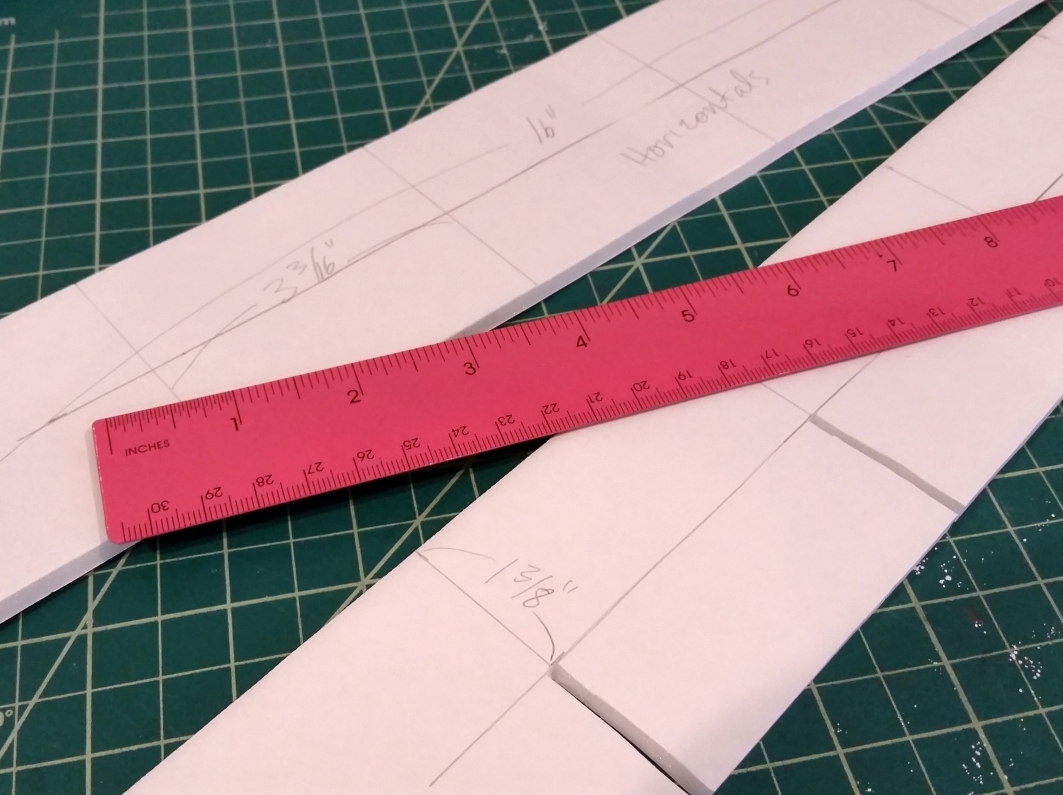
Horizontal Pieces With 4 Half-Way Slits Being Cut
For the internal shelving structure, I cut the foam core into the following 15 pieces:
1. Four verticals: 2 3/4″ x 15″ with eleven 3/16″-wide half-way slits that are 1 1/4″ apart (the 1 1/4″ gives the clearance for the 1″ high ink pads)
2. Eleven horizontals: 2 3/4″ x 16″ with four 3/16″-wide half-way slits that are 3 3/16″ apart (the 3 3/16″ gives the clearance for the 3″ wide ink pads)
Adjustment Options: The 2 3/4″ width of the pieces made the compartments shorter than the 3″ wide Distress Ink pads for which I was building this unit. The shorter depth of the shelves makes the ink pads easy to take in and out of the storage unit. If you are making a storage unit for longer ink pads, you could adjust this width to be larger (like 3 1/2″ for Ranger Adirondack ink pads). The height and width of the half-way slits for spacing out the compartments would work fine for other standard ink pads if they are more narrow than 3″ and under 1″ in height.
The following is a video illustrating these cuts as well as how to assemble the horizontals and verticals together:
For the outside frame verticals, I cut two pieces of foam core to 3″ x 15 1/4″. For the outside frame horizontals, I cut two pieces of foam core to 3″ x 16 1/2″. For the back of the unit, I cut a large piece of foam core to 16 1/2″ x 15 1/2″. For the 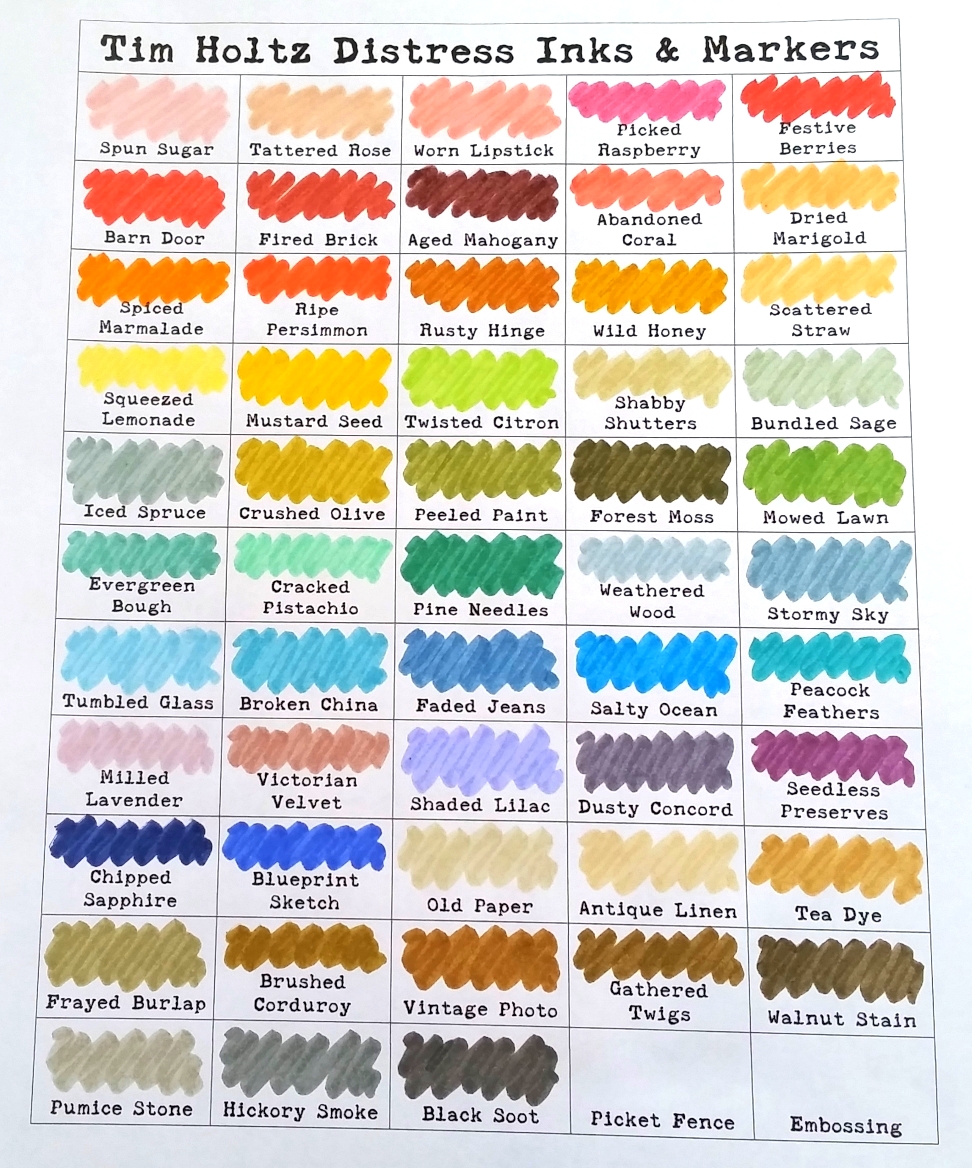 wider base to stabilize the unit, I cut a piece of foam core to 6″ x 16 1/2″. I also cut up an old rubber mouse pad in half and adhered that down underneath the back side of the wider base to weigh down and further stabilize the unit. I filled in the front side of the base with a strip of foam core to fill in the difference where the cut up mouse pad didn’t reach. Then it was just a matter of strengthening the joints and adhering all the pieces together with hot glue.
There are ready-made charts for Distress Ink Pads and other Tim Holtz products online HERE, but I wanted one that only listed the colors I have so I created a color chart in Microsoft Word with 5 columns and 11 rows just like my storage unit so that I could use it for easy reference for all the Distress Ink Pads (and matching Distress Markers) that I have in my collection. If you are interested in the labels that I made for all of my ink pads, please check out my blog post HERE for details–I just love the free distress type font I found for those!
This DIY storage unit, that was the best gift to myself this Christmas (LOL), is being entered into the Lil Patch of Crafty Friends Anything Goes Challenge
If you found this post helpful, please share and leave me a comment. Thanks!


Thank you for your input.I’m off to buy the stuff
Josephine
Good luck creating your own! I still love mine years later! 🙂
Thanks for saving us headaches from overthinking the math! Just so happens I have 3 sheets of foam core on hand! Truly appreciate this!
Thanks so much Brianne! LOL Math for crafts, right?! Crazy. I hope you found this helpful!
I would like to get one of this to put mine chalk ink .
Comment *
I made my own design a few years ago because I had a defined and limited space to store my inkpads. Foam core board is affordable, easily cut, and sturdy for small scale projects like this!
I got to try this. Its iawesome
OMG!!! Thank you soooooo much!! I’m on my way out the door heading to the dollar tree, I’m very excited about this!! Thanks a million
Hugs,
Doris
Oh I hope you love your ink pad storage! I certainly love mine!
I’m in the middle of making this and I noticed that on the 16” strips, the 3 3/16 leaves a 2” space at the end while the other 4 cubbies are 3 3/16. I’ve measured twice and cut once. Why is my 5th row only about 2ish inches?
Wow. I never knew rulers could be wrong. I used a different ruler and got it right. I’m shocked. I just pulled out all my rulers and started checking them and TWO of the 6 rulers I have were incorrect. Wow
Disregard my previous comment. I got the measurements correct. Thanks so much for this
I’ve watched some organizing videos for crafters during the past few days and laughed hysterically when the prices for the items suggested were listed. Who – I wondered, wouldn’t choose to buy more craft items and figure out an alternative than pay those prices ($53 – $99+)? Not me. Then, I saw your article about making the ink pad organizer with foam core sheets! This is my style! I bet it only took you a morning, or perhaps and afternoon once you had all the materials! Well done! Now, I will go get a couple of foam core sheets and make sure my xacto-knife is sharp!
I’m with you! It did take me a while to figure out the measurements, but once that was done, it was a breeze and basically cost about $3! 🙂
This is the best tip. I was looking for ink storage systems and couldn’t believe how much they cost, especially when you add shipping to Canada and the currency exchange! Thanks so much.
I’m so glad you found this helpful, Ruth!
Hi I found this on YouTube and love the idea. Can you tell me what thickness of foam you used as I’ve looked and in the uk it comes in two thicknesses 3mm and 5mm, what one would you recommend. Thanks in advance
Actually, the white foam core board is 5mm, but the black is 3mm. Both worked for me, but the black was denser and felt stronger. The white was plenty strong though; this storage unit has lasted for 6 years without any issues. I hope you try this out and it works for you! Thanks for stopping by and good luck!
Thank you I will definitely give this a go.
Would this work for Stampin Up new ink pads?
I would think the same principle would work, just the sizing would be different so the cuts would have to spaced out more.
Thank you so much for the video as well as all the measurements you provided. I have already purchased my supplies for this and can’t wait to get started making a much needed ink pad storage unit. I am going to figure out a way to hang mine on the wall. I will probably reinforce the outside with either another layer of foam cord all around, or use medium weight chipboard along with TyVek for the corners and edges to make sure it is stable. I have been wanting one of these for a long time but hesitated to spend over $100 for the one I wanted. This is GREAT!!!! 🙂
I. LOVE. THIS.
Thank you for sharing
Thank you, thank you!!!
This was amazing! I did mine in one day and is perfect (Starting a second one for my distress oxides).
I’m planning to re enforce the outside with MDF wood. You save me a lot of time by giving the right measurements.
Thank you again.
Do Simon Hurley ink mats fit on this ink pad storege ?
Sorry, I don’t know the size of those ink pads. I made this specifically for the square Ranger Distress ink pads.
Hi. So what size Foam Core do I need? 24″ x 36″ x 3? Thank you. Cannot wait to maike this!
I think I just got the regular poster size from the dollar tree x 2 and then one piece from another store for the thinner/denser black foam core. All about the same poster size.
Thank you so much for this great project! I finished mine this weekend. I *thought* I was measuring and cutting precisely, but when I put it together, I had to use a little extra glue here and there! But it is fabulous, and no one would ever know! I used black paper affixed with collage medium to cover up the gaps on the back where it didn’t quite come together for me, sort of like seam binding. Thanks again!
Wonderful! I’m so glad it worked for you. I had a few little gaps too, but nothing a bit of extra hot glue couldn’t fix. 🙂
I lost this pattern since I made mine quite a while ago! Just found you again and needed to make another one and found a pattern that, when I finished it, wasn’t nearly as nice or held as many ink pads as this one! Thank you for leaving this for me to find again!!
I’ve got the center done and the outside pieces cut, but I don’t know how to assemble them? Did you use hot glue? Where did you glue it?
I’ve decided to do one for myself but for Stampin’ Up ink pads. I’ll have to figure out the measurements. I already bought my foam core in black. They have very nice storage on the market but soooo expensive especially if you order from canada.